Results 141 to 160 of 573
-
05-13-2012 #141

 Registered User
- Join Date
- Jan 2011
- Location
- Boston, MA
- Posts
- 1,180

 Originally Posted by 68KMARO
 Originally Posted by jtm311
Thanks guys. Hopefully I can get this thing fired back up next weekend.
-
05-16-2012 #142
Registered User
- Join Date
- Jan 2011
- Location
- Boston, MA
- Posts
- 1,180
I put a few hours in working on engine reassembly. It didn't look much different by the time I was done. I didn't even take many pics.
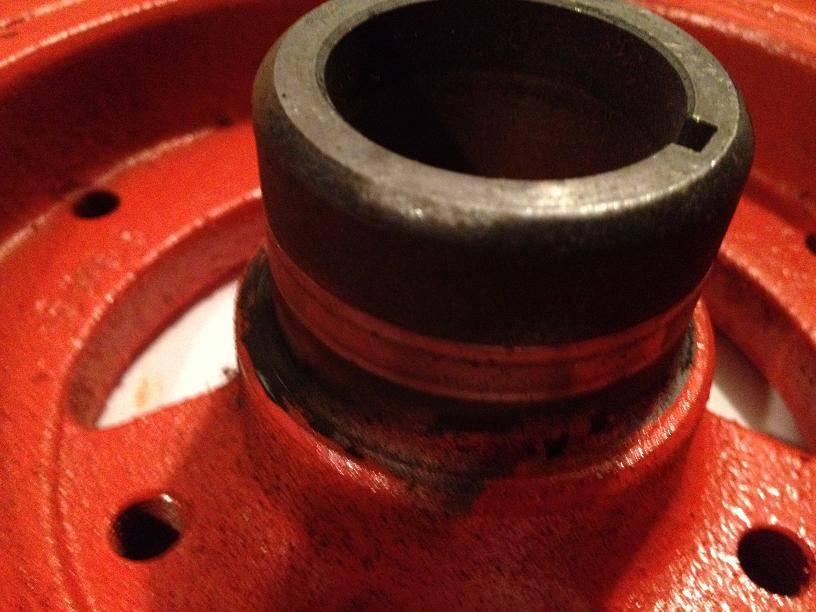
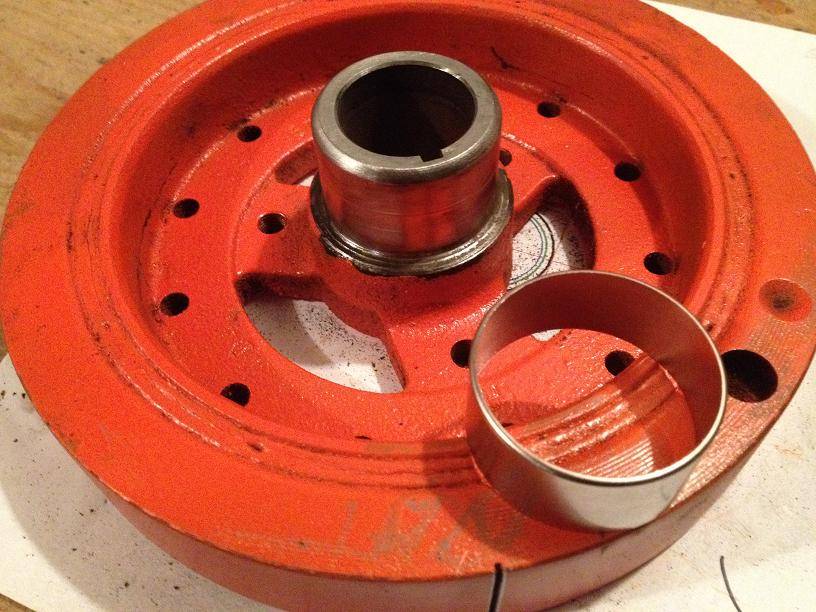
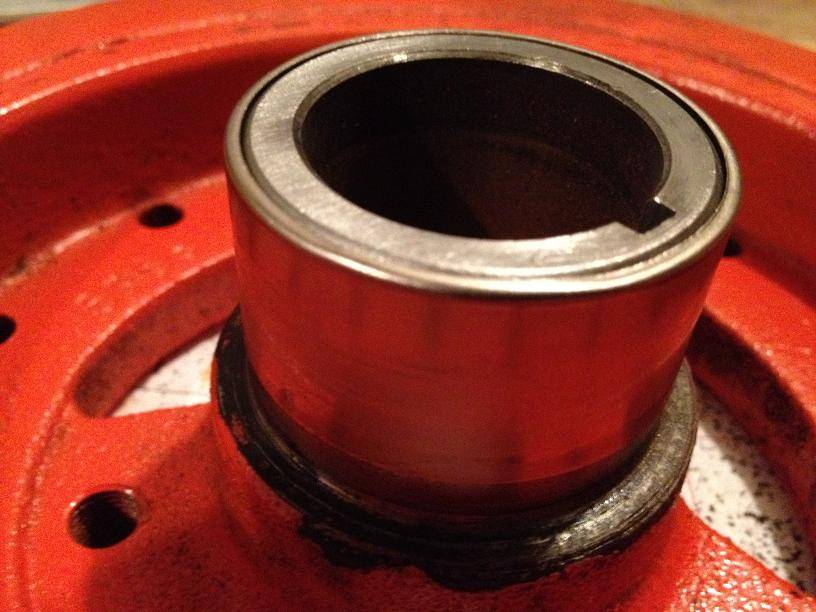
My balancer had a pretty good groove in it, so I cleaned it up and used a Fel-Pro repair sleeve:
Before:
Cleaned up with the repair sleeve ready to go on. This attaches with a loc-tite like substance that Fel-Pro supplies:
After:
-
05-16-2012 #143
Registered User
- Join Date
- Jan 2011
- Location
- Boston, MA
- Posts
- 1,180
I installed a new set of spark plugs. The Vortec heads require a plug with a .708 reach (gapped to .045), where the standard plug only reaches .460 into the block. I have read that many people switching to Vortec's have overlooked this and performance has suffered. Since I was making the switch I opted for a set of platinum tipped Accel Shorty plugs #P526S, which are designed to fit behind headers to allow removal without taking off the headers. You can see how much shorter the exterior portion of the plug is, but how much deeper the threads reach:
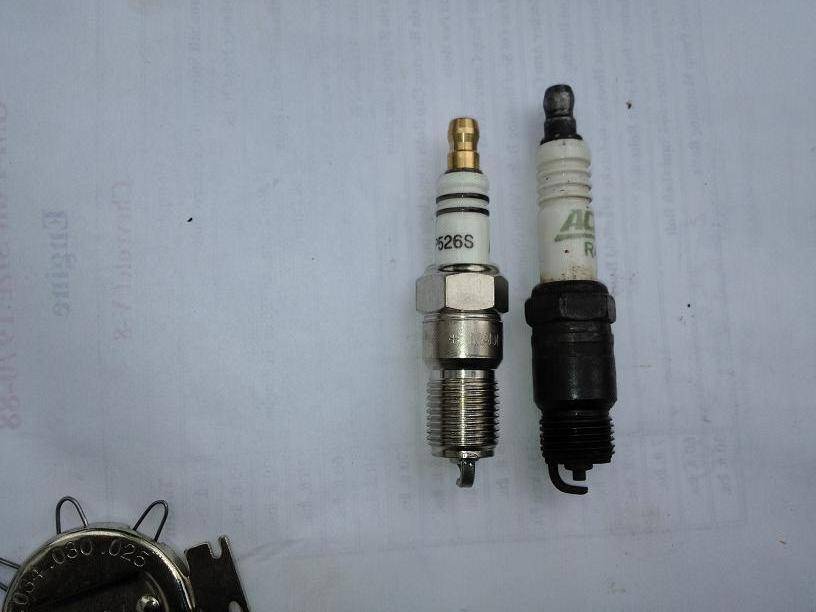
I also reattached the headers, and loosely connected the exhaust. Tomorrow I'd like to get the balancer pulley, water pump, radiator, fan, alternator and power steering pump back in and aligned.
-
05-20-2012 #144
 Registered User
- Join Date
- Dec 2010
- Posts
- 104
Awesome build! Do you have any pics of the custom seat brackets you got?
-
05-20-2012 #145
Registered User
- Join Date
- Jan 2011
- Location
- Boston, MA
- Posts
- 1,180
Thanks! They won't be shipped until next week, but I'll post pics once I get them. The seats in the photo were just mocked up on some foam blocks. Originally Posted by paulgurley
-
05-20-2012 #146
Registered User
- Join Date
- Jan 2011
- Location
- Boston, MA
- Posts
- 1,180
Once again, a big thanks to Tom (Melrose RS on Team Camaro) for donating his time and knowledge yesterday afternoon. We were able to fire the Camaro up and break in the new cam yesterday. The only minor glitches were that I forgot to hook the power wire to the distributor, which resulted in no spark, and I forgot to tighten up the headers to the exhaust pipes (I even mentioned it here in a previous post that they were only loosely attached), which resulted in a nice loud rumble that my neighbors probably loved.
We took it out for a couple of test spins and it ran and sounded great, but we noticed a pretty decent oil leak. It turned out to just be coming from the drivers side valve cover. I just put these covers on over the winter with new valve cover gaskets, with less than 50 miles on them, and I figured I could re-use them. I never stopped to think that the covers were going on a new set of heads, and the burn in pattern would be different. I picked up a new set of Fel-Pro gaskets last night and installed them.
I took it out this morning, and pulled over after 10-15 minutes and had no oil issues. I took it out for another 10 minutes and stopped to get gas, still everything was fine. A mile later at a stop light 100yds from my house I smelled a little radiator fluid. When I pulled into my driveway, there was a nice plume of steam and my radiator had sprung a pin hole leak down bottom. I almost replaced the old one while it was out, because a bunch of the fins had dents in them, but I decided it was fine for now.
Oops. Anyways, a new aluminum radiator is on the way. I pulled the old one already, so it should only take 15 minute to pop the new on in it's place.
-
05-21-2012 #147
Registered User
- Join Date
- Jan 2011
- Location
- Boston, MA
- Posts
- 1,180
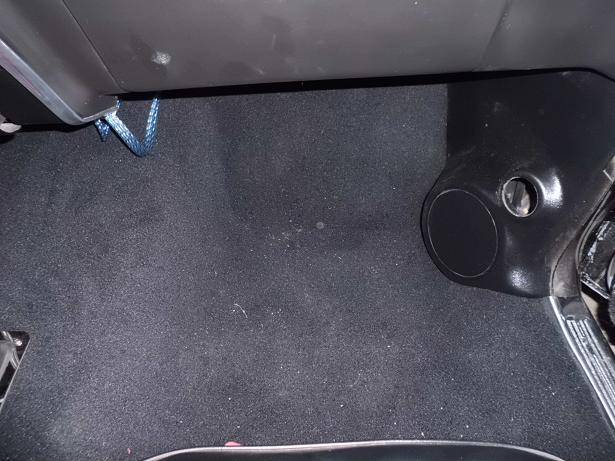
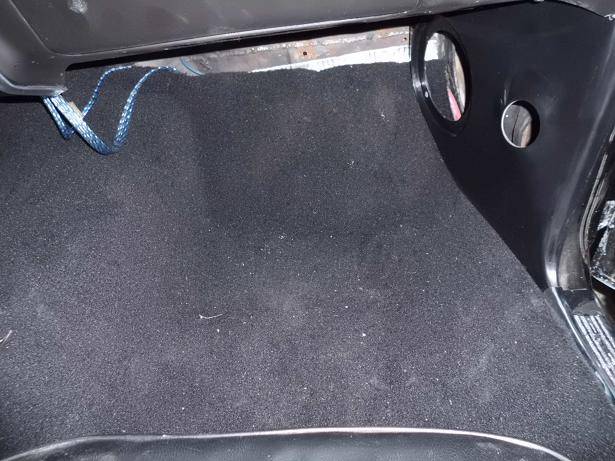
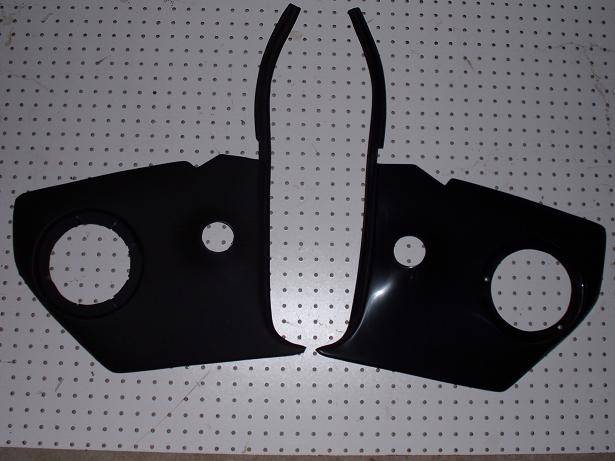
Since my radiator won't be here until mid week or so, I got back to work on the stereo install. I only had time to work on the passenger side kick panel today. The Rod Doors panels were ok, but they were made of plastic and didn't fit very well, you also have to cut the speaker holes out yourself (which I didn't bother for the 6.5") . They also took up quite a bit of foot room. The Screamin' Performance are made of fiberglass and much sturdier, they come with pre-cut speaker openings (although I had to open up the tweeter opening by 1/8" for the tweets I'm using), and they also don't intrude on the foot space.
Here's a comparison of the Rod Doors and the Screamin' Performance kick panels. The Screamin' Performance will actually sit in a little further once it's screwed in place. My new carpet is a little thick and pushed the firewall side out a little as seen in the photos:
Rod Doors on the left Screamin' Performance on the right:
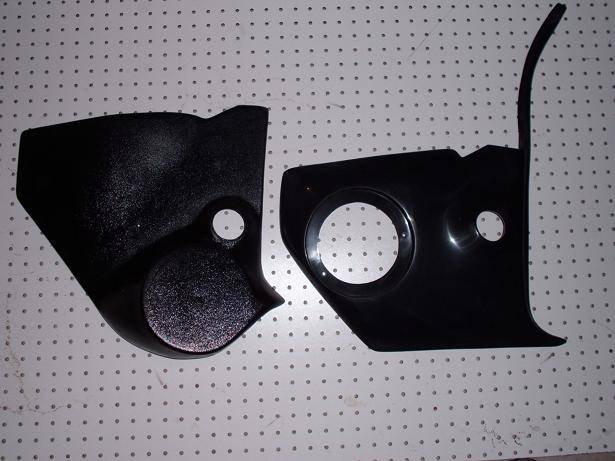
Rod Doors:
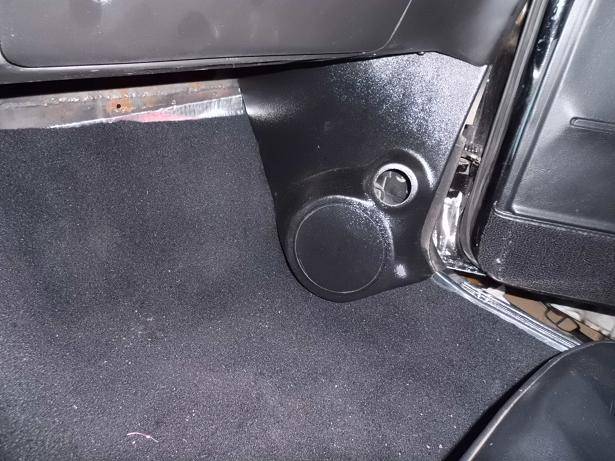
Screamin' Performance:
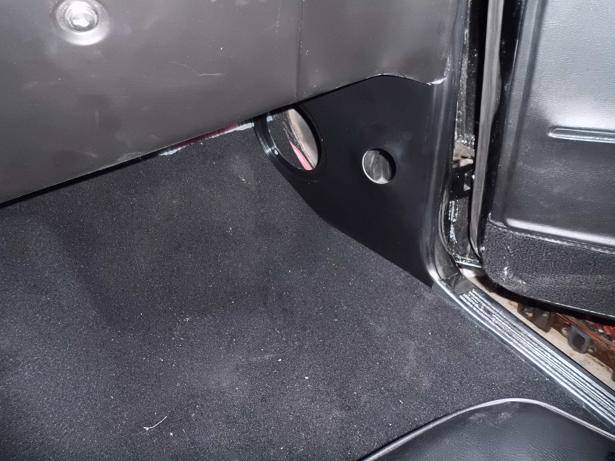
Rod Doors:
Screamin' Performance:
-
05-21-2012 #148
Registered User
- Join Date
- Jan 2011
- Location
- Boston, MA
- Posts
- 1,180
I covered the new kick panel in black vinyl. The one on the left is covered, the one on the right is not (crappy photo):
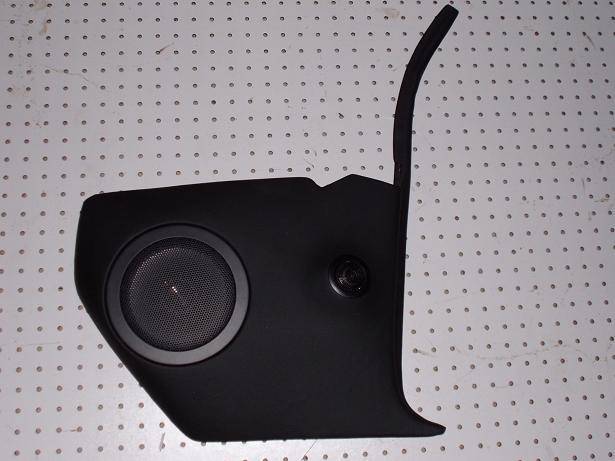
And here's the finished product wrapped in vinyl and with the speakers in place. Pretty clean look in my opinion:
-
05-22-2012 #149
Registered User
- Join Date
- Jan 2011
- Location
- Boston, MA
- Posts
- 1,180
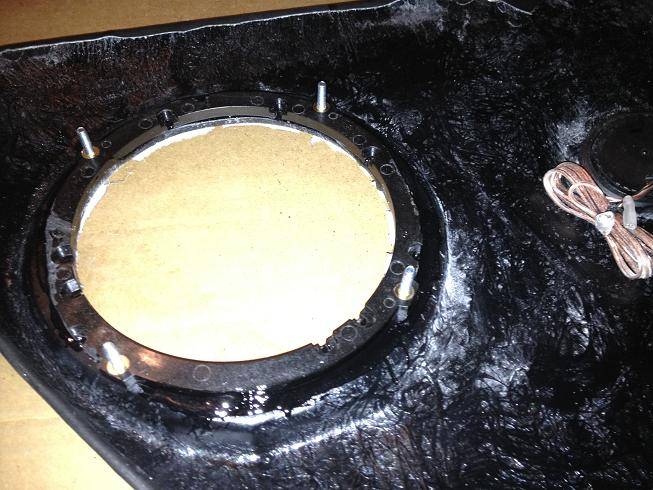
I test fitted the driver's side kick panel today, and it went in like butter. I wrapped it in vinyl, and then epoxied the speaker plates to the back side of the kick panel. This should give it a lot more support compared to just screwing the speakers into the fiberglass, and will allow easier removal of the speakers without damaging the kick.
-
05-22-2012 #150
 Pro-Touring Veteran
- Join Date
- Jul 2006
- Location
- Merritt Island,FL
- Posts
- 1,182
Nice job man ! Looks great !
Check out my web site.
http://screaminperformance.net
-
05-22-2012 #151 Registered User
- Join Date
- Nov 2009
- Location
- New York
- Posts
- 366
Good news can't wait to drive mine... Originally Posted by 67rally
05-24-2012 #152
Registered User
- Join Date
- Jan 2011
- Location
- Boston, MA
- Posts
- 1,180
Thanks, I should have the speakers installed and kicks mounted this weekend as long as I can avoid the Honey-Do list. Originally Posted by 67speedfreak
05-24-2012 #153
Registered User
- Join Date
- Jan 2011
- Location
- Boston, MA
- Posts
- 1,180
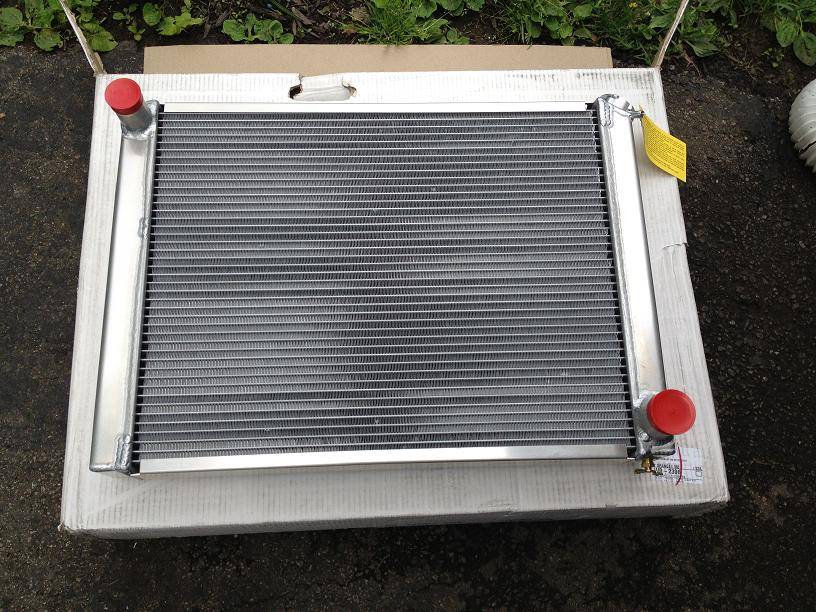
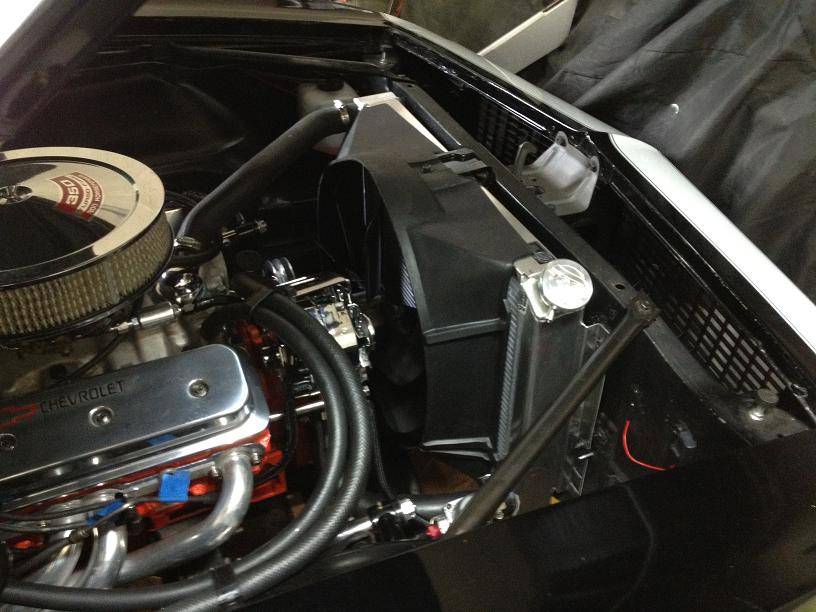
I got the new radiator from Be Cool yesterday. This is the Direct Fit line, it looks like a nice piece. I also installed a Flex-A-Lite sacrificial zinc anode in place of the petcock. I didn't upgrade to the electrical fans at this time. Maybe later down the road.
I need to pick up another gallon of coolant before I can fire it back up, which should be tomorrow afternoon.
05-26-2012 #154
Registered User
- Join Date
- Jan 2011
- Location
- Boston, MA
- Posts
- 1,180
A pretty productive day. I got the radiator filled and fired the car back up. I took it out for a 30 minute spin and no problems. No fluid leaks, oil or coolant, which makes me happy.
I also shimmed up my sun visors, they are brand new, and I couldn't cinch the screw down enough to keep them from flopping around. I just used a single piece of electrical tape around the outside of the shim that was already there and they work perfectly now.
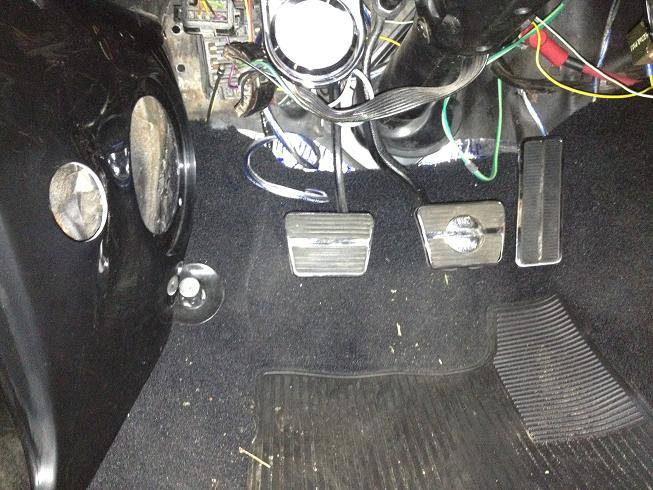
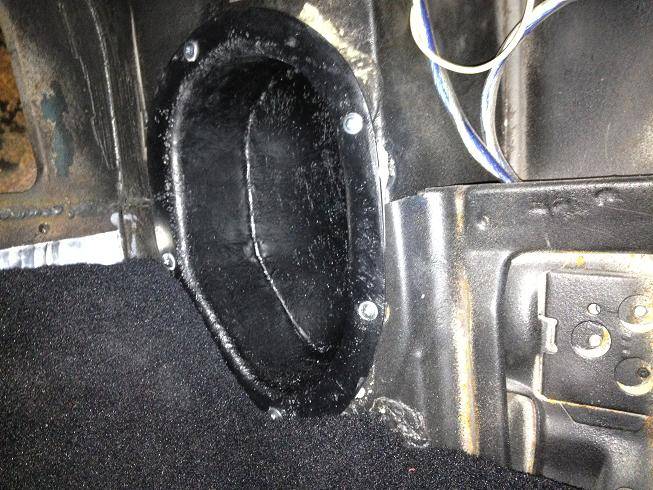
I installed the kick panel closeout cans:
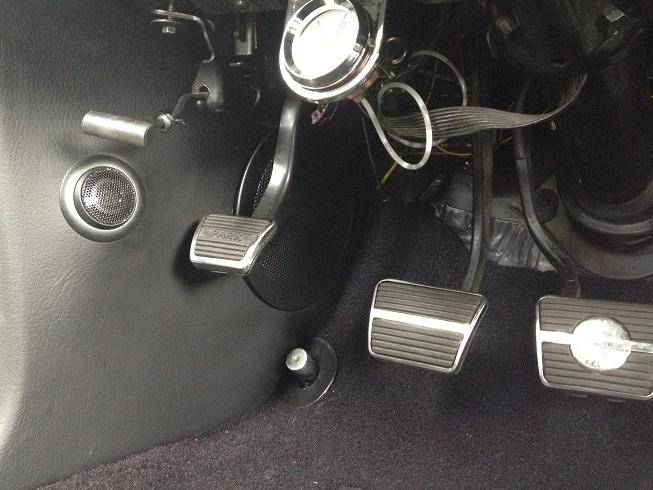
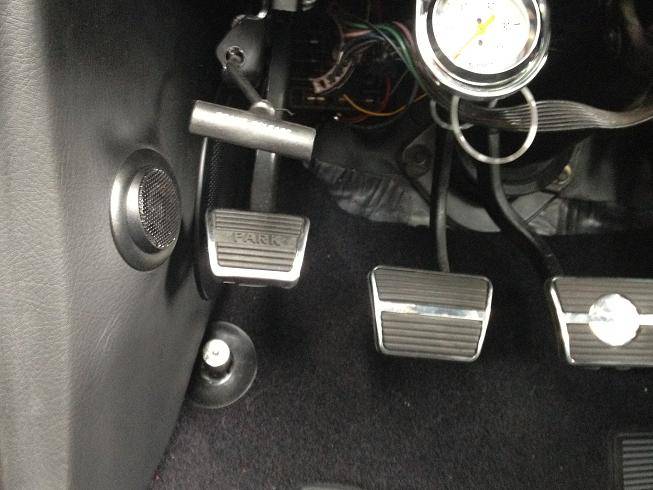
And installed the new kick panels. I wired and installed the new Alpine 6.5" Type R speakers. I still don't have a stereo yet, so please don't ask me how they sound, but I think the new panels look killer:
I also pulled back the carpet, taped everything off, and repainted the inside firewall flat black, and painted the sound deadener above the carpet which was driving me crazy.
05-27-2012 #155 Registered User
- Join Date
- Jul 2010
- Location
- OREGON
- Posts
- 364
Car is turning out pretty nice looks like it was a wise choice to change out the kick panel speaker pods for something more user friendly.
05-27-2012 #156 Registered User
- Join Date
- May 2011
- Location
- Central FL
- Posts
- 216
I have a set of 6.5"s in my door and have trouble hearing them. To balance out front/rear, the fronts have to be on at least a +2. I don't see how you'll be able to hear your front speakers with them so far forward and low. Love the build regardless.
- David
1967 Camaro - In remembrance of my friend Scott
06-01-2012 #157
Registered User
- Join Date
- Jan 2011
- Location
- Boston, MA
- Posts
- 1,180
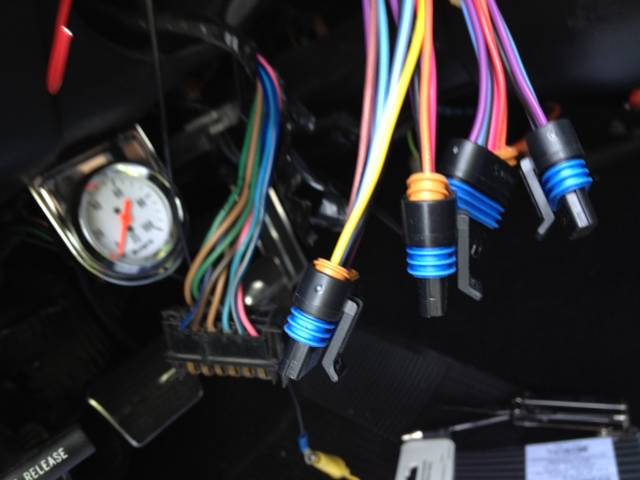
I started wiring in the NVU gauges this week. These are going to be pretty sweet. Here's a couple pics of the wiring. Everything will be wrapped in braided hose and zip tied once I make sure all gauges are working. The connections are crimped, soldered and then heat shrinked.
[IMG]http://i228.photobucket.com/albums/ee208/modi_photos/wiring2.jpg
06-01-2012 #158 Registered User
- Join Date
- Nov 2000
- Location
- O-town
- Posts
- 4,330
I was going to say something, glad someone did on the safety wire, Nice pics and updates, Originally Posted by MuscleRodz
Late to the party as ususal, Brians stuff is nice, all the updates look good,Steve68- 1968 Camaro SS LSX T56, 12bolt 3:90's, 18" Fikse Profil 13s, Deep Fathom Green paint, Spearcos, just bunch of old junk because another member said so, LOL
70 Nova SS street/drag 454, T400, 3:55, ugly!
06-01-2012 #159
Registered User
- Join Date
- Jan 2011
- Location
- Boston, MA
- Posts
- 1,180
Originally Posted by MyFriendScott
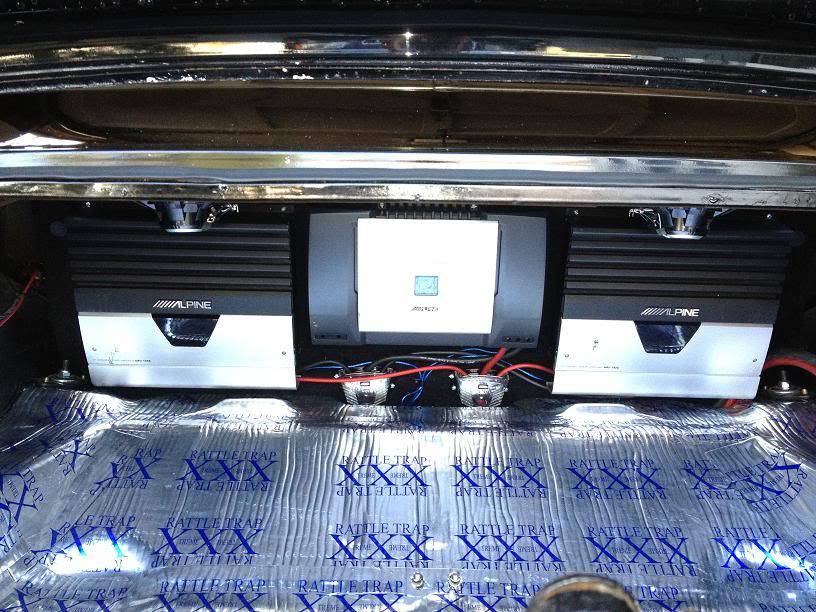
Thanks, but I'm not too worried about that. I'm running three amps, each with an adjustable gain, so I can dial in the power to each set of speakers pretty well. Plus, the front tweeters have their own gain adjustment so I can really dial in not just how loud the front channel is, but also how loud the woofer is vs the tweeter. The whole system should be around 1000w RMS.
06-01-2012 #160
Registered User
- Join Date
- Apr 2009
- Posts
- 327
Looking really nice guys...


 Reply With Quote