


Results 101 to 120 of 573
-
03-15-2012 #101

 Registered User
- Join Date
- Jan 2011
- Location
- Boston, MA
- Posts
- 1,180

Assembly begins:
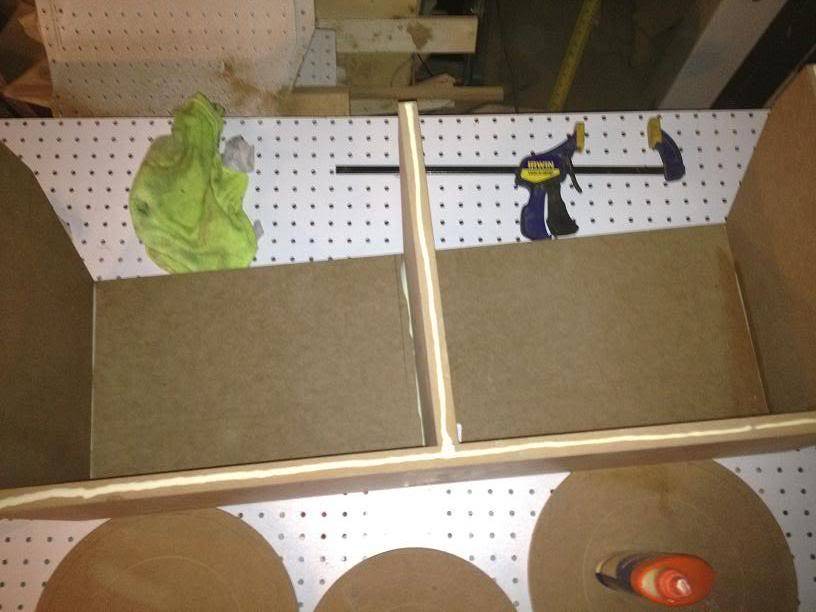
A second layer of 3/4" MDF is added to the front with a bigger circle cutout to recess the face of the sub. I'm using Tee nuts to attach the speaker to the box so I can remove the subs whenever I want. If you screw directly into the MDF, you only get a few removals before the wood is stripped:
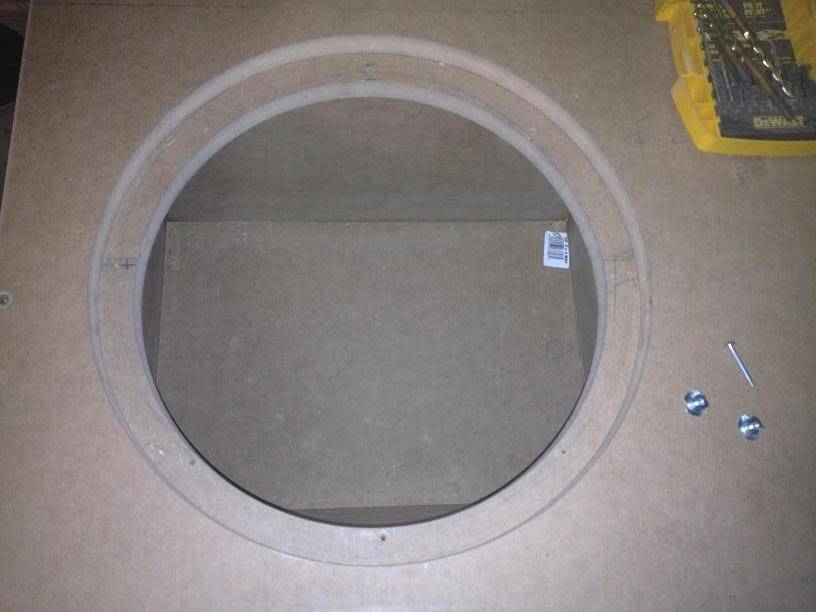
Here's a diagonal view of the box before the second front piece was added. It's tilted back in the picture, but that angle matches the angle of the diff tunnel in the trunk:
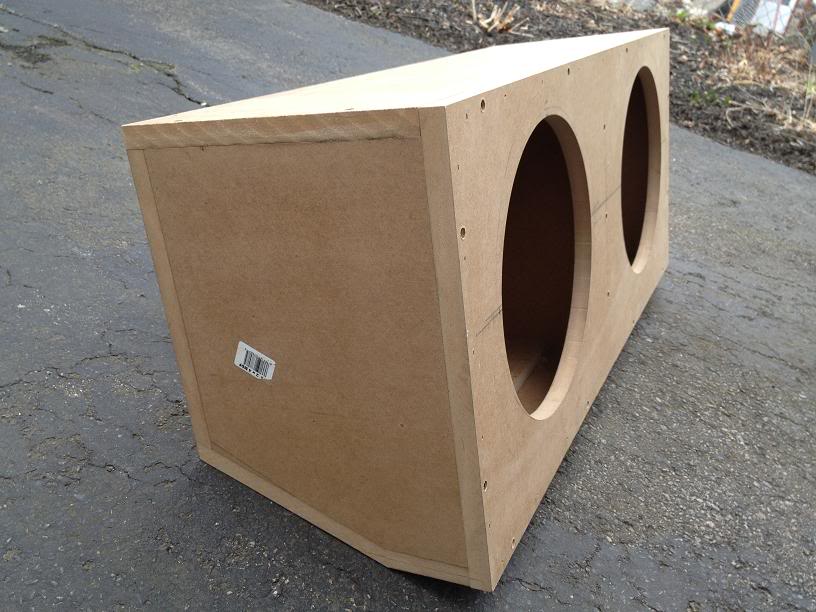
Here it is in the trunk, the face is still just attached by two screws in case I need to do some tweaking. It's a very tight fit, and that's without carpet:
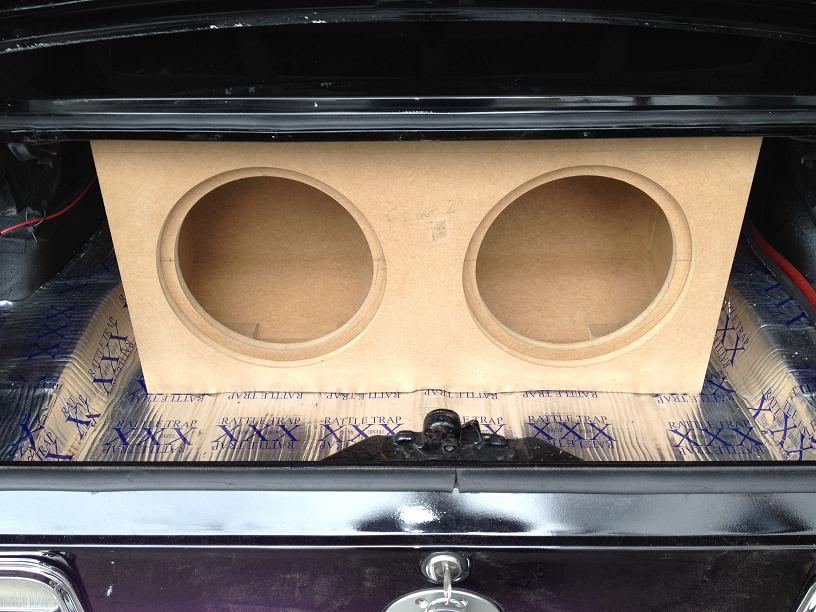
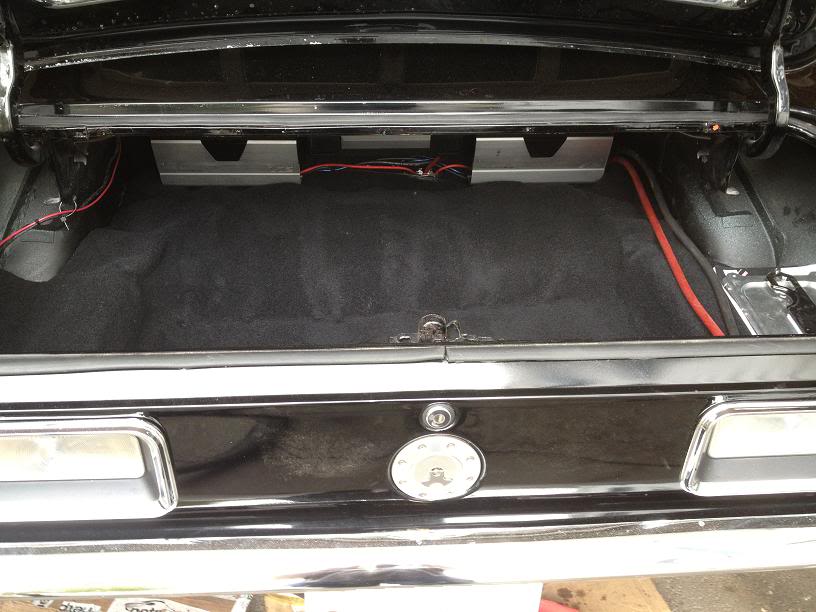
Speaking of carpet, my new trunk carpet arrived today from ACC, I went with the black cut pile for the trunk and interior, and picked up a couple extra yards to do the sub box and trunk close out panels as well. I just layed it in so it would start to settle. I may have to pull the amp rack to tuck it under near the rear seats:
-
03-18-2012 #102
Registered User
- Join Date
- Jan 2011
- Location
- Boston, MA
- Posts
- 1,180
Well, a semi-productive day all things considered. I finished up the subwoofer box. I sealed the inside, cut out the holes for the speaker terminals, installed and sealed those. Routed a recessed area for the handles (incase I want to be able to remove the box). Then I carpeted it and test fit it.
Wow, it's super snug. I normally use speaker carpet which is pretty thin, but I decided to order a couple extra yards of automotive carpet from ACC to match the rest of the trunk. The carpet is much thicker than what I'm used to, and it made getting the box in very tight. I had to remove the trunk latch bolts because they stick out a quarter of an inch or so. I may pick up some button head hex bolts so I won't have to remove them in the future.
Here's a view of the box from above. I can't bolt down the speakers until the silicone has had 48 hours to dry. It can wreak havoc with the speaker surrounds:
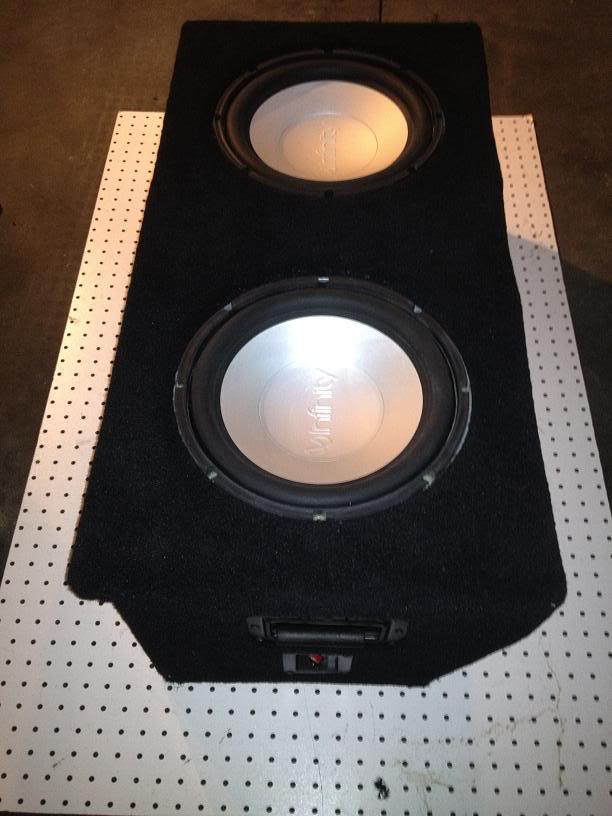
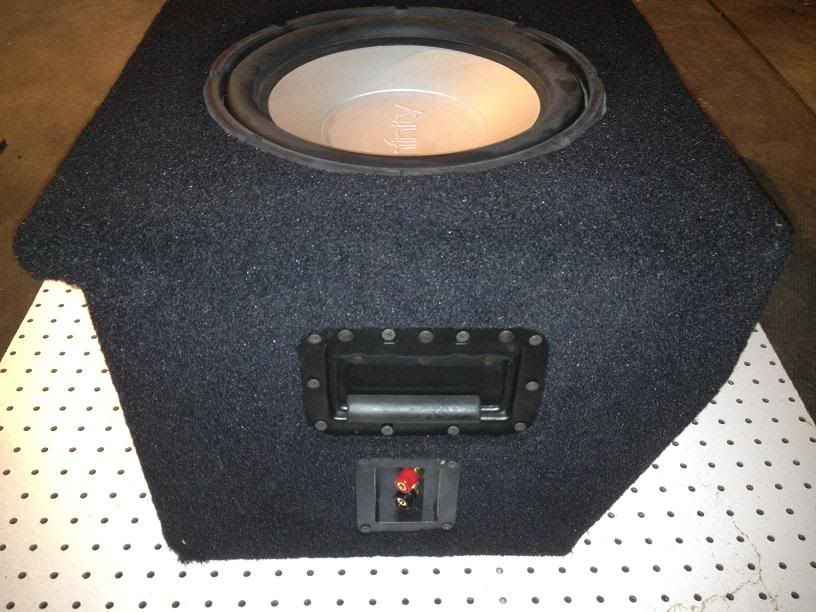
Here's a shot of the side showing the speaker terminal and the handle:
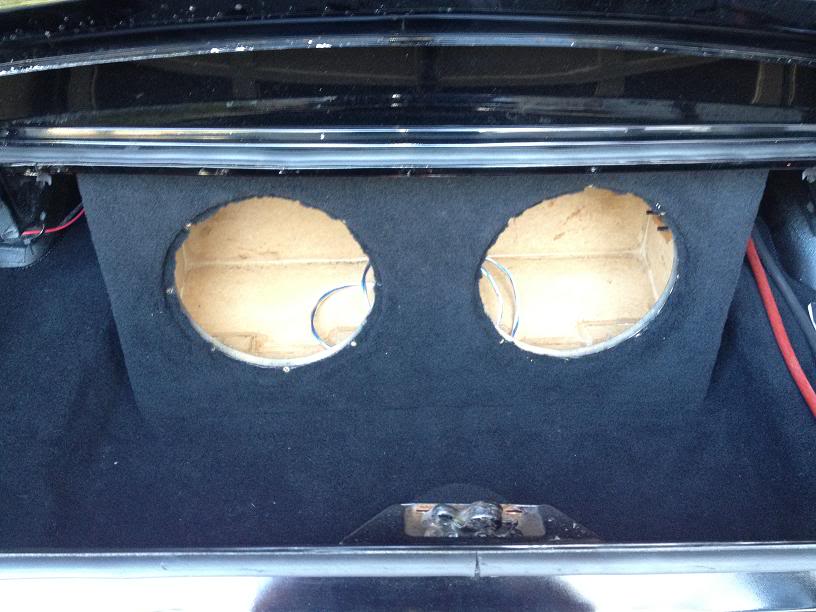
Here's the box installed without the subs. I'll fill them with polyfill, run the wires and bolt the speakers down in a couple of days. I'm also going to build some closeout panels for the left and right sides of the box, so it will look like one flat panel from one side of the trunk to the other, but that's further down the list:
03-21-2012 #103
Registered User
- Join Date
- Jan 2011
- Location
- Boston, MA
- Posts
- 1,180
Well, I got a little work done. I should have connected all my wires to the amps before installing the rack. It's a pain to work on when it's that deep in the trunk. I got all my speaker wires connected, all I have left is to connect the RCA's which will be a breeze, just need to figure out final routing to keep everything away from the power lines.
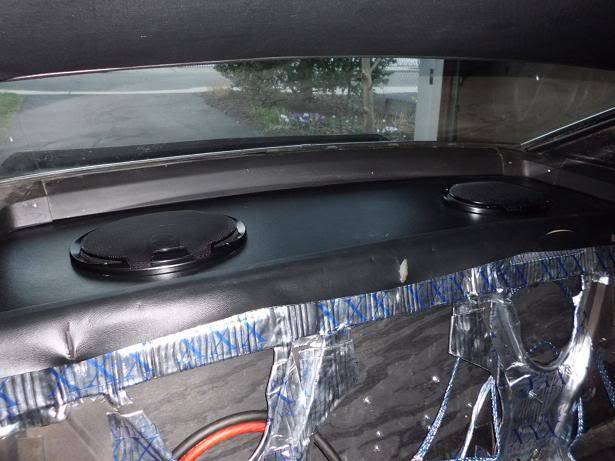
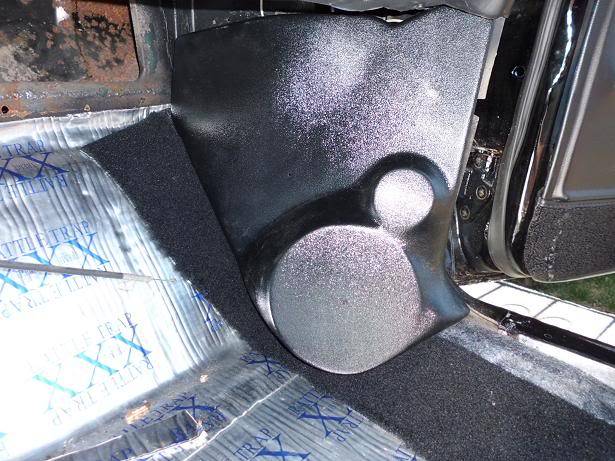
I cut the holes in my rear package tray and installed the rear speakers, and mocked up the front Rod Door's kick panels. They say to wait to do any trimming until the carpet is in. I used a piece of scrap carpet just for a quick test fit. They do stick out a little, but not as much as I expected. Considering I spent a few hours working on the car, I'm not sure what I really accomplished.
03-26-2012 #104
Registered User
- Join Date
- Jan 2011
- Location
- Boston, MA
- Posts
- 1,180
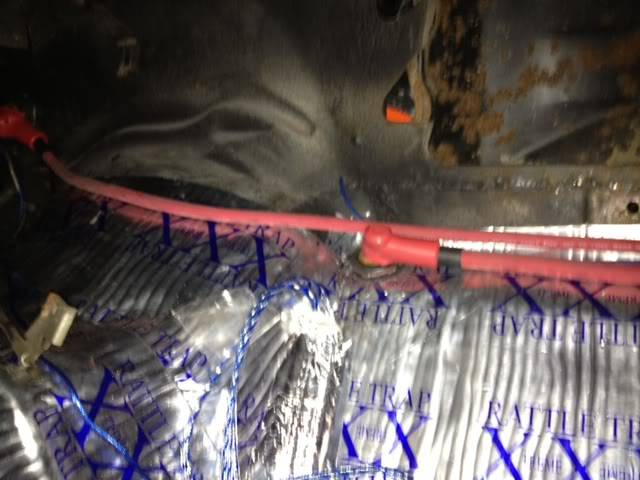
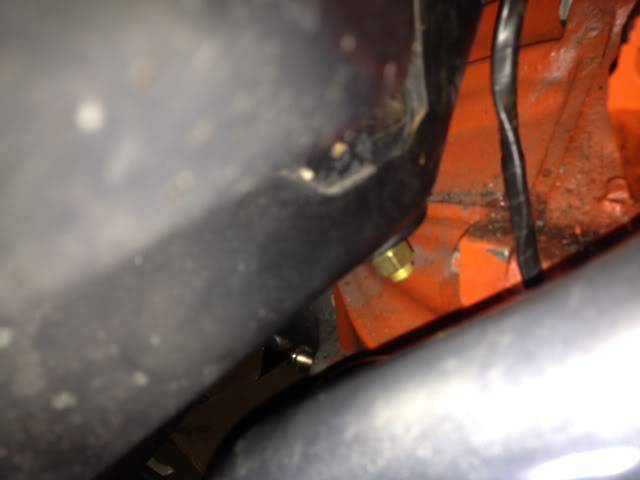
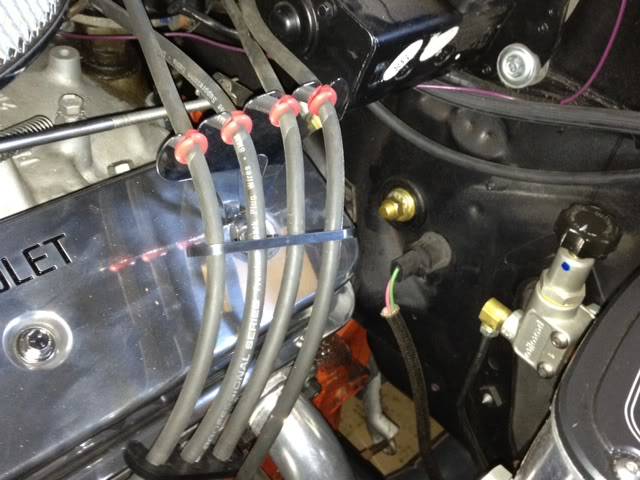
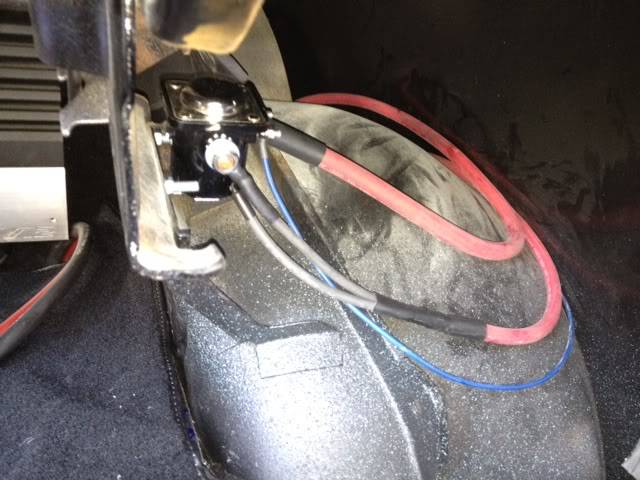
Some pics of the new wiring for the battery relocation, sorry 'bout the closeups, these were the only pics I had. Kind of difficult to tell what you're looking at.
Here are the two bulkhead connectors I used to pass the wires through the firewall. Driver's side is #2 and will supply the battery from the alternator, passenger side is 1/0 and will run to the starter. There is a small blue wire above the 1/0 bulkhead connector that runs from the remote start solenoid in the trunk to the starter. The heater box was out during this photo:
Here's where it passes through in the engine compartment. It's a straight shot back behind the headers along the side of the engine (that's a closeup of the header in the foreground):
Here's the driver's side connector that I may use instead of the CN-1 terminal block. This will run to the alternator as well as the fuse box, and the horn relay/other CN-1.
And here's the remote starter solenoid in the trunk. I connected the #2 wire to a #8 fusible link, and added a spare incase of burnout. I added a piece of heat shrink to the spare fusible link, heated it up and then pinched off the end with a set of pliers while it was still hot. I couldn't find #6 anywhere, and I'm not even sure it exists.
03-28-2012 #105
Registered User
- Join Date
- Jan 2011
- Location
- Boston, MA
- Posts
- 1,180
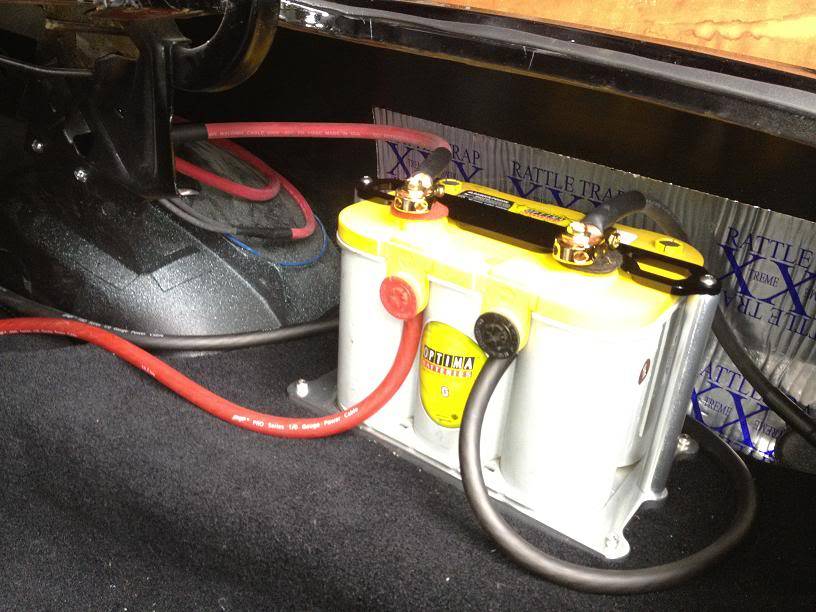
I finished all the wiring for the battery relocation all the way to the front firewall. I got the battery tray mounted, and cut my last couple pieces of 1/0 cable.
The last thing I have to do is install an inline fuse for the amps, and possibly add a big capacitor to handle any big bass hits. Then I can throw the sub box in and figure out how I'm going to mount it. Once that's done, I'll fill the boxes with polyfill and screw down the subwoofer speakers.
I'd like to get the new carpet in this week. I'll be away all next week, so it would be great to let it settle for a week before I trim it. Not sure how much time I can get in on the car between now and Sat. morning.
Battery relocation:
03-29-2012 #106
Registered User
- Join Date
- Jan 2011
- Location
- Boston, MA
- Posts
- 1,180
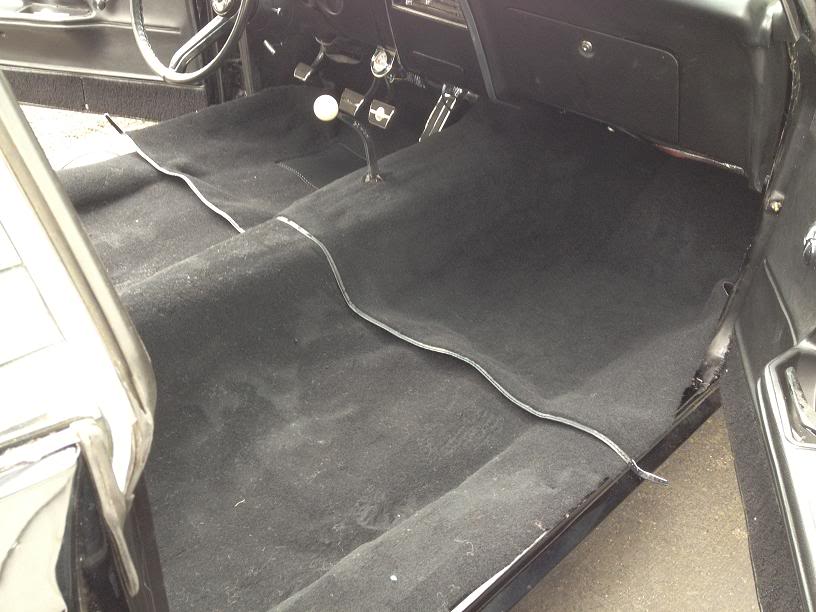
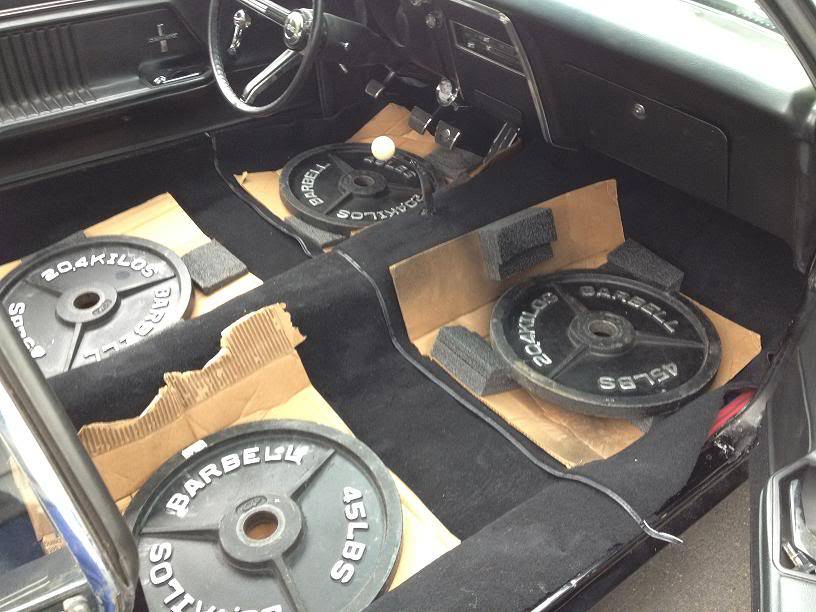
Alright, last bit of progress for the next week or so. I got the carpet in and threw some 45lb plates on it to let it settle in place. Once I get back from vacation I'll start trimming it up. This is the cut pile black carpet from ACC. I have the same carpet on the sub box and the trunk floor as well.
03-29-2012 #107 Registered User
- Join Date
- May 2011
- Location
- Central FL
- Posts
- 216
Looks great so far and enjoying watching the build come along...
With your amps mounted on plywood that appears to close out the trunk, I was wondering how much bass will actually make it into the passenger compartment. Once the rear seat is in, it seems the bass will have to pass through and around a lot of "stuff". I know bass travels in all directions, but it does get affected by changes in density as it travels. I had a similar set up with plywood closing out the trunk but I only run one amp so I cut the plywood in half when I installed a single 12". I didn't want the sound pressure in the trunk affecting the rear 6x9's sitting on the rear deck.
Do you think a few ported holes in the rear deck might improve the bass coming into your passenger compartment?- David
1967 Camaro - In remembrance of my friend Scott
03-29-2012 #108
Registered User
- Join Date
- Jan 2011
- Location
- Boston, MA
- Posts
- 1,180
That's a good question, but I think there will be plenty of bass. Each sub will see 500+watts RMS and the trunk isn't really sealed off from the front. There are air gaps along the wheel wells. I didn't want to port the sub directly into the rear deck because I want to be able to remove the sub box easily if I need to. Originally Posted by MyFriendScott

Maybe once I get it all set up I'll pull the rear 6x9's and use those openings as "ports" and then compare it with the 6x9's in the deck but no signal going to them. I have a couple of SPL apps on my iPhone so I can do a pretty accurate comparison. Maybe I'll do the same comparison without the back seat in as well. I'm waiting for the Retrosound Model 2 to come out in June, so I won't have the stereo finished until then, but I'm sure I have an old deck in the attic or basement somewhere that I can hook up in the meantime.
I'll let you know the results. Thanks for following along.
04-10-2012 #109
Registered User
- Join Date
- Jan 2011
- Location
- Boston, MA
- Posts
- 1,180
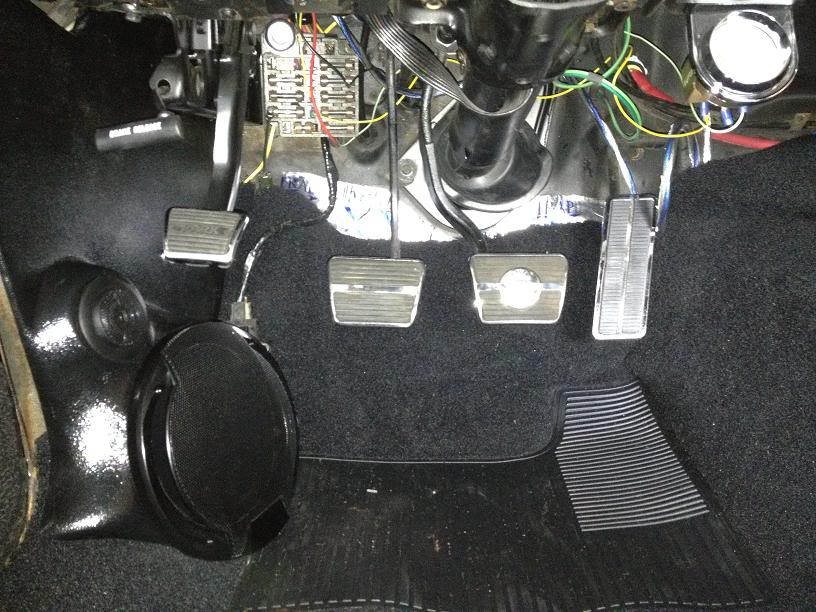
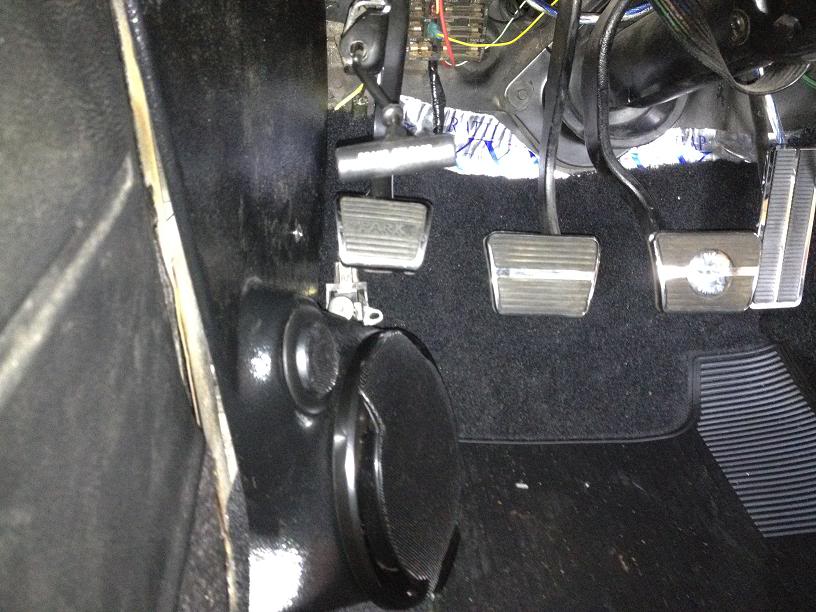
Well, I did a little more mockup on the Rod Doors kick panels, this time on the driver's side. I'm not sure I can live with the location of the speakers. The headlight dimmer switch is going to be tough to reach, as well as using the foot brake.
I'm going to give Screamin' Performance a call tomorrow and see about using a set of theirs.
Here are a few photos. Dimmer switch is just sitting on top of the carpet for a reference point:
04-10-2012 #110
Registered User
- Join Date
- Jan 2011
- Location
- Boston, MA
- Posts
- 1,180
04-10-2012 #111 Registered User
- Join Date
- Feb 2003
- Location
- St. Louis, Missouri
- Posts
- 987
Nice color combo.

Rick Butterfield
04-11-2012 #112
Registered User
- Join Date
- Jan 2011
- Location
- Boston, MA
- Posts
- 1,180
Thanks man, best color combo out there... Originally Posted by Happyfunballs

04-11-2012 #113
Registered User
- Join Date
- Jan 2011
- Location
- Boston, MA
- Posts
- 1,180
I got in touch with Brian from Screamin' Performance, and ordered a pair of his kick panels. Should be here in 2-3 weeks. No biggie, plenty to do in the meantime.
04-11-2012 #114 Registered User
- Join Date
- Jul 2006
- Location
- Orangevale, Ca
- Posts
- 147
Project: BLACK METAL - '67 Camaro
You will be very happy with the Screamin kicks they are top notch...highly recommend.
Bret Ervin
04-12-2012 #115
Registered User
- Join Date
- Jan 2011
- Location
- Boston, MA
- Posts
- 1,180
Thanks, I've heard very good things about them. Unfortunately I ordered the other kick panels over a year ago before I had even seen the Screamin' Performance panels. But luckily the other ones were pretty cheap, so I'm not out a bunch of money. Originally Posted by DirtShark
I'll cover the new ones in black vinyl when I get them, and then I just need to wait for the Retrosound 2 head unit to go into production so I can finish the stereo install.
04-12-2012 #116 Registered User
- Join Date
- Jul 2011
- Location
- NC
- Posts
- 461
Nice work-Subscribed!
Let me know how those kick panels work out for you-I'll be in the market for some soon!
04-13-2012 #117
Registered User
- Join Date
- Aug 2007
- Location
- NJ/PA
- Posts
- 396
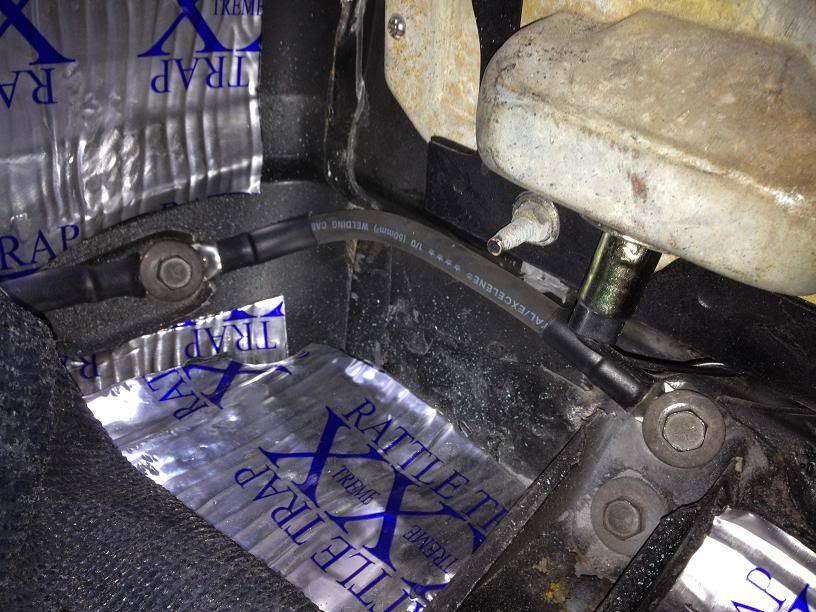
Love the car and the upgrades youve been doing. Im a bit behind you but have many of the same up grades..do you have a shot of where/what you did with the ground..? Did you go through the floor and connect to the frame rail..? Im getting ready to do mine this weekend and wanted to see exactly how you ran your, Thanks, Steven Originally Posted by 67rally
67 Camaro - LSX454 w/ T56 Magnum
04-14-2012 #118
Registered User
- Join Date
- Jan 2011
- Location
- Boston, MA
- Posts
- 1,180
I didn't go through the floor, I just grounded it to one of the bumper bolts, and later decided to jumper that to the bumper bolt bracket that attaches to the frame rail on the passenger side. The relocation isn't finished yet, so I haven't tested the grounds, but this is where I did mine: Originally Posted by boostin05blacksti
****Edit****
I just finished up the battery relocation this morning, and the ground at the bumper bolts works great. I tested the grounds in the trunk and at several points in the engine bay, and they all were good. Keep in mind I have solid body mounts and subframe connectors, and the rear frame rails are brand new, so it's all good metal front to rear.Last edited by 67rally; 04-16-2012 at 07:55 AM. Reason: Added ino
04-19-2012 #119
Registered User
- Join Date
- Jan 2011
- Location
- Boston, MA
- Posts
- 1,180
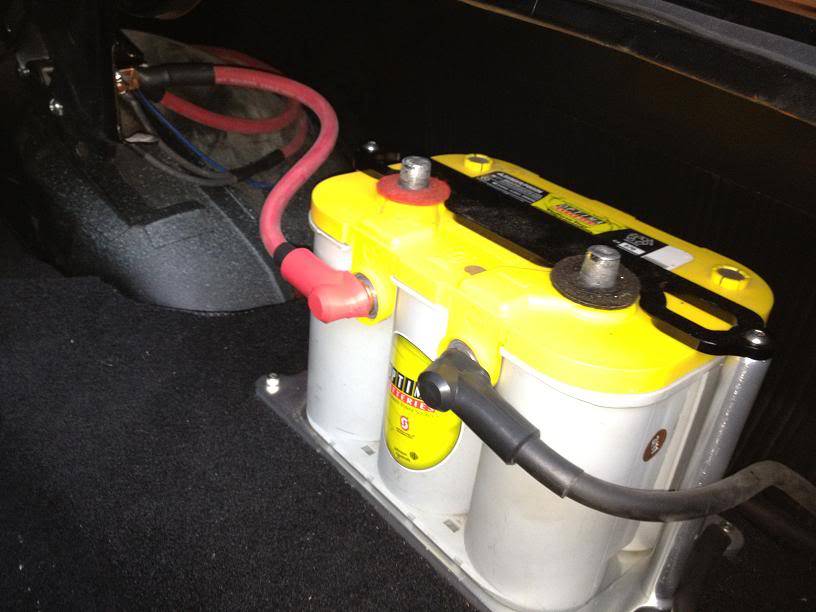
Finally finished up the battery relocation (for now). The top terminals that I was using didn't fit tightly enough on the battery, and the gold coating began flaking after 2 days. I decided to use the side terminals until I can find a quality part for the top:
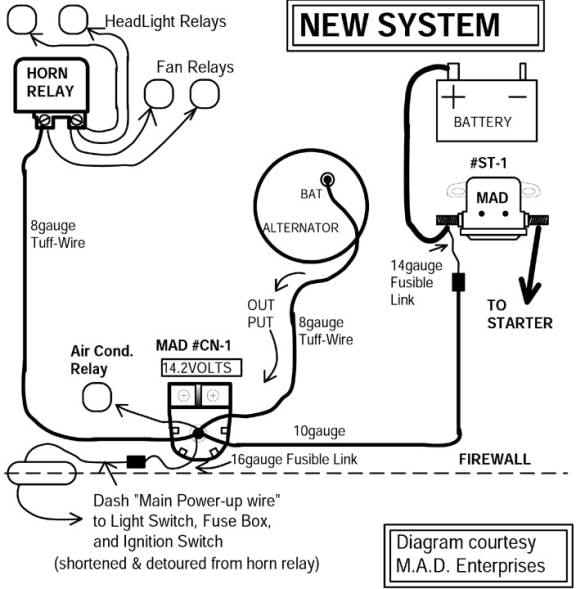
I finished up re-wiring using the MAD Electrical "New System". The only difference is that battery is in the trunk, and I ran a 2 awg from the firewall bulkhead connector to the remote starter solenoid, which is also in the trunk. I also added another CN-1 Terminal next to the horn relay on the radiator support. Most of the wiring is wrapped with the Painless split braided sleeve, so it cleans up the engine bay quite a bit.
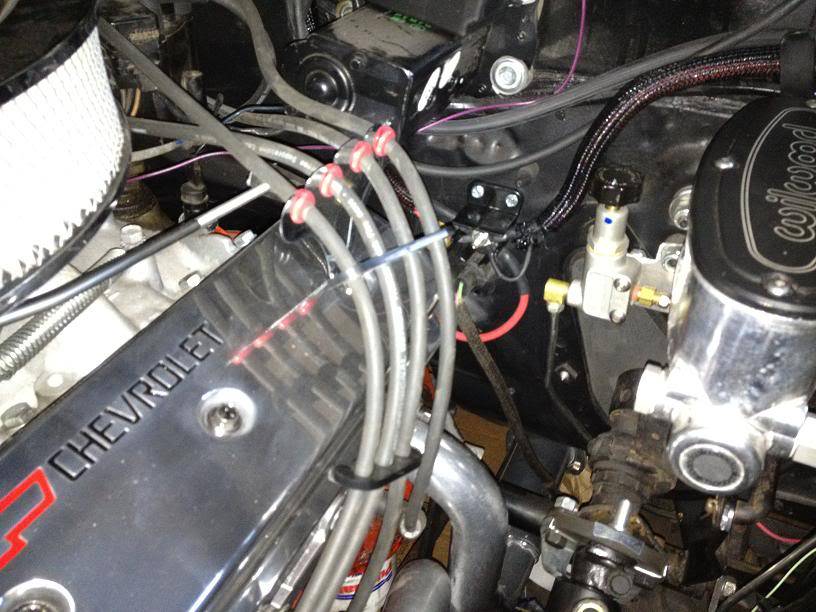
Here are two of the CN-1's that I used. The kit came with 3, so I installed the other one on the passenger side radiator support (not shown):

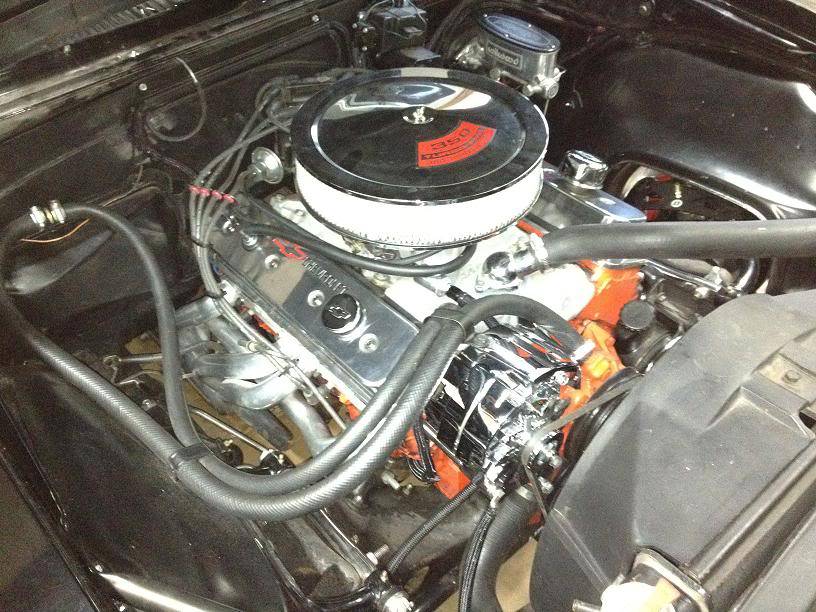
And here's the new Power Master 140 amp alternator and chrome brackets that I installed. The alternator actually bench tested at just over 160 amps, so it should be plenty for my needs. You can also see that I just have my heater hoses running in a loop using a brass connector between the supply and the return hoses. I removed the old heater core, and haven't bitten the bullet on a Vintage air unit just yet:
04-20-2012 #120
Registered User
- Join Date
- Aug 2007
- Location
- NJ/PA
- Posts
- 396
Good Info. Im still working on mine but its nice to see the install so I have an actual picture of how it goes. Thanks, Steven
67 Camaro - LSX454 w/ T56 Magnum


 Reply With Quote


