


Results 1 to 20 of 573
Hybrid View


-
12-25-2011 #1

 Registered User
- Join Date
- Jan 2011
- Location
- Boston, MA
- Posts
- 1,180

Project: BLACK METAL - '67 Camaro
I thought it was time to start a build thread on my '67 Camaro here. I have owned it for just over a year and spent a lot of that time working on all the small things that aren't really relevant to Pro-Touring, as well as a few things that were. My complete build thread is over on Team Camaro, and this car starts on page 3: http://www.camaros.net/forums/showth...=173910&page=3
Now that the car is really starting to move into the Pro-Touring stages, I'm going to try to keep this thread on track with only PT related items.
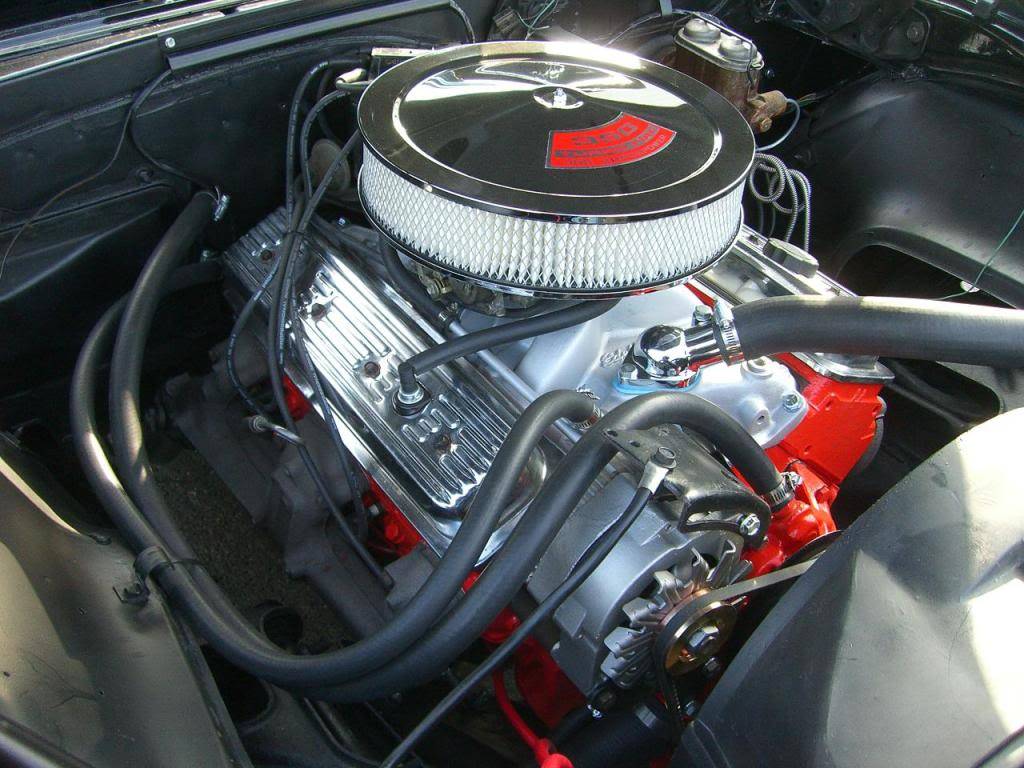
Here's where I started. 1967 Camaro, orginally a 6 cyl. It was already painted, and supposedly a good daily driver.

-
12-25-2011 #2
Registered User
- Join Date
- Jan 2011
- Location
- Boston, MA
- Posts
- 1,180
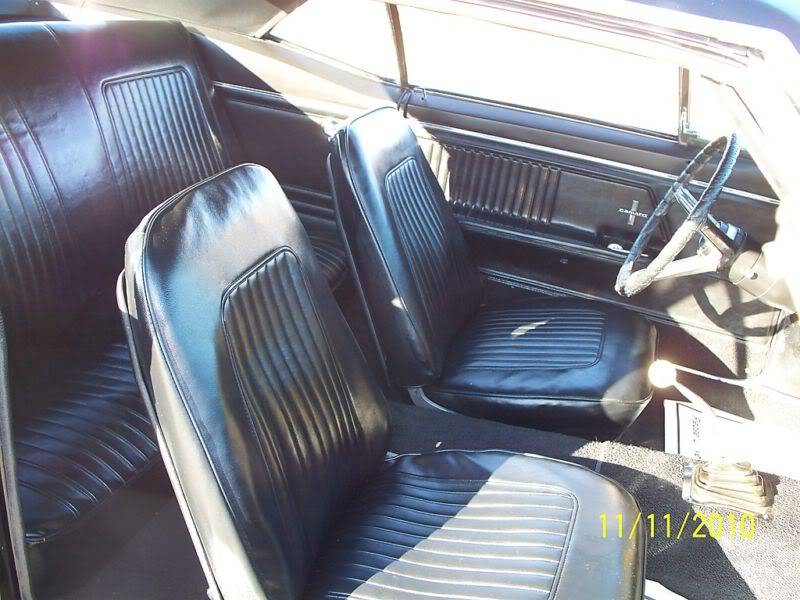
One thing to mention, I'm trying to keep the Camaro on the road throughout the build, and do as much of the work myself as possible. I'm working out of a one car garage that is only 3 feet longer and 3 feet wider than my car, and I don't have the budget to send it out and drop $50k+ into it in one shot.
Ultimately I want it to be a great driver that I can take to the track on occasion and have a little fun.
12-25-2011 #3
Registered User
- Join Date
- Jan 2011
- Location
- Boston, MA
- Posts
- 1,180
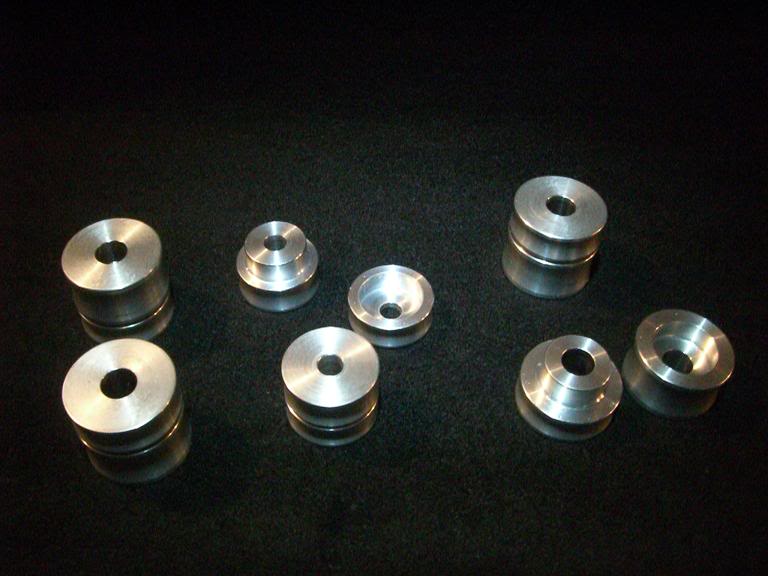
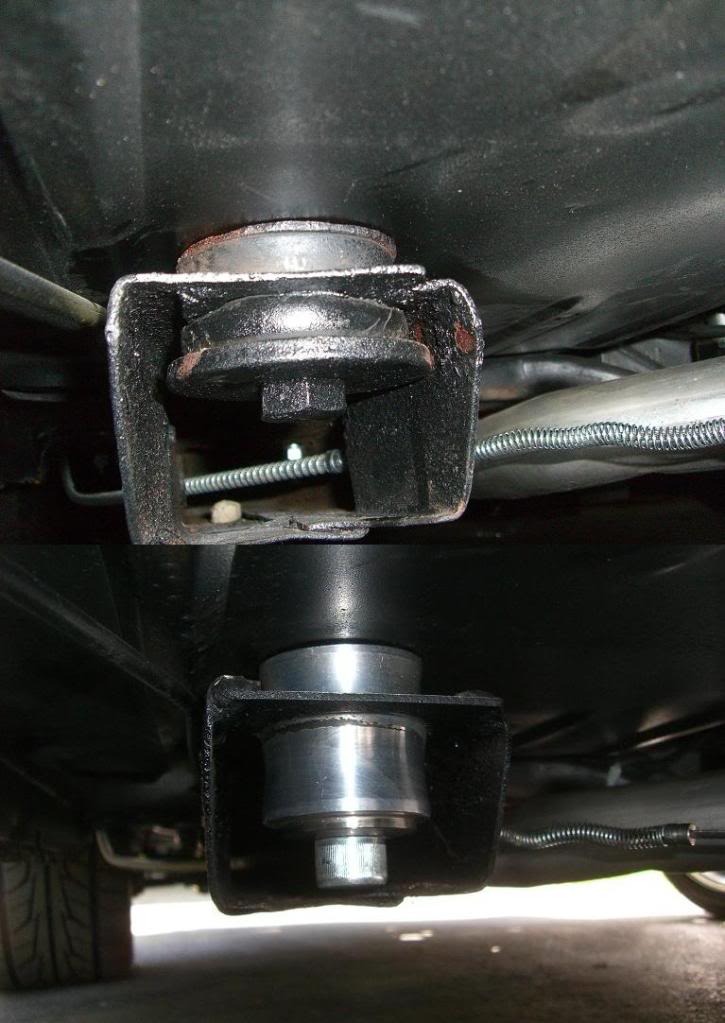
The body mounting plates were rusted out, I had new plates welded in and replaced the old worn out body mounts with Fesler solid aluminum bushings:
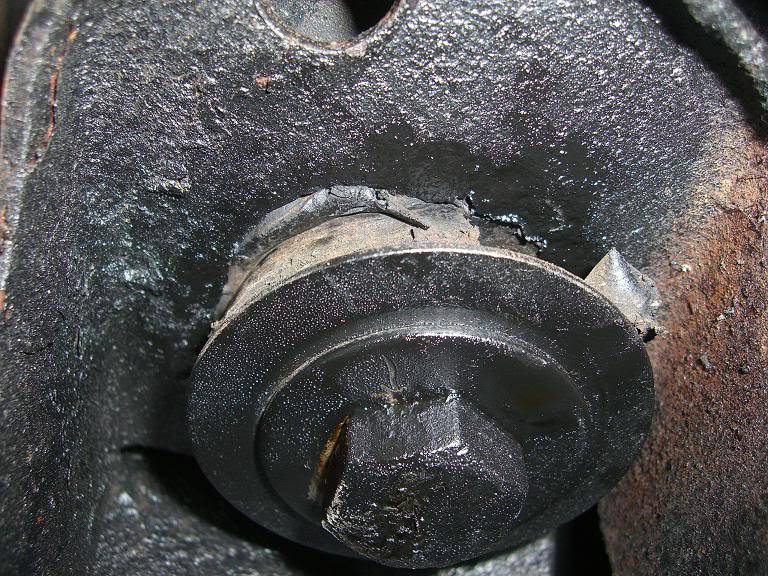
Rot:
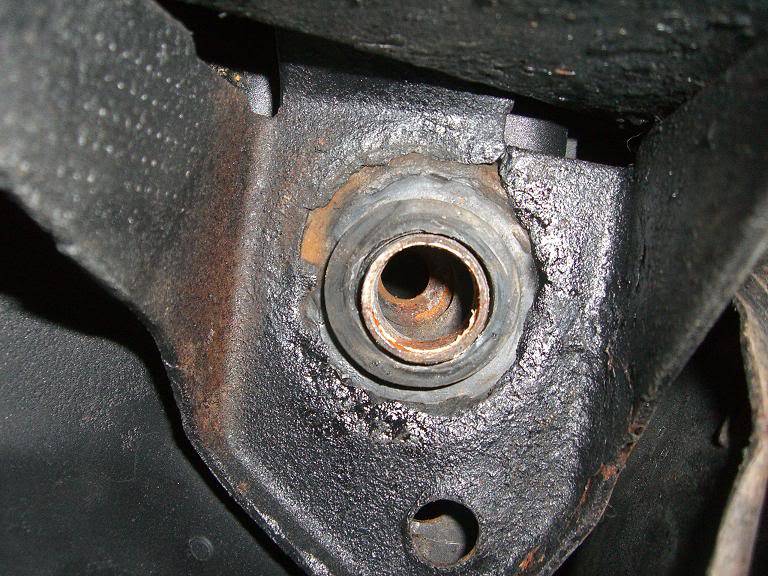
New billet mounts from Fesler:
12-25-2011 #4
Registered User
- Join Date
- Jan 2011
- Location
- Boston, MA
- Posts
- 1,180
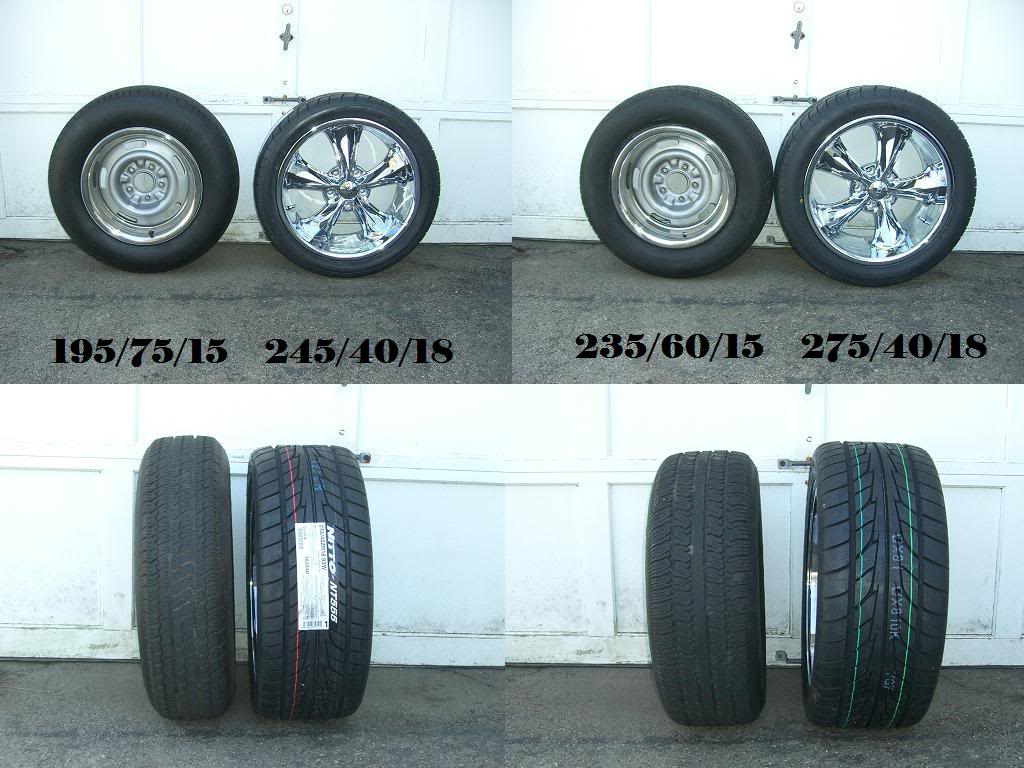
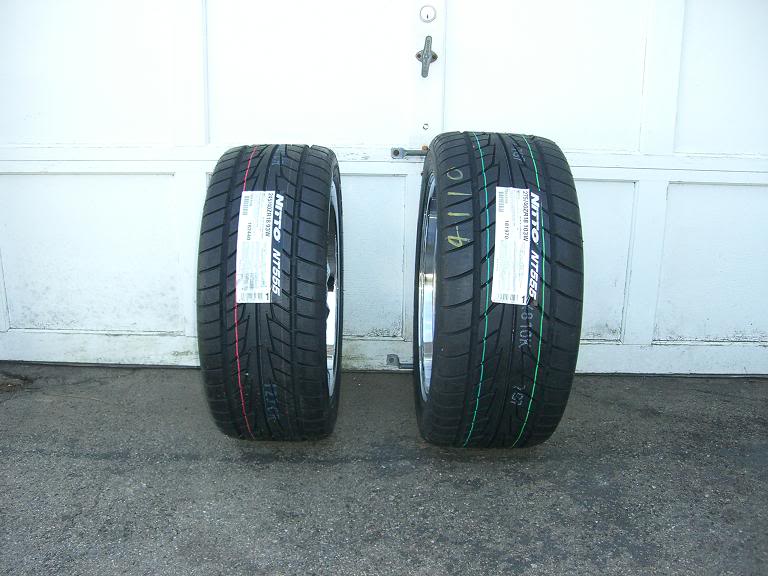
The old tires and wheels weren't the look I was going for. I replaced them with 18" Foose Legends. 18x8 up front and 18x9 in the rear, wrapped in Nitto 555's. 245/40/18's up front and 275/40/18's in the rear:
Old and new comparison (front's on the left, rears on the right):
New front/rear height:
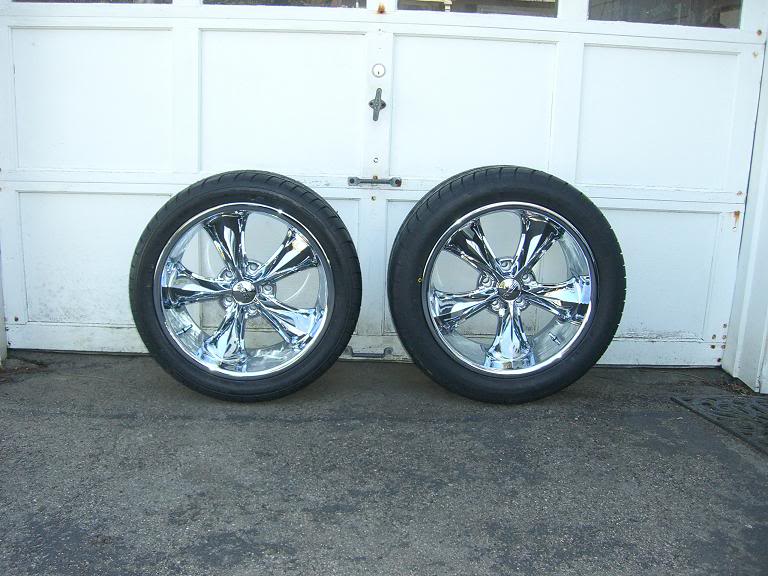
New front/rear width:
12-25-2011 #5
Registered User
- Join Date
- Jan 2011
- Location
- Boston, MA
- Posts
- 1,180
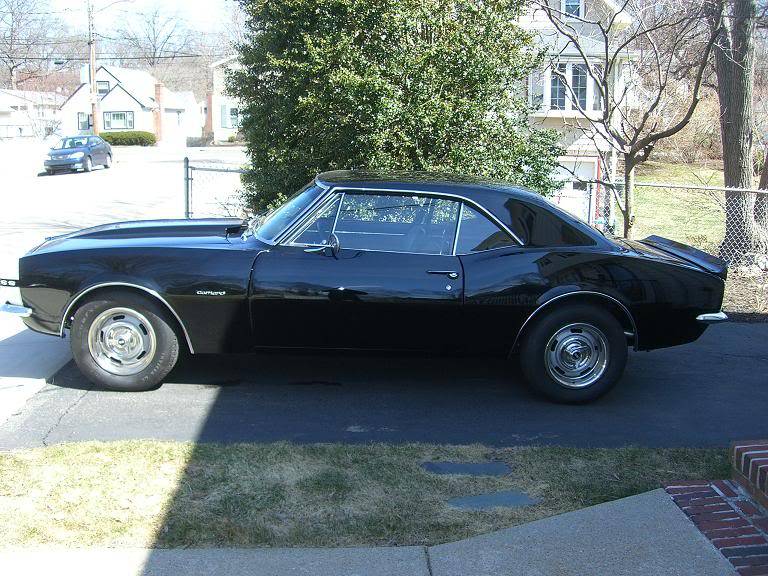
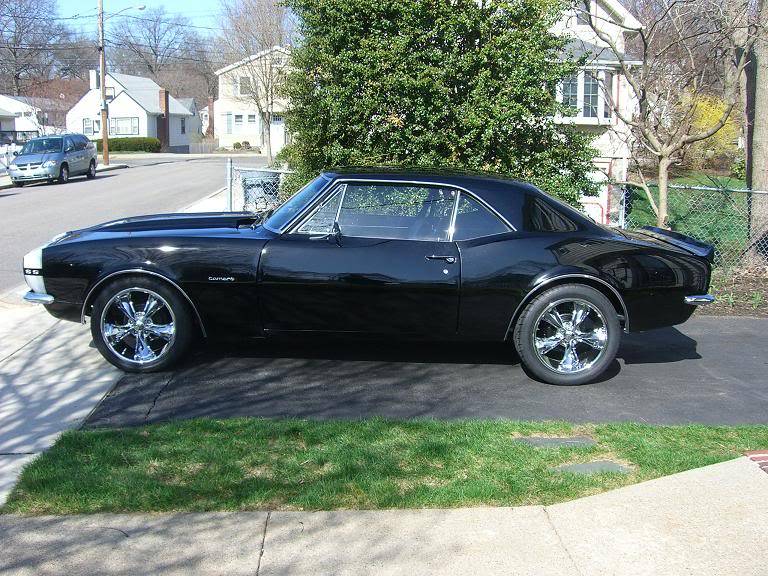
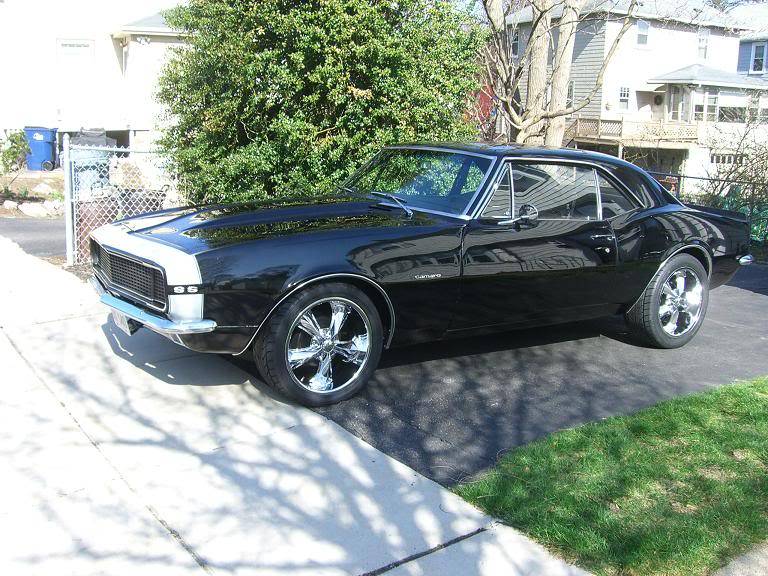
It changes the look a little...
Before:
After:
At an angle:
12-25-2011 #6
Registered User
- Join Date
- Jan 2011
- Location
- Boston, MA
- Posts
- 1,180
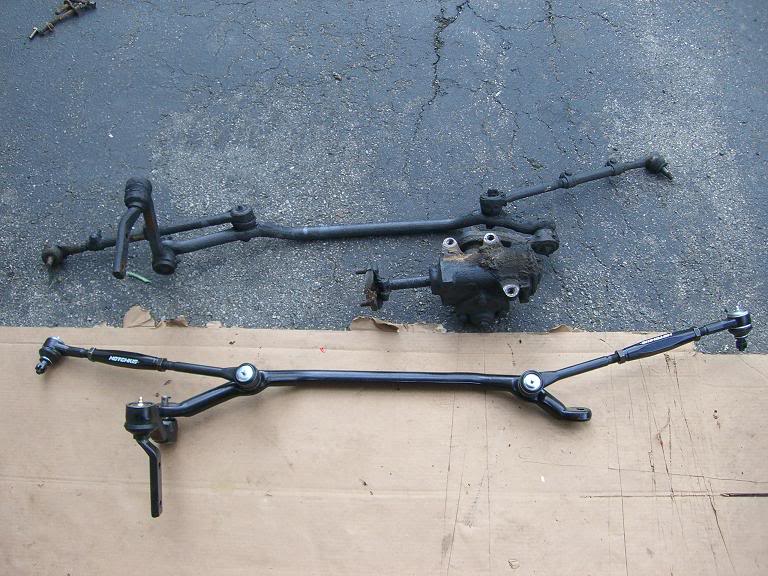
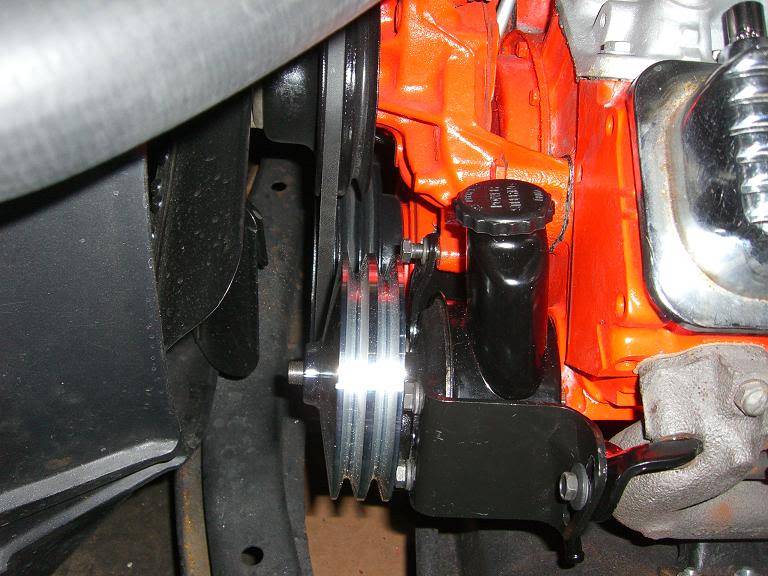
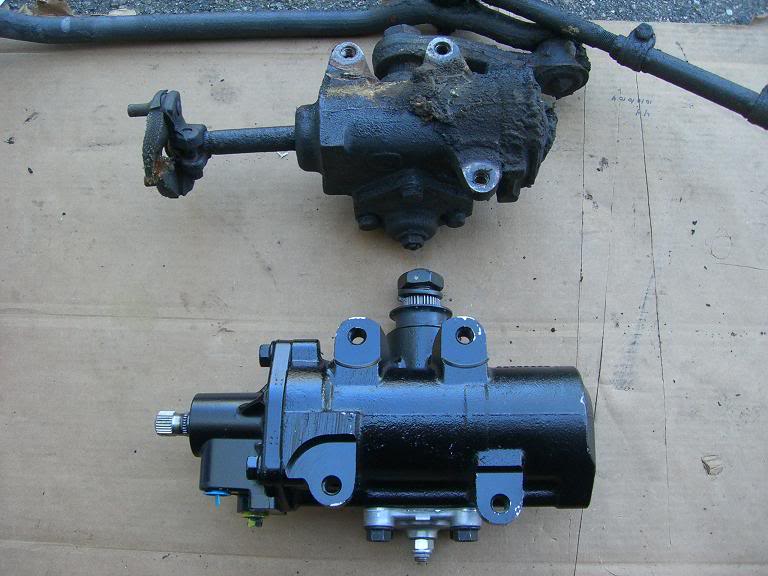
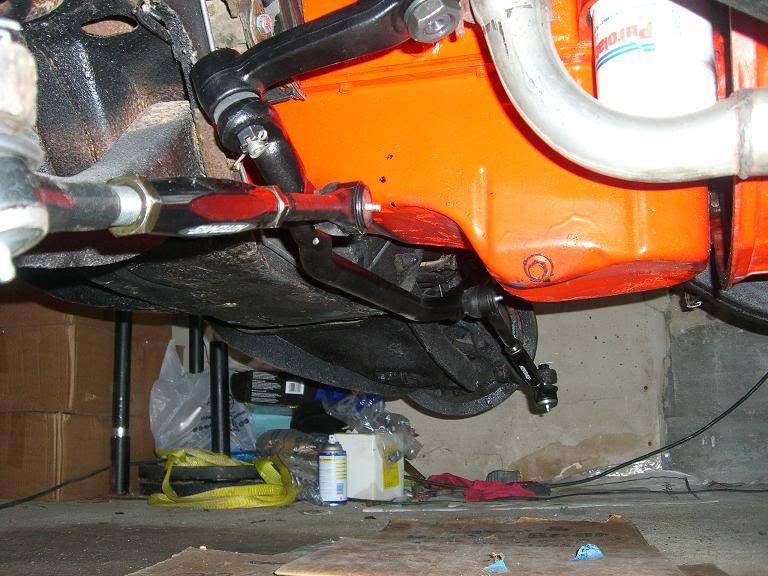
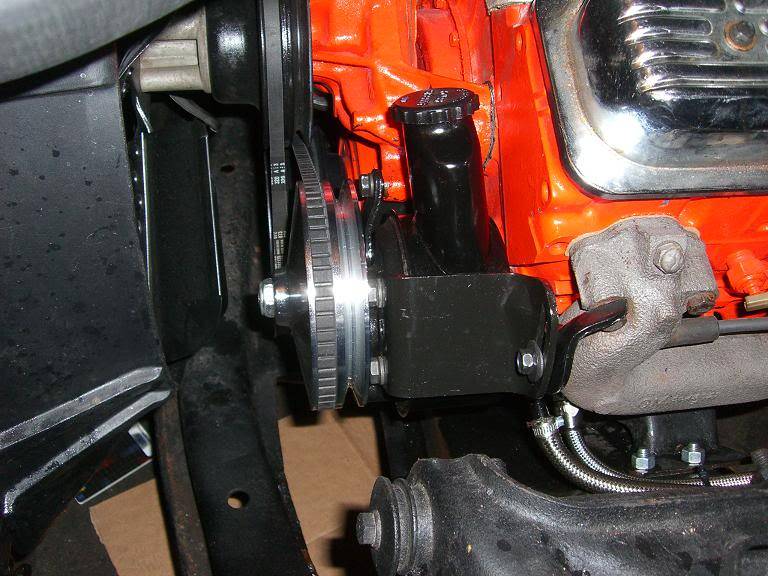
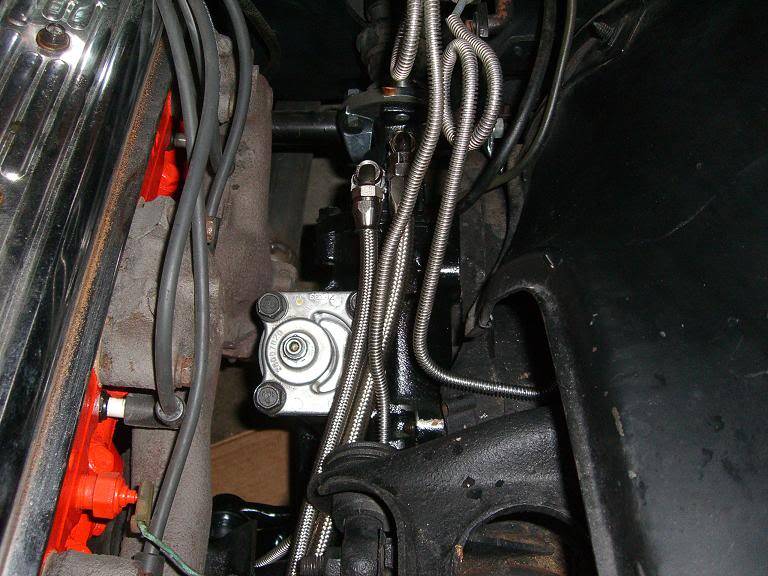
Next it was time to tackle the front end. I pulled out all the old steering linkage and replaced with new Moog parts. While I was at it, I got rid of the old manual steering box and converted to PS using a Delphi 670 box and '69 style PS pump with March pulley bracket.
The old linkage had seen better days...
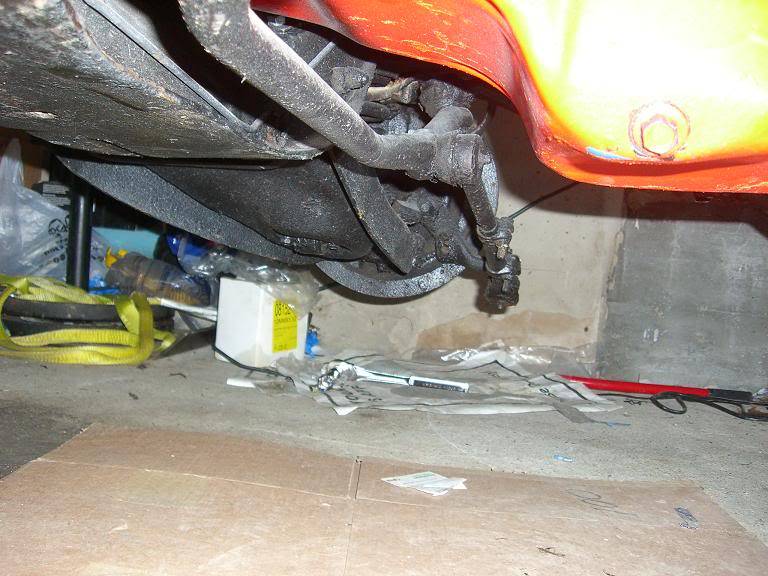
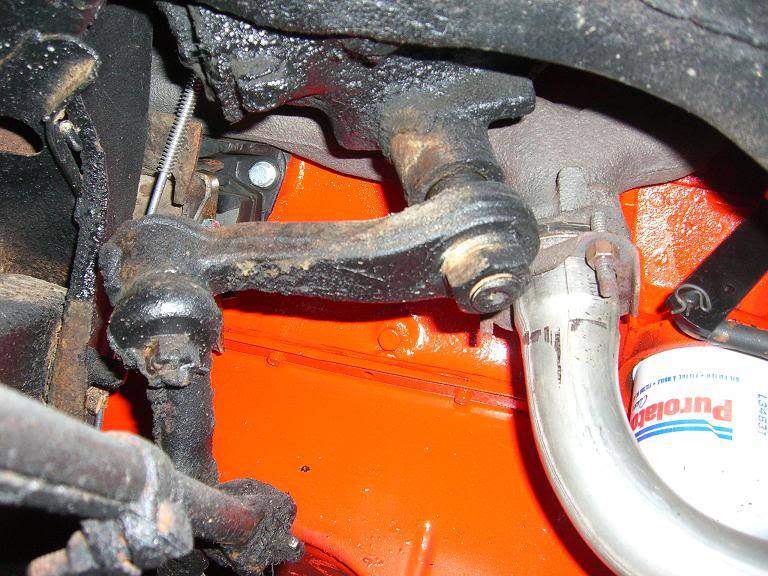
Pitman arm covered in road grime...
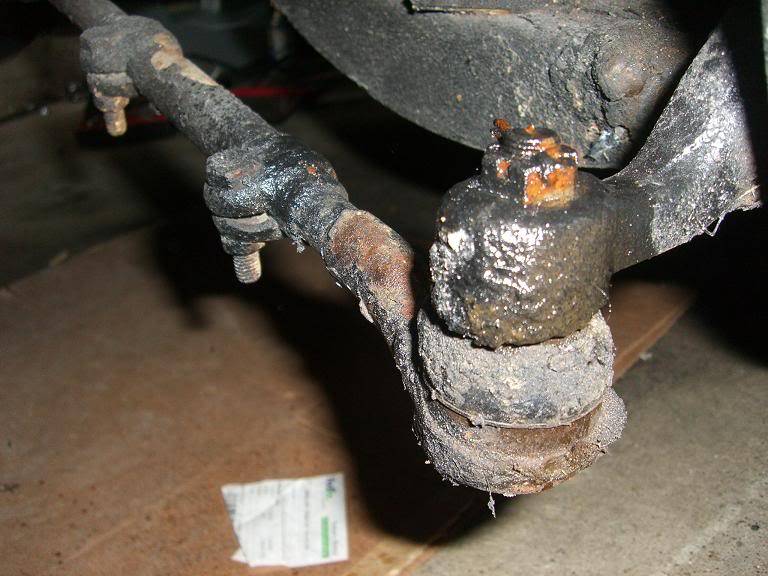
Outer tie rod ends, couldn't even find the cotter pin on the driver's side, atleast the passengers side was visable under the sludge...
12-25-2011 #7
Registered User
- Join Date
- Jan 2011
- Location
- Boston, MA
- Posts
- 1,180
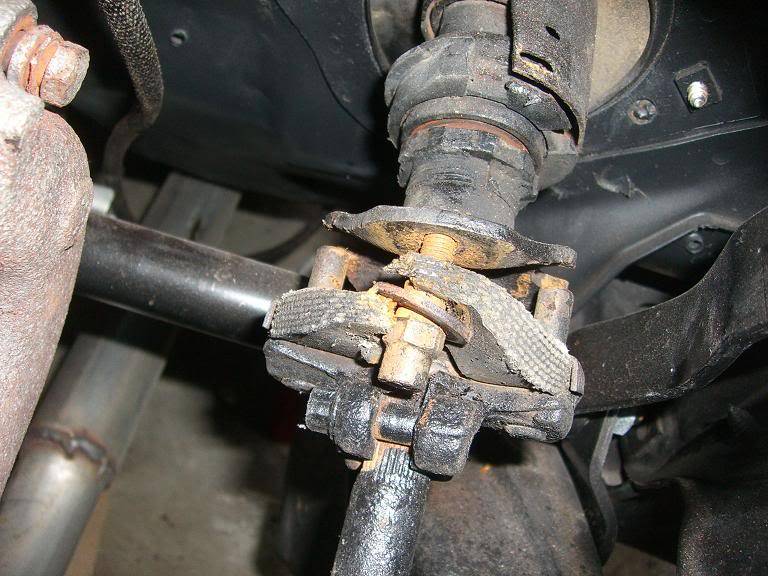
WOW, this rag joint was busted up. It was barely held on by a washer, both sides were torn to shreds. Not safe.
Old linkage and gear box came out as one piece. I mocked up the new linkage and adjusted the tie rod ends as close as possible to the same length as the old...
New pump and pulley is in. This fit like a glove...
12-25-2011 #8
Registered User
- Join Date
- Jan 2011
- Location
- Boston, MA
- Posts
- 1,180
Old steering box vs new...
New linkage...
New pump/pulley/belt...
New box installed and plumbed...
12-25-2011 #9
Registered User
- Join Date
- Jan 2011
- Location
- Boston, MA
- Posts
- 1,180
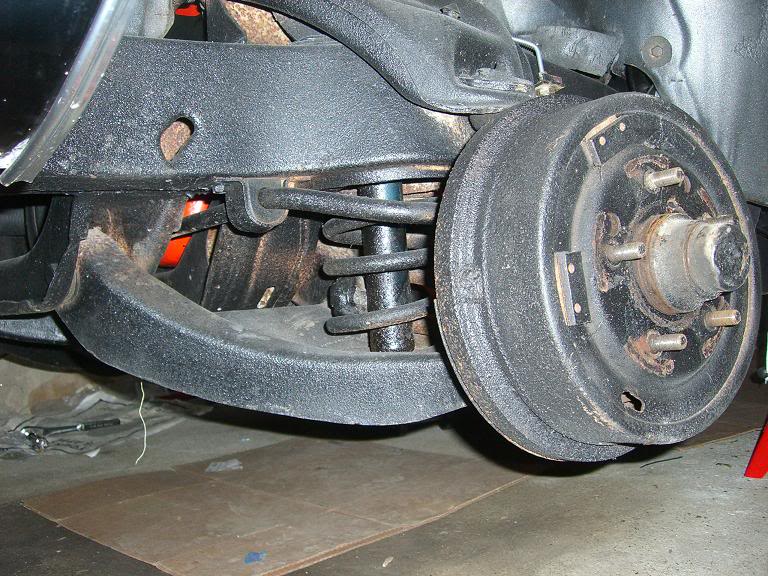
Now that the steering was taken care of, it was time to tackle the front suspension. Stock upper and control arms, broken springs and worn out shocks, not to mention the drum brakes that had seen better days:
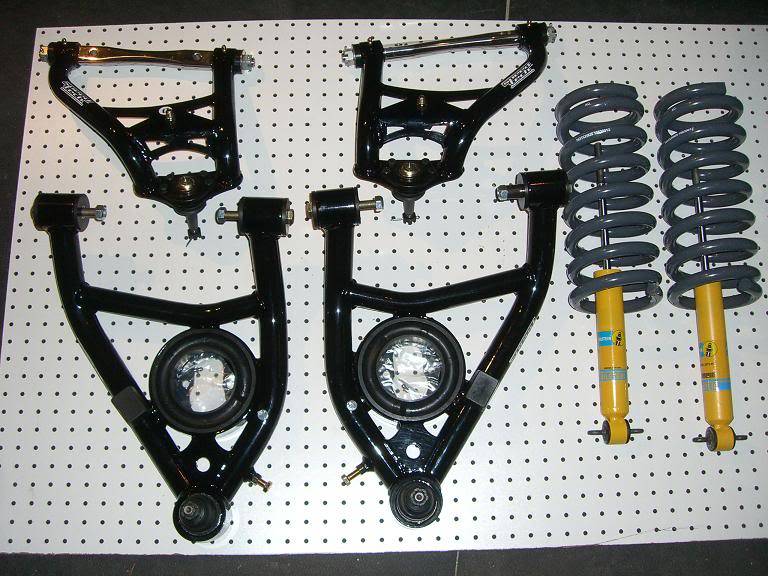
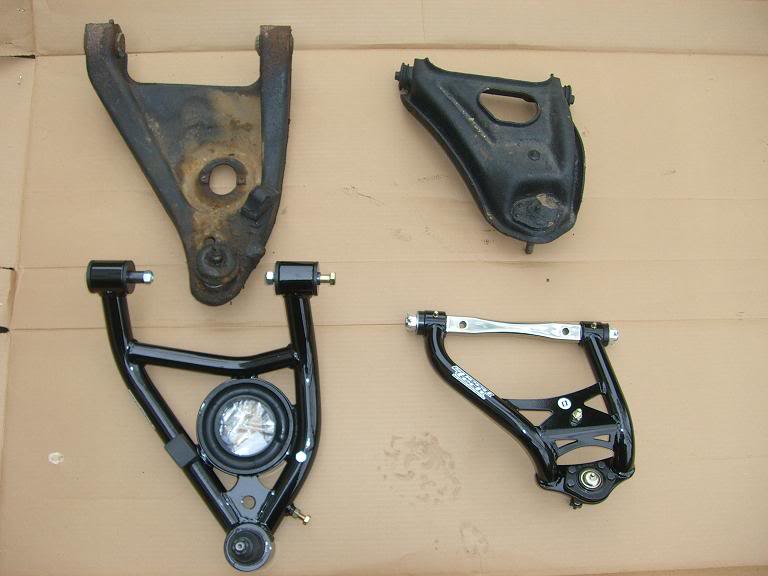
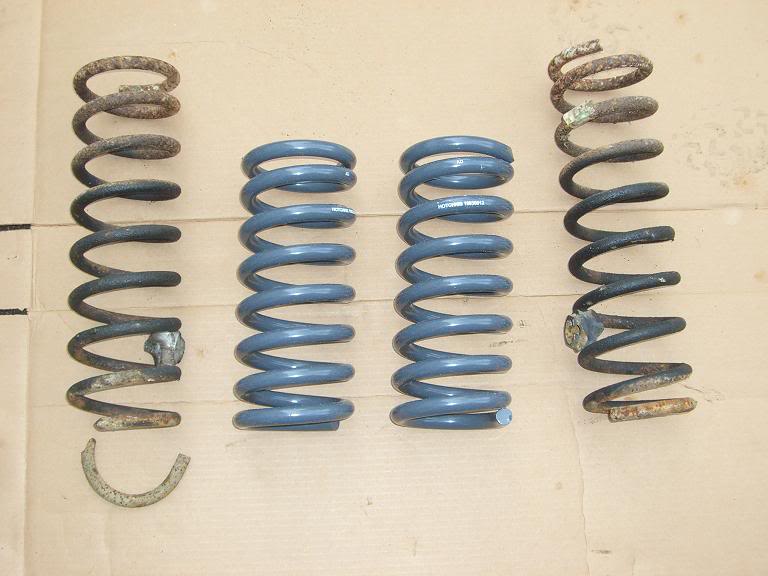
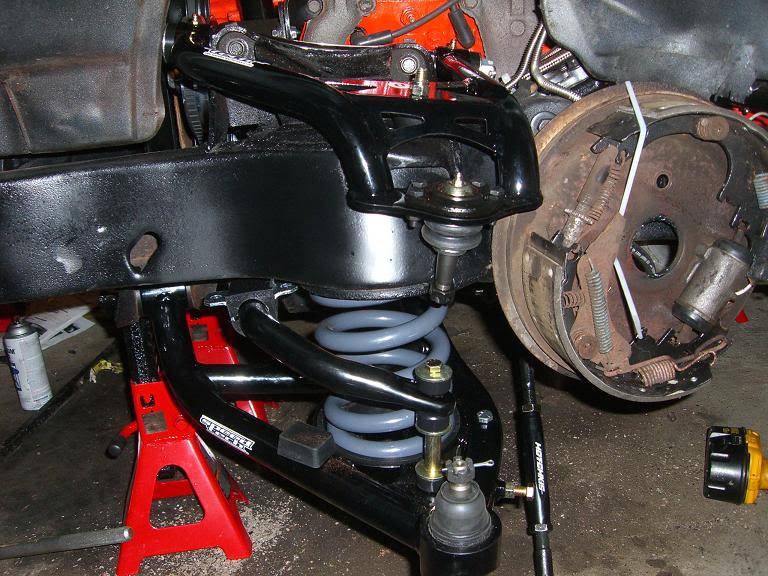
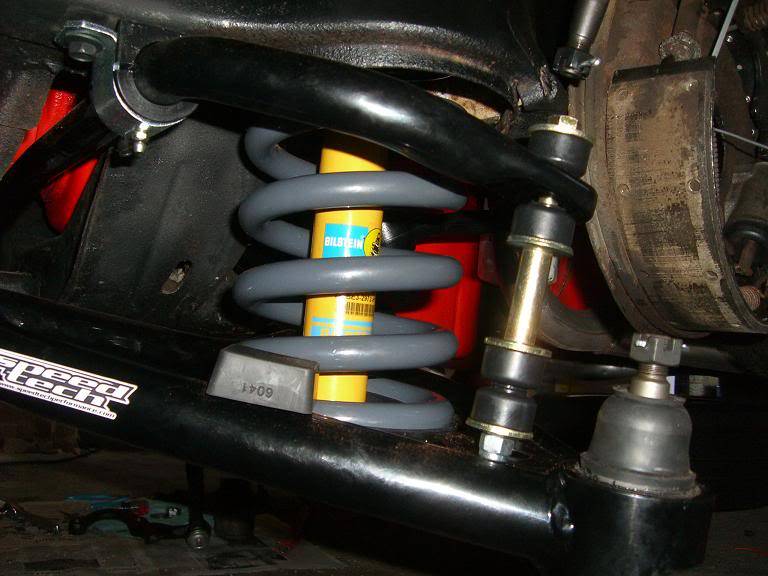
Speed Tech UCA's, LCA's and spring isolators, PPM tall upper ball joints, Hotchkis 1907F 2" lowering springs, and Bilstein valved shocks.
12-25-2011 #10
Registered User
- Join Date
- Jan 2011
- Location
- Boston, MA
- Posts
- 1,180
Out with the old, and in with the new...
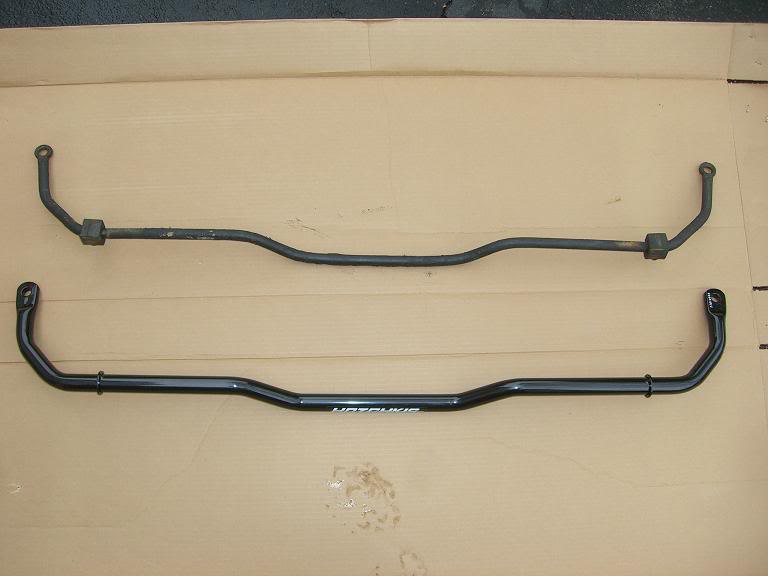
Old front sway bar vs. new Hotchkis sway bar:
Old upper and lower control arms vs. new SpeedTech tubular control arms:
Old springs vs. new Hotchkis 1907F 2" drop springs:
12-25-2011 #11
Registered User
- Join Date
- Jan 2011
- Location
- Boston, MA
- Posts
- 1,180
Upper and lower control arms are in, springs are in and seated, sway bar is in and loosely attached:
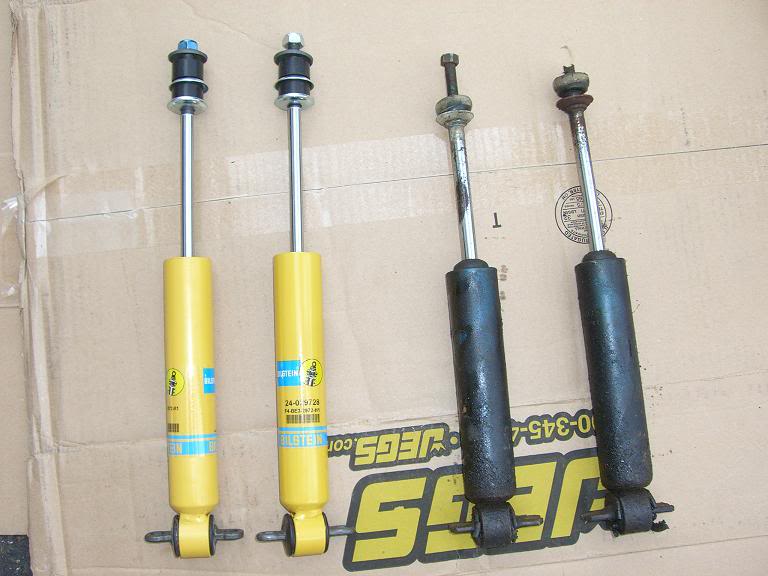
New Bilstein shocks vs Old Monromatics:
12-25-2011 #12
Registered User
- Join Date
- Jan 2011
- Location
- Boston, MA
- Posts
- 1,180
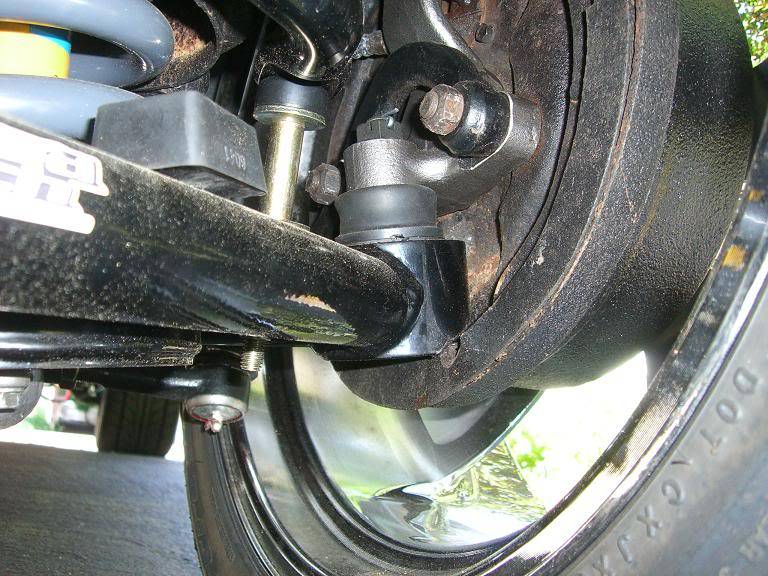
I had to throw the old drums back on because I needed to get it out of my garage and to a shop to do some trouble shooting on the engine.
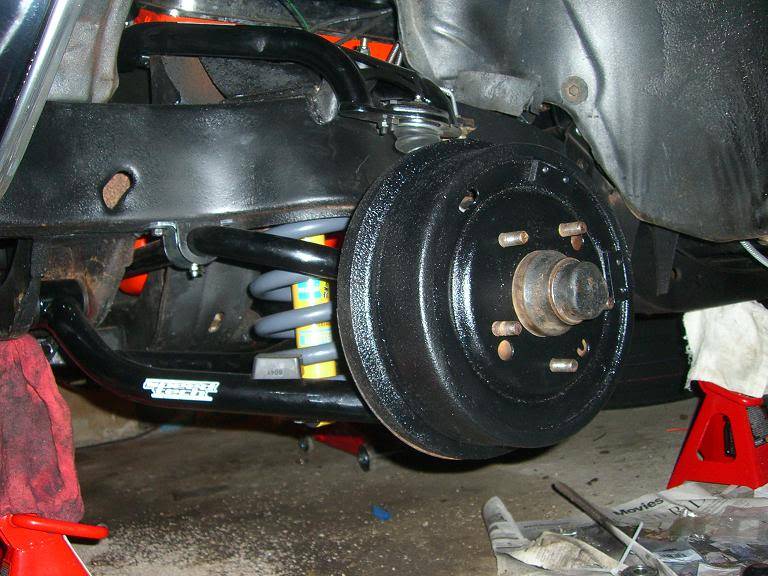
It turns out the drums don't fit over the new SpeedTech LCA's so we had to grind the drums a bit just to keep it from scraping. Temporary fix:
Passenger:
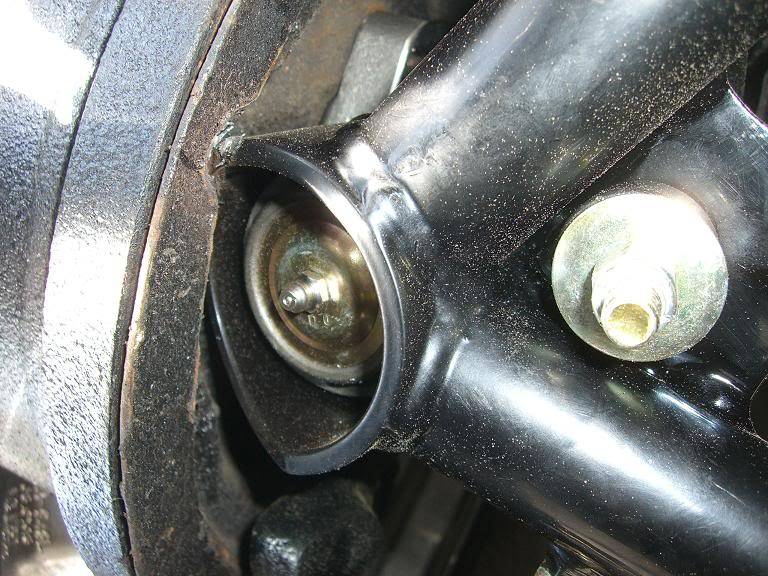
Driver:
12-25-2011 #13
Registered User
- Join Date
- Jan 2011
- Location
- Boston, MA
- Posts
- 1,180
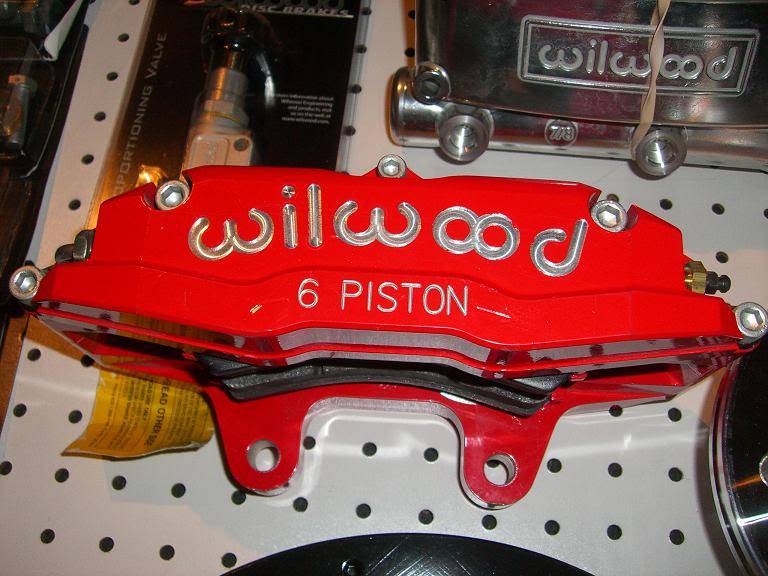
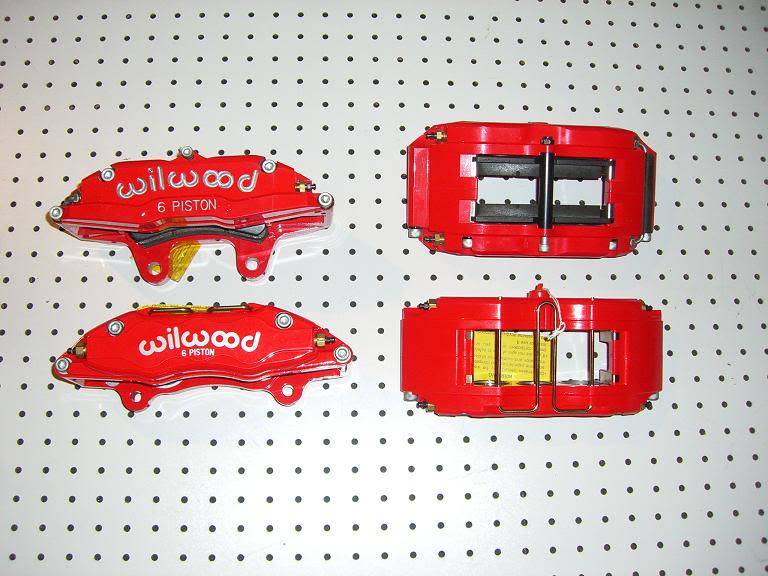
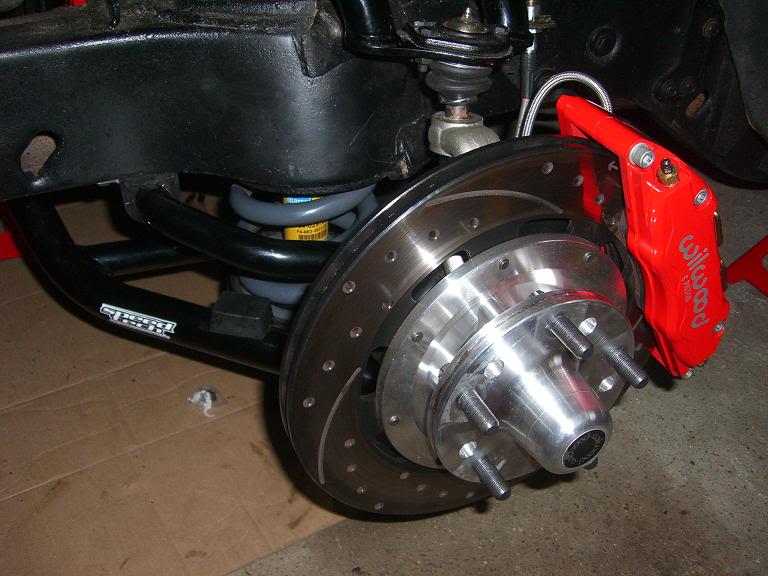
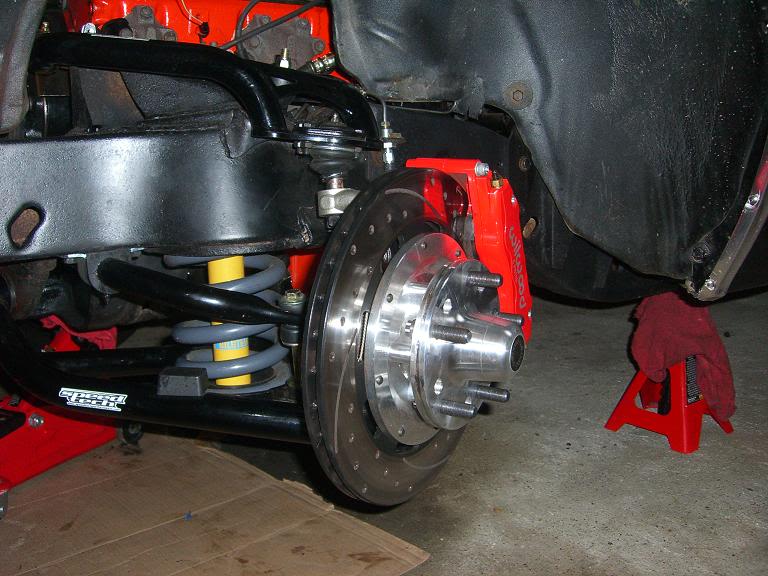
Wilwood 140-10510-DR 12.19" black drilled/slotted rotors with red 6 piston Superlite calipers and polished master cylinder. This kit was supposed to include the DynaPro's, but I got the wrong calipers in the mail. They didn't fit. I still have them in a box waiting for a return shipping label from the sender if he ever wants them back. Eventually I got the right calipers. The Superlite's use a different mounting point and are not interchangeable with the DynaPro's.
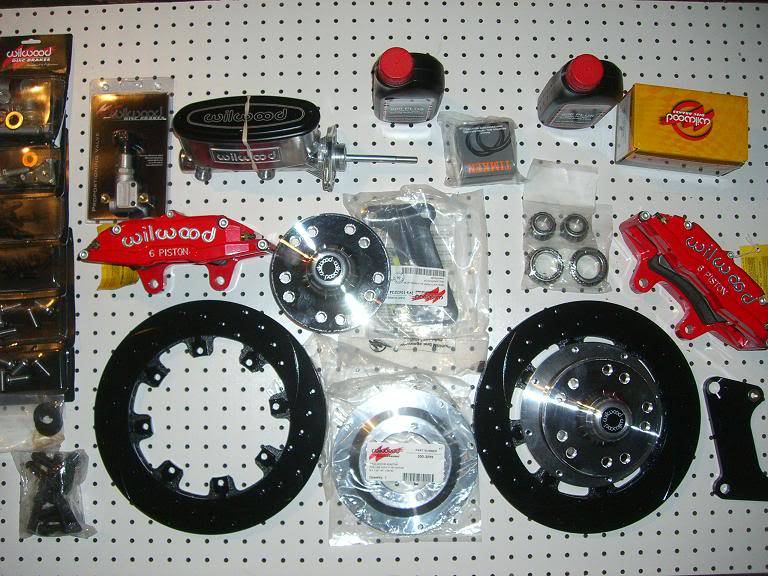
Close up of the calipers:
12-25-2011 #14
Registered User
- Join Date
- Jan 2011
- Location
- Boston, MA
- Posts
- 1,180
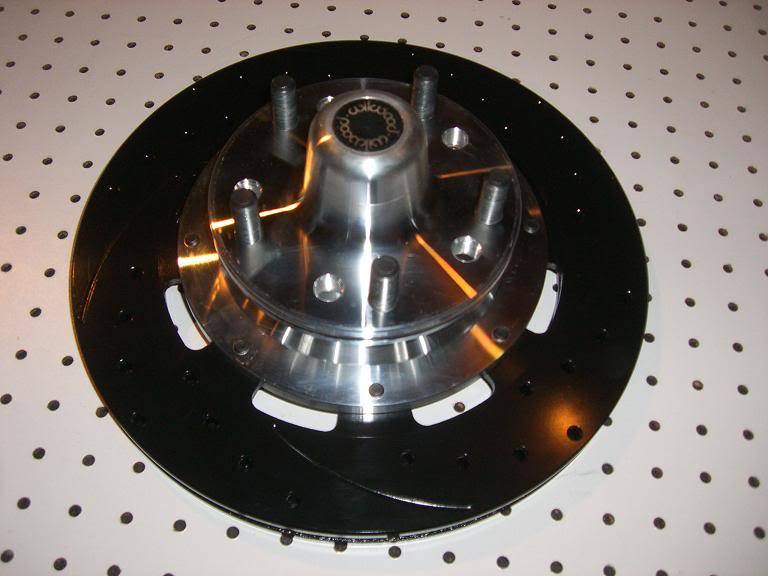
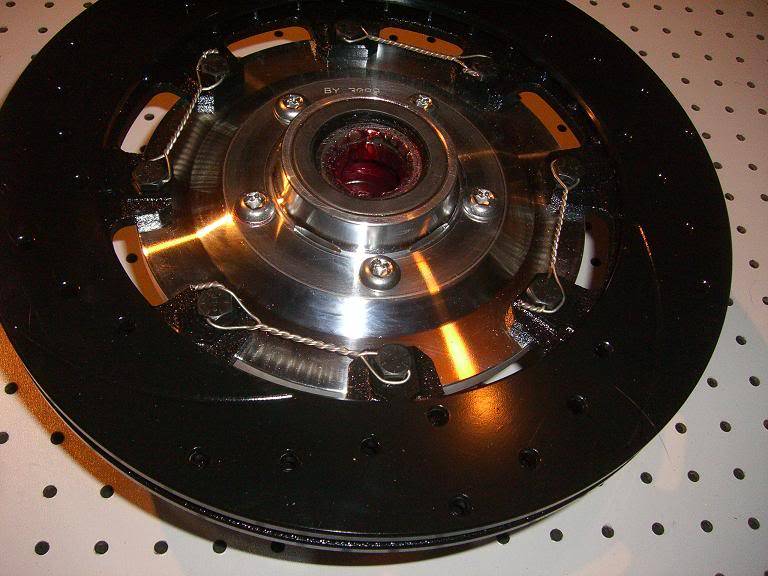
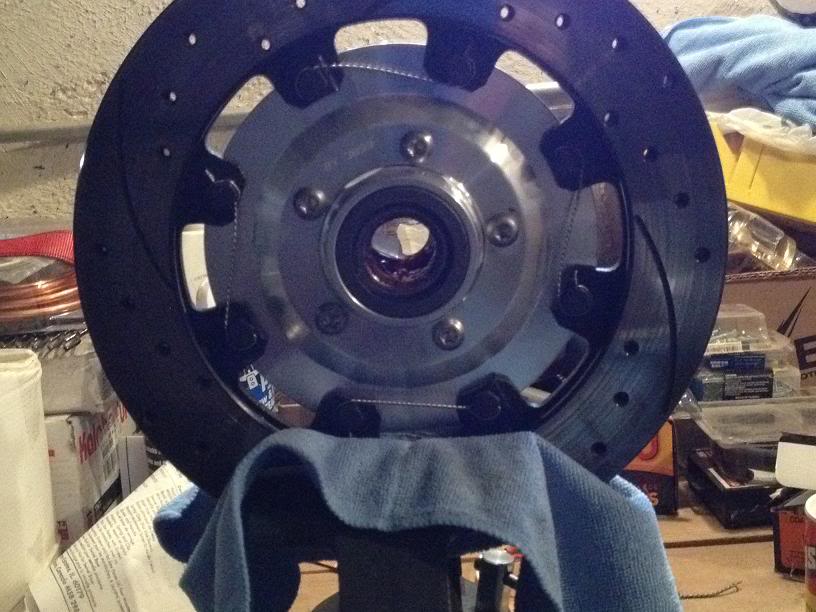
Front hubs and a pic of the safety wiring. I let my mechanic safety wire for me since I didn't have any experience with it.
06-15-2015 #15
Registered User
- Join Date
- May 2015
- Posts
- 255
Just an F.Y.I.,
Nice build, I just had to say something, I just found this thread today
This safety wire job is incorrect.
I am an A&P mechanic & I would never let that type of safety wire job pass for inspection. Originally Posted by 67rally

06-15-2015 #16
Registered User
- Join Date
- Jan 2011
- Location
- Boston, MA
- Posts
- 1,180
Yeah, if you make it to page two of this thread, you'll see you weren't the first to point that out! I learned to safety wire and did it the right way myself. Originally Posted by mean buzzen half dozen
09-10-2015 #17
Registered User
- Join Date
- Jan 2011
- Location
- Boston, MA
- Posts
- 1,180
The Vintage Air install has begun. I still have a ways to go, but here's the start of it. I purchased both of the DSE plates listed above, and ended up using the heater delete plate. I also bought their VA mounting bracket, even though it's for a '69 only. There's one bolt on the driver side that won't get mounted to anything, and I stole John's (Smitty68) idea of using the DSE brackets in conjunction with the VA brackets, which should make for a very sturdy mount.
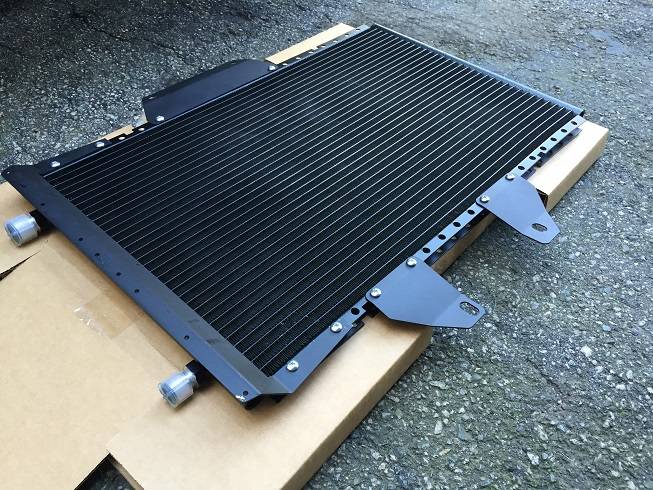
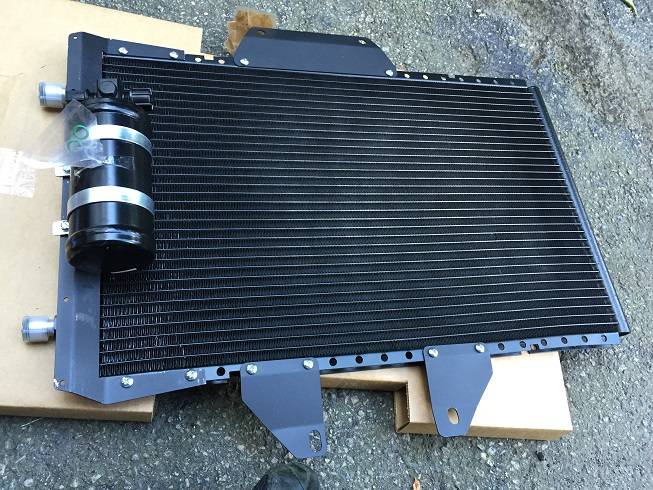
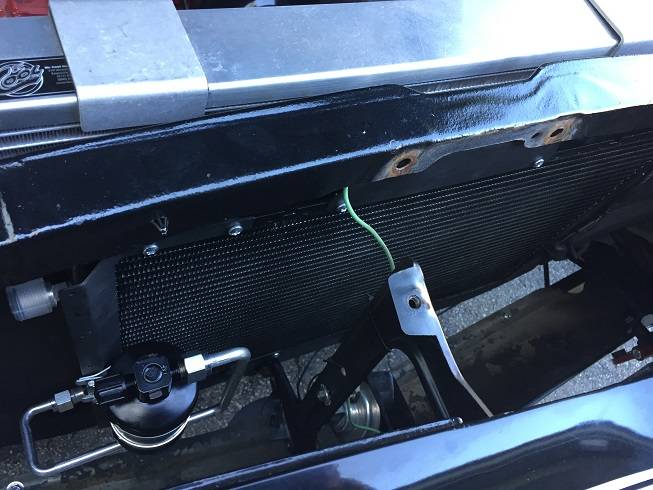
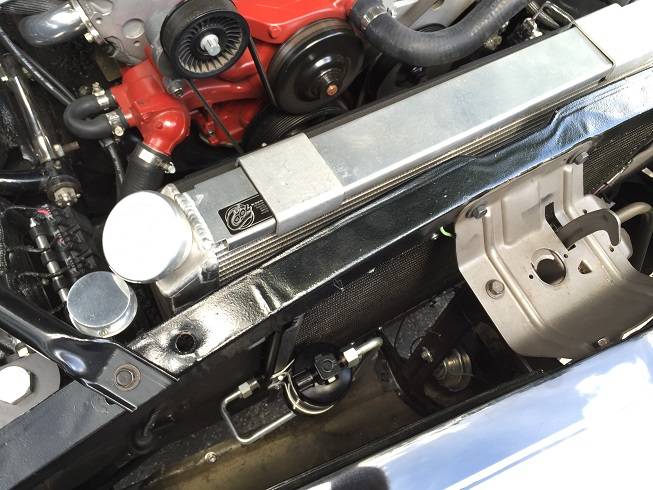
I started with the condenser and drier, since it's a fairly simple step. Just need to mount the brackets and drier to the condenser, then remove the hood latch mechanism, drop the condenser in place and bolt everything up.
Condenser and Brackets:
Drier mounted:
Mounted:
09-10-2015 #18
Registered User
- Join Date
- Jan 2011
- Location
- Boston, MA
- Posts
- 1,180
Next the hood comes off, and get ready to pull the passenger fender. The old heater box must go:
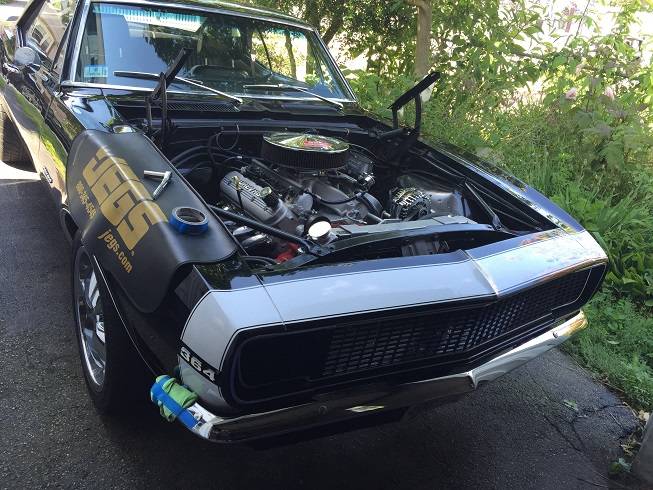
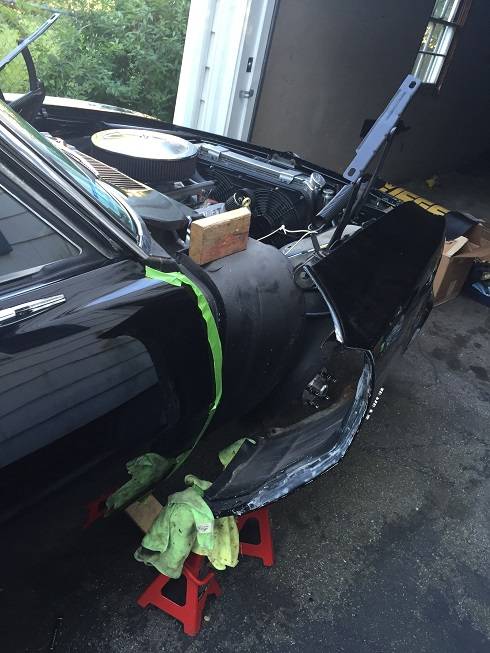
Turns out I was able to just leave a couple bolts loose at the front and support the rear of the fender on a couple of jack stands. I have a heavy piece of wire holding the the fender on at the top attached to the hood hinge:
This is the DSE heater delete plate which I painted gloss black to match the firewall:
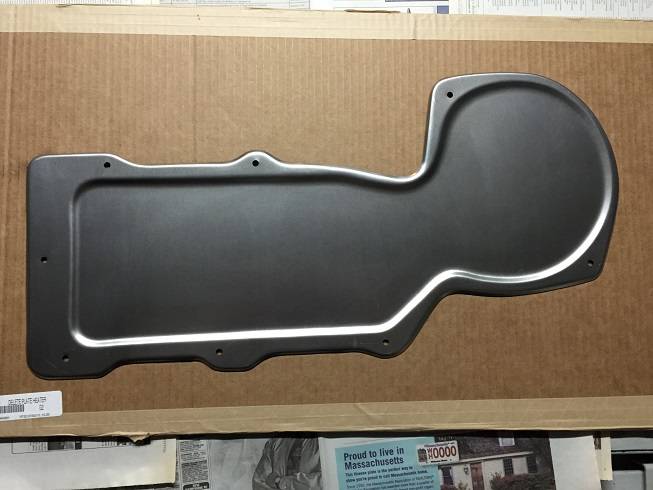
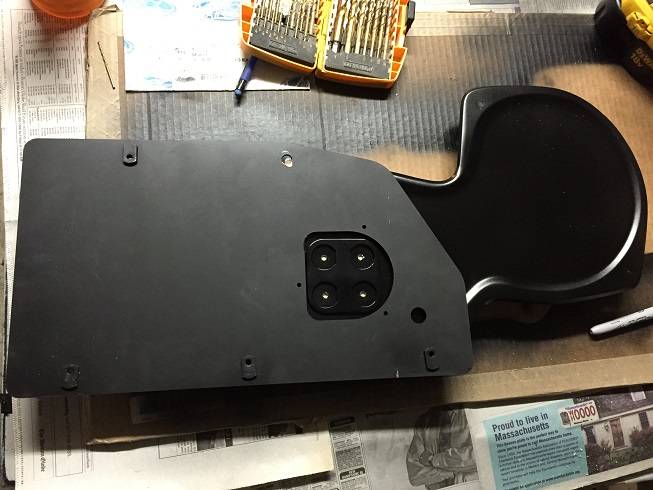
This is the VA firewall block off plate that goes on the inside. I used them both, and cut holes for the VA bulkhead fittings. This is the interior side of the panel:
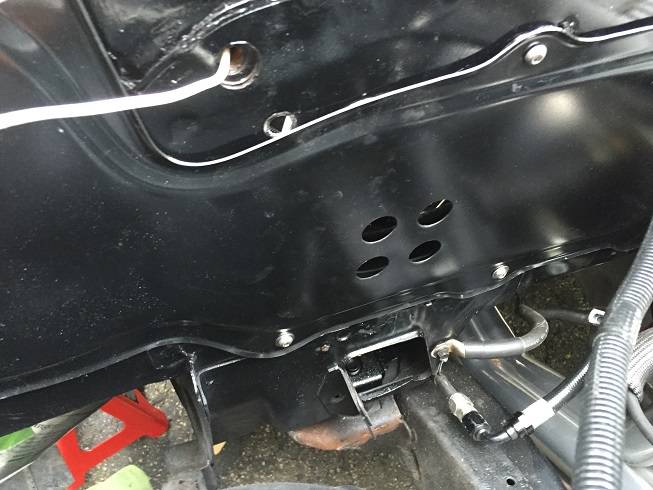
Here's the DSE Heater Delete plate mounted and sealed with black silicone:
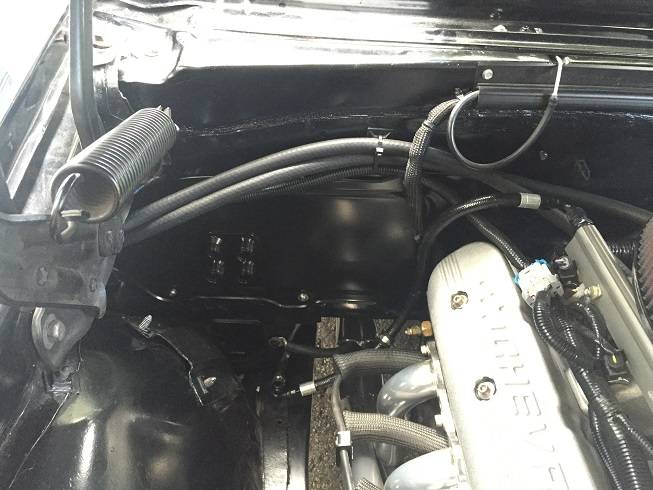
Bulkhead fittings added, the hoses will 90 degree towards the passenger fender and pass behind the fender:
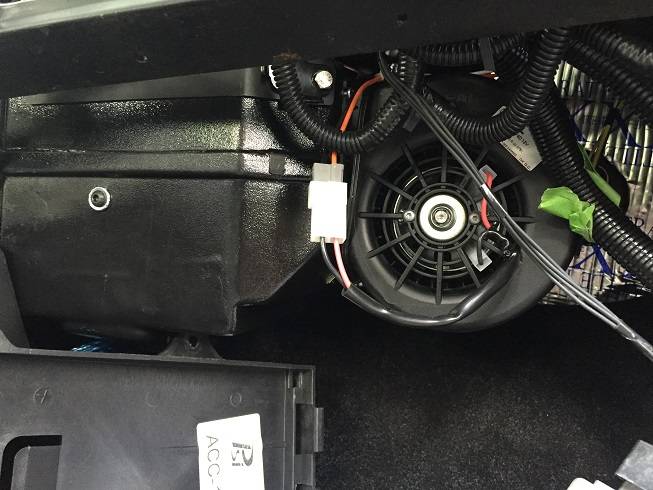
And here's the evaporater loosely mocked up (I also added more FatMat to cover the rest of the firewall, originally it stopped at the carpet line). Once I have the final fit, I will mount the LQ9 ECU above and to the right of it, on the upper cowl wall:
09-10-2015 #19
Registered User
- Join Date
- Jan 2011
- Location
- Boston, MA
- Posts
- 1,180
I ended up ordering the Vintage Air EZ Clip hoses from Summit Racing, that way I can make my own length hoses and not have to bring them to an AC shop to crimp the fittings. They are also much thinner walled and can bend a lot easier than the stock hoses that VA ships with the kit.
Hopefully I can get a little more work done this week. I'll update as I go. Thanks Jonathan for spending some time on the phone with me, providing the extra part numbers and doing some of the leg work for me. I'll be routing my hoses in the same way. (it's nice letting someone else do the research for a change!)
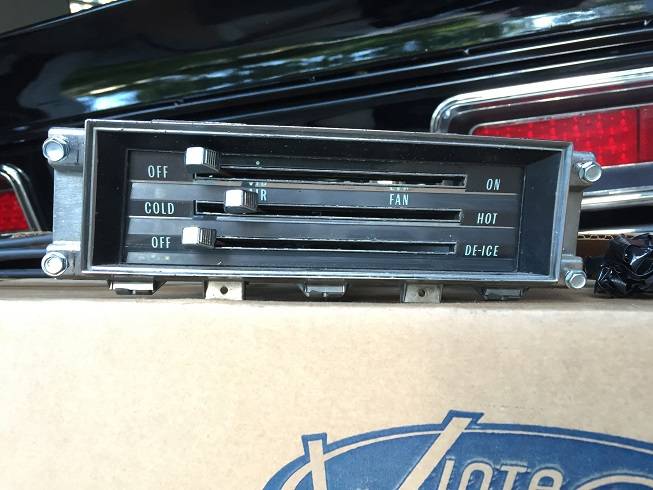
Here's my heater control unit, I think it will clean up fine for the install:
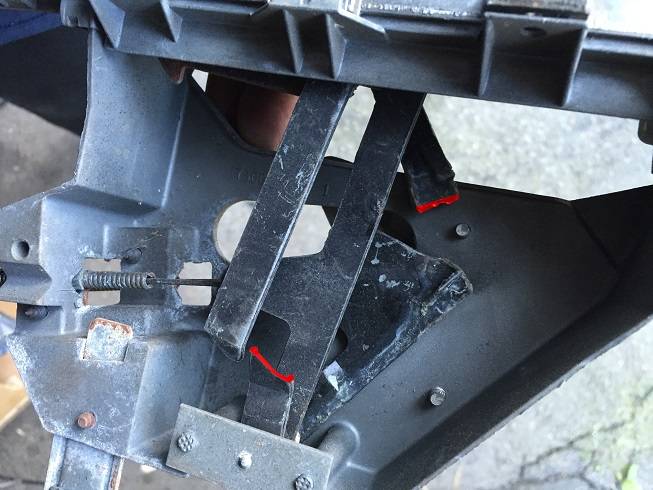
But the internals are going to need some help. Two of the three levers are broken, highlighted in red:
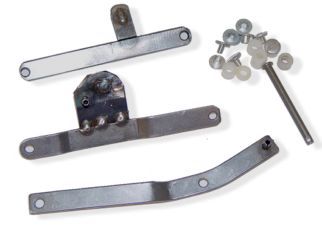
I ordered the "67-68 Camaro Heater Control Assembly Repair Kit"(http://www.firewheelclassics.com/sto...ID=&SKU=HTCHCR) from Firewheel Classics to rebuild the whole assembly:
"67-68 Camaro heater control assembly repair kit for controls without air conditioning.
Includes all the replacement levers and mounting hardware. Instructions included." Hopefully it really does include everything I need, the picture doesn't look like it's all there. Should be here by Wednesday, so I'll know then.
12-25-2011 #20
Registered User
- Join Date
- Jan 2011
- Location
- Boston, MA
- Posts
- 1,180
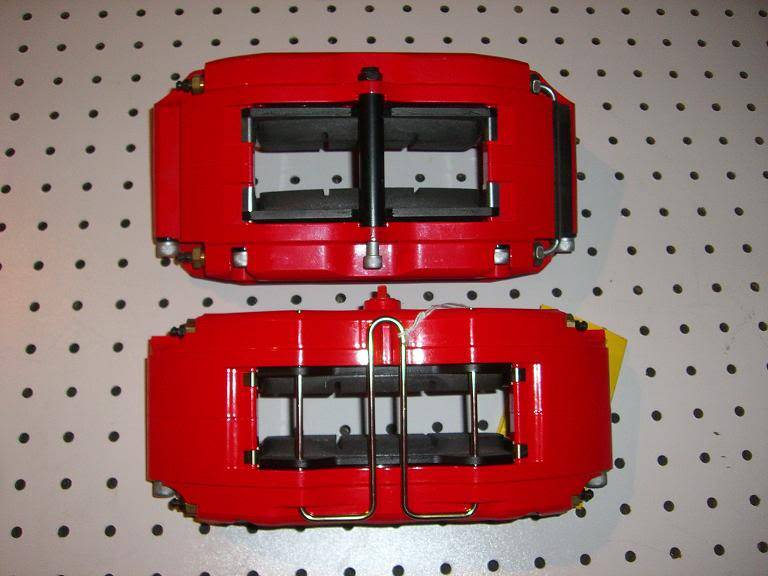
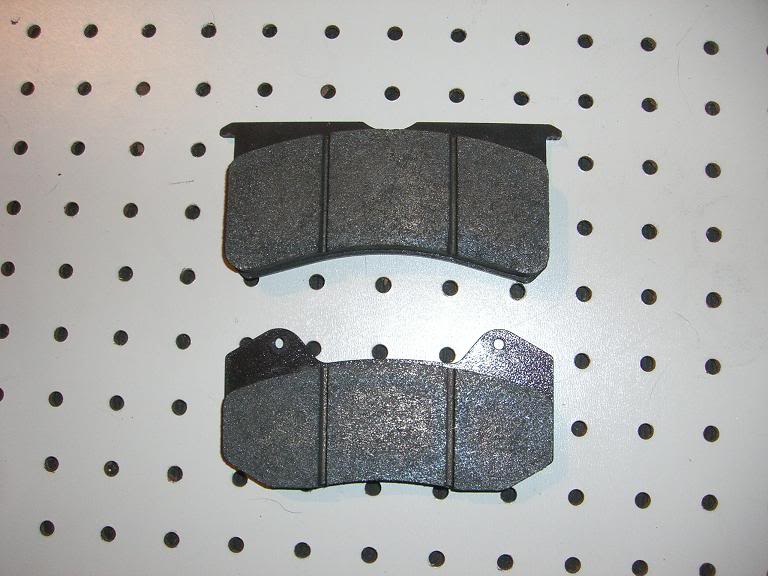
I took a couple of photos just to show the difference between the 6 piston Dynapros and the 6 piston Superlites. The Superlites are definitely beefier, the logo is engraved into the caliper, and the caliper is designed to fit around a thicker rotor. Also you can see the holes for the mounting bracket are spaced differently. The brake pads are not interchangeable between the two due to the way they are held in place.
Superlites on top, Dynapros on bottom:


 Reply With Quote





