Results 121 to 140 of 573
-
04-26-2012 #121

 Registered User
- Join Date
- Jan 2011
- Location
- Boston, MA
- Posts
- 1,180
 No problem. I pretty much ran all the wiring first and waited until everything was in place before finally tying it into the main wiring harness. It's not too difficult, just take your time crimping, soldering and heatshrinking all your connections. I also used the opportunity to tidy up some of my wiring by using the Painless Braided Sleeving, which looks very similar to my black braided fuel line.
 Originally Posted by boostin05blacksti

-
04-26-2012 #122
Registered User
- Join Date
- Jan 2011
- Location
- Boston, MA
- Posts
- 1,180
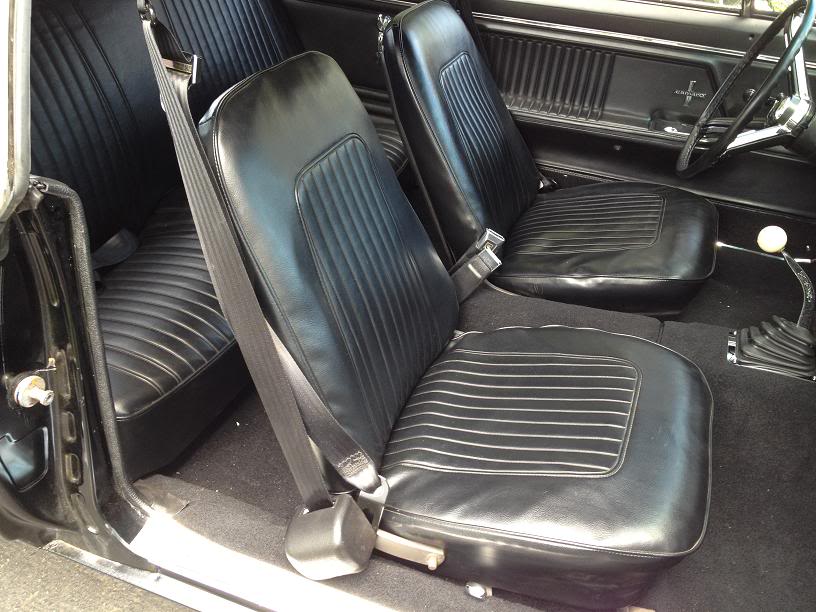
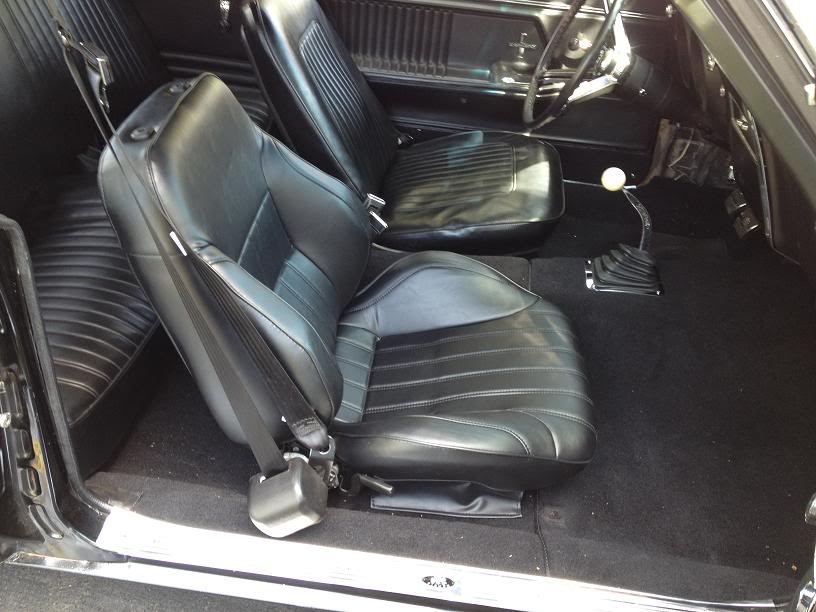
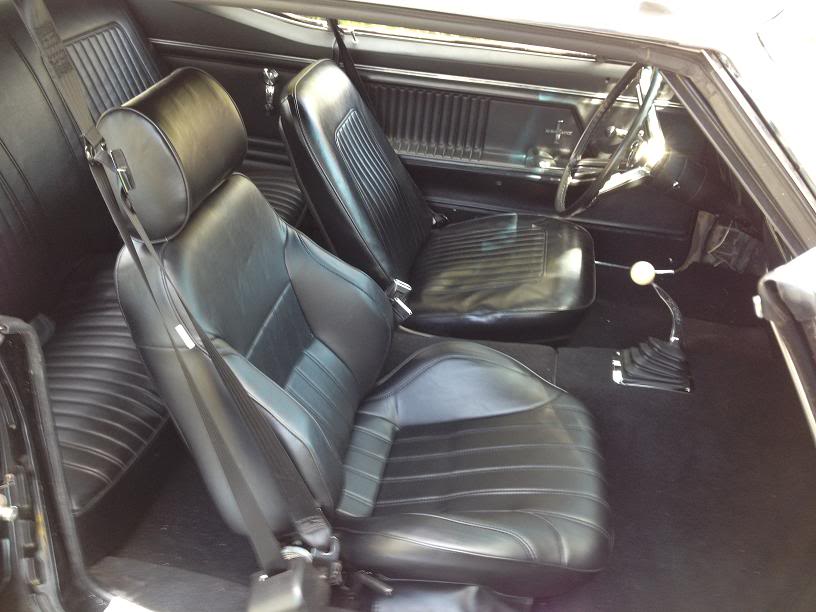
I ordered a pair of ProCar Rally 1000 Smooth Back seats in black vinyl from Jegs and they arrived yesterday. I didn't order the brackets because everyone says they make the seats sit too high. I'm having a custom set of brackets and sliders fabricated. It's going to take 4 weeks for them to be done, but I should be able to pick up a couple inches of headroom with the custom brackets. I decided to do a test fit on the passenger seat in the mean time. The seat is just sitting on 3-4" of blocks in the pictures. I think I like the look of the seats better without the headrest, but the headrest will be nice from a safety and comfort point of view:
Old:
New seats without headrest:
New seats with headrest:
-
04-30-2012 #123
Registered User
- Join Date
- Jan 2011
- Location
- Boston, MA
- Posts
- 1,180
Not much excitement, I'm still waiting on a bunch of different parts before I can make much more progress.
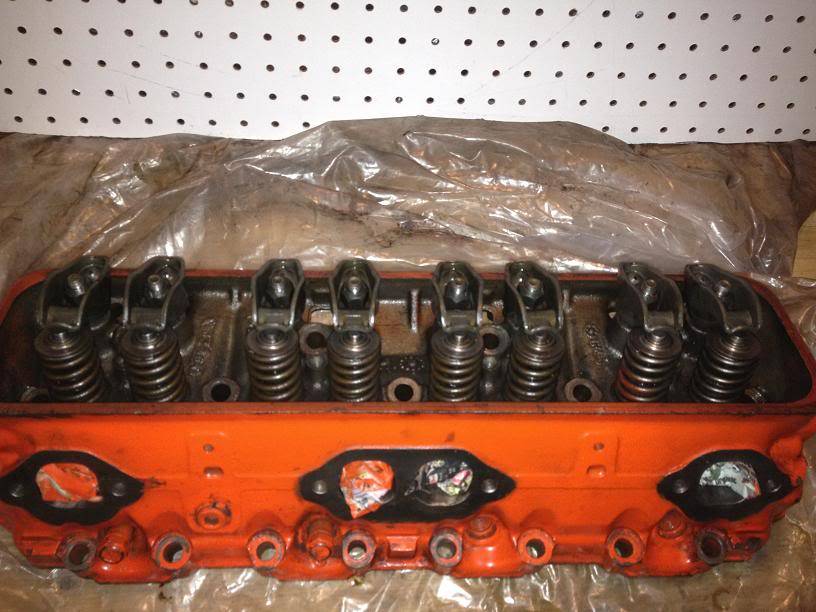
So I decided to work on the 906 Vortec heads that I picked up a couple months ago. I pulled the stock valve springs and retainers and installed a set of GM 12499224 LS6 Behive springs and the Comp Cams 787-16 retainers. This combo should allow closer to .550 lift rather than the stock .480 lift, which will open up the cam choices.
At some point I just need to dive in and pull the old heads and intake off the Camaro, figure out whether I need a roller or flat tappet cam and do the upgrade.
Stock valve springs and retainers:
Swapping out for some LS6 beehive springs:
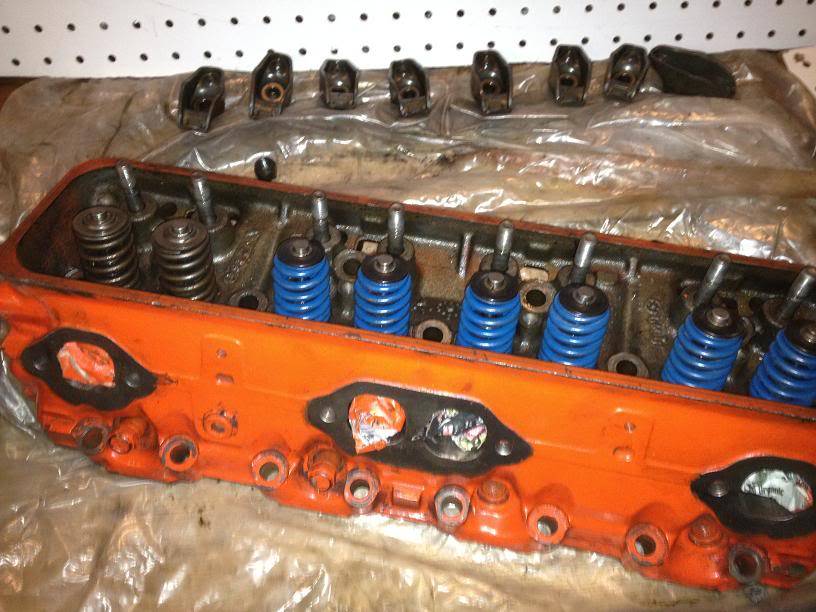
New valve springs and retainers: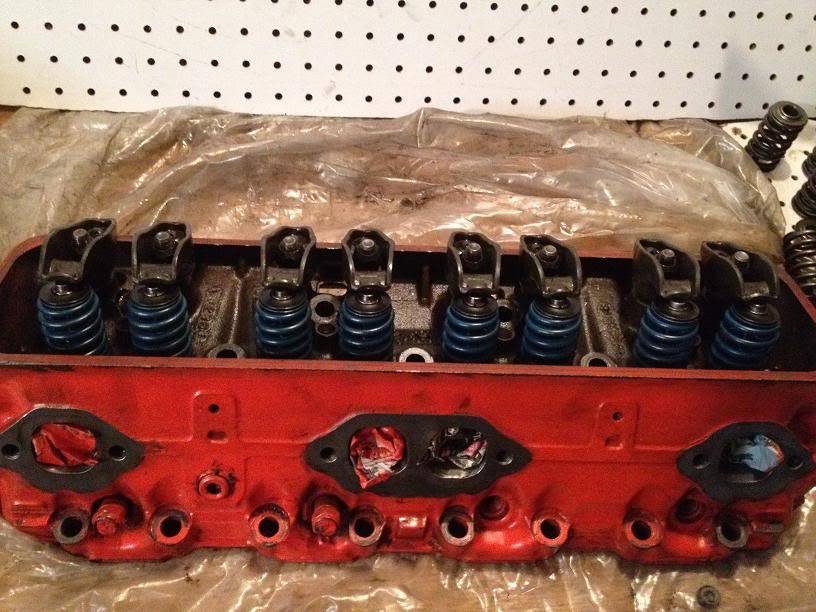
-
05-04-2012 #124
Registered User
- Join Date
- Jan 2011
- Location
- Boston, MA
- Posts
- 1,180
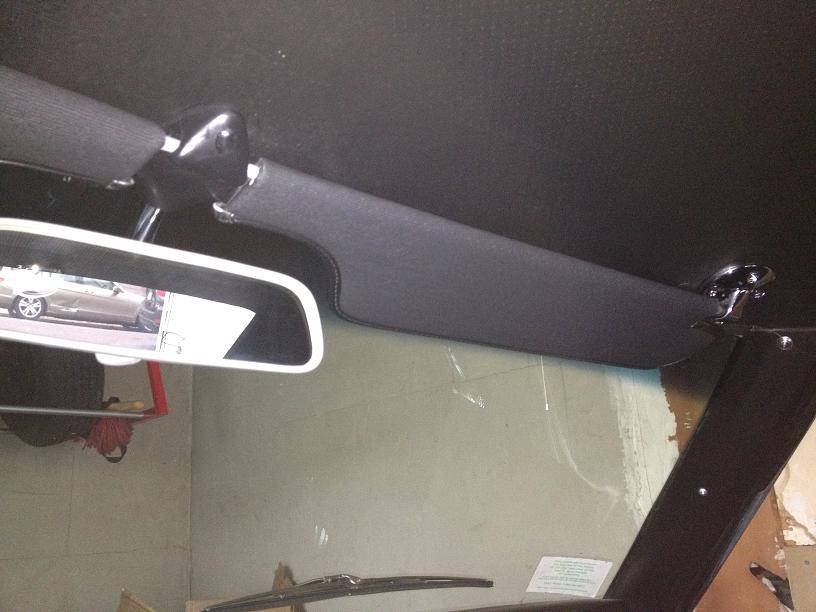
Did some minor work at lunch today. My rearview mirror was pretty crusty, and the car didn't come with sun visors or the brackets to hold them in place. Luckily the PO left the screws in place behind the head liner, so it was easy to find the mounting locations. So I installed the new outer brackets, along with a new rearview mirror and bracketry, and a pair of sun visors from PUI. The new rearview is a little smaller than the old one. Who knows what kind of car the old one came off.
Outer bracket holes:
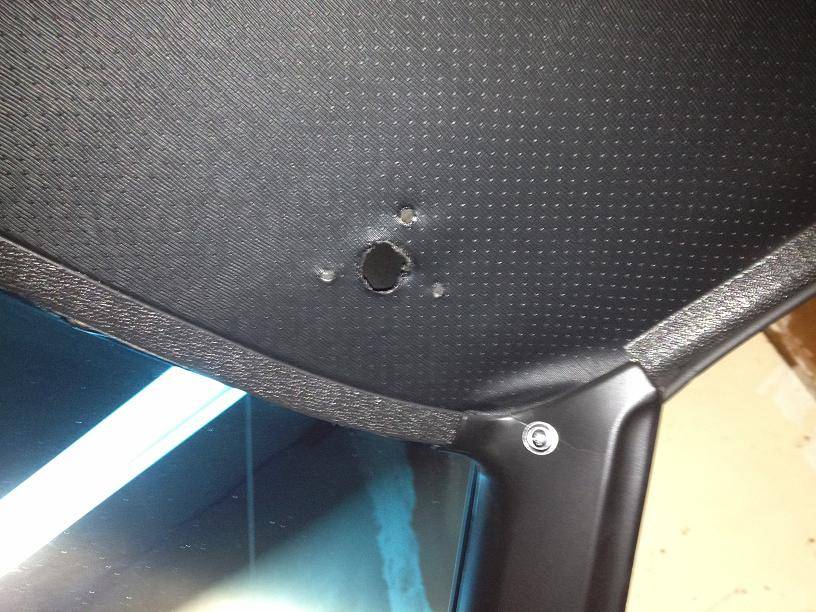
Old:
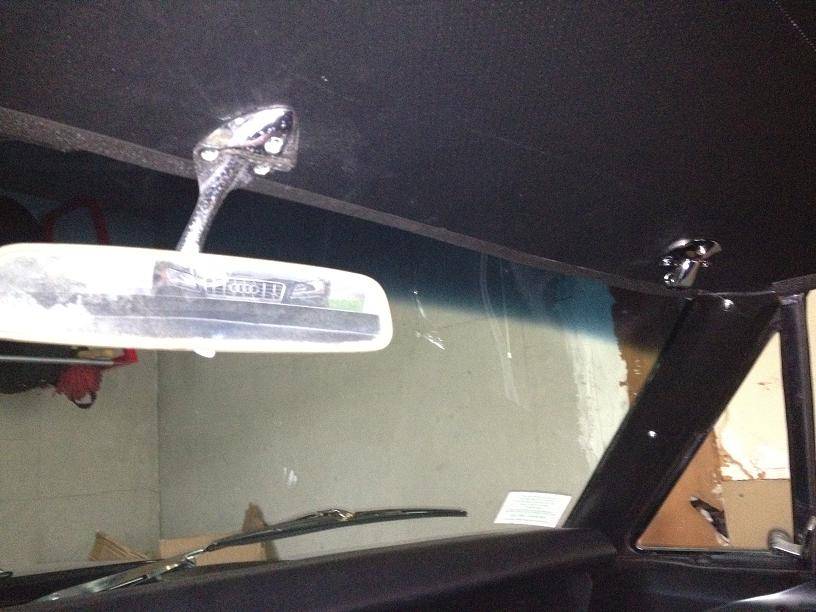
New:
-
05-04-2012 #125
Registered User
- Join Date
- Jan 2011
- Location
- Boston, MA
- Posts
- 1,180
I'm going to pull the intake and heads tomorrow, and Tom is going to come over on Sunday to help me measure the bore and quench. Then I'll be able determine the new head gasket thickness.
Once the intake is off, I can determine whether or not this is a roller motor. The casting number on the block is 10054727. Even though I have had numerous people here and on TC say that they think it is, I have seen an equal number of posts in different forums that say my block is not set up for a roller cam. I'm betting against it being a roller. If all goes well, we'll find out tomorrow.
Either way, this block has the old (crap) swirl port heads and the cam is very mild. With a set of Vortec heads, Edelbrock Performer RPM intake and a more agressive cam, I think this should really wake the motor up.
-
05-05-2012 #126
Registered User
- Join Date
- Jan 2011
- Location
- Boston, MA
- Posts
- 1,180
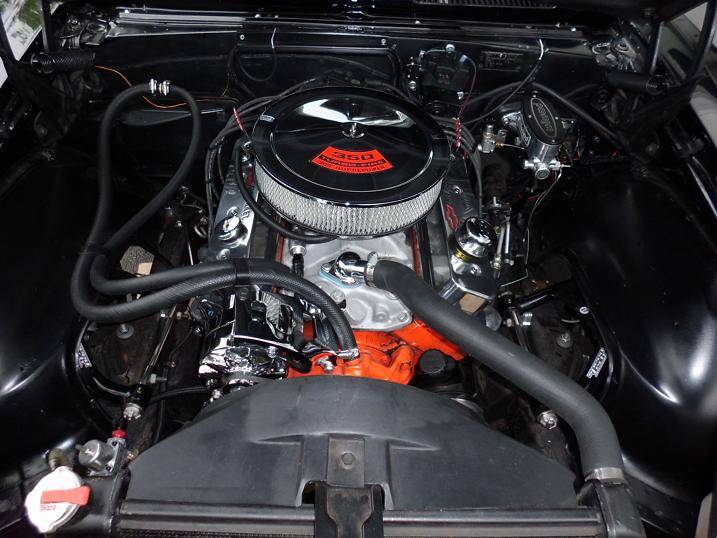
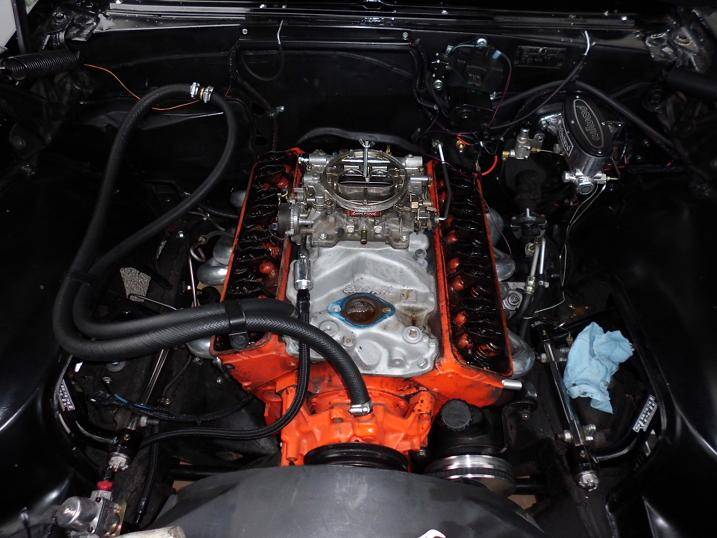
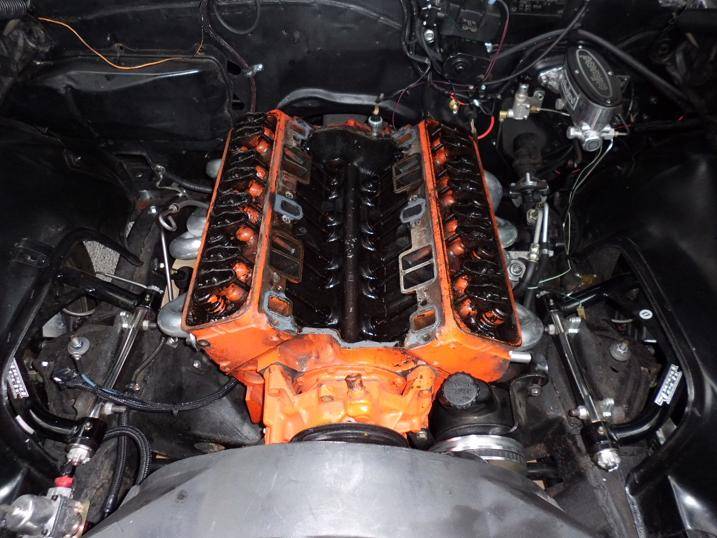
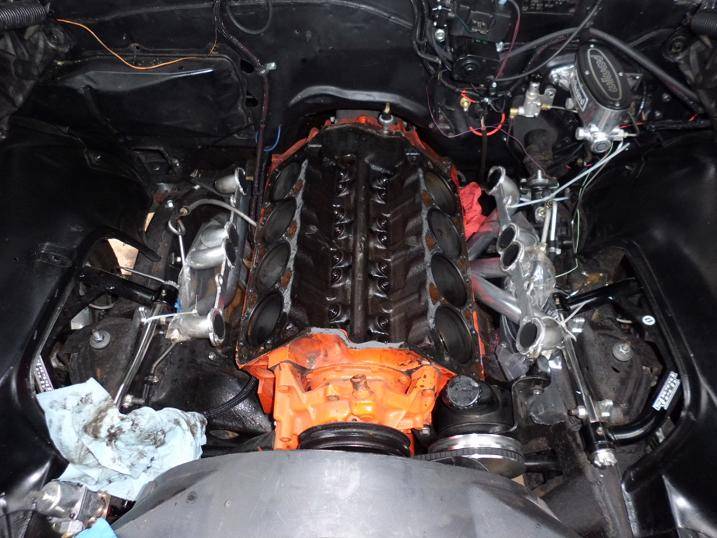
No turning back now, the engine upgrade has begun...This took about 4 hours, probably because I've never done it before, and wasn't sure what I had to remove and what could stay. I thought I could leave the headers bolted at the flanges, but they definitely have to move out of the way to get to the lower head bolts.
9:30am:
10:30am:
11am:
2pm
-
05-05-2012 #127
Registered User
- Join Date
- Jan 2011
- Location
- Boston, MA
- Posts
- 1,180
As I thought, there is no provision for a spider, so this is not a roller motor. At least now I can start trying to figure out what I'm going to run for a new cam. It will be a little more on the agressive side. I still want it to be quite streetable, but it's not my daily driver, so I can push it a little.
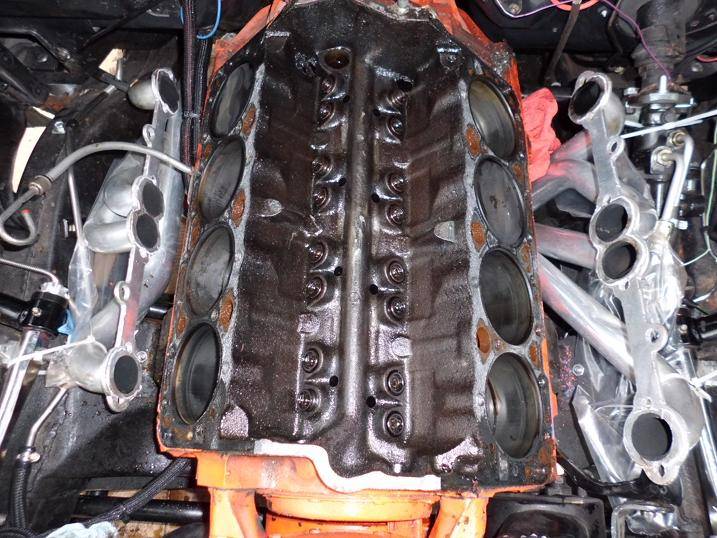
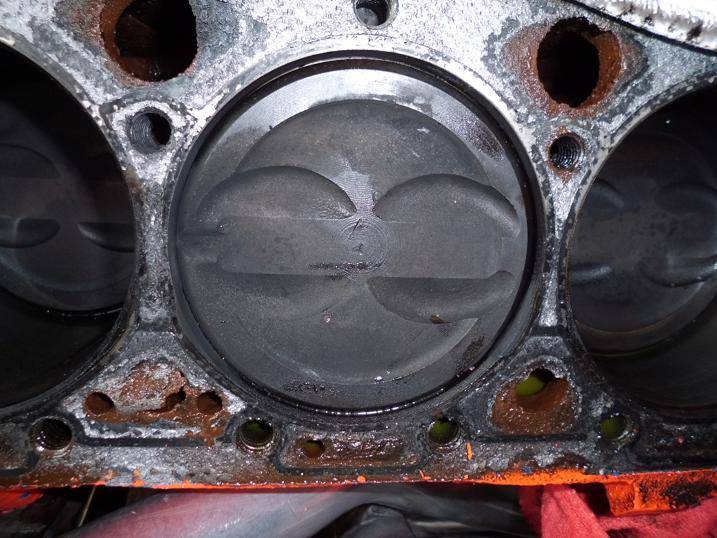
Dished pistons:
-
05-06-2012 #128
 Registered User
- Join Date
- Aug 2006
- Posts
- 381
Awesome job man. Do you a close up photo showing the positive battery cable hooked up to the remote starter solenoid as well as the alternator cable? The reason why I am asking is that I have the remote starter solenoid mounted on the passenger side fender well, the starter cable and the battery positive cable connected on one pin ofthe remote starter solenoid and the alternator cable is connected on the other pin of the remote starter solenoid along with some small wires hooked up to the remote solenoid posts Originally Posted by 67rally
72 Camaro RS:SOLD
68 Camaro:
LS6 Engine,Tremec TKO 600,5 Speed
Complete Speedtech Subframe Kit,Speedtech Torque Arm, 9" Rearend from Strange, Wilwood Brakes, Minitubbed, Hotchkis Subframe Connectors
-
05-06-2012 #129
Registered User
- Join Date
- Jan 2011
- Location
- Boston, MA
- Posts
- 1,180
Thanks, I'll post a pic later today, but battery positive and alternator goto the same pin. Starter goes on the opposite pin, and the small wire goes on the S terminal. Originally Posted by 72Z/28
-
05-06-2012 #130
Registered User
- Join Date
- Aug 2006
- Posts
- 381
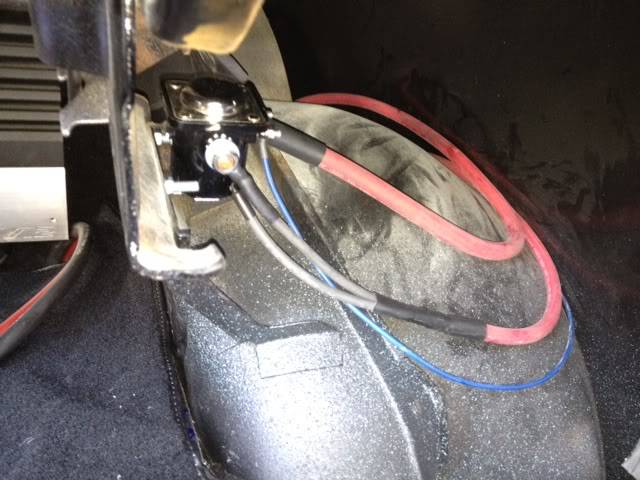
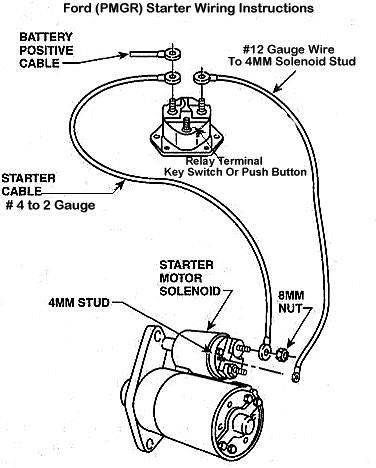
The photo below illustrates what I am talking about. I bought the car with this set up. It is a remote starter solenoid from Mastercraft. The battery positive cable is routed from the trunk. Man I do not what the rest of the wires are for. The wiring kit is from Painless. Originally Posted by 67rally

I assume the wiring on the remote starter solenoid as per Ford starter wiring instructions, I might be wrong though.
 72 Camaro RS:SOLD
68 Camaro:
LS6 Engine,Tremec TKO 600,5 Speed
Complete Speedtech Subframe Kit,Speedtech Torque Arm, 9" Rearend from Strange, Wilwood Brakes, Minitubbed, Hotchkis Subframe Connectors
-
05-06-2012 #131
Registered User
- Join Date
- Jan 2011
- Location
- Boston, MA
- Posts
- 1,180
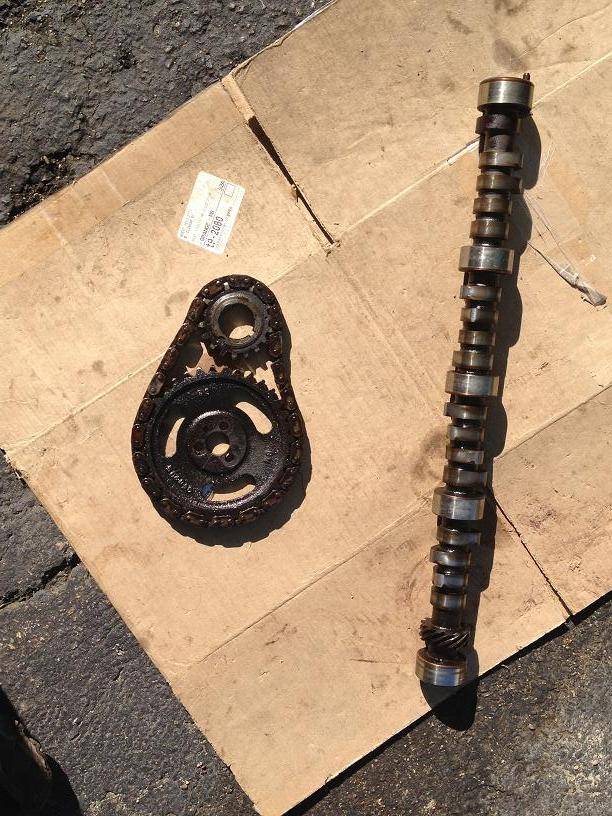
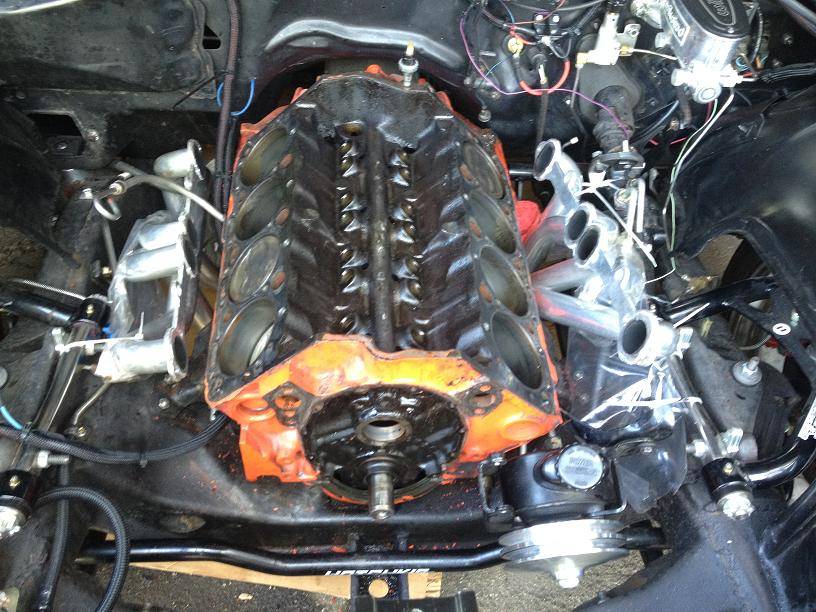
Tom came over this morning and brought some measuring tools. We were able to measure for the new head gasket. Still deciding on what cam to run, but I need to figure that out soon and order that along with a new timing chain. I also need to order a pushrod length checker, as I may need to order new pushrods as well.
Finished pulling the water pump, timing chain, lifters and camshaft today.
Old stuff:
A fairly empty engine bay:
I'll clean up the engine bay and block this week and hit it with a fresh coat of paint. I'll also be painting the balancer, water pump, timing chain cover and the new heads to match.
-
05-06-2012 #132
Registered User
- Join Date
- Jan 2011
- Location
- Boston, MA
- Posts
- 1,180
Alright, your wiring is a little different. Mine is set up to make the starter wire dead after starting, so I won't have a 1/0 running hot through the interior. Originally Posted by 72Z/28
Yours looks like it's setup as a main junction block. There's a small wire behind the large ones that is jumped from one terminal to the other, so essentially everything is hot all the time. I'm not a wiring guy, so you may want to post this question in the electrical forum. Much better luck there.
-
05-06-2012 #133
Registered User
- Join Date
- Aug 2006
- Posts
- 381
Thanks man for your input and will post this issue in the electrical section as you recommended. Originally Posted by 67rally
72 Camaro RS:SOLD
68 Camaro:
LS6 Engine,Tremec TKO 600,5 Speed
Complete Speedtech Subframe Kit,Speedtech Torque Arm, 9" Rearend from Strange, Wilwood Brakes, Minitubbed, Hotchkis Subframe Connectors
-
05-10-2012 #134
Registered User
- Join Date
- Aug 2006
- Posts
- 381
Hi again
Juat wondering about the battery cables,how much did you end up using to run the cable from the remote starter solenoid to the starter and alternator to the positive battery cable? Also, if you don't mind, where did you order the postive & ground cables and the boots that cover the cables studs mounted on the firewall as well as the battery?72 Camaro RS:SOLD
68 Camaro:
LS6 Engine,Tremec TKO 600,5 Speed
Complete Speedtech Subframe Kit,Speedtech Torque Arm, 9" Rearend from Strange, Wilwood Brakes, Minitubbed, Hotchkis Subframe Connectors
-
05-10-2012 #135
Registered User
- Join Date
- Jan 2011
- Location
- Boston, MA
- Posts
- 1,180
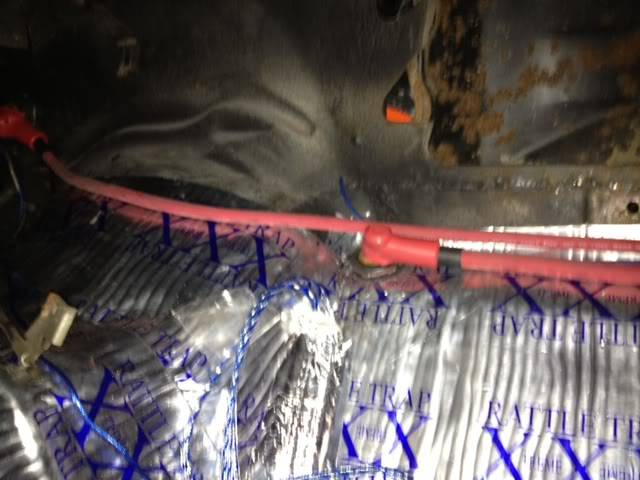
For the alternator I ordered 20' of the #2 red Royal Excelene Welding cable, and probably had 4 or 5' left over. It connects to a bulkhead connector (summitracing) on the drivers side firewall inside the car. On the engine side of the firewall I ran a #8 to the alternator, not sure how long.
For the starter cable I ordered 20' of 1/0 red and had a couple of feet left over, I also used a bulkhead connector just below my heater core. For the negative, I just used 2' of the 1/0 black. I got the cables from wireandsupply.com here --> http://www.wireandsupply.com/www_wir...2_htm_s/22.htm
The remote starter solenoid wire was less than the positive cable. Maybe 15' or so. If you want to be exact (since welding cable is expensive), just run a piece of string along the path the wires will run, and then measure that and give yourself a little extra leeway.
The boots came from www.remybattery.com, but you could probably go to any marine supply store and pick some up.
-
05-10-2012 #136
Registered User
- Join Date
- Jan 2011
- Location
- Boston, MA
- Posts
- 1,180
A fresh coat of paint on the engine block:
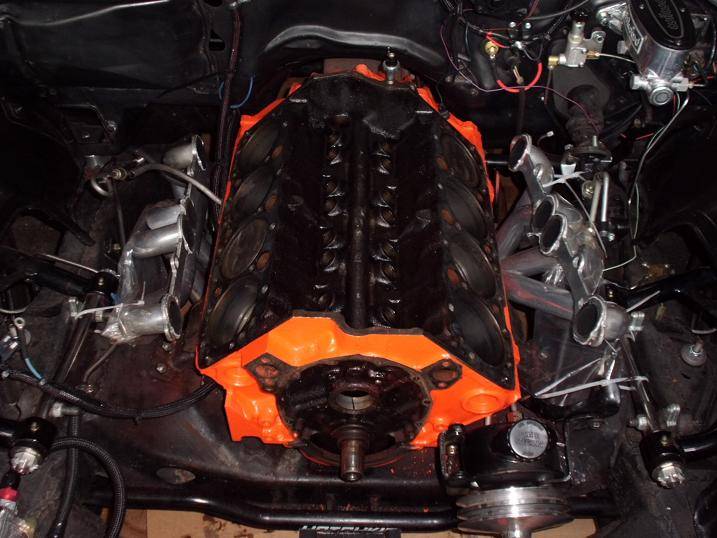
As well as the Vortec heads, timing chain cover and balancer:
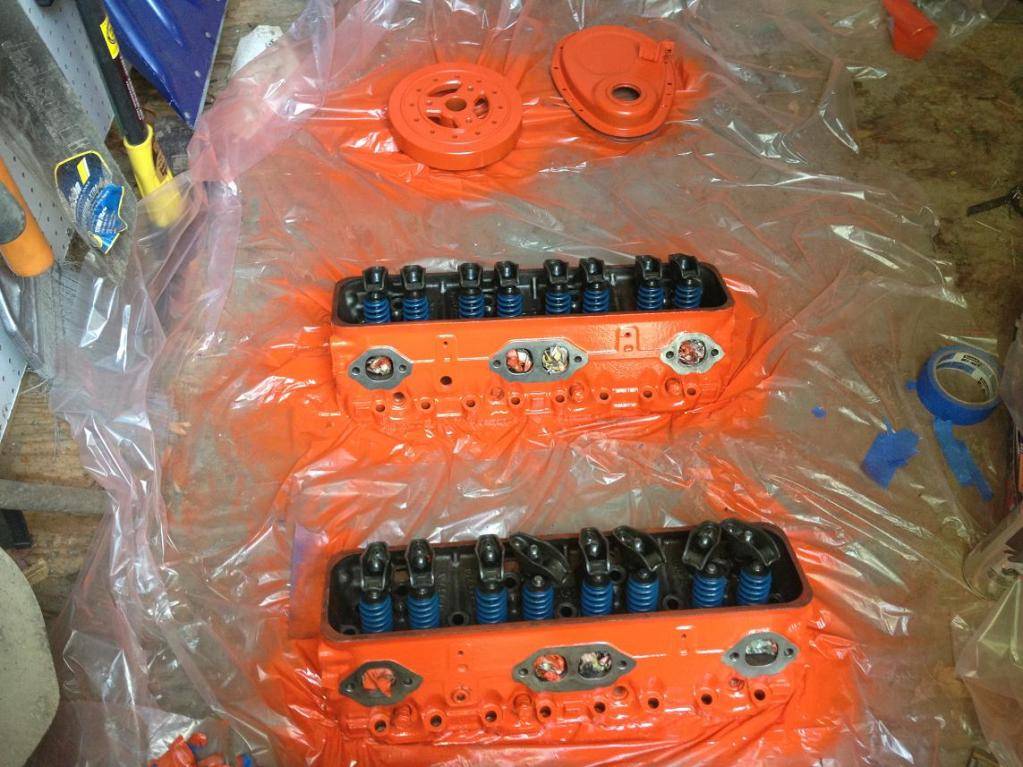
Still need to clean and paint the water pump and pulley, and clean up all the debris laying on the subframe. My new parts should arrive this afternoon, and then reassembly starts Saturday morning.
-
05-10-2012 #137
Registered User
- Join Date
- Aug 2006
- Posts
- 381
Thanks dude for the cables details you provided, really appreciate it and good luck with your build. Originally Posted by 67rally
72 Camaro RS:SOLD
68 Camaro:
LS6 Engine,Tremec TKO 600,5 Speed
Complete Speedtech Subframe Kit,Speedtech Torque Arm, 9" Rearend from Strange, Wilwood Brakes, Minitubbed, Hotchkis Subframe Connectors
-
05-12-2012 #138
Registered User
- Join Date
- Jan 2011
- Location
- Boston, MA
- Posts
- 1,180
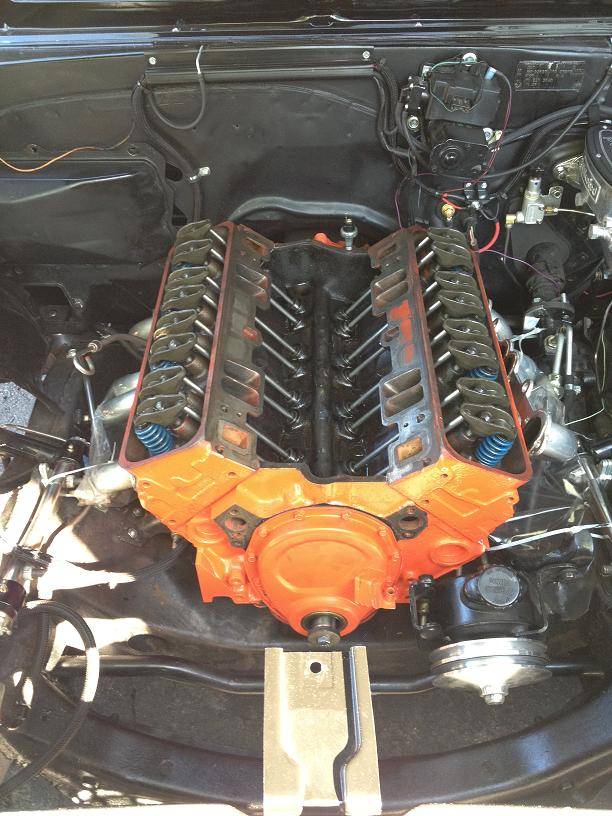
New cam (Voodoo 60103 268/274), and lifters are in, new timing chain is in. Cam is degreed. Timing chain cover is back on (PIA).
A big thanks to Tom for lending a hand and helping degree the cam.
Head gaskets are on, I went with a .020 thick with 4.1" bore to keep my quench at .045 (.025 in the hole +.020 gasket). Heads are on and torqued down, pushrods are in. That's where I'm leaving off for the day. Probably won't get anything accomplished tomorrow.
-
05-13-2012 #139
Registered User
- Join Date
- Nov 2006
- Location
- LOS ANGELES
- Posts
- 47
outstanding work and detail. thanks for all the info.
rich
-


 Reply With Quote