


Results 241 to 260 of 573
-
03-11-2013 #241

 Registered User
- Join Date
- Jan 2011
- Location
- Boston, MA
- Posts
- 1,180

I ended up with the afternoon off today, so I managed to get some work done. I didn't get many good pics because it was a low light situation, and most everything came out blurry.
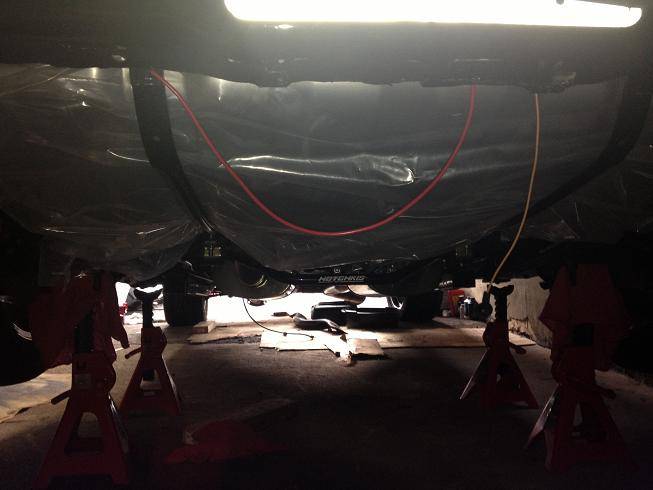
I drained (11 gallons) and dropped the old fuel tank, and removed the Holley Black fuel pump. Mocked up the new corvette bypass regulator, which will sit right where the Holly pump was mounted. Then I mocked up the new Tanks Inc. tank, and figured out exactly how and where I was going to run my fuel plumbing. I'll order the new PTFE hoses this week.
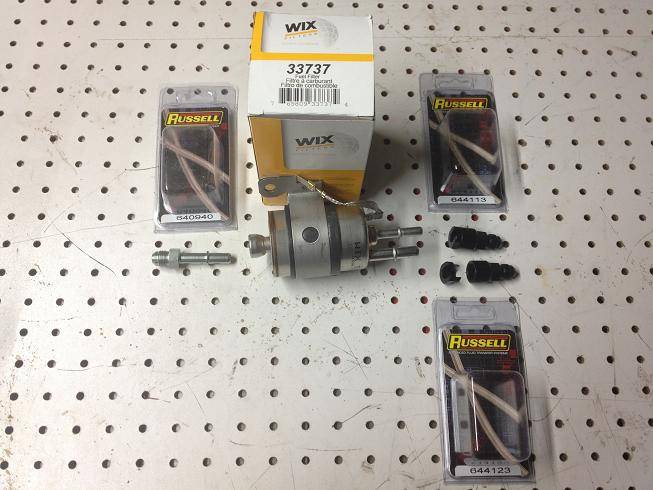
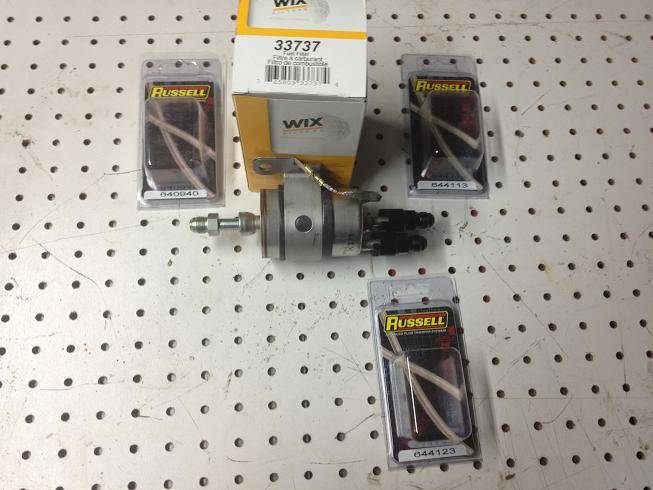
Here's a pic of the Wix 33737 fuel filter/regulator along with a few Russell fittings. The 640940 is a -6AN to 3/8" quick disconnect male fitting, the 644113 is a -6AN male to 5/16" quick disconnect female fitting, and the 644123 is a -6AN male to 3/8" quick disconnect female fitting.
And here's a pic of the tank mocked up. I left it in it's baggie because I didn't want to bang it up too badly since it will be in an out a couple of times. I think I'm going to leave it silver and paint or order some new tank straps.
-
03-18-2013 #242
Registered User
- Join Date
- Jan 2011
- Location
- Boston, MA
- Posts
- 1,180
Not much for pictures, but I ordered a bunch of stuff, so I have a half dozen tracking numbers.
-I won an auction for a set of freshly rebuilt Bosch 36lb injectors (which will be 42lb at my psi)
-I ordered my PTFE lined braided fuel hoses from Lyons Performance for the supply and return lines from the regulator to the tank, the output line from the regulator to the hard line, as well as one to connect the fuel rails. I'll order the one from the front hardline to the fuel rail once the motor is in.
-I ordered my Energy Suspension poly motor mounts from Summit Racing.
-I ordered a set of Dirty Dingo slider mounts, so I will have 2 1/2" of front to back adjustability.
-I won an auction a new serpentine belt for the new layout of the accessories.
-I ordered a new water pump from an L99 Camaro from Rock Auto, which uses the truck accessory offset, but places the outlet on the driver's side instead of the passenger's side.
-And my freshly ported heads, cam, push rods, head gaskets, ported oil pump, etc. should ship out from Total Engine Airflow tomorrow.
03-18-2013 #243
Registered User
- Join Date
- Jan 2011
- Location
- Boston, MA
- Posts
- 1,180
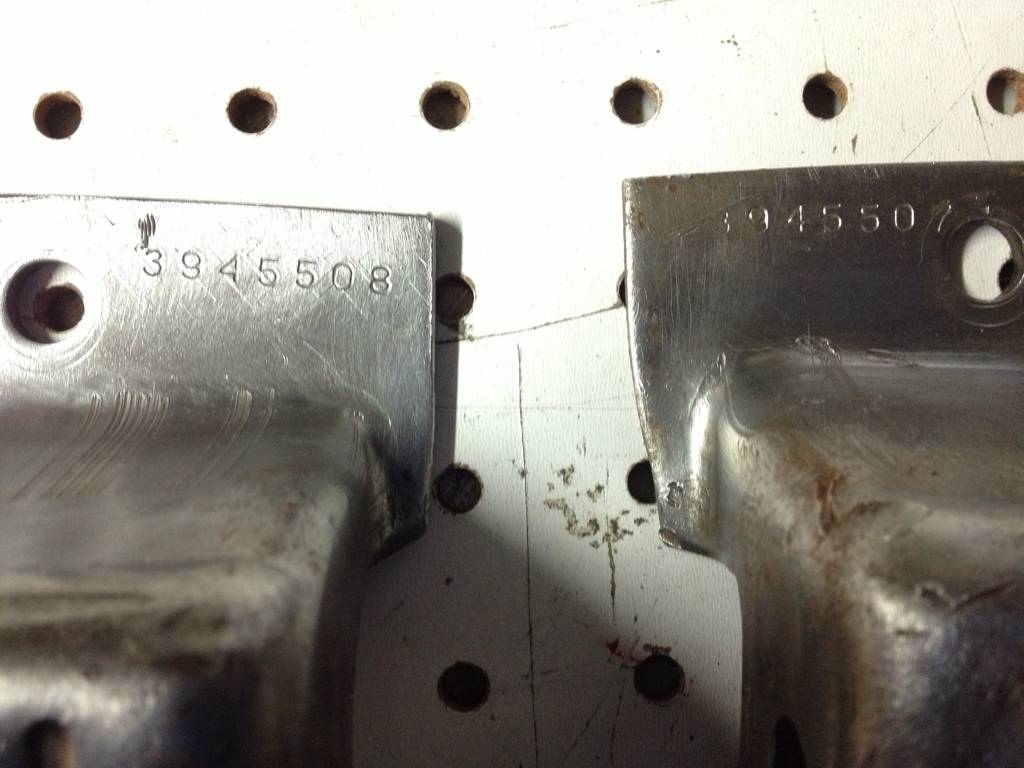
Here's my only pic. I removed my frame (motor) mounts to get ready to clean up the subframe (still waiting for a day above 40 degrees to powerwash), and assumed I had the standard low performance frame mounts. Frame mounts come in short & wide or tall & narrow. The low perf. are the short and wide, and the hi perf. are the tall and narrow. It doesn't really matter which one's you have as long as you get the right motor mounts to match. It turns out I have the tall and narrow, which are for a '69 Camaro with the 350 or 302 engine. Just one more piece to my Frankenstein build.
Part #'s 3945507 and 3945508:
03-19-2013 #244
Registered User
- Join Date
- Jan 2011
- Location
- Boston, MA
- Posts
- 1,180
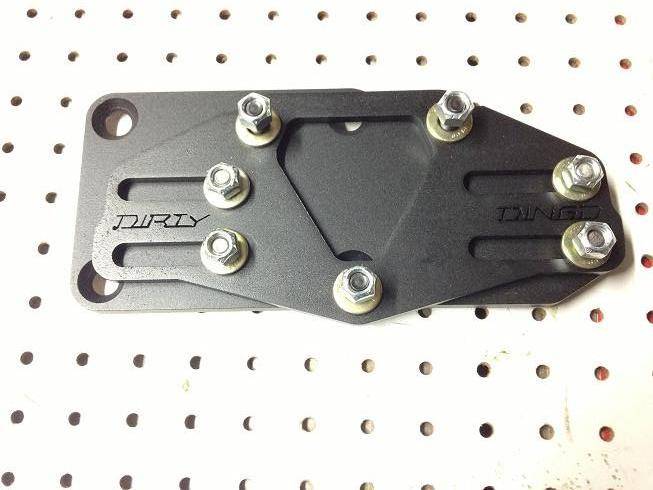
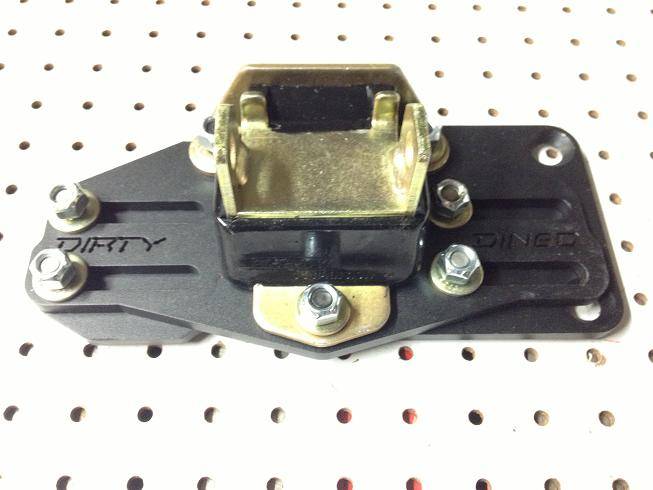
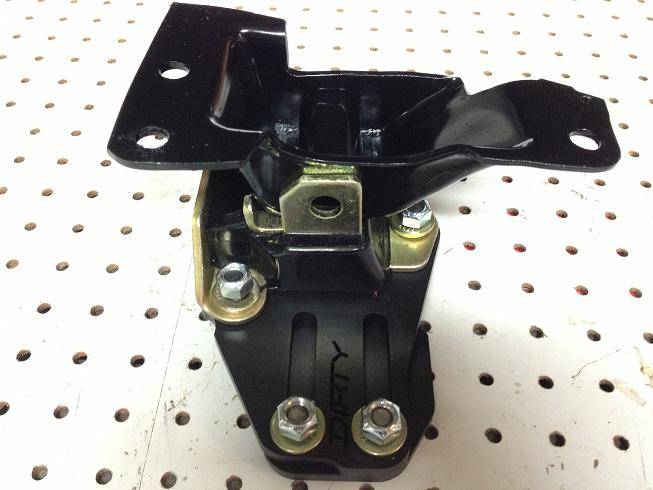
My Dirty Dingo Sliders and Energy Suspension (3-1117G) poly motor mounts arrived today.
The sliders are very nice and allow 2" (not 2 1/2" as I previously stated) of forward to backward engine placement. The slider attaches to the engine, then the motor mount attaches to the slider and the frame mount.
Here's one of the Dirty Dingo Slider's in powdercoated black:
Here it is with the ES motor mount:
And here it is mocked up with the frame mounts as well (driver's side):
03-20-2013 #245
Registered User
- Join Date
- Jan 2011
- Location
- Boston, MA
- Posts
- 1,180
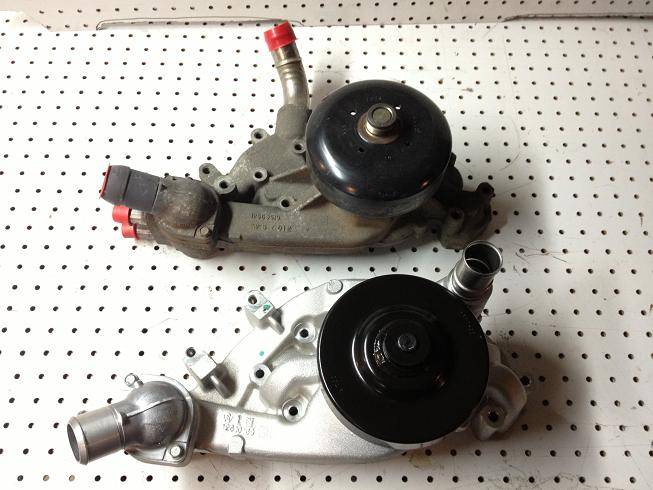
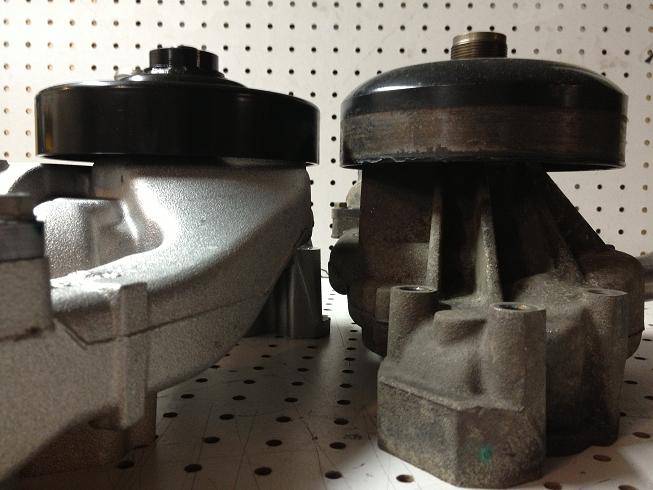
The new water pump arrived today. There wasn't anything wrong with the old one, but the outlet was on the passenger side, and my radiator's is on the driver's side. Since I had the choice of replacing a 9 year old water pump for $140, or a brand new aluminum radiator for $500, I chose the lesser of two evils.
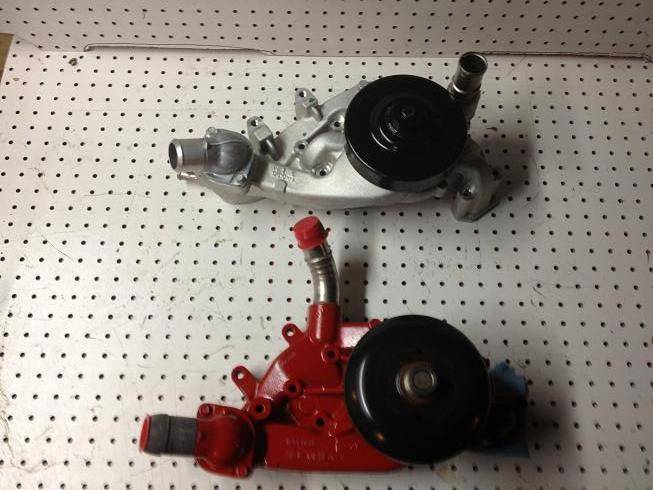
This is the water pump for the 2010+ L99 Camaro (#19207665). It uses the same accessory spacing as the truck motors:
03-24-2013 #246
Registered User
- Join Date
- Jan 2011
- Location
- Boston, MA
- Posts
- 1,180
I finally made some progress today, rather than just taking pics of new parts.
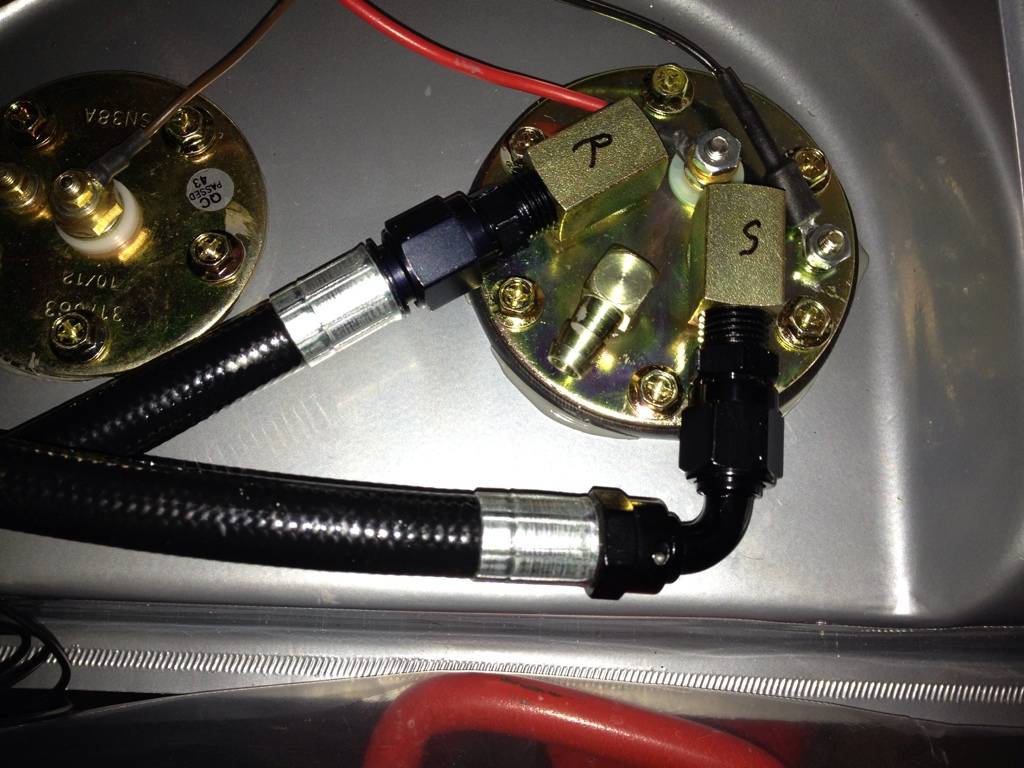
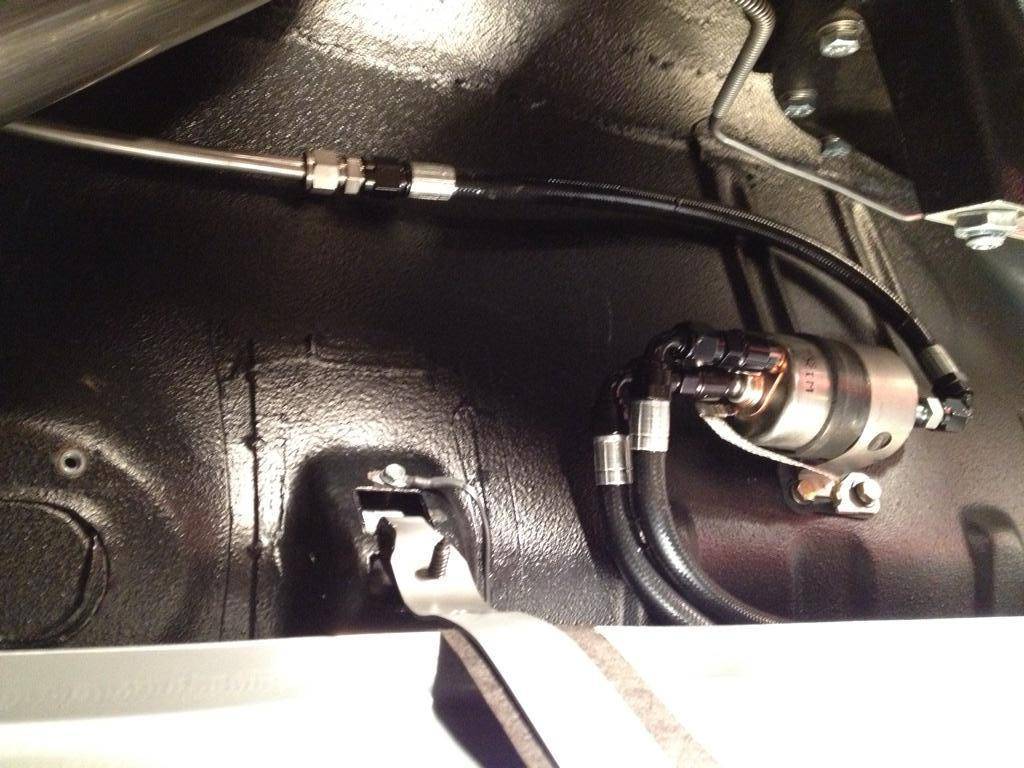
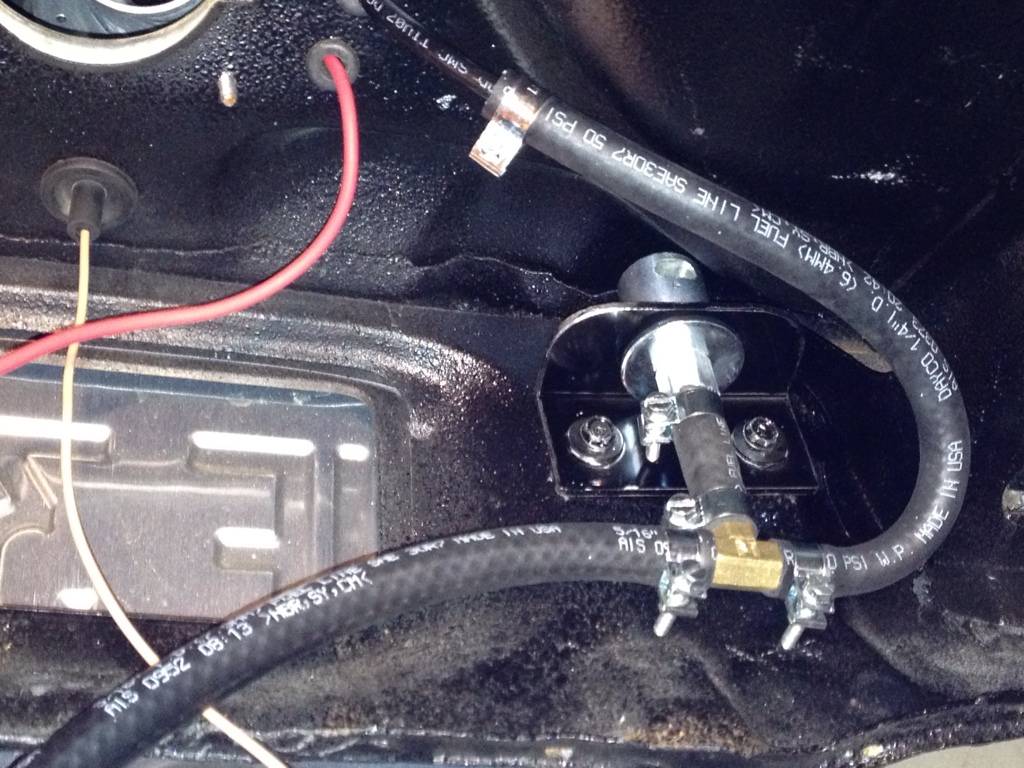
I dropped the new tank, got it wired up, ran the new hoses, and reinstalled everything. I took my time and did it right. All connections are soldered and heat shrinked. The PTFE (Teflon) lined fuel hoses are nice and tidy.
New hoses and wiring:
Corvette Fuel Filter/Regulator plumbed:
I fabricated a bracket for the Tanks Inc. check valve. This closes the fuel vent incase you flip the car over, so the fuel won't pour out. I don't want to test this feature out:
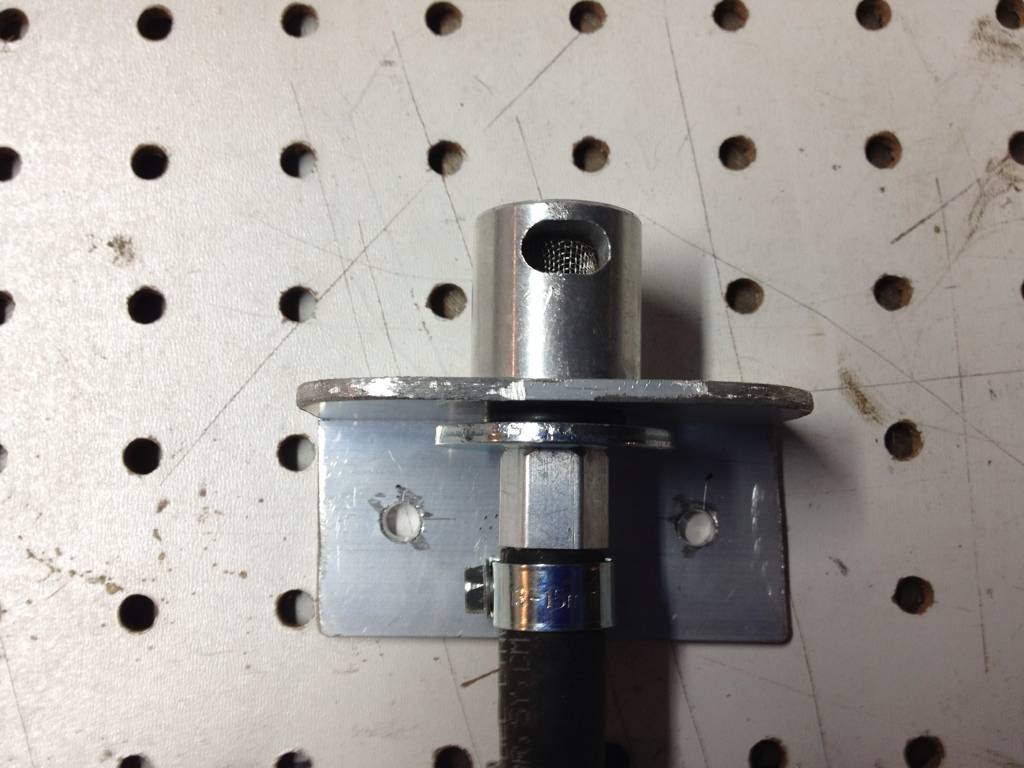
I mounted behind the license plate up high and out of the way. I T'd into the existing fuel vent that is on the ridetech filler neck:
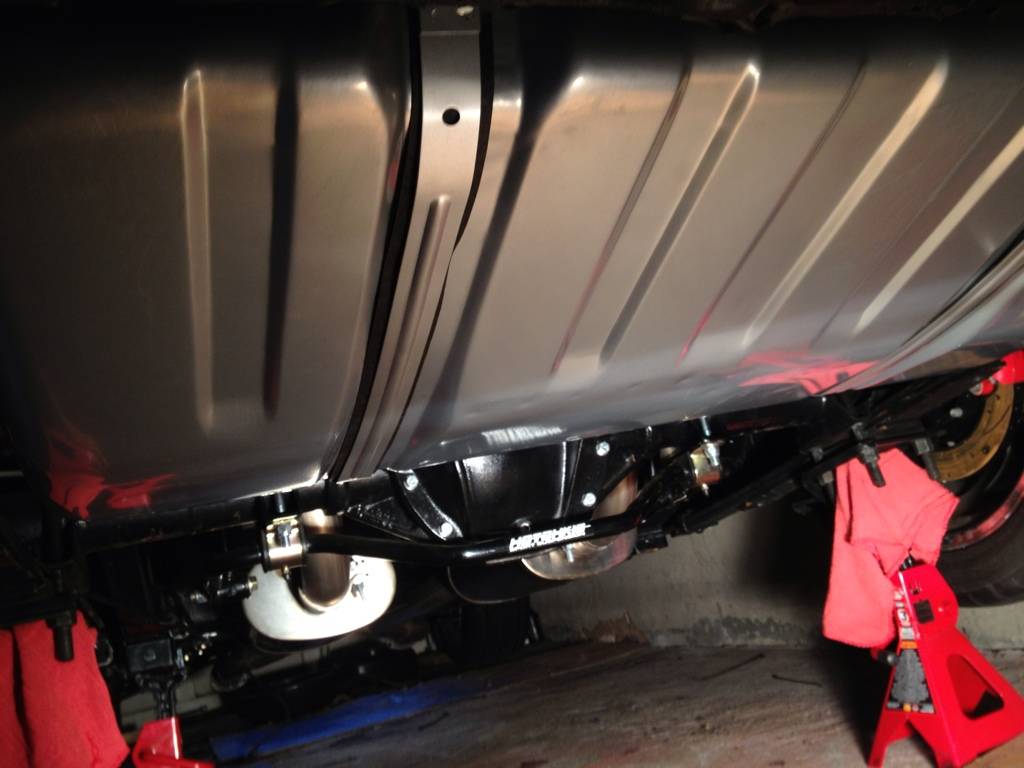
And here's a shot of the new tank. It looks just like a stock tank, but has the EFI baffle inside, along with the provision for the sender and intank pump in the first photo. It's a little hard to tell, but I left it powdercoated silver, and painted some new tank straps to match:
03-24-2013 #247
Registered User
- Join Date
- Jan 2011
- Location
- Boston, MA
- Posts
- 1,180
Here's a pic of the custom length hoses I had made. These are from Fragola, and I ordered them from Matt at Lyons Performance. They are braided black and then covered in a protective plastic sheathing which almost looks like carbon fiber. The 90 degree ends swivel which made installation a lot easier. And the fact that they are factory crimped will give me a little peace of mind that I won't spring a leak.

Close up of the fittings:

And I painted my old water pump the new engine color. I'm going to mock up the old pump painted red and the new pump in natural finish to see which way I want to go.
03-27-2013 #248
Registered User
- Join Date
- Jan 2011
- Location
- Boston, MA
- Posts
- 1,180
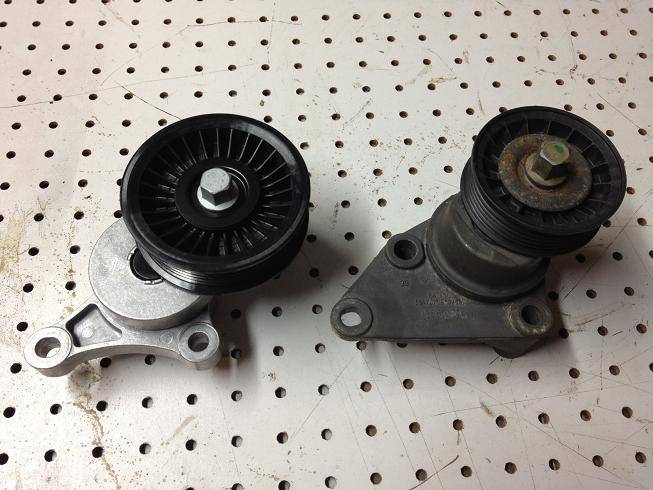
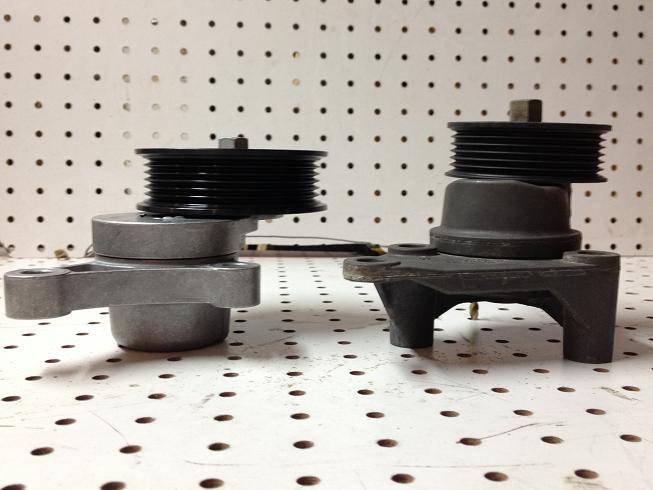
I had to order a new tensioner to go along with the new water pump. It was wishful thinking that I could re-use the old one. But I found a brand new take-off from a 2012 Camaro for half the cost of a new one.
Just a couple pics showing how different they are (new one on left):
03-27-2013 #249
Registered User
- Join Date
- Jan 2011
- Location
- Boston, MA
- Posts
- 1,180
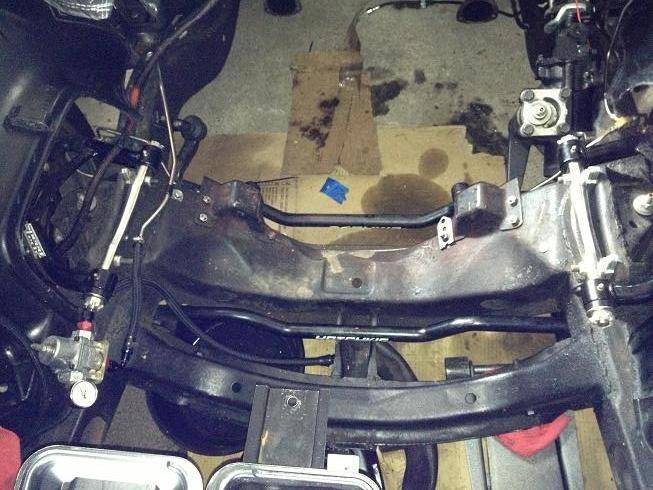
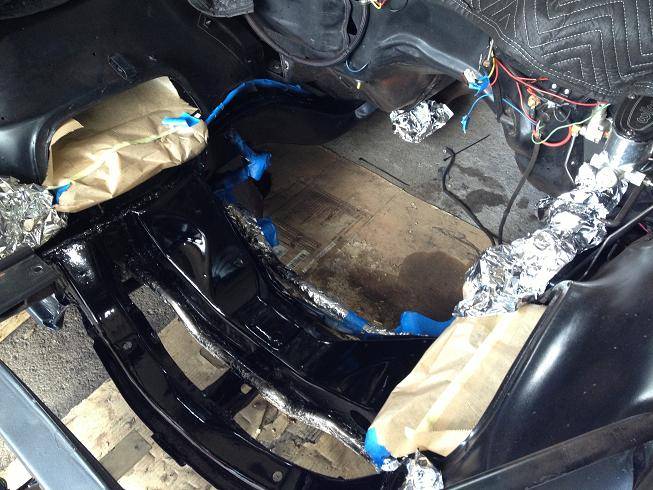
I cleaned up the subframe with some degreaser and a power washer. Then I took it down to bare metal everywhere I could. There's a couple areas I may go back and re-do, but they'll be hidden from sight, so it's not a top priority since it's not a show car.
Before:
After (still need to pull the tape and tinfoil off)
03-28-2013 #250
Registered User
- Join Date
- Jan 2011
- Location
- Boston, MA
- Posts
- 1,180
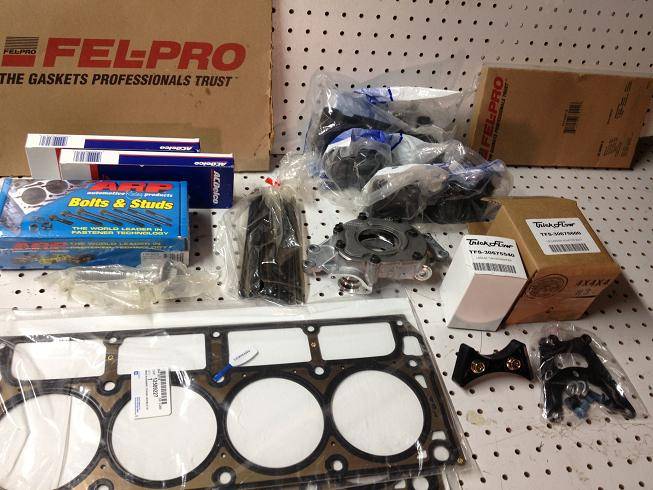
I got a nice shipment from Total Engine Airflow today. I got new timing cover gasket, valve cover gaskets, head gaskets, ARP head bolts, crank bolt, push rods, LS2/7 lifters, ported high volume LS6 oil pump, lifter trays, and the Trick Flow timing chain damper and bracket.
03-28-2013 #251
Registered User
- Join Date
- Jan 2011
- Location
- Boston, MA
- Posts
- 1,180
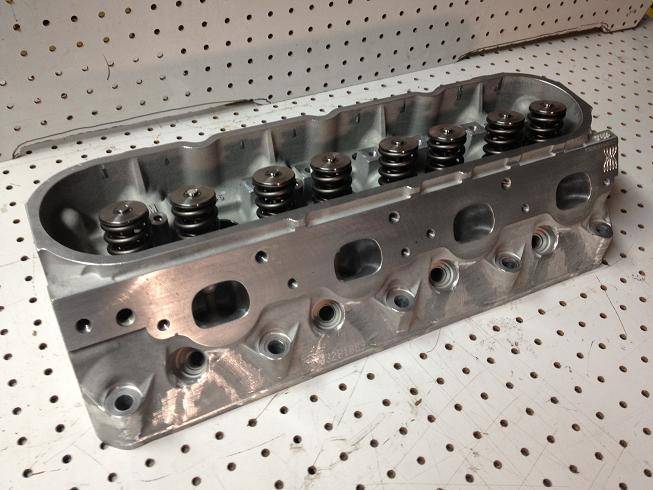
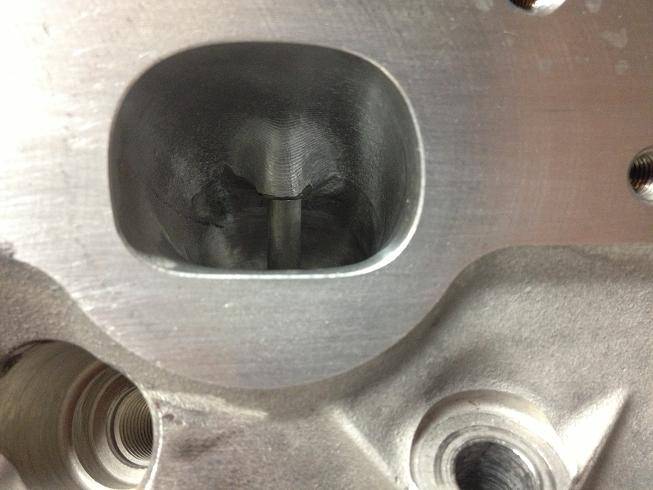
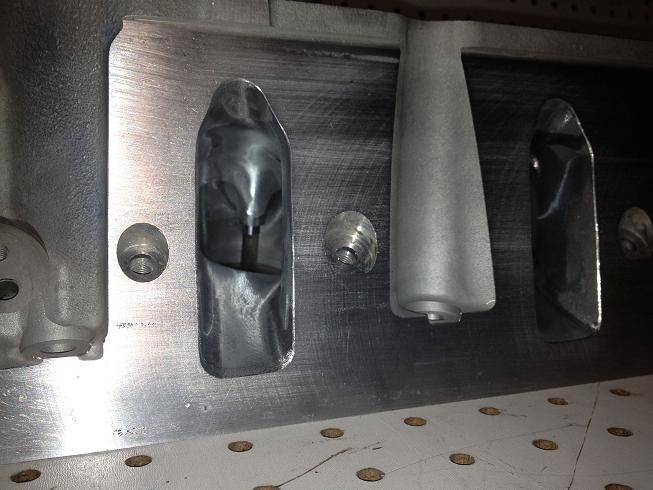
And of course I got my 243 heads back from TEA all cleaned up, ported and polished. I'm heading to Mexico for a week, won't be able to do any assembly until I get back, but I here's some shots before they go on. The new custom cam should arrive from Comp Cams tomorrow and I'll post the specs when I get them.

03-28-2013 #252
Registered User
- Join Date
- Jan 2011
- Location
- Boston, MA
- Posts
- 1,180
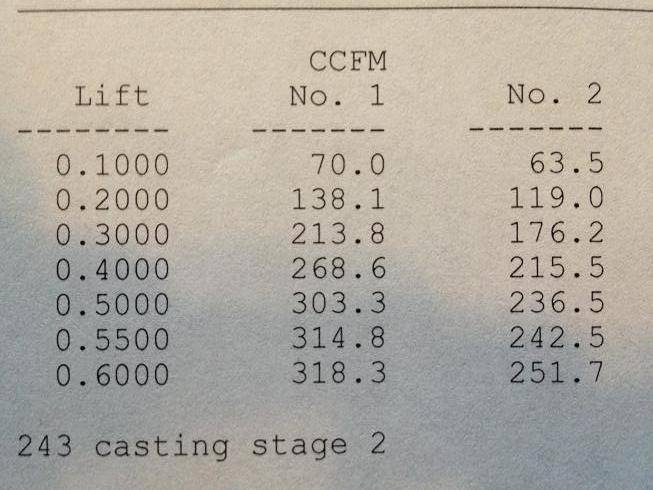
Here's a copy of the flow sheet from my heads:
04-07-2013 #253
Registered User
- Join Date
- Jan 2011
- Location
- Boston, MA
- Posts
- 1,180
I just got back from the Mexico trip, plane got delayed then cxl'd, slept on the airport floor for about an hour. I ended up getting home a day late, so Saturday was a wash.
I was hoping to install the new cam and heads, but my new timing chain set didn't arrive, so I couldn't do much. I finished cleaning the firewall and wheel wells and painting them. No pics yet. The new timing set should be here tomorrow.
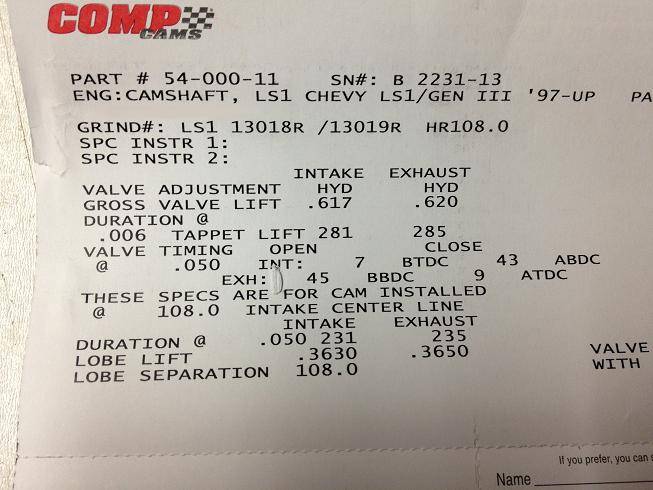
My new camshaft arrived from Comp Cams and I'm including a photo of the cam card. This should take full advantage of the newly ported heads and .650 lift springs. It should also have a nice lump to it. It's a custom grind, and I went with a 108 LSA due to the intake choice.
231/235 @.050 with .617/.620 lift on a 108 LSA.
04-14-2013 #254
Registered User
- Join Date
- Jan 2011
- Location
- Boston, MA
- Posts
- 1,180
Well, I got my new timing chain set, and I thought I was going to install the new cam/timing chain/oil pump/heads/pushrods/lifters,etc, but as I was starting to tear down the engine I realized that I never ordered a new cam retaining plate. The retaining plate has a gasket on the back of it and if it goes bad, you lose oil pressure. I found out you can't just pick up a new gasket at the dealership, so I'll be waiting until that arrives to carry on. I'd rather not have to tear down the engine over not installing a new $18 part.
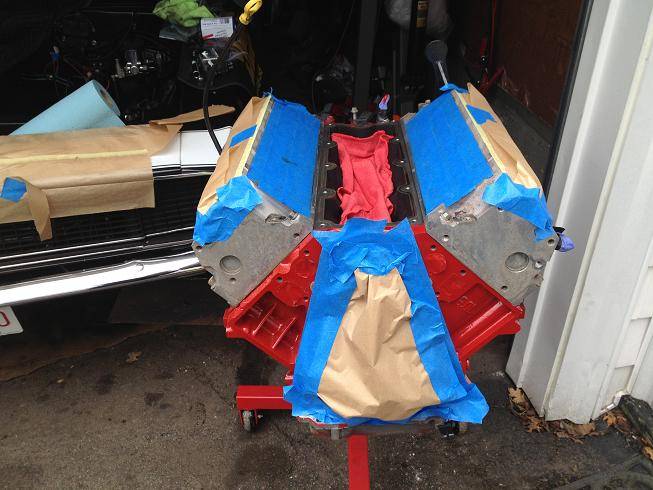
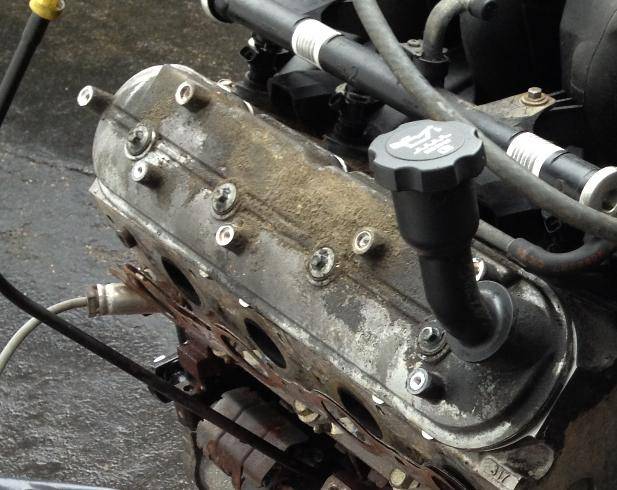
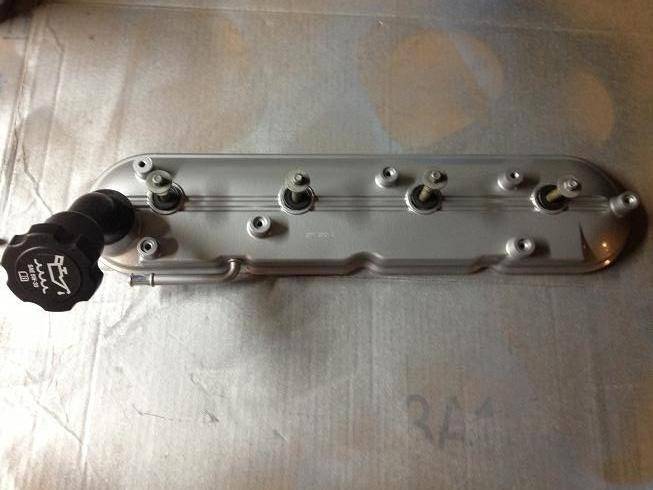
Anyways, I finished cleaning up and re-assembling the engine bay. And I degreased and painted the valve covers, valley cover and re-painted the timing chain cover as well since I chipped the edges taking it off.
Here's what the valve covers looked like when I got them:
and here it is with a fresh coat of paint:
04-14-2013 #255
Registered User
- Join Date
- Mar 2009
- Location
- Houston, TX
- Posts
- 1,197
Looking good. I'm about to do an LS swap myself so I will be watching this with much interests.
TuTu Ho
Firebird V2-LS swap
04-14-2013 #256
Registered User
- Join Date
- Jan 2013
- Location
- Columbus, OH
- Posts
- 5
TEA 243's absolutely killer heads. I don't think you'll be dissapointed with the results.
04-14-2013 #257 Registered User
- Join Date
- Nov 2006
- Location
- Ma.
- Posts
- 5,560
Wow it looks great nice job.
Wayne
Car FINALLY home !!!!!! lol
Project FNQUIK https://www.pro-touring.com/showthre...ghlight=FNQUIK
04-15-2013 #258
Registered User
- Join Date
- Jan 2011
- Location
- Boston, MA
- Posts
- 1,180
Thanks guys. I should really start making some progress over the next few weeks. I've just been collecting parts and cleaning stuff up to this point. Assembly should begin this coming weekend. I'd like to be on the road for Memorial Day weekend.
04-15-2013 #259
Registered User
- Join Date
- Feb 2013
- Location
- DFW
- Posts
- 8
That cam will thump on a 108 LS. With 21 degrees of overlap make sure you find a reputable tuner that will spend time adjusting your MAF and VE tables using a wideband. A good tune goes a long way when it comes to drive-ability of a cam that size. Originally Posted by 67rally
 09 G8 GT - Daily
68 C10 - Project
04-16-2013 #260
Registered User
- Join Date
- Jan 2011
- Location
- Boston, MA
- Posts
- 1,180
Thanks. Yes, I have a great tuner lined up, one of the best. We'll be doing a speed density tune. Originally Posted by HammerBuilt
I had the guys at TEA spec the cam, we went with a 108 LSA because I'll be using a single plane intake, which likes a narrower LSA.
I came up with 17 degrees of overlap, which should still have plenty thump: ((231+235)/4-108)x2=17. How'd you get 21?


 Reply With Quote





