


Results 361 to 380 of 573
-
07-28-2013 #361

 Registered User
- Join Date
- Jan 2011
- Location
- Boston, MA
- Posts
- 1,180

Off the road again...
I decided to investigate the vibration I was having at highway speeds (also the reason why the tuner shut the dyno test down early). A friend of a friend said "Don't drive it, it will eat parts." I'm glad I listened. Luckily almost all of my driving has been around town to break in the clutch, and only a few short blasts on the highway.
It turns out, the idiot (code name 67rally) that installed the engine and transmission is the same guy who measured the rear pinion angle. I guess I mistakenly wrote down a positive angle for the rear pinion angle and then matched the trans angle in the opposite direction so that the trans angle and pinion angle would be equal but opposite. This puts them parallel to each other, but not in the same plane. And then I didn't take into account the 1-1 1/2* that the diff rotates under load. It turns out that the pinion angle was actually negative, so I had the trans facing down towards the rear, and the pinion facing down towards the front. And when the axle rotated back, it added another degree or so. Blah, blah, blah. Long story short, they were way out of whack, and I need to shim the differential up 4 degrees. My fault, luckily I caught it early.
I also found the U-bolts holding the axle were loose. Not sure if this caused some of the vibration, or if the vibration caused them to come loose. Anyways, the rear end is not perfectly facing forward any longer. The passenger side needs to come forward, or the driver's side needs to go back.
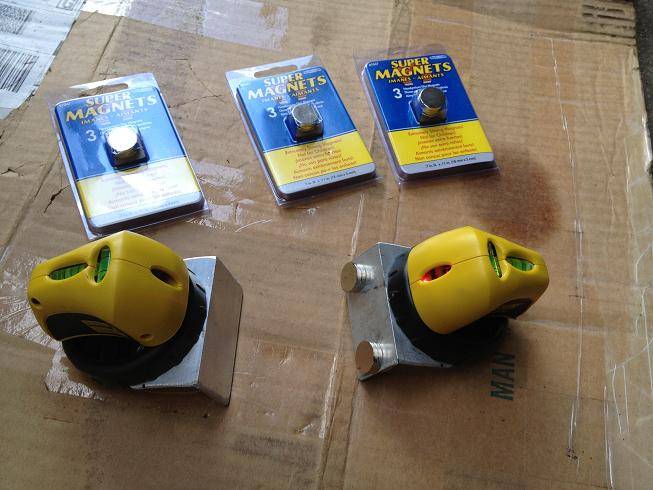
I bought a couple cheap laser levels, and mounted them to some angle stock so I can place one against the trans output shaft, and the other on the face of the pinion yoke and line everything up when I do the shims.
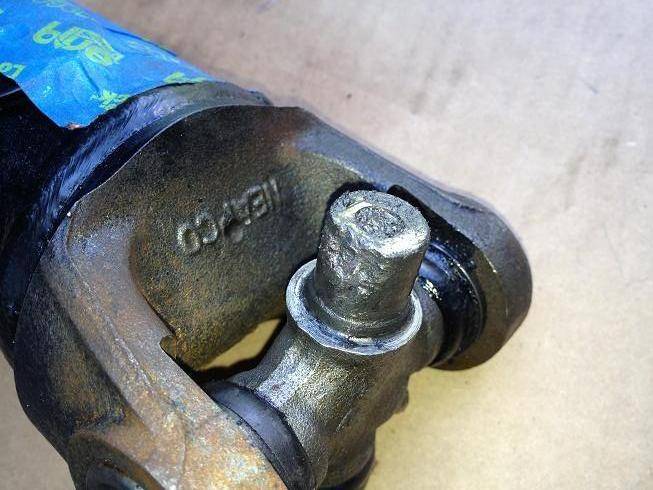
My fault for rushing the job to get it to the tuner in time. Just a reminder not to take shortcuts, luckily this time it's only going to cost me a U-Joint:
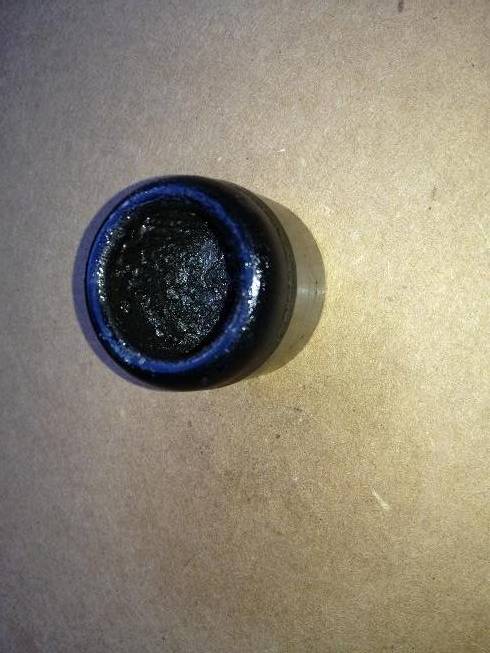
Here's the bearing cap and bearing mush that's left:
-
07-29-2013 #362
 Registered User
- Join Date
- Aug 2007
- Location
- Roanoke (FortWorth) Texas
- Posts
- 786
hmmm. I've been fighting driveline issues myself and after recently adjusting it to within 1* of perfect. I still have vibration. I wonder if my u-joints are chewed up like that causing it to still vibrate. Good post. thanks
ChrisTotal Cost Involved - Ridetech - Fatman - Total Control Products - Gateway Performance - MaverickMan Carbon
-
07-29-2013 #363
Registered User
- Join Date
- Jan 2011
- Location
- Boston, MA
- Posts
- 1,180
No problem. I just replaced the U-joint on my lunch hour today, just waiting on the shims to arrive to dial in the pinion angle. If you've been having vibrations for a while, there's a good chance you could have chewed up your U-joint. If you haven't done it before, you can pull the caps off pretty easily to check without dropping the driveshaft completely. Just remove the U-Bolts, push the driveshaft into the trans and support it (or hold it in the air), and carefully pull the bearing caps off. Actually, when I tried to rotate my caps, I felt a crunching/grinding so I knew there was a problem. The other common issue is over tightening the u-bolts, which will crush the bearing caps. Originally Posted by GrabberGT

-
07-29-2013 #364
Registered User
- Join Date
- Jul 2005
- Location
- Grain Valley, MO
- Posts
- 92
Good catch and keep us posted on the fix.
-
08-01-2013 #365
Registered User
- Join Date
- Jan 2011
- Location
- Boston, MA
- Posts
- 1,180
I spent about 4 hours under the car lining the drive train angles up. Lots of pics.
Here are the el cheapo laser levels that I bought from Home Depot and mounted to a piece of angle aluminum. I bought some "Super Magnets" and placed a couple on each side, sandwiching the aluminum, so I could attach it to the pinion. I had a few times where the magnets didn't cooperate and I have a couple blood blisters where the suckers pinched my skin. These are serious magnets!
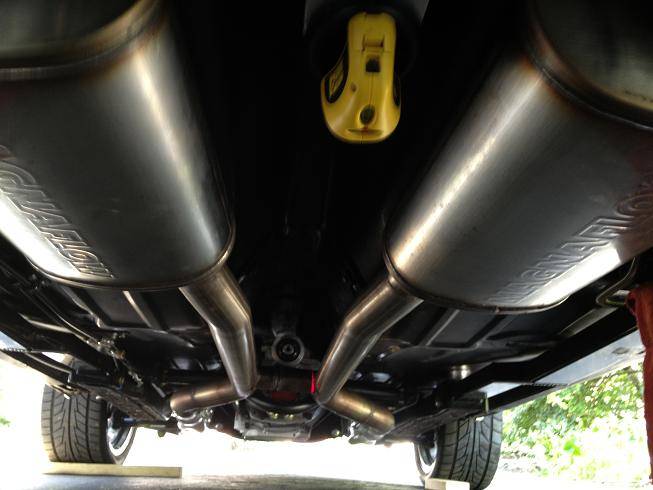
Here's a nice blurry photo of where my pinion was pointing. The laser level is attached to the face of the pinion with the magnets:
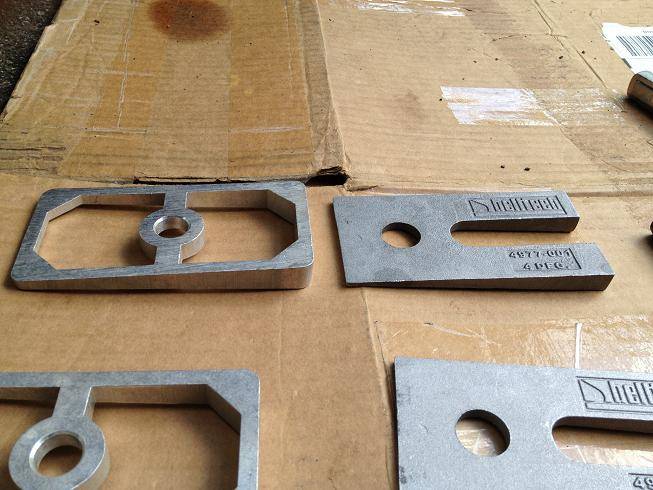
I bought two different kinds of 4* shims. The "hollow" ones are from Speedway Motors, and the ones with the long cutout are from Belltech. I wasn't sure which I would use, and better to have a couple options once I was under there:
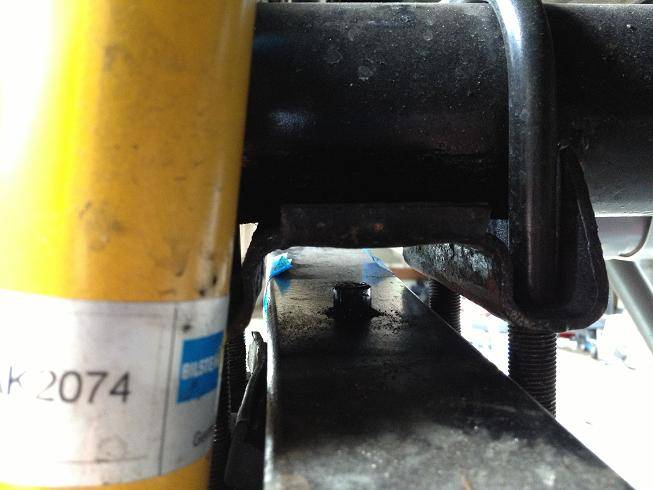
I jacked up the rear by the axle, supported the car under the subframe connectors and under the leaf springs, loosened the U-bolts around the axle and then raised the diff until the leaf springs were "floating" between the axle and the shock plate. I removed the urethane pad, and here's the pin on top of the leafs (looking towards the rear):
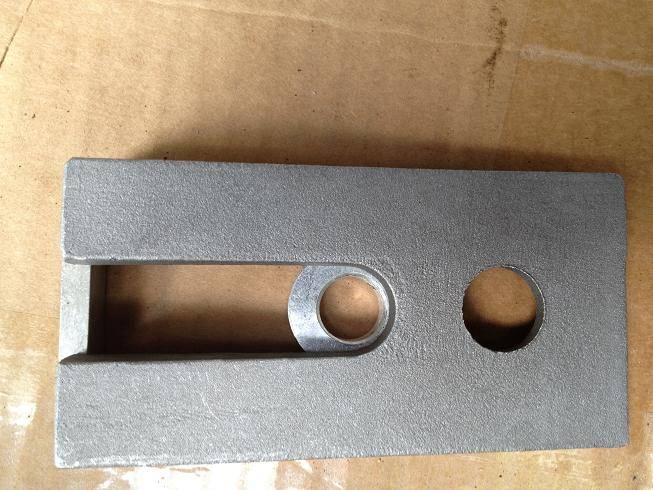
Here's the Belltech shim on top of the Speedway Motors shim. The hole in the Speedway shim was the perfect size, while the Belltech one was too big and could allow for some movement.
This was the Belltech shim with the urethane pad on top. With the monoleaf spring perches, the leafs would not even be in the perches:
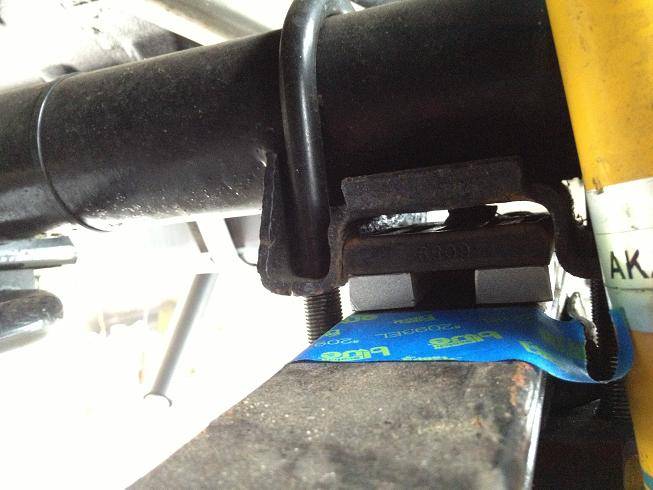
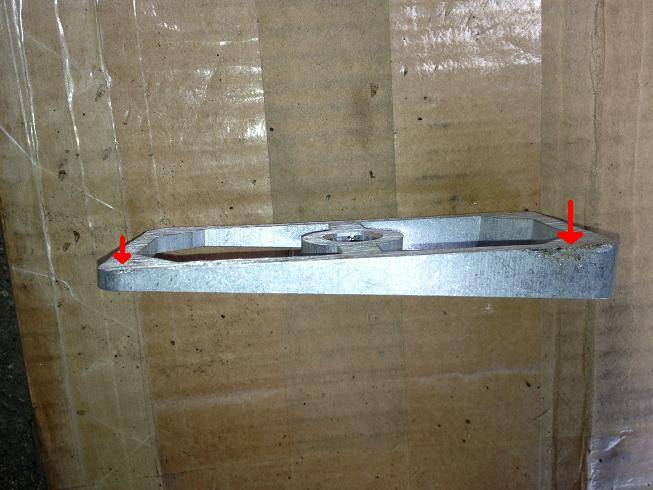
I decided to go with the Speedway Motors shims and no urethane pad. The corners of the spring perch are rounded a little, while the shim is cut at 90 degree angles and hit along the edges. The arrows show the witness marks:
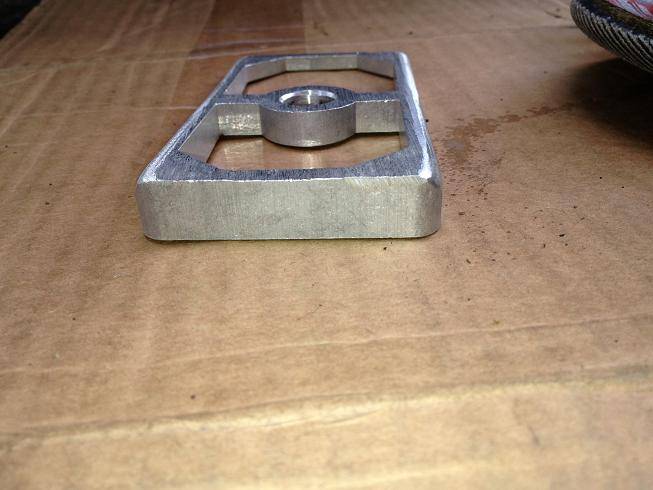
I rounded the sharp edges over with a bench grinder and then my angle grinder with an 80 grit disc:
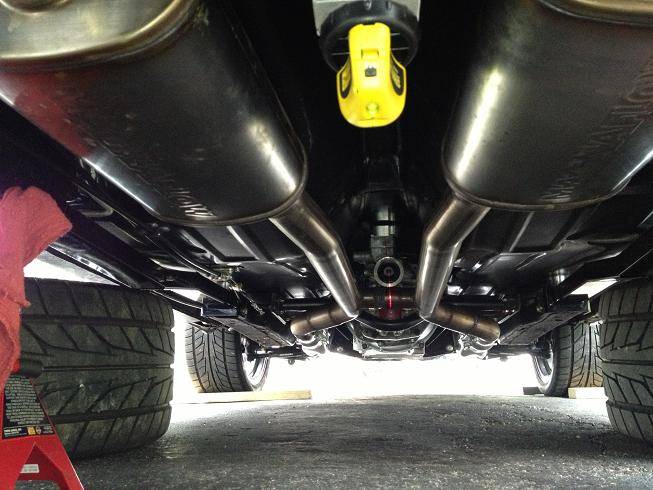
I moved the passener side of the axle slightly forward, and the driver's side slightly backwards and bolted everything back together...A little better alignment:
I took it out for a test ride, and was out for about an 30 minutes. I hit the highway...parking lot. Route 1, parking lot. I couldn't get over 35mph before I ran into more cars. I hit some back roads, got up to about 60 from a stoplight and tmore traffic. I went everywhere I could think of that had an open stretch of road and spent most of my time parked in traffic. I'll test again tomorrow. I didn't have any vibration, but couldn't really get it up to speed to say for sure.
-
08-01-2013 #366
 Registered User
- Join Date
- Oct 2010
- Location
- Mena, AR
- Posts
- 287
very informative write up about the drive live repair. Thanks.
Chris
Chris
1967 ElCamino
2004 Chevy SSR (my sons)
1951 Chevy pickup(my sons)
1967 Elky https://www.pro-touring.com/showthre...587-Evil-Angel
1951 truck https://www.pro-touring.com/threads/...3-year-old-son
-
08-02-2013 #367
Registered User
- Join Date
- Jan 2011
- Location
- Boston, MA
- Posts
- 1,180
Thanks, hopefully there's something in this thread for everyone. Originally Posted by bmbrzmn101
-
08-02-2013 #368 Registered User
- Join Date
- Dec 2009
- Posts
- 1,607
I think there is! You've done a great job with the car and documenting the process Originally Posted by 67rally
 Ron in SoCal
69 Camaro in progress
http://www.lateral-g.net/forums/showthread.php4?t=31246
Used to be known as flash911
08-03-2013 #369
Registered User
- Join Date
- Apr 2013
- Location
- Granite Bay, CA NORCAL
- Posts
- 40
I just finished reading from start to current and must say very detailed and awesome build. I'm subscribing in case I ever do the swap. Question. You mentioned earlier about your shifter and console but said more on that later. I'm wondering what the console is from since I may have missed it.
08-03-2013 #370
Registered User
- Join Date
- Jan 2011
- Location
- Boston, MA
- Posts
- 1,180
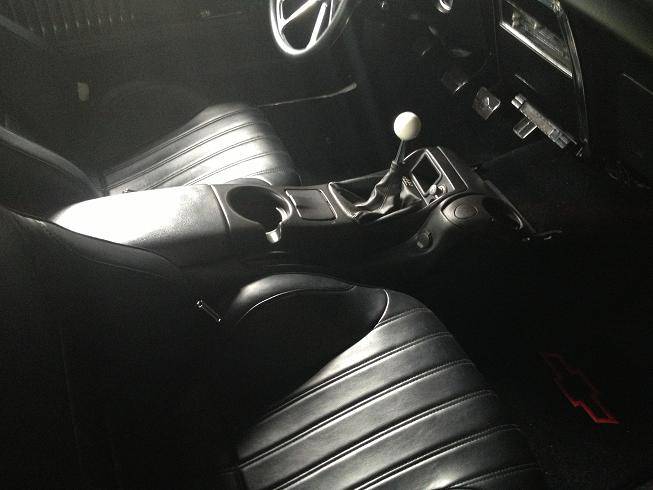
I haven't really gotten to it yet. I'm using a 2002 Camaro console from a 6 speed car. The console fits the tunnel pretty well. It wants to lean towards the passenger seat a bit, but I haven't screwed it down yet either. The console is too short for a first gen, but I'm going to fabricate a filler piece out of mdf or aluminum, then staple felt over that, fiberglass it, sand it smooth, and cover with vinyl. Once everything is together, I'll spray the vinyl and plastic parts with the appropriate black SEM paint so it matches the interior. It looked black when I bought it, but compared to the rest of the interior it has too much of a gray tone for me (tough to see in the pics). Originally Posted by Dmaxed
Here it is loosely installed:
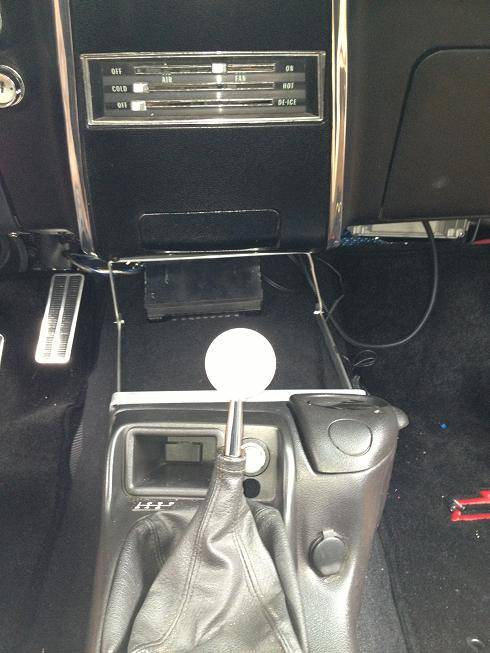
And here's a very sophisticated Microsoft Paint job to show where the closeout panel will run:
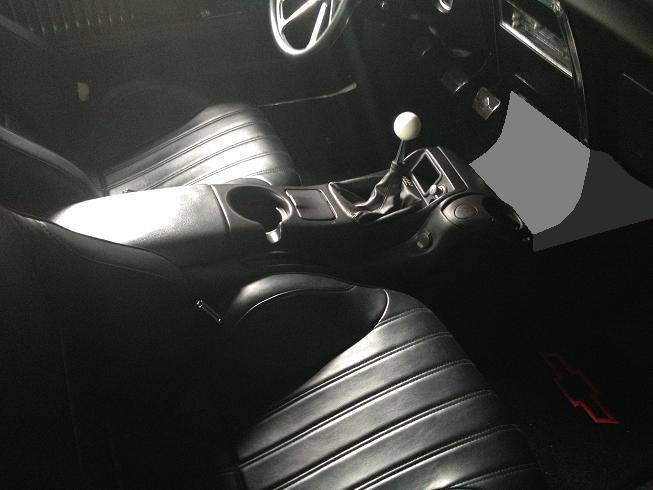
I have a plan, but I'll post photos along the way, because that plan may change as I go.
08-03-2013 #371
Registered User
- Join Date
- Jan 2011
- Location
- Boston, MA
- Posts
- 1,180
Thanks Ron. Like I've said before, I have learned just about everything from online info, so I thought this thread would be a good way to pass along some of that consolidated info. Originally Posted by Ron.in.SoCal
08-04-2013 #372
Registered User
- Join Date
- Jul 2005
- Location
- Grain Valley, MO
- Posts
- 92
I'm looking for pics on how people have run their power steering lines. Please post one when you've got the time. Thanks.
08-04-2013 #373
Registered User
- Join Date
- Jan 2011
- Location
- Boston, MA
- Posts
- 1,180
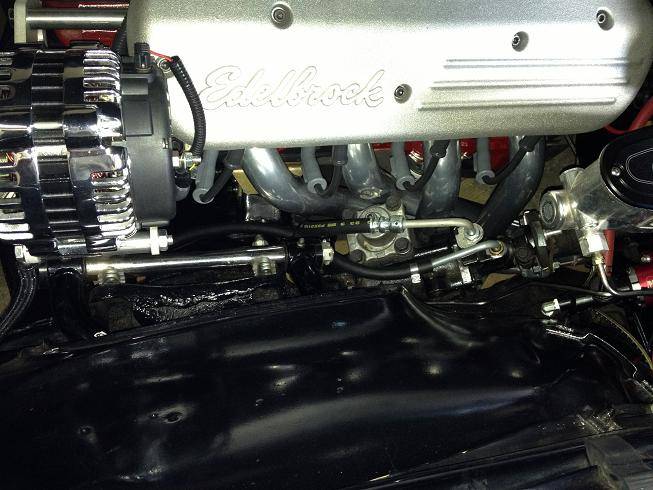
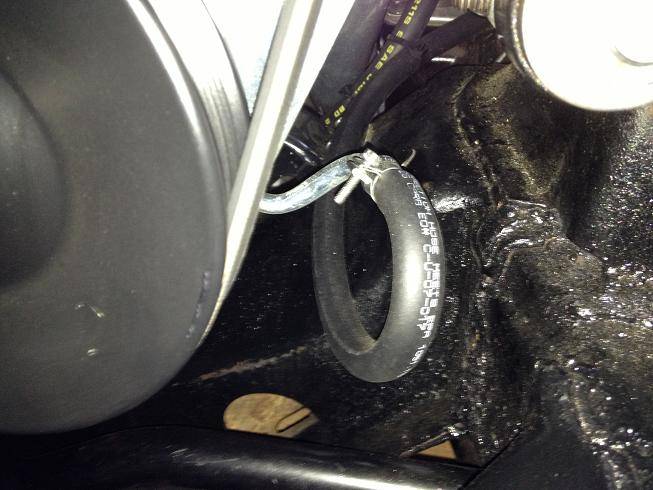
I'm using stock '69 (not '67) Camaro PS hoses. I ended up needing a longer run for my return line, so I used some fuel injection hose for that line. I went with FI hose, because it is more rigid, and needed something that would not collapse on a tight bend. Originally Posted by Mizzouri
Here's the routing from the PS box. The pressure line makes a 90 degree turn in front of the #1 header, and another 90 behind the frame mount. I have it zip tied to the return line hose to keep them from hitting the header and the upper control arm. I also have a second zip tie on the pressure hose connected to the frame mount. The return line travels straight forward and past the pump, making a U-Turn for the connection:
Here's how I have the hoses tied together:
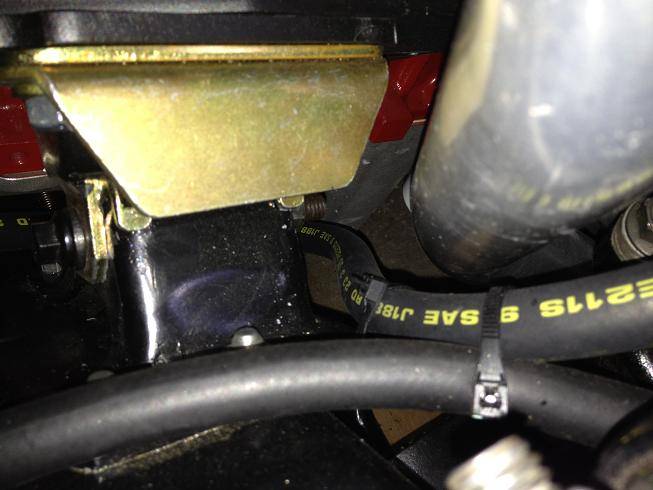
Here's where the pressure line connects to the pump and runs between the frame mount and oil pan:
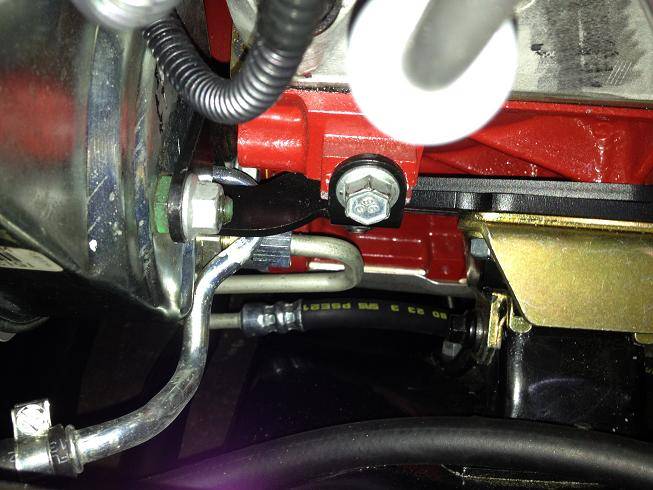
Here's the U-Turn for the return hose. This pic is looking from the front of the car towards the firewall. The PS pulley is on the left of the pic:
08-04-2013 #374
Registered User
- Join Date
- Jan 2011
- Location
- Boston, MA
- Posts
- 1,180
Update on the driveline...I got almost all of the vibrations gone. I still have a slight rumble at 70-80mph that goes away under acceleration. This generally means that the pinion needs more upward angle (since when you accelerate the pinion rotates upward). I ordered some 6* shims to replace the 4* ones I just installed. If this turns out to be too much angle, I can lower the angle of the transmission a little to fine tune it.
Good news, I just hit 500 miles on the new Monster Stage 2 clutch and let her rip. All I can say is FUN! 0-60 is crazy fast, and this engine loves to rev! 0-100 is really fast as well (I'm assuming it is, obviously with the speed limit set at 65 around here, I wouldn't know. ).
).
08-04-2013 #375
Registered User
- Join Date
- Jul 2005
- Location
- Grain Valley, MO
- Posts
- 92
Thanks for the pics and great job on getting the vibration problem under control!
08-18-2013 #376
Registered User
- Join Date
- Jan 2011
- Location
- Boston, MA
- Posts
- 1,180
Well, that didn't go so well. I was supposed to cruise up to Maine today with a bunch of guys from Team Camaro. I put 100 trouble free miles on yesterday, topped off the fluids and was ready to go.
I got up long before sunrise this morning, hit the road at 5am and within 10 minutes I had a mechanical issue. It felt like it wasn't getting spark or fuel, so I pulled off the parkway into a sketchy section of town and into a gas station. It felt like it was dropping cylinders, but occasionally they would all come back and run smooth for 10-15 seconds. The driver's side headers didn't feel as hot as they should have.
I couldn't get to my coil packs because of the coil covers I installed, so I couldn't do much trouble shooting. Once it started running ok, I turned around and headed home. It ran good for a couple minutes, then the problems returned. I limped home, pulled off the coil covers to start trouble shooting, and this was what I found under my driver's side cover:
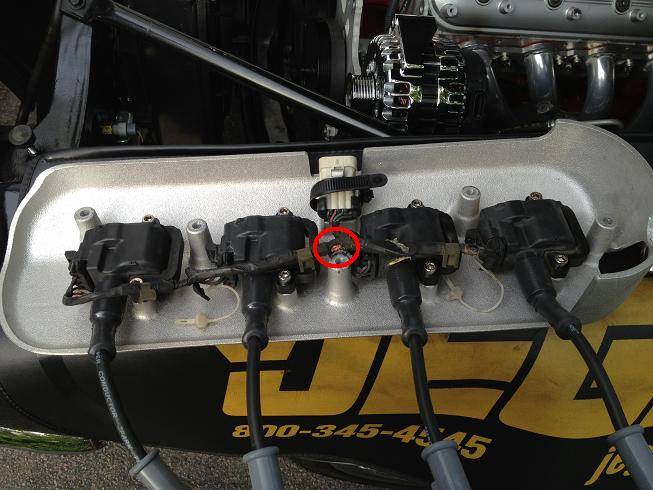
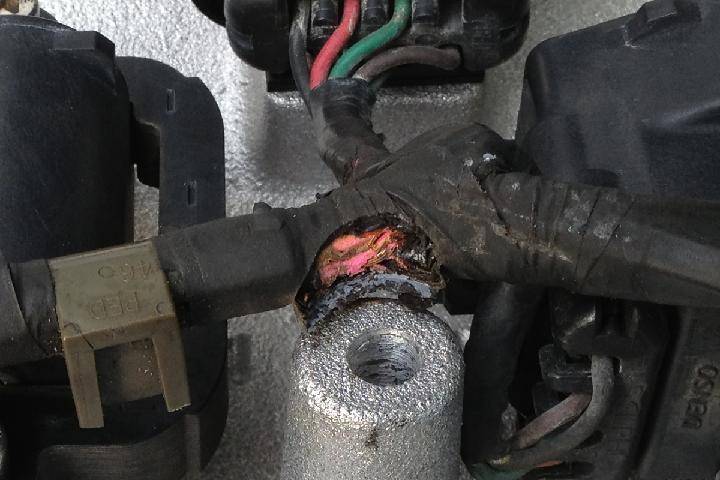
The wiring harness was rubbing on the cover and ate through the wires. If this had happened yesterday, I could have fixed it by this a.m. Anyways, I removed the covers and LS1 coils, bolted my old LQ9 coils to the valve covers, put the old wiring harness back on, cleaned the plugs, and she fired right up. Cheap fix, but I'm pretty bummed I missed out on the cruise.:(
09-02-2013 #377
Registered User
- Join Date
- Jan 2011
- Location
- Boston, MA
- Posts
- 1,180
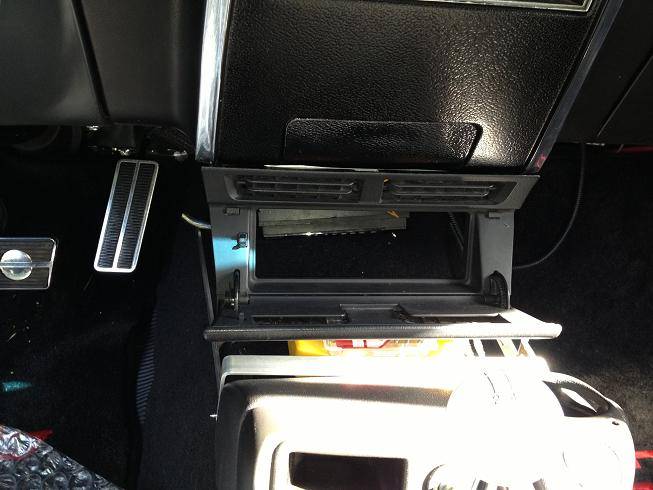
I have been working on a closeout panel for my console over the past couple weeks. I'm using the console out of a 2002 Camaro. It fit's the tunnel great, has an armrest, cup holders, etc. but doesn't meet up with the dash.
***THIS IS NOT A HOW TO***, it is a "how I did it". I have no experience working with fiberglass. I just saw it done on some TV show, probably West Coast Customs, or Over Haulin'.
Skip to the end for finished results...
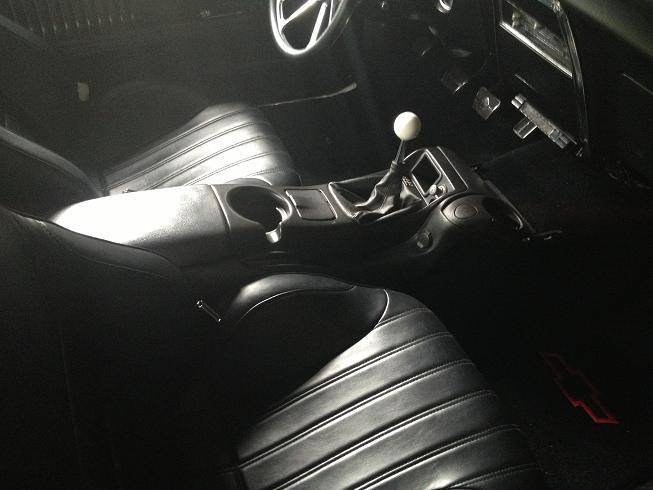
Here's what my rough vision was:
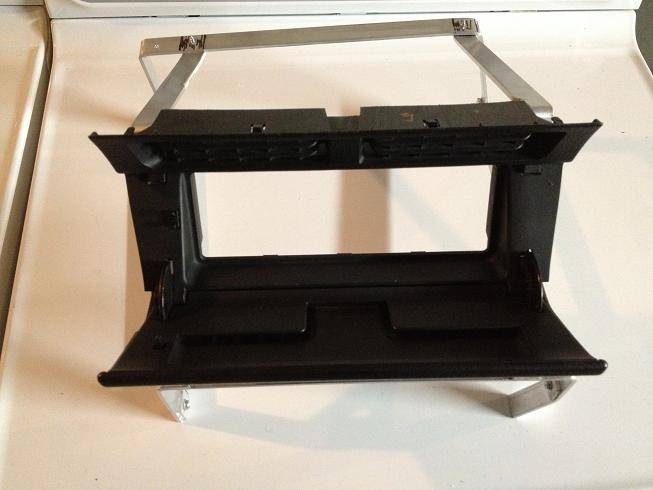
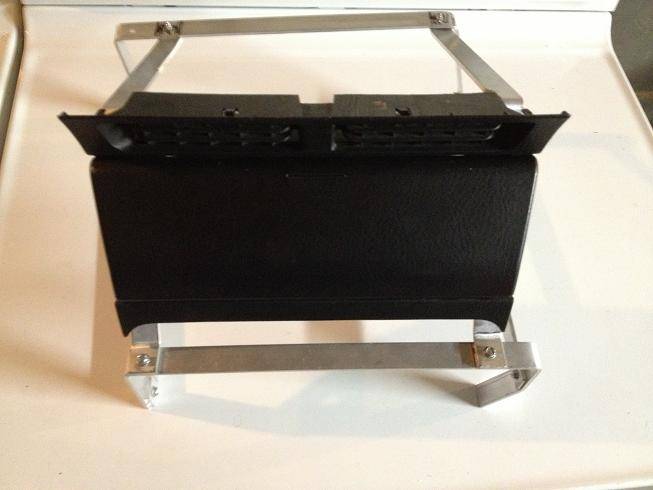
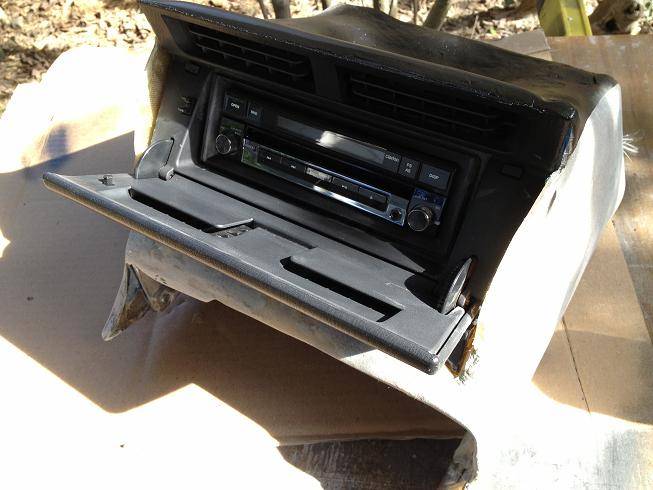
I found this radio bezel for a 2001 Honda S2000 on eBay and it looked to be about the right size:
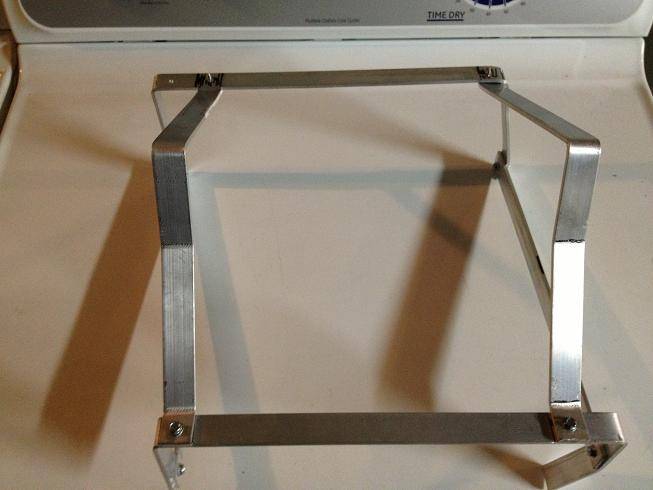
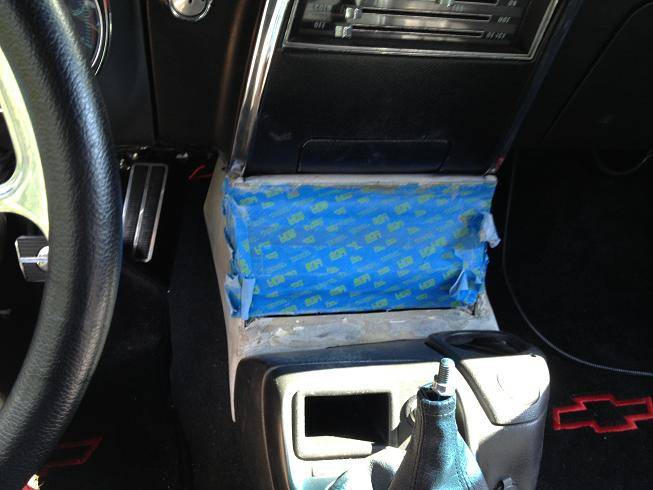
I started with some aluminum stock (light weight, easy to bend and I had some lying around). The console sits a little towards the passenger side, so the aluminum looks and is crooked. No worries, since I was going to be covering it in fiberglass. I just wanted it to mold to the tunnel:
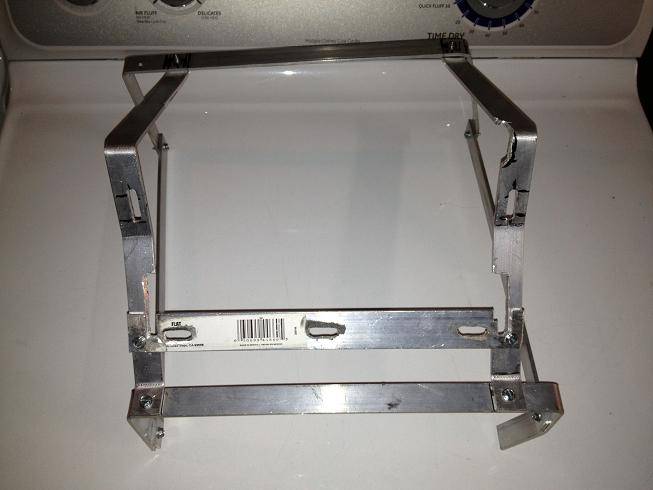
I added two more pieces that I had shaped to the radio bezel:
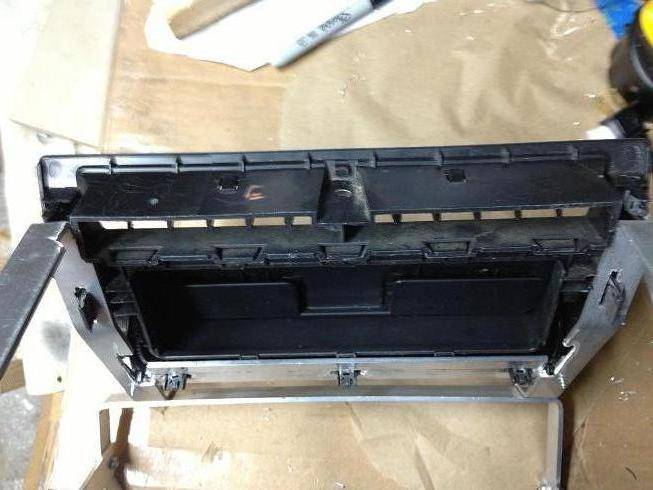
Cut out some openings for the clips on the back of the bezel to fit through:
And mounted it up:
09-02-2013 #378
Registered User
- Join Date
- Jan 2011
- Location
- Boston, MA
- Posts
- 1,180
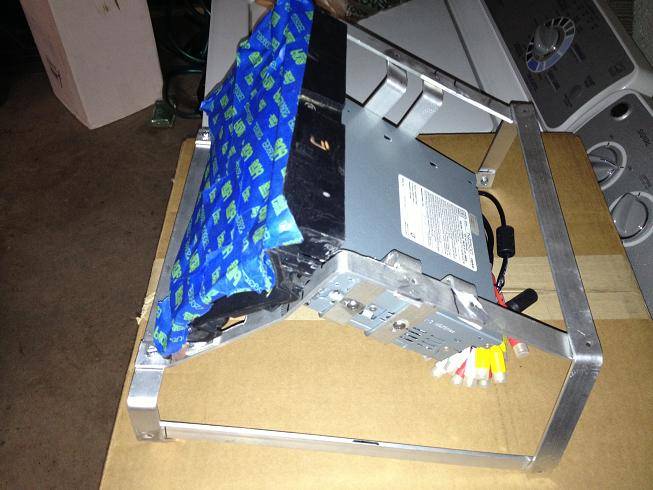
I taped off the front in preparation for the fiberglass.
I started with some fiberglass cloth, resin and hardener.
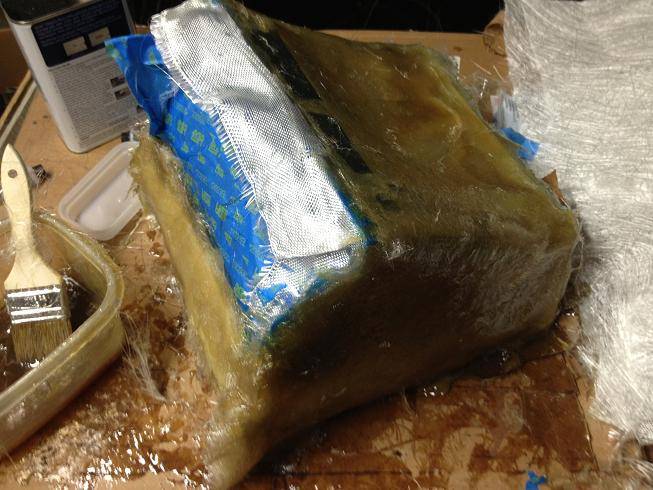
Sanded it, added fiberglass mat to the areas I needed to build, sanded it:
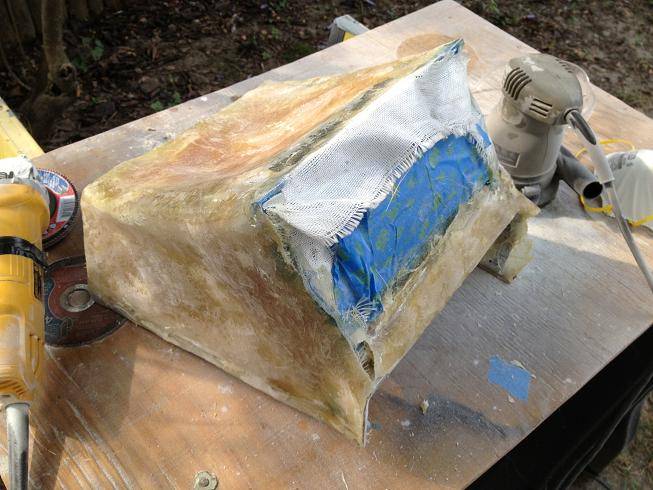
Then started my layers of Bondo Glass:
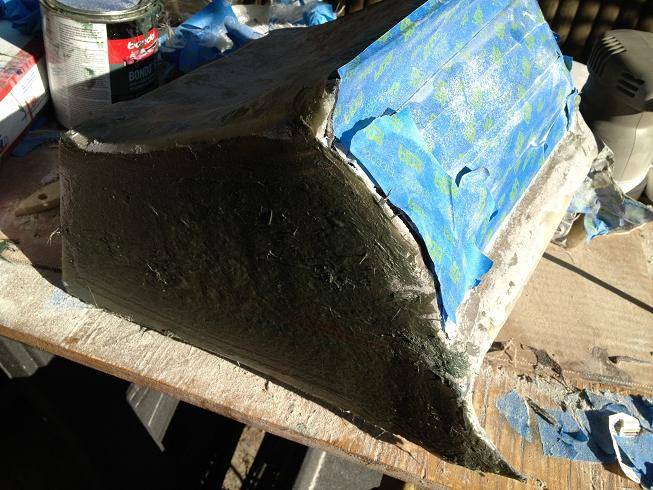
I didn't finish the top, since it will not be seen, and I didn't want to build it up due to clearance issues. Since I was going to cover it in vinyl, it just needed to be smooth, but not perfect. If I was going to paint it, I would have moved on to some Bondo body filler for a glass like finish.
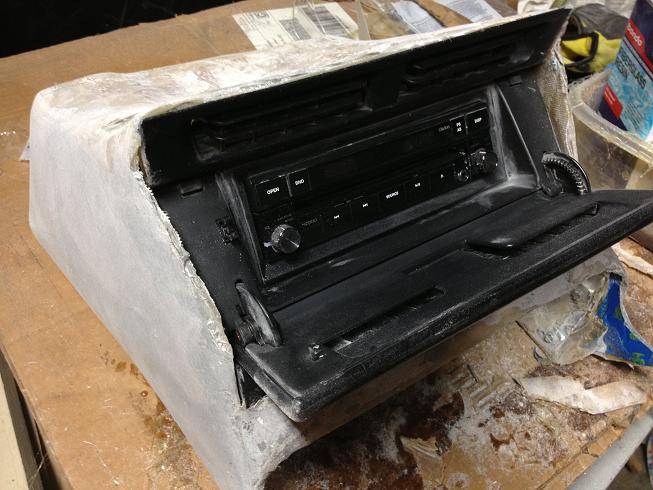
Test Fitting:
I sprayed the top lip with black plastidip to give it a rubberized finish:
Started covering it in black vinyl, using 3M 80 Rubber & Vinyl Adhesive:
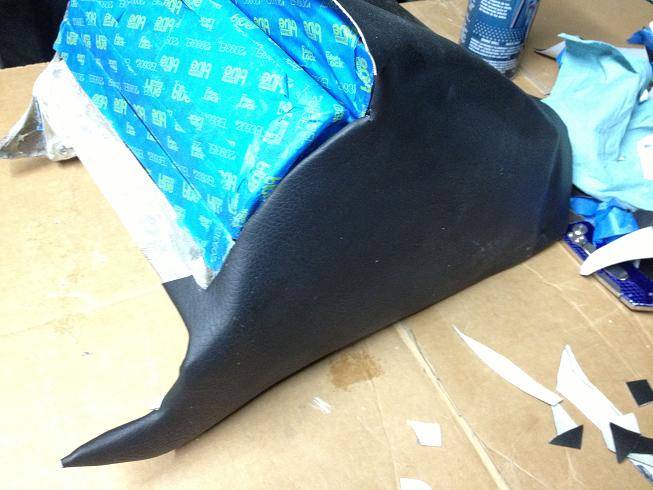
I knew I was going to have to have some seams because the angles on the front were pretty complex for someone of, uh, my skill level. I decided to seam it in line with the where the door opens. I probably should have made some grooves with a dremel and flushed it in, but it'll do.
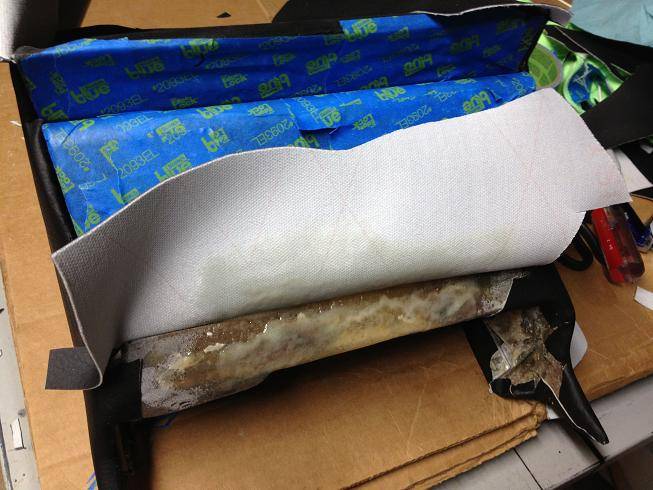
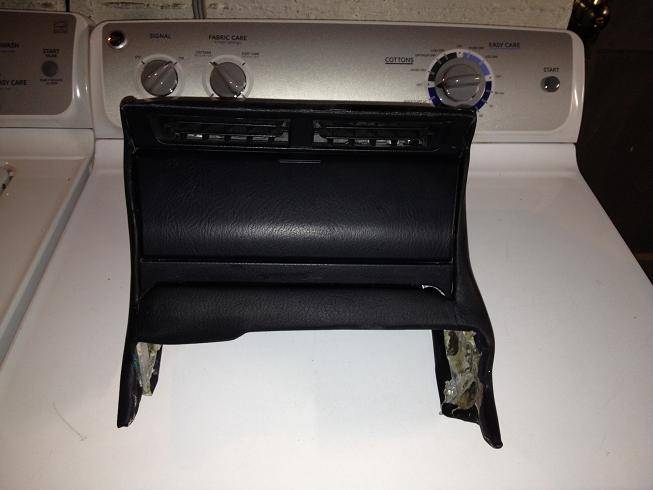
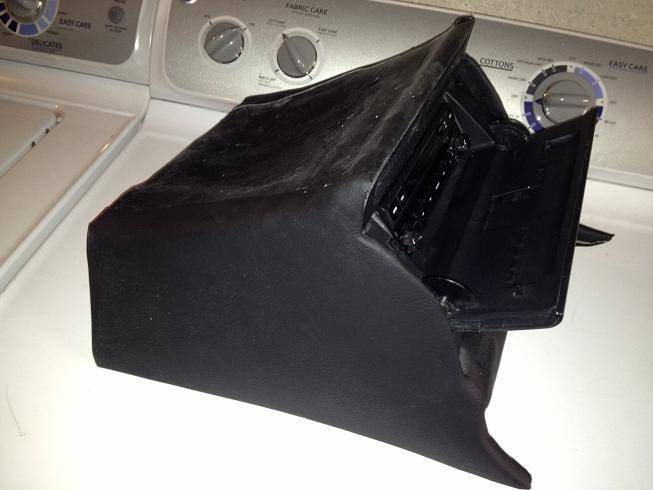
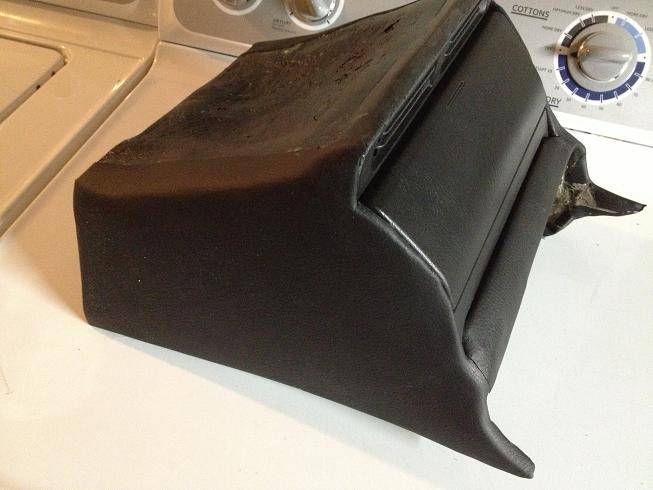
Test fit:
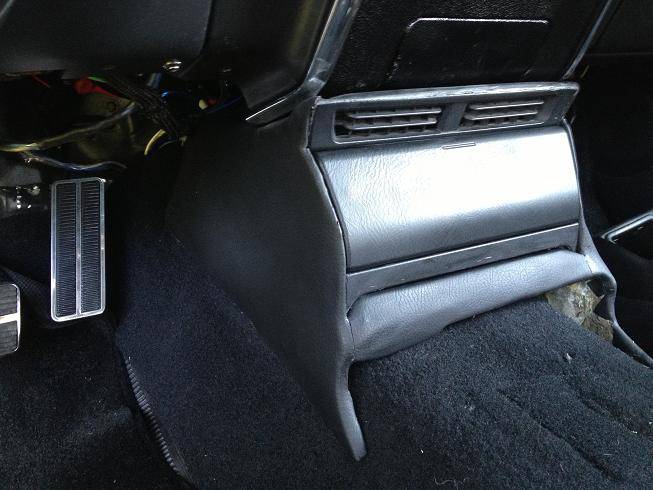
Here it is installed:
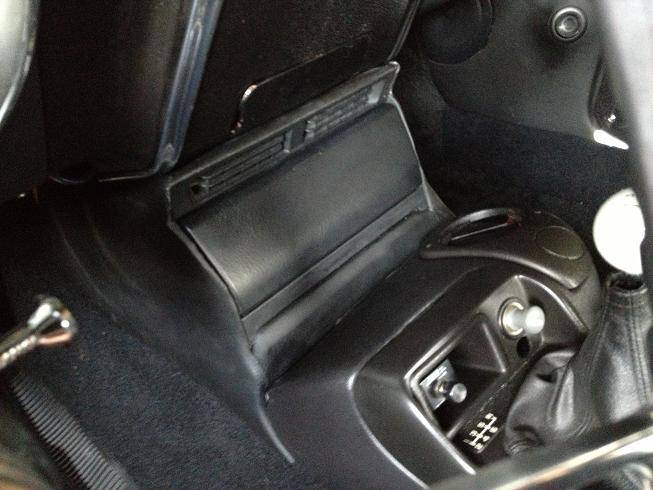
Radio is in and working:
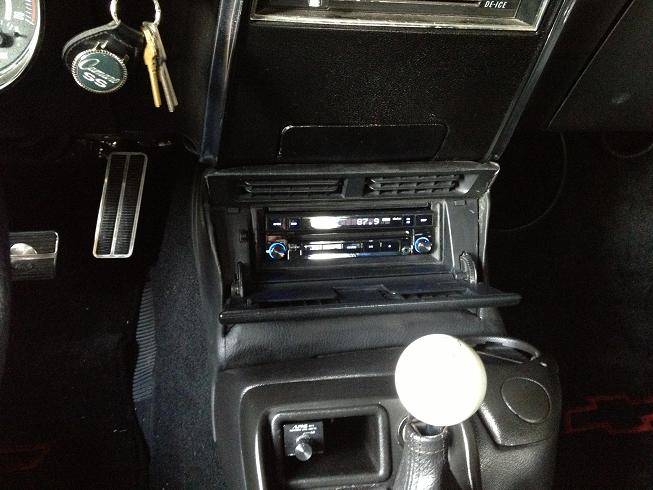
This is a Clarion NZ500 I picked up off eBay. It's a couple model years old, but I actually preferred it because the new models don't have knobs to adjust the volume, just buttons. Touch screen, iPod controls, Nav, backup camera (if I want it):
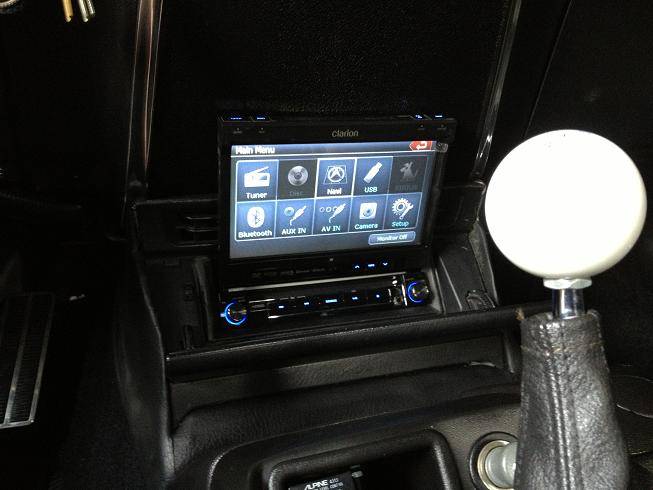
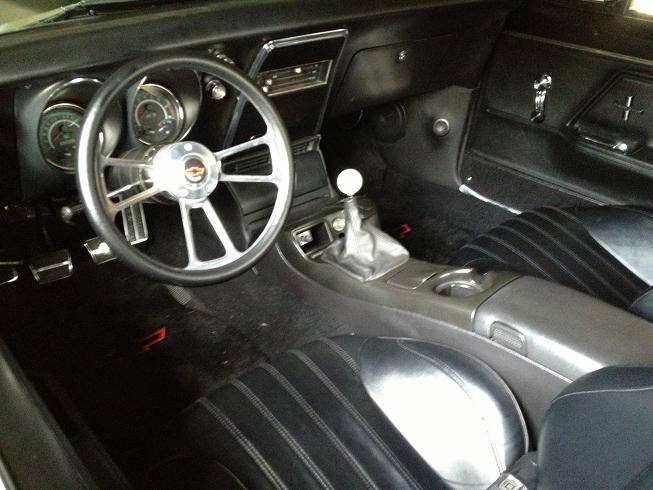
A couple more shots of the finished install:

09-02-2013 #379 Registered User
- Join Date
- Feb 2010
- Location
- Modesto California
- Posts
- 84
I love this build, so much detail and great ideas. Such as the steam cross over. Sub'd for sure.
"If you analyse the function of an object, its form often becomes obvious." - Prof F.A. Porsche
"Perfection is a myth..." Nakai-San, Rauh Welt.
Build Thread 68 Firebird Aka Firechicken
09-03-2013 #380
Registered User
- Join Date
- Mar 2009
- Location
- Houston, TX
- Posts
- 1,197
Nice work on the center console. I might have to do something similar on mine. It has a stock console there now.
BTW, looks like the ebay headers tuck up really nice to the sub frame. How far does it hang down from the sub frame? I have Dynatech headers now and they hang way too low (3" of ground clearance).Tu Ho
Firebird V2-LS swap


 Reply With Quote





