


Results 441 to 460 of 573
-
05-01-2014 #441

 Registered User
- Join Date
- Jan 2011
- Location
- Boston, MA
- Posts
- 1,180

This isn't very exciting, so there's no need to go and make popcorn...
But here's a comparison between the H and X pipes, with everything else staying the same on my '67 Camaro. The info is in the vid, but here it is again:
6.0l LQ9 (iron block LS engine)
Ported 243 heads
Comp Cams 231/235 .617"/.621" 108LSA
Edelbrock Vic Jr. Intake
Longtube headers
2.5" Magnaflow mufflers
2.5" Flowmaster tailpipes.
The only thing that changed was the first clip has the 2.5" Aluminum Flowmaster H-Pipes, and the second clip has the 2.5" SS Magnaflow X-Pipes.
There's a small difference in tone. I think the difference in loudness was due to camera placement, as the X-Pipe doesn't seem any quieter.
-
05-01-2014 #442
Registered User
- Join Date
- Jun 2012
- Posts
- 427
I think the X pipe balances a little better. And so the individual pulses are split evenly per muffler... vs the h pipe having two different lenth exhaust pathways for each pulse... like the left bank having to travel down the h pipe and then down the right bank. Power wise I think they're the same. Muffler wise the h pipe in your case sounded more pronounced, while not really any louder...I know that tying in my twin 3" exhaust with a short h pipe section made it much quieter by cutting the pronounced "R" sound in half... But the drone and overall decibal level stayed almost the same.
05-02-2014 #443
Registered User
- Join Date
- Jan 2014
- Posts
- 53

I have a Street-pro 3" exhaust from Pypes (X-pipes) and when it idles its fairly quiet but when you hit it, damn it's loud ! really blows things away. I think I should upload a sound check.
05-30-2014 #444
Registered User
- Join Date
- Jan 2011
- Location
- Boston, MA
- Posts
- 1,180
Uh-oh...
05-30-2014 #445
Registered User
- Join Date
- Jan 2011
- Location
- Boston, MA
- Posts
- 1,180
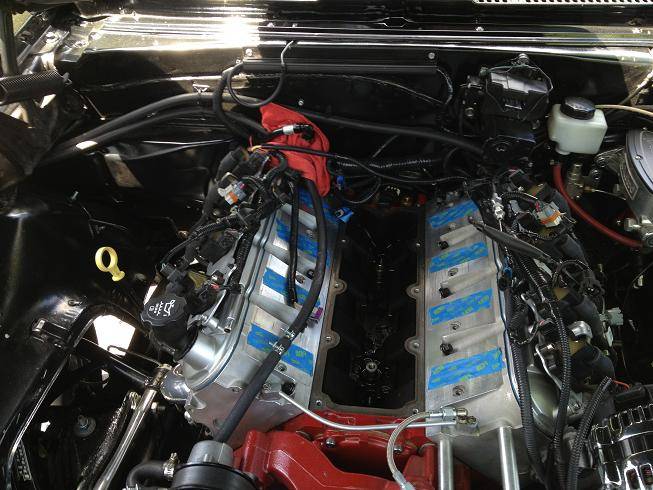
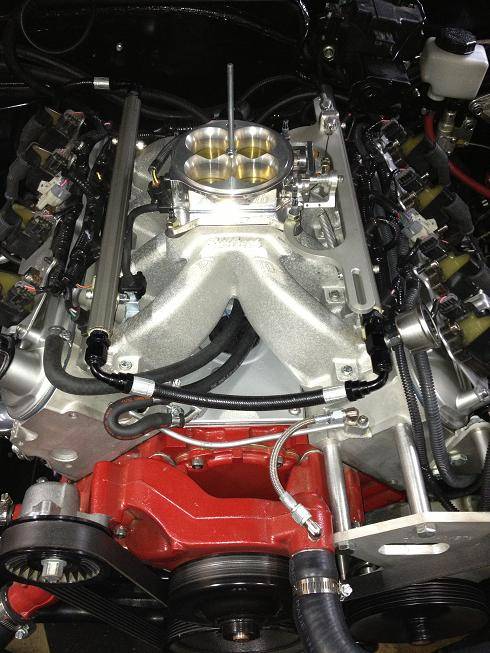
Nah, no big deal. I just swapped out the LQ9 valley cover for an LS6 valley cover. The LS6 valley cover has an internal PCV valve with a vent tube coming out the front. I didn't have a PCV system before, just a hose running from one valve cover, to a vented catch can, to the other valve cover. And I have been getting a little oil pushing out from under the valve covers and from under the valley cover as well.
Here's what I had been running for a setup:
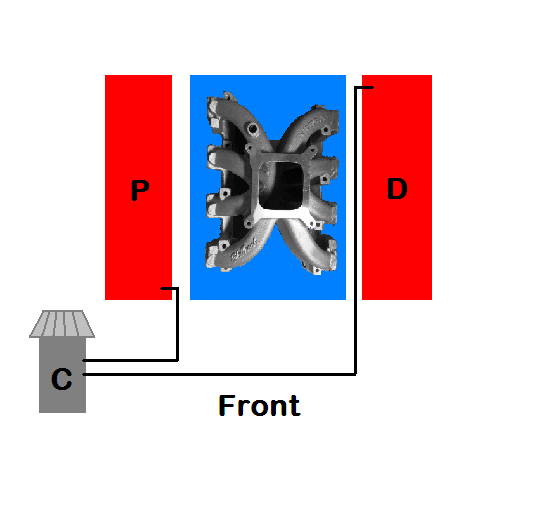
And the old LQ9 valley cover (that black hose in the middle attached to the vent tube on the front of the passenger side valve cover):
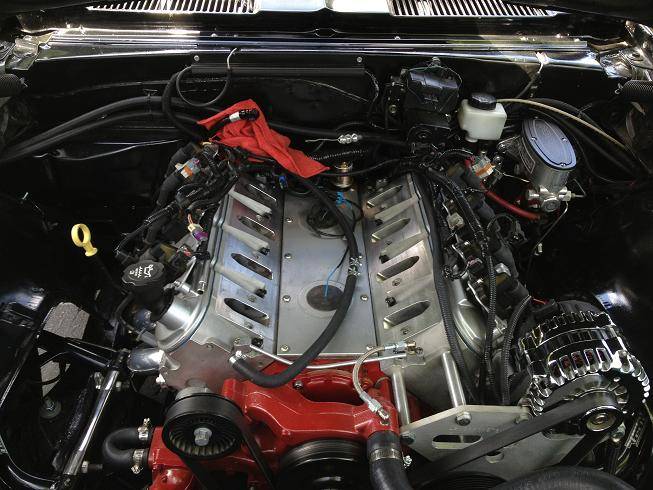
And this is the new setup:
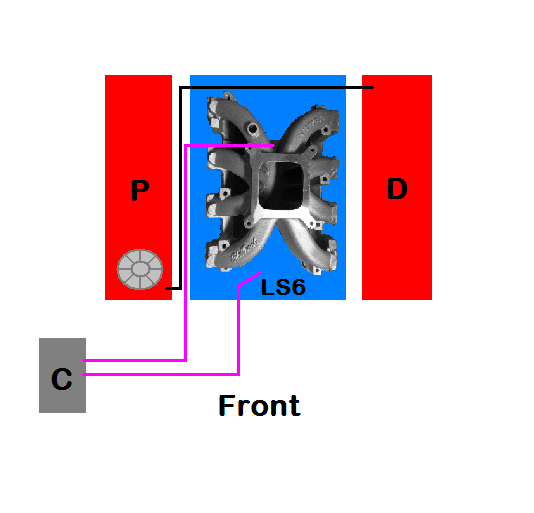
And the new LS6 valley cover (I hadn't installed the knock sensors yet, and you can see the vent tube in front with a red cap on it):
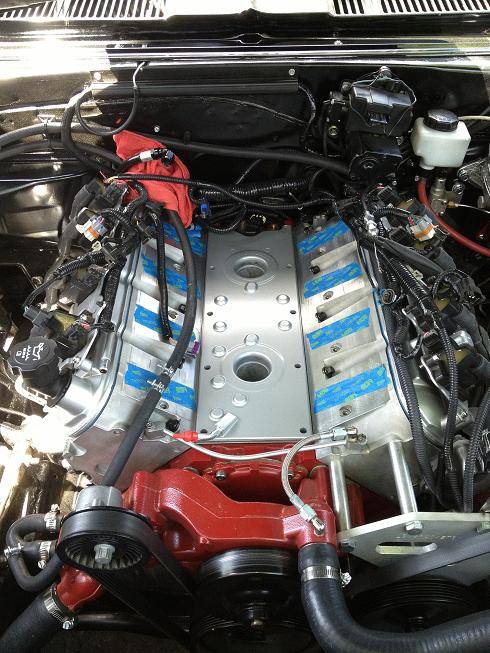
Here it is all plumbed up and back together. It took about 2-2.5hrs start to finish, and now I have a working PCV. I have an oil cap breather installed on the drivers side valve cover, and the catch can is now a sealed system, but I didn't capture it in the pic.:
07-11-2014 #446
Registered User
- Join Date
- Jan 2011
- Location
- Boston, MA
- Posts
- 1,180
Alright, it's been a while since I've updated. I was just driving and enjoying the car, not trying to work on it much this summer. I made a trip up to NH to the Cars 'n Coffee @ Classic Car Blasting and met up with a bunch of guys from Team Camaro. Had a lot of fun, and cruised over to the coast with Phil, Scott and significant others for some lunch.
After lunch, I noticed that reverse was very hard to get into, and some of the shifts felt a little notchy. I tried bleeding the MC, and it didn't help. I flushed the clutch fluid and re-bled and it stayed the same. After a lot of googling, everything pointed towards my slave cylinder. Added to this, I was concerned that my clutch disc had gotten contaminated from the oil getting pushed out of my valve covers and valley cover before I added the PCV system. More googling, there was a concern that I might have blown the rear main seal from all the crank case pressure. And lastly, I was getting a little trans fluid that was escaping past the tailhousing seal. I thought the fluid level might have gotten low enough to affect the shifts, but the level was right up to the top.
Not wanting to wait for parts once I got everything apart, I ordered a new rear cover that has the rear main seal already pressed in (also came with a rear cover gasket and new bolts along with the white plastic alignment tool insert), all for less than $50. A rear main seal itself was around $35, so worth it to me.
This job would have been so much easier with a lift. Instead I did it on jack stands on a downward sloping driveway with a trans jack. Even with 6 ton jack stands, I couldn't get the car high enough to get the trans out from under the car. And at 140lbs, I didn't want to wrestle it off the trans jack and then get it back on. All tolled, this probably took two full days to complete.
07-11-2014 #447
Registered User
- Join Date
- Jan 2011
- Location
- Boston, MA
- Posts
- 1,180
Here's the oil I was worried about trickling down the back of the pan:
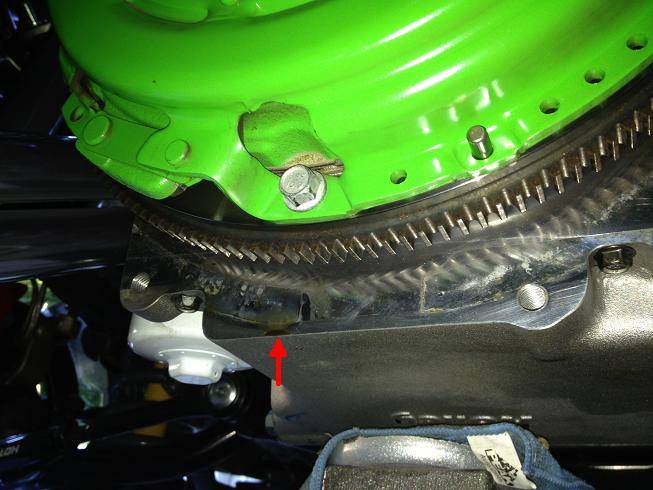
Old rear main looked fine, but since I was already there, and didn't want to do this twice...
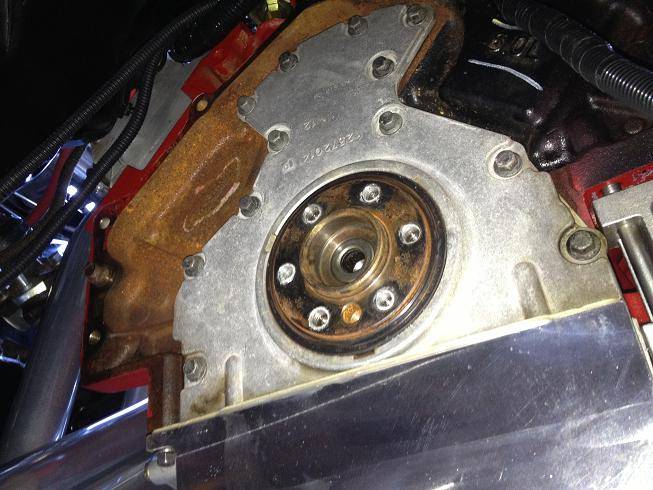
New Rear Cover #12639250
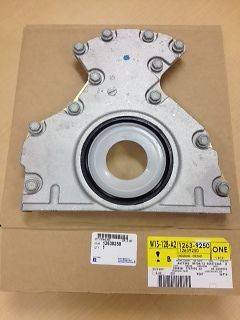
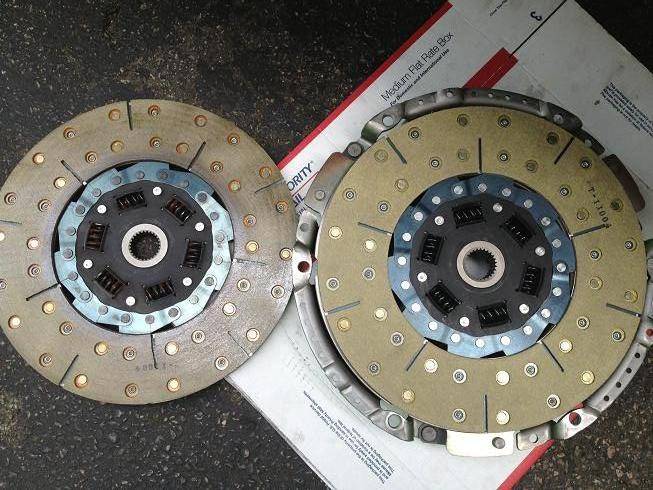
I also ordered a new clutch disk from Monster. We didn't feel that the pressure plate and flywheel needed replacing since they both only had about 2000 miles on them.
Old vs New (I replaced it since I had already had it, but I don't think this was necessary):
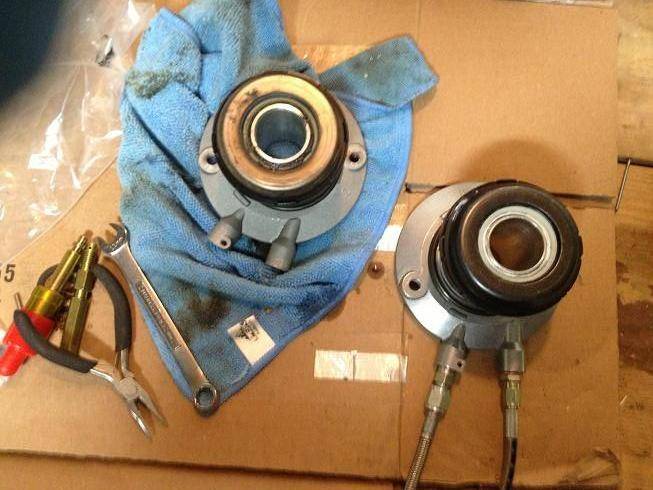
I ordered a new Slave/TOB from them for around $75 as part of the package. I save a little by ordering an F-Body slave (same exact slave as the GTO, but the GTO comes with different fittings, which I didn't need). I just swapped over my exisiting fittings. A new one by itself would have been around $125 and the GTO one is around $175.
Old on left, you can see all the crud from the blown seal:
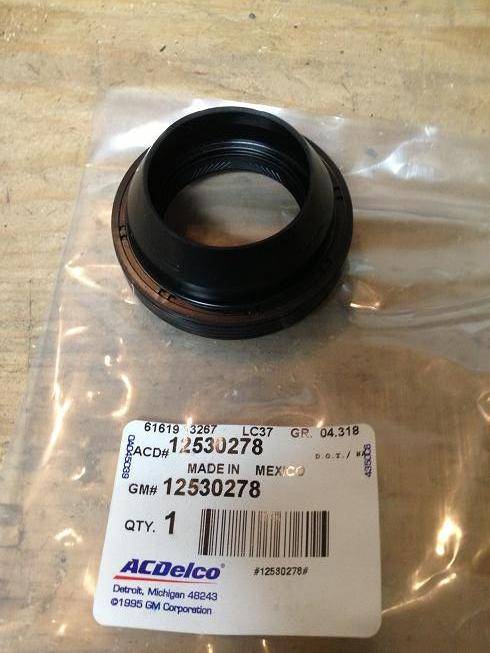
New GTO Tailhousing seal #1253028:
Old seal coming out (I used a drywall screw and a set of vice grips to pull it):
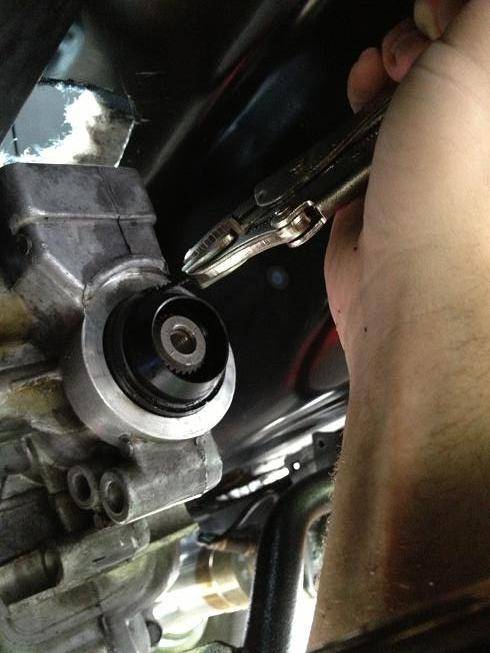
No seal:
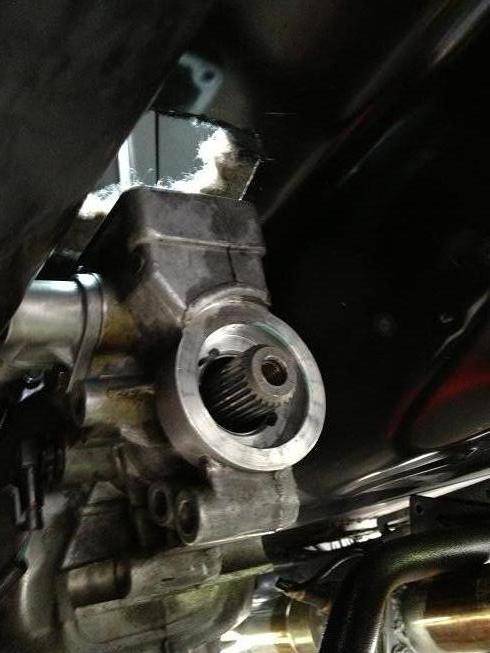
I looked for something the right size to tap the new seal in place. It turns out that the old Slave/TOB was just right. I pulled it apart and used the top bearing to tap it flush with the trans housing:
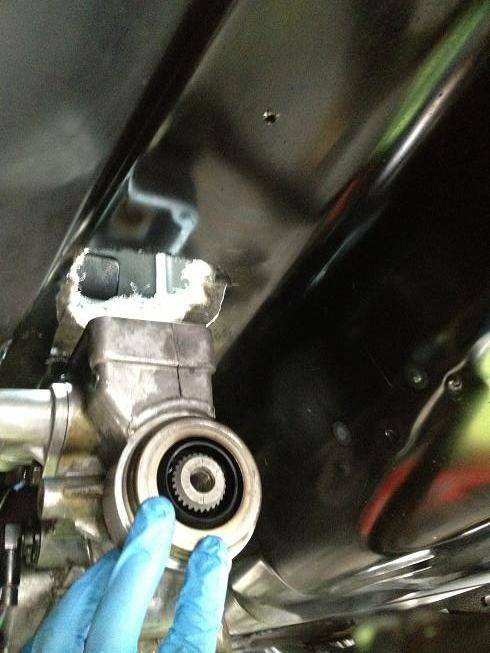
Then pulled it apart a little more and used the inner part (which fits perfectly inside the tailhousing shaft) to tap it all the way in. It should sit about 4mm deep once in place:
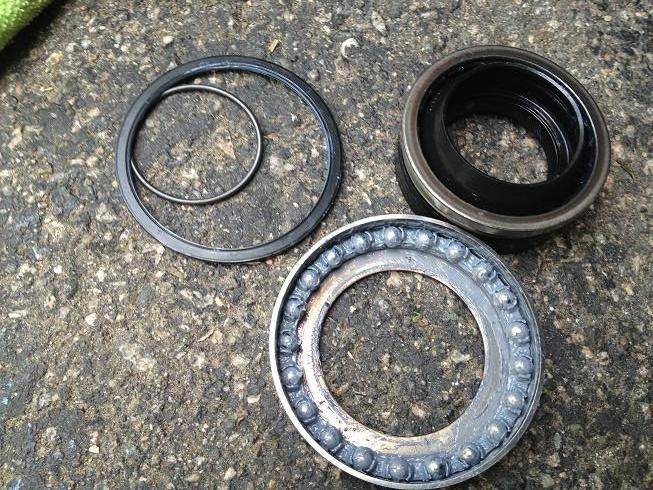
New one installed:
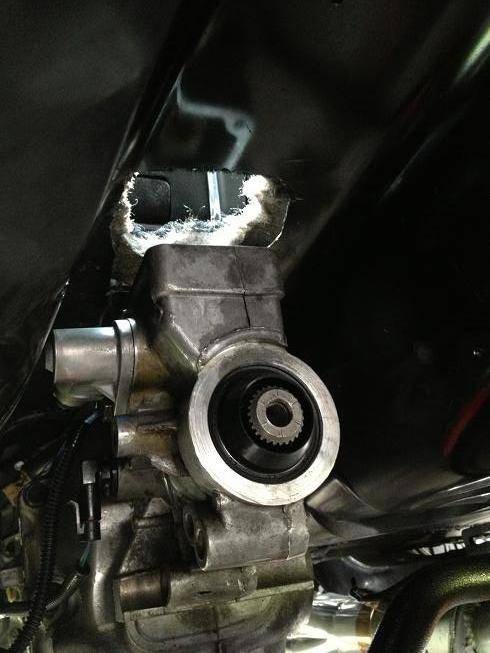
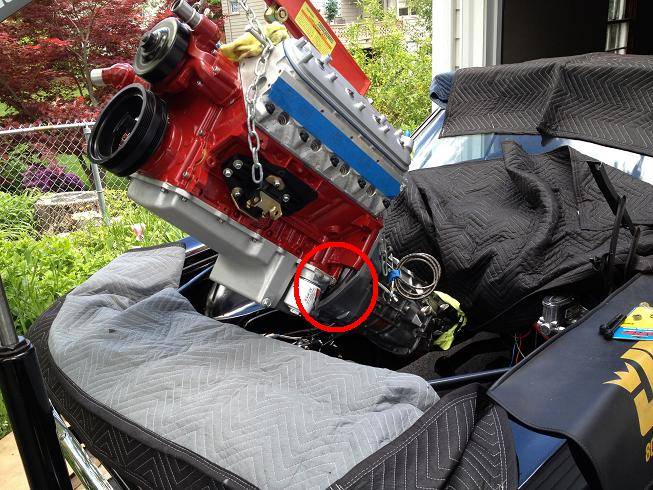
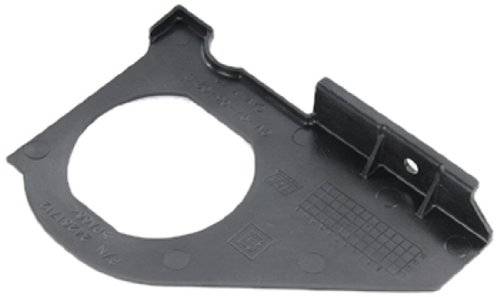
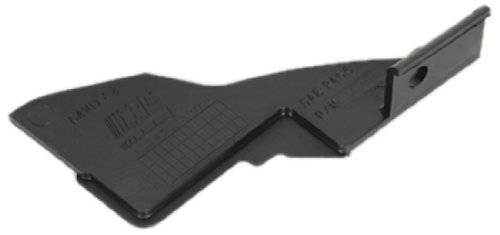
And while I was at it, I didn't want to run the risk of any road debris/dirt getting into the bellhousing. There were a couple of open spots on the front of the T56. Apparently they sell plastic "inspection plates" that you can remove to look inside, so I installed these as well.
I didn't take a picture installed, but here is one of the openings from an old photo (I didn't pull the engine this time):
ACDelco 24261712 GM Original Equipment Manual Trans Cover:
ACDelco 24261714 OE Service Transmission Cover:
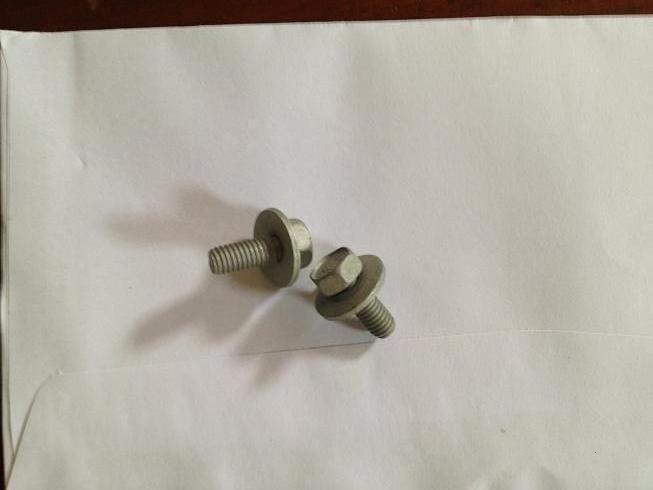
And the bolts that hold them in place #11515704:
07-11-2014 #448
Registered User
- Join Date
- Jan 2011
- Location
- Boston, MA
- Posts
- 1,180
I have started the break in (easy stop and go driving for 500 miles) on the new clutch. I need this thing broken in before my first AutoX on July 27th. I have 100 miles on it already and it's smooth as butter, and not a drop of fluid anywhere (knock on wood).
07-17-2014 #449
Registered User
- Join Date
- Jan 2011
- Location
- Boston, MA
- Posts
- 1,180
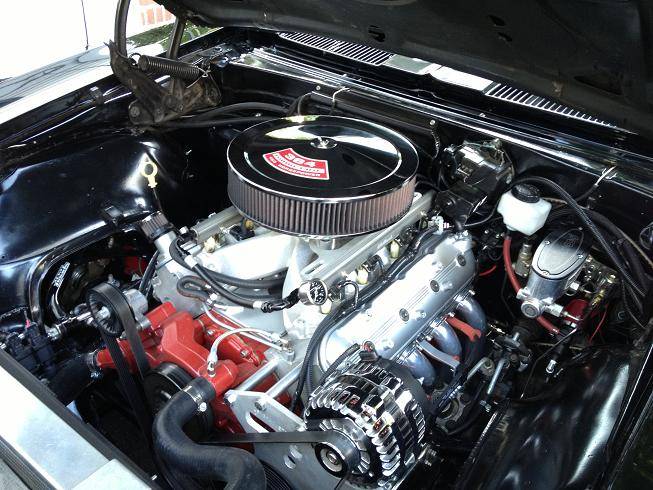
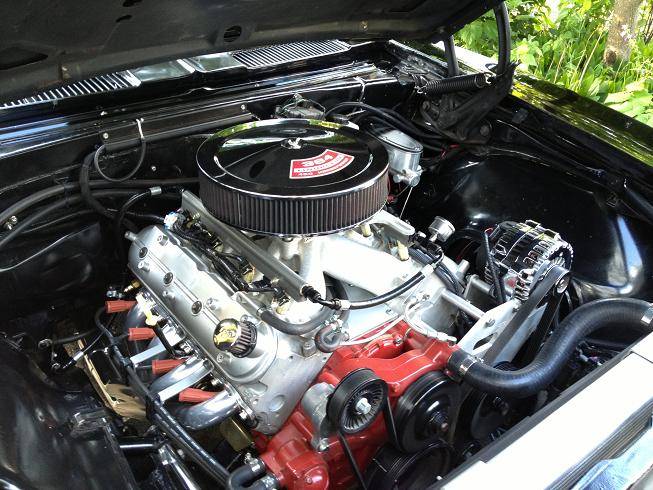
I finally tackled the coil pack relocation project. Like everything else, this seemed to take way longer than it should have. I had to figure out where I wanted to run my spark plug wires and how to keep them away from hot/moving parts
Here's the brackets I'll be using, they were $60 on eBay:
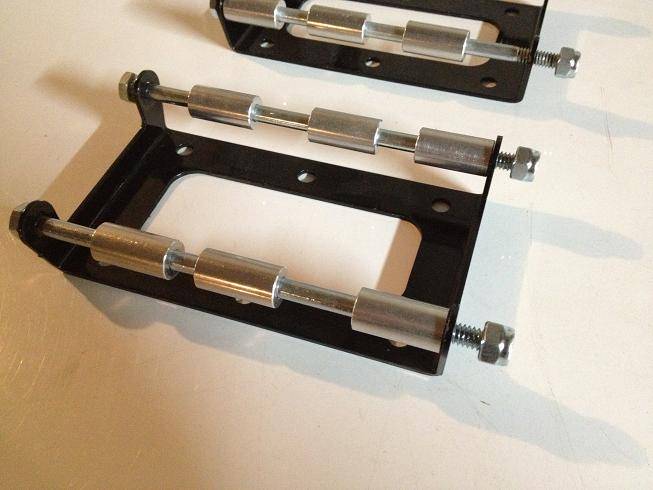
Here are one set of coils mocked up:
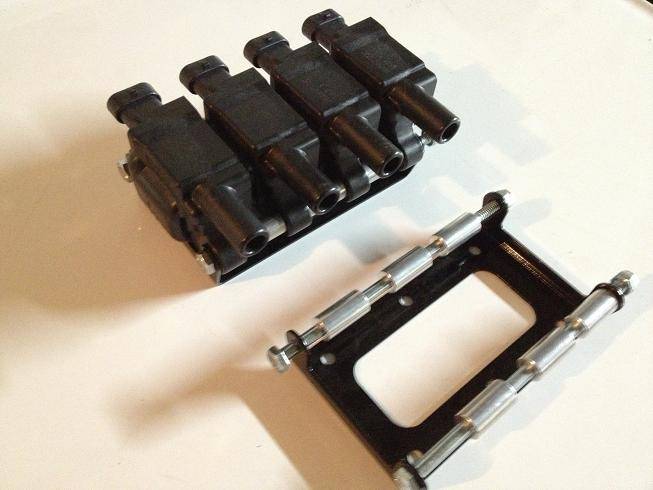
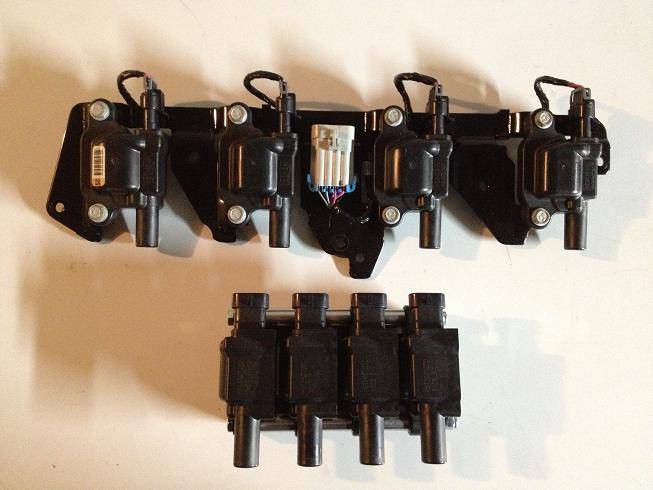
Here are the LS3 Coils on their stock bracket and then on the relocation bracket. A little more compact:
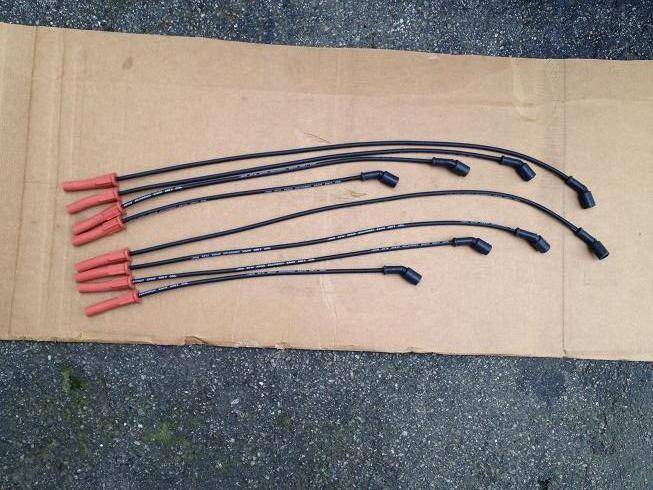
Here are the custom length plug wires I had made up. I'm not a fan of the red plugs, but I'm going to add some heat shield socks, so they will be covered up. These took forever to get from someone on LS1tech, and I didn't feel like sending them back to have the boots changed out.
I found a couple of locations up front that would work. This was my original thought:
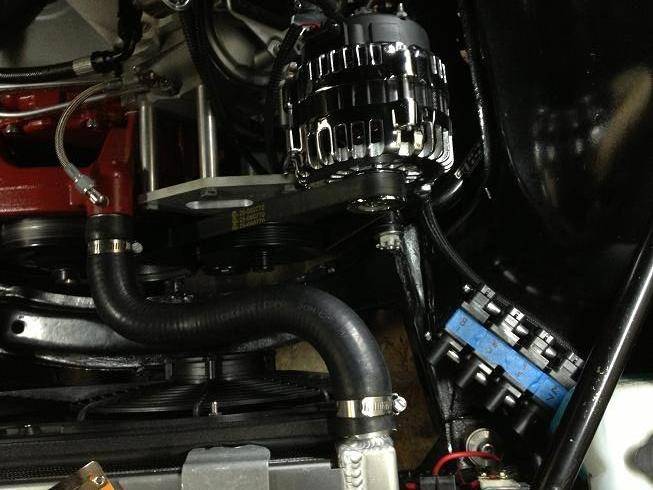
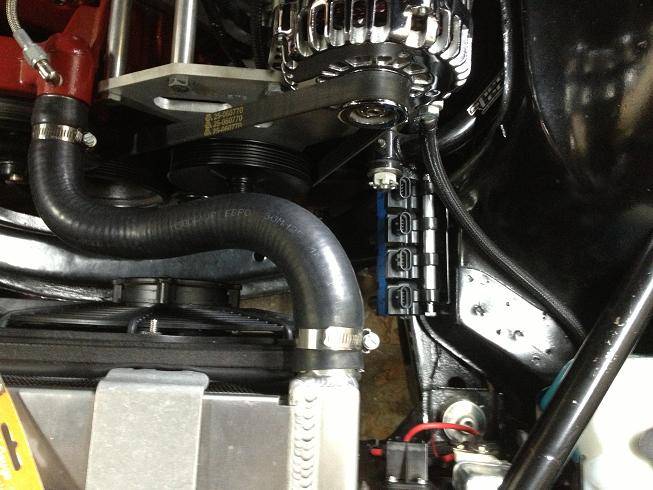
But I finally decided on this. I wanted them off the valve covers, but still accessible in case I ever had a problem with them:
This is the original LS3 coil pack wiring harness. I staggered the cuts so I wouldn't end up with all the crimps in the same spot:
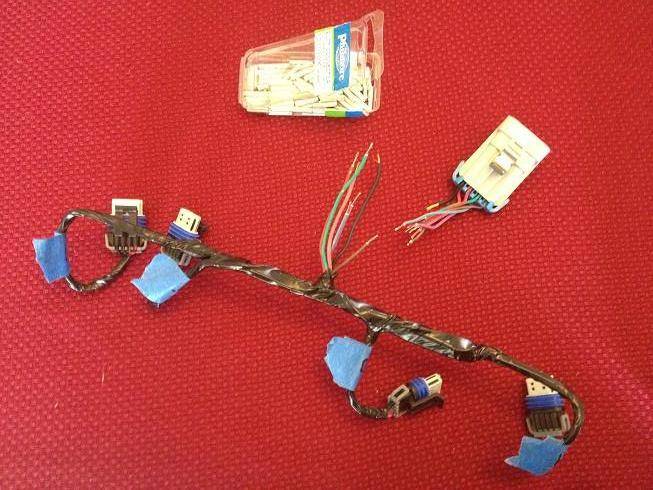
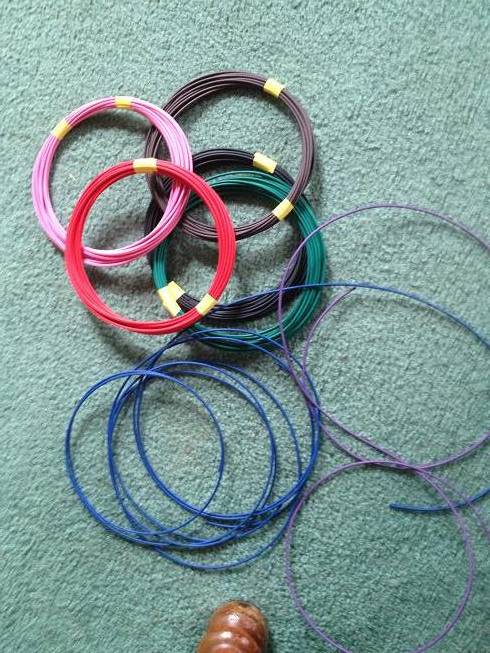
I ordered a bunch of automotive wiring on eBay and got to choose the colors. I tried to keep everything the same as the stock wiring, even if the shades are a little off:
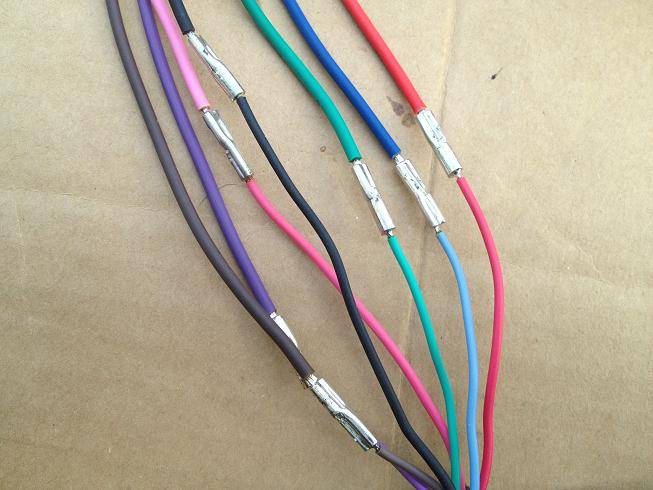
All connections were crimped, soldered and then heat shrinked:
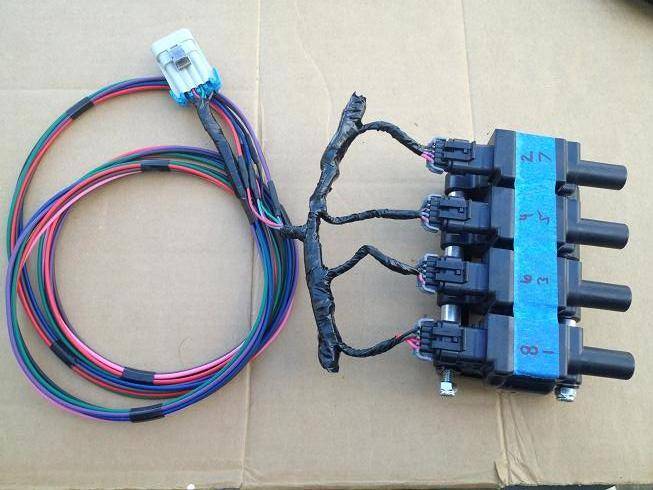
Here's the harness without the loom on it:
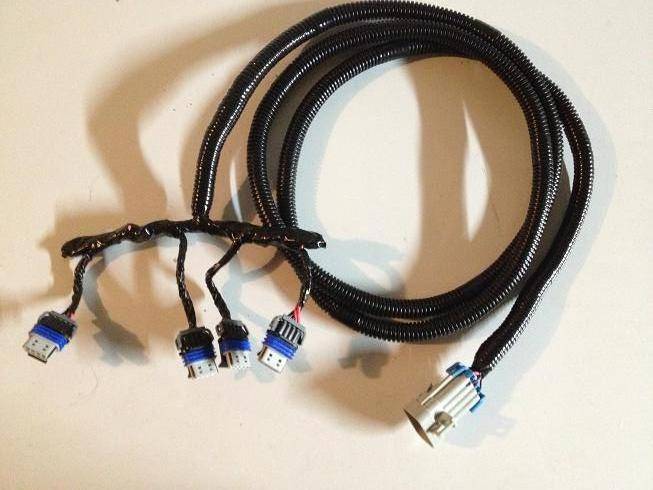
Here's the final extension harness. When I have some free time, I'm going to clean up the ends where it plugs into the packs. I didn't want to go cutting wires until I knew that everything worked first:
07-17-2014 #450
Registered User
- Join Date
- Jan 2011
- Location
- Boston, MA
- Posts
- 1,180
Here's a before pic, with the big LQ9 coil packs still on the valve covers:
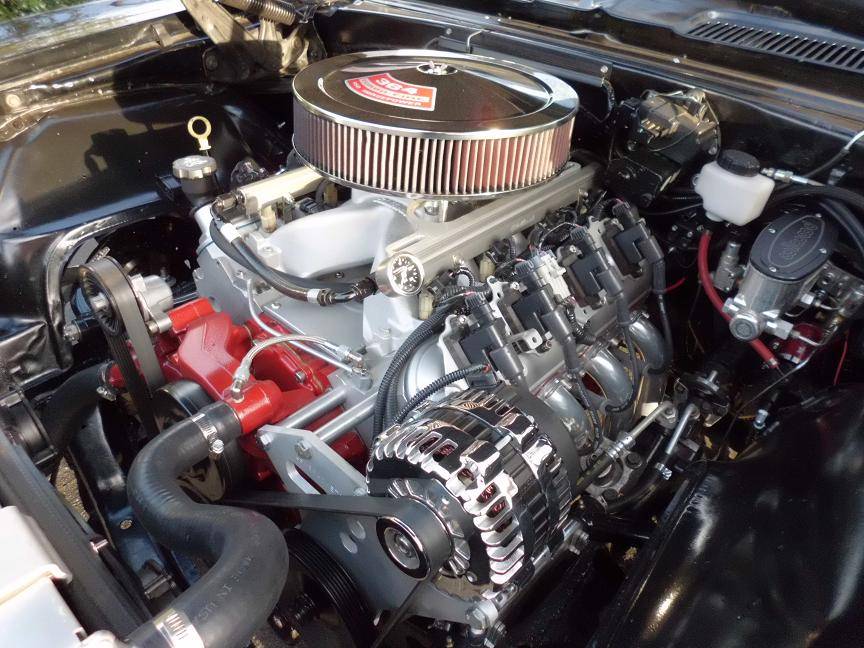
And a couple afters. I'll swap out the valve covers for some nicer one's once I find the right pair. But I'm happy with the result, it's definitely another step on the 'old school look' directions:
07-17-2014 #451 Registered User
- Join Date
- Aug 2008
- Location
- jacksonville,fl
- Posts
- 972
Lookin good.
Feel your pain on repulling a t-56 at home for a leak. Been there more than once & still have a minor drip back there but the monster still bites, so heck with it for now.
PS, on hold on the tail light & bumper till it cools off, see my stainless cross ram intake project in the ls engine section yet?
07-17-2014 #452
Registered User
- Join Date
- Jan 2011
- Location
- Boston, MA
- Posts
- 1,180
Thanks. I haven't been on here much lately (been working on the car when I'm not driving it) so I haven't seen the thread yet, I'll take a look. Originally Posted by jlcustomz

07-17-2014 #453 Registered User
- Join Date
- Aug 2004
- Location
- Jacksonville, FL
- Posts
- 1,666
Looks good with the coils re-located. Might be a project for next year, have to get mine on the road this year first LOL
Chris
1968 Chevy Camaro SS
LT4 (coming)/T56 DSE suspension
1969 Oldsmobile Cutlass S convertible (442 Clone)
LS3/4L70e, DSE suspension

07-19-2014 #454
Registered User
- Join Date
- Jan 2011
- Location
- Boston, MA
- Posts
- 1,180
Those were my thoughts as well. Get it running right first, then make it purdy. Originally Posted by 130fe
08-13-2014 #455
Registered User
- Join Date
- Jan 2011
- Location
- Boston, MA
- Posts
- 1,180
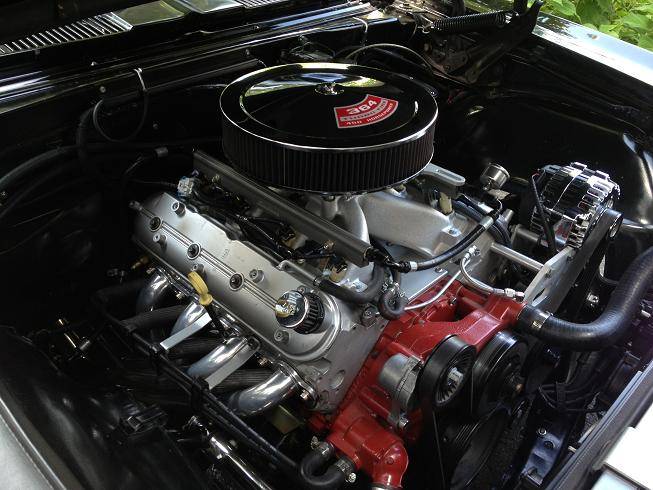
I added the heat socks for the plug wires:
08-13-2014 #456
Registered User
- Join Date
- Jan 2011
- Location
- Boston, MA
- Posts
- 1,180
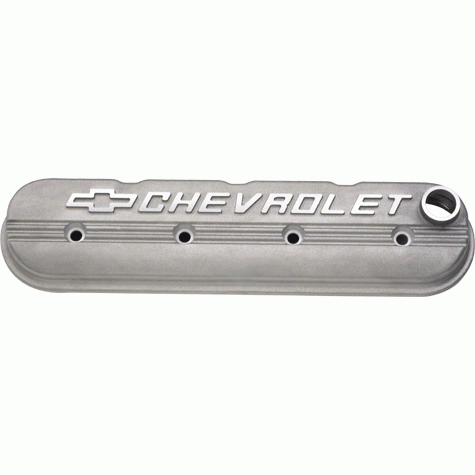
I have been looking at different valve covers to finish off the engine. I like the look of these, but maybe painting them the same red as my engine block, and then sanding the paint off the word Chevrolet.:
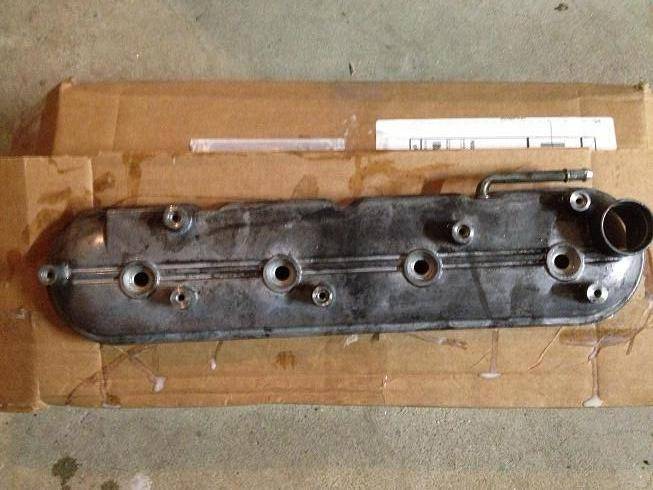
In the meantime, I picked up a set of valve covers identical to mine on eBay for $22 so I could experiment, and decide if I like the red valve covers. Here's the passenger side one:
Driver's side after degreasing. I screwed it to a piece of scrap wood and clamped my bench vice onto the wood:
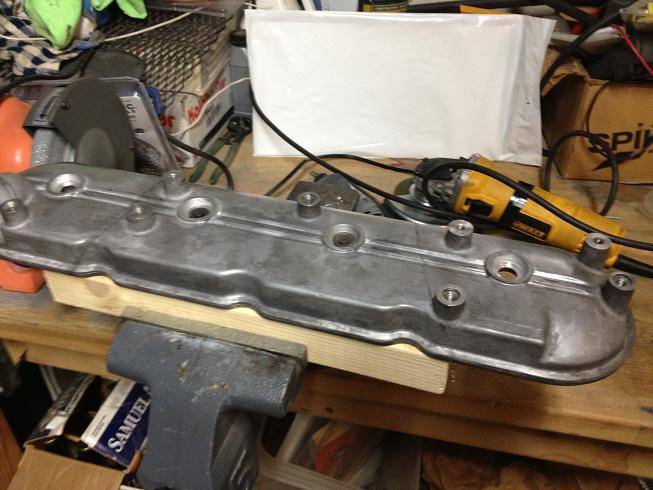
With the bosses roughly cut off using a thin cutoff wheel and angle grinder:
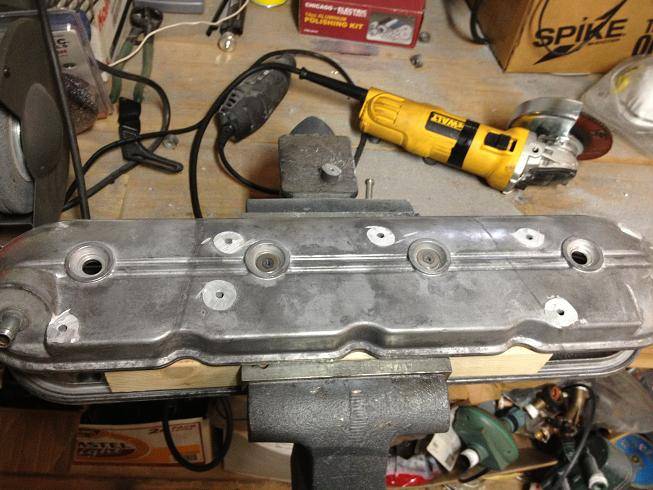
With the bosses smoothed using a flap sanding wheel:
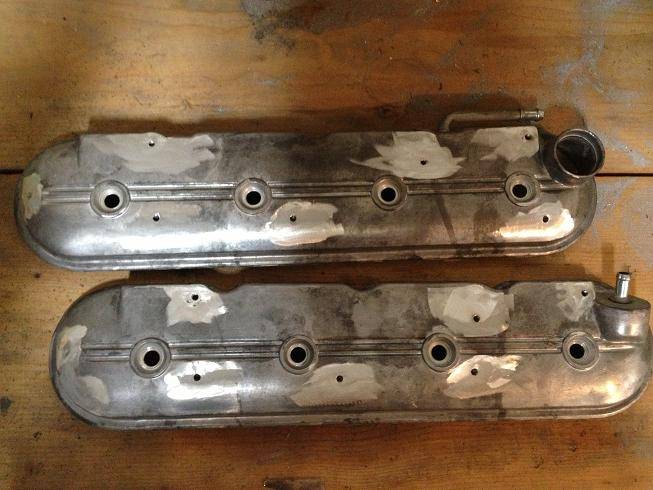
I filled the remaining holes with metal epoxy and sanded them smooth:
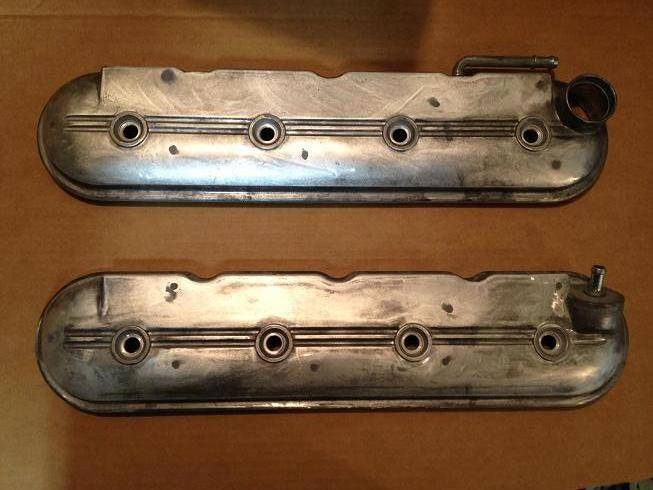
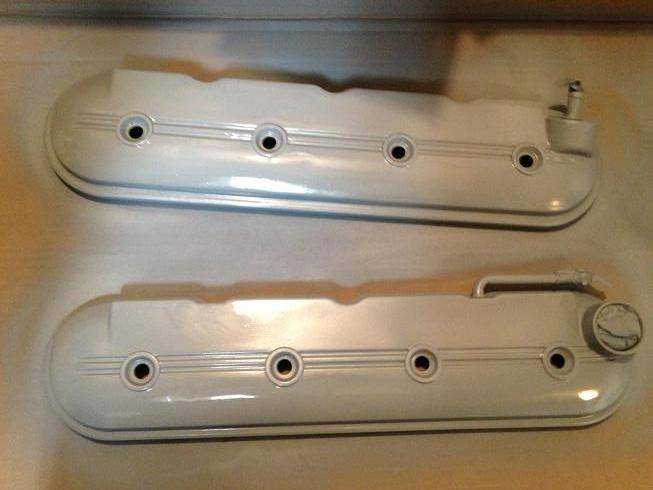
A coat of Duplicolor engine paint primer:
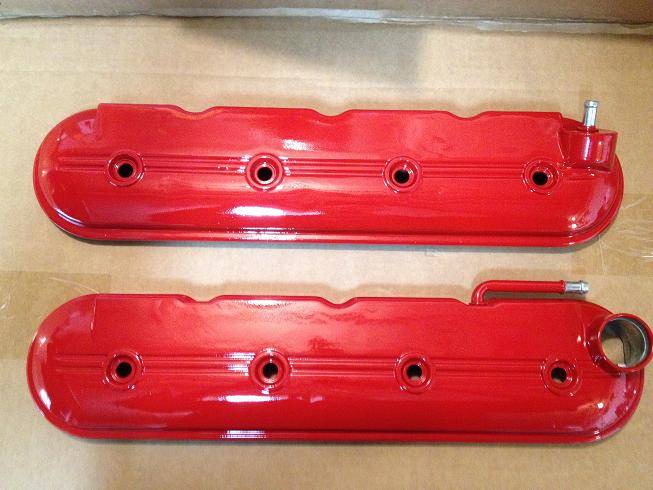
And a coat of Duplicor Red engine paint. The gloss really brought out the imperfections in the valve covers, as well as in my grinding job. If I were going to keep these, I think I'd strip them back down and do a better job of filling/sanding:
I decided to paint the two grooves silver (actually aluminum color), so I taped off the valve covers:
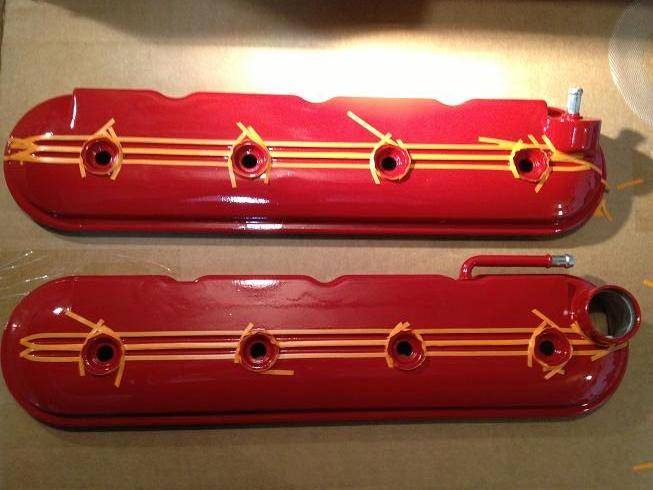
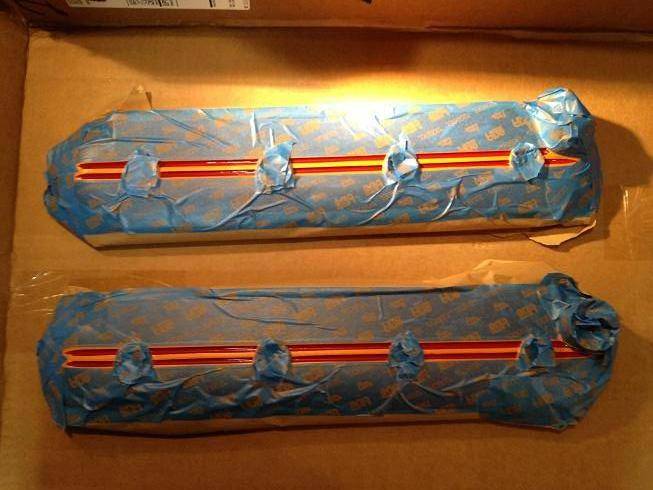
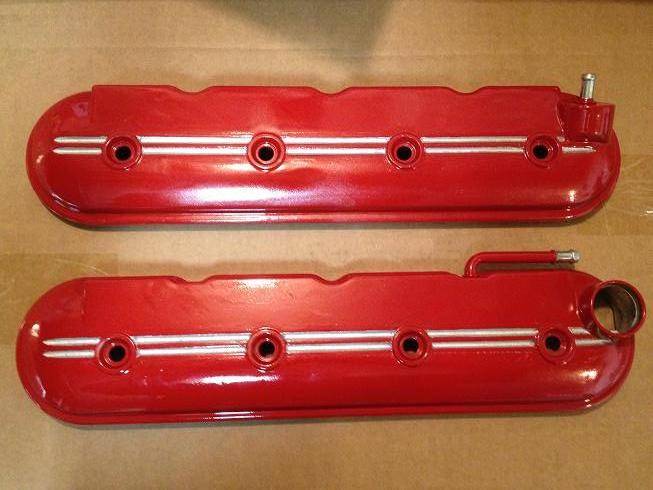
And hit the stripes with some aluminum colored engine paint. I had to go back and touch up some spots with a brush, but they came out alright. Not a masterpiece by any means. But I'll toss these on the engine for a couple of weeks and see how they look.
08-13-2014 #457
Registered User
- Join Date
- Jan 2011
- Location
- Boston, MA
- Posts
- 1,180
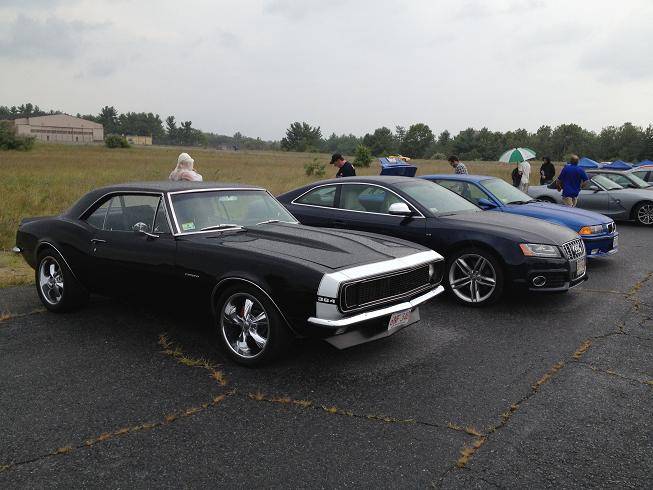
I can't believe I didn't post this here. I did my first Autocross a couple of weeks ago. It was actually an autocross school, so we had an instructor in the car all day with us. Everything went well, we got a ton of runs in. Probably 5-6 runs on each of the 3 parts in the morning and then 5 full runs in the afternoon.
My '67 lined up next to my wife's Audi S5, and my buddies BMW M3:
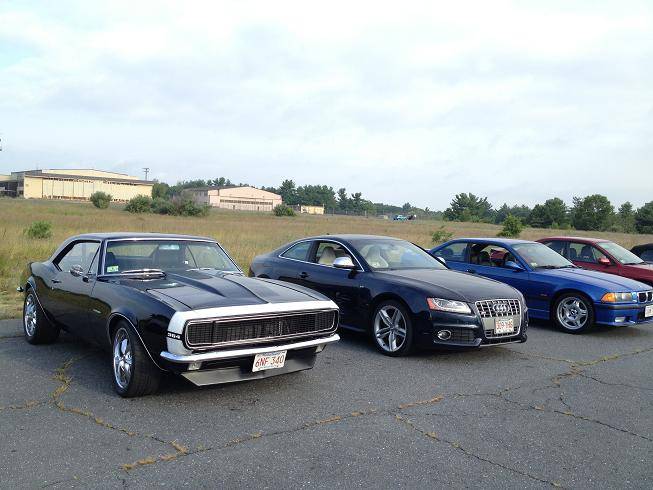
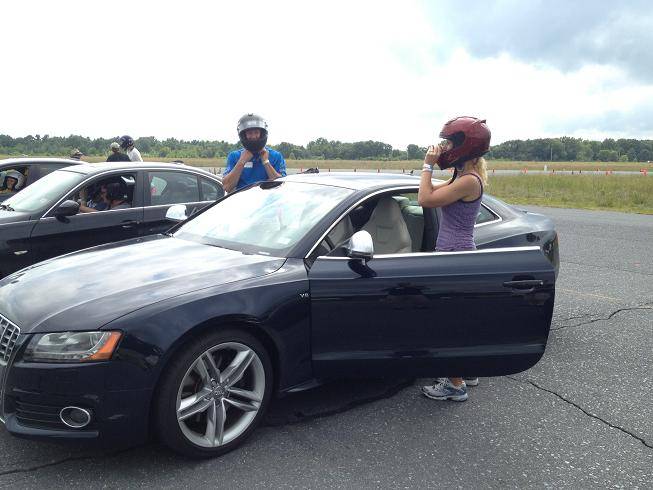
Right after we got our morning runs in it started to pour. And it poured for all of the other groups morning runs. Then when the afternoon session rolled around, the rain stopped and the sun tried to come back out!
My wife getting ready for one of her afternoon runs:
Here I am about to go out in the afternoon:
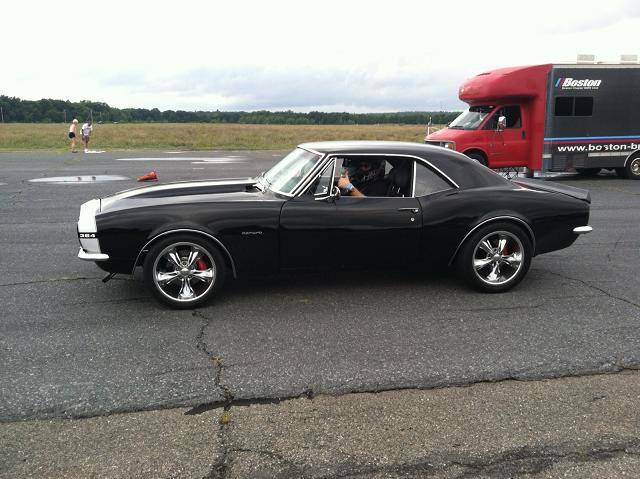
My instructor was driving a Corvette Z06. Great guy, and gave just enough instruction without being too much. We got along well, and he took me along for two of his laps in the afternoon.
08-13-2014 #458
Registered User
- Join Date
- Jan 2011
- Location
- Boston, MA
- Posts
- 1,180
I had one mechanical failure after the 2nd run. I lost a whole bank of cylinders. I had just relocated my coil packs off the valve covers and extended the new wiring harness, but had no issues with 500 miles of driving. For some reason I grabbed the old coil packs and old wiring harness on my way out the door to the event. Luckily I did, I was able to swap out the coilpacks and wiring harness and spark plug wires between runs, with about 30 seconds to spare!
I found my cars major weakness. I have massive pad knockback in the brakes. I had this problem with the old 12 bolt and c-clips. When I switched to the Strange S60 with tapered bearings, the problem went away completely on the street. This was the first time I have had a hint of knockback since the swap. After 2-3 hard turns, there was almost no brakes on the first push. I had to tap the brakes to reset the pistons, and then had full brakes. There was just too much to think about to left foot brake on the course yesterday, so I ended up engine braking for the majority of the time. This isn't an excuse, but I think I could have knocked a lot of time off without this issue, especially after seeing the instructors drive. I really babied it around the course after watching my videos...
The upside is that each run was quicker than the last. My 5 runs went:
1:45
1:40
1:35
1:30
1:28
I am slow. I'm fully aware of that! Here's a couple vids. Reading the cones and remembering the course got easier, but still a challenge at the end of the day. I think this will get a lot easier with practice.
Run #4
Run #5
08-13-2014 #459
Registered User
- Join Date
- Aug 2008
- Location
- jacksonville,fl
- Posts
- 972
Hey Brent, on those valve covers you could let the paint sun or oven bake a little & blocksand instead of stripping & starting over. Should be able to get them pretty straight that way.
Used the dupli-color black ceramic paint on my ground effects as temporary paint. It's pretty tough once fully cured. It will also color sand & buff pretty good for a more professional look.
08-14-2014 #460
Registered User
- Join Date
- Jan 2011
- Location
- Boston, MA
- Posts
- 1,180
Thanks. If I decide to keep them I'll probably do that. Right now, they are just to decide if I like the idea of red valve covers. If so, I may go with the GMPP Chevrolet valve covers I posted above, painted red. Originally Posted by jlcustomz


 Reply With Quote





