


Results 401 to 420 of 573
Hybrid View


-
02-21-2014 #1
 Registered User
- Join Date
- Nov 2009
- Location
- Orlando, FL
- Posts
- 250

Good job with the brakes. Nice for Strange to help you out on that.
How are you going to run the coil pack wires?
-
02-21-2014 #2 Registered User
- Join Date
- Jan 2011
- Location
- Boston, MA
- Posts
- 1,180
 Yeah, I guess it was nice of them...I mean, it was their mistake in the first place, so I'd be kind of pissed if they didn't make good on it. Granted, they just took the register size off the Wilwood site, but it only took me 30 seconds to measure the hub of the rotor, I would have been happy to measure for them. Regardless, it only cost me a weekend of waiting, and there's plenty of time before spring actually gets here.
 Originally Posted by sebtarta

I haven't decided where the new coils are going to go. Once I decide on a location, I'll try to keep the wires on the stealthy side.
02-27-2014 #3 Registered User
- Join Date
- Apr 2011
- Location
- Bucks Co. Pa
- Posts
- 7
Great thread... Thanks for spending the time.. a lot of useful info for any ls swap...
03-03-2014 #4 Rat Pack Member

- Join Date
- Nov 2004
- Location
- LYNCHBURG,OHIO
- Posts
- 512
Great Build! A lot of good information in this thread! Keep it up!
Greg Tholen
GT Motorsports
Dealer for Wilwood,Baer,Viking,Moser,BMR,Earl's
(937)763-7272


03-30-2014 #5
Registered User
- Join Date
- Jan 2011
- Location
- Boston, MA
- Posts
- 1,180
It's been a few weeks since I've done any updates (or made any real progress), I'm still waiting on my driveshaft to arrive from Denny's, hopefully it gets here next week so I can finish this project up.
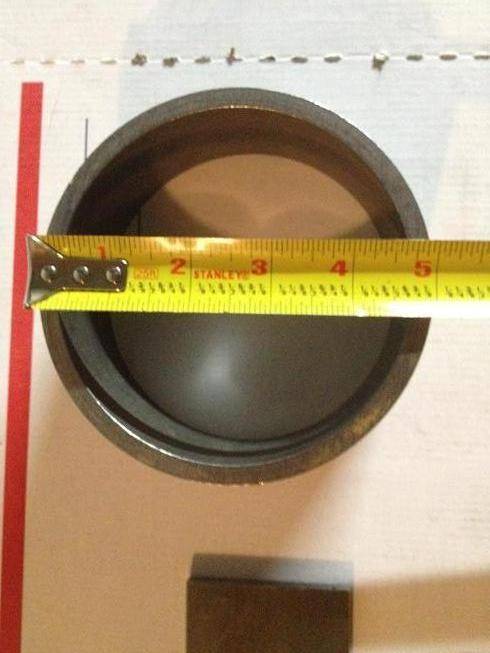
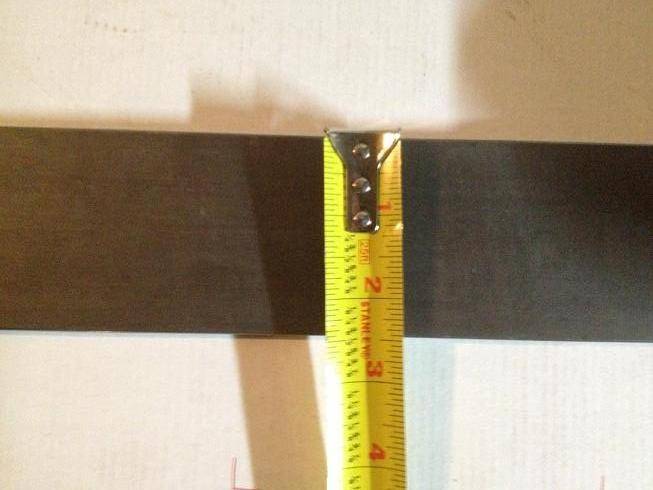
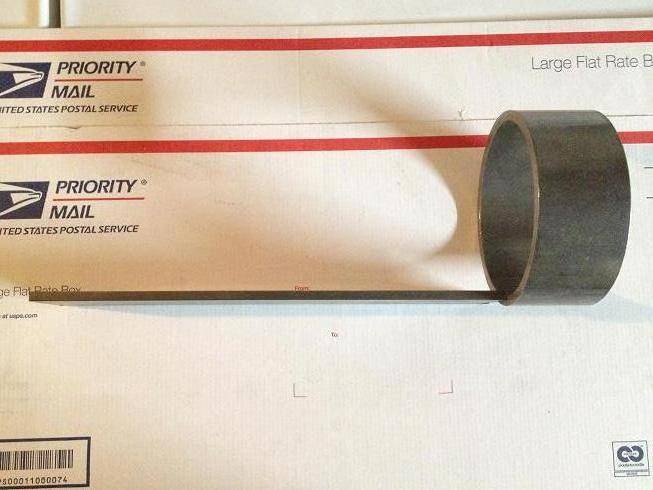
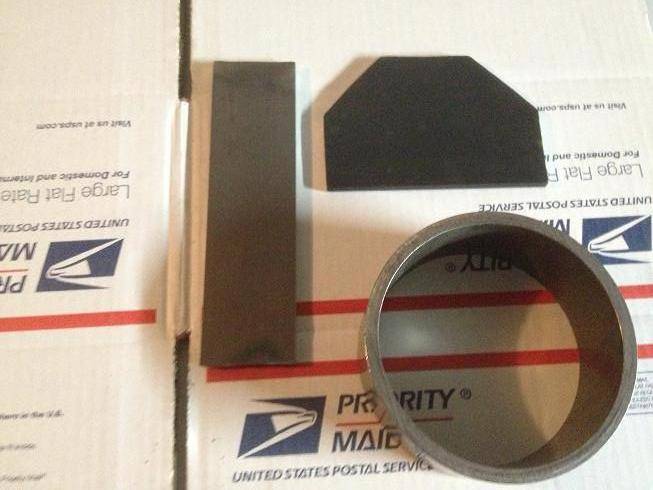
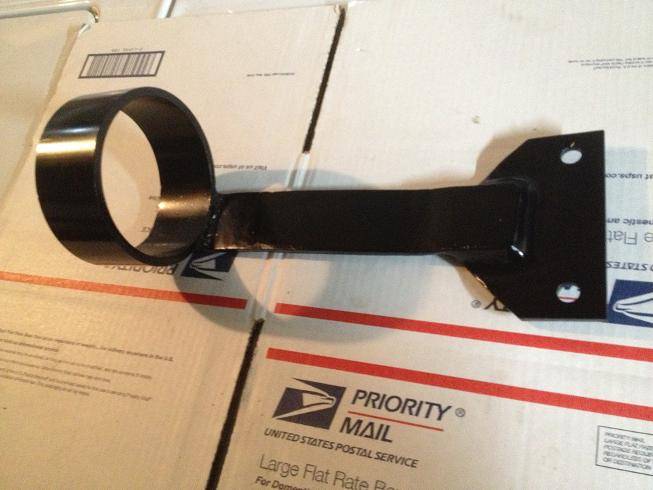
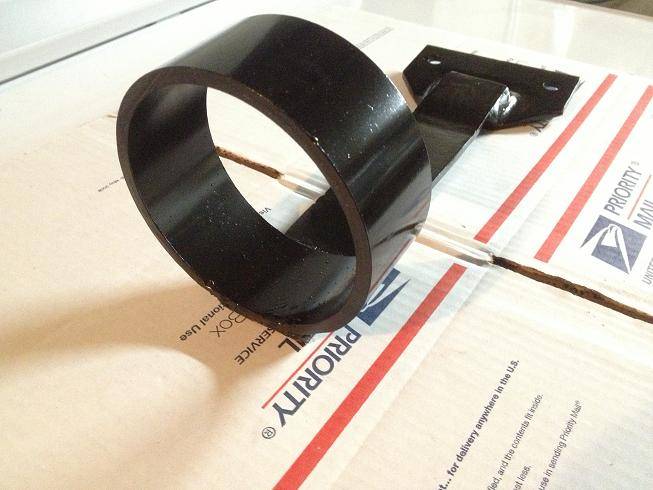
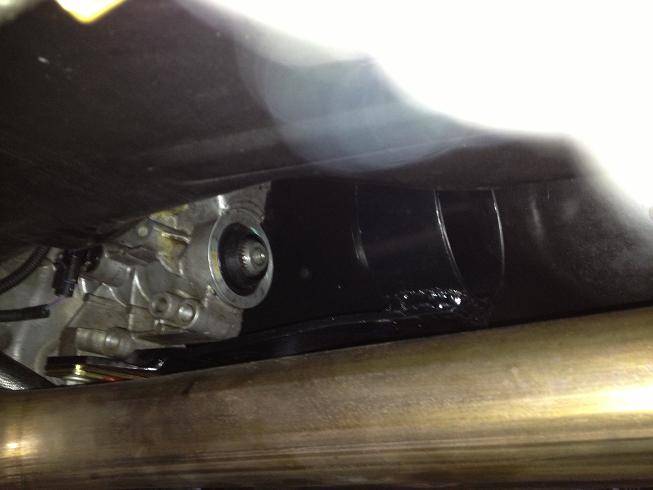
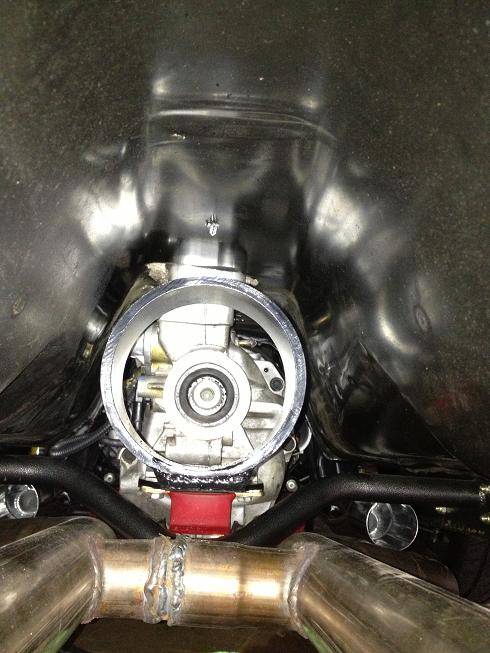
In the meantime I made a driveshaft safety loop out of 1/4"x2-1/2" steel plate. I got the solid ring from Jegs, and the rest is bar stock. I mounted this between the T56 mount and the trans itself. I thought I'd get lucky and make a straight run back, but the loop needed to be about 1" higher than the front mount.
Jegs loop:
Bar stock:
Basic shapes:
This is what I came up with:
Here it is installed:
Notice the hack job on the exhaust H-Pipe. That's not my work, and yes I paid to have that done. When I get back from Jamaica:hurray:, it's going to a real exhaust shop and I'm having them install a Magnaflow X-Pipe, with new pipe running from the new headers to the existing Magnaflow mufflers.
03-30-2014 #6
Registered User
- Join Date
- Jan 2011
- Location
- Boston, MA
- Posts
- 1,180
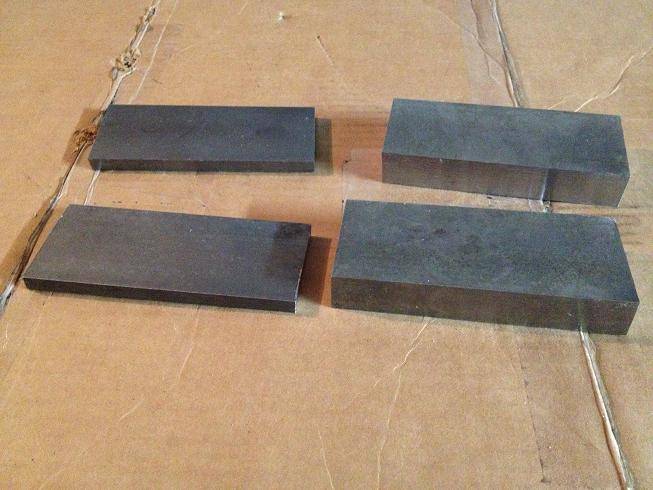
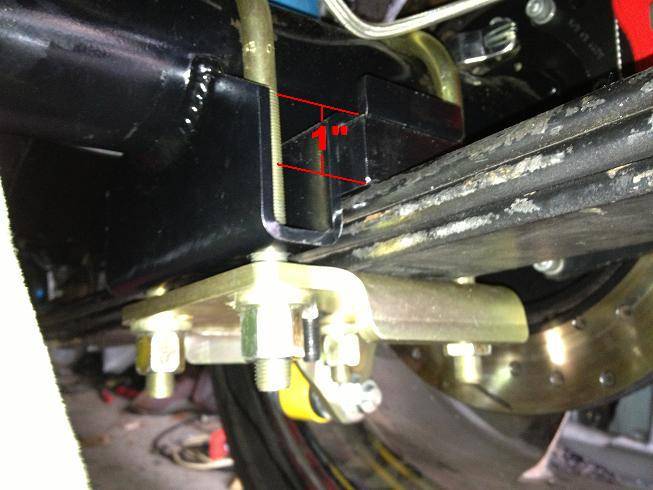
I also made some lowering blocks/spacers for the new rear end. With the multileaf spring perches, there was about 5/8" gap (can't remember exactly now) between the Hotchkis springs and the DSE shock plates. I had temporarily put the rearend back together with the rubber pads, but wanted everything as solid as possible. I have also always had a slight lean towards the driver's side (even without me in it), so I decided to correct that problem as well.
I bought some 2 1/2" wide steel plate in 6" sections. I used a 1" thick piece on the passenger side, and then a 3/8" & a 5/8" piece on the drivers side.
Here's the 3/8" and 1" pieces:
I drilled a 3/8" hole for the centering pin (I bought some 3/8"x3" grade 8 socket head cap screws for the longer centering pin)
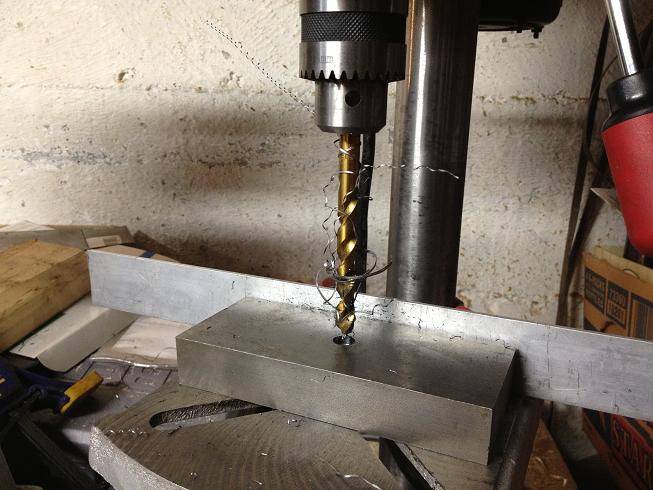
Then I worked my way up to a 9/16" bit to counter bore for the socket head. The socket head cap is 3/8" tall, but the hole in the spring perches is only 3/16" deep, so they bolt heads need to be recessed 3/16":
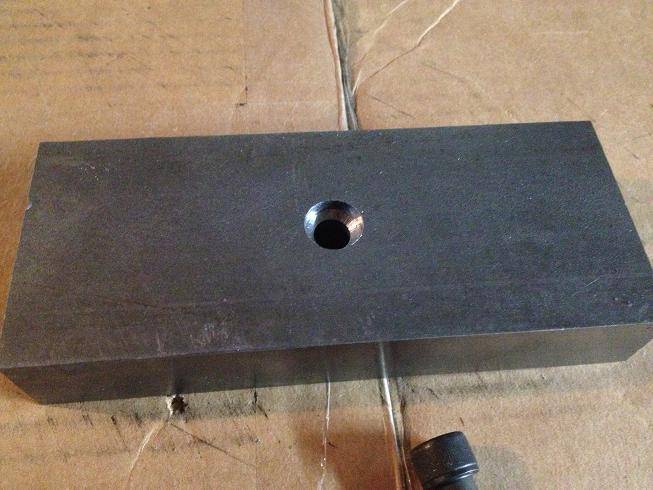
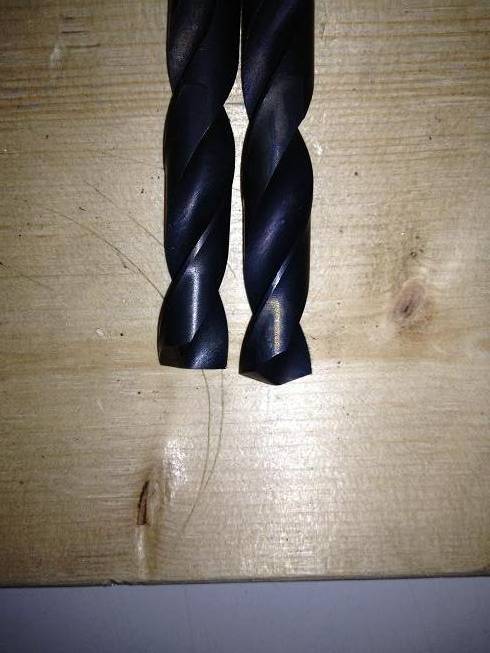
But this left an angled bottom to the counter bore. So I bought a sacrificial 9/16" bit, ground the end flat, and ground some reliefs on the back side of the cutting edge, so I could drill the bottom truly flat:
Here's the 1" block on the passenger side, notice how the cap only sticks up 3/16"::
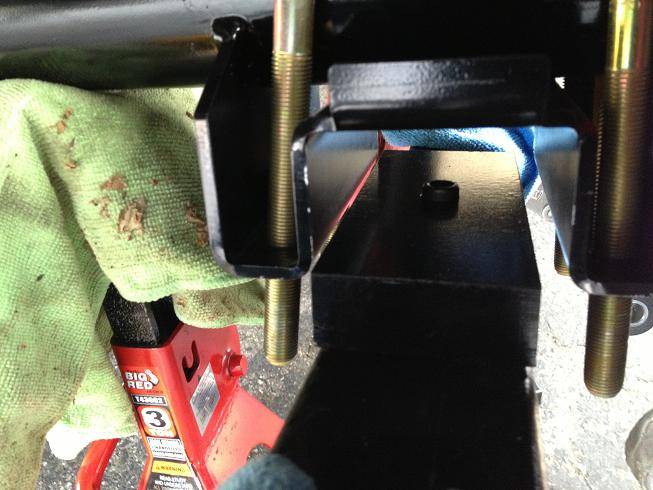
Here's what the passenger side looks like bolted down:
And here's the driver's side:
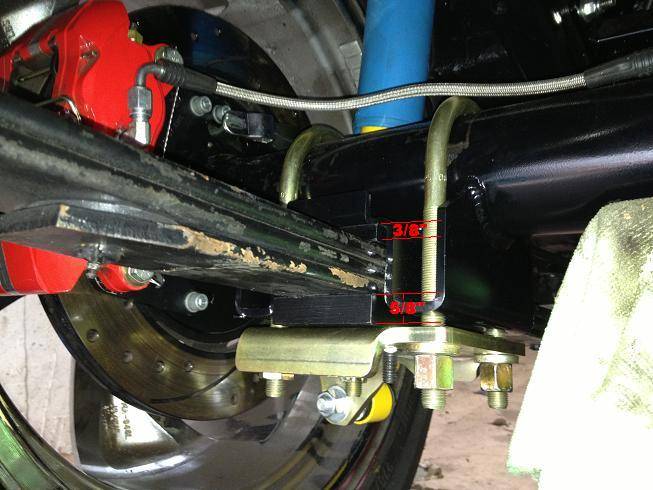
It looked pretty level, but I won't really know until I can drive around the block and let the suspension fully settle. I can also swap the 5/8" and 3/8" piece around if the drivers side needs to come down any, or I have a leftover 1" block if I want to set it up like the passenger side.
03-30-2014 #7
Registered User
- Join Date
- Jan 2011
- Location
- Boston, MA
- Posts
- 1,180
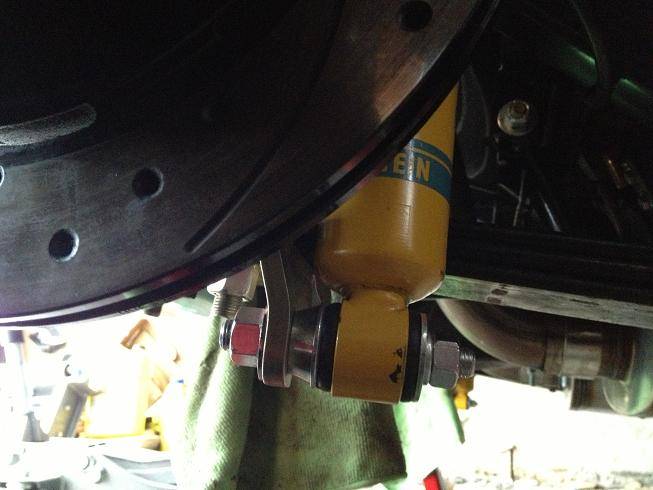
I also figured out why I needed a couple washers between my shocks and the DSE multileaf shock plates. I didn't realize that the monoleaf setup just used a bolt and washers, where the multileaf uses a stud.
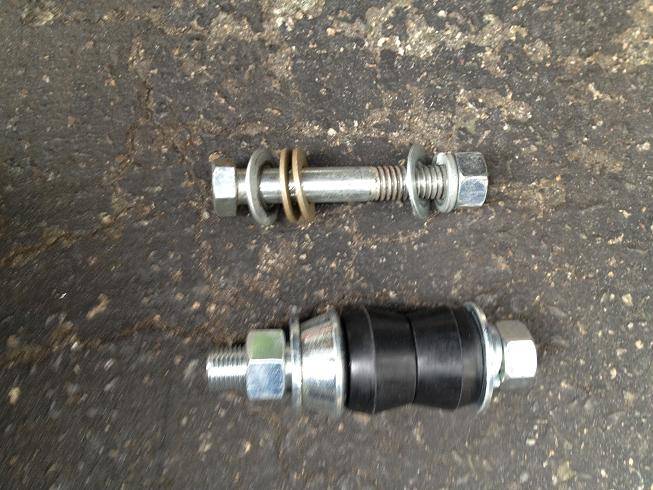
Multileaf stud:
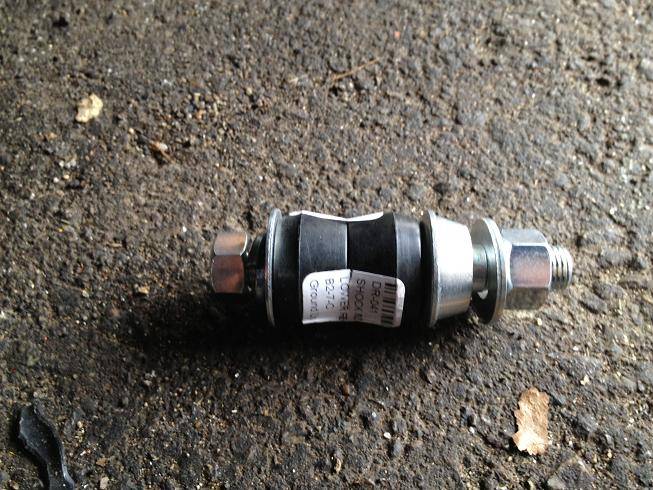
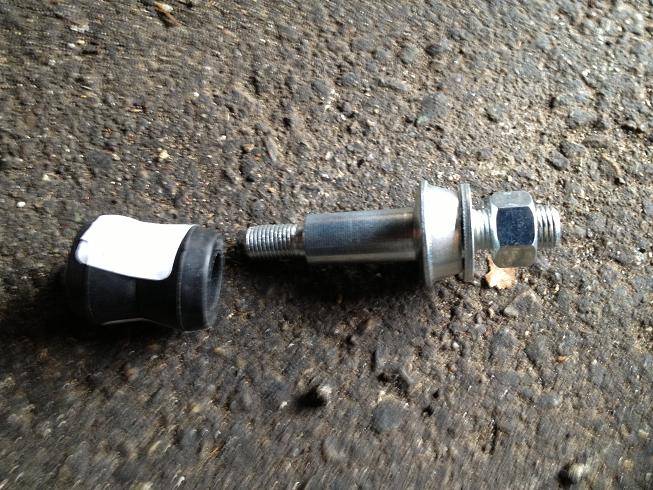
I made up a press to remove the bushing in the Bilstein's. I just used a 5/16" bolt, some washers, sockets and a nut to press it out. This was super easy.
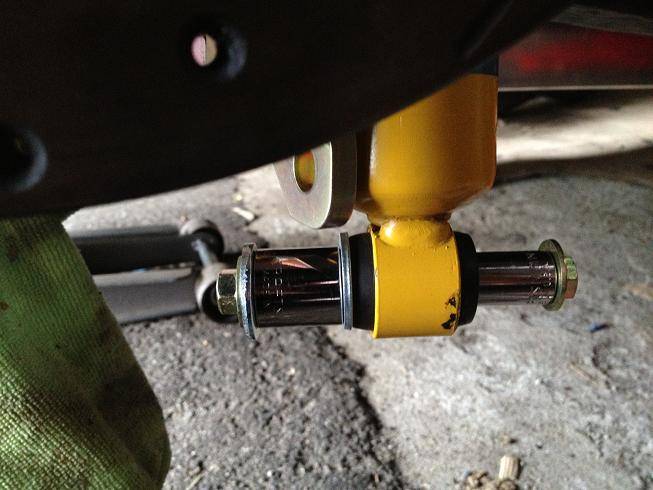
New stud going in:
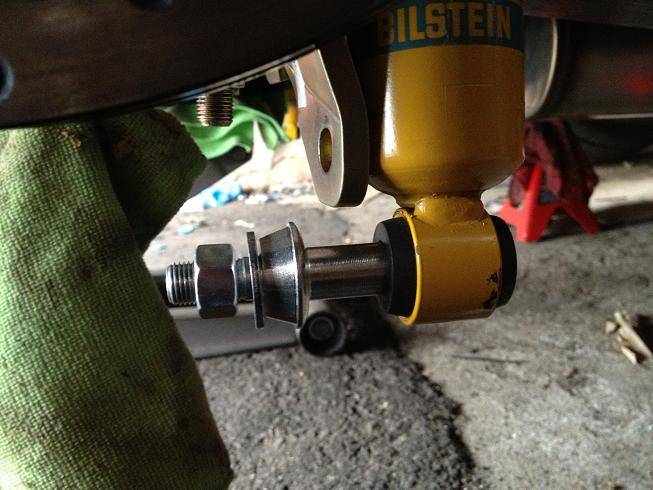
And here it is bolted up:
04-03-2014 #8
Registered User
- Join Date
- Jan 2011
- Location
- Boston, MA
- Posts
- 1,180
I got the new Denny's Driveshaft installed.
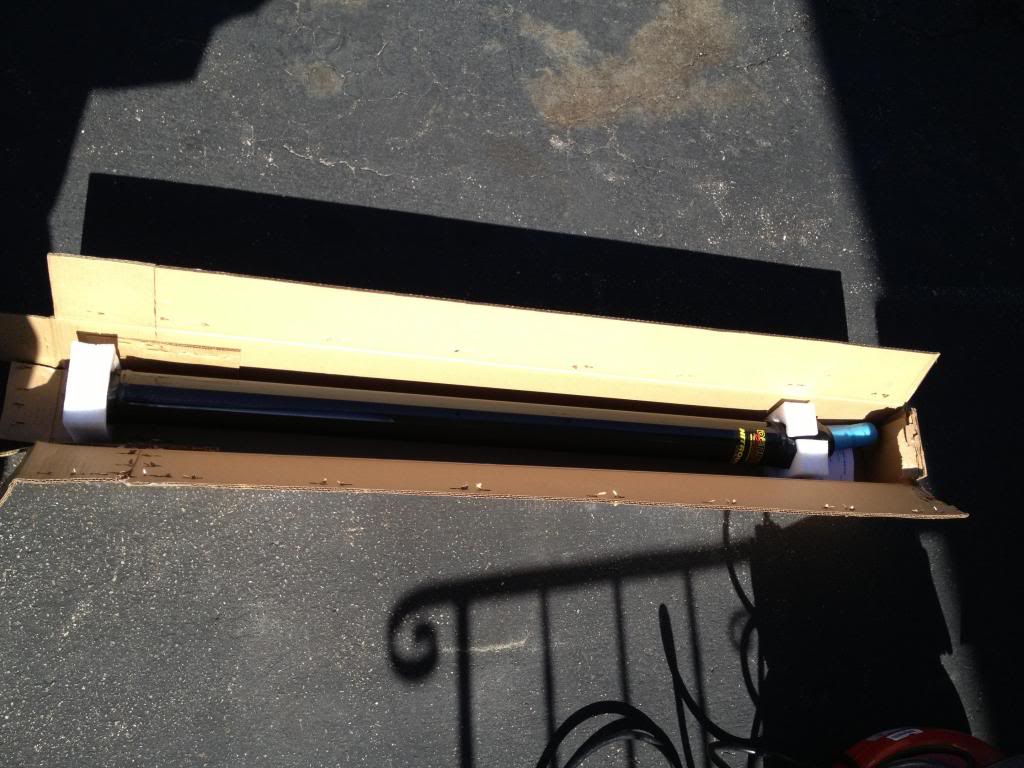
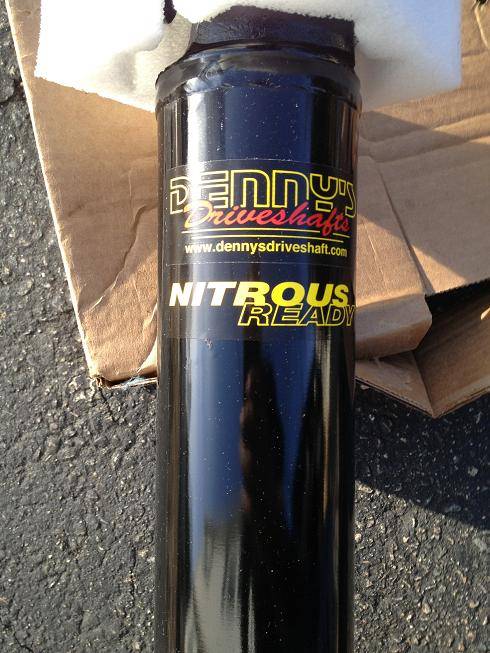
I cut my exhaust pipes back an inch or so to account for the new headers and new engine position and fired her back up for the first time this year. Ran like a charm. I took it for a couple of gentle laps around the neighborhood and tightened down the suspension.
I'm going to leave it until I get back from the trip and go through all the bolts I loosened/removed over the winter to make sure everything is torqued to spec, and then I should be good to go. The exhaust is actually good enough that I could drive it as is, but since I have the new Magnaflow X-Pipe already, I'll get it to the exhaust shop as soon as they have some free time.
It was good to get her out for a quick spin, cruising season is almost here!!!
04-04-2014 #9 Registered User
- Join Date
- Aug 2008
- Location
- jacksonville,fl
- Posts
- 972
Lookin good man, I'm sure you'll be itching to take a real drive in it once you finish checking it over::::: after vacation.
Considering going with Denny's myself for a shaft. Thinking about an aluminum one though. My old salvage yard shaft has a little annoying vibration at higher highway speeds with my 3.73's & double overdrive.
04-04-2014 #10
Registered User
- Join Date
- Jan 2011
- Location
- Boston, MA
- Posts
- 1,180
I was going to go aluminum and Denny talked me out of it. He said the steel was stronger, cheaper, already had the 1350 U-joints, and could be shortened if I ever needed to change it. Originally Posted by jlcustomz
My buddy just ordered an aluminum one for his '69 Camaro with a similar LS swap. It should be about 10 lbs lighter than mine. I asked Denny about running an aluminum one to reduce the risk of vibrations and he said mine won't vibrate. High speed balanced up to 10,000rpm.
04-20-2014 #11
Registered User
- Join Date
- Jan 2011
- Location
- Boston, MA
- Posts
- 1,180
And to prevent that in the future, here's my version of a clutch pedal stop that I made from stuff I picked up at Lowe's.
I used a 3/8" elevator bolt, a 3/8" grade 5 bolt, a 3/8" coupling nut (that I cut down to fit), a couple of stainless 3/8" fender washers and a 3/8"x1" grade 5 bolt:
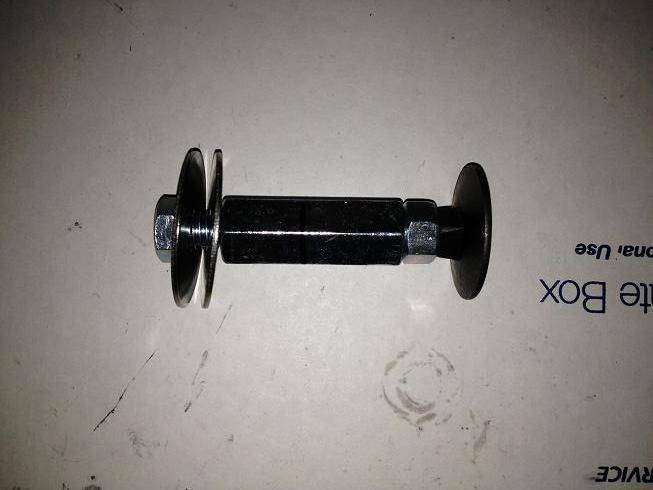
Here's how it will work:
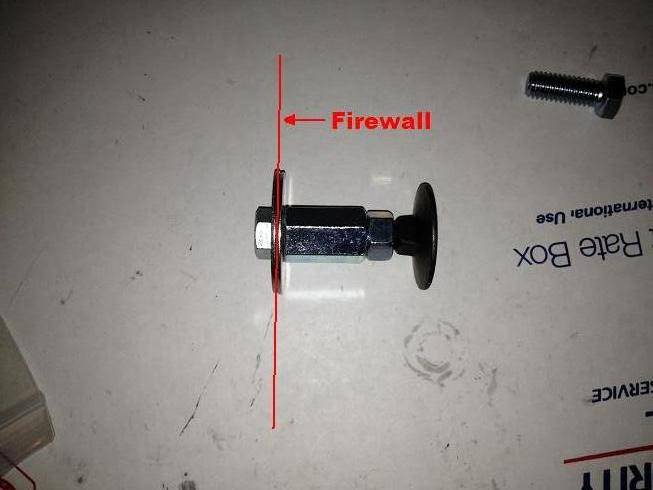
I mocked up the coupling nut and the elevator bolt, and pushed the clutch pedal down to leave an imprint of the nut on the sound deadener:
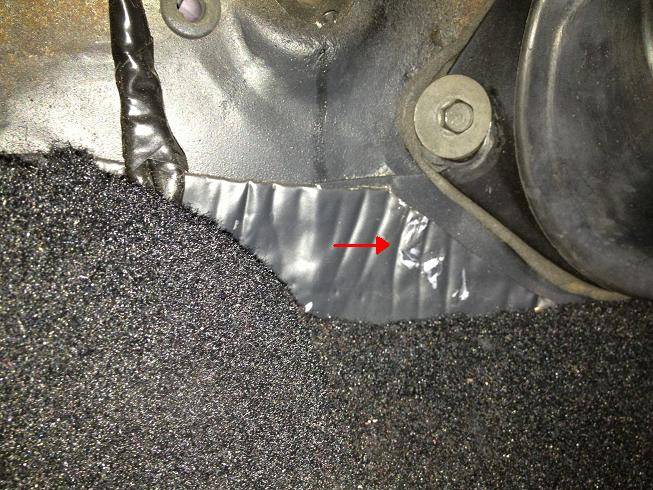
I drilled a 3/8" hole through the firewall, assembled everything and red locktited the bolt through the firewall into the coupling nut. I then used one of these:
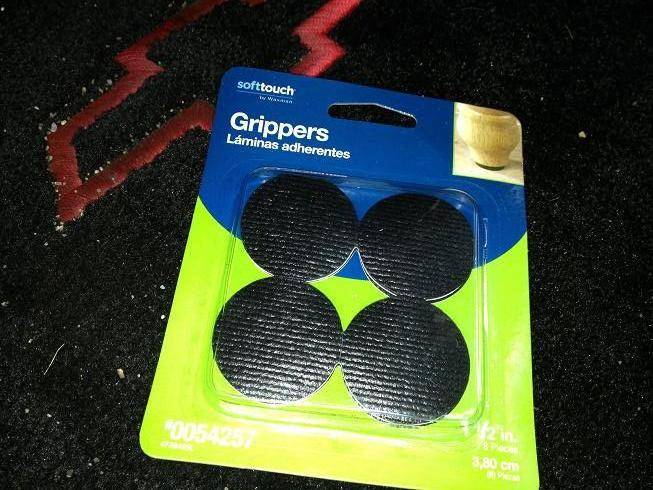
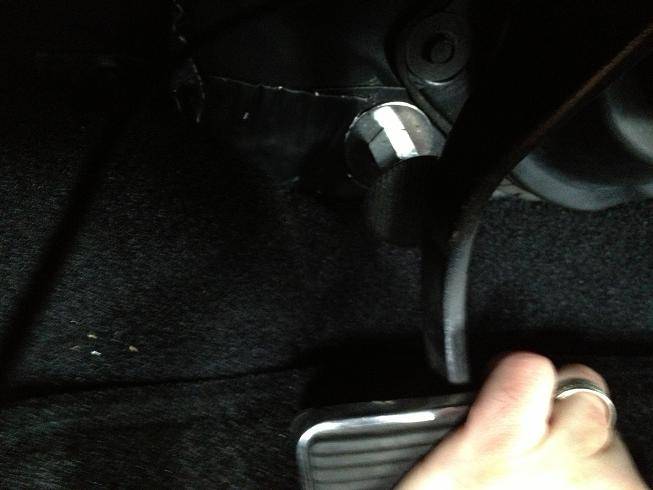
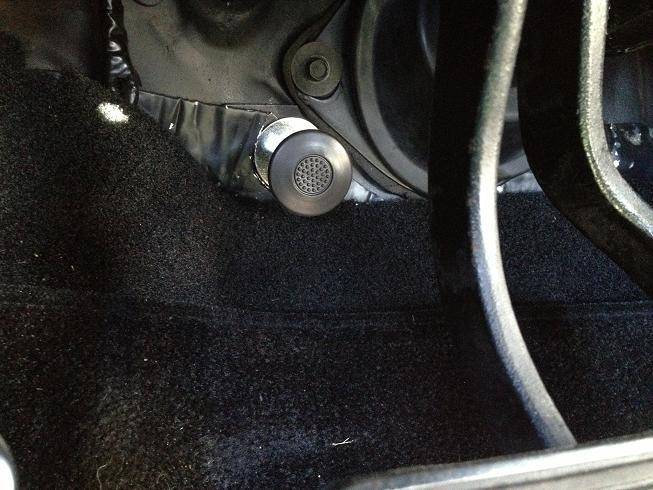
On top of the elevator bolt, so it wouldn't be metal on metal contact. I can adjust the elevator bolt out an inch if I want to shorten the throw of the clutch in the future. They also had some made of rubber and slightly thicker, which I'll probably pick up next time I'm at Lowe's, but this works great as is:
04-20-2014 #12
Registered User
- Join Date
- Jan 2011
- Location
- Boston, MA
- Posts
- 1,180
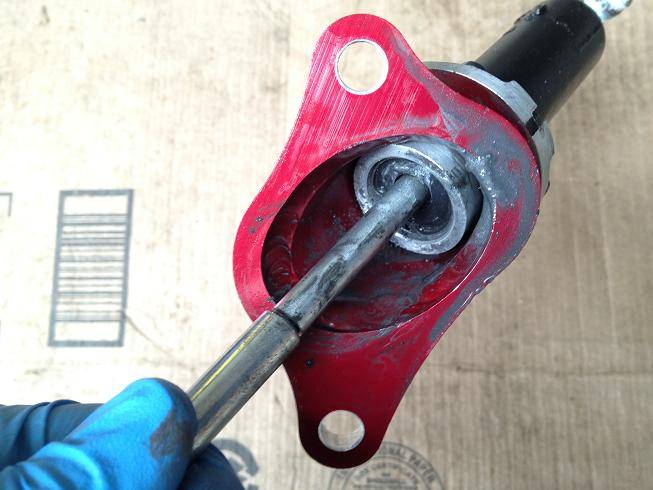
Alright, so this is bad right? Here's a shot of the McLeod hydraulic MC that I trashed because I didn't install a clutch pedal stop. I'm pretty sure the combination of clutch fluid and metal shavings is a bad sign...
I ordered a replacement MC direct from McLeod. The part number is 139310 if you go through Summit or Jegs. It's Z-260-12707 direct from McLeod:
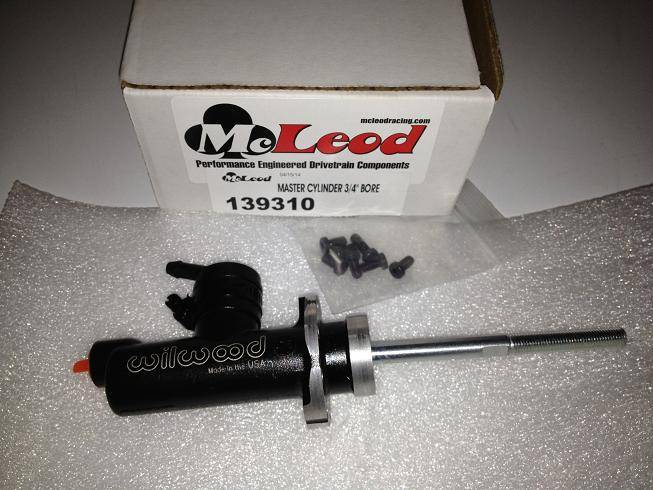
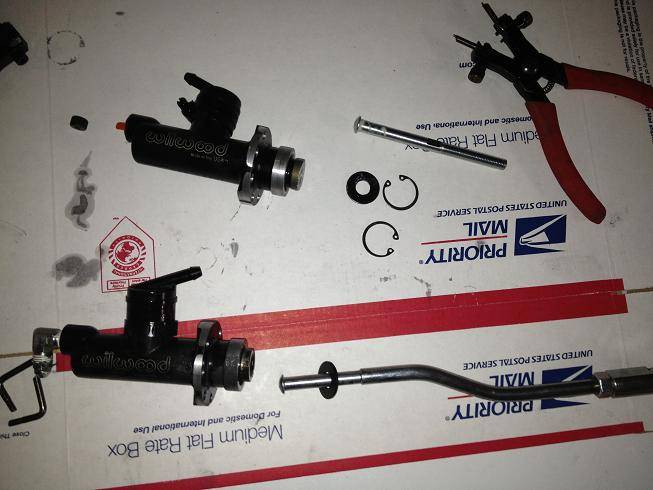
You don't get the anodized housing, just the MC itself. It is attached with 7 allen head bolts. Of course it comes with the wrong pushrod installed. The new one had a straight pushrod, and the 67-69 Camaro uses a curved one. Direct replacement from the factory. Why would it be simple, right? It's just held on with a snap ring, easy change. New MC on top, old one on bottom:
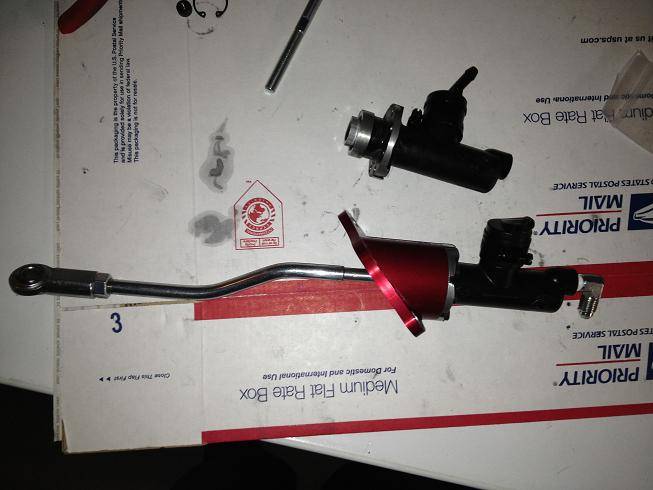
Here's the new one all re-assembled:
04-20-2014 #13 Registered User
- Join Date
- Feb 2007
- Location
- Tinley Park, IL
- Posts
- 1,220
Same exact thing I did for a clutch stop on mine. Except I used a thick rubber foot you would put on the legs for tables/chairs as a padded stopper over the elevator bolt.

Nick ~ 1969 Cutlass
04-22-2014 #14
Registered User
- Join Date
- Jan 2011
- Location
- Boston, MA
- Posts
- 1,180
Alright, I'm trying to tackle some small projects that even if I screw them up, won't keep me off the road. If the weather holds out, there's a Cars 'n Coffee up in NH that I'd like to hit this weekend, and the Kingpins Season Opener is in Metheun the following weekend.
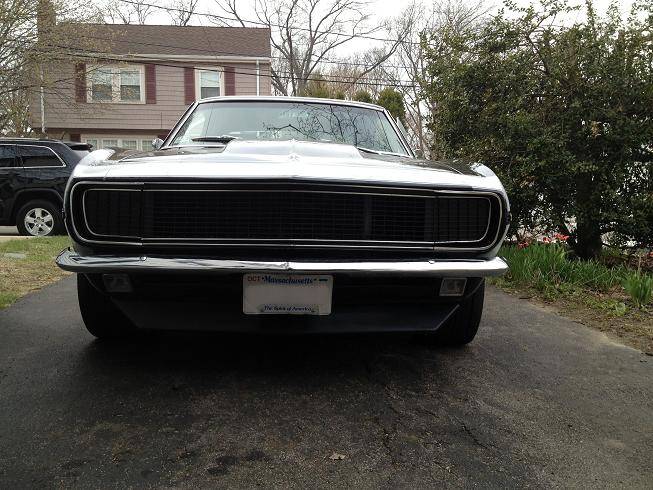
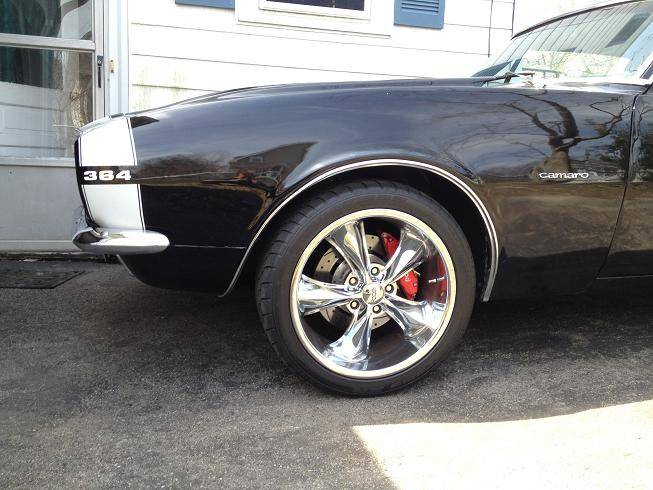
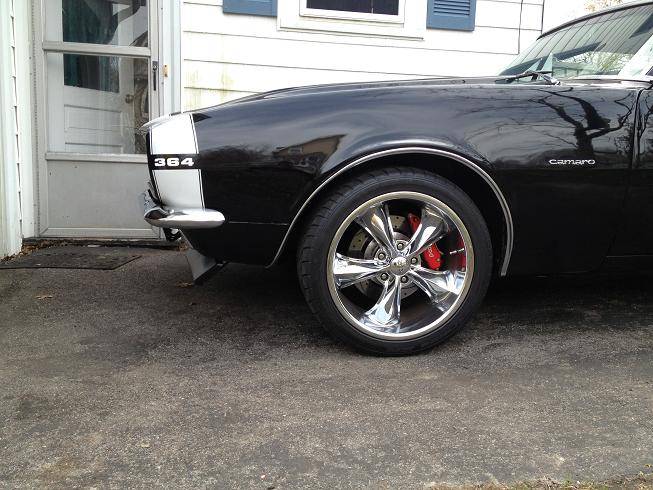
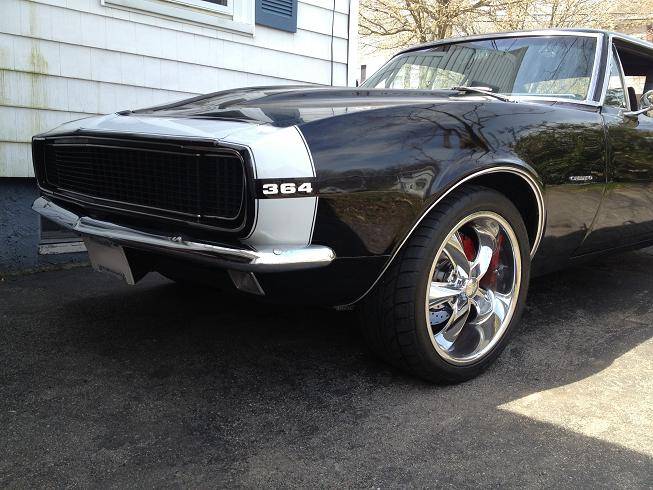
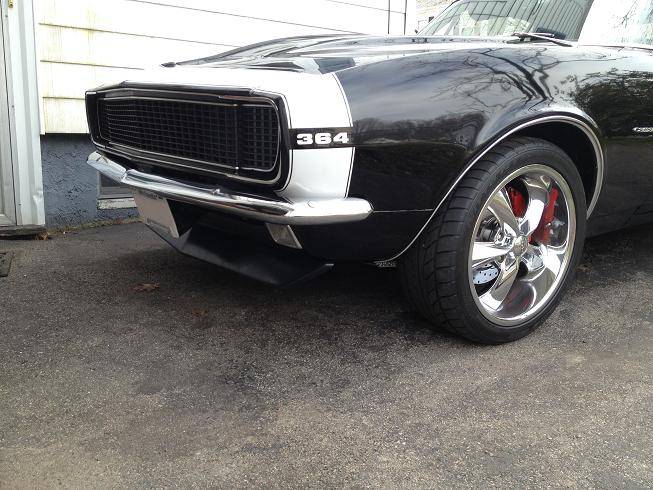
I finally got around to installing the front spoiler I got for Christmas. I just went with a standard spoiler instead of a pro-touring style one. I figure I'll curb it at some point and be much happier replacing a $40 part instead of a $300 one.
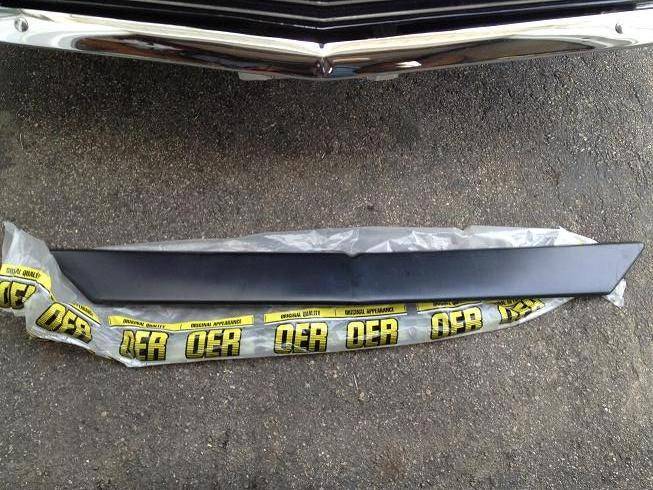
Here's the diagram I used:
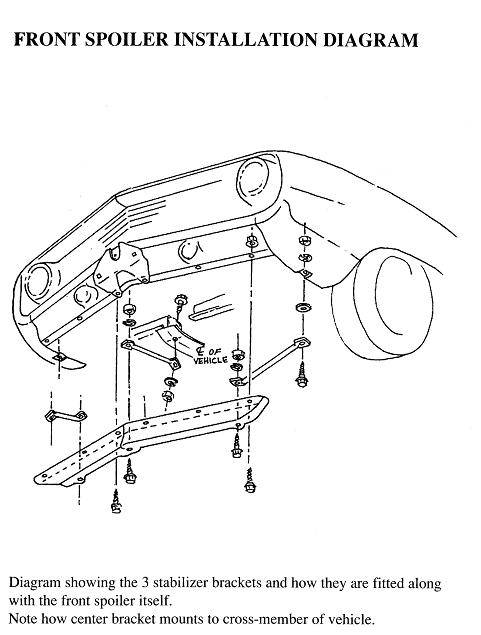
Of course nothing is as simple as I'd expect. Apparently my Camaro had a front spoiler at some point, so the holes were already there, but someone used oversized sheet metal screws, so the screws that came with the kit were useless. I drilled the holes in the valance out to 1/4" and used some 1/4" stainless button head bolts.
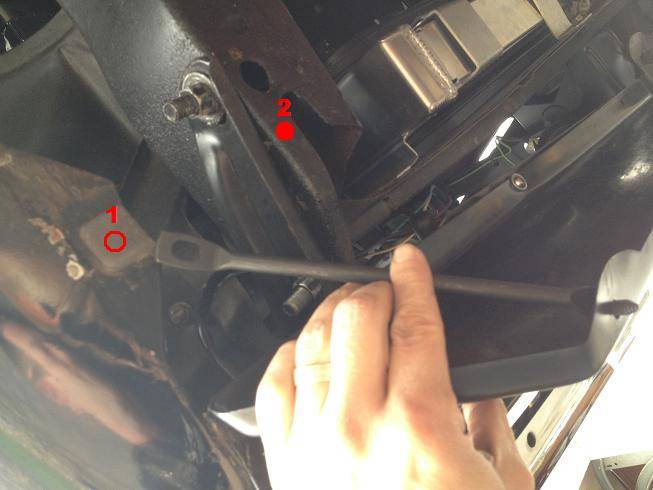
Also, the braces were too short to line up with where they should hit on the fenders (1), but I've read about people curbing the spoiler with the braces and damaging the fenders. I decided to just use the two outer braces and drilled a couple new holes in my subframe (2) and attach them there.
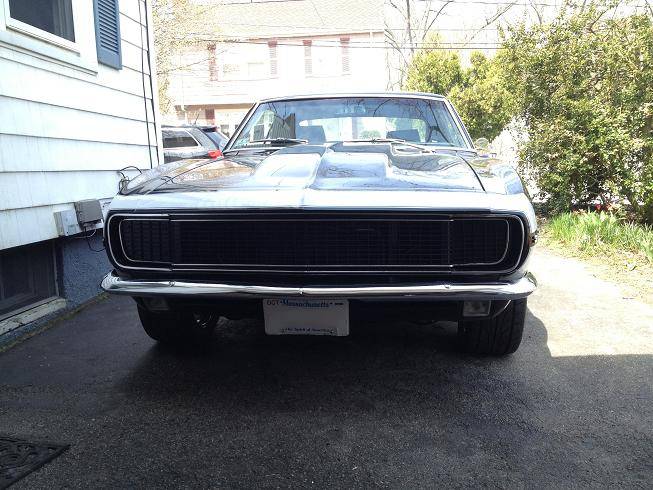
Anyways here are a few before and after photos, not the best lighting. I like the new look, it definitely needed it. I'll probably remove the front licence plate at some point.
04-22-2014 #15
Registered User
- Join Date
- Aug 2008
- Location
- jacksonville,fl
- Posts
- 972
Looks more complete with spoiler.
For years I've thought about making a lower spoiler mounted on a slotted & spring loaded assembly to take some of the initial shock of a hit off of it. Would at least be helpful for low speed parking lot bumping.
Just a thought, If you drive at all, spoiler damage will eventually happen.
04-22-2014 #16 Registered User
- Join Date
- Dec 2009
- Posts
- 1,607
It does look more complete. Originally Posted by jlcustomz
My last 68 I must've destroyed four of those suckers just in my driveway alone.
I do think GM found some downforce was created even with the plastic spoiler, so spring loading it might defeat the purpose (unless it's strictly a street car).Ron in SoCal
69 Camaro in progress
http://www.lateral-g.net/forums/showthread.php4?t=31246
Used to be known as flash911
04-22-2014 #17
Registered User
- Join Date
- Aug 2008
- Location
- jacksonville,fl
- Posts
- 972
By spring loaded, I meant the brackets being on slots, able to slide rearwards with enough force from being hit. Not changing angle. Would have to be fairly stiff springs. This would be most useful in driveway, parking lot bumper/ curb situations.
Just another thought from the mind of a weird person who doesn't sleep much.
04-23-2014 #18
Registered User
- Join Date
- Jan 2011
- Location
- Boston, MA
- Posts
- 1,180
If I could fabricate like ljcustomz, I probably would have done something similar to the Spoilers by Randy design. I'm just going to consider the spoiler an expendable part, like brake pads or tires. I'll probably pick up a spare to keep around for when I crack this one.
04-23-2014 #19
Registered User
- Join Date
- Jul 2005
- Location
- Grain Valley, MO
- Posts
- 92
Thanks for the detailed pics on the clutch pedal stop. I'm at the point where I need to get that installed on mine.
04-24-2014 #20
Registered User
- Join Date
- Jan 2011
- Location
- Boston, MA
- Posts
- 1,180
No problem. Originally Posted by Mizzouri
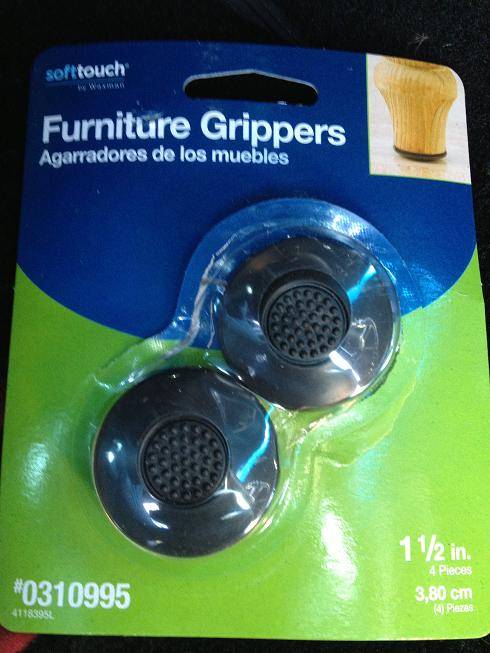
I changed out the pad on the new clutch stop for a rubber one (got it at Lowe's). The first one's I used were very thin and seemed like they'd wear out fairly quickly. It also had a very hard stop (felt like metal on metal).
This project took about 30 seconds to scrape the old adhesive off, and another 5 seconds to put the new rubber pad on.
Here are the pads I used:

 Reply With Quote





