Results 281 to 300 of 573
-
05-05-2013 #281

 Registered User
- Join Date
- Aug 2006
- Posts
- 381
 Thanks man for the info. Just keep up the posts coming
 Originally Posted by 67rally

72 Camaro RS:SOLD
68 Camaro:
LS6 Engine,Tremec TKO 600,5 Speed
Complete Speedtech Subframe Kit,Speedtech Torque Arm, 9" Rearend from Strange, Wilwood Brakes, Minitubbed, Hotchkis Subframe Connectors
-
05-06-2013 #282
Registered User
- Join Date
- Mar 2009
- Location
- Houston, TX
- Posts
- 1,197
I wonder what the check valve's purpose is for. Here's a thought. The way you have the check valve teed (as per TI's instruction), I'm not sure it will do any good to prevent fuel leaks, as the vent line by passes the valve.
I plumped my tank over the weekend, and decided to skip the check valve all together and ran my vent line straight to a dual vent set up made by Brian Finch.Tu Ho
Firebird V2-LS swap
05-07-2013 #283 Registered User
- Join Date
- Jan 2011
- Location
- Boston, MA
- Posts
- 1,180
Sure it will. The check valve is open when it's in the upright position, allowing vapors to escape. It closes when the car is sitting on it's roof. When the tank is upside down, fuel will leak down the vent line near the fuel pump as well as the vent line on the filler neck, but will not get past the check valve. At first I thought you might be onto something since it can flow down the other vent line, but it would just end up back in the tank, so this setup should work fine. Originally Posted by rickpaw
05-07-2013 #284
Registered User
- Join Date
- Jan 2011
- Location
- Boston, MA
- Posts
- 1,180
Well, can't really blame anyone other than myself here. Once again I'm waiting on some parts, but it's my own fault for not ordering in the right order. I have my new engine wiring harness coming from PSI conversions, a new 6 cylinder gas pedal so I can convert to cable rather than mechanical linkage, a new alternator relocation bracket, a new oil fill tube, and some other loose end. Well, I did order a bunch of gaskets, seals and sensors that USPS lost for 4 days, and once they arrived, the bag of 8 intake gaskets was opened and taped back up with one gasket missing...but I probably won't install the intake until I drop the engine into the bay anyways.
So in the meantime, lots of pics without much excitement.
New GM GTO slave cylinder (bottom) and old (top):
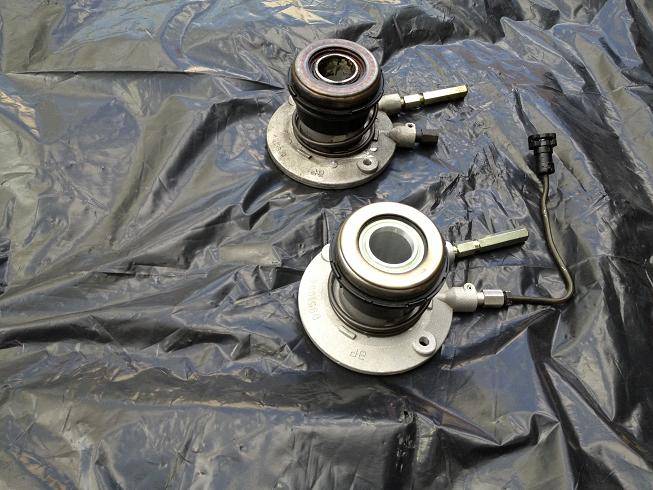
I'm adding a speed bleeder from Tick Performance so I can bleed the clutch from the engine bay. Old bleeder comes off:
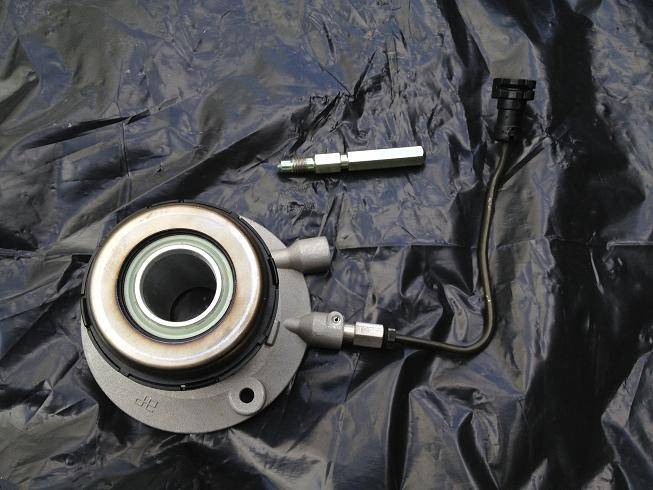
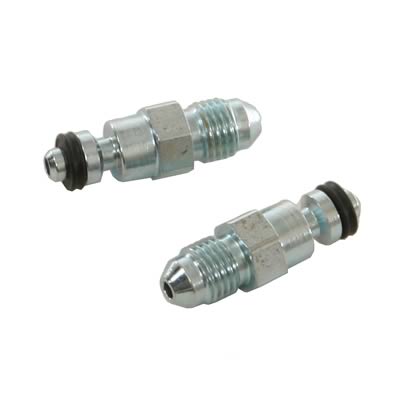
Here's the new Tick bleeder:
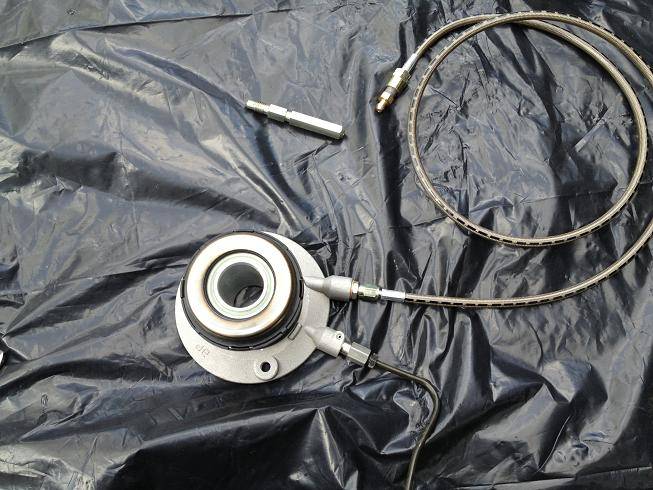
The copper washer is shipped on the wrong side of the fitting so it does't get lost, just make sure to move the copper washer so it sits between the fitting and the slave cylider:
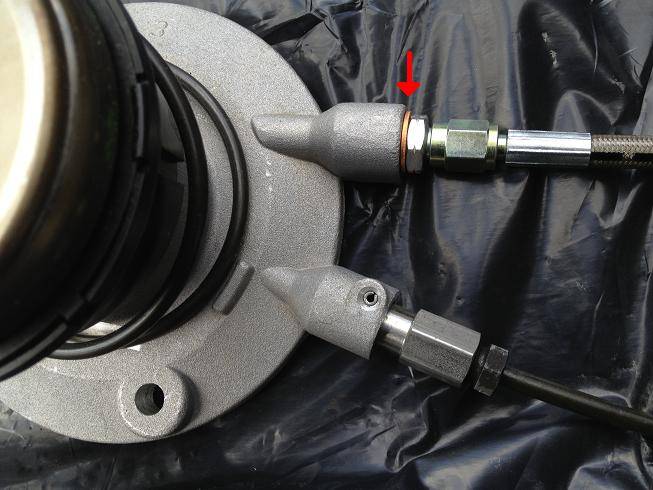
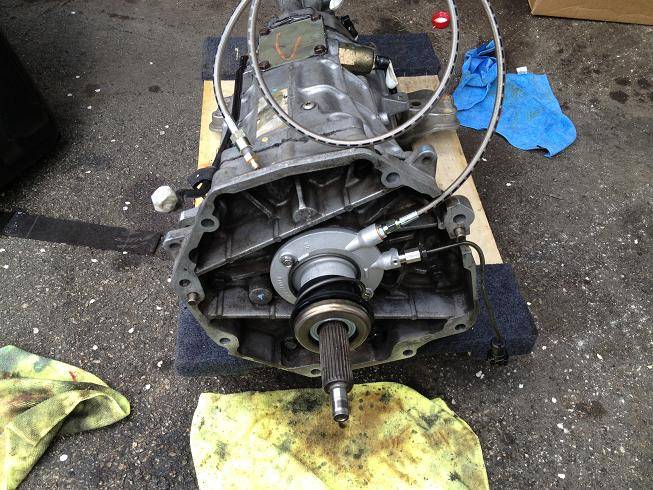
Attaches with two 10mm bolts torqued to 71 inch pounds:
05-07-2013 #285
Registered User
- Join Date
- Jan 2011
- Location
- Boston, MA
- Posts
- 1,180
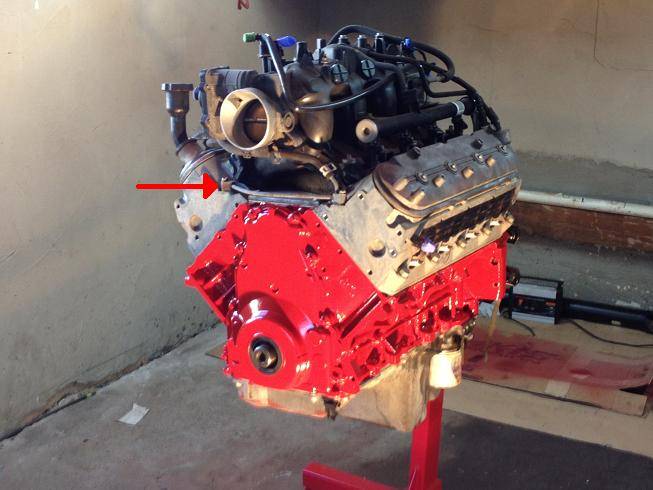
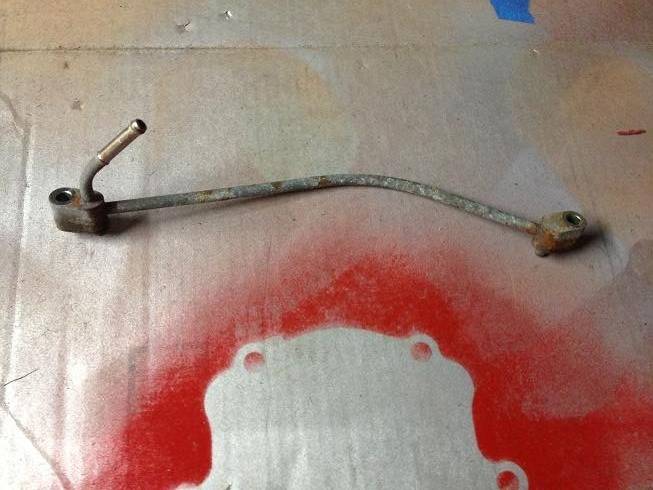
Here's an issue that you don't have on the sbc's. The LS engines have a steam tube vent (crossover tube) that connects the water passages on the both heads to a small line and ties back into the cooling system. It's recommended that you tie into the highest point in the system to prevent air pockets in the system.
Here's the tube in question:
Here it is removed and all cruddy (and backwards):
Before I knew what I was doing with it, I cleaned it up and painted it:
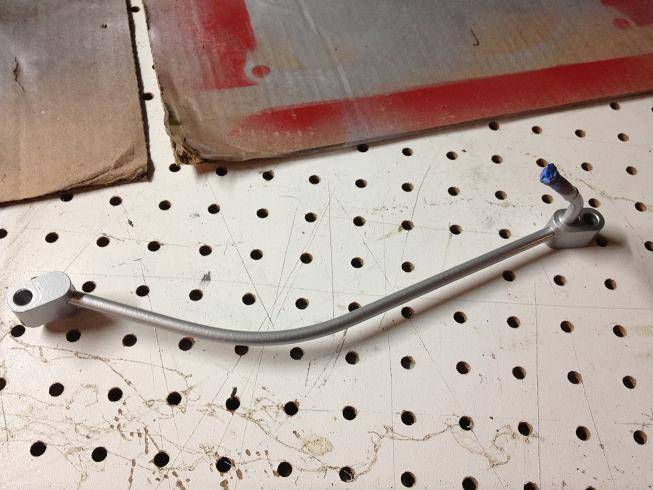
Then I cut the tube off the top of the driver's side and drilled a 11/32" hole:
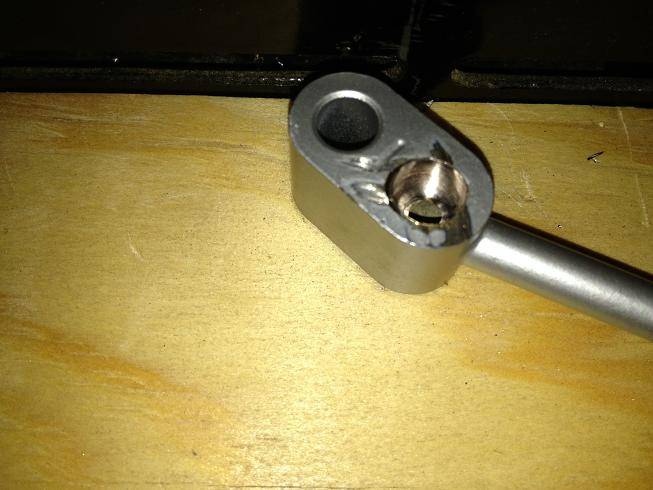
Then I drilled an 11/32 hole through the top of my brand new water pump:
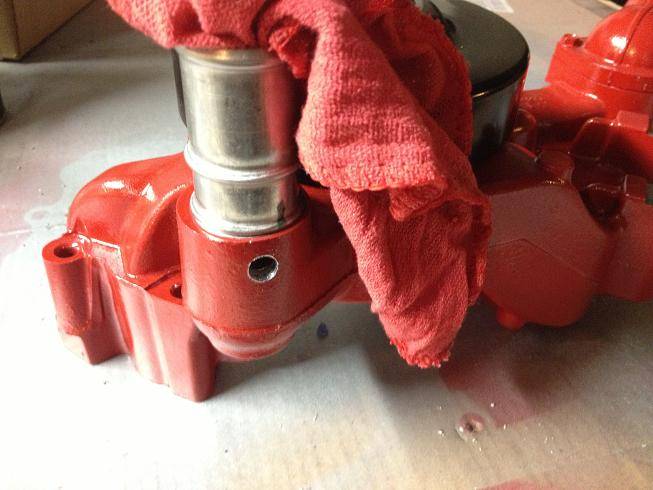
Tapped both holes with a 1/4" NPT tap:
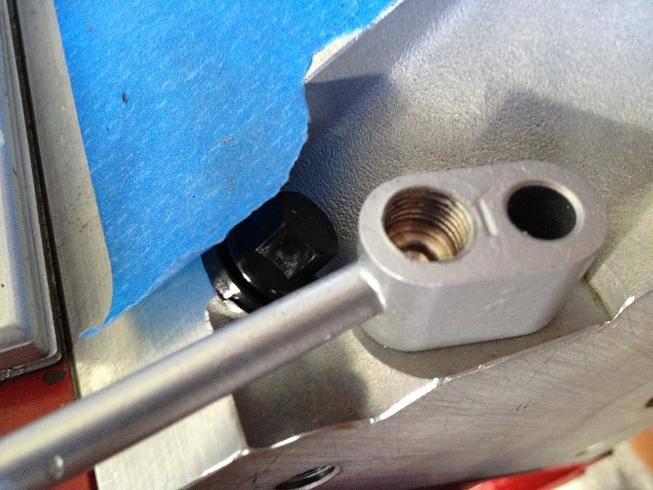
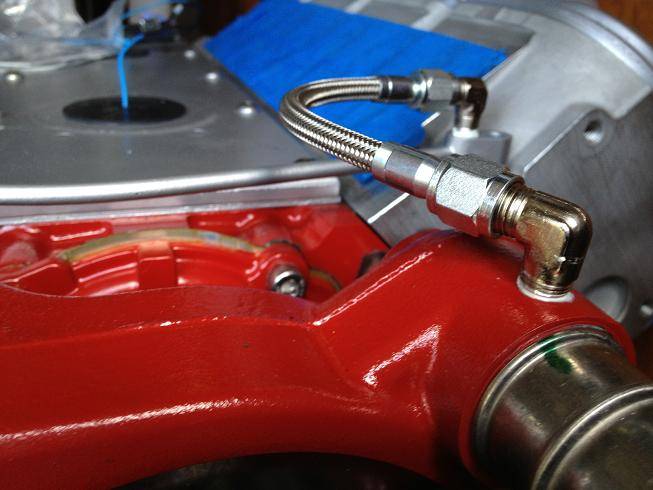
Installed a 90 degree 1/4"NPT to -4AN fitting and sealed it with ARP thread sealer, and attached a 6" long -4AN stainless steel PTFE hose to it (I'm still waiting on the seals that go between the vent tubes and the heads, along with the correct bolts, so this is just for mockup):
05-07-2013 #286
Registered User
- Join Date
- Jan 2011
- Location
- Boston, MA
- Posts
- 1,180
I also figured out that the harmonic balancer install tool that you can rent from Autozone or Pep Boys isn't deep enough to reach the LS crank, so I had to buy a makeshift one from eBay. That should be here tomorrow.
And I'm in the process of cleaning up the coil packs and painting the coil pack mounting plates to hide them a little. Eventually I'll relocate the coil packs, but at this point I need to spend money wisely so I can get back up and running.
If the weather cooperates I'm going to install the new clutch, mate the engine to the the transmission and try dropping it in this weekend. I just ordered an adjustable T56 crossmember from BMR Suspension. Hopefully it fits. If not, I know the ATS one will, but it's twice the price, so we'll see.
05-09-2013 #287
Registered User
- Join Date
- Jan 2011
- Location
- Boston, MA
- Posts
- 1,180
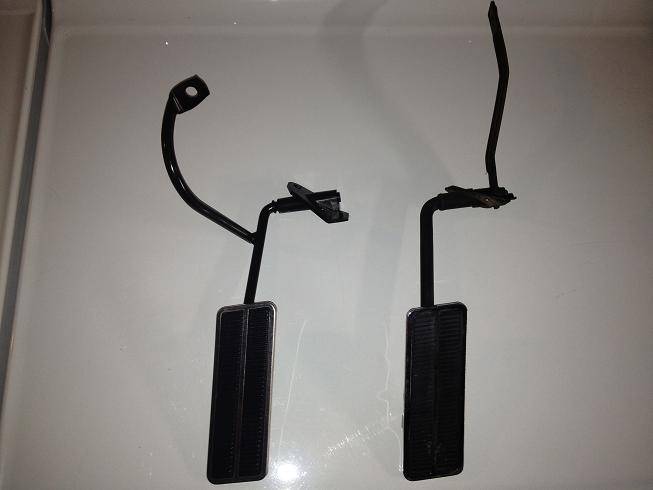
I installed a new gas pedal today. I'm using one designed for a 6 cyl. '67 Camaro, which is the same as the crossram accelerator pedal. It is set up for a cable rather than mechanical linkage. The arm is inside the passenger compartment rather than in the engine bay. If you're going to do this swap, make sure to do it when the engine is out.
New (cable) on the left, Old (linkage) on the right:
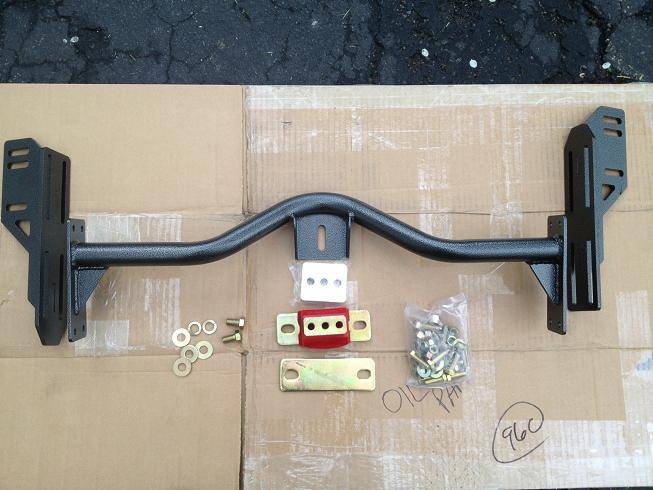
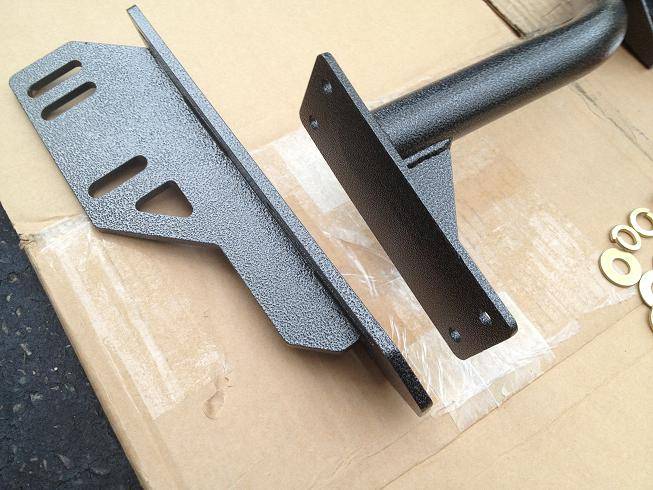
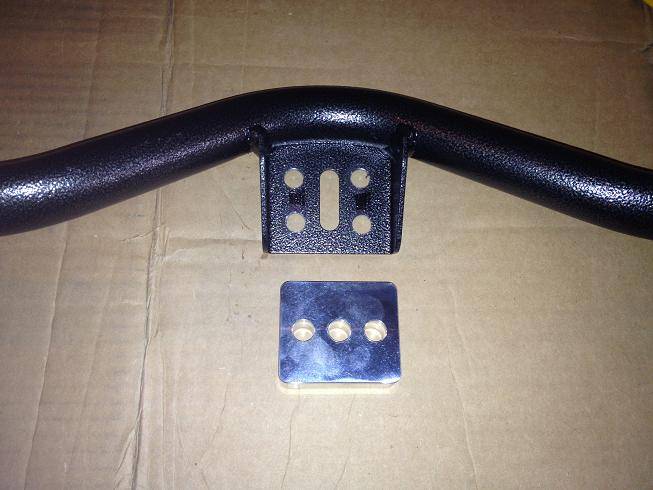
My adjustable crossmember for my T56 arrived from BMR Suspension. I figured something wouldn't fit right, but this thing has a ton of adjustability. It bolts up to the old crossmember bolt holes and allows for quite a bit of front to back as well as side to side movement. It also comes with an Energy Suspension tranny mount and all the hardware. The aluminum spacer (with 3 holes) is only used for an automatic transmission, so it will get tossed. Overall it's a very nicely built piece and comes in black hammertone finish. I'd rather it be gloss black, but no one is ever going to see it, so it's staying the way it is.
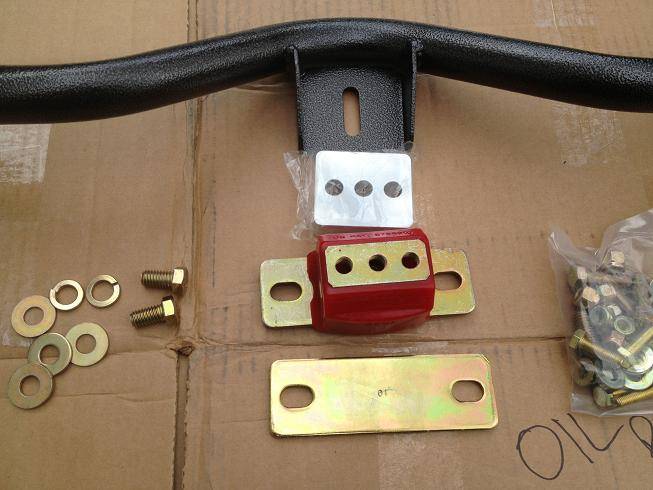
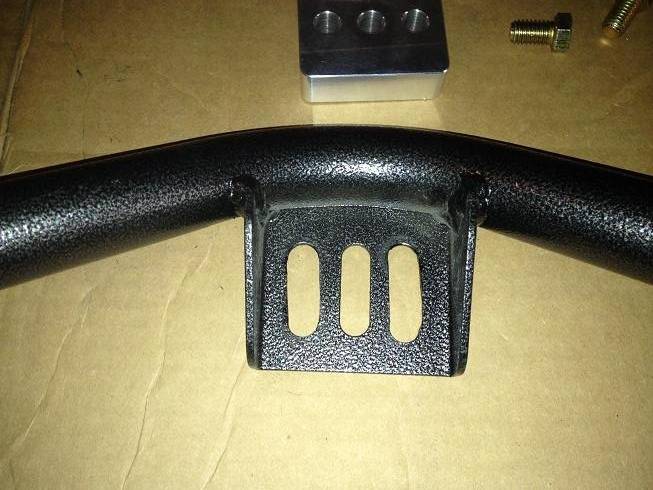
The only thing I don't like is that it only uses the center hole of the trans mount to bolt up to. I decided to modify it to use the outer two holes. I just used the aluminum spacer to mark my holes and drilled them out on the drill press:
Then I used a Dremel with a cutoff wheel to hack away the rest, it looked pretty good until I realized that I was off a hair on my spacing, so I had to go back and grind a little more away. Not the prettiest work, but it'll do. I touched up the raw edges with some Roll Bar & Chassis black paint:
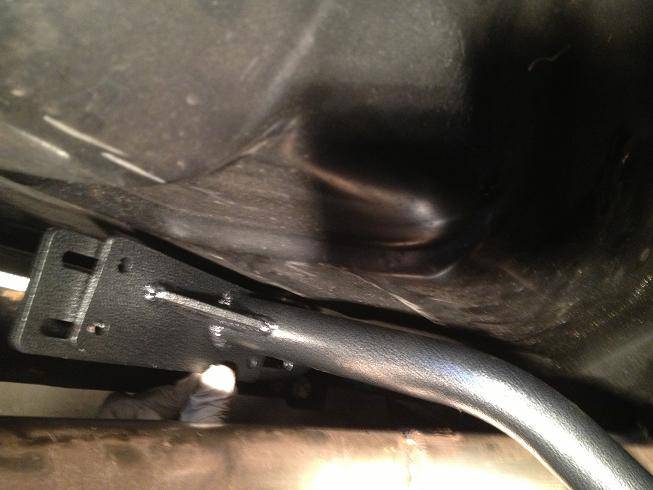
And here's a quick pic when I mocked it up. Just showing how tight it runs to the floor pan. I should have plenty of clearance exhaust.
05-11-2013 #288
Registered User
- Join Date
- Jan 2011
- Location
- Boston, MA
- Posts
- 1,180
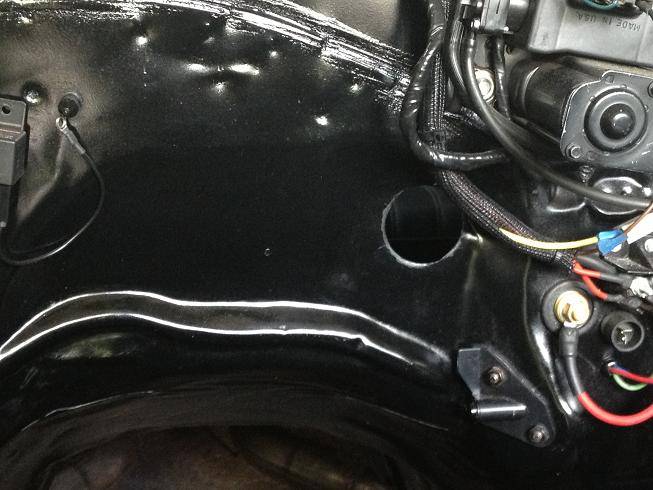
I cut a 2" hole through the firewall for my wiring harness today, but forgot to take pics. I'll snap one tomorrow to show where it goes through. I just used a 2" hole saw, deburred the edges with a dremel and painted the raw edges so they won't rust.
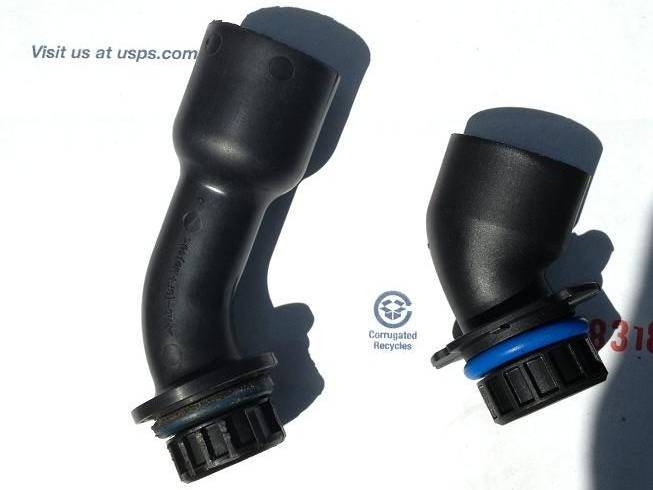
I also installed a shorter oil filler neck. Here's the old long LQ9 one next to the new LS1/LS6 shorty.
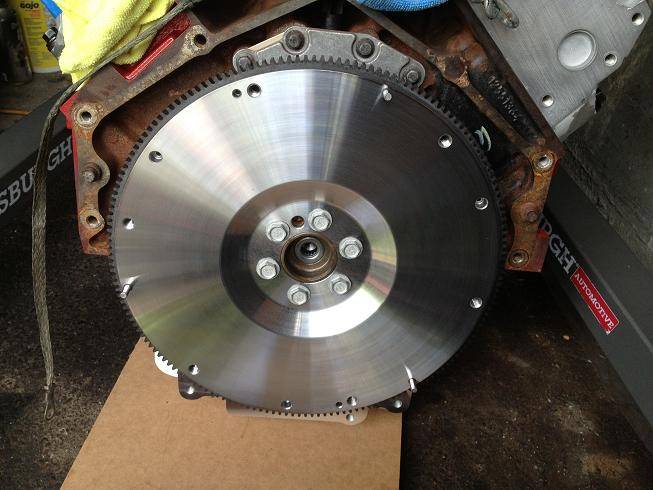
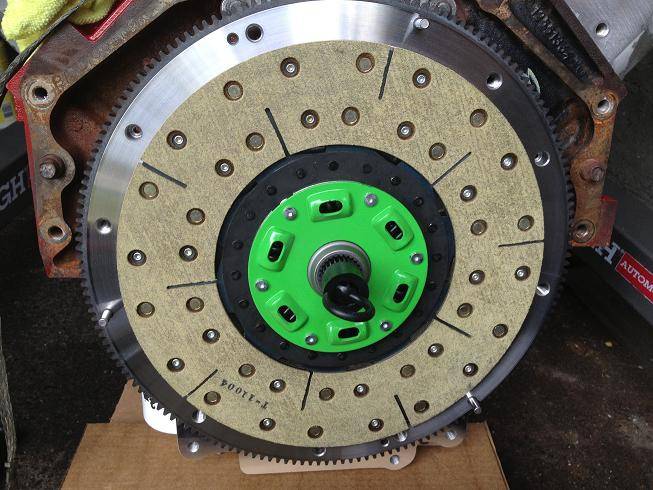
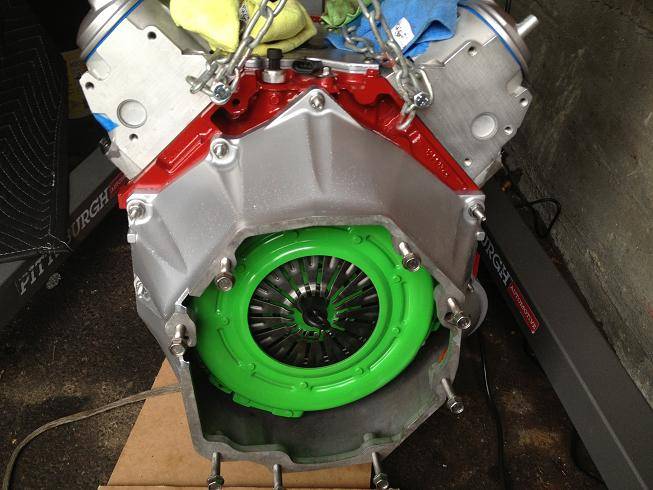
I got the motor off the stand and hanging on the engine hoist. I installed a new pilot bearing and the new Monster Level 2 clutch today along with a new GTO starter and the bell housing. If the weather cooperates tomorrow, I'm going to bolt up the tranny and try dropping her in.
Flywheel:
Clutch plate and alignment tool:
12" Pressure Plate:
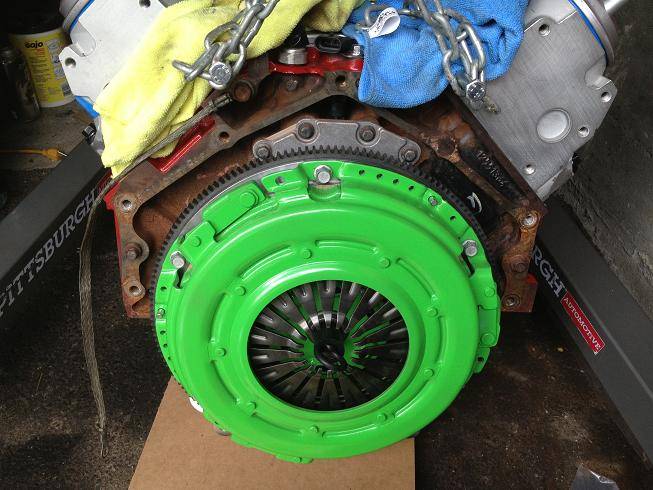
All bolted up:
05-11-2013 #289 Registered User
- Join Date
- Aug 2007
- Location
- Roanoke (FortWorth) Texas
- Posts
- 786
I dont need another camaro subscription but I like your work and detailed updates. Good job.
ChrisTotal Cost Involved - Ridetech - Fatman - Total Control Products - Gateway Performance - MaverickMan Carbon
05-11-2013 #290 Registered User
- Join Date
- Oct 2007
- Posts
- 1,872
Hey just read through the thread.. Let me know how you like PSI conversions... I am very interested in checking them out... did they give you an idea how long it would take to get the harness? Originally Posted by 67rally
From a place you will not see comes a sound you will not hear....
67 Camaro In progress
https://www.pro-touring.com/showthre...-Tap-67-camaro
05-11-2013 #291
Registered User
- Join Date
- Jan 2011
- Location
- Boston, MA
- Posts
- 1,180
I already got it. It took about 4 days to get it from the time I ordered. Jon's customer service is exceptional. He answers his phone and responds to emails quickly. Originally Posted by XLexusTech
The harness looks very good as well. I would definitely recommend PSI Conversions.
05-11-2013 #292
Registered User
- Join Date
- Jan 2011
- Location
- Boston, MA
- Posts
- 1,180
Thanks. Grinding away. Originally Posted by GrabberGT
05-11-2013 #293 Registered User
- Join Date
- Dec 2009
- Posts
- 1,607
I agree completely. Originally Posted by 67rally
Ron in SoCal
69 Camaro in progress
http://www.lateral-g.net/forums/showthread.php4?t=31246
Used to be known as flash911
05-11-2013 #294
Registered User
- Join Date
- Oct 2007
- Posts
- 1,872
Awesome... will order Monday.. Originally Posted by Ron.in.SoCal
From a place you will not see comes a sound you will not hear....
67 Camaro In progress
https://www.pro-touring.com/showthre...-Tap-67-camaro
05-11-2013 #295
Registered User
- Join Date
- Sep 2012
- Posts
- 108
I have a PSI harness for my ls3/t56 in my 69 camaro. haven't fired up the car yet but so far I like the harness a lot and Jon isn't done with you soon as he gets his money, he will help until you get things lined out. Originally Posted by XLexusTech
05-12-2013 #296
Registered User
- Join Date
- Jan 2011
- Location
- Boston, MA
- Posts
- 1,180
Well, I might have hit a small bump in the road here...
I have a -4an line coming off my master cylinder and need to find an adapter to the GTO slave cylinder. I found one from Russel but can't tell if it attaches directly to the slave (inside the bellhousing) or to the quick disconnect fitting (outside the bellhousing). I don't want to install the engine/tranny today and find out there is no fitting to connect outside the bellhousing.
I have PM'd Tick Performance, posted here in the Emergecy Room and on LS1tech to see if I can get a quick answer to see if I can move forward. But I'm posting here as well just in case someone may know the answer.
Copy and pasted from LS1tech.com:
Originally Posted by 67rally
05-12-2013 #297
Registered User
- Join Date
- Jan 2011
- Location
- Boston, MA
- Posts
- 1,180
Well, couldn't really find an answer to my question, so I didn't install the engine/tranny today. I ordered the above part and when it arrives, I'll see what my options are.
I did a bunch of small stuff, and took a pic of the hole for the PSI harness to pass through. This is why you don't paint in the dark. I must have grabbed a can of flat or satin black by accident instead of the gloss. Luckily it will be covered by the grommet, but I may still go back and paint it gloss if I have a can of it lying around.
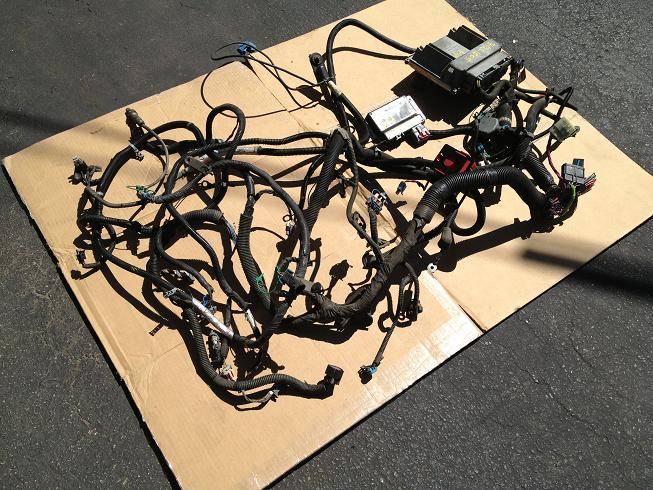
Here's the old LQ9 harness, I sold it on eBay:
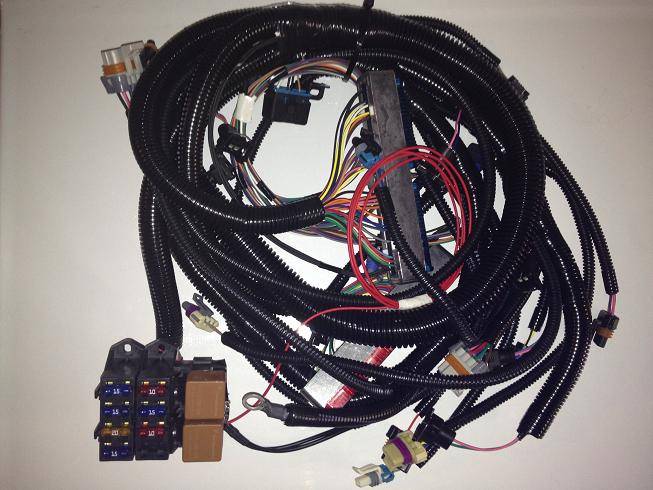
Here's the PSI conversion harness, this is for Drive By Cable:
I also mounted up the Dirty Dingo Sliders and the Energy Suspension poly motor mounts. Energy Suspension says you must use the preload plate on the left of the photo, Dirty Dingo says you don't. After much research and debate I went without it, as the Dingo sliders act as the preload plate:
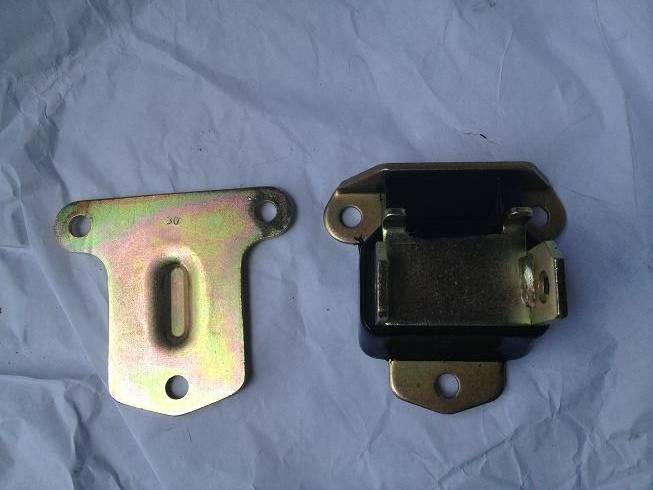
The slider on the left doesn't have the preload plate, the one on the right does:
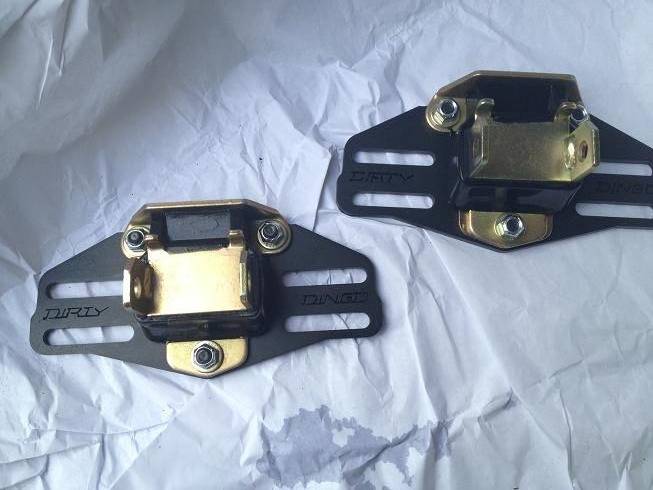
Here's a shot from above, the one on the top doesn't have the plate, the one on the bottom does:
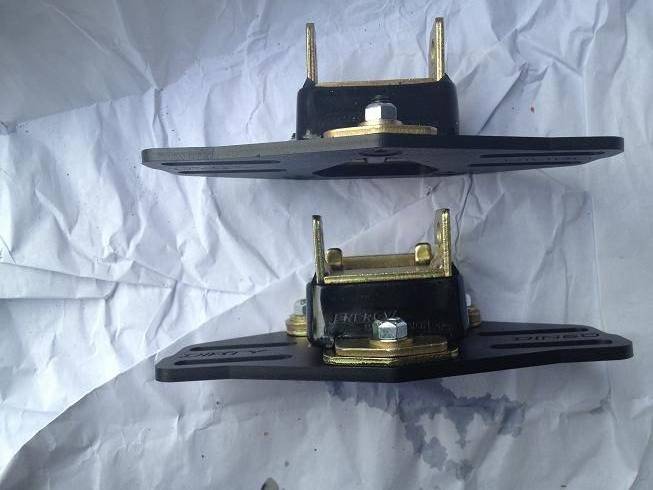
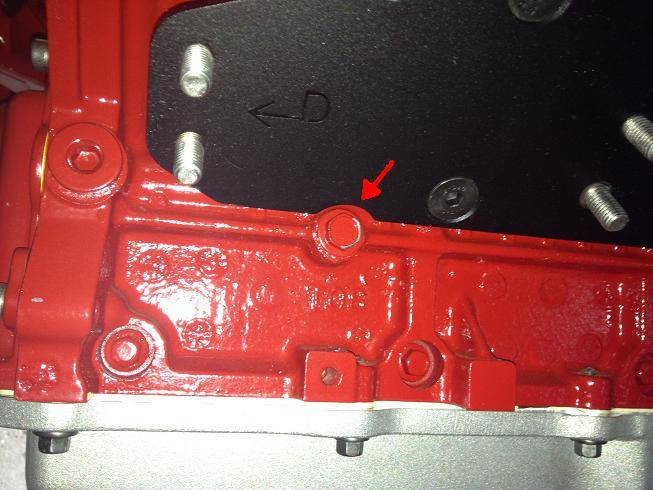
I mounted up the driver's side and only had about 1/2" of adjustability before it locked. It turned out the slider was hitting this bolt. Luckily I had taken a million photos and was able to go back and see what the bolt was used for, and it's just for a ground strap. I was worried it might be a PS bracket or something necessary. I just removed the bolt and touched it up with some engine enamel:
Sorry about the blurry photo, I think that's my finger in the top left, but the next two photos show the passenger side mount and how much adjustability these mounts from Dirty Dingo give you:
Engine all the way forward:
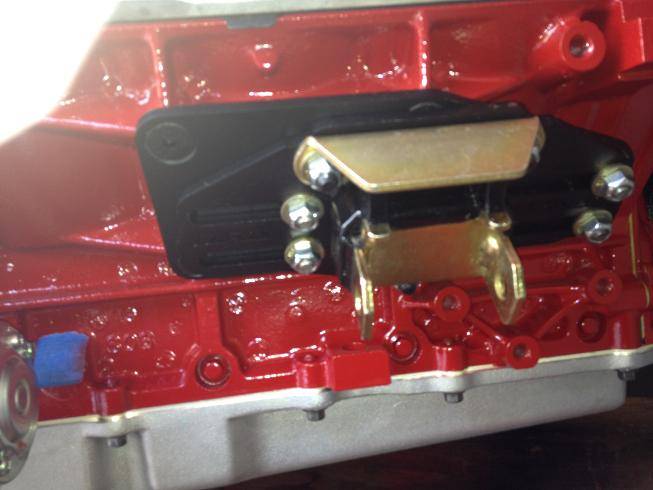
All the way back:
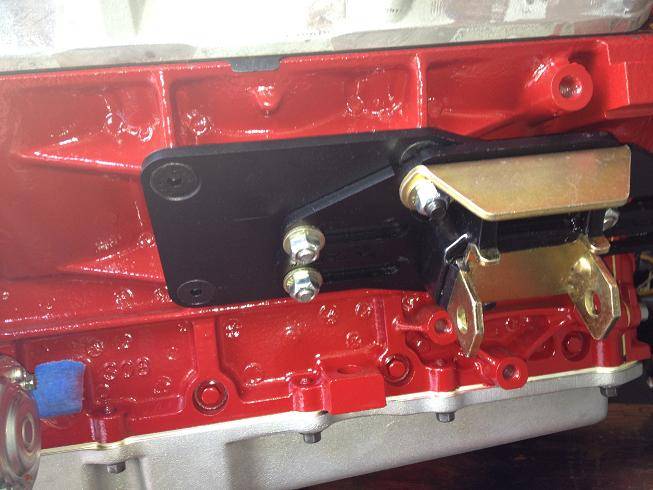
05-13-2013 #298
Registered User
- Join Date
- Aug 2006
- Posts
- 381
Great progress man, and PSI conversion harness looks much nicer than the conversion harness I have from Painless Wiring. I drilled a 2" hole in the same location;unfortunately it became a bit oval not round because I drilled it while the engine was still in the car. Hopefully the grommet I purchased will make it invisible
72 Camaro RS:SOLD
68 Camaro:
LS6 Engine,Tremec TKO 600,5 Speed
Complete Speedtech Subframe Kit,Speedtech Torque Arm, 9" Rearend from Strange, Wilwood Brakes, Minitubbed, Hotchkis Subframe Connectors
05-14-2013 #299
Registered User
- Join Date
- Jan 2011
- Location
- Boston, MA
- Posts
- 1,180
Yeah, it was kind of a catch 22. I wanted to drill the hole while the engine was out, but then you don't really know if that's the best place for it. I have found a few other people that drilled in the same spot, so it should work out fine. If you're hole is too big for the grommet, you place some masking tape or duct tape behind the uneven section of hole and use some JB Weld to fill it it. It dries as hard as metal, and then you could sand it smooth and use a dremel to round the hole off again. Touch it up with some paint and no one will ever know. Originally Posted by 72Z/28
05-14-2013 #300
Registered User
- Join Date
- Jan 2011
- Location
- Boston, MA
- Posts
- 1,180
I think I have found a solution to the GTO slave cylinder/-4AN hose issue. Actually 2 solutions, so one has to work (finger crossed), so I can install the engine and tranny this weekend.
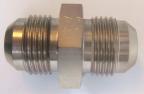
I ordered a Russell clutch adapter fitting #641001, which I believe attaches directly to the slave cylinder and has a -4AN male end to it. I also purchased a 6" -4AN hose and a -4AN to -4AN union, so I could make the connection outside the bellhousing.
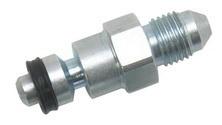
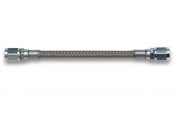
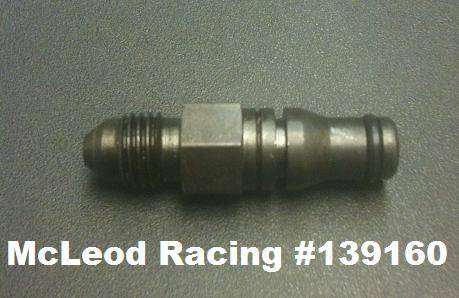
And I called McLeod Racing and they said their part # 139160 wire clip fitting to AN-4 male should connect directly to the quick disconnect fitting outside the bellhousing on the end of the GTO slave elbow. So I ordered that as well.

 Reply With Quote