Results 461 to 480 of 573
-
08-14-2014 #461

 Registered User
- Join Date
- Jan 2011
- Location
- Boston, MA
- Posts
- 1,180

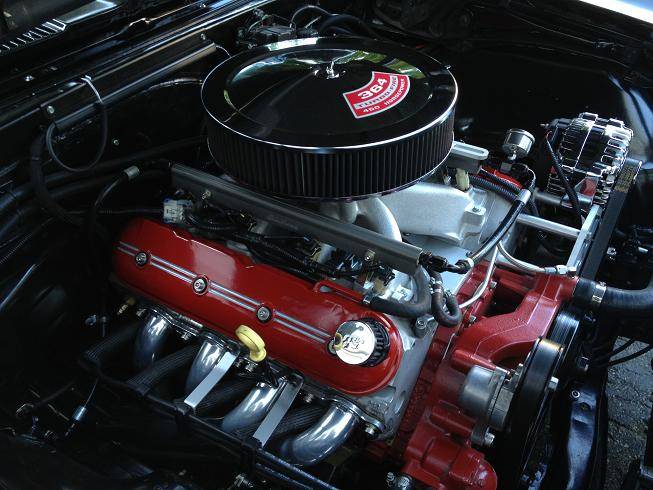
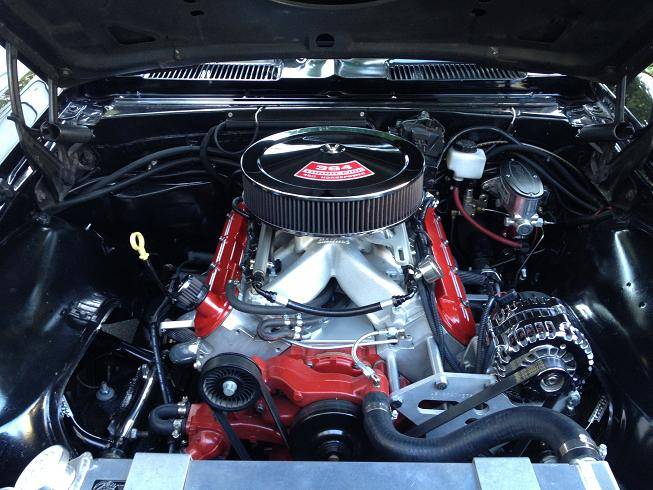
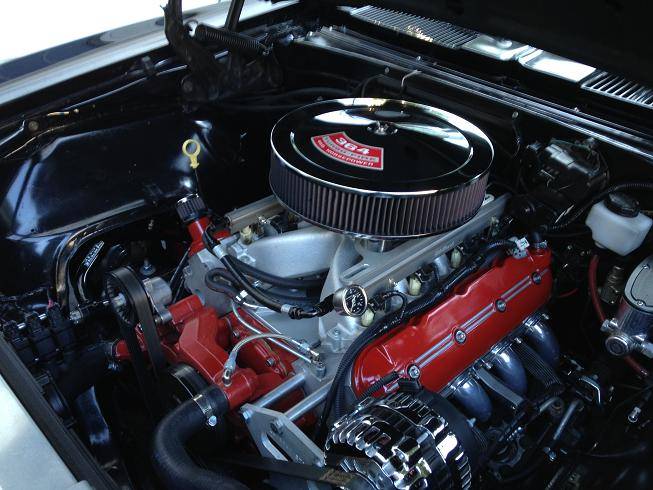
Got the valve covers on, here are a few pics:
-
08-15-2014 #462
Registered User
- Join Date
- Mar 2009
- Location
- Houston, TX
- Posts
- 1,197
Like the look of the new covers. Really spruced up the engine compartment.
Tu Ho
Firebird V2-LS swap
09-15-2014 #463 New to Pro-Touring
- Join Date
- Jun 2010
- Location
- Commerce MI
- Posts
- 50
Awesome Job!!
I went for a similar look with my LS3, relocating the coil packs really cleans things up..
We have very similar taste in how we think things should look under the hood of a first gen.
Awesome build thread..
09-16-2014 #464
Registered User
- Join Date
- Jan 2011
- Location
- Boston, MA
- Posts
- 1,180
Thanks! Yours looks great as well, very much my style, I love it!!! Originally Posted by Tom5410

10-18-2014 #465
Registered User
- Join Date
- Jan 2011
- Location
- Boston, MA
- Posts
- 1,180
Time for a little update. I took my car out for a drive last week, and left hard from a stoplight. When I got to the next light, the engine was racing at 3000rpm and wouldn't kick down. I limped home and noticed that my gas pedal was flopping around and the cable was hung up. It turns out that I broke the plastic bracket that attaches the gas pedal to the firewall. I don't know why they make the new ones out of plastic, but when I switched over to the cable linkage, I also switched pedals. Well, it broke, and there is absolutely no room to get the old bracket out and the new one in.
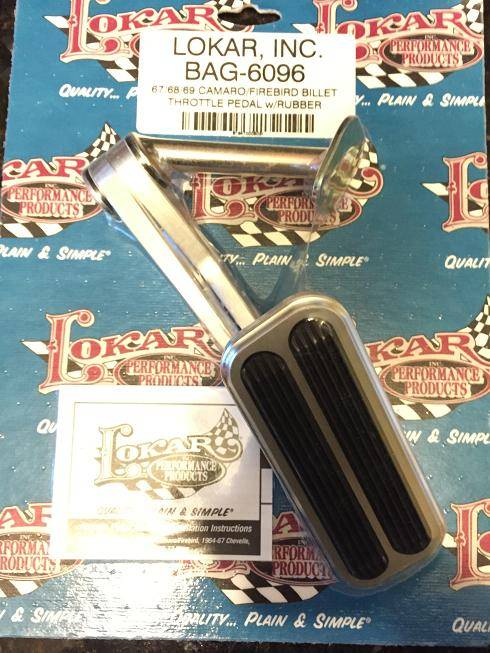
So I ordered one of these from Lokar since I have seen some people attach this from the interior side of the firewall, and would make my life much easier:
Here it is installed:
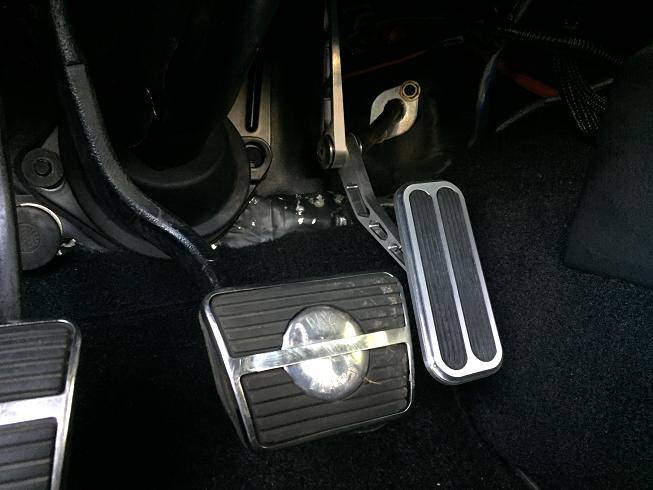
One of these pedals does not look like the others:
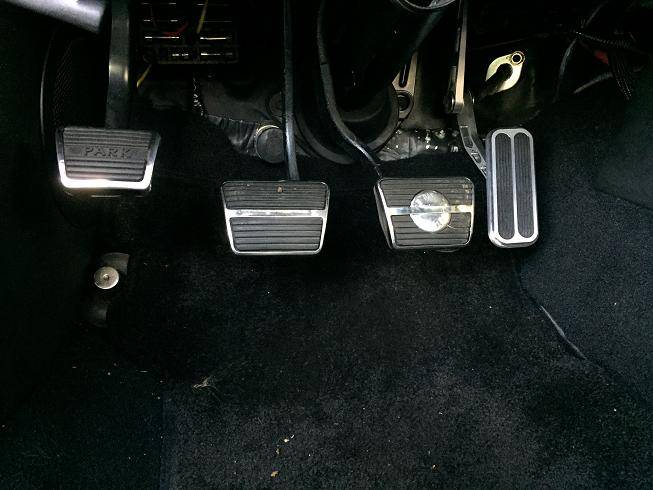
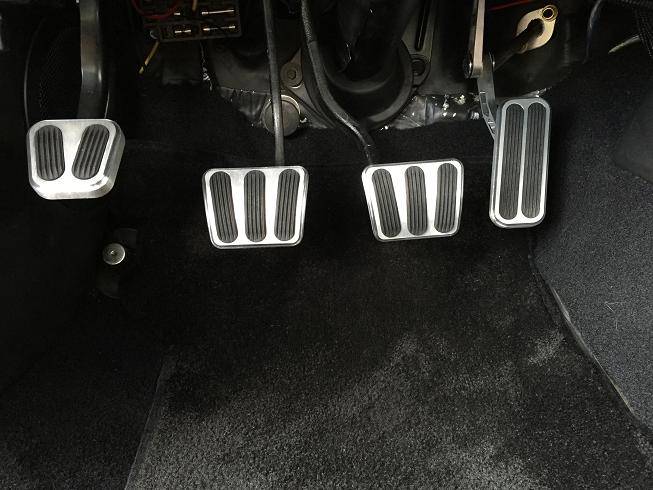
Of course I couldn't live with one oddball pedal, so I ordered a set of Lokar pedal covers to match the gas pedal:
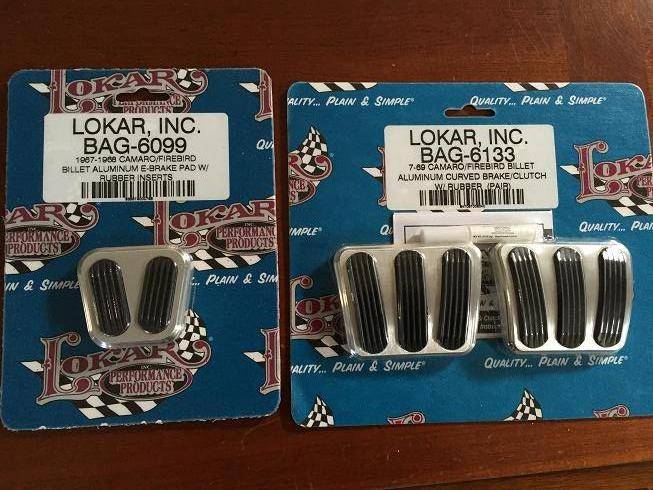
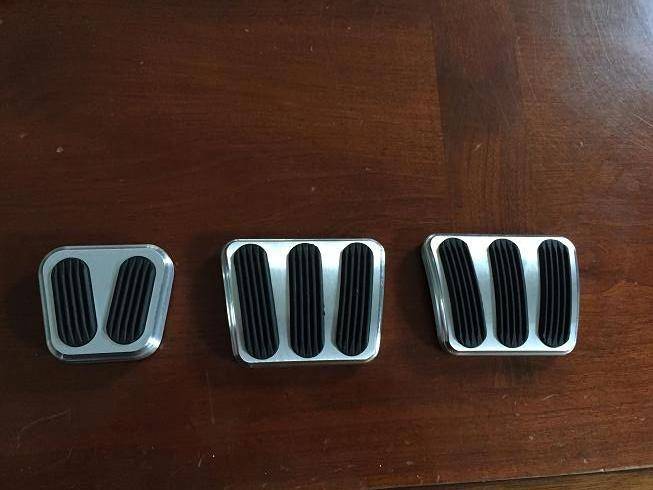
The brake and clutch pedal attach with machine screws. This is the backside of one:
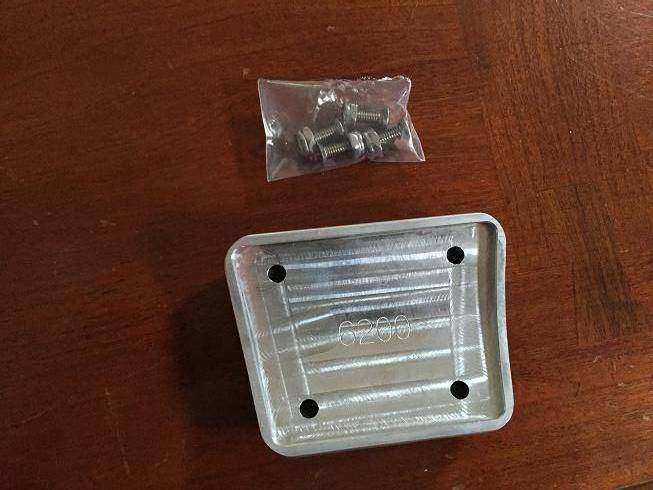
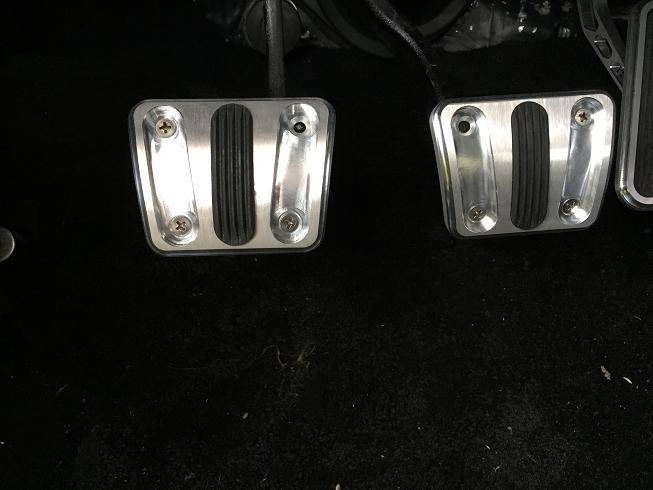
You have to drill through the pedal. They recommend drilling at least 2 holes on opposite corners. I did 3, the 4th would have been right where the pedal arm lies:
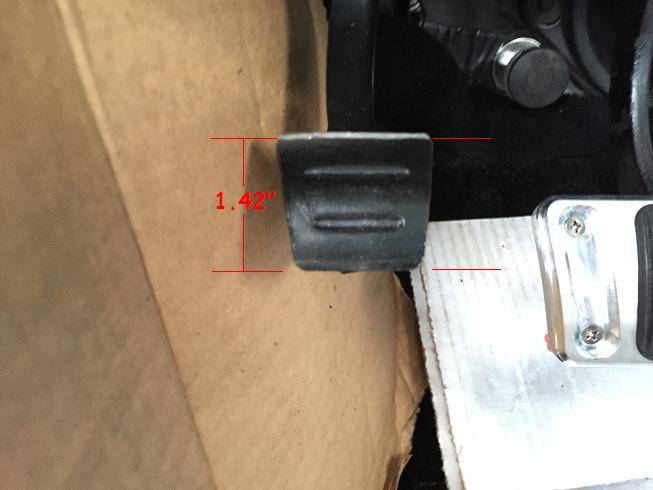
The e-brake pedal slips over the old pedal has a few allen head bolts that catch the edge of the old pedal. Unfortunately my old pedal is 1.50" tall, and the opening on the back of the Lokar cover is 1.42", so I had to grind .08" off the top of the old pedal so it would fit:
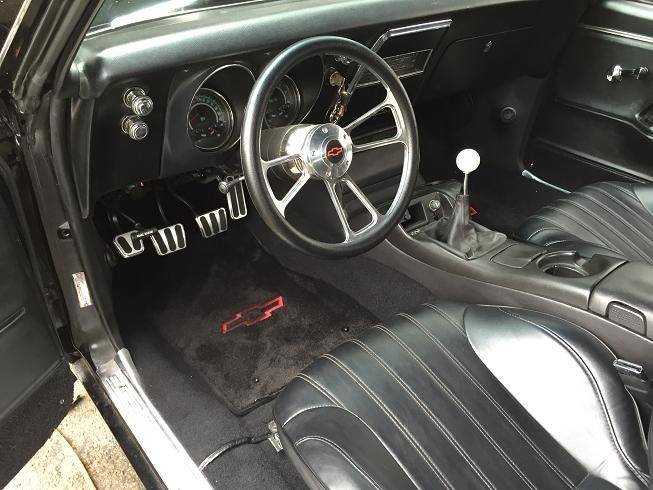
Here's the final product:
10-18-2014 #466 Registered User
- Join Date
- Aug 2008
- Location
- jacksonville,fl
- Posts
- 972
Looks cool Brent.
We got no time in the day for broken sticking gas pedals, do we?
Lokar really doesn't make all that many different items, but what they do make is good proven stuff. Their throttle cable shows no signs of ever wanting to let me down, OR should I say stick me up.
06-15-2015 #467
Registered User
- Join Date
- Jan 2011
- Location
- Boston, MA
- Posts
- 1,180
Just realized I haven't updated here in a while...
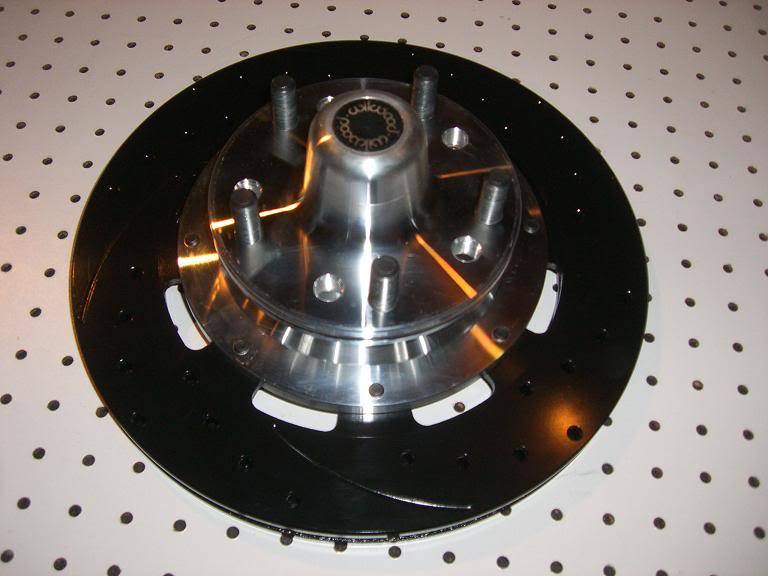
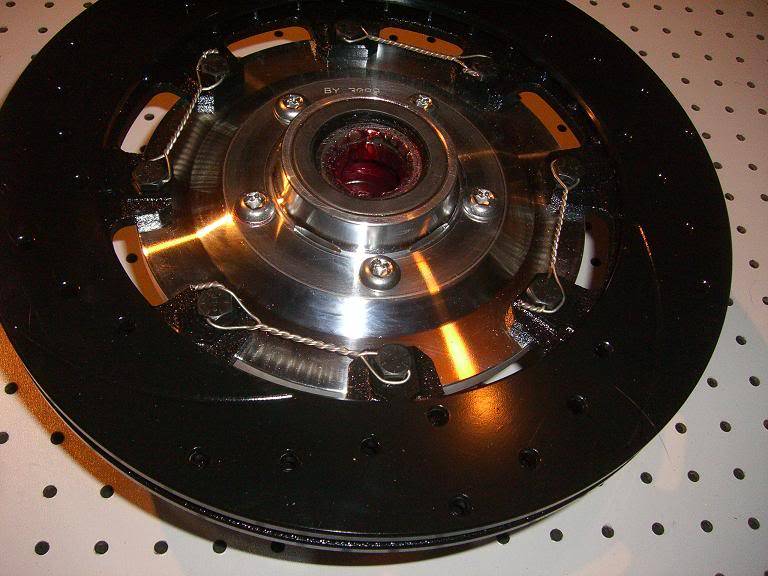
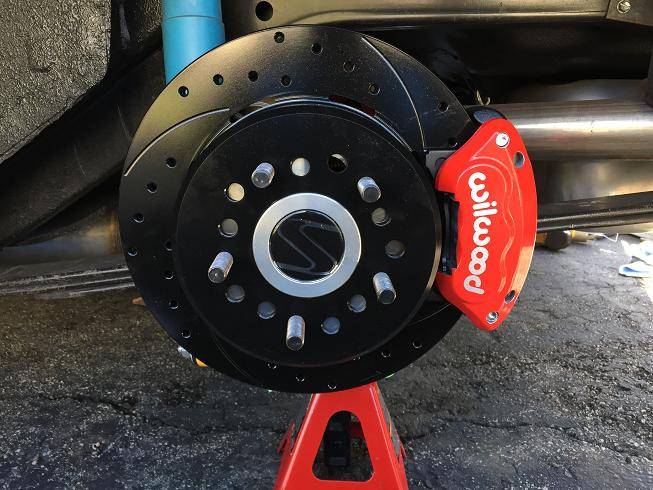
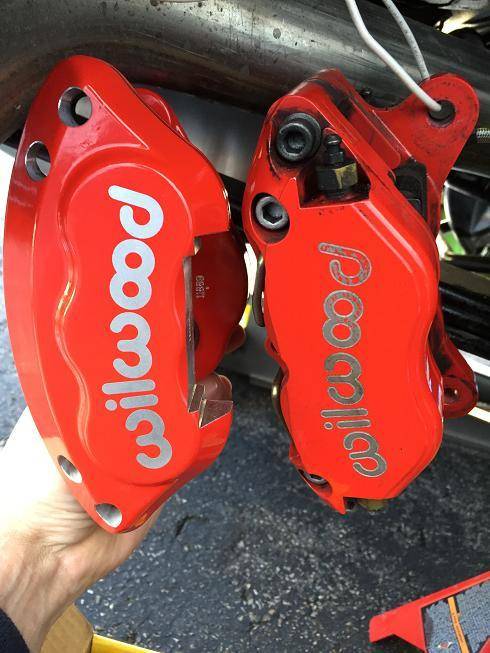
I purchased a new Wilwood brake kit from Matt's Classic Bowties a few months ago, and then we got 8 feet of snow, so nothing happened. I finally got around to installing it this weekend, but will need to order a new fitting to go into the back of the new calipers. For some reason the Wilwood DynaPro's use an M10x1.0 fitting and the new D154's use an M10x1.5 fitting. I was hoping it would be a direct swap. Nothings ever easy...
I'm switching to the D154's because they are a floating caliper and should eliminate the pad knockback problem I had on the AutoX last year. With a fixed caliper, when the axles move at all, it causes the rotors to push the caliper pistons back into the calipers. The first time you hit the brakes, it just pushes the pistons back towards the rotor, so you have very soft brakes. I had to tap the brakes after every series of turns. The feeling is very much like when you need to bleed your brakes and have a squishy pedal.
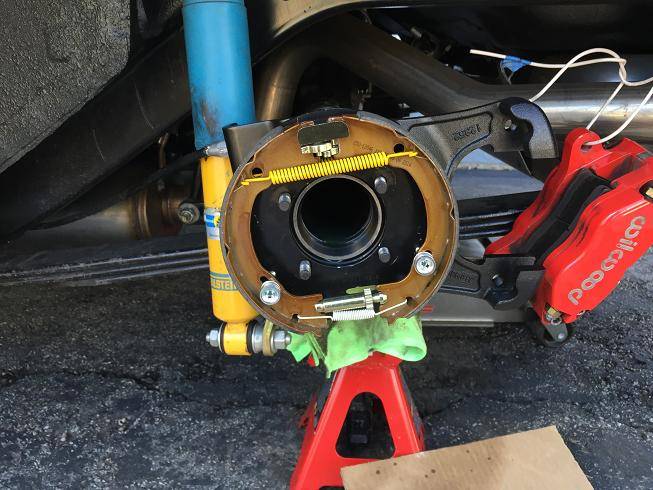
My old setup on the left, sitting next to the new setup. I had to swap all the internal parking brake components as well as the caliper mounting brackets from the new backing plate to the one I had been using. If you look closely, the big hole in the middle of the black backing plate is larger on my old setup (for the S60 rear with tapered bearings). The one on the right is for a 12 bolt, but they don't make the D154 setup for an S60. I could have left the old internal parking brake components and just swapped the caliper brackets, but might as well have all new stuff on there:
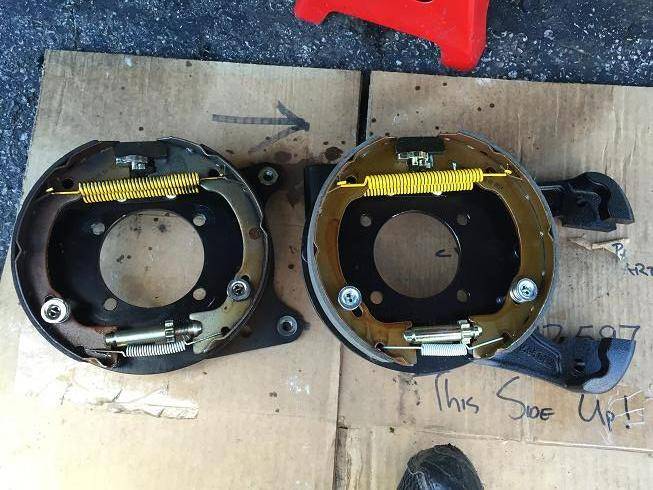
Here the old backing plate with all new components swapped over. The old caliper is still hanging next to it in this shot:
Old DynaPro 4 pistons:
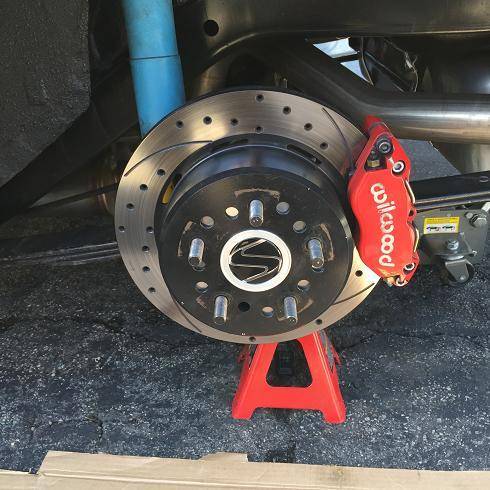
New D154 floating calipers:
D154 (left) vs DynaPro 4 (right)
06-15-2015 #468
Registered User
- Join Date
- Jan 2011
- Location
- Boston, MA
- Posts
- 1,180
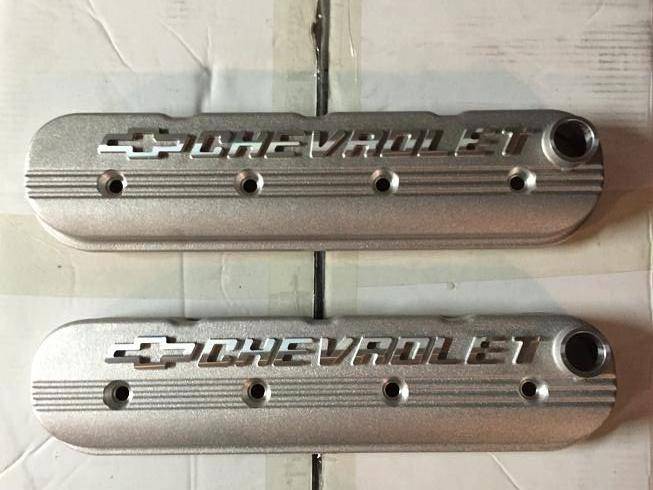
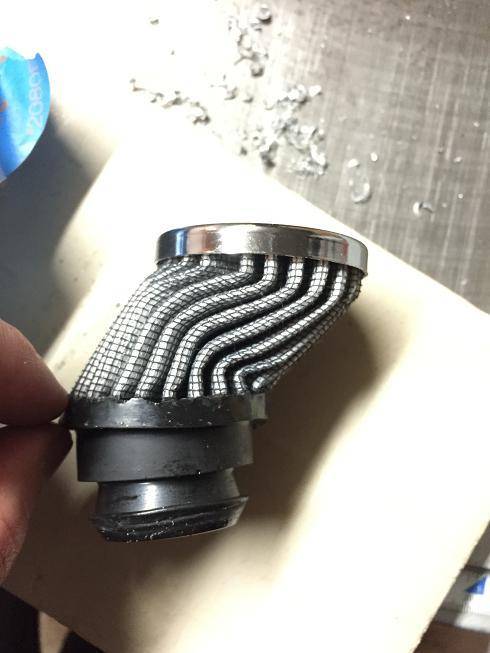
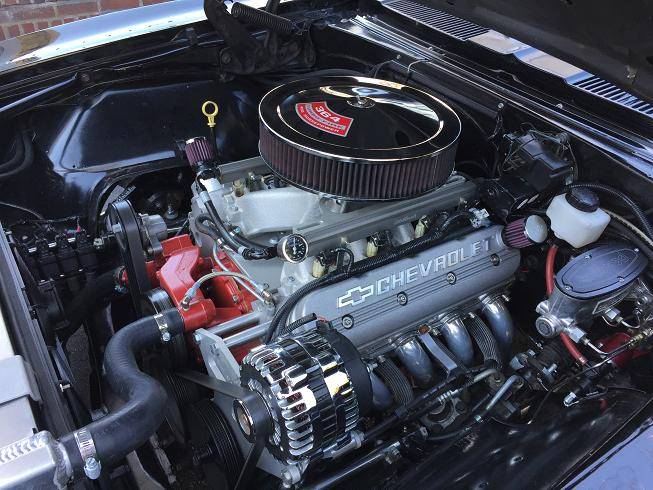
After living with the red valve covers for a season, they just weren't my style. I bought a set of GMPP "Chevrolet" valve covers, which I really like the style of. The only issue with them is that they do not have a screw in oil cap, but they do have a push in breather which I can pull and use that as the filler hole. Of course the hole in the valve covers was slightly smaller than the push in K&N breather I wanted to use.
New valve covers:
Push-in breather that was slightly larger than expected:
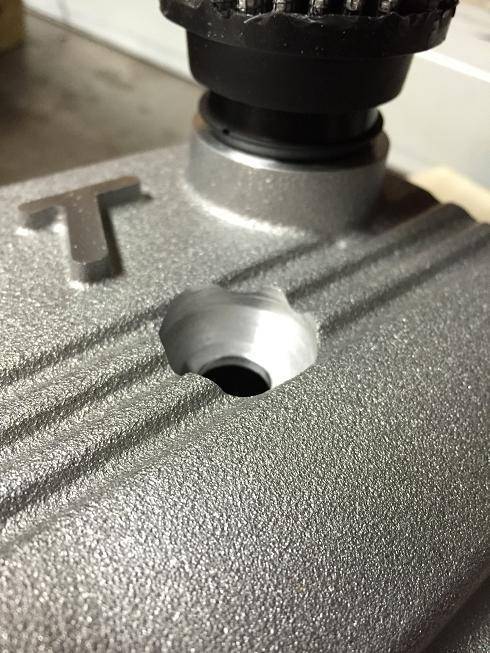
Just jam the thing in and see what happens...$20 mistake.
I ended up boring out the valve cover hole with a step drill bit. Here they are installed:
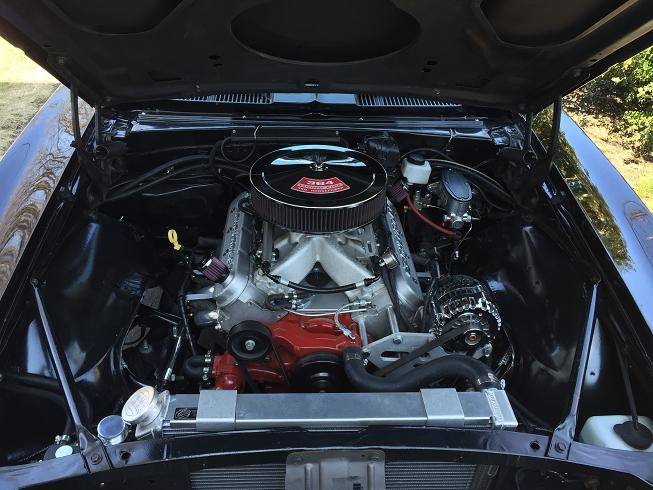
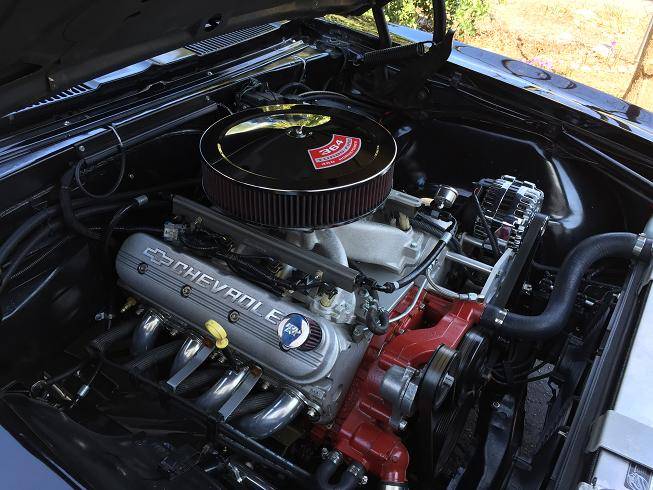
06-15-2015 #469
Registered User
- Join Date
- Jan 2011
- Location
- Boston, MA
- Posts
- 1,180
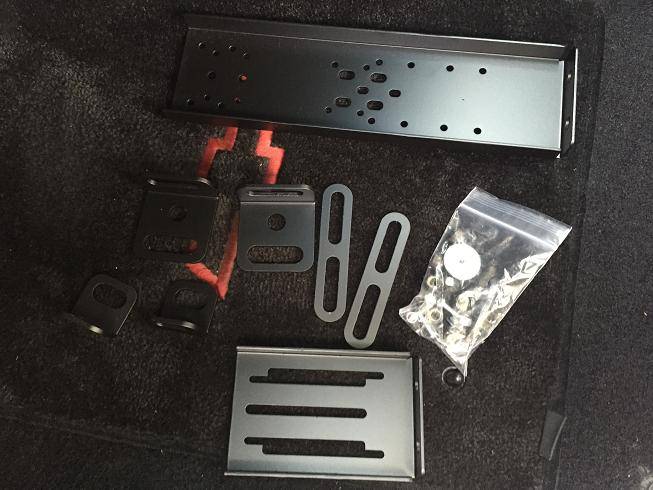
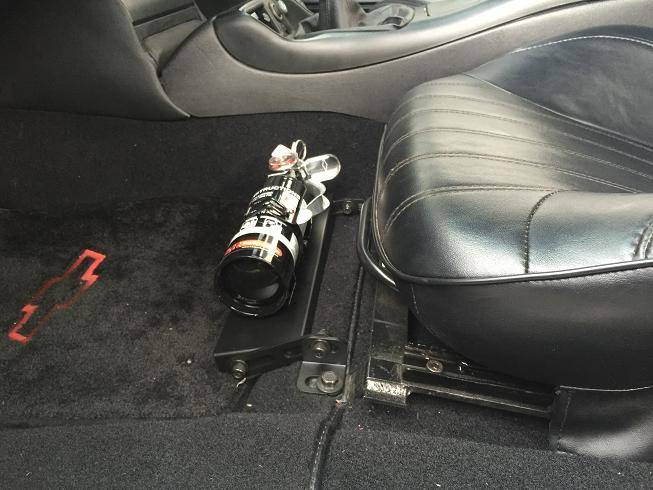
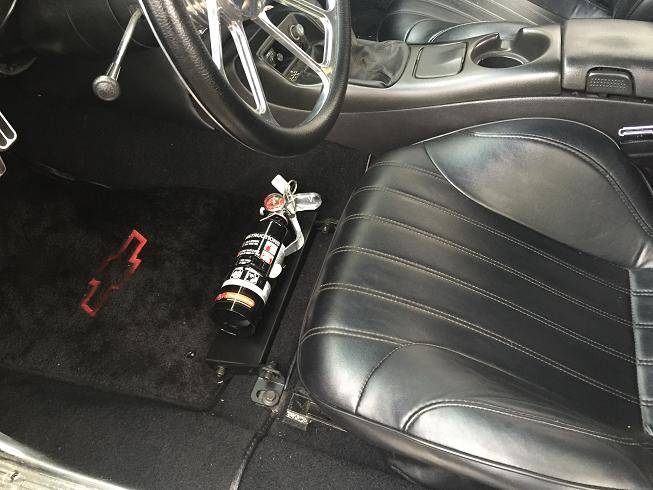
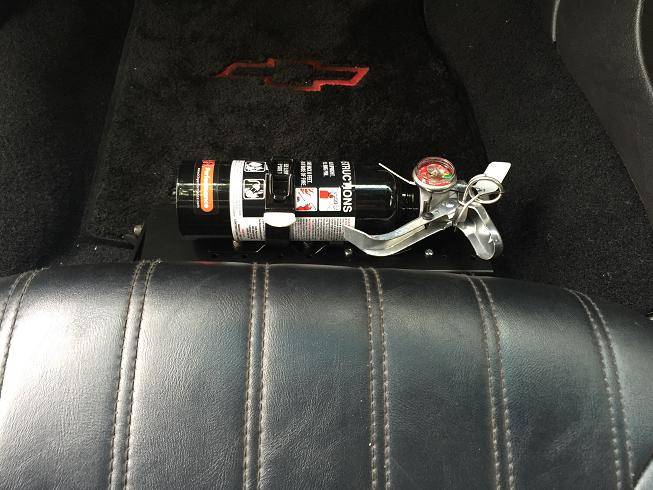
I finally decided to install a fire extinguisher. I have been wanting to do this for a while, since you see the carnage after a car fire. I went with the smallest (1.4lb) Black H3R HalGuard extinguisher, which is a clean agent (no mess or residue): http://www.h3rperformance.com/hg100b.htm not cheap, but if I ever have to use it, I don't want to deal with the mess afterwards.
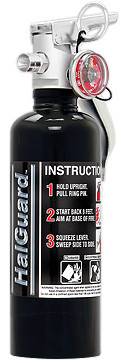
Using this universal seat mount from H3R, powdercoated black:
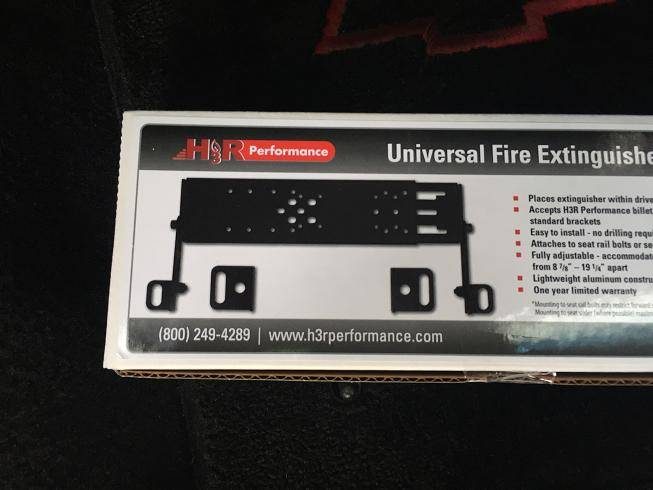
Here's what's in the box:
Here it is mounted. I ended up modifying the bracket slightly just so I could angle the extinguisher all the down to the floor. It's full adjustable, and I can move it closer or further away from the seat. I left it further away so I can still slide my seat forward a couple of inches.
06-15-2015 #470
Registered User
- Join Date
- Aug 2008
- Location
- jacksonville,fl
- Posts
- 972
Grey covers look more fitting with everything. Of course valve covers are like wheels, we can change our mind anytime we like.
Good call on getting the fire extinguisher in NOW. I had a work truck years ago that had an unknown to me splice in the trans line break & spray tranny fluid on the exhaust manifold. That fluid is really flammable by the way. Haven't had to use an extinguisher again in over 10 years, but I don't go without one . Glad I had it when needed.
06-15-2015 #471
Registered User
- Join Date
- May 2015
- Posts
- 254
Just an F.Y.I.,
Nice build, I just had to say something, I just found this thread today
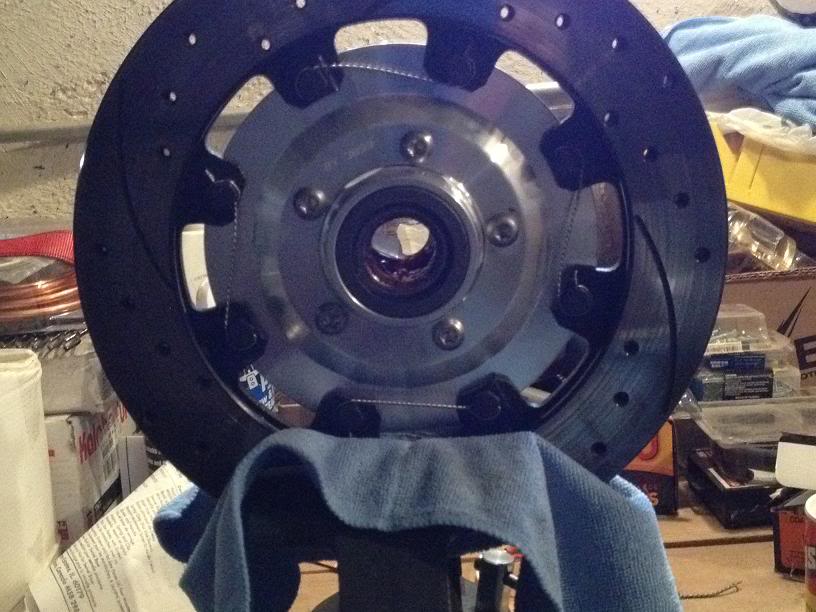
This safety wire job is incorrect.
I am an A&P mechanic & I would never let that type of safety wire job pass for inspection. Originally Posted by 67rally
06-15-2015 #472
Registered User
- Join Date
- Jan 2011
- Location
- Boston, MA
- Posts
- 1,180
Yeah, if you make it to page two of this thread, you'll see you weren't the first to point that out! I learned to safety wire and did it the right way myself. Originally Posted by mean buzzen half dozen
09-10-2015 #473
Registered User
- Join Date
- Jan 2011
- Location
- Boston, MA
- Posts
- 1,180
Time for another update. I decided it was time to install heat & AC to my Camaro. I went with the Vintage Air Gen IV setup. I did this install over the course of a couple of weeks. Posted this on TC, but forgot to update it here.
09-10-2015 #474
Registered User
- Join Date
- Jan 2011
- Location
- Boston, MA
- Posts
- 1,180
The Vintage Air install has begun. I still have a ways to go, but here's the start of it. I purchased both of the DSE plates listed above, and ended up using the heater delete plate. I also bought their VA mounting bracket, even though it's for a '69 only. There's one bolt on the driver side that won't get mounted to anything, and I stole John's (Smitty68) idea of using the DSE brackets in conjunction with the VA brackets, which should make for a very sturdy mount.
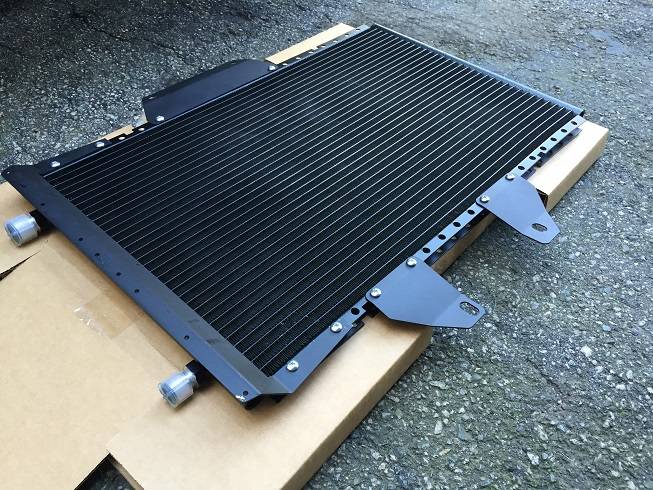
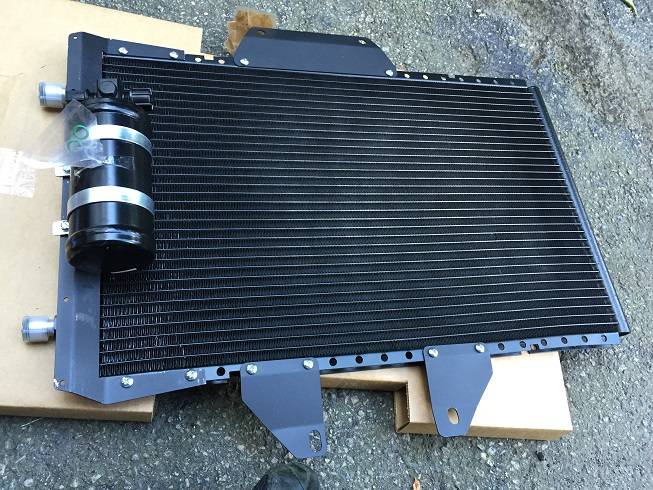
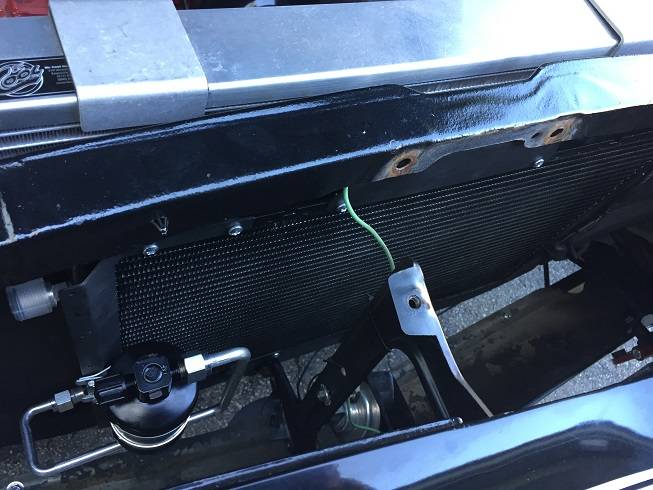
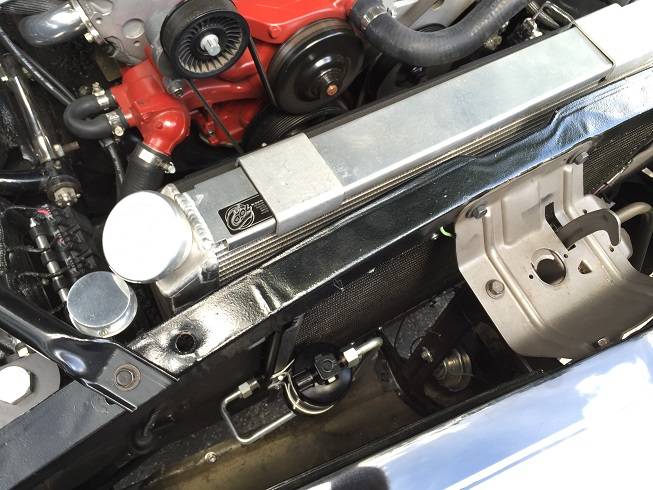
I started with the condenser and drier, since it's a fairly simple step. Just need to mount the brackets and drier to the condenser, then remove the hood latch mechanism, drop the condenser in place and bolt everything up.
Condenser and Brackets:
Drier mounted:
Mounted:
09-10-2015 #475
Registered User
- Join Date
- Jan 2011
- Location
- Boston, MA
- Posts
- 1,180
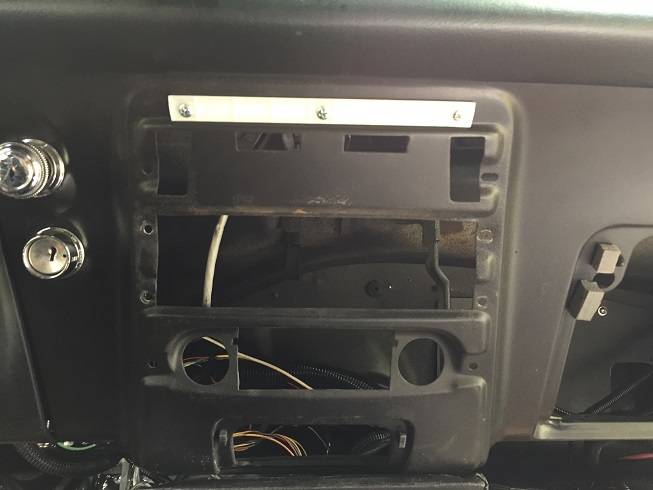
Next thing I had to do was pull the console, pull the stereo, temporarily remount the LQ9 ECU, remove the glove box, and remove the dash center trim plate.
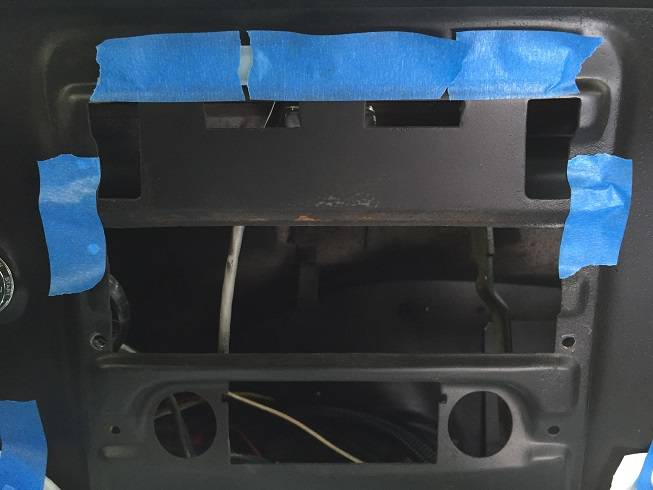
Once that was done, I was able to enlarge the center opening above the heater control for the new center vent:
Just masked it off with some painters tape for some straight cuts:
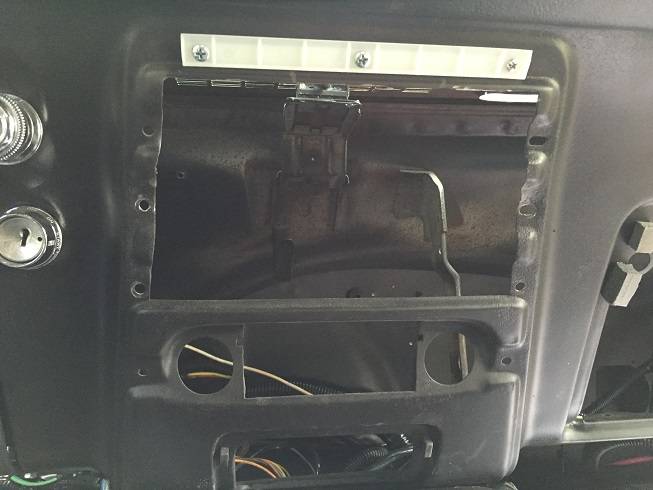
Then I mounted the new upper defrost ducts:
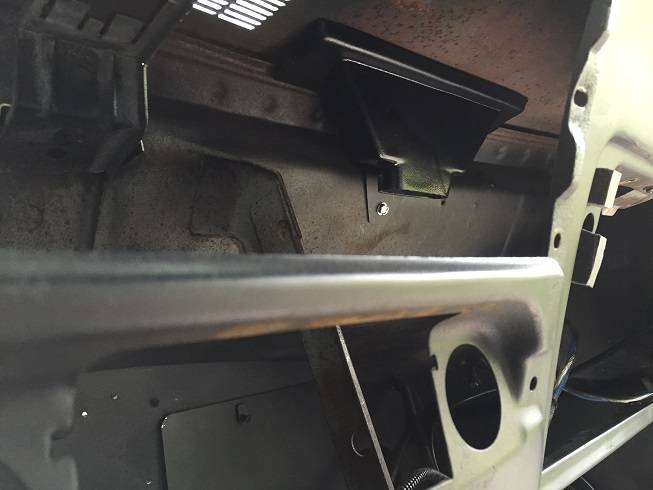
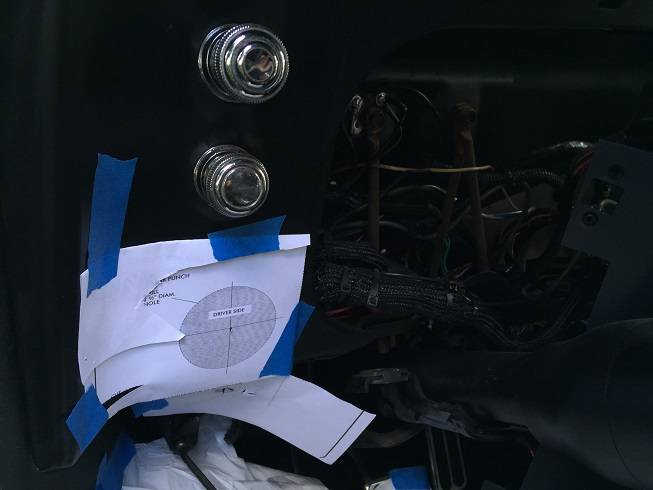
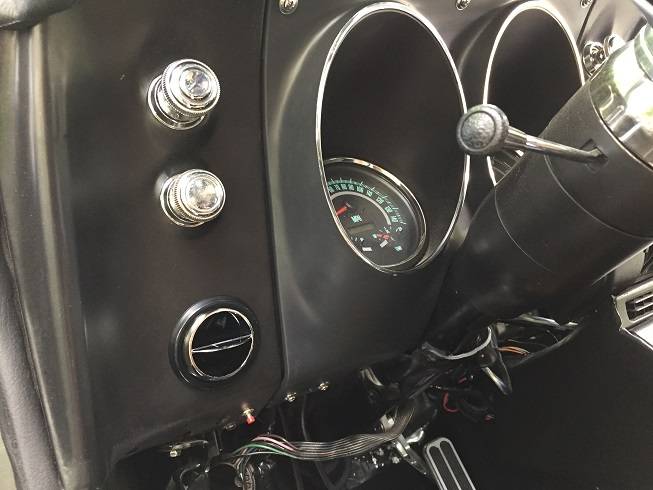
Next I moved on to the new "Astro-like" ball vents. The steering column and instrument panel have to come out for this part. They proved templates for the cuts:
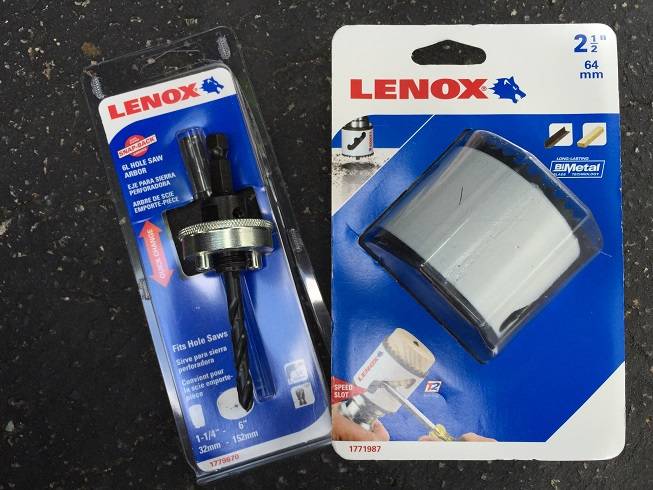
I used this 2.5" bi-metal hole saw from Home Depot:
I applied a layer of painters tape to keep the paint from chipping. After I cut the hole and removed the tape:
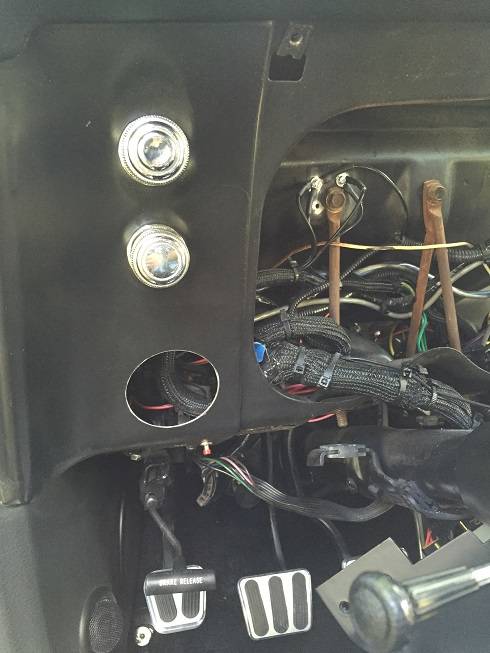
And with the new ball vents installed:
09-10-2015 #476
Registered User
- Join Date
- Jan 2011
- Location
- Boston, MA
- Posts
- 1,180
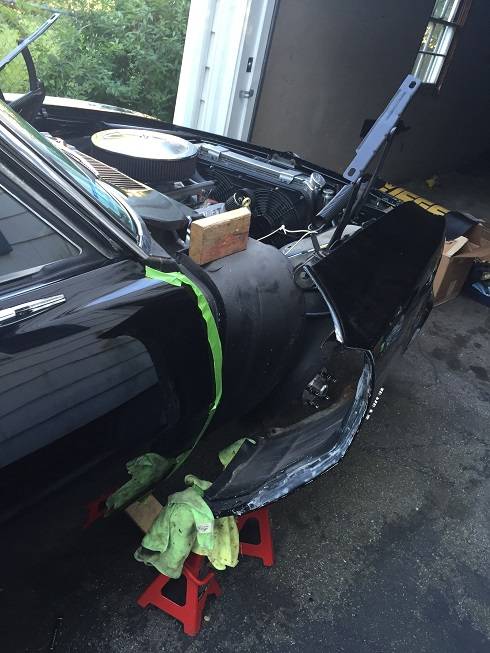
Next the hood comes off, and get ready to pull the passenger fender. The old heater box must go:
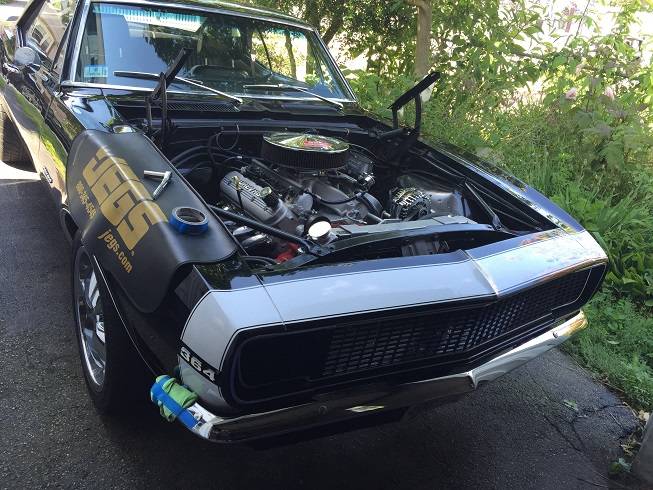
Turns out I was able to just leave a couple bolts loose at the front and support the rear of the fender on a couple of jack stands. I have a heavy piece of wire holding the the fender on at the top attached to the hood hinge:
This is the DSE heater delete plate which I painted gloss black to match the firewall:
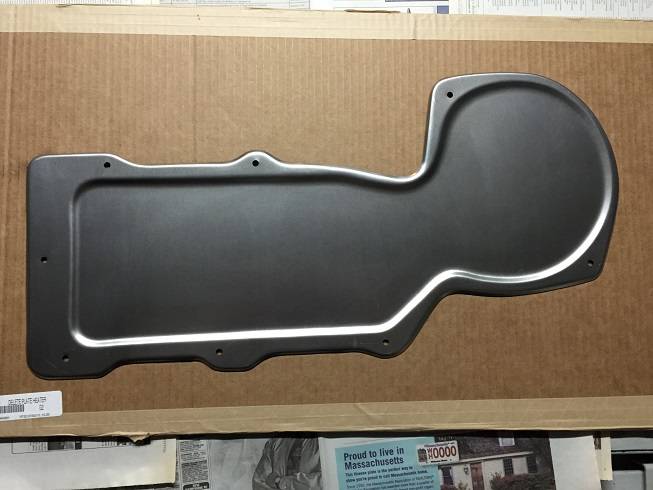
This is the VA firewall block off plate that goes on the inside. I used them both, and cut holes for the VA bulkhead fittings. This is the interior side of the panel:
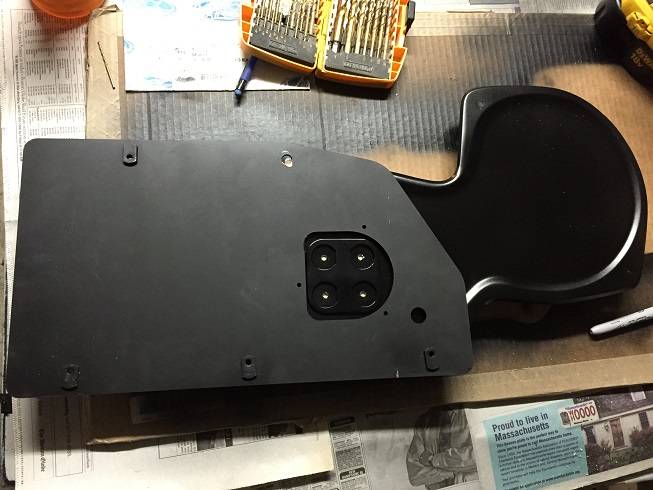
Here's the DSE Heater Delete plate mounted and sealed with black silicone:
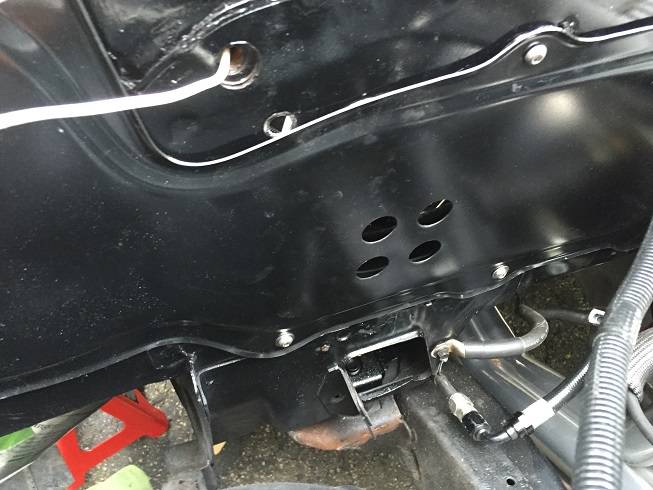
Bulkhead fittings added, the hoses will 90 degree towards the passenger fender and pass behind the fender:
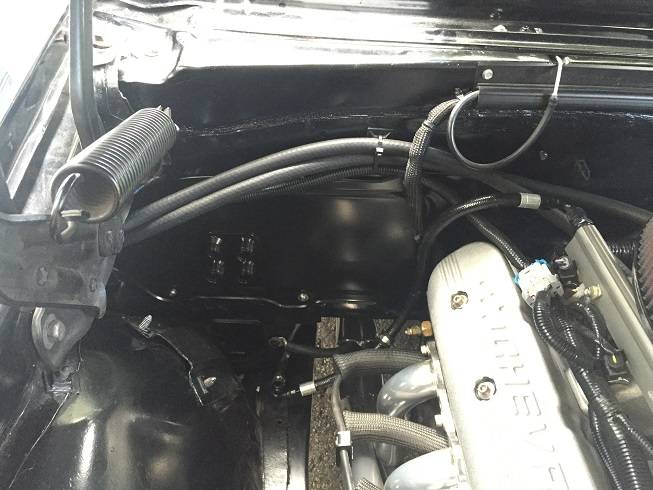
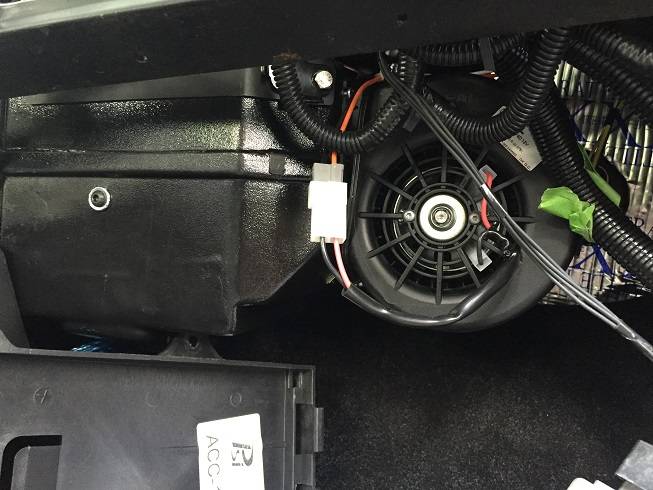
And here's the evaporater loosely mocked up (I also added more FatMat to cover the rest of the firewall, originally it stopped at the carpet line). Once I have the final fit, I will mount the LQ9 ECU above and to the right of it, on the upper cowl wall:
09-10-2015 #477
Registered User
- Join Date
- Jan 2011
- Location
- Boston, MA
- Posts
- 1,180
I ended up ordering the Vintage Air EZ Clip hoses from Summit Racing, that way I can make my own length hoses and not have to bring them to an AC shop to crimp the fittings. They are also much thinner walled and can bend a lot easier than the stock hoses that VA ships with the kit.
Hopefully I can get a little more work done this week. I'll update as I go. Thanks Jonathan for spending some time on the phone with me, providing the extra part numbers and doing some of the leg work for me. I'll be routing my hoses in the same way. (it's nice letting someone else do the research for a change!)
Here's my heater control unit, I think it will clean up fine for the install:
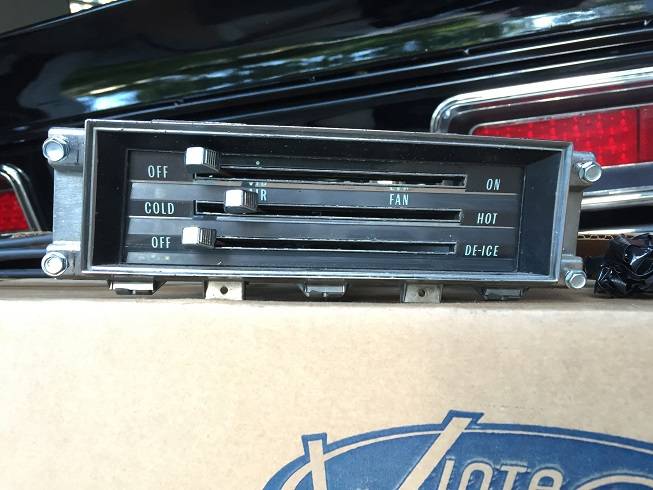
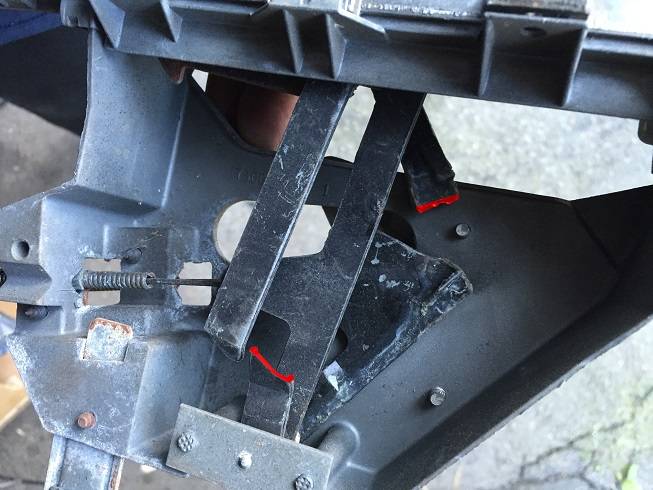
But the internals are going to need some help. Two of the three levers are broken, highlighted in red:
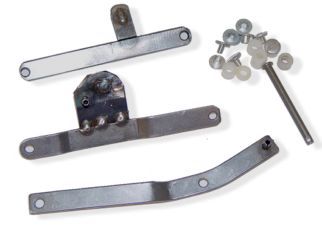
I ordered the "67-68 Camaro Heater Control Assembly Repair Kit"(http://www.firewheelclassics.com/sto...ID=&SKU=HTCHCR) from Firewheel Classics to rebuild the whole assembly:
"67-68 Camaro heater control assembly repair kit for controls without air conditioning.
Includes all the replacement levers and mounting hardware. Instructions included." Hopefully it really does include everything I need, the picture doesn't look like it's all there. Should be here by Wednesday, so I'll know then.
09-10-2015 #478
Registered User
- Join Date
- Jan 2011
- Location
- Boston, MA
- Posts
- 1,180
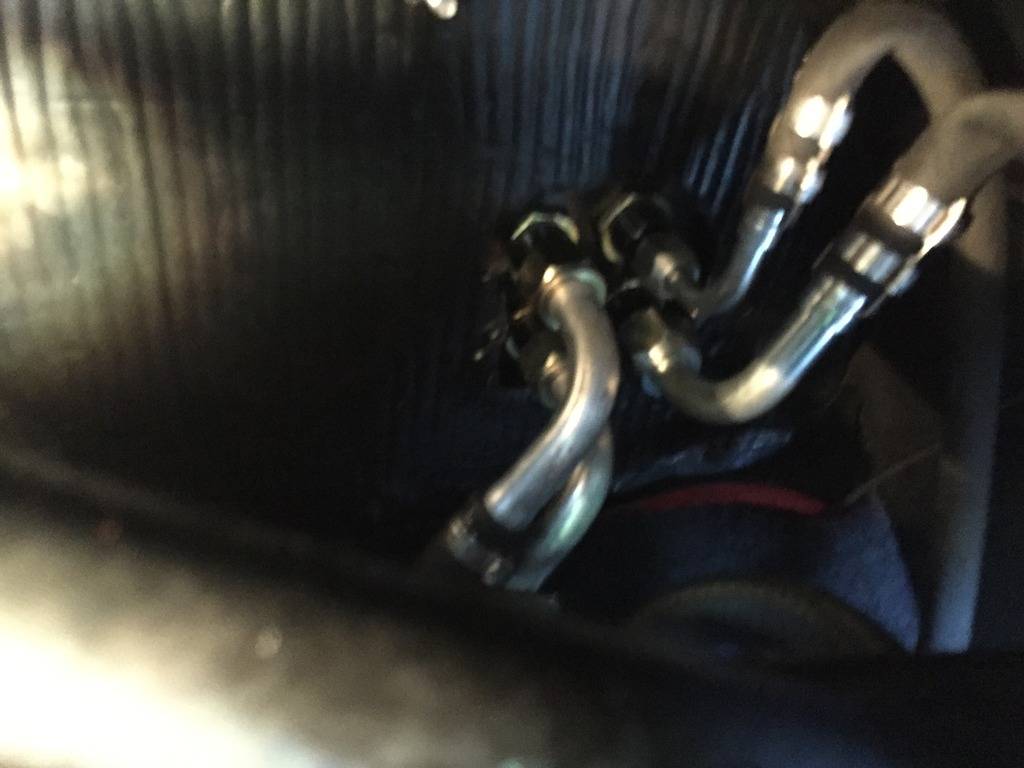
I have installed and removed the Evaporator unit about a dozen times. The location I chose to install the bulkhead was less than ideal, since heater hoses and fittings, as well as the 6an AC hose on the back of the evaporator are all in the same spot as the fittings coming off the bulkhead. I have been fighting with trying to find a way to angle all the fittings without interference. I should have done the bulkhead a couple inches closer to the passenger fender.
I finally figured it out last night, but pinched one of the heater hoses in the process, and I'm worried that the wall of that hose is compromised, so I'll pull the evap one more time and build a new hose. Also started the rebuild of the heater control.
Here's the Evaporator unit with the hoses:
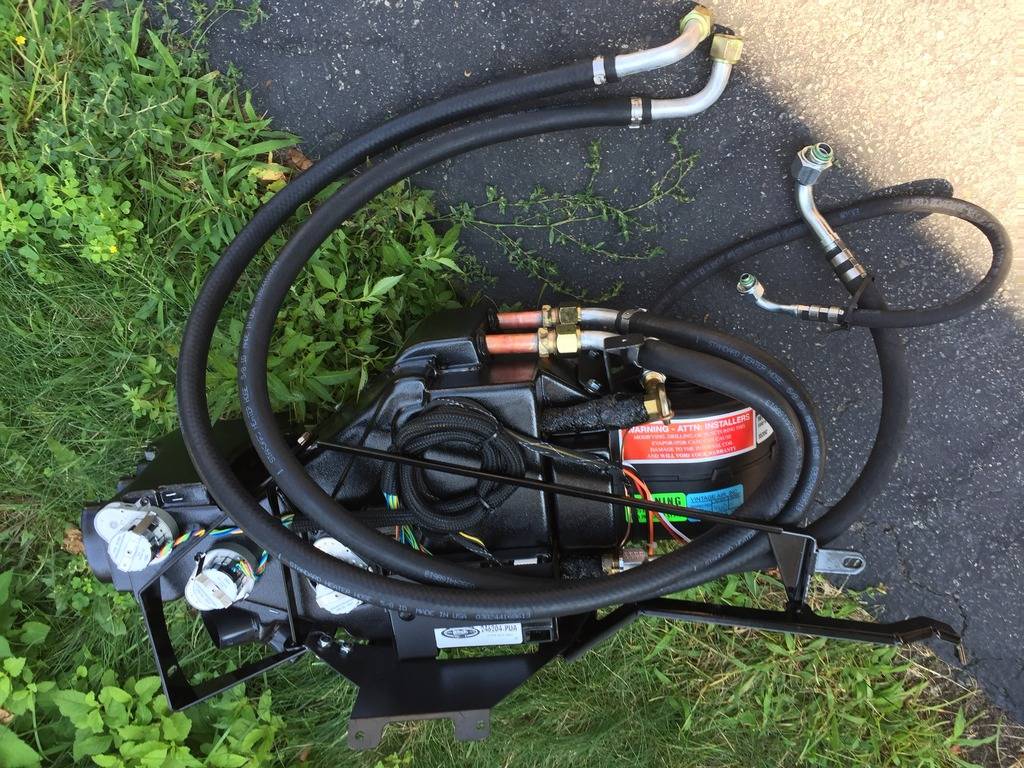
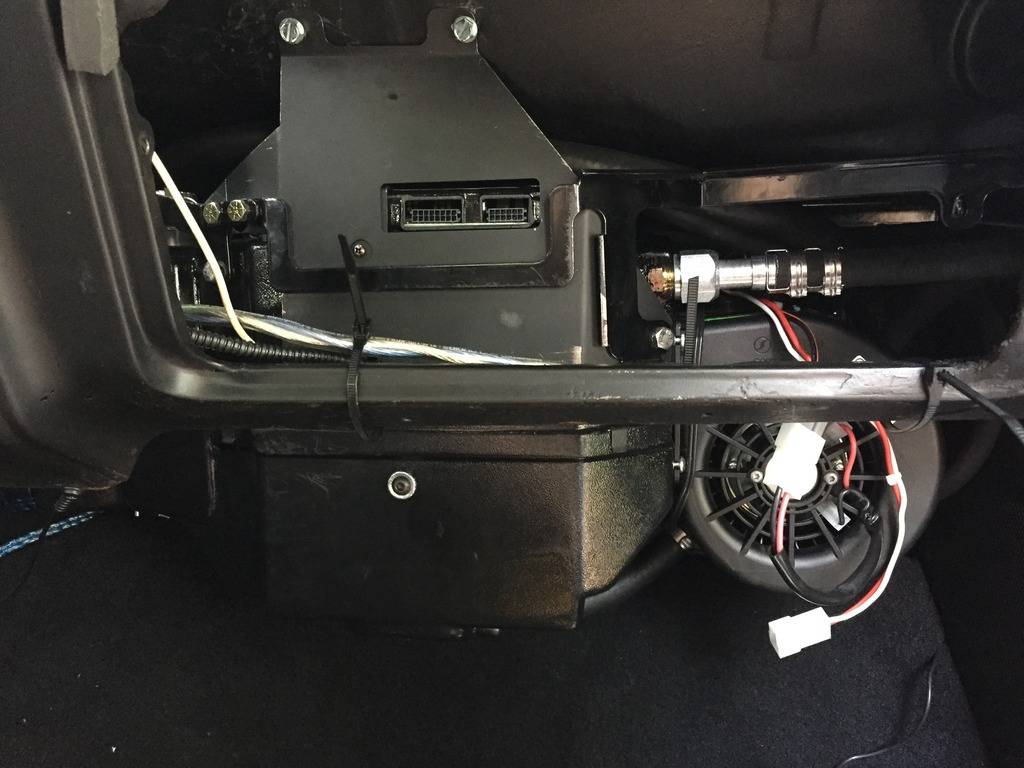
This is how my fitting attach at the bulkhead. In the above pic I had a -6AN straight on the evaporator, but I had to switch to a 45 degree -6AN angled towards the kick panel to make it work, and a -10 straight for the AC lines. I used a pair of 45 degree fittings angled upwards for the heater hoses.
Here's the Evalorator unit plumbed and mounted for good:
09-10-2015 #479
Registered User
- Join Date
- Jan 2011
- Location
- Boston, MA
- Posts
- 1,180
This is the -6 hardline for the condensor, next to a piece of copper tube that I bent up for reference. The hardline ended up right where I had relocated my coil packs to (where the passenger inner fender and subframe meet just behind the stock battery location).
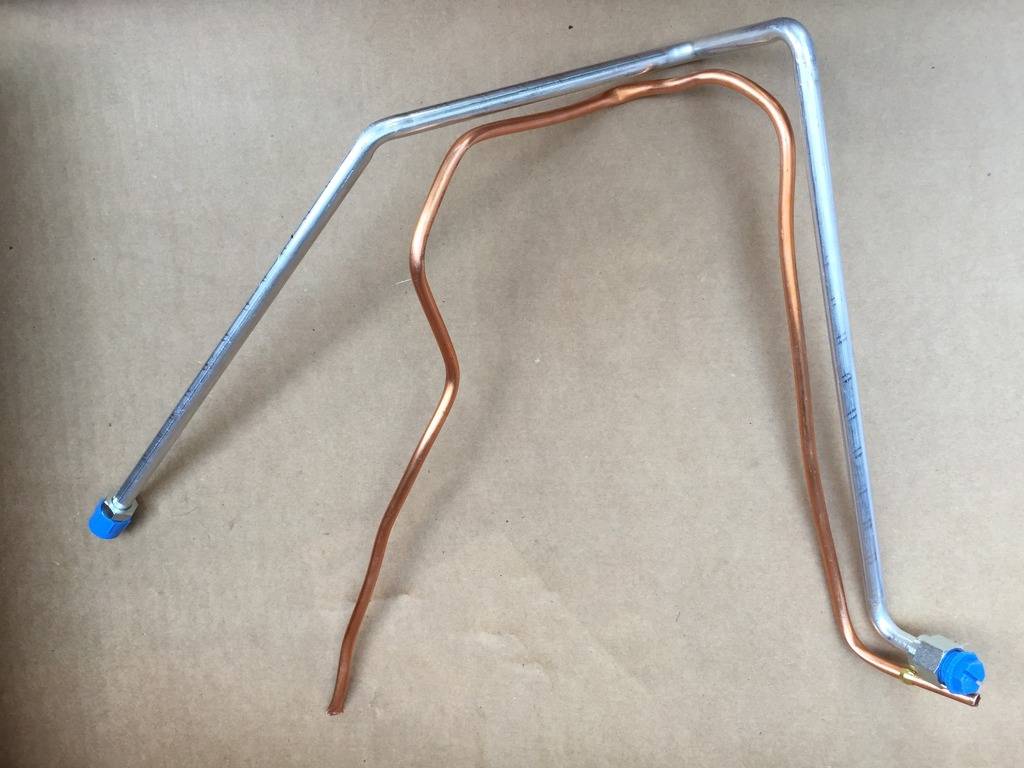
Rather than moving the coil packs, I just rebent the -6 hardline with a tubing bender:
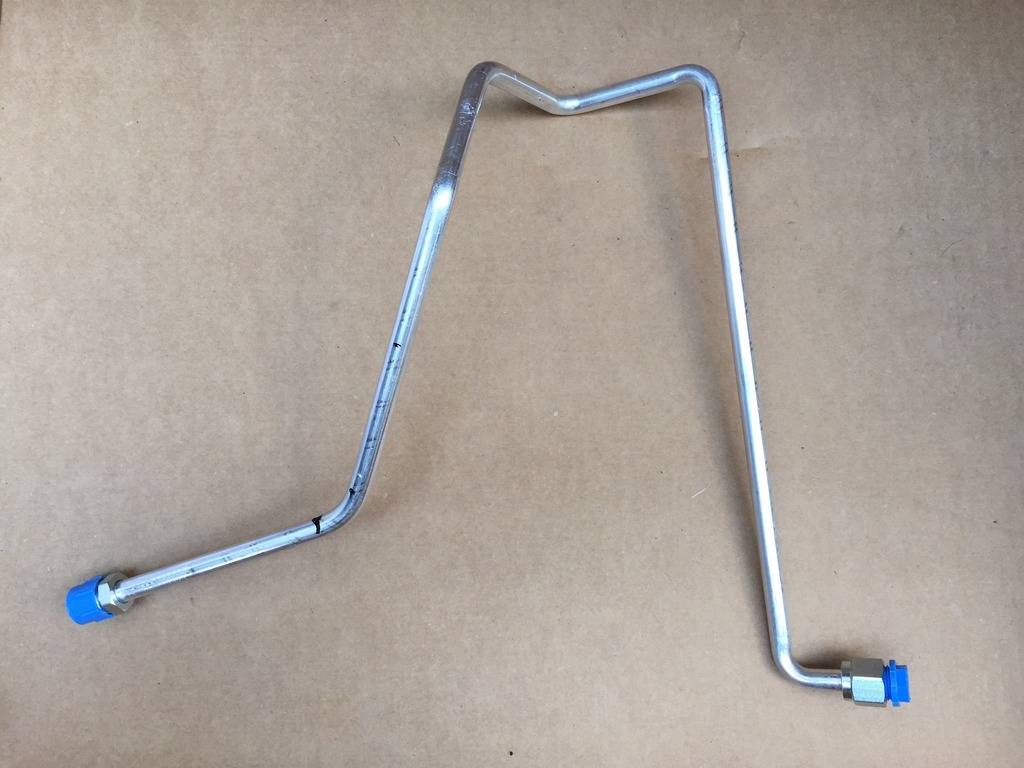
Here's where it pops out now, and a shot of the Vintage Air EZ Clip hose, I'll take better photos tomorrow for future reference.
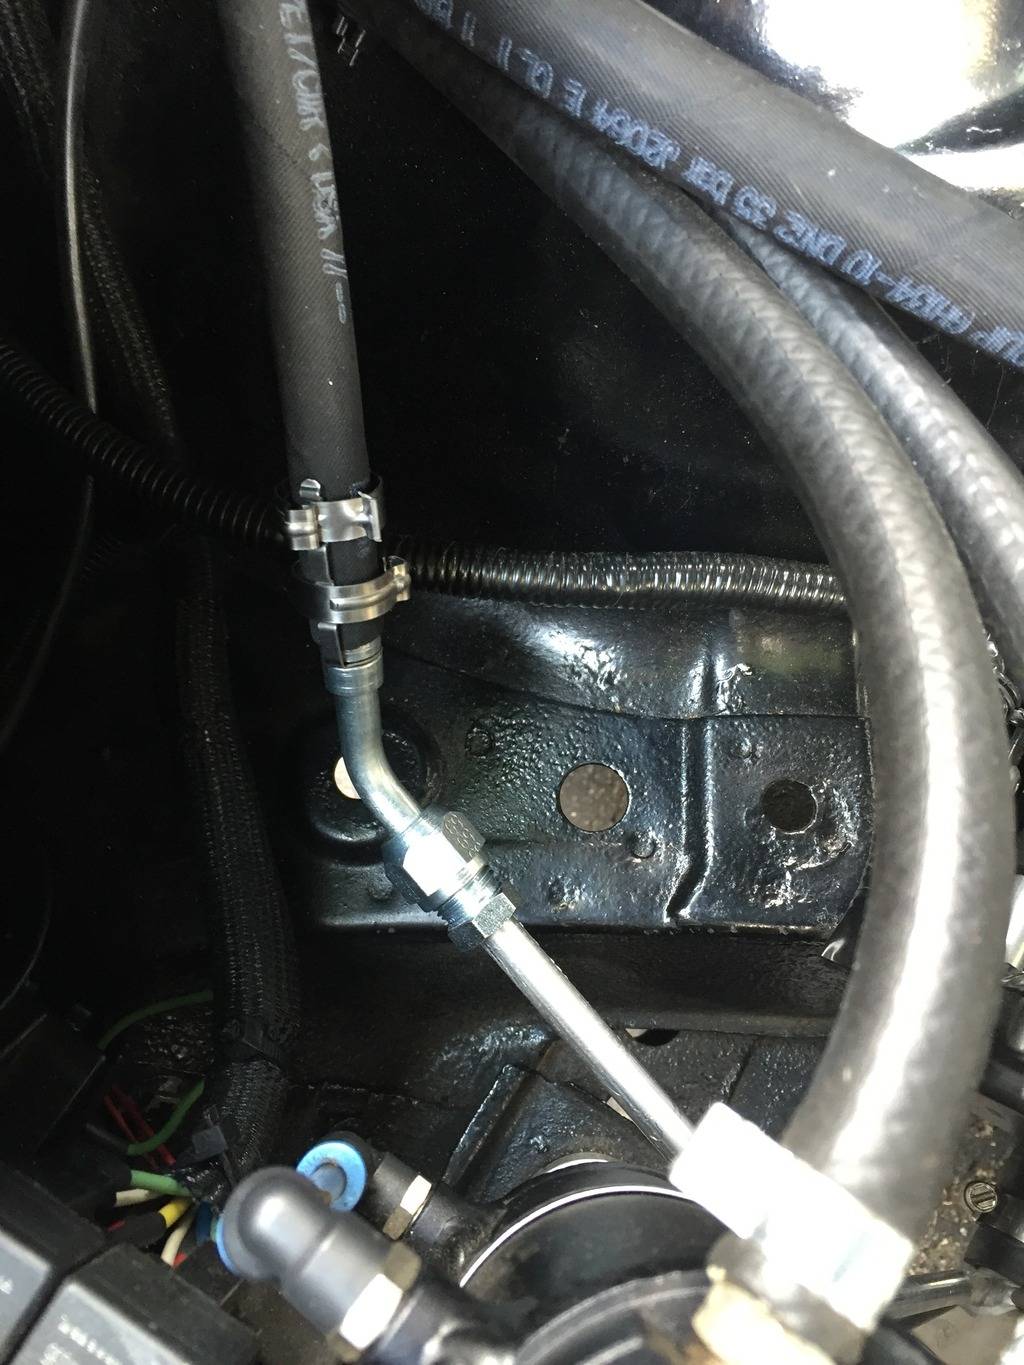
Got some work done today. For some reason, almost everything went as planned and I got further along than expected. Not sure how that happened, but I'll take it...
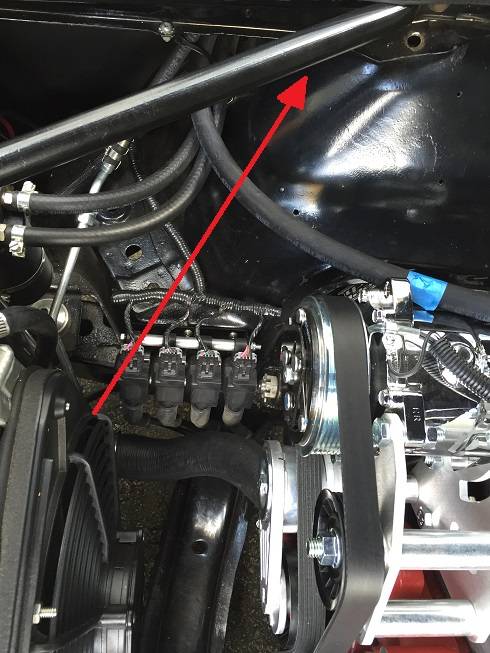
Here's a better picture of where I relocated my coil packs, and the red arrow is where the hardline from the condesor wanted to pass. You can see the silver hardline tucking much closer to the radiator support now:
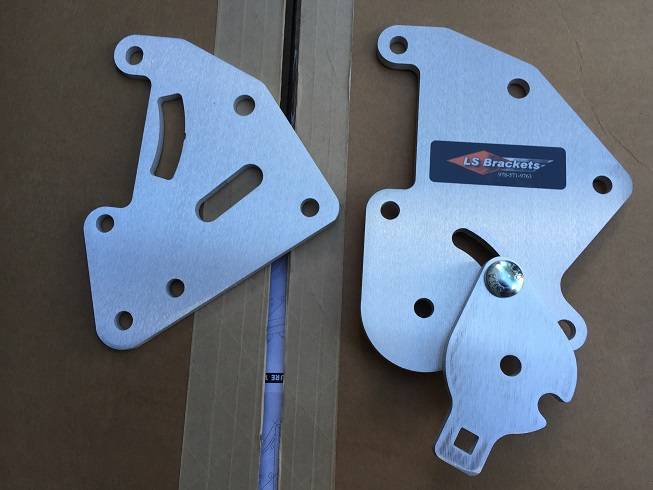
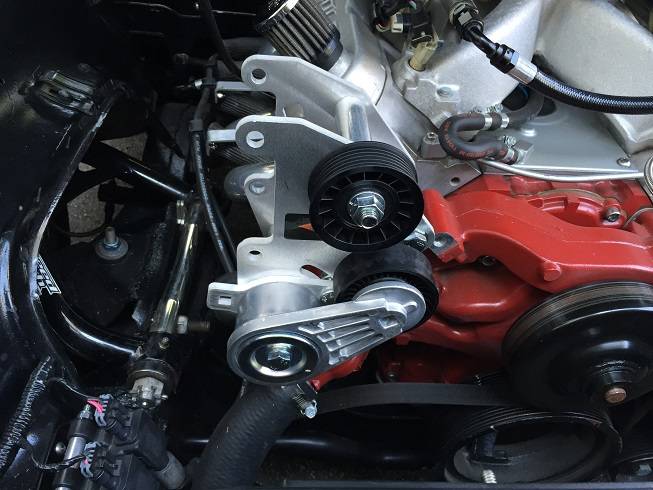
This is the AC compressor bracket (LS-0262) I'm using from lsbrackets.com. I used one of their other brackets for my PS/Alternator relocate on the the drivers side, so I wanted to stay consistent:
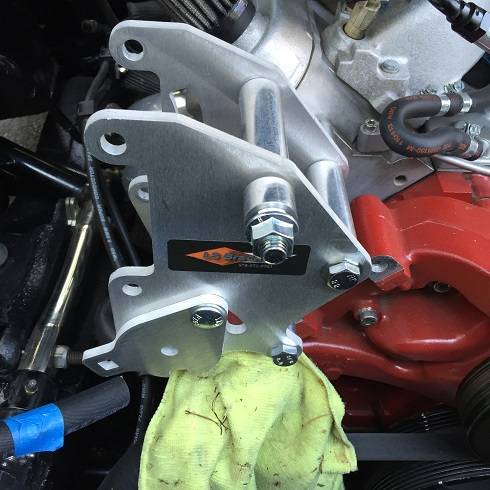
Beginning to assemble the bracket on the motor:
New idler pulley (Gates 38008) and tensioner (Gates 38164):
New Chrome Sanden AC Compressor with 7 groove pulley:
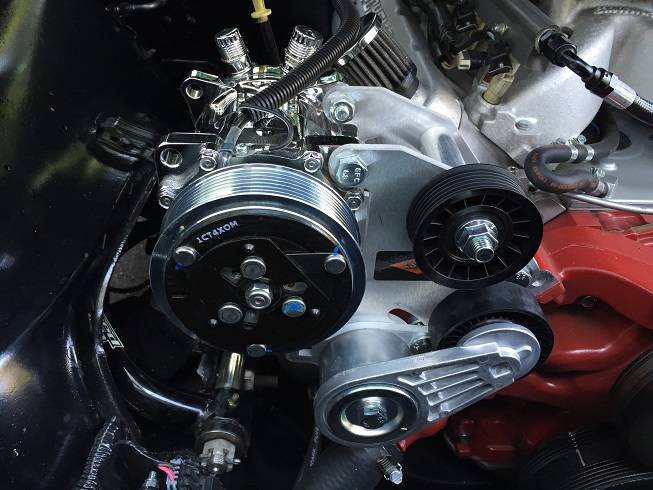
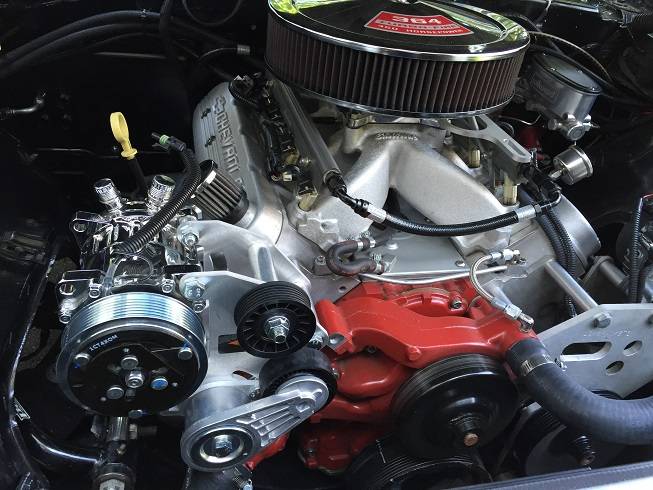
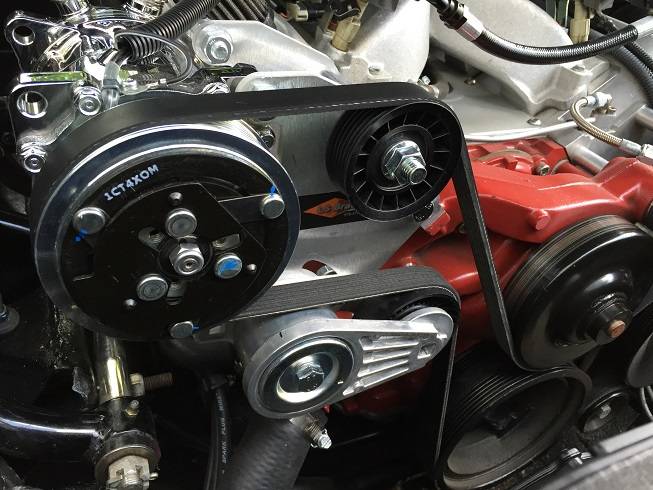
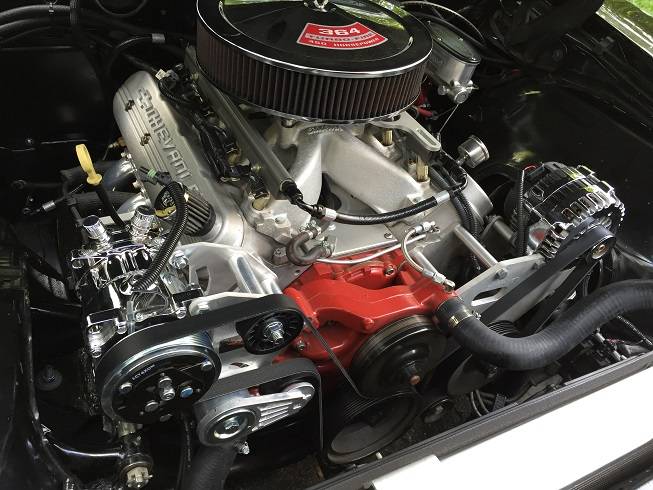
The first belt I tried was a Dayco 5060945 (6 groove 94.5"), and it was 2" too long. I swapped it out for this 5060925 and it fit perfect with 1" movement on the tensioner (which is ideal):
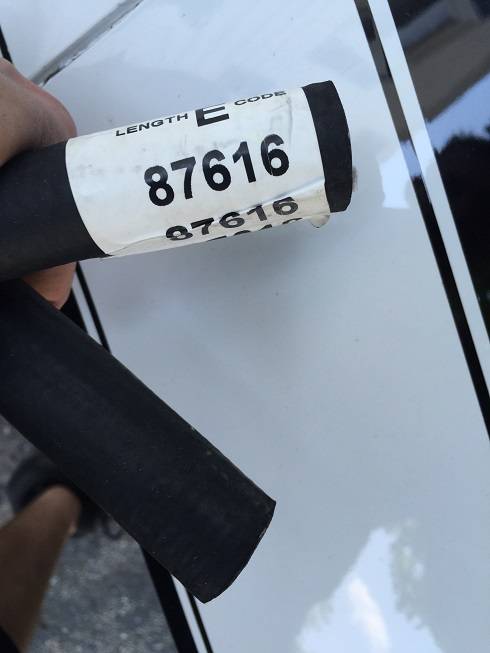
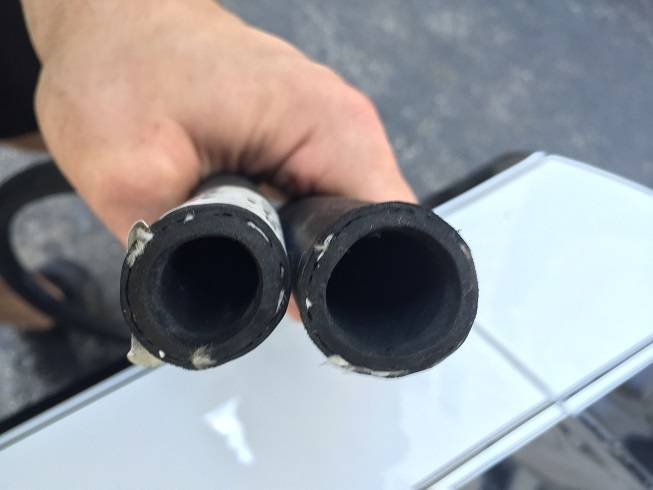
The Vintage air unit uses 5/8" hose on the heater supply and return, just like a SBC, but the LS engine uses a 5/8" supply, 3/4" return. I found a 5' hose that is 5/8" on one end and 3/4" on the other, which is exactly what I needed. Dayco 87616:
5/8" on left, 3/4" on right:
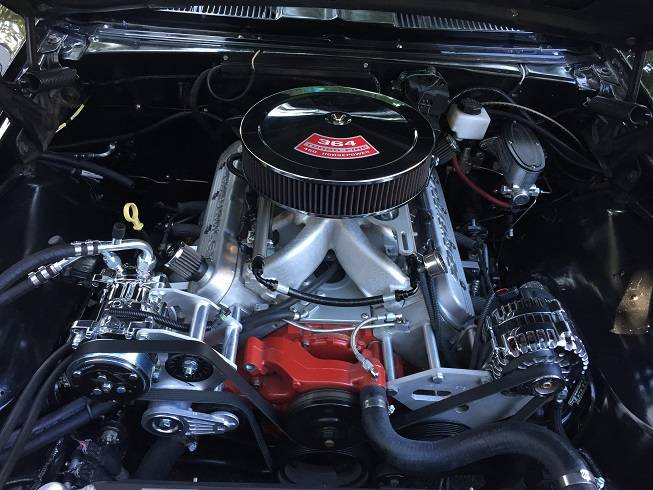
Then I got a few more hoses done. All of the AC side is plumbed, except for one 90 degree fitting at the bulkhead. I ran the heater hoses, but won't connect them until I'm ready to drain the radiator.
09-10-2015 #480
Registered User
- Join Date
- Jan 2011
- Location
- Boston, MA
- Posts
- 1,180
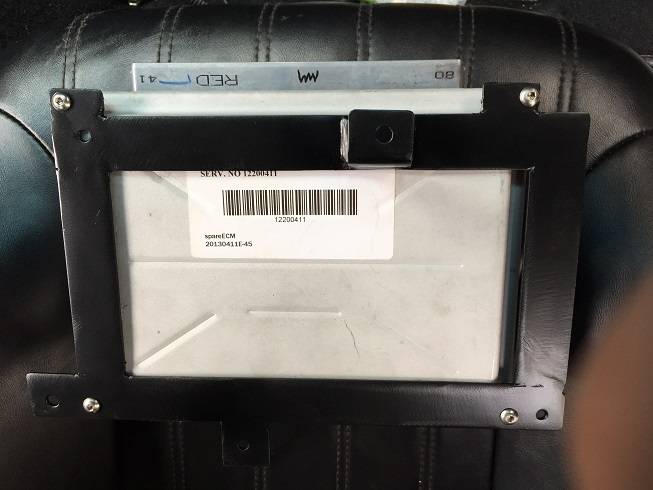
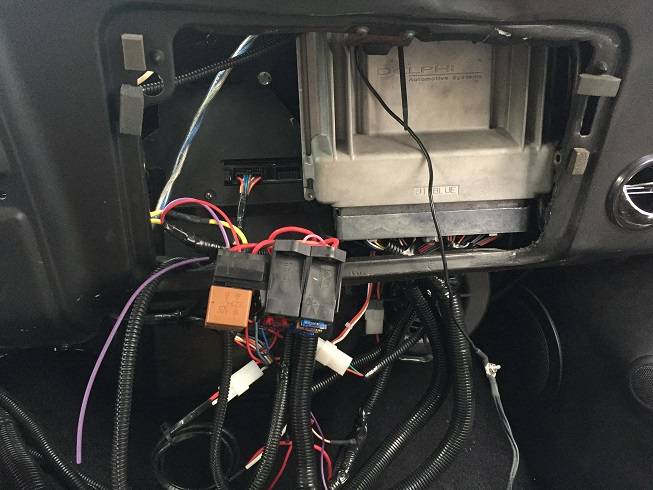
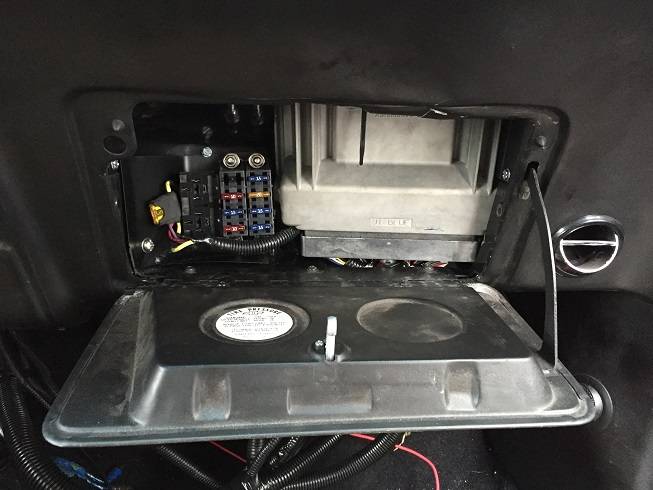
Wow, I feel like I've spent the entire last two days just trying to button up the wiring. I had to relocate the LS ECU, tried a bunch of locations (behind the ashtray, in place of the original center speaker, behind the ignition switch, tucked up on the passenger side below the dash pad, behind my radio housing) and it just wouldn't fit anywhere. I finally decided to give up my glove box and mount it there as well as the fuse box. Got pretty much all the wiring done, just need to stuff it all neatly back under the dash.
Here's the mount I made for the ECU:
Here it is mounted. Not much space back there for an ECU, evaporator, all the wiring and hoses:
Got the glove box door back on, but the latch on the right side hits the computer, so I can't close the door. I'll figure something out:
I also tried clocking my compressor 90 degrees to the left, but the service port on the high pressure side is millimeters away from the inner fender:
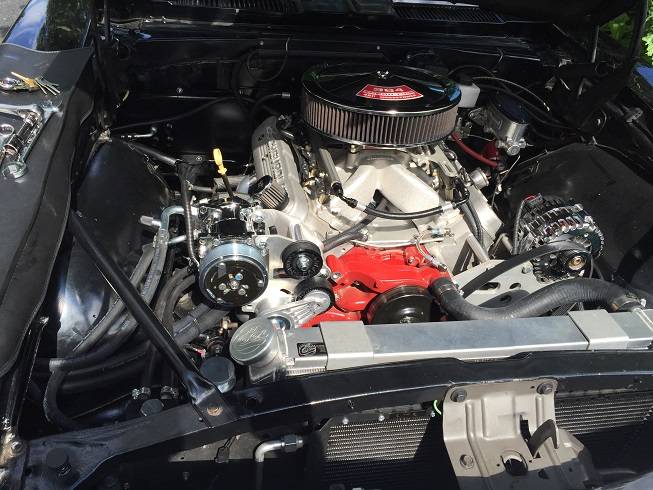
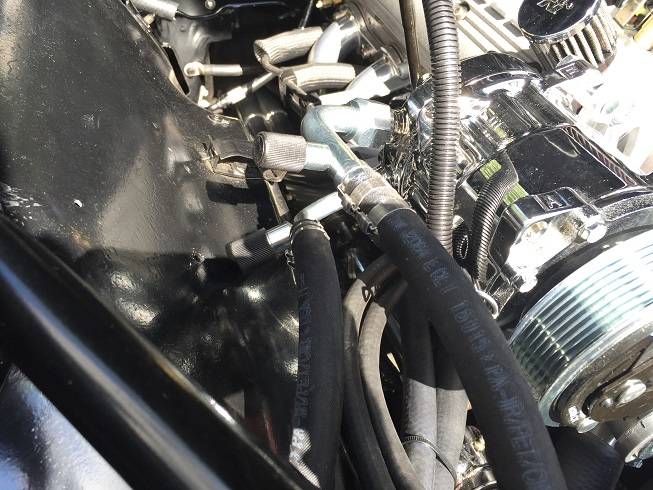
I do like the look of it clocked over more that way, so I ordered a couple other fittings to see if I can make it work.


 Reply With Quote