


Results 341 to 360 of 573
-
06-28-2013 #341

 Registered User
- Join Date
- Jan 2011
- Location
- Boston, MA
- Posts
- 1,180

Thanks guys. I don't have any formal training, and didn't grow up around cars. Everything I have learned has been from forums and books, which is why I wanted to document everything I did. Hopefully there's something useful in this thread for someone else to learn from.
-
06-28-2013 #342
 Registered User
- Join Date
- Oct 2007
- Posts
- 1,872
Hi Nice work... not to be a critic, but i would caution having a High pressure fule line.. and a connector to boot.. right over the header... leak+ heat=FIRE.
Also if you ever want to go to a track.. even a local drag strip they will not let you run. It would fail tech for it's proximity to heat and the flywheel.From a place you will not see comes a sound you will not hear....
67 Camaro In progress
https://www.pro-touring.com/showthre...-Tap-67-camaro
-
06-28-2013 #343
Registered User
- Join Date
- Jan 2011
- Location
- Boston, MA
- Posts
- 1,180
That's good to know, and an easy fix, although I'd think anywhere the high pressure fuel line runs would be close to a header, even to the front of the rail? Originally Posted by XLexusTech

-
06-28-2013 #344
Registered User
- Join Date
- Oct 2007
- Posts
- 1,872
the NHRA rule book for example has strict rules about the line and the the flywheel. consider this.. line right were you have it.. then up the inside of the fender well to and a bulkhead fitting coming out of the fender well, then down along the block up the front of the engine to the rail.
From a place you will not see comes a sound you will not hear....
67 Camaro In progress
https://www.pro-touring.com/showthre...-Tap-67-camaro
-
07-02-2013 #345
Registered User
- Join Date
- Jan 2011
- Location
- Boston, MA
- Posts
- 1,180
Thanks, I am going to re-route the lines similar to what you suggested. I'll take pics (of course) once it's done. Originally Posted by XLexusTech
In the meantime I put about 100 miles on it today and it's running great. I contacted Wilwood last week because the brake MC was leaking around the bolts causing the paint to peel. When I pop my hood, that's the first thing people noticed, not the shiny new engine, but some paint peeling around a couple of allen head bolts. Go figure. Anyways, they were happy to send a replacement cover and seal (diaphragm) at no cost. They said they ran a batch of covers that were e-coated and they had a problem with them peeling. They switched to black anodized and all is well. Here are pics of the old, the new, and a comparison of the two:
Old:
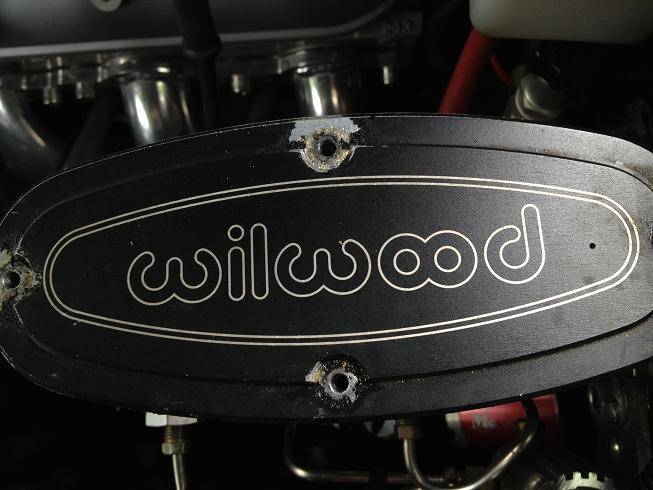
New:
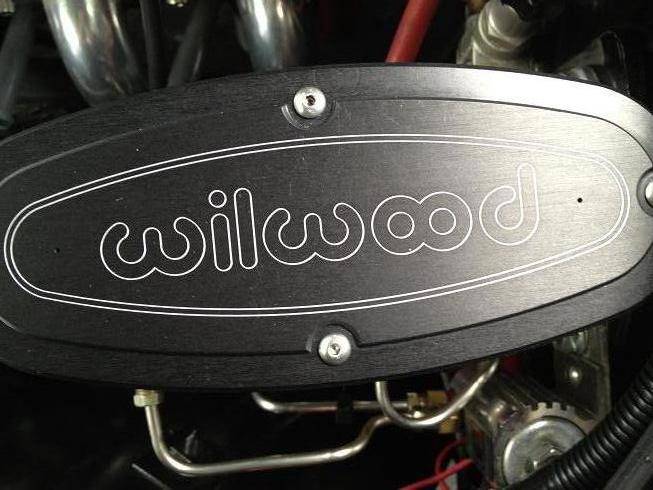
New vs Old:
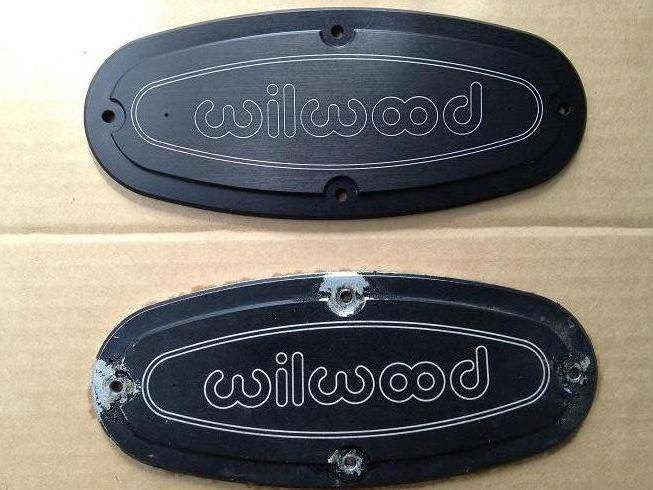
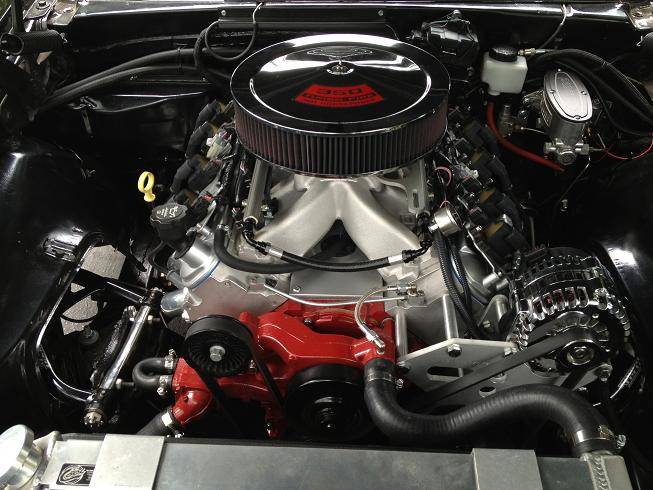
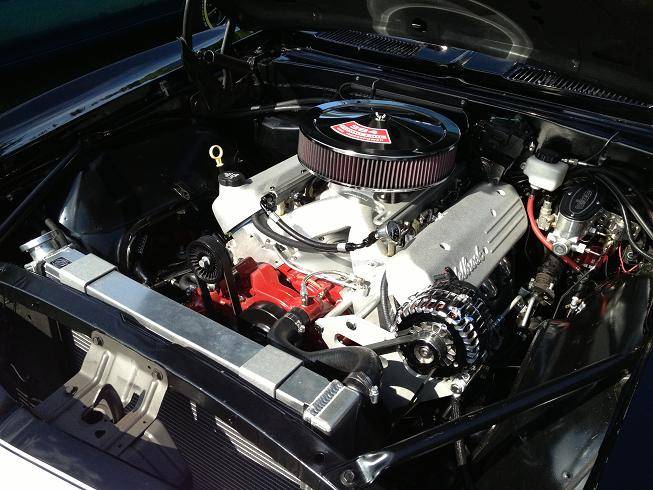
And a better shot of the engine:
-
07-03-2013 #346
 Registered User
- Join Date
- Feb 2005
- Location
- Las Vegas, NV
- Posts
- 1,267
I like the idea of using the crossover tube and drilling & tapping for a an fitting, then to the water pump (I think that I may have to borrow that idea!)
Thanks, Jeff
-
07-03-2013 #347
Registered User
- Join Date
- Jan 2011
- Location
- Boston, MA
- Posts
- 1,180
Thanks, I learned that on ls1tech.com Originally Posted by jwcarguy
I'd suggest using a straight 1/4" NPT to -4an with 90's on the hose itself. If you use a 90 degree 1/4" NPT, you have to tap the crossover tube just right so the 90 comes out at the angle you want it.
-
07-03-2013 #348
 Registered User
- Join Date
- Apr 2005
- Location
- IN/MI border
- Posts
- 1,920
Very nice looking motor and engine bay
-
07-03-2013 #349
Registered User
- Join Date
- Nov 2009
- Location
- Orlando, FL
- Posts
- 250

Brent looks great! Thank you for all the great info
-
07-03-2013 #350
Registered User
- Join Date
- Jan 2011
- Location
- Boston, MA
- Posts
- 1,180
Thanks Buddy! Originally Posted by BuddyP
No problem. Feel free to ask questions in this thread. It might help someone else down the road. Let me know what engine combo you go with. Originally Posted by sebtarta
-
07-21-2013 #351
Registered User
- Join Date
- Jan 2011
- Location
- Boston, MA
- Posts
- 1,180
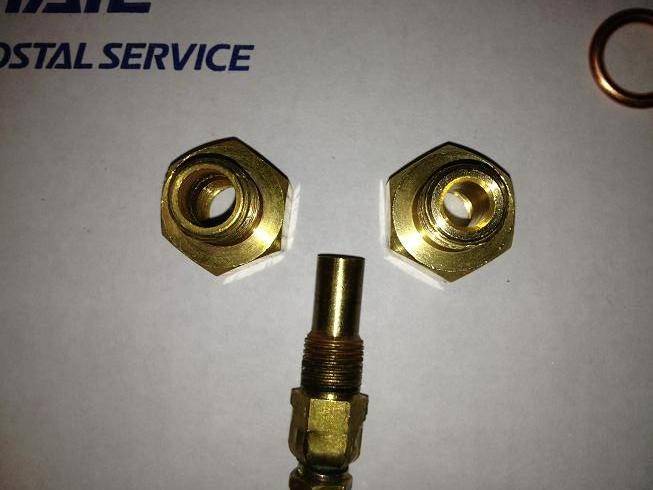
The new temp sensor adapter arrived. The thread pitch was right, but the opening for the sensor was too small. I knew this in advance, and just drilled the opening with a 5/16" bit. The opening was .250" and needed to be .3125. I managed to do it without cracking the adapter, and even installed it into the head without breaking it!
Here's the old adapter on the left and the new one (before I drilled it out on the right):
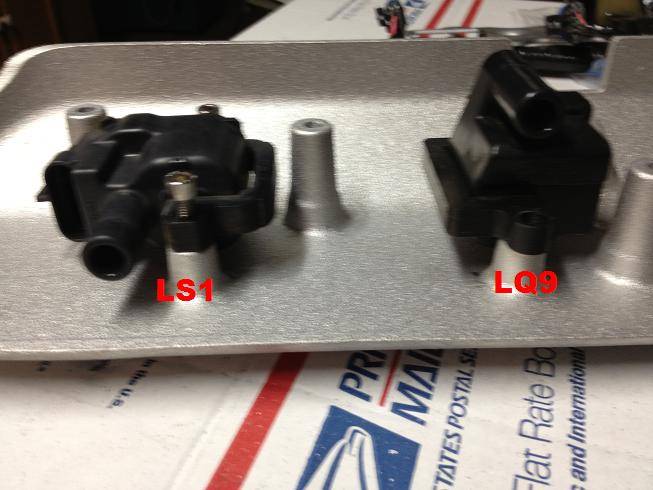
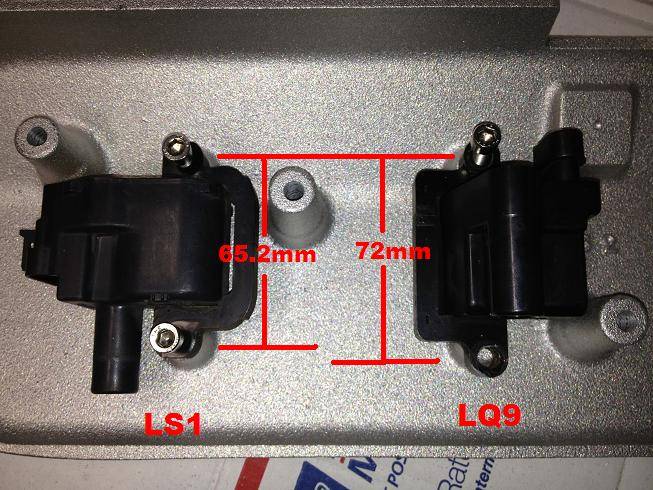
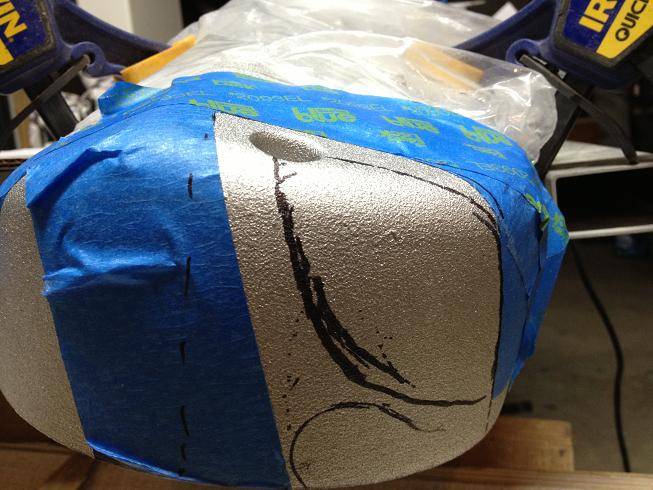
I also got my Edelbrock Coil Covers in while I was away. I had to switch to an LS1 coil pack because the LQ9 is too big, and the mounting holes on the LQ9 coils are too far apart. Of course nothing ever fits right. The coil cover was hitting the PS/Alt bracket as well as the alternator itself. I contacted the guy who makes the LS brackets and he said he could do a one off set for me with the right height and spacing, but I couldn't swallow the cost, so I did a litte modification to the coil covers. I'm happy with the finished product, but always a little nervous to hack into a brand new anything.
Blurry photo, but it shows the height difference of the LS1 vs LQ9 coil packs:
And here you can see the hole spacing between the two:
Here's the coil cover and where I had interference:
A little Dremel and cutoff wheel work:
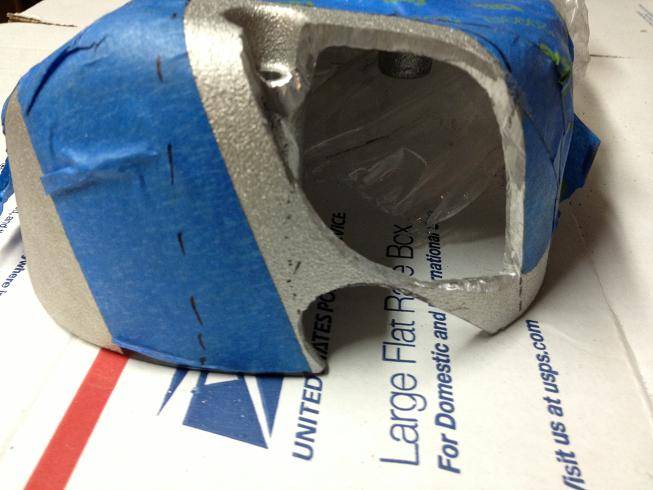
Mocked up:
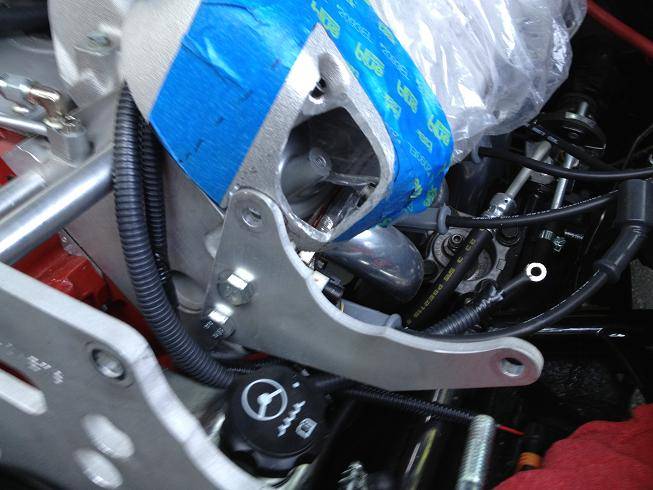
Mounted:
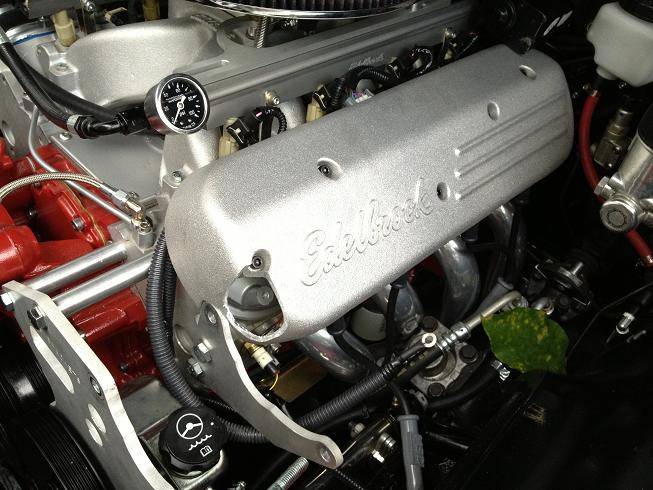
And with the alternator in place:
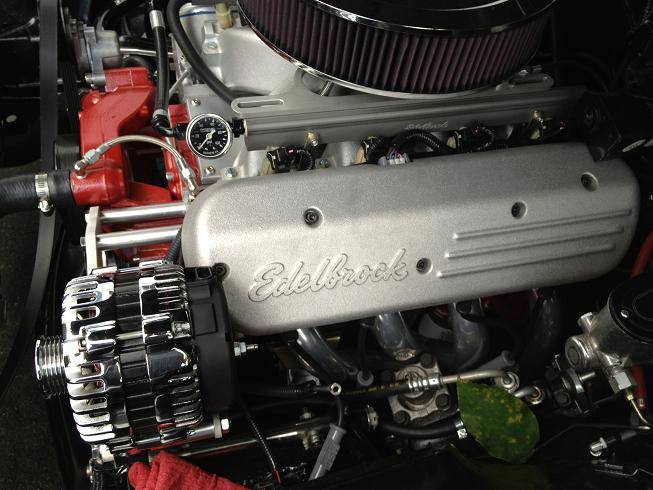
-
07-21-2013 #352
Registered User
- Join Date
- Jan 2011
- Location
- Boston, MA
- Posts
- 1,180
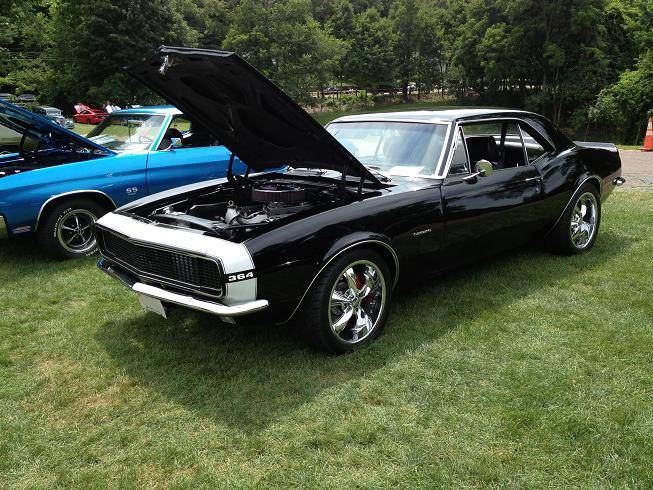
I also entered my car into the American Car & Truck Day at Larz Anderson Auto Museum. I didn't expect to win any awards, and I didn't. But I had a ton of positive comments. A lot of people had to do a double take and then ask what it was, how I did it, etc.
The highlight of the day was this old timer (85+) and his two "kids" (both in their 60's)...The old timer was pointing everything out and oohing and ahhing, and then he sees the emblem on the fender, then the emblem on the top of the air cleaner and says "Wait. That ain't the original motor, this car get's no votes from us." And the two kids bow their heads and all three just move on to the next car. I had to chuckle.
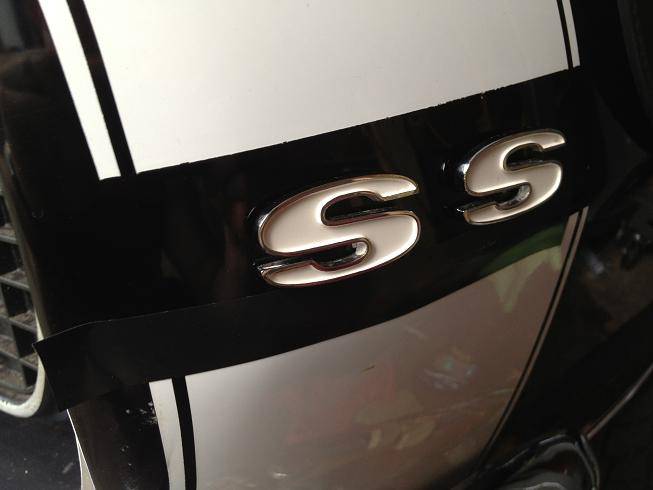
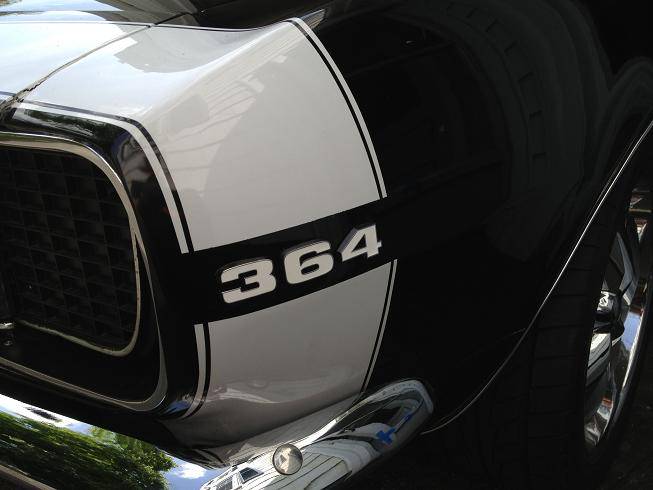
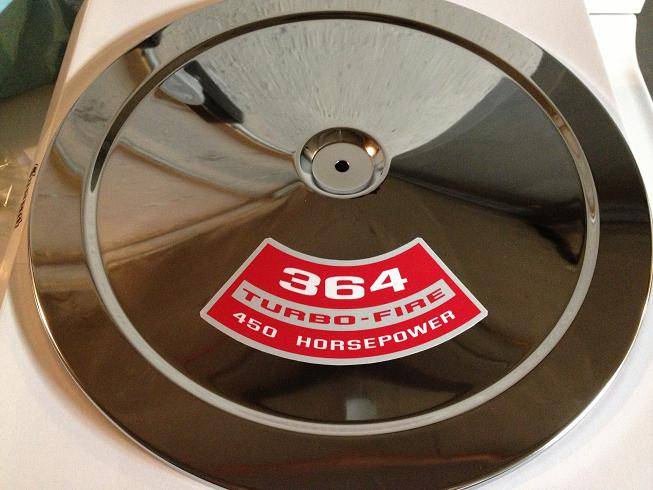
I finished debadging the SS emblems. It wasn't a real SS and I wasn't trying to fool anyone. But in keeping with the theme of the car, I replaced them with "364" emblems, and had a custom air cleaner decal made to replace the old 350/300hp decal.
Say goodbye to the SS emblems:
And hello to the 364:
And here's the new air cleaner decal:
Here are a few photos from the show:
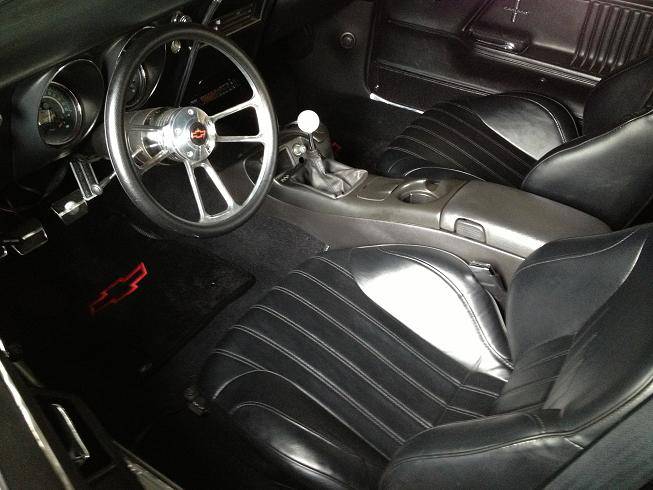
-
07-22-2013 #353
 Registered User
- Join Date
- Aug 2006
- Posts
- 381
Man I had the same issue with my Wilwood cover about that paint peeling off, I tell what, it does make the cover look ugly. Originally Posted by 67rally
I really like the black anodized cover, it looks awesome. Do you have by any chance the part number of the anodized cover because I had tried to look up just the cover but unfortunately no luck.72 Camaro RS:SOLD
68 Camaro:
LS6 Engine,Tremec TKO 600,5 Speed
Complete Speedtech Subframe Kit,Speedtech Torque Arm, 9" Rearend from Strange, Wilwood Brakes, Minitubbed, Hotchkis Subframe Connectors
-
07-22-2013 #354
Registered User
- Join Date
- Jan 2011
- Location
- Boston, MA
- Posts
- 1,180
Originally Posted by 72Z/28
For future reference, the part numbers are 330-8573 (cover) and 210-8458 (diaphragm).
-
07-22-2013 #355
Registered User
- Join Date
- Mar 2009
- Location
- Houston, TX
- Posts
- 1,197
Don't you just love the numbers matching/factory correct crowd. Love what you've done to the engine. Originally Posted by 67rally;1007474}
Tu Ho
Firebird V2-LS swap
-
07-22-2013 #356
Registered User
- Join Date
- Jul 2005
- Location
- Grain Valley, MO
- Posts
- 92
Your build is an inspiration to me!
-
07-22-2013 #357
Registered User
- Join Date
- Aug 2006
- Posts
- 381
Thanks a lot man. Do you know if this part number is unversal for all MC bore sizes or is it just for the specific bore size you have? Originally Posted by 67rally
72 Camaro RS:SOLD
68 Camaro:
LS6 Engine,Tremec TKO 600,5 Speed
Complete Speedtech Subframe Kit,Speedtech Torque Arm, 9" Rearend from Strange, Wilwood Brakes, Minitubbed, Hotchkis Subframe Connectors
07-22-2013 #358
Registered User
- Join Date
- Jan 2011
- Location
- Boston, MA
- Posts
- 1,180
Yeah, I get a kick out them. Especially if they don't even have a car. Nothing worse than having someone critique your car and then they go on to tell you what they're going to buy. Originally Posted by rickpaw
"So, what are you driving?"
"Oh, just an '87 Civic, but I'm gonna buy a 1969 Z28 RS Yenko when I find the right one."
"Oh, nice. Move along."
Thanks, it's getting there. Originally Posted by Mizzouri
07-22-2013 #359
Registered User
- Join Date
- Jan 2011
- Location
- Boston, MA
- Posts
- 1,180
I assume it's for all bore sizes, since I didn't tell them which one I had. I think all the tandem MC's are the same dimensions externally. Give them a call if you want. They replaced mine for free because the leak had caused the paint damage. Here's the thread I first posted in and got a contact name at Wilwood: https://www.pro-touring.com/showthre...ir-Cover-issue Originally Posted by 72Z/28
07-23-2013 #360
Registered User
- Join Date
- Aug 2006
- Posts
- 381
Thanks man, I sent email to Wilwood customer service yesterday and waiting for their response. Originally Posted by 67rally
72 Camaro RS:SOLD
68 Camaro:
LS6 Engine,Tremec TKO 600,5 Speed
Complete Speedtech Subframe Kit,Speedtech Torque Arm, 9" Rearend from Strange, Wilwood Brakes, Minitubbed, Hotchkis Subframe Connectors


 Reply With Quote





