


Results 81 to 100 of 573
-
02-29-2012 #81

 Registered User
- Join Date
- Jan 2011
- Location
- Boston, MA
- Posts
- 1,180

Alright, lot's of goodies coming in the mail. I'm going to upgrade my alternator from a 1 wire to a chrome Powermaster 140amp 3 wire 12si alternator. I'll be relocating the optima yellow top battery to the trunk, and using a bunch of MAD electrical stuff to rewire most of it. I ordered a billet battery mount from Billet Specialties, and I'm going to run 1/0 welding cable (100% copper) to the starter, and use a remote solenoid in the trunk to make the 1/0 dead after starting.
-
02-29-2012 #82
Registered User
- Join Date
- Jan 2011
- Location
- Boston, MA
- Posts
- 1,180
I currently have no sound system at all (no head unit, no speakers, not even any wiring), that's about to change. Here's the stereo plan so far...still deciding on a head unit. I may wait until the Retrosound Model Two comes out in June for it's iPod controls.
I have a bunch of components that came out of my last SUV and wouldn't fit into the new Jeep. They are a little older, but they sound killer:
Alpine MRD-1005 Mono subwoofer amp (700w RMSx1 or 1000w RMS into 2 ohm)
2 - Alpine MRV-T420 two channel amps (110w RMS x2)
2 - Infinity Kappa Perfect 12.1 subs
Nitro 1.5 Farad Capacitor
And I just ordered:
Alpine SPR-60C 6.5" component speakers (110w RMS) for the front
Alpine SPR-69 6x9 coaxial speakers (100w RMS) for the rear
72' 12 awg Monster speaker cables
3 Cadence RCA cables
I'll be using a set of Rod Doors kick panels for the 6.5 components speakers and building a custom sub box and an amp rack for the rest of the components. This project will probably take a while to finish, but should look pretty good and sound great once it's done. Plenty of pics in the following weeks.
-
03-04-2012 #83
Registered User
- Join Date
- Jan 2011
- Location
- Boston, MA
- Posts
- 1,180
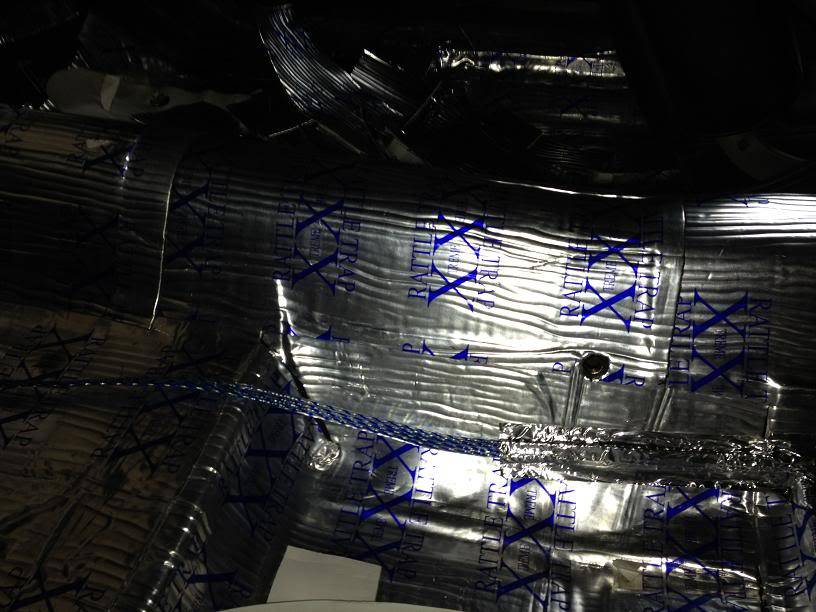
Got a little work done on the stereo wiring. I laid down a single and a double Cadence RCA cable, as well as the 12 awg Monster speaker wire for the front speakers, and secured them with foil tape. The RCA's run down the passenger side of the trans tunnel, and the speaker cable is on the driver's side:
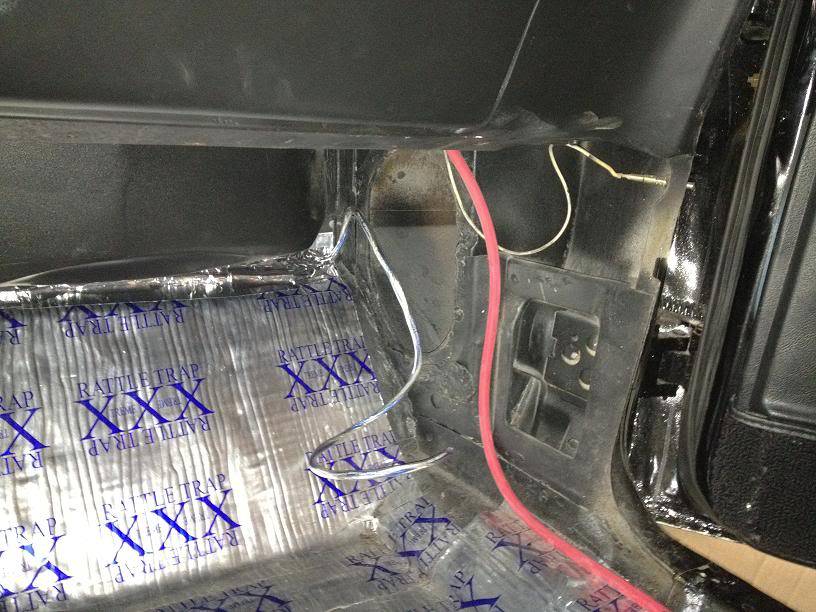
I pulled the passenger side kick panel and test ran the 2 awg welding cable that will be responsible for charging the battery once it's relocated to the trunk. I'll run a 1/0 from the starter to the batter in the same channel. I'm using Excelene brand for both, super flexible and easy to run. The 2 awg will run over towards the drivers side and pass through a Monster Cable grommet to a MAD terminal block. I'm still deciding on where I want to pass the 1/0. I might go through the old kick panel vent and then use a closeout can there and feed the wire behind the passenger fender.
-
03-04-2012 #84
Registered User
- Join Date
- Jan 2011
- Location
- Boston, MA
- Posts
- 1,180
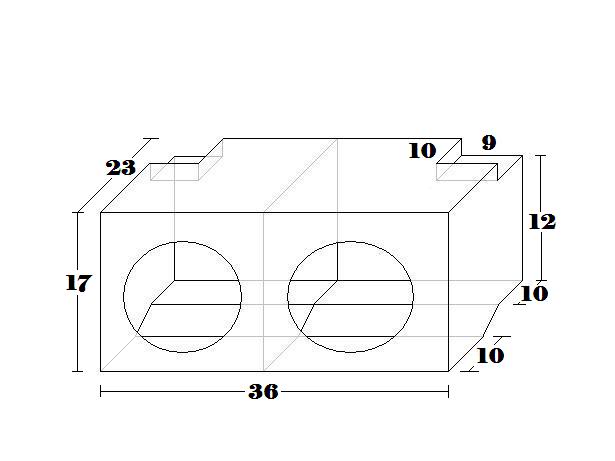
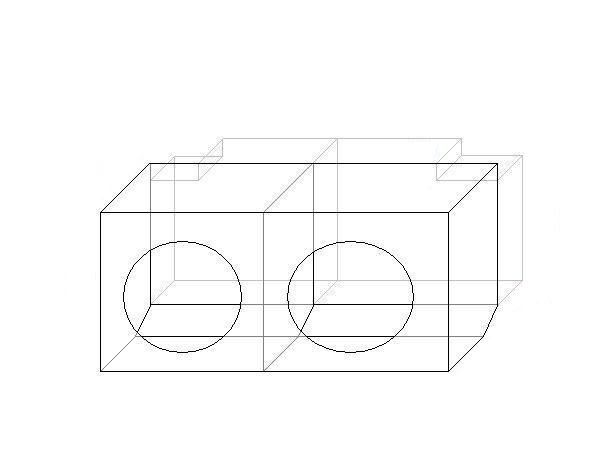
I did some measuring for the subwoofer box that will go in the trunk. I was going to mount the 3 Alpine amps in a shallow box on the trunk floor in front of the subs, with the subs firing towards the trunk. I did a quick drawing in MS Paint, only to realize that the box would be roughly 2.75 cubic feet per side, and my subs only need 1 cubic foot per side. Here was the original drawing:
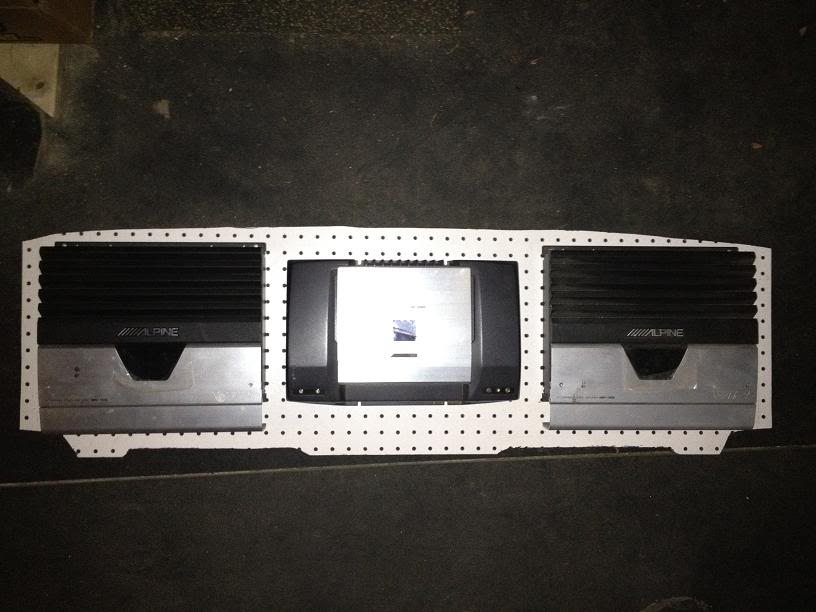
Since the subwoofer box doesn't need to take up as much space, I am going to mount the amps on a board on the back side of the rear seat facing the trunk, and then build a sub box that is more shallow than initially planned. I used a piece of cardboard to come up with a template for the amp rack, and then cut out a piece of peg board that I had lying around. I'll build the final rack out of plywood and cover in carpet. The sub box will be made from 3/4" mdf.
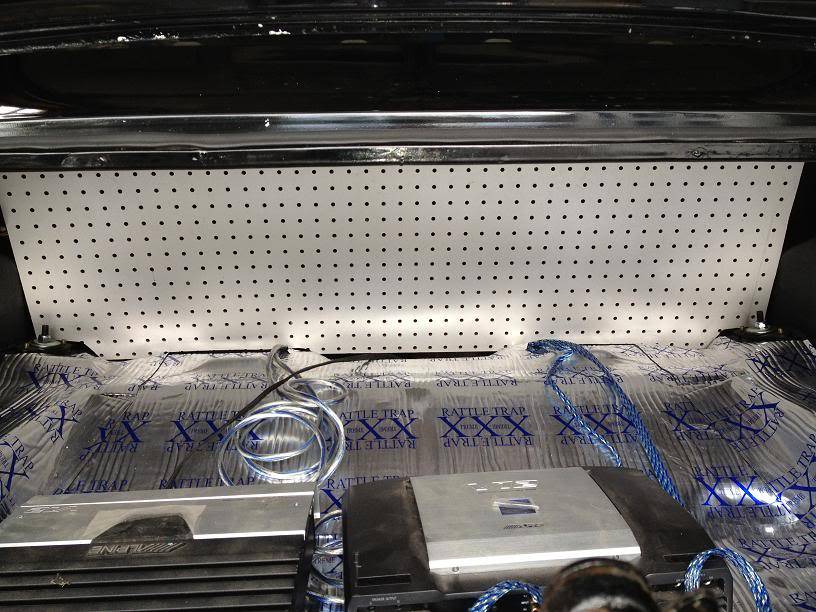
And this will be the amp layout:
-
03-04-2012 #85
Registered User
- Join Date
- Jan 2011
- Location
- Boston, MA
- Posts
- 1,180
This is what the new sub box will probably look like, which is 10" shallower than planned. Everything in light gray will be eliminated, and it will result in a much easier box to build. I had planned on building cutouts into the back corners to make room for the 6x9's in the rear deck. This design will leave enough room for the rear speakers to drop down, and also leave enough room between the sub box and the amp rack to allow the amps to have a little breathing room.
-
03-04-2012 #86
 Registered User
- Join Date
- Nov 2009
- Location
- New York
- Posts
- 366
Nice work... Looks like we took the same path
 .. Keep going.. Love my foose rims
John
-
03-07-2012 #87
Registered User
- Join Date
- Dec 2011
- Posts
- 3
[QUOTE=67rally;888276]I did some measuring for the subwoofer box that will go in the trunk. I was going to mount the 3 Alpine amps in a shallow box on the trunk floor in front of the subs, with the subs firing towards the trunk. I did a quick drawing in MS Paint, only to realize that the box would be roughly 2.75 cubic feet per side, and my subs only need 1 cubic foot per side. Here was the original drawing:
Since the subwoofer box doesn't need to take up as much space, I am going to mount the amps on a board on the back side of the rear seat facing the trunk, and then build a sub box that is more shallow than initially planned. I used a piece of cardboard to come up with a template for the amp rack, and then cut out a piece of peg board that I had lying around. I'll build the final rack out of plywood and cover in carpet. The sub box will be made from 3/4" mdf.
Would this box be able to slide through the trunk opening or would it have to be built in the trunk? Im having the same issue with my car as I'm trying to fit a single solo x 12" in it.
-
03-07-2012 #88
Registered User
- Join Date
- Jan 2011
- Location
- Boston, MA
- Posts
- 1,180
I will build it to slide through the trunk opening. The measurements were rough (+/- 1/2"), just so I could figure out the volume of each side. I will construct each side with cardboard first to make sure it fits exactly before I begin building it. Originally Posted by bowtie707

Since I only need 1 cubic foot, I will end up building it just as wide, but not as deep as the sketch. I want to be able to remove it if I go to the track or auto-x it.
***Edit***
I just went out and measured the trunk opening, and there's no way that box would fit through the opening. I also forgot about the fuel filler neck, which is angled into the trunk. If I just build a simple rectangular box, it only needs to be 36" wide, 17" tall and 8" deep to get one cubic foot per side. If I build it with an angled bottom to follow the lines of the trunk, I can get it to sit a little deeper and salvage some more trunk space, which is what I'll probably do.
-
03-07-2012 #89
Registered User
- Join Date
- Jan 2011
- Location
- Boston, MA
- Posts
- 1,180
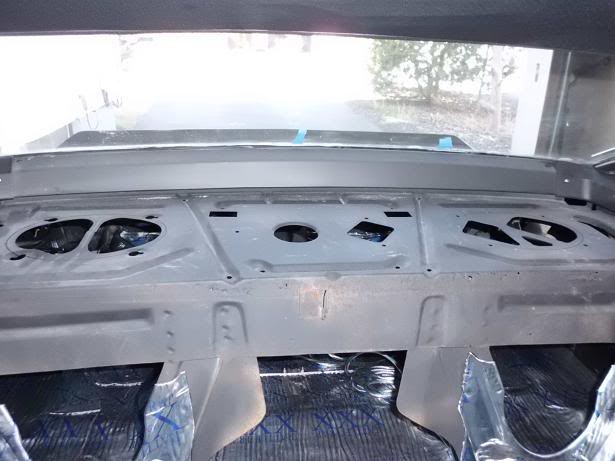
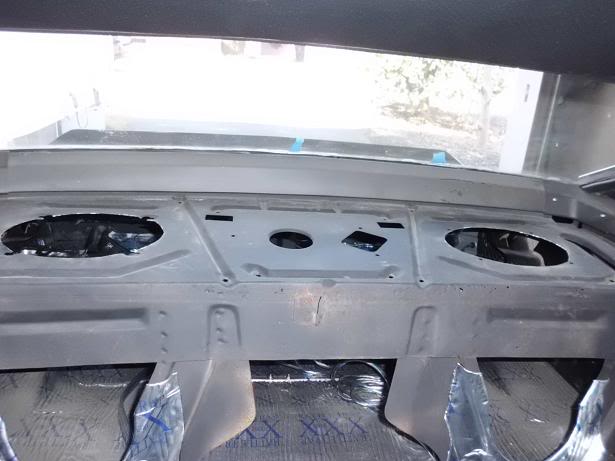
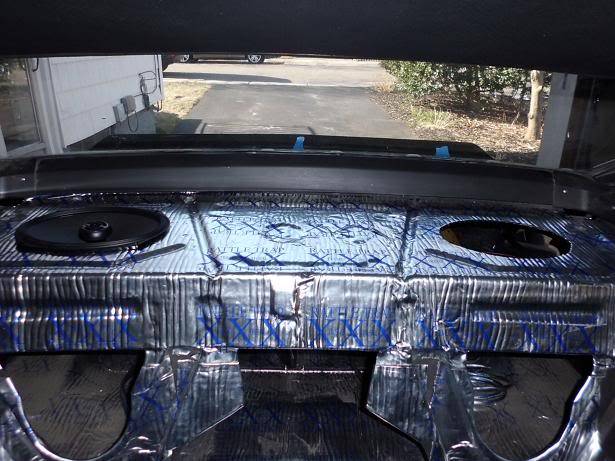
I worked on the rear speakers today. This car has never had a stereo, so I had to cut out the holes for the 6x9 Alpines. I tried using a set of tin snips and knew the hole would be pretty ugly, so I broke out the Dremel with a cut off wheel...actually 5 cut off wheels. But it came out pretty clean, and the speaker is a perfect fit. Finished it off with some more sound deadener.
Before, you can see where I marked the holes using the templates that Alpine provides:
During, holes are cut, and edges are cleaned up:
After, RattleTrap is installed and one of the Alpine's is mocked up. The magnets on these are a little smaller than I expected, but I have heard very good things about their Type R series, so I'll reserve judgement until after I feed each one 100+ watts.
-
03-07-2012 #90
Registered User
- Join Date
- Dec 2011
- Posts
- 3
Looks good! Cant wait for the finished product

-
03-07-2012 #91
Registered User
- Join Date
- Oct 2010
- Location
- Longwood, FL
- Posts
- 191
don't go too shallow on the box. figure at least 1" deeper than half the diameter of the speaker so 7" min. make sure you retain at least one angle in the enclosure as well. These tips will ensure the best performance out of your speakers. if you want them removable then you should do two individual boxes for ease of installs and less risk of trunk jamb injuries! project is looking killer and i really like the name!
 project 72 chevelle rs1
Used to be known as streetmetal
-
03-08-2012 #92
Registered User
- Join Date
- Jan 2011
- Location
- Boston, MA
- Posts
- 1,180
Thanks, I have always built sub boxes with one side at an angle, so that's why I'm leaning towards angling the bottom to follow the trunk pan. It will actually be a 5 sided box. It will have to be between 8-10" deep (depending on how much of the floor is angled) to get to my 1 cu ft. so that's not a problem. Removal will only be once in a blue moon, and I plan on adding some handles to the sides or top to make it a little easier, but in general it will be a permanent fixture. Originally Posted by zipsimons
On a side note, I ran the 12" Infinity's in a very shallow box, that was only about .75 cu ft in my Montero, and then thing would make your head vibrate and teeth rattle, so I'm looking forward to seeing how this box does.
-
03-08-2012 #93
Registered User
- Join Date
- Oct 2010
- Location
- Longwood, FL
- Posts
- 191
Sounds like you have a great plan! You should see the peak range of frequency response with that. If you really want to go nuts, make a double enclosed bandpass box with the ports running up to the package tray/rear deck panel. This keeps the spl out of the trunk and only in the cabin with your ears!
project 72 chevelle rs1
Used to be known as streetmetal
-
03-08-2012 #94
Registered User
- Join Date
- Jan 2011
- Location
- Boston, MA
- Posts
- 1,180
I don't think the Infinity Kappa Peferct 12.1's are designed for a band pass box. I thought about building a ported box with the ports running through the package tray like you mentioned, but I want to be able to remove it, so the ports would would have to stop at the top of the box, and then do a trim ring in the package tray. Also, if I go ported the box will need to be 1.75 cu ft. I'll probably stick with the sealed box, but appreciate the ideas. Originally Posted by zipsimons
-
03-08-2012 #95
Registered User
- Join Date
- Oct 2010
- Location
- Longwood, FL
- Posts
- 191
I've been out of the car audio business for 16 years now, so my knowledge of todays product isn't exactly up to date! Lol
project 72 chevelle rs1
Used to be known as streetmetal
-
03-11-2012 #96
Registered User
- Join Date
- Jan 2011
- Location
- Boston, MA
- Posts
- 1,180
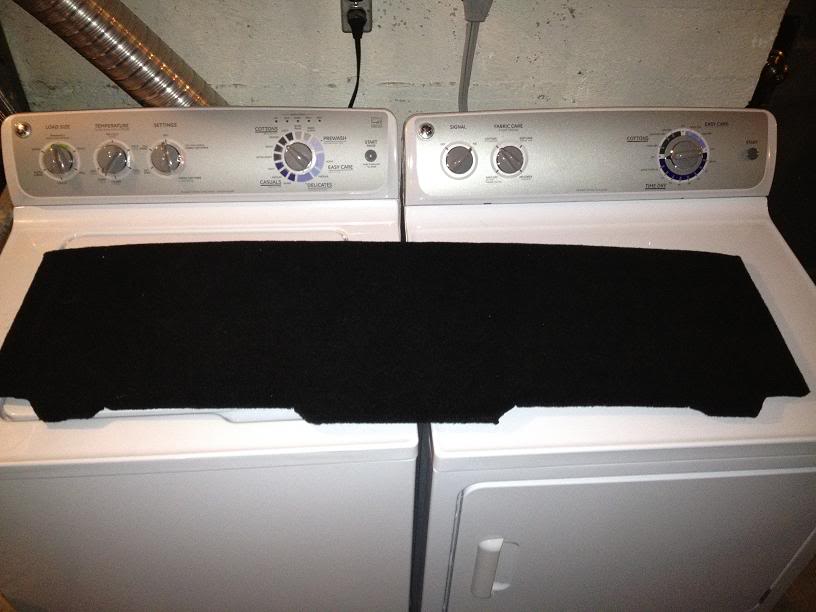
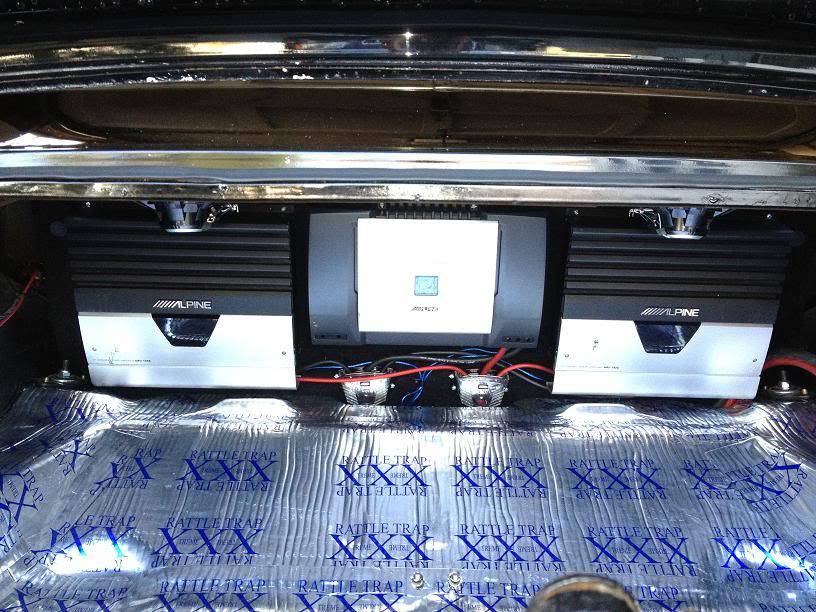
I finished up the amp rack this weekend. I build it out of 1/2" plywood and covered it with speaker carpet. Even though it will be hidden by the subwoofer, I still wanted it to come out clean. It attaches to the rear seat by 4 elevator bolts, and will act as a trunk divider to quiet it down even more.
Amp rack:
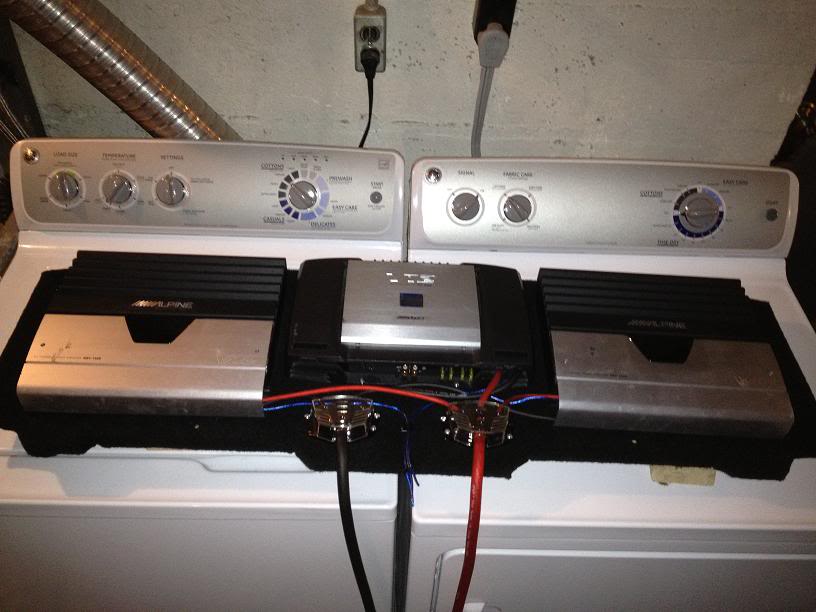
I'm using StreetWires 1/0 for my main power and ground cables to a pair of Monster MPC-P300 distribution blocks. Then 4 awg to the subwoofer amp (middle) and 8 awg to the front and rear amps.
With everything mocked up:
And here it is in the trunk (without carpeting):
-
03-12-2012 #97
Registered User
- Join Date
- Jan 2011
- Location
- Boston, MA
- Posts
- 1,180
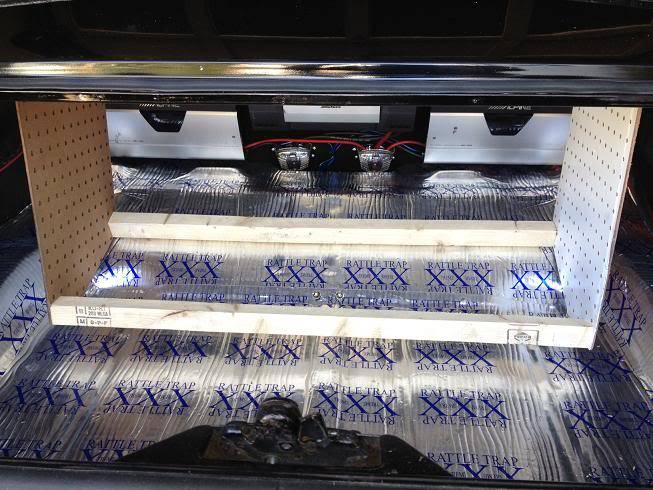
I used some more of the scrap pegboard to cut the templates for the ends of the subwoofer box, and then some scrap wood just to mock up the subwoofer. At first it didn't seem like it was going to fit the opening, but I was able to insert the subwoofer top end first, slide it back into the opening and then stand it up.
I need to tweak the ends a bit more, and the front needs to be 3/4" taller, and then figure out how I'm going to attach it, but I should have some progress during the week. It will also have a divider between left and right subs.
I'll do a step by step on how to build a box and countersink the subs into the face.
-
03-12-2012 #98
 Registered User
- Join Date
- Oct 2006
- Location
- McKinney, TX
- Posts
- 899
Looks good, but what's with the Pegboard? My knowledge of stereo installations is nill...just curious
Confucius says, "Choose a job you love, and you will never have to work a day in your life"
My build Beast
-
03-13-2012 #99
Registered User
- Join Date
- Jan 2011
- Location
- Boston, MA
- Posts
- 1,180
Lol. Originally Posted by absintheisfun
I had a bunch of pegboard lying around from a shed project. I'm just using it for mock up. First I cut a rough panel out of cardboard, fine tune it using the pegboard, and cut the final out of plywood for the amp rack and MDF for the sub box.
The cardboard is easy to cut in place, but it has too much give, so it will get you in the ballpark but won't tell you if its a perfect fit. The pegboard doesn't have any give, so if your cut is off, you'll know it when you try to fit the panel.
03-15-2012 #100
Registered User
- Join Date
- Jan 2011
- Location
- Boston, MA
- Posts
- 1,180
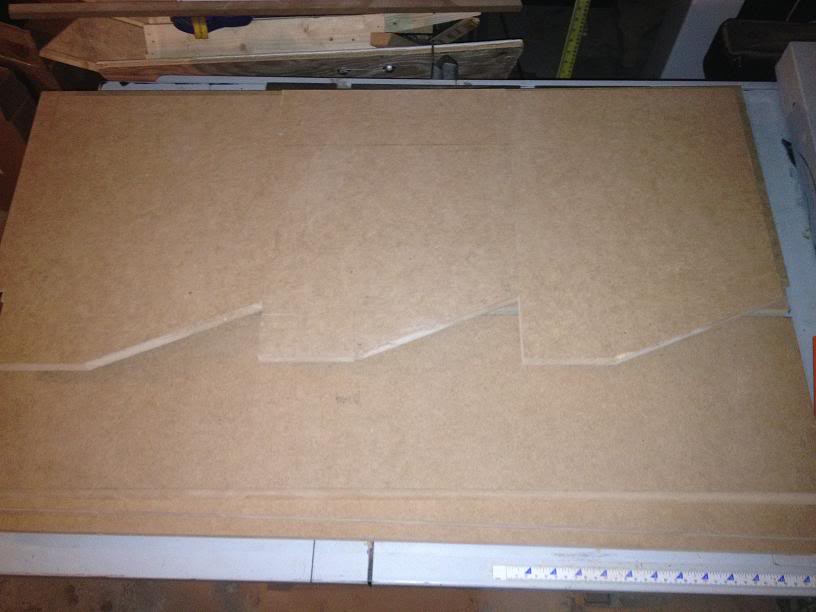
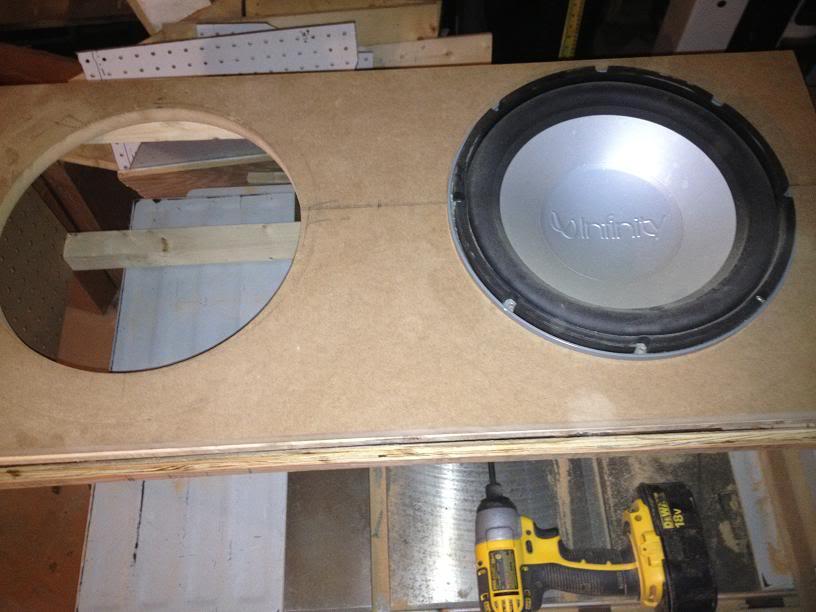
Alright, some quick updates, got some more work done on the sub box. I got it glued and screwed together, and test fit the subs.
Here's the pile of cuts I started with:
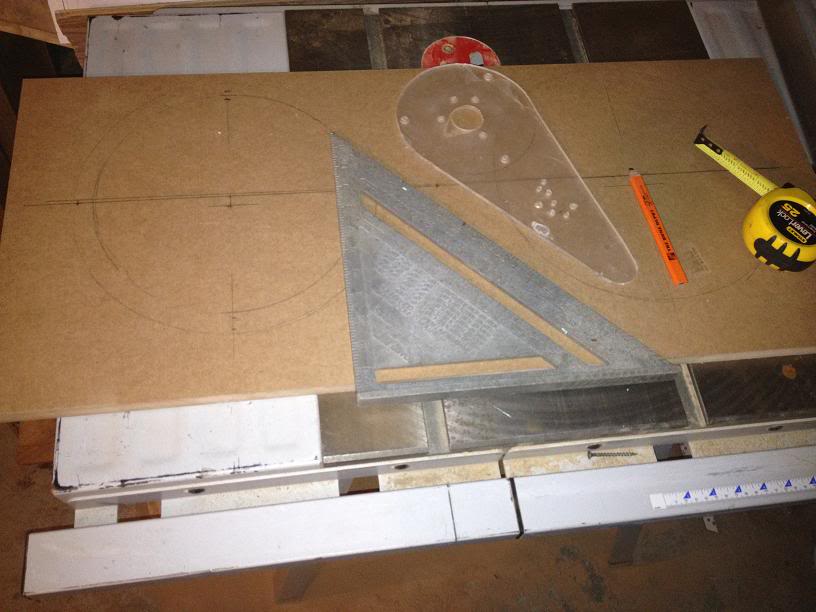
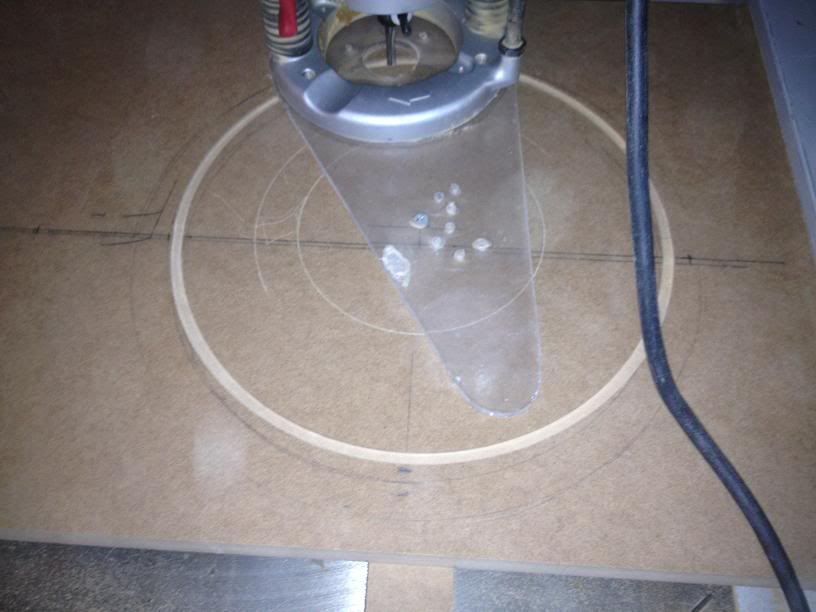
Laying out the speaker cutouts, I made a circle cutting jig for my plunge router out of acryillic:
First pass with the router:
Test fitting the Infinity:


 Reply With Quote



