


Results 201 to 220 of 412
Thread: '66 Pontiac Resto-Mod Update
-
01-12-2010 #201

 Registered User
- Join Date
- Nov 2006
- Location
- Ma.
- Posts
- 5,560

Wow great that looks great. That interior color set that exterior color off great.
Wayne
Car FINALLY home !!!!!! lol
Project FNQUIK https://www.pro-touring.com/showthre...ghlight=FNQUIK
-
01-13-2010 #202
 Registered User
- Join Date
- Aug 2008
- Location
- Pgh, PA
- Posts
- 2,177
Thanks! I was a little worried at first, but when I got the interior actually I was really happy.
BTW, exhaust fitment and TIG welding was completed, and I took it to a metal finishing company last night to have it silver ceramic coated and polished.
Stainless brake lines are also now complete.
-
01-15-2010 #203
Registered User
- Join Date
- Feb 2006
- Posts
- 478
Would you be interested in selling one of those billet dash pieces? I had been thinking of doing something like that, but you beat me to it. Yours looks perfect. It would probably be easier and cheaper just to have your guy knock out another one, than for me to reengineer one of my own.
Alex Godsey
Somerset, KY
Pro Touring 67 GTO
461 Pontiac Power
-
01-15-2010 #204
Registered User
- Join Date
- Aug 2008
- Location
- Pgh, PA
- Posts
- 2,177
I have no problem giving you the info. But, it's not automated, so it's going to be another kind of "build from scratch" job. If you're interested, I want to check with the machinist just to make sure he's interested in doing it. If he is I'll put you directly in touch with him as I wouldn't provide any value and I certainly don't want any money or anything. I'm just not sure how much of a PITA it was and don't want to commit him if he'd rather not do it. I suspect that he'd be more than willing at the same price.
The original dash bar and handle is kind of a 3 module assembly. There is a chromed pot metal frame that bolts to the actual dash. There is a lucite plate (black, that says "GTO") that inserts in the frame. Then there is the grab handle assembly that goes in front and bolts through all of it also. I used a beat up chrome frame to send to the machinist as it is actually not "square" (the bottom is thicker than the top to make the plate orient correctly). I had a "good" frame with good chrome already on the car. However, when I got the finished product back - it fit perfectly in the "beat up" frame but did not completely fit into the "good" frame. I had to spend about 45 minutes carefully filing and sanding the inside of the "good" frame so as not to damage it, but to allow the billet piece to fit. I then needed to spend some time clearancing the dash holes also. What I thought would take 5 minutes to mount took over an hour. Cost of the piece was not terribly cheap. Before I tell you the cost I'm curious as to what you'd guess it would be?
-
01-15-2010 #205
 Registered User
- Join Date
- Aug 2008
- Location
- Lima Oh,
- Posts
- 181
Man your car is going to be bad
 I can't wait to see some pics of it outside.The color and the parchment guts
 I take it the top is going parchment or white also?
The dash peice is sweet,I've been talking to a buddy of mine that makes a lot of billet peices to make one for my car also.He just switched to a different machine shop so we have to wait a little bit before he can sneek the job in
Jake P
65 GTO
85 442
-
01-15-2010 #206
Registered User
- Join Date
- Aug 2008
- Location
- Pgh, PA
- Posts
- 2,177
Thanks! I really appreciate it. The interior is actually "pearl white". I was afraid that the parchment which has a little green/gold tinge might not work with the top down. The top is black, but the boot is pearl white. My thought was that I'd almost never have the top up anyway, and was afraid that the fold lines in the material would get stained. Originally Posted by progoat

Let me know if I can help with anything.
01-15-2010 #207
Registered User
- Join Date
- Aug 2008
- Location
- Lima Oh,
- Posts
- 181
Ahh you went custom? I haven't seen any pearl white replacement covers.reguardless its sweet and a great color cambo
 My dad had a black 66 gto with parchment interior then his dumda-- got rid of it
 Jake P
65 GTO
85 442
01-15-2010 #208
Registered User
- Join Date
- Aug 2008
- Location
- Pgh, PA
- Posts
- 2,177
Nope - it's not custom really. Legendary makes the OEM style uphostery in colors other that what was offered from the factory. The Pearl White was available as an option from GM a few years later. Legendary has lots of choices.
01-15-2010 #209
Registered User
- Join Date
- Nov 2006
- Location
- Ma.
- Posts
- 5,560
Did you use prebent brake lines or did you have them bent from a shop near you?
Wayne
Car FINALLY home !!!!!! lol
Project FNQUIK https://www.pro-touring.com/showthre...ghlight=FNQUIK
01-16-2010 #210
Registered User
- Join Date
- Aug 2008
- Location
- Pgh, PA
- Posts
- 2,177
When I started the project, I was not under the influence of mind altering drugs and planned to build a mild driver. So, I bought some pre-bent stuff along with some OEM type brakes from Right Stuff. However, as the project quickly changed, I decided to do so many modifications that I ended up not using much of it. I only really used one line from that kit - the single line that goes from front to back. For the rest of it, I cut, bent and flared it myself.
I will never do that again with stainless. It was a ridiculous PITA.
01-18-2010 #211
Registered User
- Join Date
- Aug 2008
- Location
- Pgh, PA
- Posts
- 2,177
4 days and counting
Well, no pics today. But...
It's Monday AM. Spent Friday night, and about 15 hours each on Saturday and Sunday working. Car must be loaded in the trailer early Wednesday morning, and I need to be at the Convention Center to off-load at 10am. Actual show starts Friday at 3pm.
The Dash and molded dash pad are in. What a friggin PITA. It took forever to get the clips lined up so that the screws would go through - First the custom molded dash pad, then the plastic dash bezel, then the clips on the steel dash backing... All while being totally petrified of scratching something. I have not yet put the Twist Machine Gauge Bezels on yet - since it only takes a few minutes, that will wait until Friday AM to keep them clean.
Grills and headlight buckets are in. Another PITA. Also, the coil pass-through connector is in. Billet specialties door and window cranks installed. Some minor paint imperfections touched up. Reveal moldings finished. Drivers rocker trim replaced. Underneath of car detailed starting from the back - by last night it was done forward to around the tranny. Exhaust silver ceramic coated, "mostly" polished, and ready to put back on. I'll be working on it again tonight and tomorrow night. I've got some help continuing to work on detailing the bottom all day today.
A couple notes....
1) Though I keep track of all the assorted costs for this car in extreme detail, I don't keep track of my hours. I realized last night that if I charged myself time for this, the cost would be astronomical. This has given me so much more appreciation for what it really takes.
2) Just to keep people honest - some time ago I bought some windshield reveal trim from a guy with the username "woodsonduffy" on ebay. It was advertised as "GTO, chevelle, etc" and in nice shape. Mine wasn't great, and though all the other pieces I of stainless I was able to refurbish and polish quite well, I bought those pieces from him. I looked at them when I got them, and polished them some more. Problem: I didn't notice that the lengths were slightly different - the pieces turned out to be from a 4 door sedan (and in case you don't know, there was never a '60s GTO sedan). I've reached out to him but he doesn't respond. So, beware of this guy, who is named "Clifford Wood".
01-19-2010 #212
Registered User
- Join Date
- Jan 2010
- Location
- Greenwood Lake, NY
- Posts
- 105
Nice build. Always good to se the Pontiacs.
Jeff.
1972 GTO - long term project
1968 Firebird - all original, low mileage
01-19-2010 #213
Registered User
- Join Date
- Feb 2006
- Posts
- 478
dash piece
wmhjr, I would say you have about $100 in that piece. I had a bracket made in a cnc mill that I did the cad drawing for and bought the aluminum for. He charged me $100 labor.
Have you talked to him about it to see if he would make another? My chrome piece is very good, so I can use it. I'll just fit the aluminum piece to my chrome bezel. If I can't use the grab bar, heck with it. I like the way yours looks just fine!Alex Godsey
Somerset, KY
Pro Touring 67 GTO
461 Pontiac Power
01-19-2010 #214
Registered User
- Join Date
- Aug 2008
- Location
- Pgh, PA
- Posts
- 2,177
You're pretty far off on the cost. I'll PM you. Originally Posted by gearbanger
01-20-2010 #215
Registered User
- Join Date
- Aug 2008
- Location
- Pgh, PA
- Posts
- 2,177
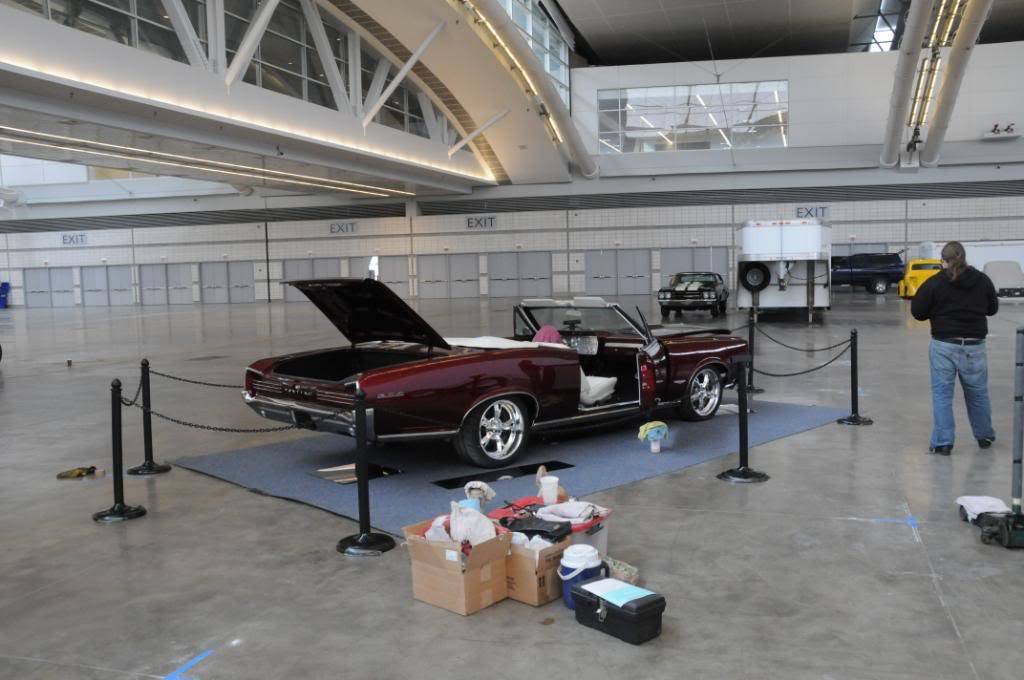
Well, delivered the car to the show this morning. Only forgot a few things
I was glad we got an early time/date to get in. When we arrived at the convention center, there was almost nobody there. Easy to offload and setup. The power to the spots has not been setup yet, but at least we got the spot, the carpet down, and the stanchions setup. Still have to setup the lights, mirrors, display boards, clean, polish.... In the background you can see I even washed my truck and trailer. It's been so messy outside recently that I was afraid they wouldn't let me in on the convention center floor if I didn't at least rinse the crud off.
These are poor pics, but here are a couple...

01-20-2010 #216 Registered User
- Join Date
- Apr 2001
- Location
- Rockford Illinois
- Posts
- 3,949
The car looks beeeeeaaaauuuuutttiiiifffuuullllll !
You will get a lot of lookers and droolers so it will be a good thing it is chained off from them.
The questions will wear you out by the weekend I bet.
I hope you have a lot of fun , ENJOY !!May The Horsepower Be With You !!!
01-20-2010 #217
Registered User
- Join Date
- Aug 2008
- Location
- Pgh, PA
- Posts
- 2,177
Thanks, Jim. Still lots to do (including actually finishing the car after the show) but it really feels good to have something to show for all the work so far. I already had some folks hanging around. But, there are some really awesome cars that showed up later today. One rig from Texas with 3 incredible cars - including a top 10 finalist for this past years Ridler. I can't even imagine the time and cost of some of these.
01-20-2010 #218 Registered User
- Join Date
- Mar 2009
- Location
- overseas
- Posts
- 3,434
very nice!!
Kevin S. (overseas in Germany)
1963 Chevrolet Impala 2d ht Coupe
www.CruznArt.com
CRUZN - Automotive Artworks
01-21-2010 #219
Registered User
- Join Date
- Aug 2008
- Location
- Lima Oh,
- Posts
- 181
Very nice
still can't wait to see some pics of it outside
Jake P
65 GTO
85 442
01-21-2010 #220
Registered User
- Join Date
- Aug 2008
- Location
- Pgh, PA
- Posts
- 2,177
Thanks! Setup continues. Still have some things to get done in the morning. The show starts tomorrow at 3pm. Still in progress....
Out of focus, but getting there. Still need to secure the carpet edges, finish the lights, adjust the mirrors, and CLEAN.
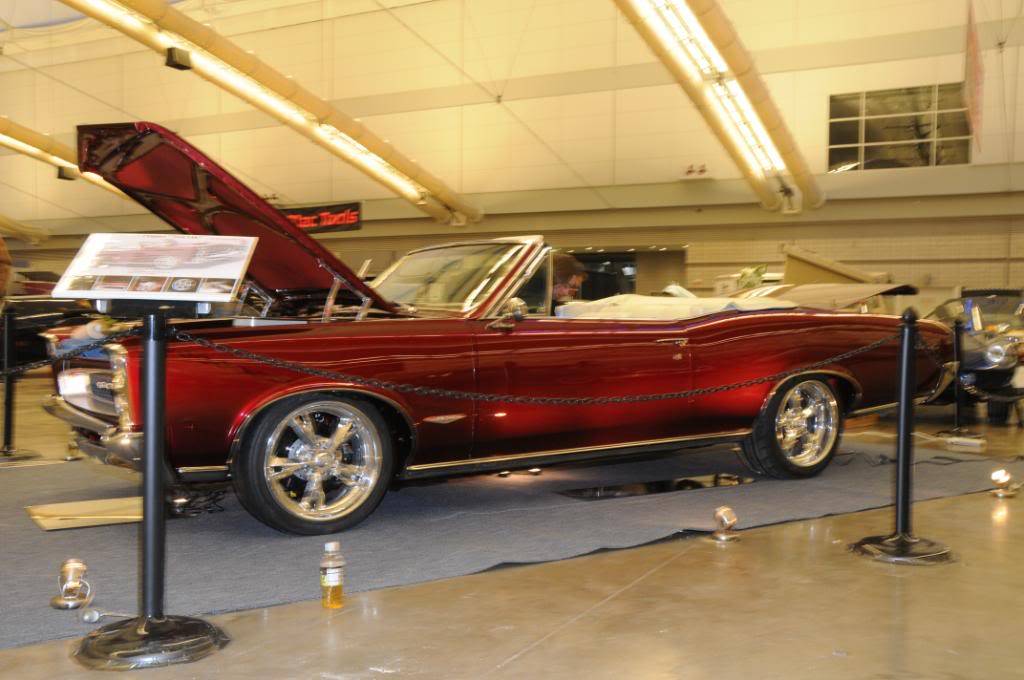
Need to cover the pesky fan wires in the AM, and POLISH....
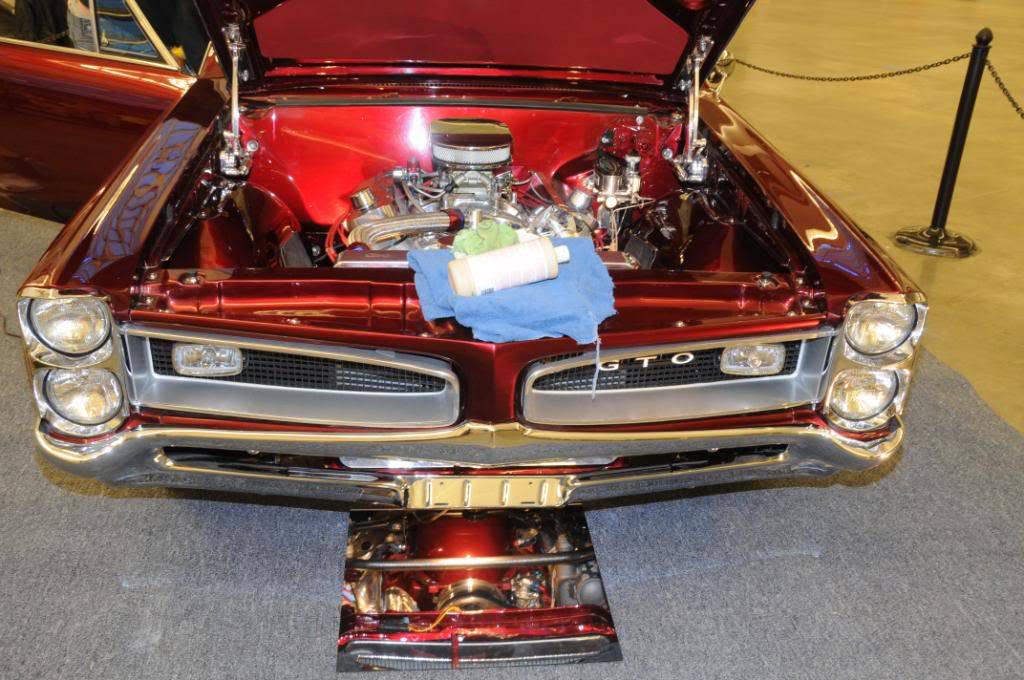
Display boards (one general - shown here, and one with technical details not shown) mounted for viewing on the stanchions....
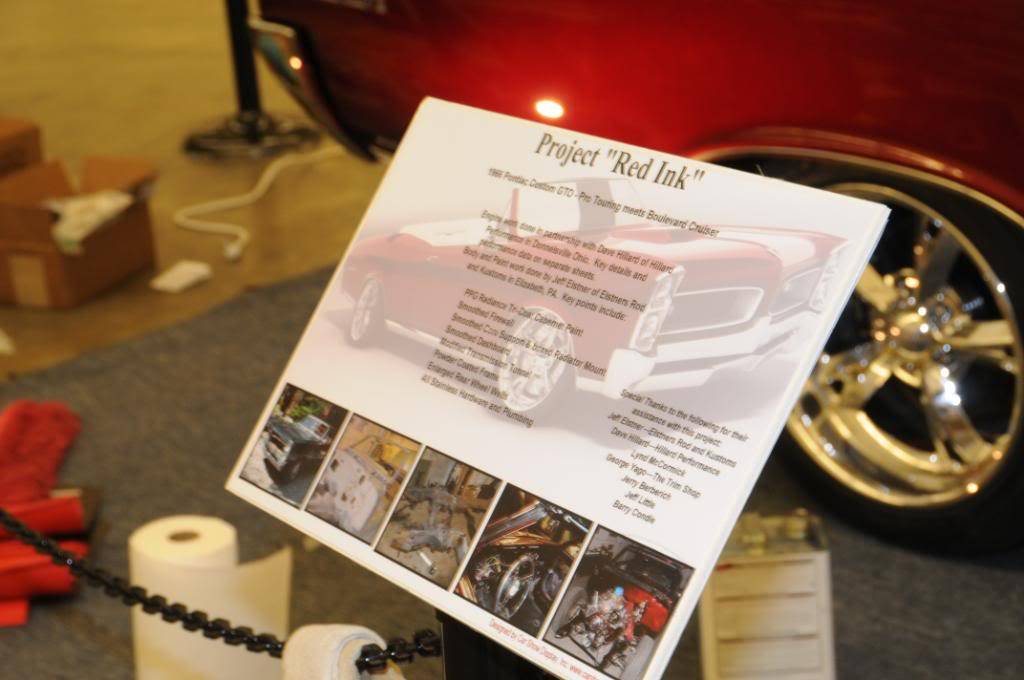
Show isn't open yet, and I'm getting a good bit of interest. Having fun.

 Reply With Quote



