


Results 301 to 320 of 376
Thread: 1967 GTO project thread
-
02-09-2016 #301

 Registered User
- Join Date
- Feb 2005
- Location
- Waterloo, Ia
- Posts
- 1,408
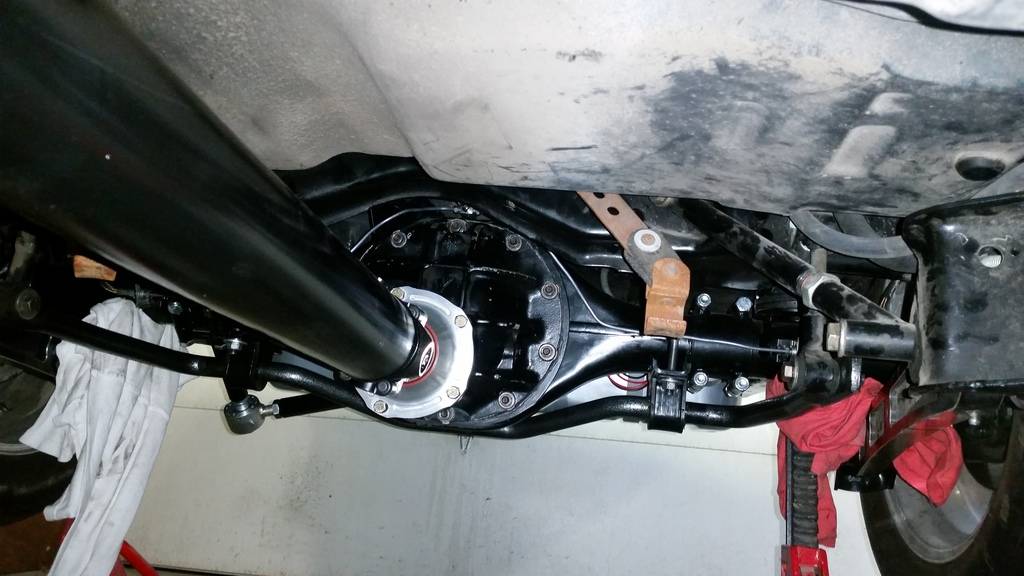
I got my rear axle reinstalled and filled, watts link in and angles correct, new tank in place, new gas lines made, new brake lines made and bled. Looks like the back end part of my winter work is done! On to the middle of the car where we will be adding a driveshaft loop, reworking the exhaust with some Dougs headers, V band clamps and an O2 bung on the collectors and a little bit of rework on the pipes themselves!
A couple notes on the Watts Link.
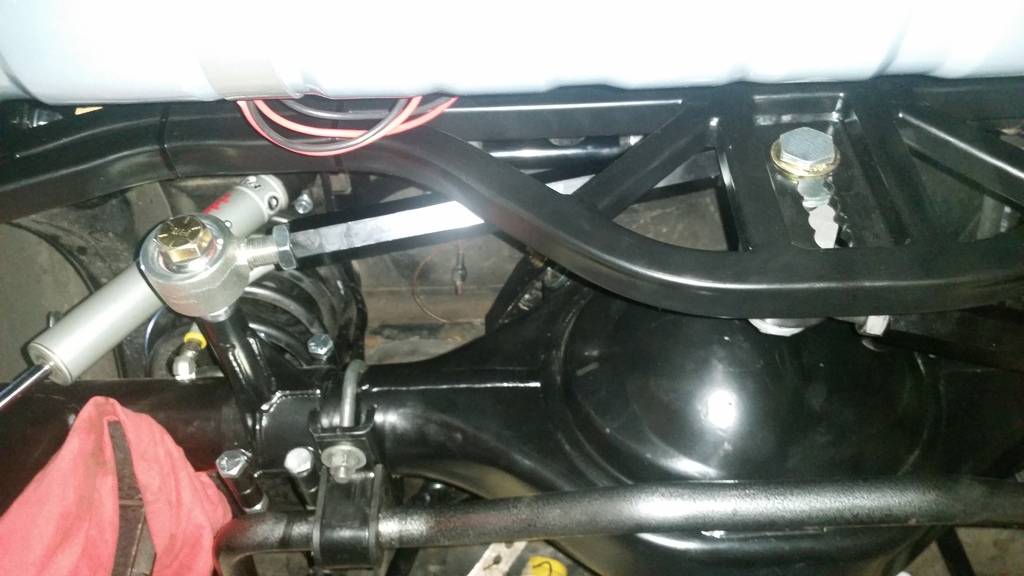
-The Watts was kind of a pain in the ass to install. It wasn't horrible but it wasn't a 2 hour install like I expected. This wasn't because of the watts setup itself but because I had to move the axle vent, grind the rear sway bar mounts to fit over the speedway type housing on my Moser 9", I had it re powder coated since it was bright red and I hated the color and I ended up having Jim @ Fays 2 send me 11" watts bars as opposed to the 9" ones he sent. The instructions were generic but pretty decent, Marc@SC&C was a big help and Jim@Fays2 also answered his phone any time I called. Excellent customer service out of these guys.
-On a very bright note I found that a modified gas tank was not necessary at all in my 67 GTO. The reason I mention this is because the instructions and even Marc @ SC&C thought I was going to need a 69 Nova tank. I mocked it up with a 1967 stock gas tank and used a tanks inc 1967 GTO gas tank. I think the warnings on this install about using a Nova tank are possibly aimed at Chevelles. I'm guessing that the Chevelle has a shorter rear trunk area and that the tank is mounted closer to the rear axle making a short tank necessary though that is 100% speculation. So if you have a 67 GTO and are thinking about the watts but the gas tank issue has you questioning it, I didn't need a different tank.
Heres a couple pics!
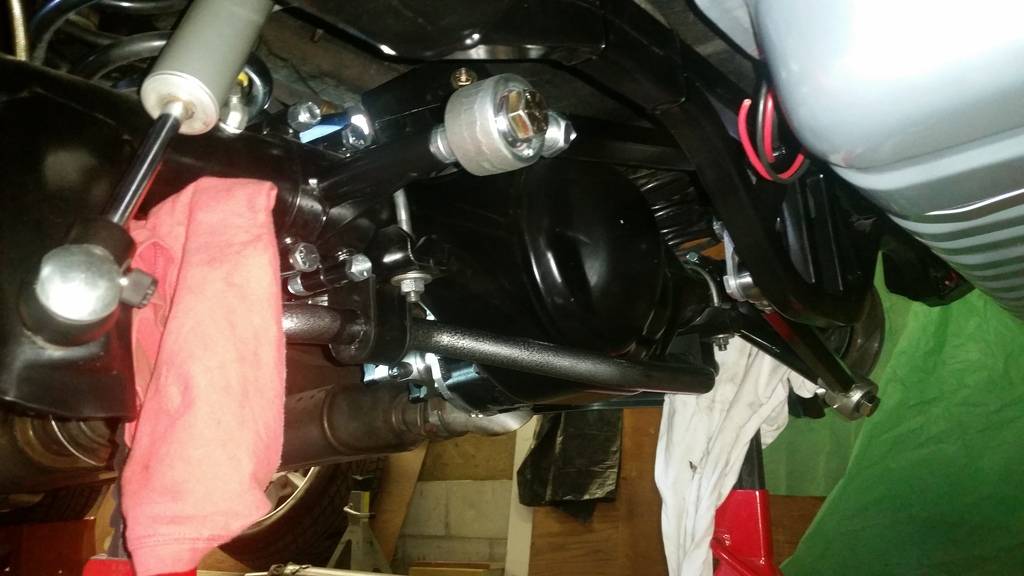
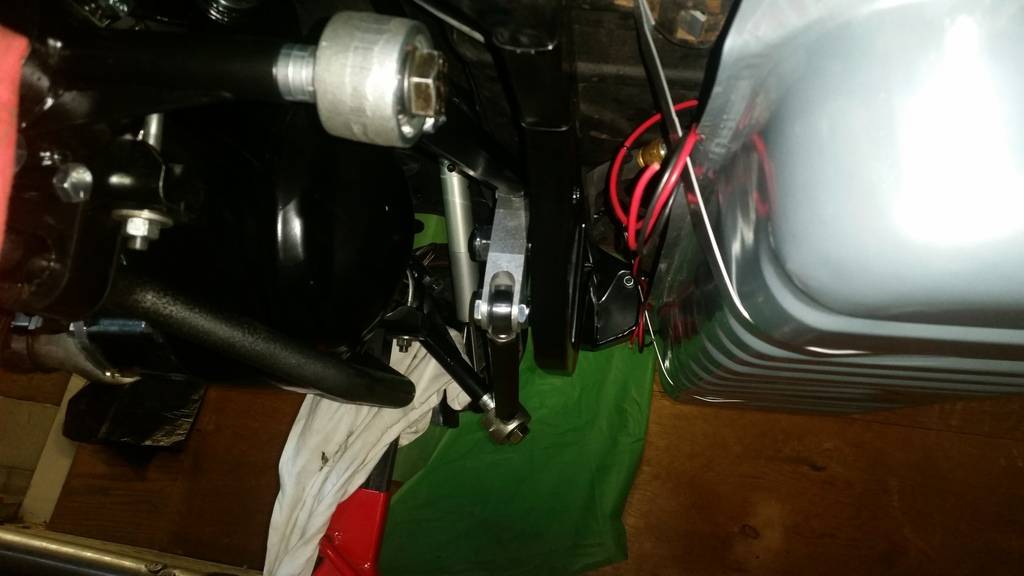
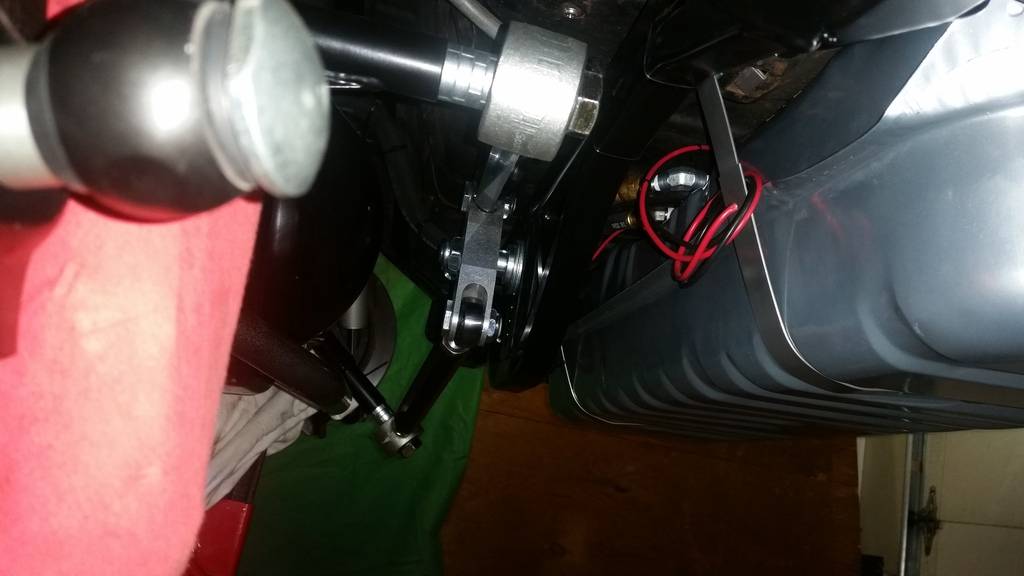
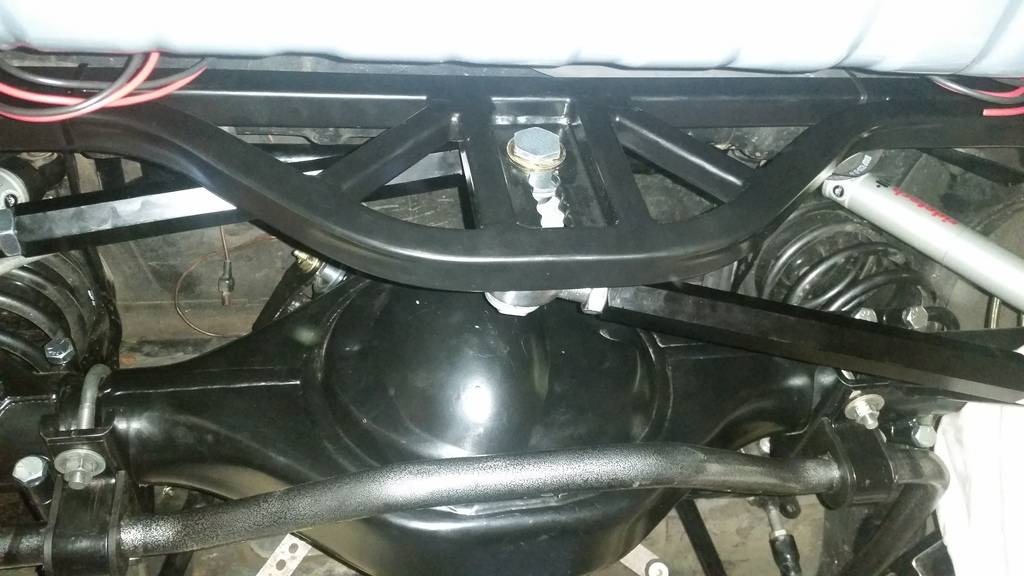
You can see here where the swaybar mount had to be ground out on one side to make it all fit and its still tight.
 -Nick
-1967 GTO I drive and race
-Build threads:
-http://forums.maxperformanceinc.com/forums/showthread.php?t=615847&page=23
-https://www.pro-touring.com/showthre...project-thread
-
02-09-2016 #302
Registered User
- Join Date
- Feb 2005
- Location
- Waterloo, Ia
- Posts
- 1,408
Yessir. #4 line comes off makes a loose loop up high so I don't pull it in half on a corner and is sitting on top of the watts link frame! Thanks! Originally Posted by ekmxryda
 -Nick
-1967 GTO I drive and race
-Build threads:
-http://forums.maxperformanceinc.com/forums/showthread.php?t=615847&page=23
-https://www.pro-touring.com/showthre...project-thread
-
02-12-2016 #303
Registered User
- Join Date
- Feb 2005
- Location
- Waterloo, Ia
- Posts
- 1,408
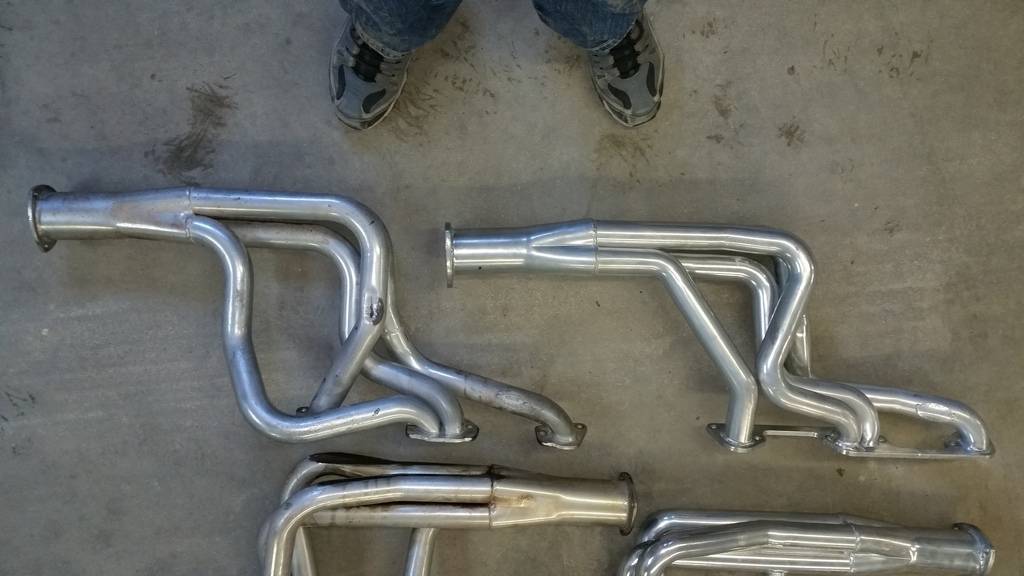
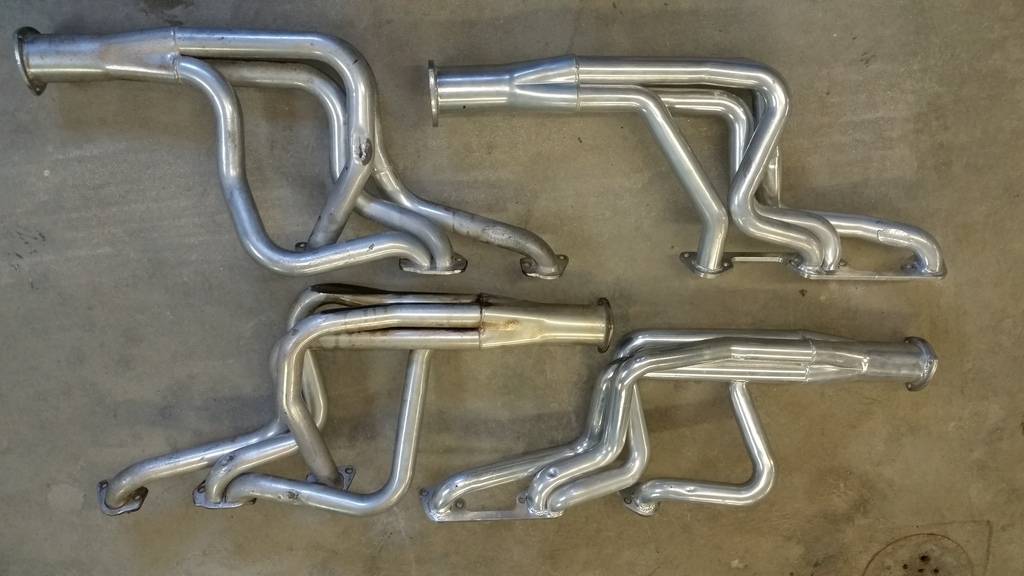
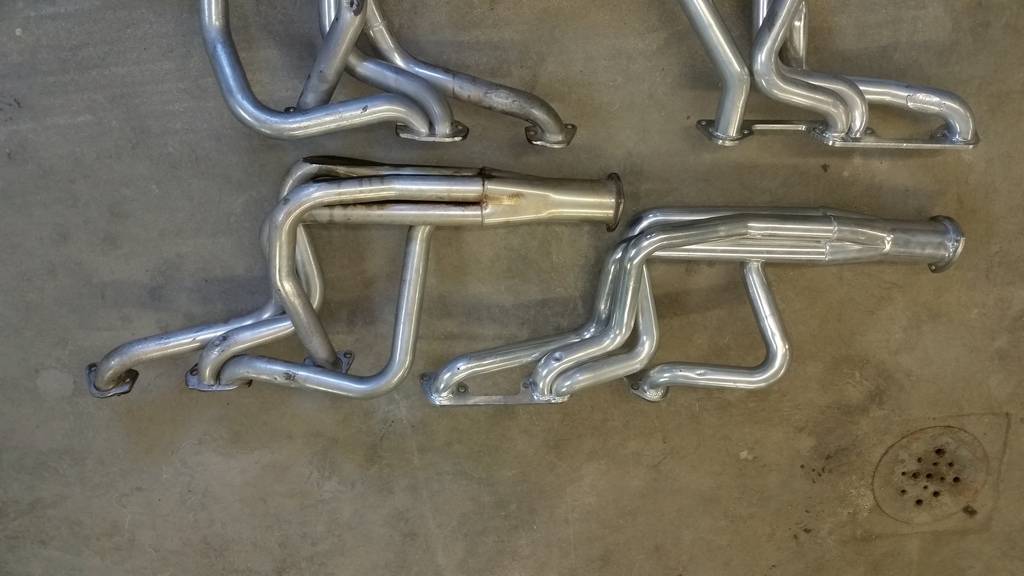
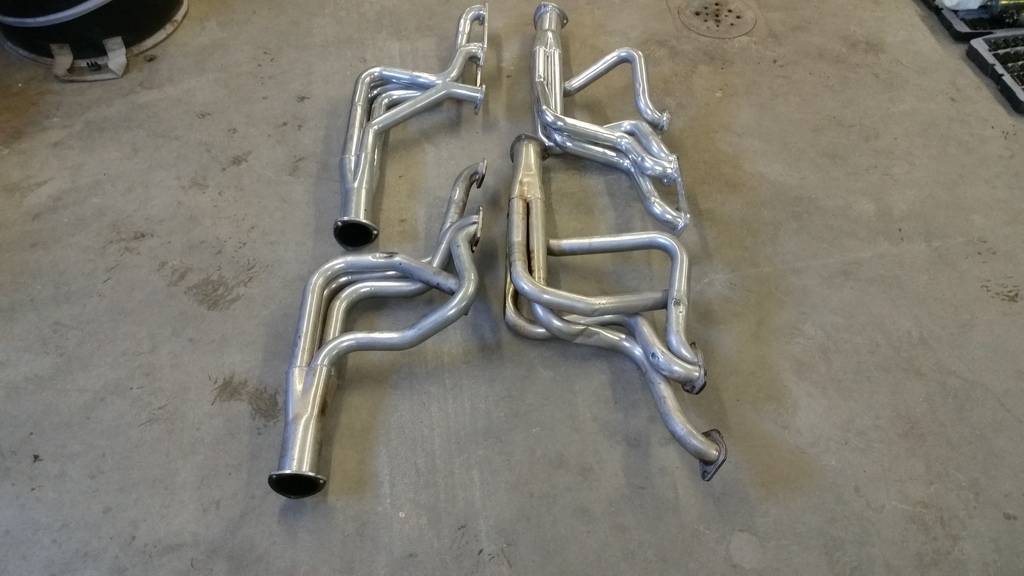
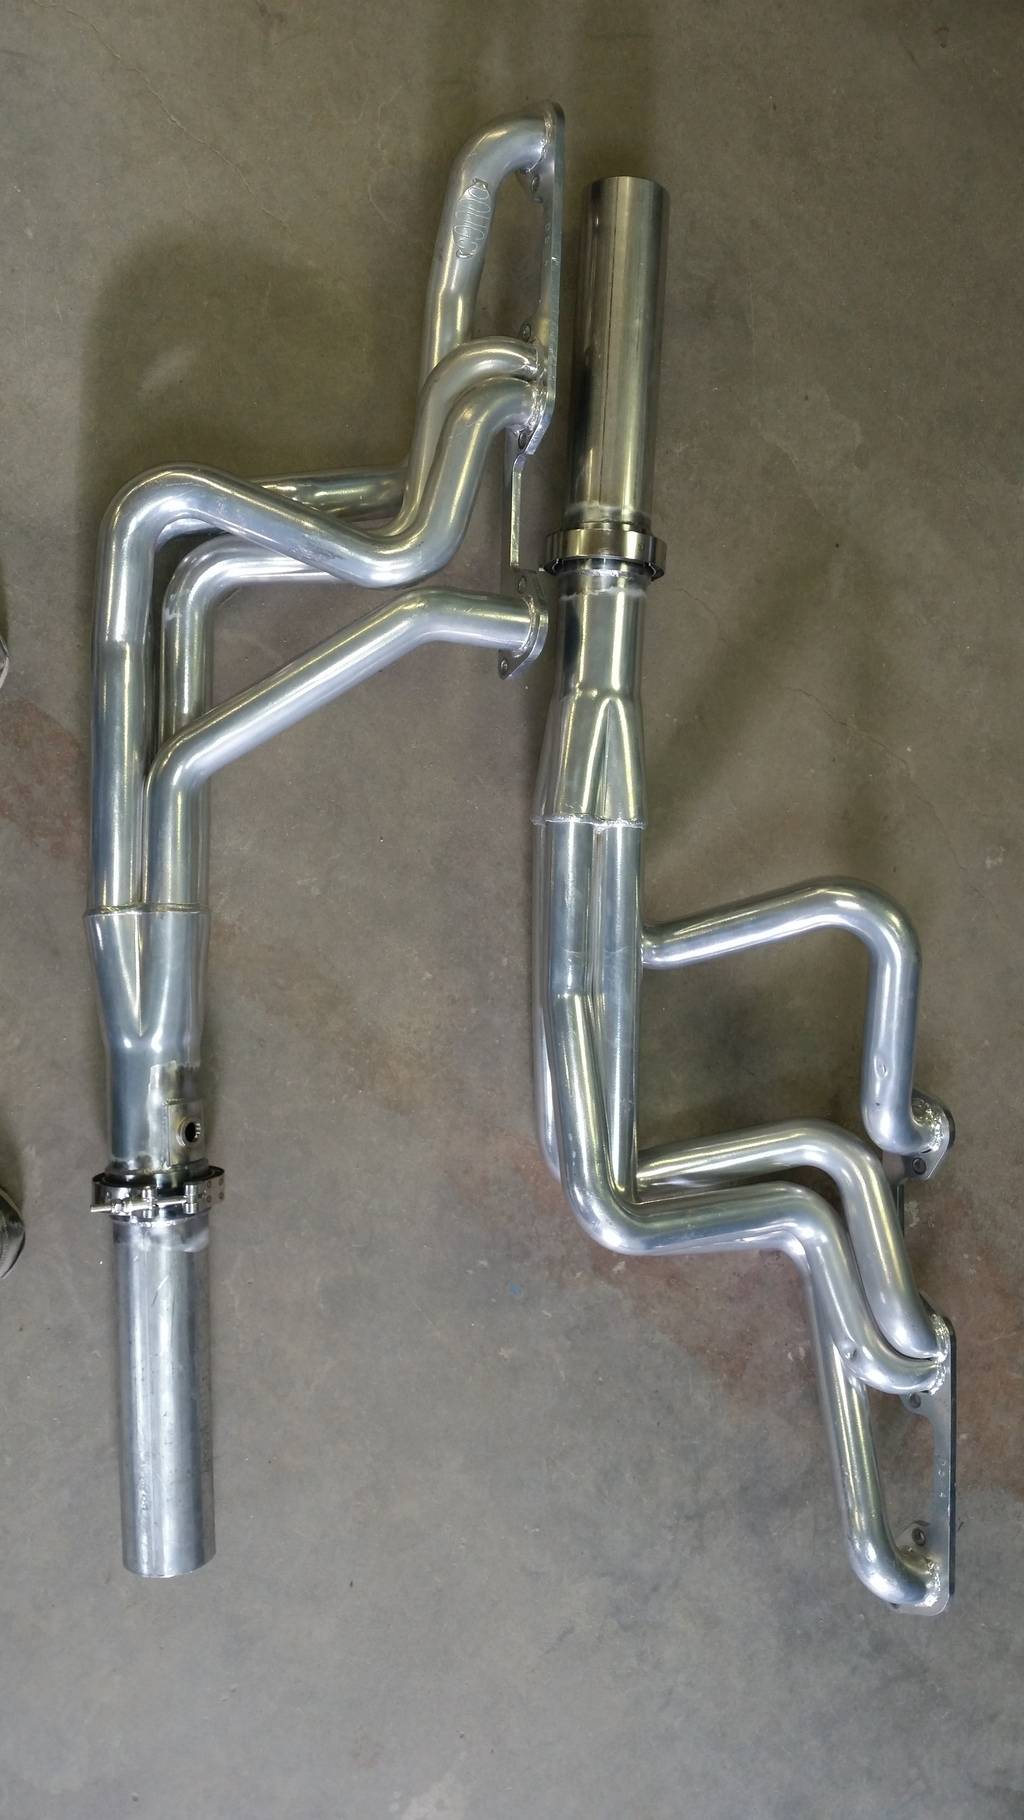
Since the back end is pretty much done im starting in on my exhaust project. On the off chance someone here is going to run a traditional Pontiac in their old 64-67 poncho, I did a little compare and contrast on a common debate amongst Pontiac guys. D port headers for a 64-67 A body Pontiac. Dougs vs Super comp
There's always been a debate about what headers are best for the 64-67 A body D port crowd. Hooker Super Comps or Dougs. Since I have both on hand I thought id snap a few pics of them side by side for a compare and contrast.
My analysis: The Dougs win by a very wide margin in every category
-More room for bolts, especially on the center ports
-Much tighter to the floor/better ground clearance which is big for me running auto X
-Though both sets of headers I had were used the Dougs had the better finish quality and they were used far more than the super comps I bought
-Install went far easier than the old hooker removal. By that I mean it required far less horsing around with a floor jack moving the car up and down. In fact I only had to use the floor jack one time for about 1/16" of movement on the drivers side, jacking the engine up with the driver side motor mount bolt out.
IMO this is a dead topic now. The Dougs win hands down. The Dougs are the clean headers, super comps are the dirty headers.
 -Nick
-1967 GTO I drive and race
-Build threads:
-http://forums.maxperformanceinc.com/forums/showthread.php?t=615847&page=23
-https://www.pro-touring.com/showthre...project-thread
-
02-14-2016 #304
 Registered User
- Join Date
- Mar 2013
- Location
- Beaufort,SC
- Posts
- 329

Just went thru this whole thread, great progress with step by step.
-
02-14-2016 #305
Registered User
- Join Date
- Feb 2005
- Location
- Waterloo, Ia
- Posts
- 1,408
Thanks for stopping by! Originally Posted by no go nova
-Nick
-1967 GTO I drive and race
-Build threads:
-http://forums.maxperformanceinc.com/forums/showthread.php?t=615847&page=23
-https://www.pro-touring.com/showthre...project-thread
-
02-14-2016 #306
Registered User
- Join Date
- Feb 2005
- Location
- Waterloo, Ia
- Posts
- 1,408
Got a little done this weekend...
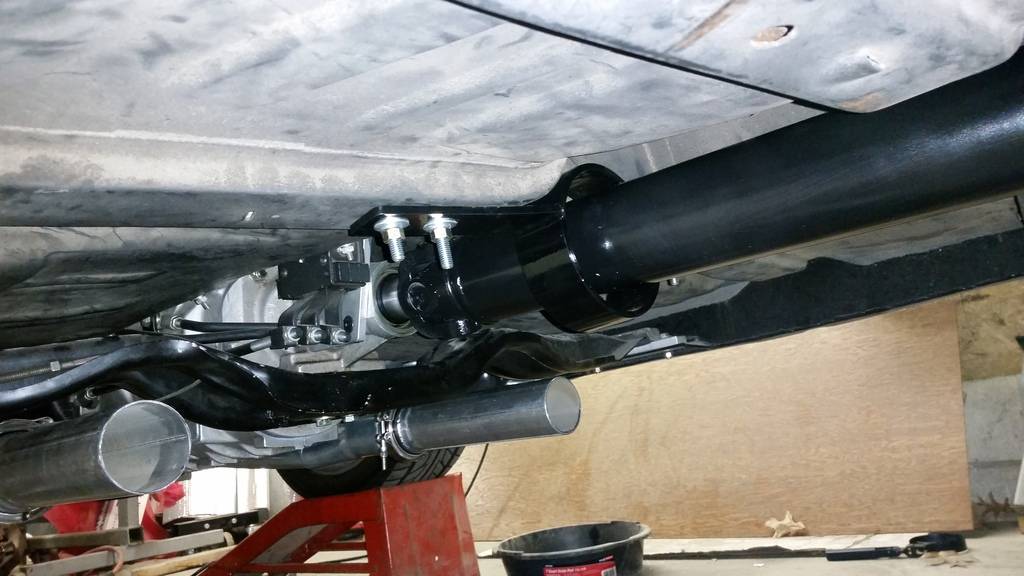
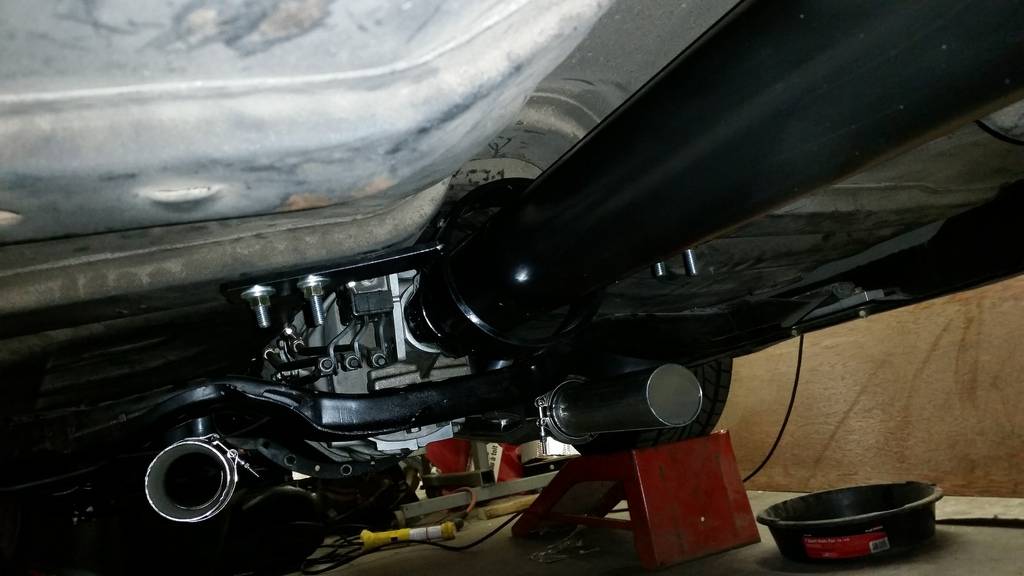
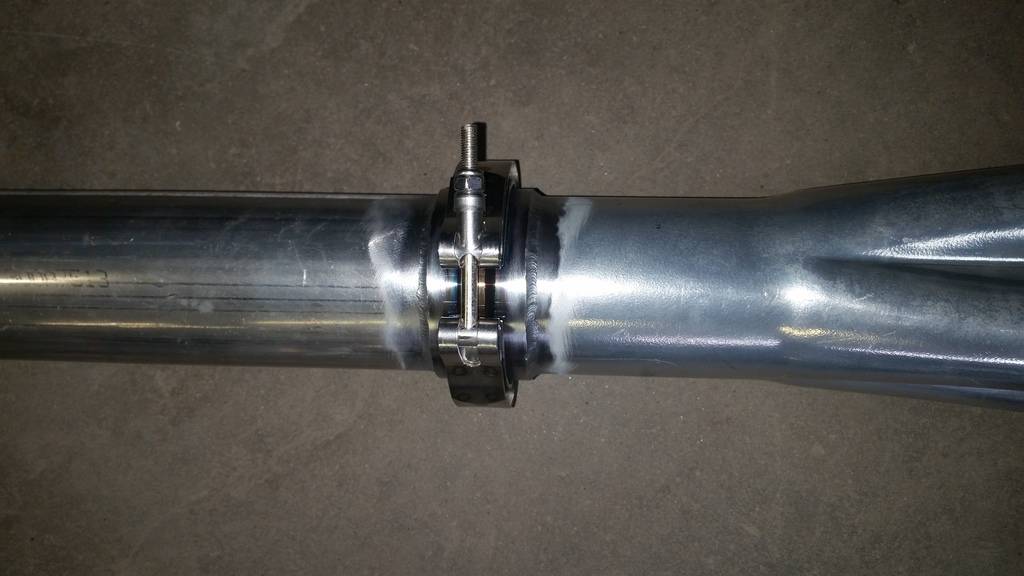
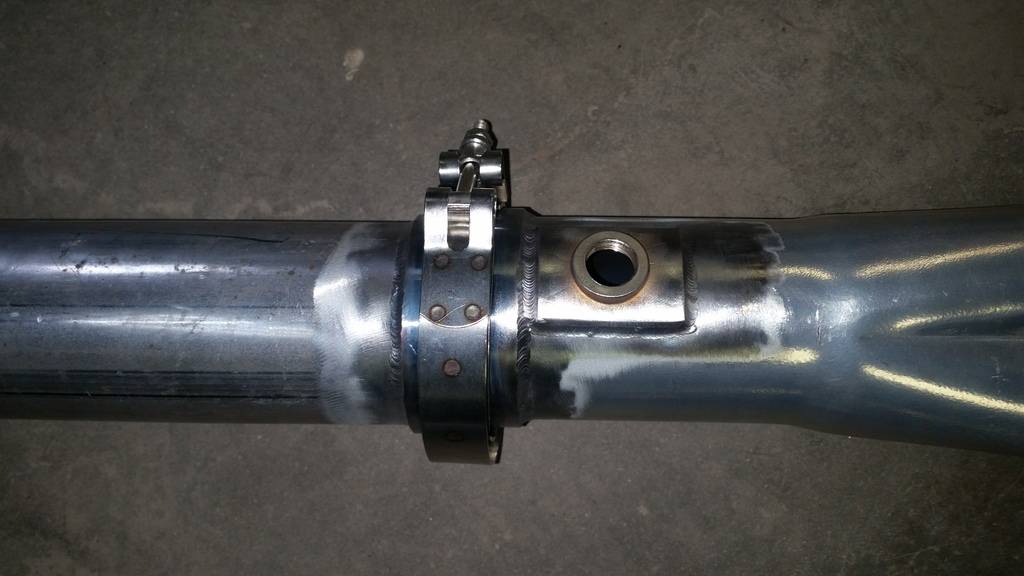
Installed my UMI driveshaft loop. If you want a no frills driveshaft loop with a nice black finish ill recommend this. Fits like a glove and took 45 minutes to install. I also bought a new drive shaft last year with 1350 Ujoints on both ends to replace my stock necked down unit since ill be beating heavily on it. I had a local business do it. They did a fine job. I cleaned her up and shot it with some satin black paint.
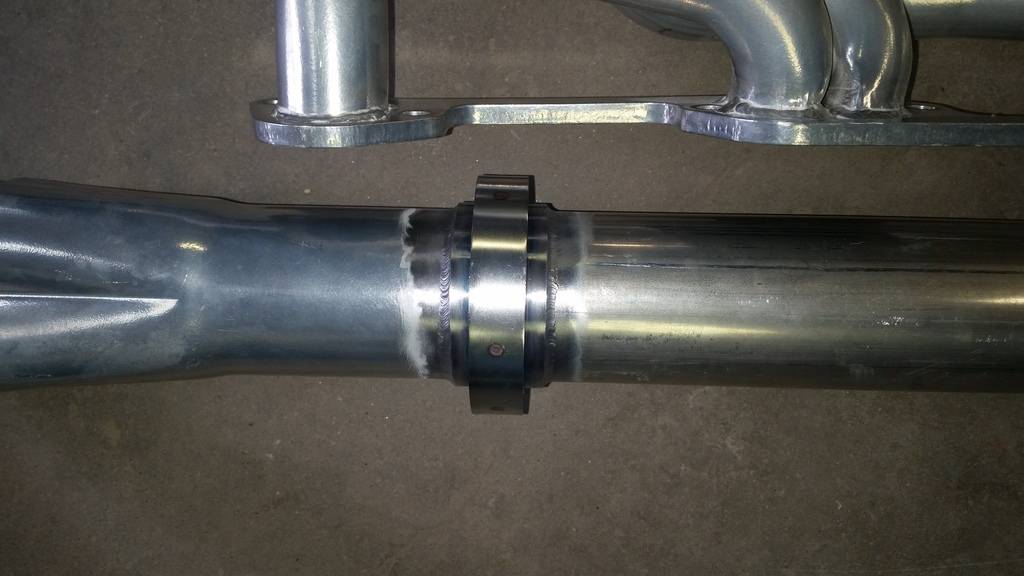
I also started my exhaust install. I'll be making a custom setup from parts I have laying around, a chop saw, my cheap lincoln flux core welder and an angle grinder. The first step was having a local guy tig me in an O2 bung for the EFI and a V band setup on the collector of the new Dougs I bought used from a PY member. Hopefully I can say... gone are the days of blown out 3 bolt gaskets and a leaking exhaust collector. I never got one of those 3 bolt setups to totally seal, on any car, ever. Ever. I did the v bands since the O2 sensor is going to be so close and will probably be sensitive to leaks. Ill be adding QTP electric cutouts and painting the whole exhaust with rattle can POR-15 exhaust flat black.

 -Nick
-1967 GTO I drive and race
-Build threads:
-http://forums.maxperformanceinc.com/forums/showthread.php?t=615847&page=23
-https://www.pro-touring.com/showthre...project-thread
-
02-14-2016 #307
 -Moderator/Sponsor-
- Join Date
- Apr 2001
- Location
- The City of Fountains
- Posts
- 16,129
Nice work Nick!
Andrew1970 GTO Version 3.0
1967 Cougar build
GM High-Tech Performance feature
My YouTube Channel Please Subscribe!
Instagram @dr__efi
I deliver what EFI promises.
Remote Holley EFI tuning.
Please get in touch if I can be of service.
"You were the gun, your voice was the trigger, your bravery was the barrel, your eyes were the bullets." ~ Her
-
03-10-2016 #308
Registered User
- Join Date
- Feb 2005
- Location
- Waterloo, Ia
- Posts
- 1,408
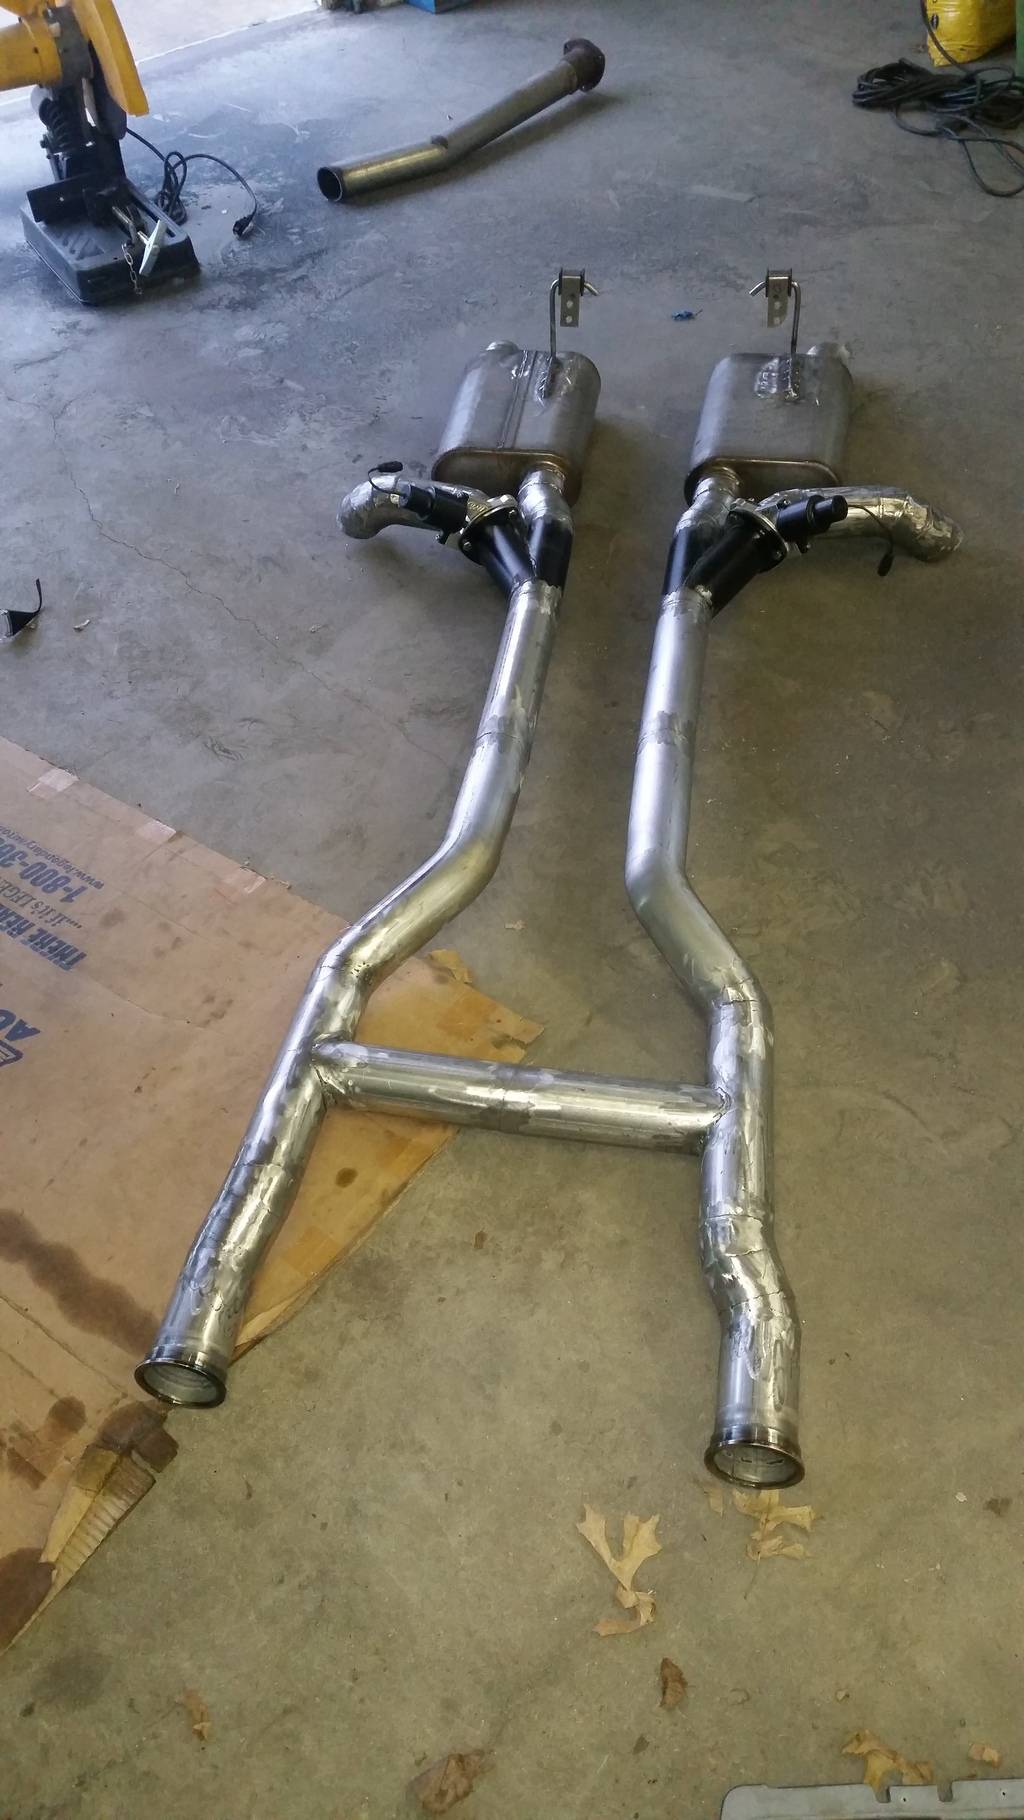
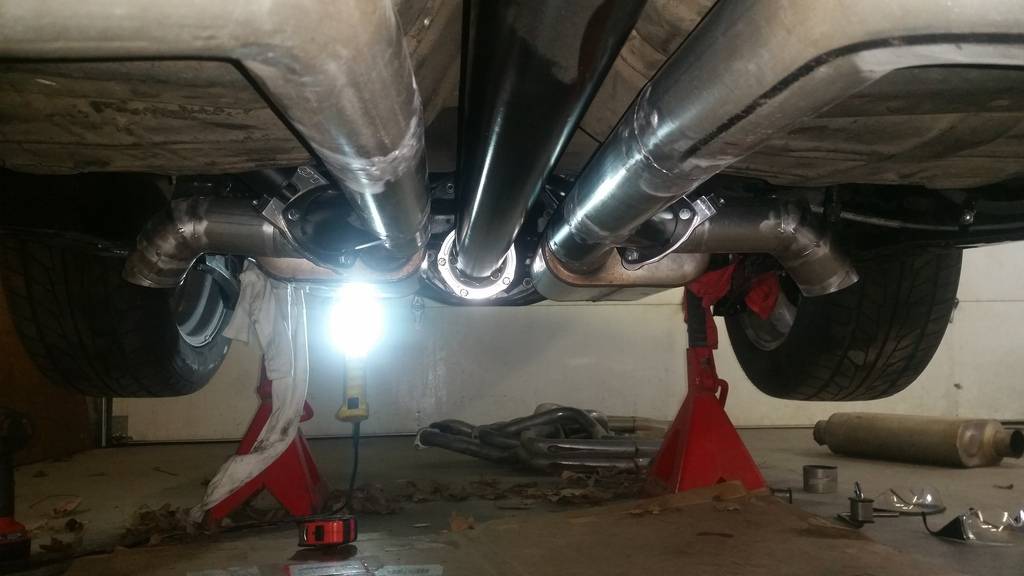
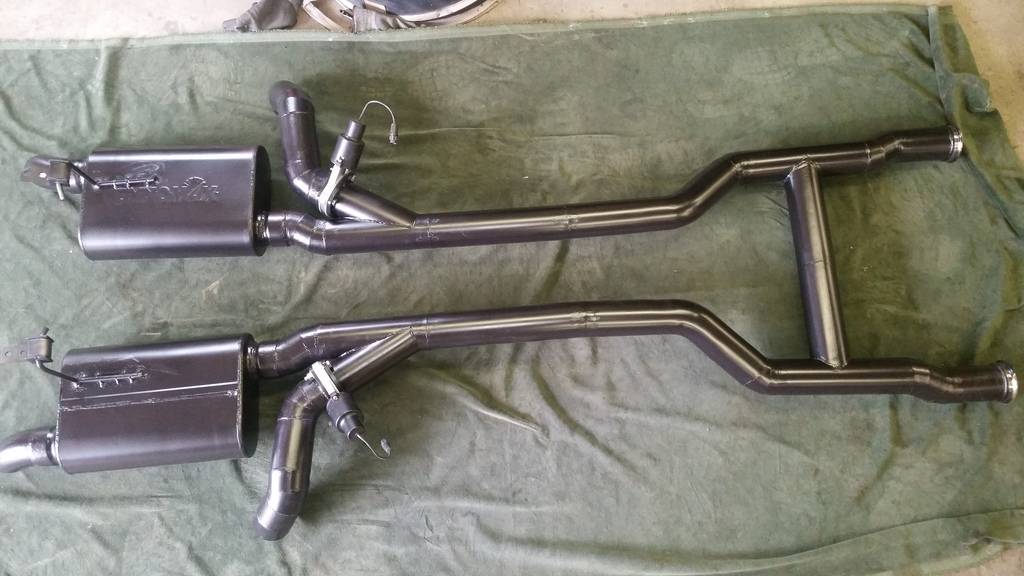
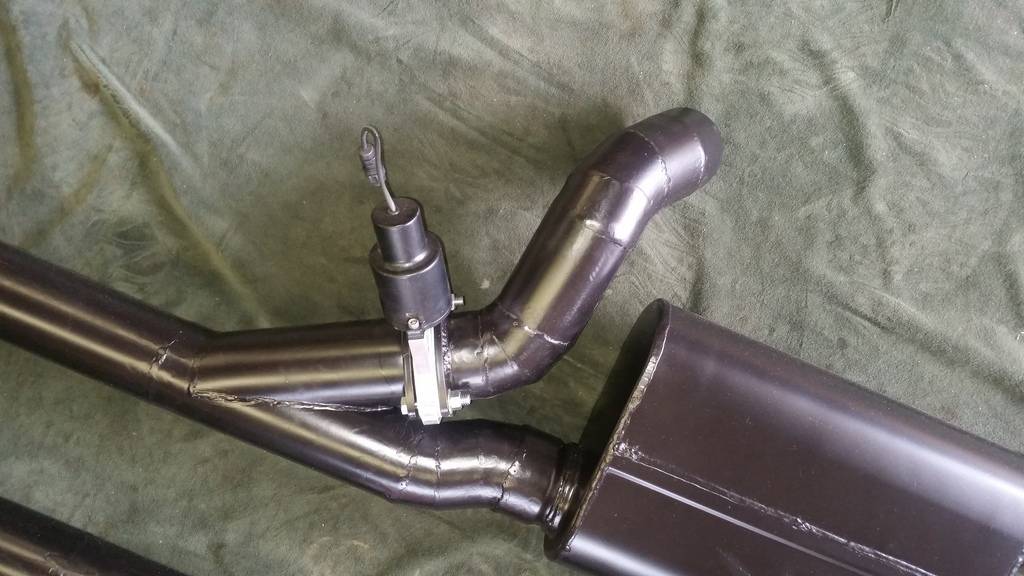
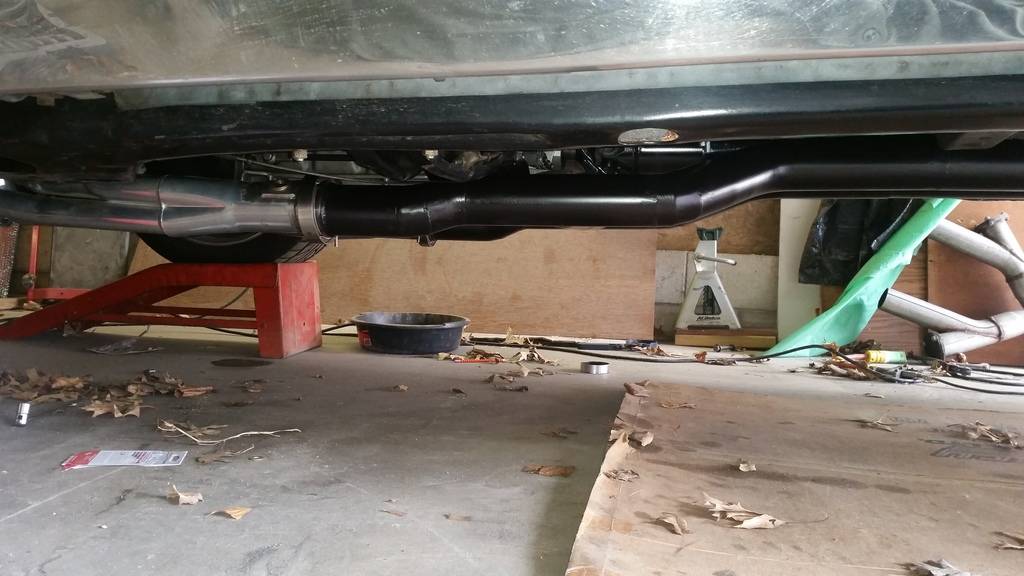
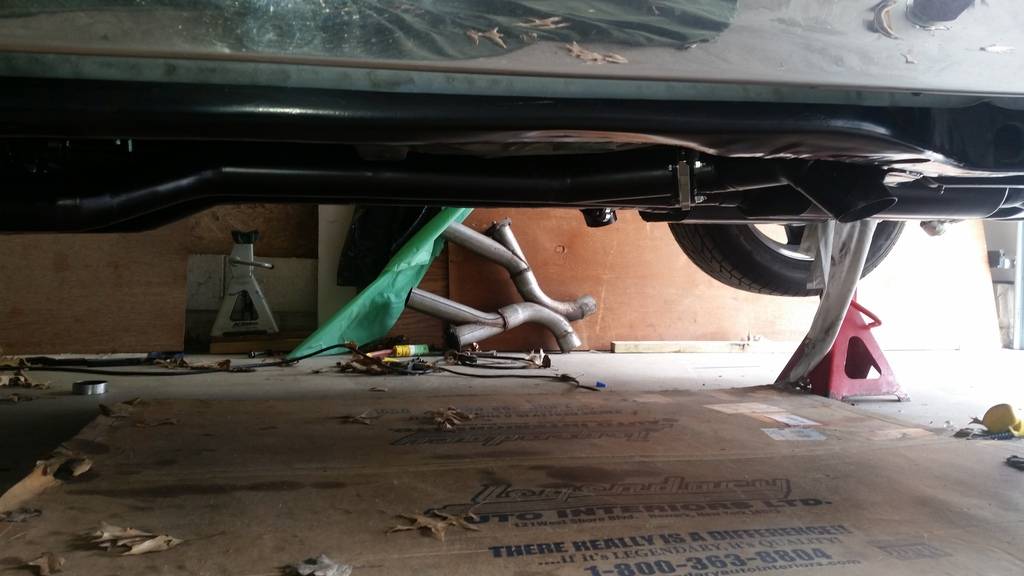
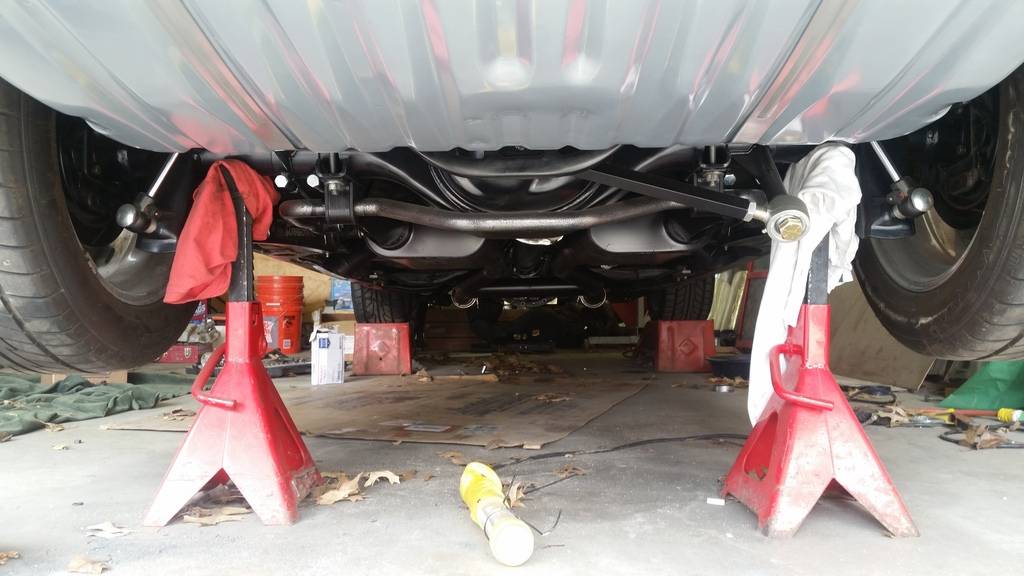
Its been a few weeks and I got some more stuff done. From the get go I couldn't stand my X pipe. I threw it together in a hurry and it was easily visible from the side of the car. It hung low, caused issues with getting the driveshaft out, it just didn't seem to jive and looked like hell. So I pulled it, rounded up some scrap 3" aluminized exhaust pipe, a chop saw, 3" hole saw, level, bench grinder, angle grinder, and Lincoln flux core welder and went to work.
I ended up making the new H pipe setup from scratch. All in all it came to about 50 pieces. The offsets were made with pie cuts on a chop saw. I believe all the pie cuts were at 15* except a few extras were at 7*. The H pipe was made with a 3" hole saw. It was all a trial and error thing but it turned out ok. I really wish I had a better welder. The flux core welder just spits slag everywhere requiring that the surface be ground down a bit. It will hold anything and gets good penetration but the welds are never pretty.
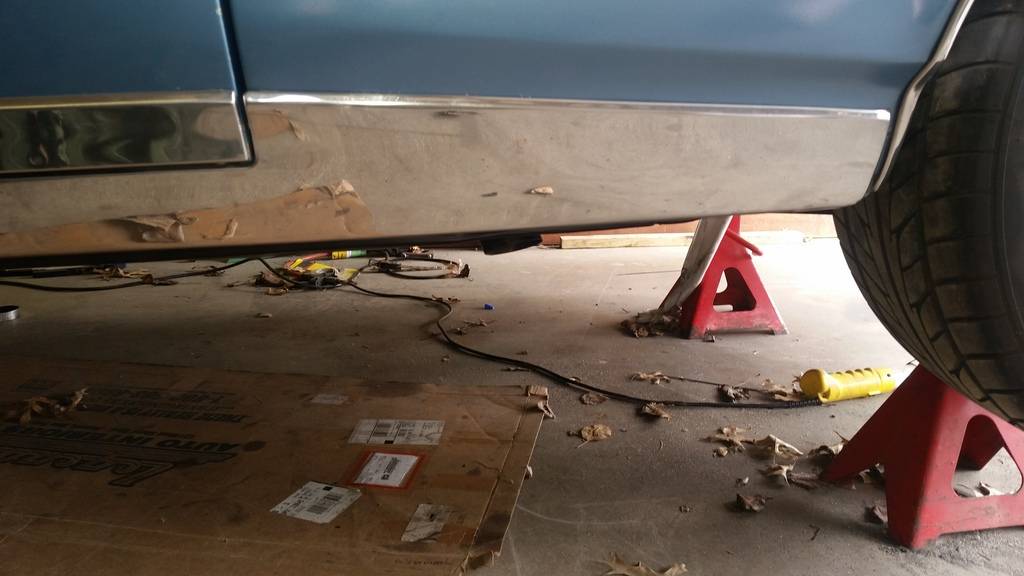
This honestly took FOREVER but it turned out decent and fits well making the exhaust pretty much invisible at ride height. Its coated in POR15 exhaust paint and im just going to cure it by running it around for a few hours after I fire it.
I also did some QuickTime Dumps. The dumps are tucked way up there and you cant see anything except a 1/2" or so poking out under the frame from the side by the rear control arm mount. I cant wait to open this thing up with the flick of a switch!
 -Nick
-1967 GTO I drive and race
-Build threads:
-http://forums.maxperformanceinc.com/forums/showthread.php?t=615847&page=23
-https://www.pro-touring.com/showthre...project-thread
-
03-10-2016 #309
 Registered User
- Join Date
- Dec 2006
- Location
- ROBBIEVILLE
- Posts
- 263

Your work is excellent I only wish I wrenched more of mine that giving most of it too a shop
1966 GTO HELL BEAST PROJECT
-
03-10-2016 #310
Registered User
- Join Date
- Feb 2005
- Location
- Waterloo, Ia
- Posts
- 1,408
Thanks! I tell ya though, as much as I love making things and wrenching, sometimes I wish I could just hand it to a shop. This one took forever. Originally Posted by robbie9999
-Nick
-1967 GTO I drive and race
-Build threads:
-http://forums.maxperformanceinc.com/forums/showthread.php?t=615847&page=23
-https://www.pro-touring.com/showthre...project-thread
-
03-25-2016 #311
Registered User
- Join Date
- Feb 2005
- Location
- Waterloo, Ia
- Posts
- 1,408
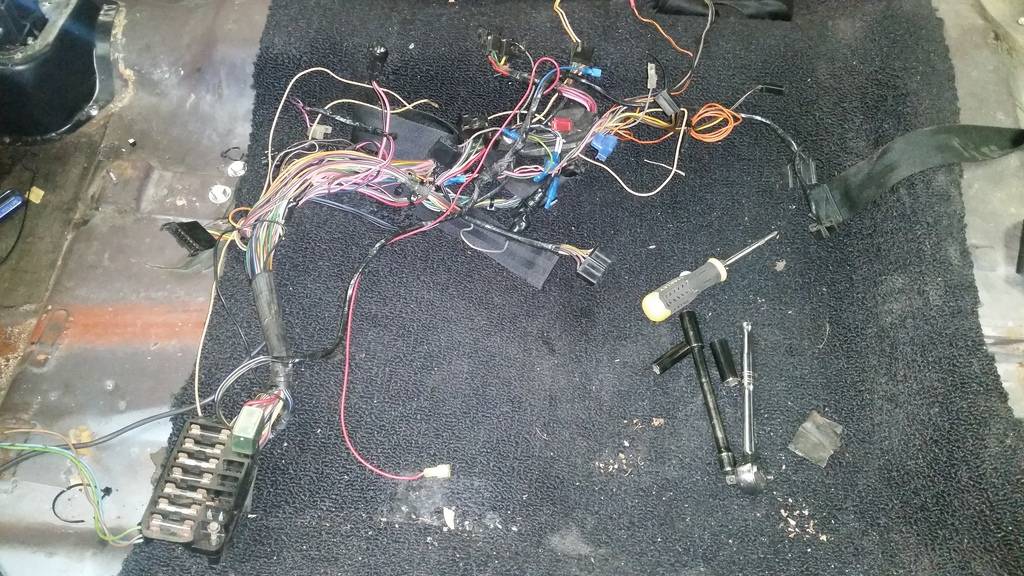
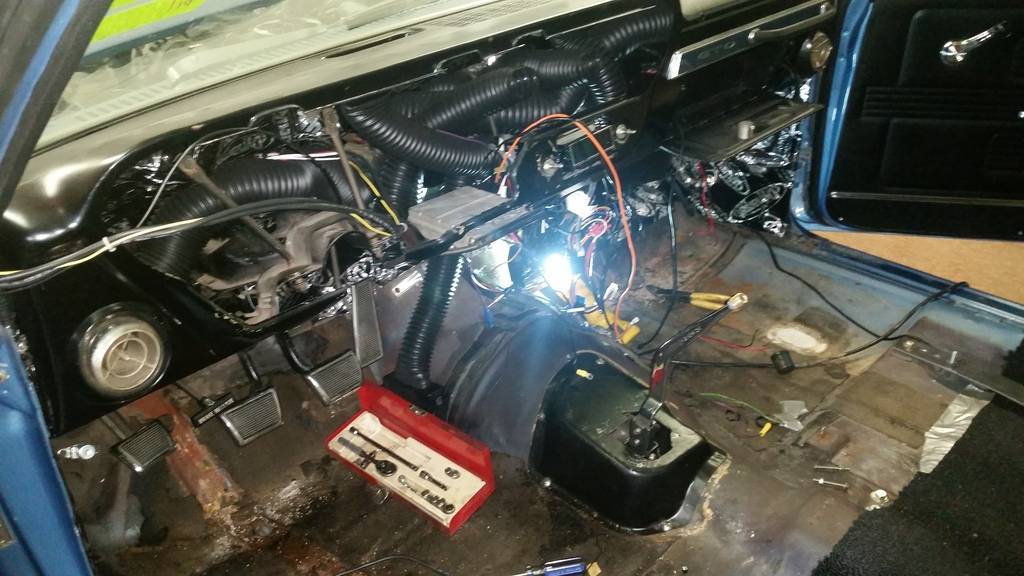
Let the rewire begin! Out with the old....
 -Nick
-1967 GTO I drive and race
-Build threads:
-http://forums.maxperformanceinc.com/forums/showthread.php?t=615847&page=23
-https://www.pro-touring.com/showthre...project-thread
-
03-26-2016 #312
 Registered User
- Join Date
- Aug 2012
- Location
- Peoria, AZ
- Posts
- 1,758
Oh my...

I hate wiring, good luck with that. I'm sure it'll be nice when finished like all the rest of your projects.Lance
1985 Monte Carlo SS Street Car
-
03-26-2016 #313
 Registered User
- Join Date
- Feb 2005
- Location
- Metro Detroit
- Posts
- 865
Nick I have followed your thread for ever. Very impressed with your mind set and tenacity. I'm a little older and not in good health, however I have much admiration for your work ethic. This makes it all worth while in the end. Originally Posted by SSLance
Keep up the good work and congrats on your continuous progress.
-
03-26-2016 #314 Registered User
- Join Date
- Sep 2013
- Location
- sw Kansas
- Posts
- 1,662
Patience and perseverance will get this done.
 There's many things we don't get right the first time. Looking good.
03-27-2016 #315
Registered User
- Join Date
- Feb 2005
- Location
- Waterloo, Ia
- Posts
- 1,408
So do I.... The irony here is that I'm an industrial electrician. Ha! Seriously though there's nothing worse that electrical gremlins in a car. I was stranded in StPaul last year at Street Machine Nationals when all of the sudden the car decided to start again out of nowhere. Im done with 50 year old hacked up wiring. Originally Posted by SSLance
-Nick
-1967 GTO I drive and race
-Build threads:
-http://forums.maxperformanceinc.com/forums/showthread.php?t=615847&page=23
-https://www.pro-touring.com/showthre...project-thread
03-27-2016 #316
Registered User
- Join Date
- Feb 2005
- Location
- Waterloo, Ia
- Posts
- 1,408
Thanks Roger. I figure I've got an honest couple of years left finishing this one but one piece at a time will get it there. All of the little things I'm doing are in prep work for an engine build I'm planning for this fall/winter. Stay tuned! Originally Posted by Roger Poirier
-Nick
-1967 GTO I drive and race
-Build threads:
-http://forums.maxperformanceinc.com/forums/showthread.php?t=615847&page=23
-https://www.pro-touring.com/showthre...project-thread
03-27-2016 #317
Registered User
- Join Date
- Feb 2005
- Location
- Waterloo, Ia
- Posts
- 1,408
Thanks man. Patience and perservierence....and a heaping pile of money lol Originally Posted by wfo guy
-Nick
-1967 GTO I drive and race
-Build threads:
-http://forums.maxperformanceinc.com/forums/showthread.php?t=615847&page=23
-https://www.pro-touring.com/showthre...project-thread
03-27-2016 #318
Registered User
- Join Date
- Aug 2012
- Location
- Peoria, AZ
- Posts
- 1,758
I put a supplemental brake system in our 2012 Jeep Liberty last week, including a break away system and light kit to make the taillights act as trailer lights when the Jeep is towed behind our RV. The mechanical part of mounting everything up was right in my wheelhouse, the electrical part was slow and tedious for me. When I'm wiring I have to double and triple check everything before making the final connections and even then I'm still nervous when I power the system back up for the first time.
I understand wanting to get rid of the 50 year old wiring, hopefully the kit you use is complete and easy to transplant in place.Lance
1985 Monte Carlo SS Street Car
03-27-2016 #319
Registered User
- Join Date
- Jun 2012
- Posts
- 427
Loving your exhaust setup... yes, flipping a switch and being earthquake loud is an awesome thing...
Just a heads up, triple check the bolts.... a LOT... the heat cycles tend to loosen things up, and you lose parts on the road...
03-28-2016 #320 Registered User
- Join Date
- Mar 2009
- Location
- San Antonio, TX
- Posts
- 1,635
Great build Nick! I really enjoy seeing others doing garage builds.
You spend a good deal on sweating out the little details that make it great.
Nice work on the exhaust, BTW.Dave
84 Monte SS - just a few bolt-ons


 Reply With Quote