


Results 1 to 20 of 27
Thread: 1968 Firebird; A Labor of Lust
-
11-20-2014 #1

 Registered User
- Join Date
- Jan 2010
- Location
- East Tennessee
- Posts
- 31

1968 Firebird; A Labor of Lust
I've been a long time lurker of this forum, and as I'm approaching the 5th anniversary with my '68 Firebird, it's finally time I share a build thread. Only this past winter did we actually start building it.
With that said, a lot has changed for my car in the last 8 months. One of my best friends and I have been spending many hours building my car to be a fun daily driver with performance upgrades that can handle some fun on the backroads. The over all goal is to have a somewhat stock appearance but I did decide to finally bite the bullet and go with an LS1 swap. In March, I procured an '02 z28 with 42k miles. So that's my drivetrain plan. (I am still keeping and storing the YJ code 350 the car was built with). I'll post the plans for motor upgrades once we hit that stage. ;)
Right now, we're in the body work phases. Here are some pictures of our progress:
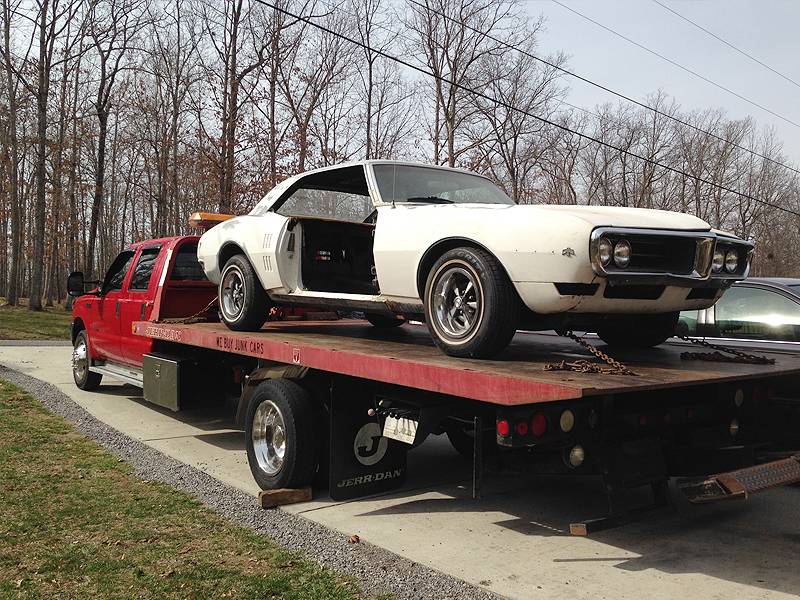
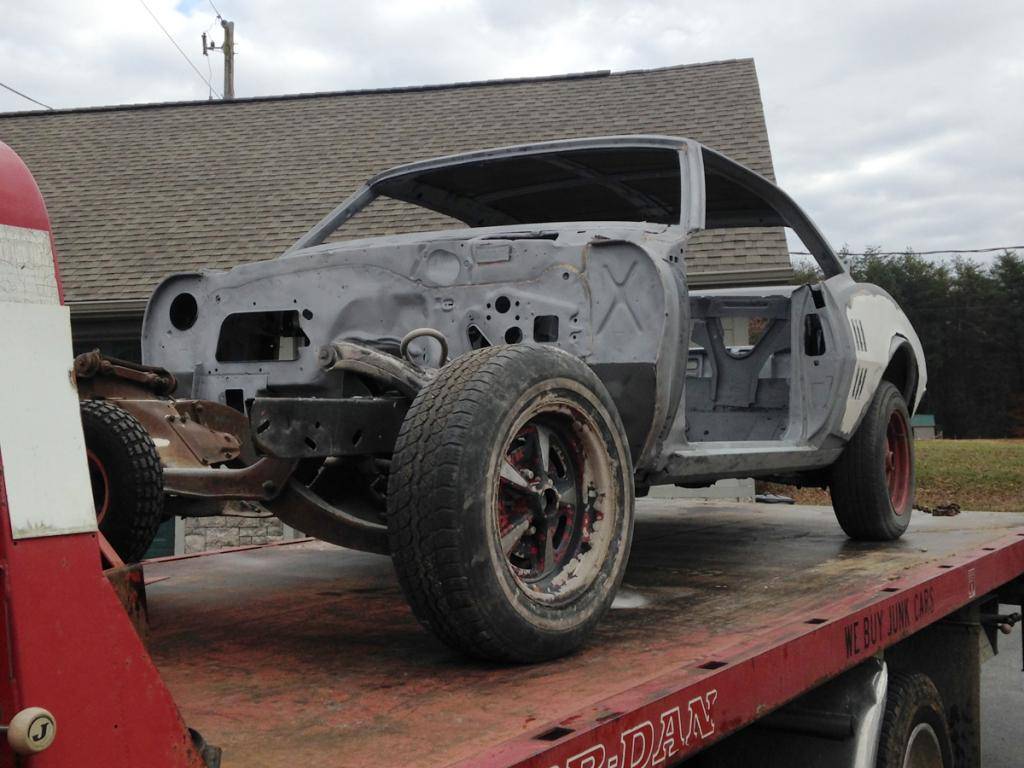
Back in March, on the rollback, the day it left to my buddy's shop!
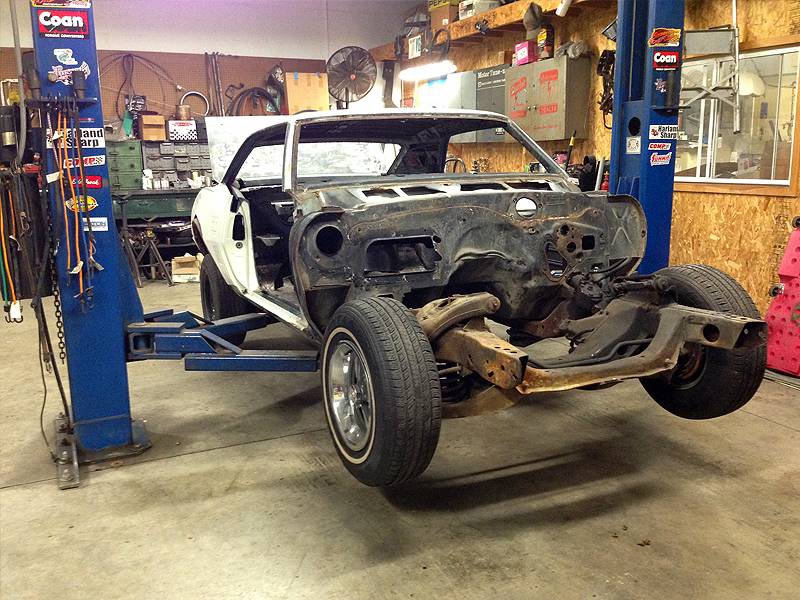
Sadly, my subframe is quite a bit bent, and the cost to fix and restore it is about the same price as just buying a new stock style frame. Still trying to decide on my options. I'd love to go fully aftermarket with all upgraded suspension, but right now that's not in the budget.
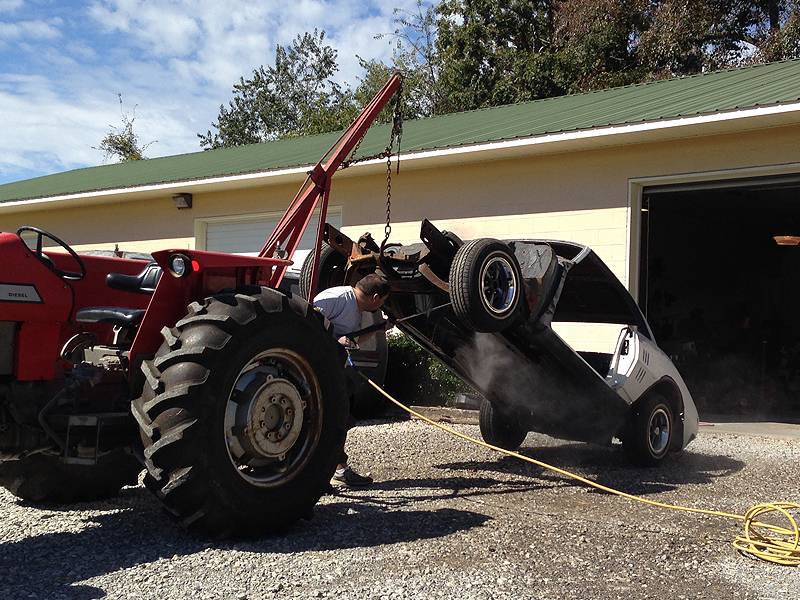
Pressure washing the undercarriage. Floor pans need patching, so does my trunk, have all the sheet metal to go in. Doors were a little rough but are fixable (trying to salvage the frames and reskin the passenger side using AMD sheet metal). QPs luckily only need partial skins, and those will be going in once it's back from sand blasting.
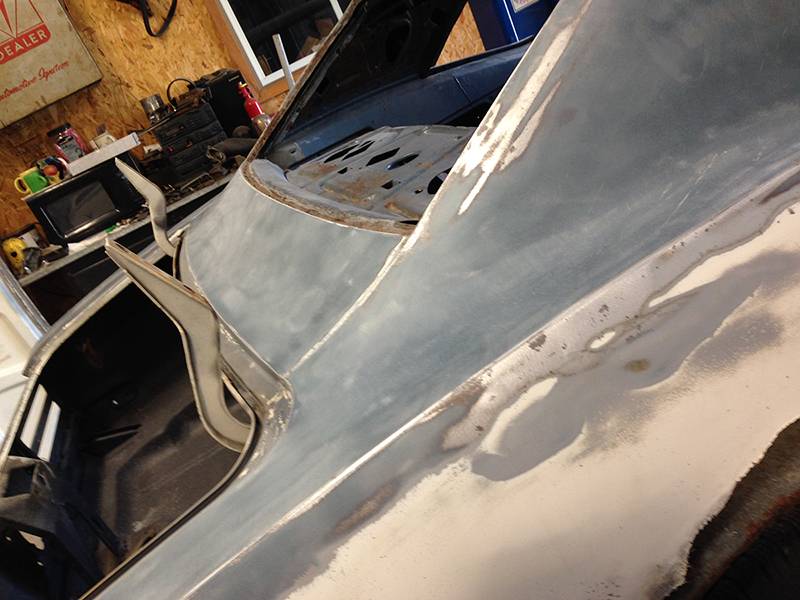
In early October (10/5/2014) we spent time prepping and sanding off the second layer of paint (which seemed honestly like an 80s Macco paint job) to help prepare it for the sand blaster and of course, reduce friction time. A glimpse of the car's original color (Aleutian blue) which is actually the color I'll be choosing for it once we're ready to spray. Going with PPG I believe. We actually were OCD enough to use a razor blade to remove a lot of that white paint, which was oddly cathartic.
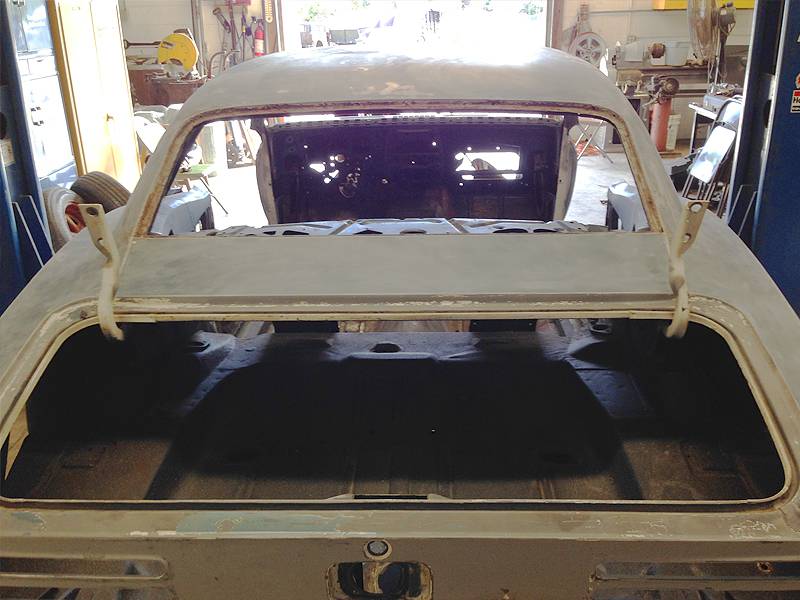
The dutchman's panel was a lot more solid that I was expecting. We'll see come after this Saturday when it returns from the media blaster where we'll be needing to patch. I have several pinholes around both windshield and rear glass that need repair, but knew about that before we started paint stripping.
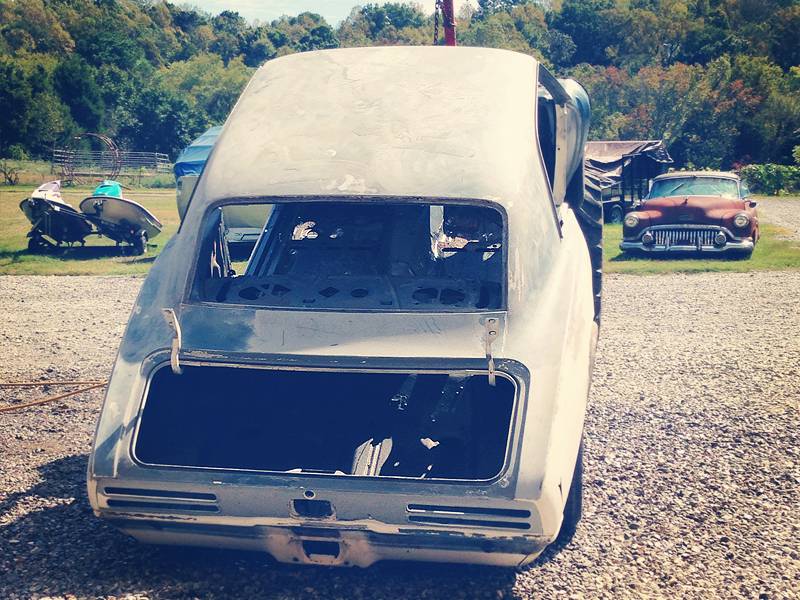
Roof shot! (Of course it has a nice dent in it)
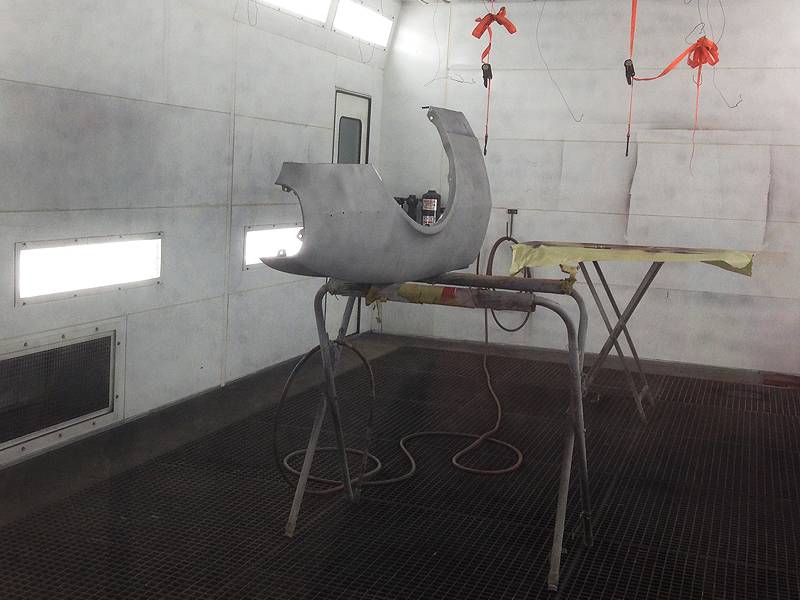
I'm incredibly impressed with how solid the passenger fender was once we had it blasted. Only 1 major spot of rust that we cut out and fixed, and several tiny pin holes that have been closed up. Sadly, the car had been hit at one point in time from the driver's side, so that fender (god I wish I took a picture) had a 2'x9" chunk of filler hiding the obscene dent. We're thinking that same wreck was responsible for the bent frame. Fender wasn't really worth repairing and I had an awesome buddy I know through facebook spot me a brand new unused reproduction fender for the cost of greyhound shipment. Really curious to see how much finagling it'll need to fit right, but was pretty awesome of him to do that.
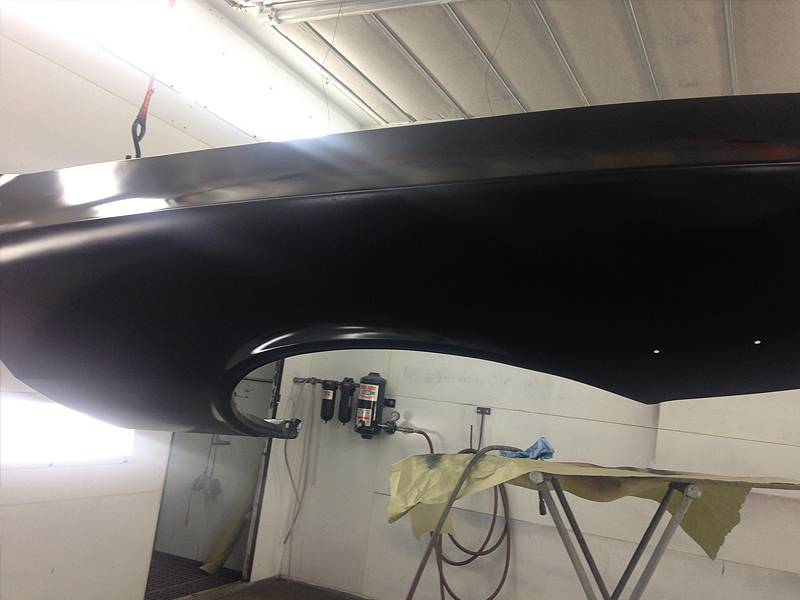
RH fender shot in epoxy ready to be body worked! Again, very happy with my RH fender!
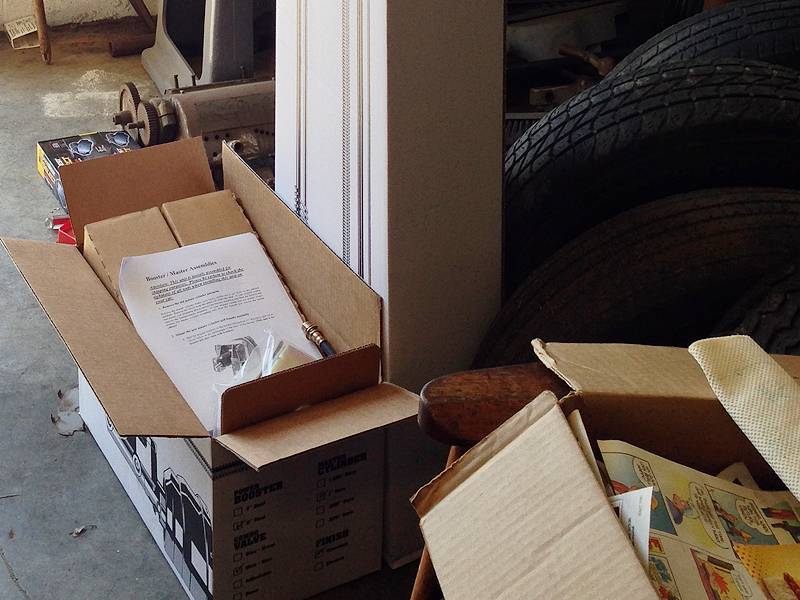
I've already procured a lot of parts. I've got a full brand new Vintage Air unit that will be going in, new brake setup (Right Stuff) master cylinder, booster, stainless lines, etc. Have my brakes that I've already retrofitted and used a set of spare '68 hubs I had that I had turned down on a lathe to fit the rotors off of an '02 Trans Am. Figure those late 4th gen brake components will hold me over until I can get a more beefy brake set up. The wheels may be 17in Year one Rally 2's to accommodate the disk brake and wider wheel/tire setup. Not tubbing the car so only going I believe 8 in the front, 9 in the rear. My buddy has a set on his '70 Judge that I plan to steal for a little and see how I like my car with them.
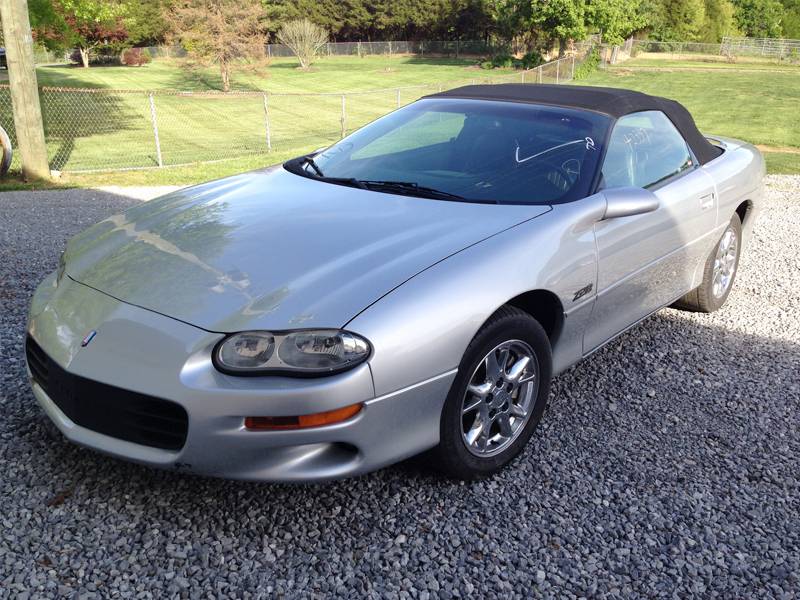
And the parts car we scored. Yes, some insurance company totaled it out. Has some front suspension damage (think it slid off the road), and had quarter damage that we have since rednecked the dent out. The car is a solid running car with service records. Almost hate to tear it down but, I want/need the motor.
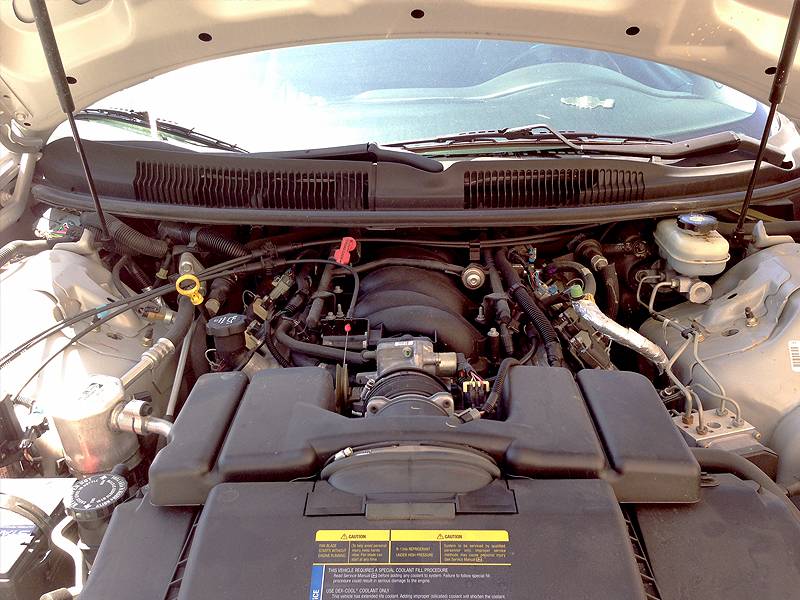
42k miles, the entire car is super clean.
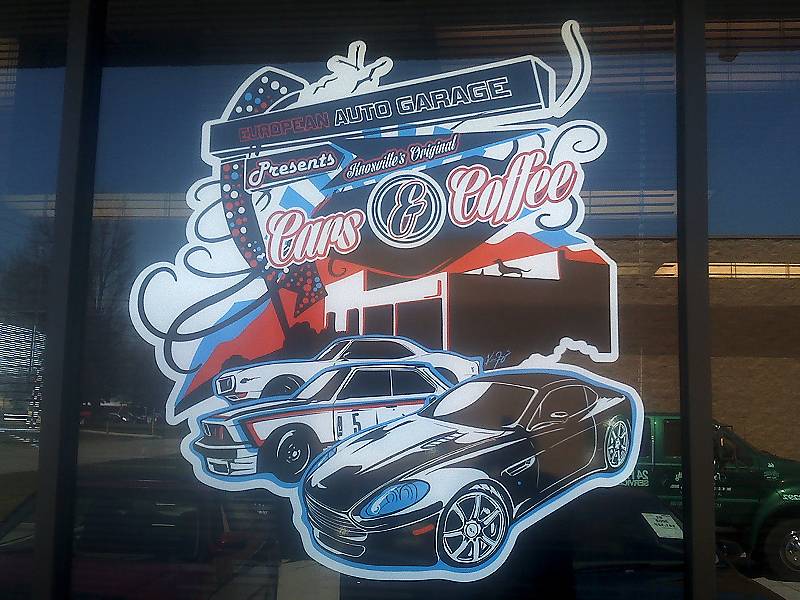
I'm a professional graphic designer for a living, and this is the type of stuff that funds this build. A client that had me doing several illustrations for a car show he hosts and requested I include my firebird in the artwork. Funny how I'm an illustrator but I never draw renders of my own car, this is to date the only drawing I've done of it haha. Pictured is the vinyl that's on their shop front, it's also on their trailer and countless vendored tshirts.
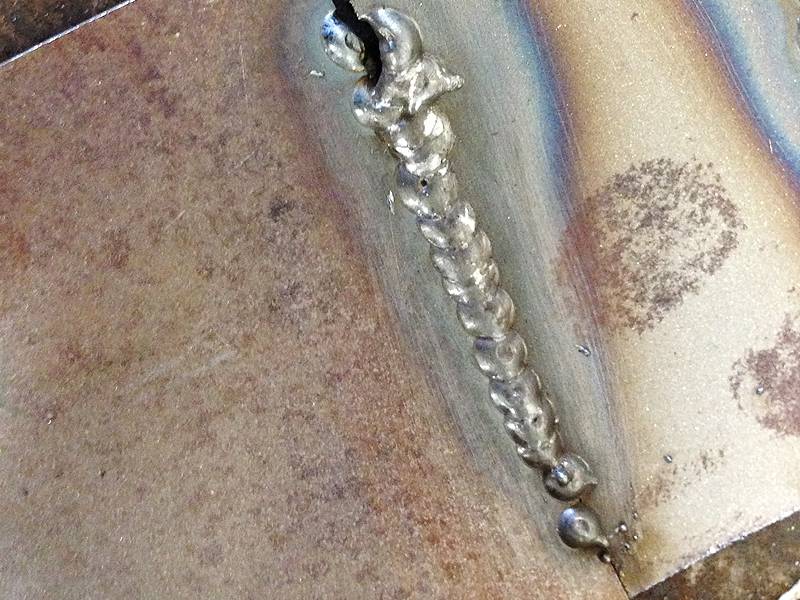
For those who are curious about my amateur welding skills, I haven't actually welded on the car. My buddy who has been building old cars for years has been doing all the metal work; though he is giving me welding lessons whenever we've got some extra time. Here's my first attempt at MIG Welding! Don't laugh too hard. ;)
I'll have more progress shots soon, hopefully door shots! My driver's side door doesn't seem to need as much work as the passenger side. Already had to order the passenger door skin because it was full of rot and just dented right at the crease. The frames we're trying to repair just to avoid the absolute nightmare that is aftermarket doorframes. Also, I'll be needing a new frame because I don't think we'll be giving the frame shop the price he quoted us to straighten my very ****-eyed factory frame.
Still need to source my rear end and going brand new suspension. I'll share more once I know what we'll be going with.
Holidays are getting in the way, but hoping after thanksgiving we'll make some headway in the metal repair.
As for everyone typically my age, this is a build on a budget, but the goal here is to get the body straight, done properly, and slick, then upgrade the drive train, renew the suspension and drive the car for a bit. Eventually, I'd love to do IRS, aftermarket subframe, etc. and the works, but saving for a house and land has been cutting into my build budget so that'll come later. Bleh, priorities.. ;)
-
11-22-2014 #2
Registered User
- Join Date
- Jun 2012
- Posts
- 427
you're gonna love the 4th gen disc brakes, especially the rears. good setup for cheap. Looking forward to seeing what you'll do with this bird...
-
11-23-2014 #3
 Registered User
- Join Date
- Nov 2006
- Location
- Ma.
- Posts
- 5,560
Welcome nice project and in pretty good shape. It should be nice when your done.
Wayne
Car FINALLY home !!!!!! lol
Project FNQUIK https://www.pro-touring.com/showthre...ghlight=FNQUIK
-
11-26-2014 #4
Registered User
- Join Date
- Jan 2010
- Location
- East Tennessee
- Posts
- 31
Thanks guys, I really appreciate it. I definitely will enjoy the 4th gen brakes. I actually have a front set from an '02 WS6 that I put on a spare set of hubs I had off of a '68 camaro with brand new calipers, so just need the rears off of this camaro or another car. Got my rear end today. Went with a Nova 8.5" 10 bolt. Looking into ordering the parts for it. Thinking of going with 3.73 gears. Gonna get it sand blasted friday and hope to pick up my shell as well this weekend. Fingers crossed, our sand blaster is great but he's so limited on when he blasts, things take forever.
-
12-01-2014 #5
Registered User
- Join Date
- Jan 2010
- Location
- East Tennessee
- Posts
- 31
UPDATE December 1st, 2014:
We FINALLY were able to pick up the shell from the media blaster. He only blasts on weekends and we had a lot of rain and his compressor had a sensor that ended up going out when he first started shooting the car. Long story short, the shell is finally done, and here are the results and what we found:
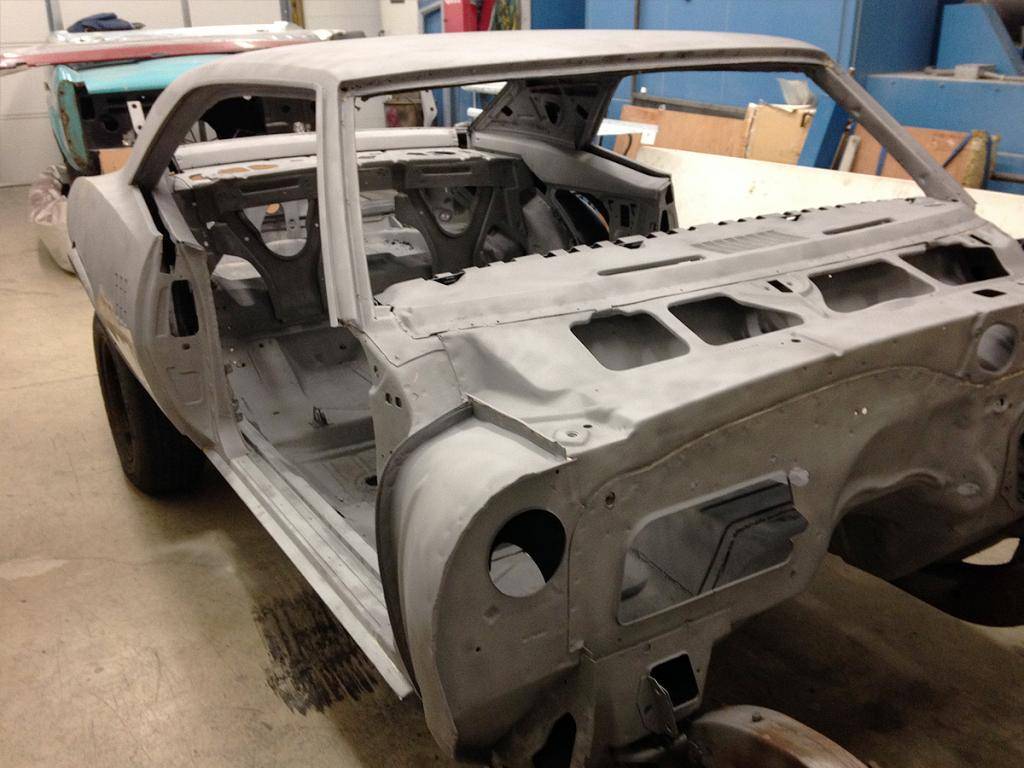
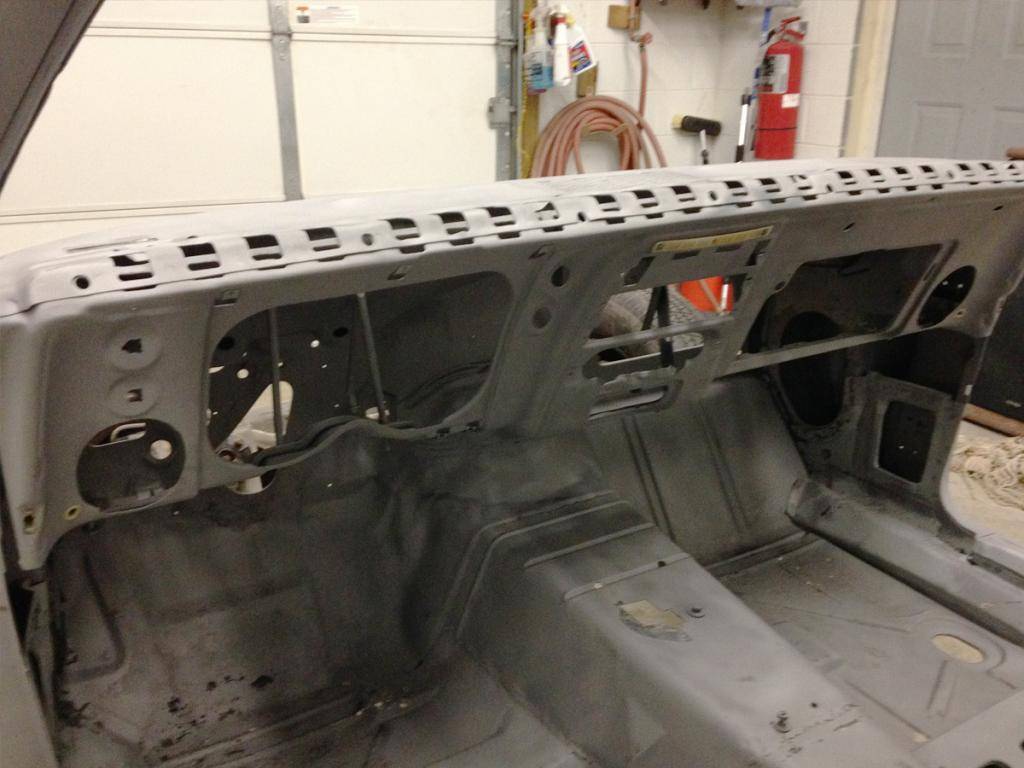
You can see the damage where the radio goes... Someone had a field day whacking it to pieces apparently. Needless to say, I need some replacement metal for it if anyone knows of anyone reproducing it or a parts car of some sort. Ignore the transmission tunnel, that was previous "fixed" by some previous owner, which is currently on the list of un-do and re-do properly.
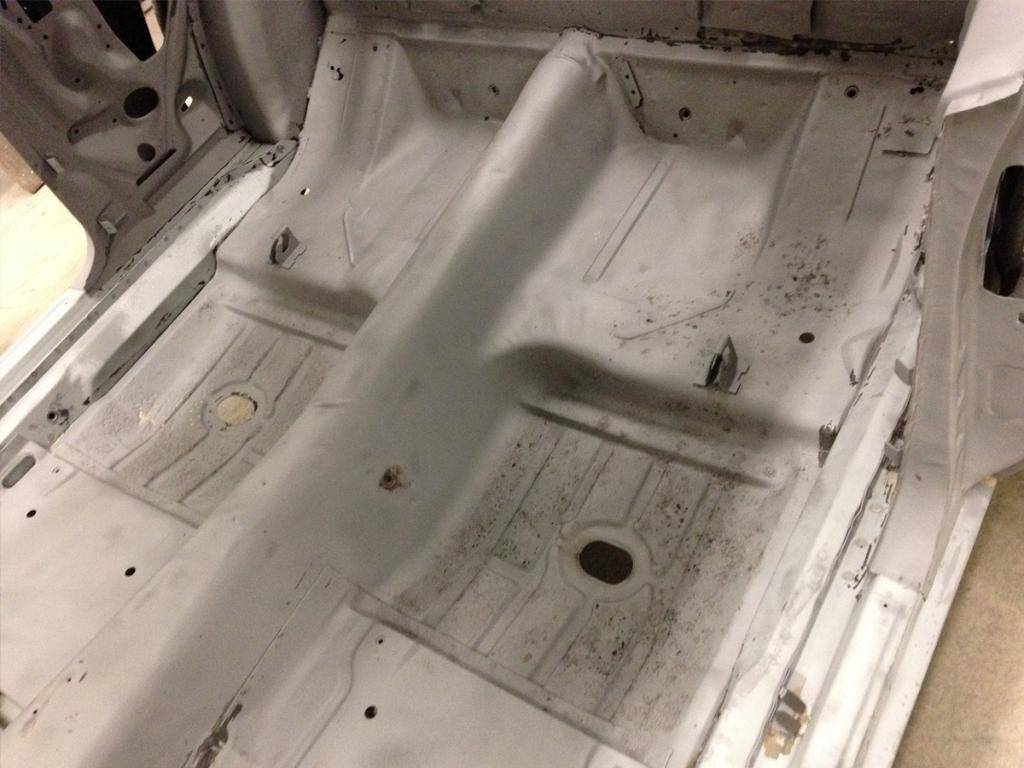
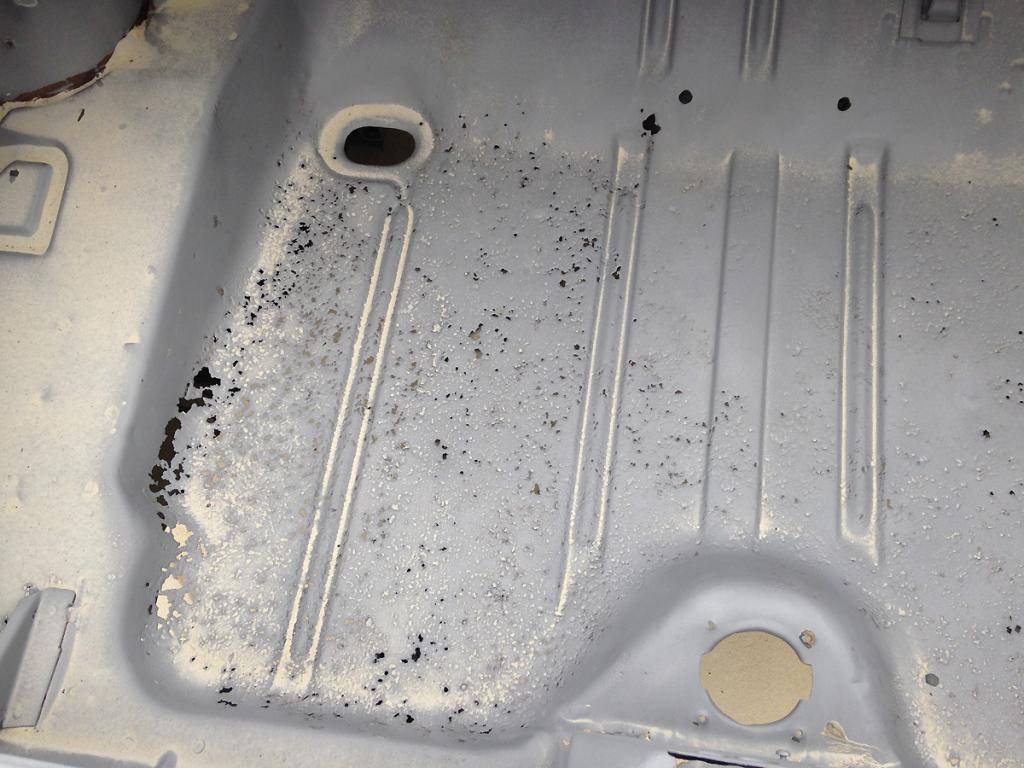
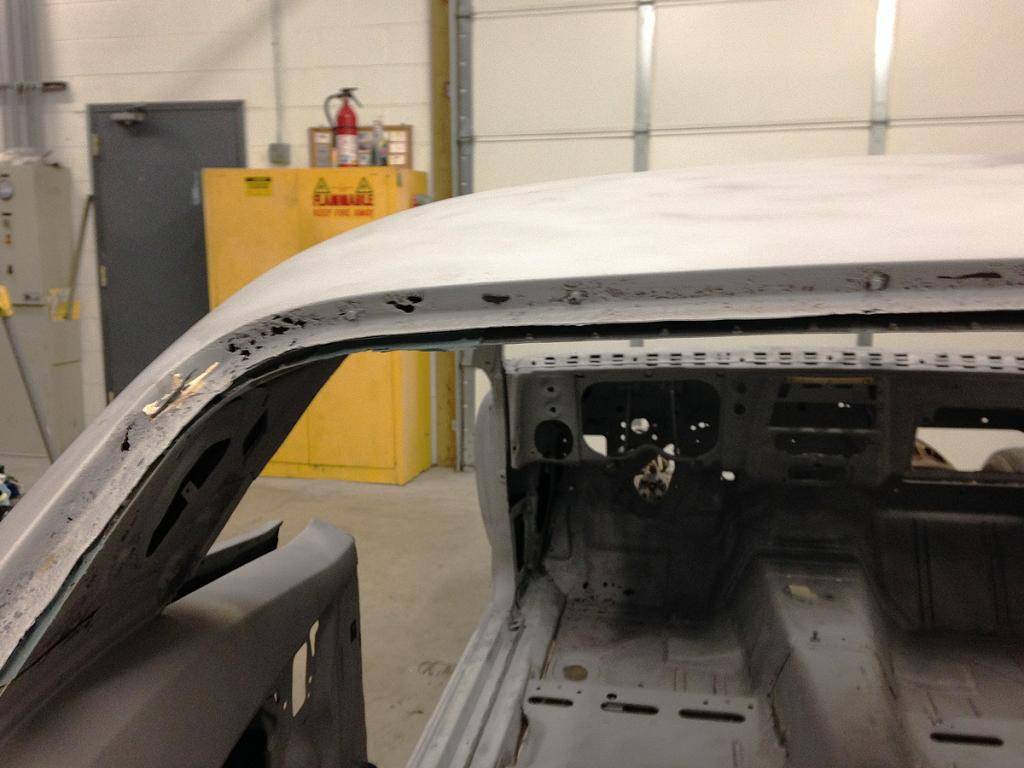
Doors are currently being blasted as well as the rear end. I think it was worth the wait for this guy, very pleased with the diligence he took.
Going to completely rebuild the rear end, thinking 3.73 gears. Need to order all the new parts for that as well.
-
03-21-2015 #6
Registered User
- Join Date
- Jan 2010
- Location
- East Tennessee
- Posts
- 31
Okay, so a TON of work has been done since I last posted. Full floors to firewall (went with the heater core delete firewall), partial quarters, inner fender wells repaired, had to source another subframe since mine was bent, new passenger side door skin, both door frames had to be repaired, got a new trunk lid as original was warped, new hood (went with 400 hood), new lower valance, core support, new inner fenders, list goes on haha. I'll just share some pictures. ;)
So all of this work started January 5th, 2015

The floors were pretty much entirely full of pinholes. Rather than trying to patch it every where, we opted to just replace the entire floors. My transmission tunnel was also cut to hell by a previous owner, so a new floor fixed that issue as well.
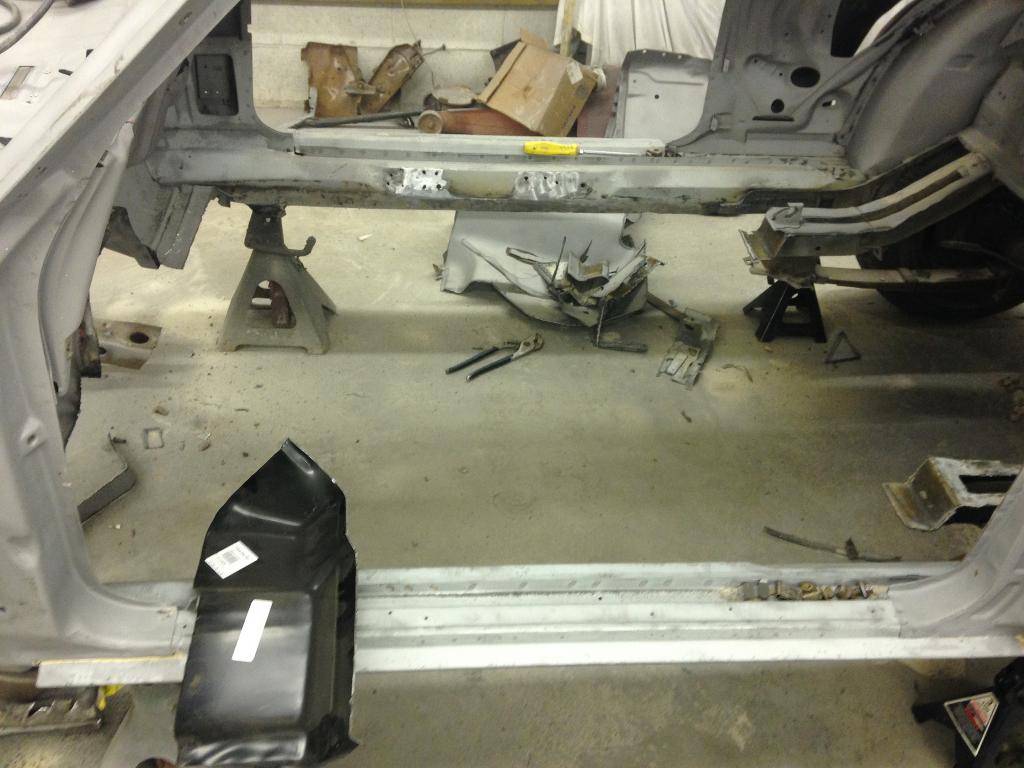
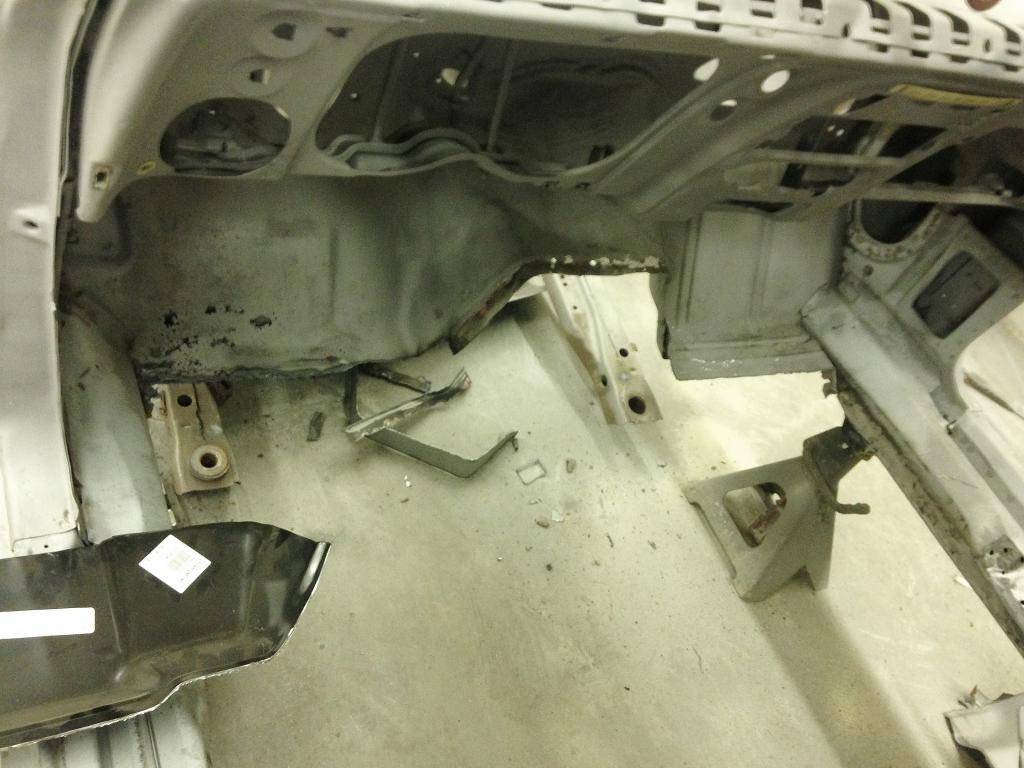
There was a bit of rot up into the toe boards as well.
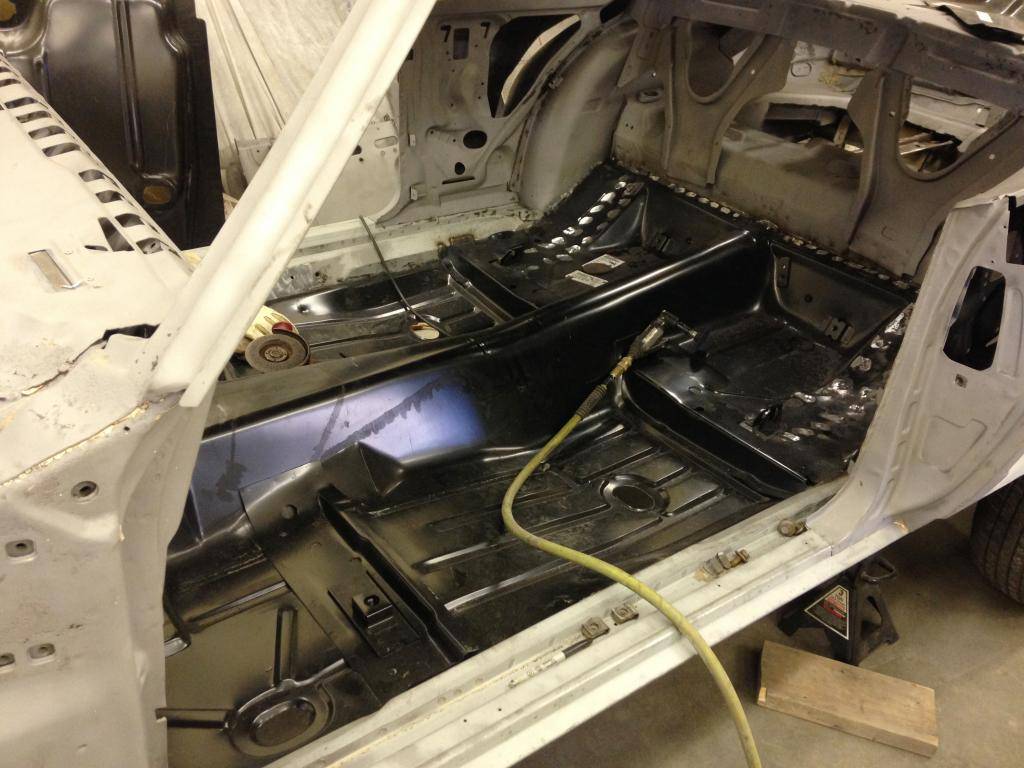
New floors in.
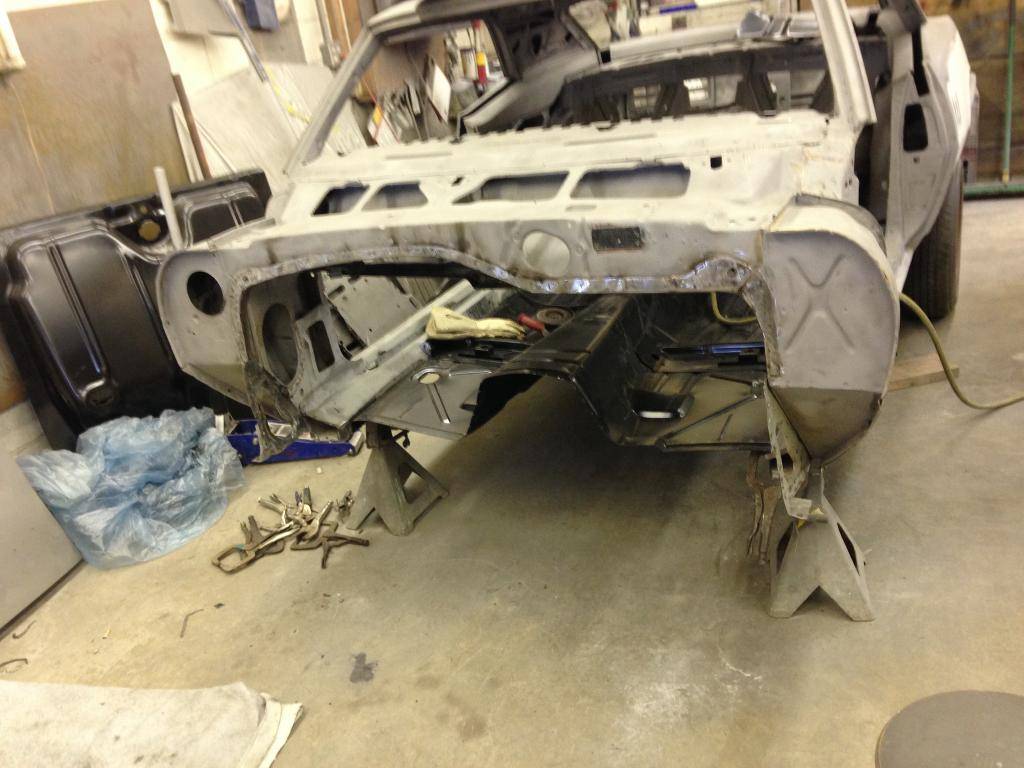
Since the car is getting vintage air, didn't need the old heater core anymore, so we just ordered a slicked firewall and that fixed the toeboard rust as well.
There was nearly a baseball sized hole in the corner of this door. My buddy fixed that for me.
After all holes were welded up, epoxied the inside as well as the backside of the door.
Passenger side door was waaay worse.
Epoxied the entire inside of the door. No skin obviously made that simple.
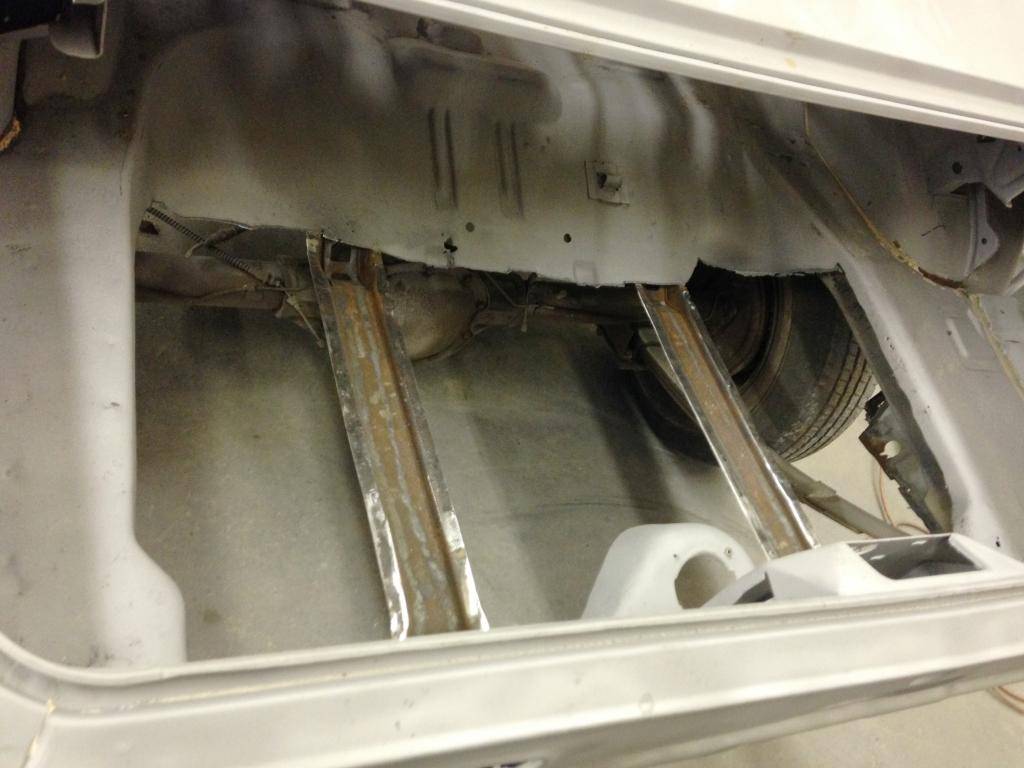
Old trunk gone ;)
New trunk in.
Repaired & epoxied driver's side inner fender well.
Quarter fitment.
Driver's side quarter welded up.
Inner fender repair on passenger.
-
03-21-2015 #7
Registered User
- Join Date
- Jan 2010
- Location
- East Tennessee
- Posts
- 31
Epoxied inside the quarter.
Passenger quarter fitted.
Got some epoxy up inside the firewall since it was blasted and well, the firewall was out, so why not? haha.
New firewall in and sealed up.
Rear window channel was a bit ugly. A buddy made some patches for us to use in the corners.
Original seat risers back in place.
New to me '68 Nova subframe. Original was bent, unfortunately.
New trunk lid has some gaps as expected, this was fixed later on.
Passenger door skin installed and door mounted.
Original passenger fender was luckily not hurt and needed minor metal work where there was some rust.
-
03-21-2015 #8
Registered User
- Join Date
- Jan 2010
- Location
- East Tennessee
- Posts
- 31
Repop fender was absolute junk. Using original fender instead which had some wreck damage, but is fixable.
Scored these Heidts drop spindles at a swap meet. Barely used, buuuut need the tubular control arms that go with them to make'em work ;)
Got a sweet deal on a new Goodmark hood and scoops, sooo obviously that had to go on.
Got some EMS billet hinges for the new hood since my originals were shot.
Body workin'
Even had to get a new spoiler. My orginal '68 Camaro spoiler had all but one post broken hah.
So the car will be coming back from the body shop for us to test fit the motor and trans, as well as the Vintage Air unit among other things, before it goes back to be put on the rotisserie for final welds and to get the the bottom side painted. This means I need to make a decision on headers and motor mounts. We're thinking maybe chevy small block mounts with adapter plates. Did a search here on the forum a little earlier and have seen some people have had luck with this method, though I am open to other options. Also looking into the Speartech engine harness.
Sorry for all the posts, photo-limit didn't like me putting everything in one reply.
-
03-22-2015 #9 Registered User
- Join Date
- Apr 2009
- Location
- FRANCE
- Posts
- 683

A lot of work done right !
Very nice
Gil
03-22-2015 #10
Registered User
- Join Date
- Jun 2008
- Location
- Foxboro, MA
- Posts
- 91
Great thread and build.
03-25-2015 #11
Registered User
- Join Date
- Jan 2010
- Location
- East Tennessee
- Posts
- 31
Thanks guys, I appreciate it!
Gil, I saw you recently had to roll your fenders and it kind of brought up an area of concern for me. I'm just planning to go with 17in wheels in both front and rear. Probably 8 wide in the front, 9 wide in the rear. I'm wondering how this would fair as far as rubbing goes. The car will have a 2.5in inch drop I believe from stock height. Originally Posted by Gil

03-25-2015 #12 Registered User
- Join Date
- Apr 2007
- Location
- Utah
- Posts
- 533
Nice work. that is a lot of work.
Sam
Northern UT.
'68 Camaro "Bodacious"
'56 210 2dr "Buckshot"
03-25-2015 #13
Starting The Transformation
- Join Date
- Jan 2015
- Location
- Charlotte, NC
- Posts
- 309
At least you can use the re-pop front fenders for expensive patch panels
03-25-2015 #14
Registered User
- Join Date
- Mar 2009
- Location
- Houston, TX
- Posts
- 1,197
Looks like you're doing LS swap. I'd suggest you use Holley for motor mounts/headers/crossmember. They're designed to be used together as a system, and has great clearances for headers. Originally Posted by lawless
The car is moving along great.Tu Ho
Firebird V2-LS swap
03-26-2015 #15
Registered User
- Join Date
- Jan 2010
- Location
- East Tennessee
- Posts
- 31
Haha, true. I'm not sure if the original fender will need large patches, but around the wheel lip there's a rather large dent, so we'll see.
That is a good suggestion. Right now we're looking at S&P mounting plates and oil pan. Originally Posted by rickpaw
03-26-2015 #16 Registered User
- Join Date
- Aug 2011
- Location
- Connecticut
- Posts
- 925
Did you brace the car at all when you did the floor? It looks like its just on 4 jack stands.
1967 Firebird "Poor-Boy Build"
New updated thread
https://www.pro-touring.com/threads/...bird-(Updates)
Follow me on Instagram @NaturalLivingMan
03-26-2015 #17
Registered User
- Join Date
- Jan 2010
- Location
- East Tennessee
- Posts
- 31
The frame rails were still in place and the stands were placed in all areas needed to ensure no flexing would occur. Originally Posted by Buryingthesun
03-26-2015 #18
Registered User
- Join Date
- Apr 2009
- Location
- FRANCE
- Posts
- 683
Well, was more bend and try to flatten than roll in fact... Originally Posted by lawless
Did it because of the 235/60R15 too wide for the 7" wheel & bulge a bit.
I think it will be necessary to do it for the 17x8 I hope to have them next month...
Also my rear end is a GTO 71 8.5 10 bolt so I think wider than a stock 69... I have chosen 17x8 BS 4.5 all arround, should work for me ...
I'm not aware of the room in a 68 wheel well but should be good with 17x9 BS 5, even a 9.5 BS 5.5...
But if you can roll them before paint, so you'll be sure it won't rub at all.
Gil
03-27-2015 #19
Registered User
- Join Date
- Jan 2010
- Location
- East Tennessee
- Posts
- 31
Originally Posted by Gil
Thanks for the info, let me know how it goes! I'm a little nervous about how my choice of wheels and tires will fit...
[COLOR=#141823][FONT=helvetica]This week's progress! Some primer after blocking. Moving right along. Waiting on the arrival of the newly restored bumper I ordered from a company out in CA. Fingers crossed fitment isn't a nightmare. Re-pop bumper was a complete joke as far as being "triple plated" as they claimed. Kept the rear repop, though.
03-27-2015 #20
Registered User
- Join Date
- Nov 2006
- Location
- Ma.
- Posts
- 5,560
Nice work its come a long way.
Wayne
Car FINALLY home !!!!!! lol
Project FNQUIK https://www.pro-touring.com/showthre...ghlight=FNQUIK


 Reply With Quote


