Results 81 to 100 of 536
Thread: Project 70 RS
-
10-27-2011 #81
 Full Blown G-Machiner
- Join Date
- Oct 2008
- Location
- Santa Fe Springs, CA
- Posts
- 625
Cool design. It looks like it will support some serious weight, without weighing a ton. How much does it weigh?
 Hotchkis Sport SuspensionToll Free: 877-466-7655
-
10-27-2011 #82 Registered User
- Join Date
- Feb 2009
- Location
- N.J.
- Posts
- 690

I haven't weighed it, I'm not sure I want to know. I just want it to be strong and made by me.
It's my first time at really fabbing something from scratch. Learning alot.
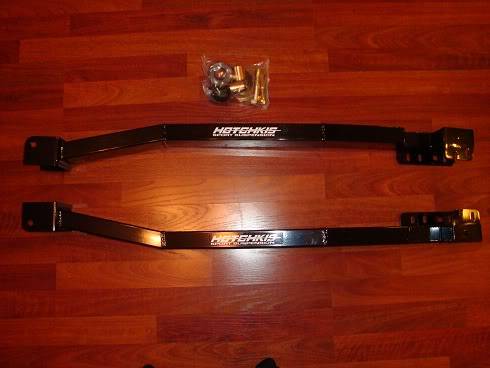
Got my frame connectors in today. Awesome pieces.
 - Paul
70 Camaro RS Project Build
https://www.pro-touring.com/showthre...-Project-70-RS
90 Mustang GT Project Build
https://www.pro-touring.com/threads/...ang-Gt-Project
My Garage Project
http://garagejournal.com/forum/showthread.php?t=189511
10-27-2011 #83 Registered User
- Join Date
- Jun 2011
- Location
- St. George, Utah
- Posts
- 1,629
Nice work Paul! I love how everything looks satin-y smooth!
10-28-2011 #84
Registered User
- Join Date
- Feb 2009
- Location
- N.J.
- Posts
- 690
Thanks Ben, I seem to really be into the anti-gloss these days.
I'm really happy with the way it's coming out though.
Picked up the material for the side panels today.
Ready to cover.
 - Paul
70 Camaro RS Project Build
https://www.pro-touring.com/showthre...-Project-70-RS
90 Mustang GT Project Build
https://www.pro-touring.com/threads/...ang-Gt-Project
My Garage Project
http://garagejournal.com/forum/showthread.php?t=189511
11-01-2011 #85
Registered User
- Join Date
- Feb 2009
- Location
- N.J.
- Posts
- 690
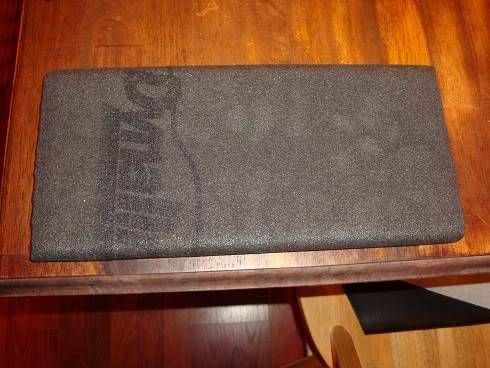
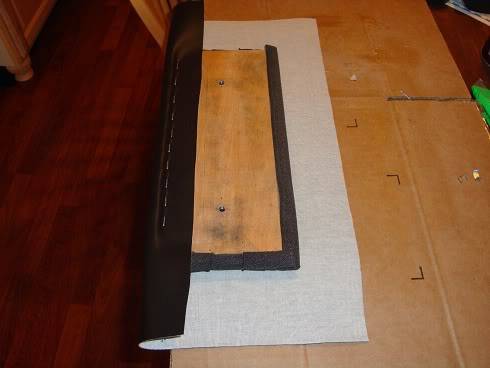
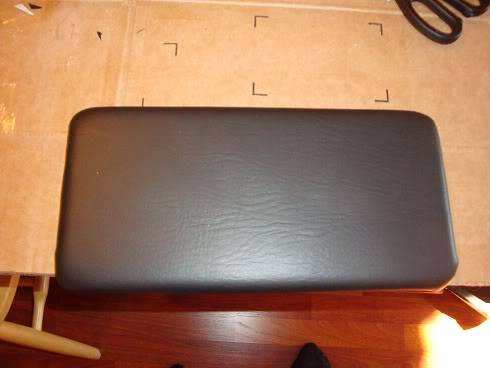
Got to work on the lid today.
Had some dynamat dynaliner leftover from covering the interior.
Used it to cover the lid, density was perfect.
Got it covered also. I have to weld in the nuts to the frame and then
finish smoothing off the welds.
Hopefully get that done tomorrow.


 - Paul
70 Camaro RS Project Build
https://www.pro-touring.com/showthre...-Project-70-RS
90 Mustang GT Project Build
https://www.pro-touring.com/threads/...ang-Gt-Project
My Garage Project
http://garagejournal.com/forum/showthread.php?t=189511
11-02-2011 #86
Registered User
- Join Date
- Sep 2011
- Posts
- 55
Nice work.
11-02-2011 #87
Registered User
- Join Date
- Feb 2009
- Location
- N.J.
- Posts
- 690
Thanks,
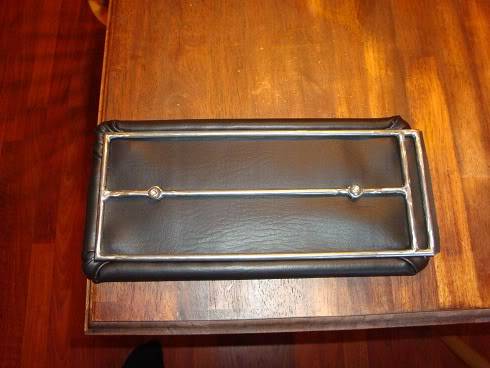
I covered the bottom and will powdercoat the frame satin black.
 - Paul
70 Camaro RS Project Build
https://www.pro-touring.com/showthre...-Project-70-RS
90 Mustang GT Project Build
https://www.pro-touring.com/threads/...ang-Gt-Project
My Garage Project
http://garagejournal.com/forum/showthread.php?t=189511
11-08-2011 #88
Registered User
- Join Date
- Feb 2009
- Location
- N.J.
- Posts
- 690
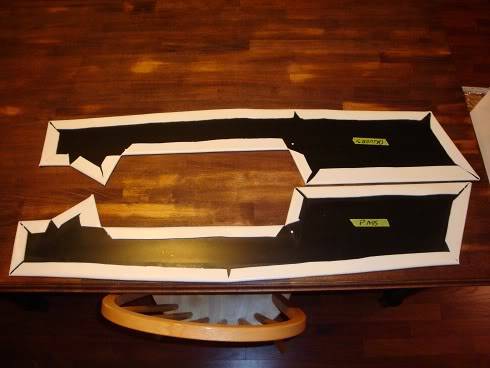
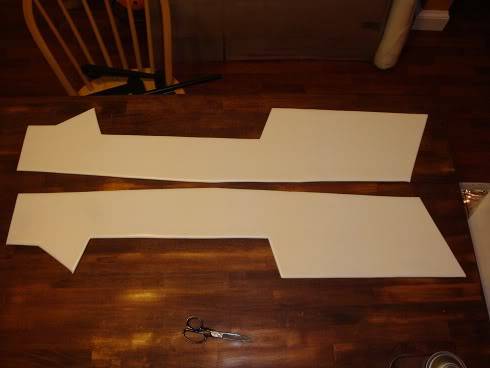
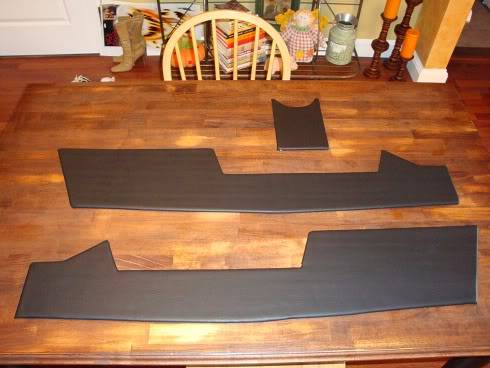
Got the padding on and the vinyl on.
I shouldn't quit my day job to do upholstery but not bad for a guy who doesn't know what he's doing.
Now I just have to sand and clear the top and cut out the holes for the shifter and cup holders.
More soon I hope.
 - Paul
70 Camaro RS Project Build
https://www.pro-touring.com/showthre...-Project-70-RS
90 Mustang GT Project Build
https://www.pro-touring.com/threads/...ang-Gt-Project
My Garage Project
http://garagejournal.com/forum/showthread.php?t=189511
11-10-2011 #89 Registered User
- Join Date
- Feb 2010
- Location
- Central NJ
- Posts
- 791
Looks great Paul!....now finish that damn console and get your car ready for RTTS this April..haha
-SeanMy 1973 Chevelle "Bad Buzz" build: https://www.pro-touring.com/showthre...velle-PT-Build
11-11-2011 #90
Registered User
- Join Date
- Feb 2009
- Location
- N.J.
- Posts
- 690
 I'M TRYING, I'M TRYING!!!!!!!!!
My plan is to finish it this weekend Sean.
It would be great to make it for the RTTS.
Thanks- Paul
70 Camaro RS Project Build
https://www.pro-touring.com/showthre...-Project-70-RS
90 Mustang GT Project Build
https://www.pro-touring.com/threads/...ang-Gt-Project
My Garage Project
http://garagejournal.com/forum/showthread.php?t=189511
11-20-2011 #91
Registered User
- Join Date
- Feb 2009
- Location
- N.J.
- Posts
- 690
Just when I thought I will be able to finish it up, I hit a snag.
I finished sanding the metal and painted the sections I wanted black.
I cleared it and the clear came out much glossier than I wanted so I had to sand it all off and start again.
Today I cleared it with a matte clear and it came out with just the finish I wanted.
Now I just have to put it together. The end is in sight!!!!!
 - Paul
70 Camaro RS Project Build
https://www.pro-touring.com/showthre...-Project-70-RS
90 Mustang GT Project Build
https://www.pro-touring.com/threads/...ang-Gt-Project
My Garage Project
http://garagejournal.com/forum/showthread.php?t=189511
11-25-2011 #92
Registered User
- Join Date
- Feb 2009
- Location
- N.J.
- Posts
- 690
Well, I cleared it again and all these white dots are appearing all over the bare metal sections.
Read up on clearing bare metal(I know, a little late) seems to be a lot more involved then I thought.
Oh well, another lesson learned. Tryed it one more time.
Same thing happens and it will be painted satin black to match the rest of the interior.
I need to to start other sections of the car and stop messing around with the console.
Just ordered Chassis Max Handle Bars from Hotchkis.
Another piece of the suspension puzzle on order.- Paul
70 Camaro RS Project Build
https://www.pro-touring.com/showthre...-Project-70-RS
90 Mustang GT Project Build
https://www.pro-touring.com/threads/...ang-Gt-Project
My Garage Project
http://garagejournal.com/forum/showthread.php?t=189511
11-28-2011 #93
Registered User
- Join Date
- Feb 2009
- Location
- N.J.
- Posts
- 690
Got the rest of the front suspension together today.
Sway bar, center link, and rag joint are all in.
Hopefully I can get the new shifter in tomorrow.
I have to cut a hole in the trans tunnel for the shifter linkage and hook up the Lokar shifter sensor.- Paul
70 Camaro RS Project Build
https://www.pro-touring.com/showthre...-Project-70-RS
90 Mustang GT Project Build
https://www.pro-touring.com/threads/...ang-Gt-Project
My Garage Project
http://garagejournal.com/forum/showthread.php?t=189511
11-29-2011 #94
Full Blown G-Machiner
- Join Date
- Oct 2008
- Location
- Santa Fe Springs, CA
- Posts
- 625
That’s too bad about the paint reacting to the bare metal. We hope you get that sorted out and will keep checking your progress.
Did you install the Hotchkis subframe connectors yet?
We’re sure you’ve seen the installation video…
Hotchkis Sport SuspensionToll Free: 877-466-7655
11-29-2011 #95
Registered User
- Join Date
- Feb 2009
- Location
- N.J.
- Posts
- 690
Thanks, I have seen that video.
I just ordered the Hotchkis handle bars also.
I will be ordering the whole suspension as I can afford it over the winter.
I would like to drive it just a little once the spring comes on the old suspension then replace it all at the same time.
It should be like driving an old car then a brand new one.
Kind of like a before and after drive.
Hoping to order the uca in the next several weeks.
Thanks for the video.
Did you get a chance to send the stickers?- Paul
70 Camaro RS Project Build
https://www.pro-touring.com/showthre...-Project-70-RS
90 Mustang GT Project Build
https://www.pro-touring.com/threads/...ang-Gt-Project
My Garage Project
http://garagejournal.com/forum/showthread.php?t=189511
11-29-2011 #96 Registered User
- Join Date
- Jul 2006
- Location
- Orangevale, Ca
- Posts
- 147
Really nice job on the car...looks real good!!!
12-04-2011 #97
Registered User
- Join Date
- Feb 2009
- Location
- N.J.
- Posts
- 690
Got a chance to work on the Camaro today.
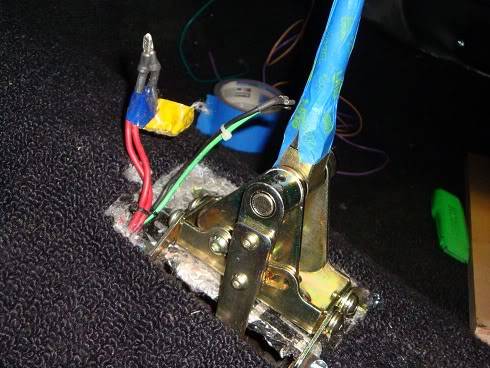
The Lokar shifter & linkage was pretty easy to install.
Had to cut a slot in the floor for the shifter lever.
I need to make some kind of rubber gasket to keep anything from coming inside.
I'm thinking just a piece of rubber with a slit in it so the linkage lever can fit through it.
Now for the shift indicator sensor and linkage.
 - Paul
70 Camaro RS Project Build
https://www.pro-touring.com/showthre...-Project-70-RS
90 Mustang GT Project Build
https://www.pro-touring.com/threads/...ang-Gt-Project
My Garage Project
http://garagejournal.com/forum/showthread.php?t=189511
12-05-2011 #98
Registered User
- Join Date
- Feb 2009
- Location
- N.J.
- Posts
- 690
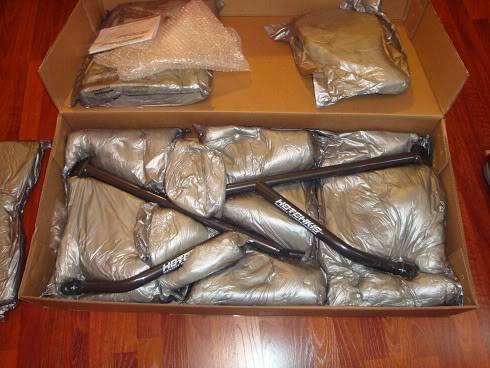
Got my Hotchkis handles bars in today.
Another piece of the suspension puzzle has been obtained.
 - Paul
70 Camaro RS Project Build
https://www.pro-touring.com/showthre...-Project-70-RS
90 Mustang GT Project Build
https://www.pro-touring.com/threads/...ang-Gt-Project
My Garage Project
http://garagejournal.com/forum/showthread.php?t=189511
12-09-2011 #99
Registered User
- Join Date
- Feb 2009
- Location
- N.J.
- Posts
- 690
Spent the morning under the car and got the Lokar shifter sensor module hooked up and wired today.
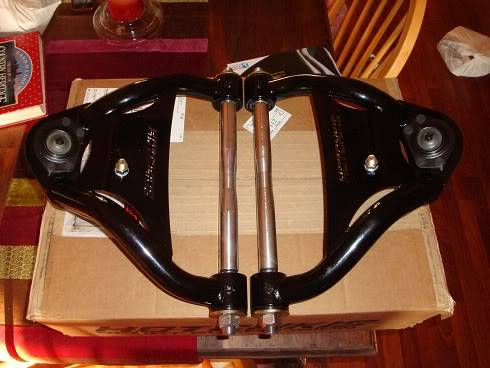
Also, Hotchkis upper control arms came in today.
Leaf springs are on their way. Getting closer everyday.
 - Paul
70 Camaro RS Project Build
https://www.pro-touring.com/showthre...-Project-70-RS
90 Mustang GT Project Build
https://www.pro-touring.com/threads/...ang-Gt-Project
My Garage Project
http://garagejournal.com/forum/showthread.php?t=189511
12-11-2011 #100
Registered User
- Join Date
- Feb 2009
- Location
- N.J.
- Posts
- 690
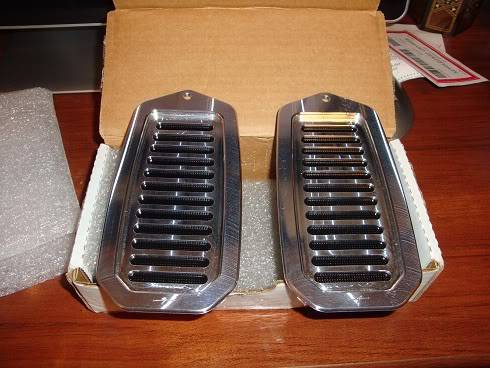
I forgot to put up a picture of what else I got in this week.
It doesn't make the car go faster, handle better, or make it lighter.
It just looks cool, and sometimes that's just enough of a reason to buy it.
Fesler billet door vents.
 - Paul
70 Camaro RS Project Build
https://www.pro-touring.com/showthre...-Project-70-RS
90 Mustang GT Project Build
https://www.pro-touring.com/threads/...ang-Gt-Project
My Garage Project
http://garagejournal.com/forum/showthread.php?t=189511

 Reply With Quote