Results 281 to 300 of 536
Thread: Project 70 RS
-
07-01-2013 #281

 Registered User
- Join Date
- Aug 2009
- Location
- ERIE, PA
- Posts
- 307

not yours?
 Originally Posted by aps63
 -Bennyhaha
-
07-01-2013 #282 Registered User
- Join Date
- Feb 2009
- Location
- N.J.
- Posts
- 690
No, sorry I used that picture to show the tool that he had made. I was making one just like it. Nice lift though.
- Paul
70 Camaro RS Project Build
https://www.pro-touring.com/showthre...-Project-70-RS
90 Mustang GT Project Build
https://www.pro-touring.com/threads/...ang-Gt-Project
My Garage Project
http://garagejournal.com/forum/showthread.php?t=189511
07-01-2013 #283
Registered User
- Join Date
- Aug 2009
- Location
- ERIE, PA
- Posts
- 307
ahhh... lol... yes it is.... been "shopping" for a new 4 post style was wondering how you liked it..
-Bennyhaha
07-28-2013 #284
Registered User
- Join Date
- Feb 2009
- Location
- N.J.
- Posts
- 690
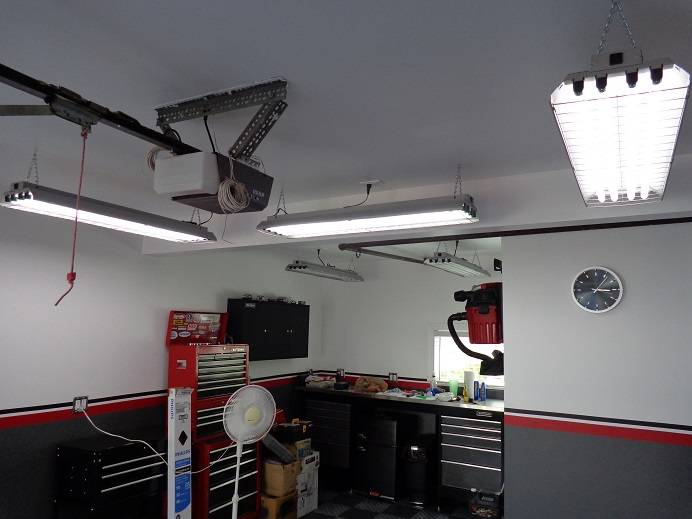
The garage is done for the most part. A few odds and ends to finish up, but for now I can get back to working on the Camaro.
Here a few pictures of the Camaro's & my new space.

 - Paul
70 Camaro RS Project Build
https://www.pro-touring.com/showthre...-Project-70-RS
90 Mustang GT Project Build
https://www.pro-touring.com/threads/...ang-Gt-Project
My Garage Project
http://garagejournal.com/forum/showthread.php?t=189511
07-30-2013 #285
Registered User
- Join Date
- Feb 2009
- Location
- N.J.
- Posts
- 690
Back to work on the Camaro today. I left off mocking up the new power steering pump.
As you can see, not enough room to plumb the reservoir fitting.
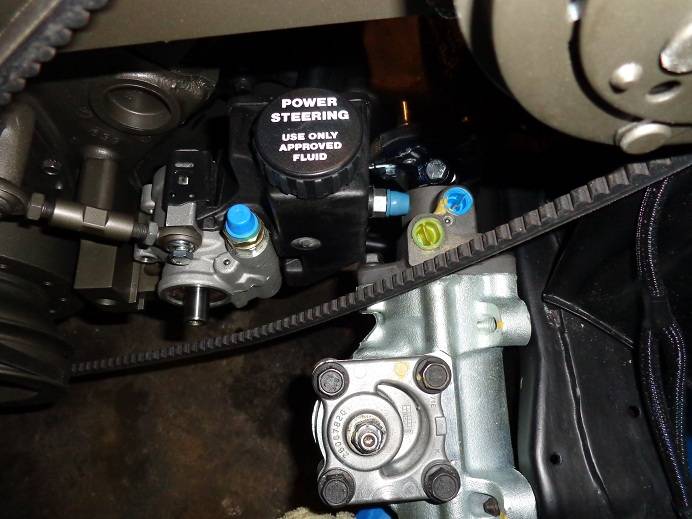
So, I ordered a replacement reservoir with the fitting molded in.
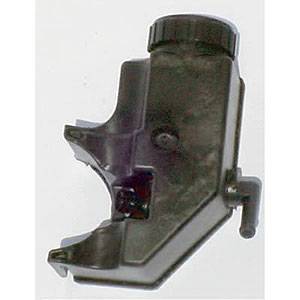
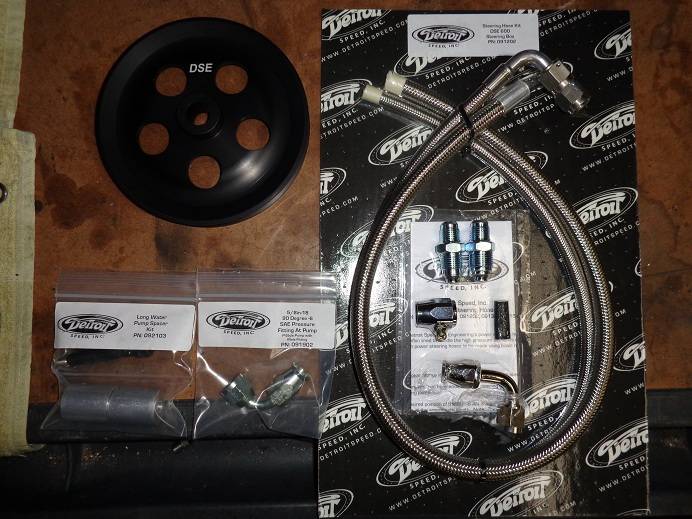
Will work perfectly with the DSE line kit I already have.
 - Paul
70 Camaro RS Project Build
https://www.pro-touring.com/showthre...-Project-70-RS
90 Mustang GT Project Build
https://www.pro-touring.com/threads/...ang-Gt-Project
My Garage Project
http://garagejournal.com/forum/showthread.php?t=189511
07-31-2013 #286
Registered User
- Join Date
- Jul 2013
- Location
- Cape Giraradeau, MO
- Posts
- 22
Awesome work, I just joined and wanted to find a second gen f-body build! I hope to do a 70-73 TA clone soon. I love what you've done so far!
07-31-2013 #287 Registered User
- Join Date
- Jan 2008
- Location
- Charlotte
- Posts
- 1,295
Liking the garage updates!
One suggestion - On your garage door opener - the coil of signal wire that goes out to your sensors or the switch panel - cut it shorter and throw out whats left.2005 LeMans Blue Corvette w/ T56 & Z51 & C6Z06 Brakes, Build Thread: https://www.pro-touring.com/showthread.php?64496
2005 GMC Sierra 2500HD LLY / Allison
2014 Chevy SS LS3 / 4 Door
08-01-2013 #288
Registered User
- Join Date
- Feb 2009
- Location
- N.J.
- Posts
- 690
Thanks and it has already been addressed. It was bugging me too.
- Paul
70 Camaro RS Project Build
https://www.pro-touring.com/showthre...-Project-70-RS
90 Mustang GT Project Build
https://www.pro-touring.com/threads/...ang-Gt-Project
My Garage Project
http://garagejournal.com/forum/showthread.php?t=189511
08-01-2013 #289
Registered User
- Join Date
- Feb 2009
- Location
- N.J.
- Posts
- 690
I got the new ps tank in today and it didn't give me as much room as I thought.
So on to changing the mounting bracket. Ordered a new March bracket from Summit that should place it about an inch higher.
That should give me enough room to plumb the ps lines.- Paul
70 Camaro RS Project Build
https://www.pro-touring.com/showthre...-Project-70-RS
90 Mustang GT Project Build
https://www.pro-touring.com/threads/...ang-Gt-Project
My Garage Project
http://garagejournal.com/forum/showthread.php?t=189511
08-07-2013 #290
Registered User
- Join Date
- Feb 2009
- Location
- N.J.
- Posts
- 690
Got the new bracket and it places everything almost 2" higher. No good.
Time to take the original bracket and modify it. If that doesn't work, the next step is a remote reservoir.
I guess I would be bord if everything fit perfect the first time.- Paul
70 Camaro RS Project Build
https://www.pro-touring.com/showthre...-Project-70-RS
90 Mustang GT Project Build
https://www.pro-touring.com/threads/...ang-Gt-Project
My Garage Project
http://garagejournal.com/forum/showthread.php?t=189511
08-14-2013 #291
Registered User
- Join Date
- Feb 2009
- Location
- N.J.
- Posts
- 690
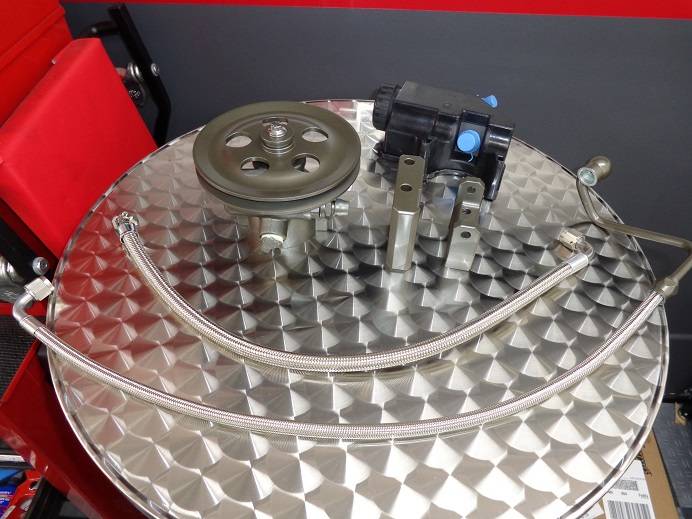
Turns out the 2nd bracket worked with a little modification.
Everything mocked up and on to paint.
Got the steering box painted and reinstalled, now just have to put the ps pump and reservoir back together and in. Hopefully in the next few days.
 - Paul
70 Camaro RS Project Build
https://www.pro-touring.com/showthre...-Project-70-RS
90 Mustang GT Project Build
https://www.pro-touring.com/threads/...ang-Gt-Project
My Garage Project
http://garagejournal.com/forum/showthread.php?t=189511
08-16-2013 #292
Registered User
- Join Date
- Feb 2009
- Location
- N.J.
- Posts
- 690
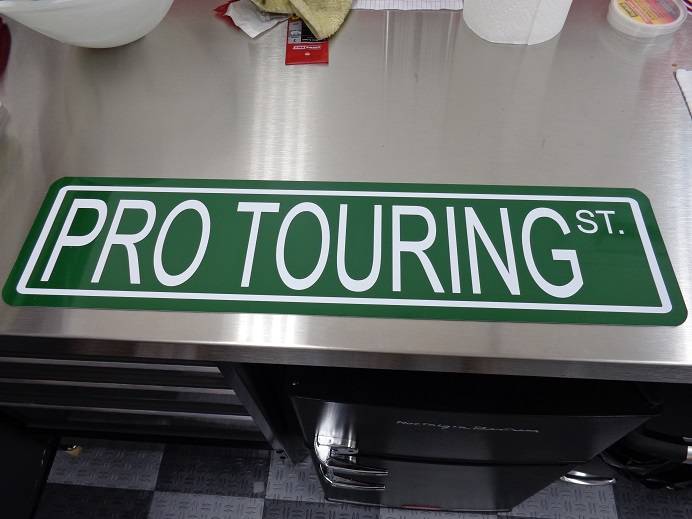
No Pro-touring garage is complete without a Pro-touring st sign.
I couldn't help myself.
 - Paul
70 Camaro RS Project Build
https://www.pro-touring.com/showthre...-Project-70-RS
90 Mustang GT Project Build
https://www.pro-touring.com/threads/...ang-Gt-Project
My Garage Project
http://garagejournal.com/forum/showthread.php?t=189511
08-17-2013 #293
Registered User
- Join Date
- Feb 2009
- Location
- N.J.
- Posts
- 690
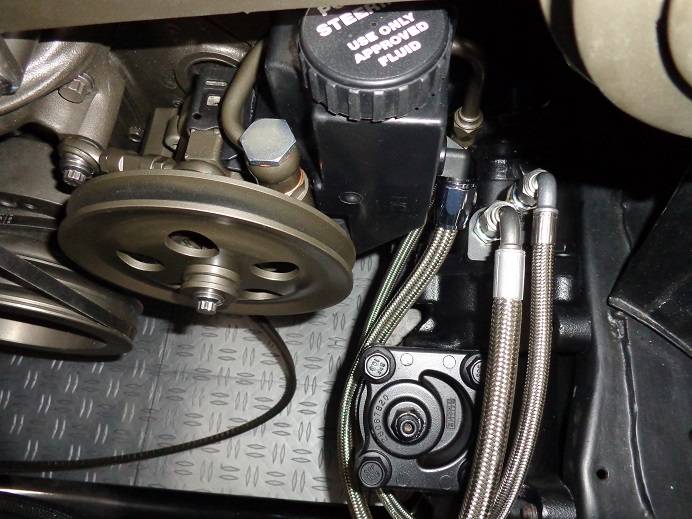
Got the pump and all the lines done today. Now just have to get the right length belt.
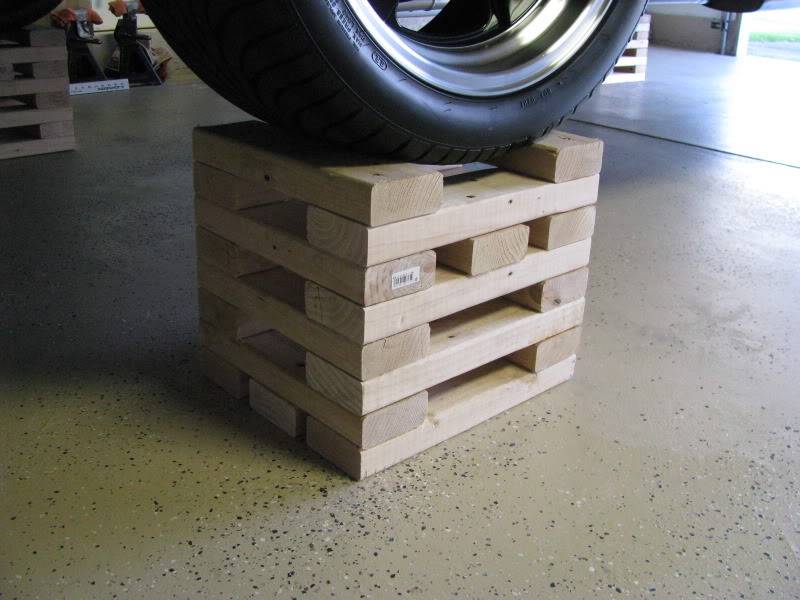
Hopefully on to the exhaust this week. I want to build some wood jack stands like these. Should make it much easier to work under the car.
 - Paul
70 Camaro RS Project Build
https://www.pro-touring.com/showthre...-Project-70-RS
90 Mustang GT Project Build
https://www.pro-touring.com/threads/...ang-Gt-Project
My Garage Project
http://garagejournal.com/forum/showthread.php?t=189511
08-18-2013 #294 Registered User
- Join Date
- Dec 2007
- Location
- British Columbia, Canada
- Posts
- 723

The shop upgrades look great Paul. Nicely done
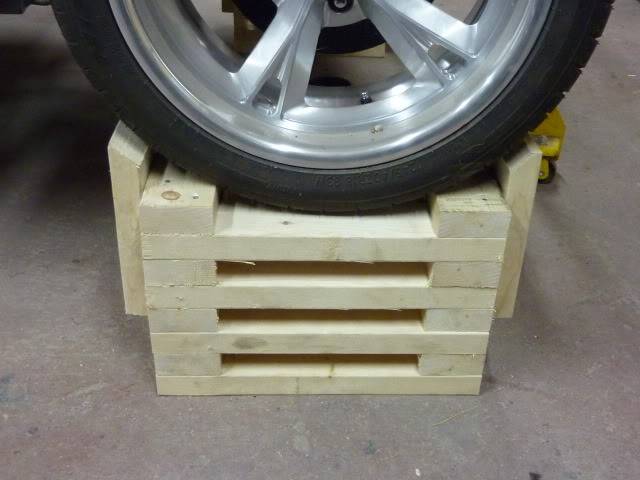
 And love the sign! You'll really like the wooden blocks if you decide to build them. I have them under my car now and it makes it so easy to get underneath. Nice thing is if you want to go higher, add a few more boards. Here's the ones I built
08-18-2013 #295
Registered User
- Join Date
- Feb 2009
- Location
- N.J.
- Posts
- 690
Thanks scherp69, I've always enjoyed working in the garage on my car. But since the upgrades, It's 100% more enjoyable and efficient, much more organization. I find that I hang out more in the garage than I ever have. It's great. Originally Posted by scherp69
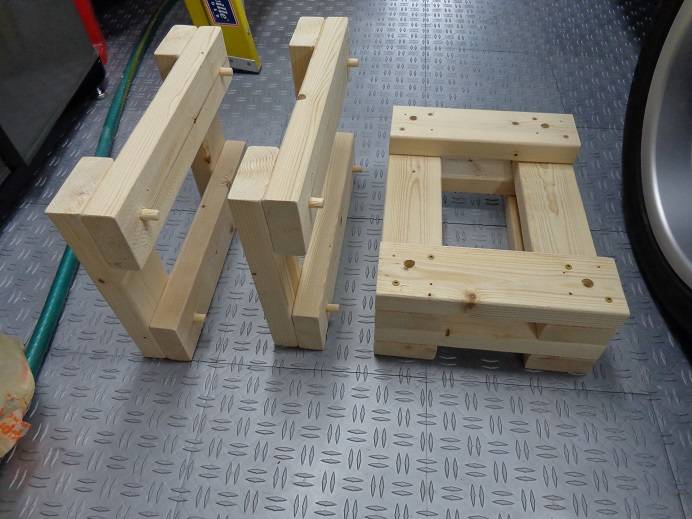
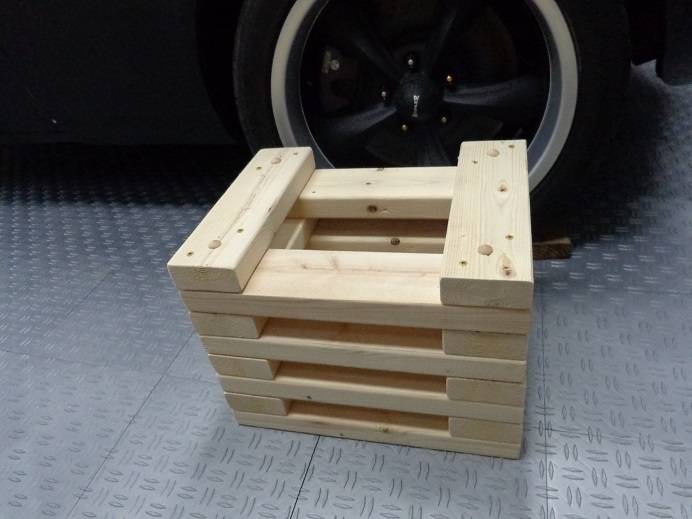
I have seen many people use 12" x 12" and 12" x 14", which is what is in that picture. I decided to go with 12" x 16" so it would cradle the tire a bit more. Plus I used 1/2" dowels for the the top 2 sections so I can make the height adjustable without having to screw and unscrew.
I thought it would only take me a couple of hours. WRONG, my ocd kicked in and I found myself spending over an hour just sanding each piece. Then I came up with the dowel idea and that added even more time. So much for a quick project. At least I'm happy with the outcome.
 - Paul
70 Camaro RS Project Build
https://www.pro-touring.com/showthre...-Project-70-RS
90 Mustang GT Project Build
https://www.pro-touring.com/threads/...ang-Gt-Project
My Garage Project
http://garagejournal.com/forum/showthread.php?t=189511
08-19-2013 #296
Registered User
- Join Date
- Feb 2009
- Location
- N.J.
- Posts
- 690
Just finished the last cradle today. Hope to have the car up in the air in the next few day's so I can start the exhaust.
- Paul
70 Camaro RS Project Build
https://www.pro-touring.com/showthre...-Project-70-RS
90 Mustang GT Project Build
https://www.pro-touring.com/threads/...ang-Gt-Project
My Garage Project
http://garagejournal.com/forum/showthread.php?t=189511
08-19-2013 #297
Registered User
- Join Date
- Feb 2009
- Location
- N.J.
- Posts
- 690
Had some extra time today so up it went.
 - Paul
70 Camaro RS Project Build
https://www.pro-touring.com/showthre...-Project-70-RS
90 Mustang GT Project Build
https://www.pro-touring.com/threads/...ang-Gt-Project
My Garage Project
http://garagejournal.com/forum/showthread.php?t=189511
09-02-2013 #298
Registered User
- Join Date
- Feb 2009
- Location
- N.J.
- Posts
- 690
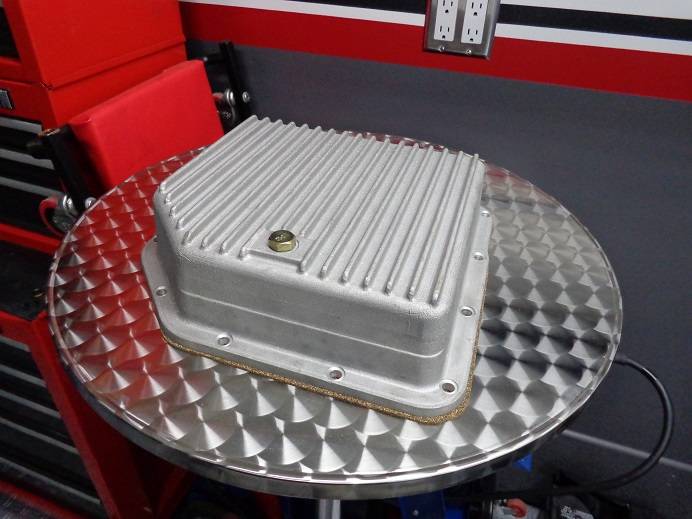
I figure while the car is up in the air, I might as well swap out the old, stock trans pan and get a new cast aluminum one.
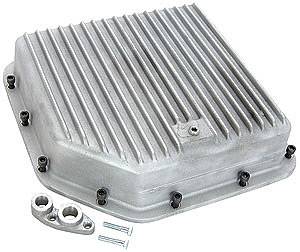
Replaced the linkage shaft seal awhile back and it's still leaking. Driving me alittle crazy. I guess while I have the pan off I will replace the seal again and check the shaft. I have read several places that it's rarely the shaft that has worn out. We'll see.- Paul
70 Camaro RS Project Build
https://www.pro-touring.com/showthre...-Project-70-RS
90 Mustang GT Project Build
https://www.pro-touring.com/threads/...ang-Gt-Project
My Garage Project
http://garagejournal.com/forum/showthread.php?t=189511
09-07-2013 #299
Registered User
- Join Date
- Feb 2009
- Location
- N.J.
- Posts
- 690
Got the new pan in today, should have it in tomorrow. Have a nice day of all car stuff planned out for sunday in my new garage.
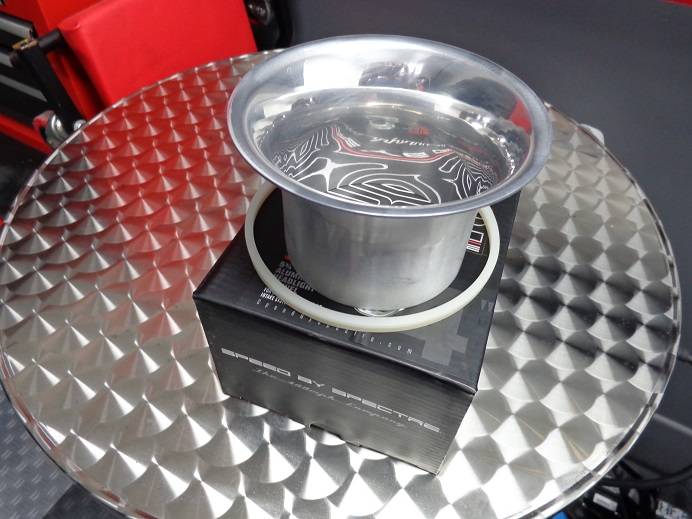
Also got one of Spectre's headlight air funnel's in so I'm looking to see if I want to put them in.
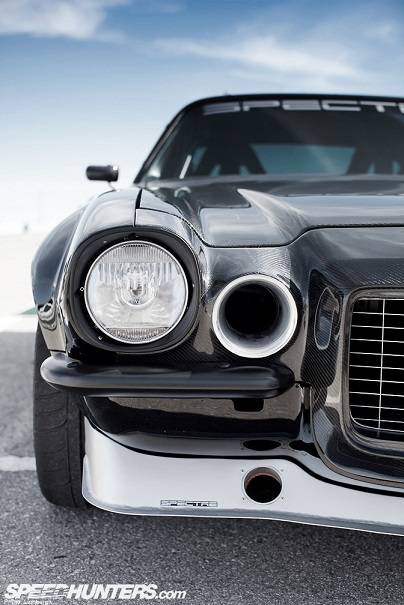
I really love the way the Spectre Camaro looks with them. Badass!!!!!!
 - Paul
70 Camaro RS Project Build
https://www.pro-touring.com/showthre...-Project-70-RS
90 Mustang GT Project Build
https://www.pro-touring.com/threads/...ang-Gt-Project
My Garage Project
http://garagejournal.com/forum/showthread.php?t=189511
09-08-2013 #300
Registered User
- Join Date
- Feb 2009
- Location
- N.J.
- Posts
- 690
I have read many times that the trans linkage shaft is 99 times out of 100 not the cause of the leak in that area. It's always the seal. So I replaced it awhile back. Still leaking. Maybe I messed the seal up when I installed it.
With the tool I got they come out very easy, so I'll just put in another.
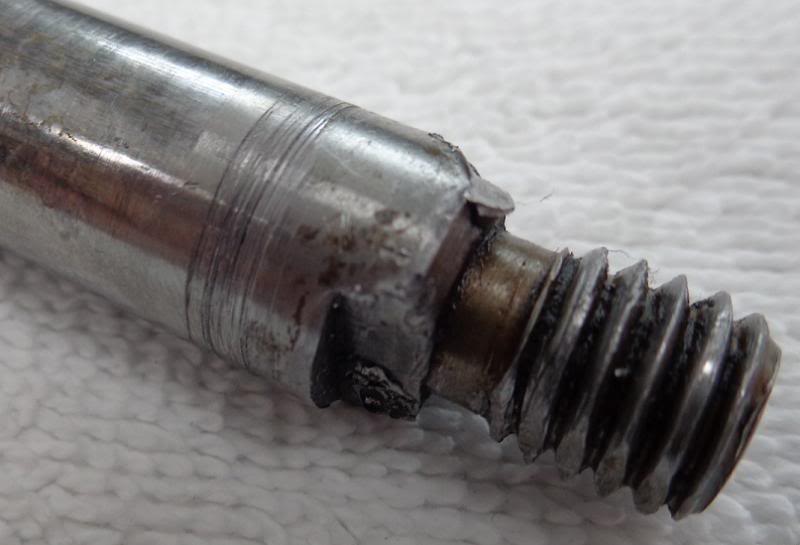
Well, while I have the pan off today why don't I spend a few more minutes and pull the shaft. This is what I found. It's not the seal. The trans was rebuilt right before I got it. Works great and the inside is very clean. I'm not sure who thought putting this shaft back in was a good idea. Must be the same guy who left the speedo gear clip off and in the pan(scroll back and you will find that discovery). I'm tempted to pull the whole trans and have it redone.
For now I will try and find a new shaft, which I have read is not an easy thing.
Anyway's, check out this shaft. The grooves are right where the seal is.
 - Paul
70 Camaro RS Project Build
https://www.pro-touring.com/showthre...-Project-70-RS
90 Mustang GT Project Build
https://www.pro-touring.com/threads/...ang-Gt-Project
My Garage Project
http://garagejournal.com/forum/showthread.php?t=189511

 Reply With Quote