


Results 141 to 160 of 587
-
05-14-2010 #141

 Registered User
- Join Date
- Dec 2007
- Location
- Carlsbad, Ca
- Posts
- 1,213

a little more work on the bumper today. ive been taking a bunch of classes at work, so progress has been slow. its hard to come home after not seeing the family for 3 days and head out to the garage. so not much has been getting done.
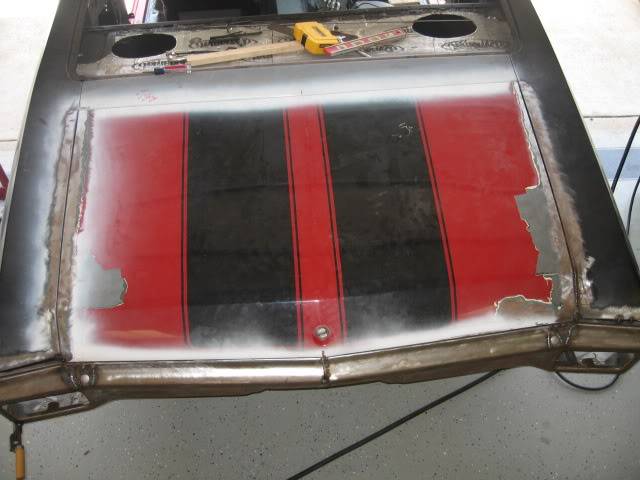
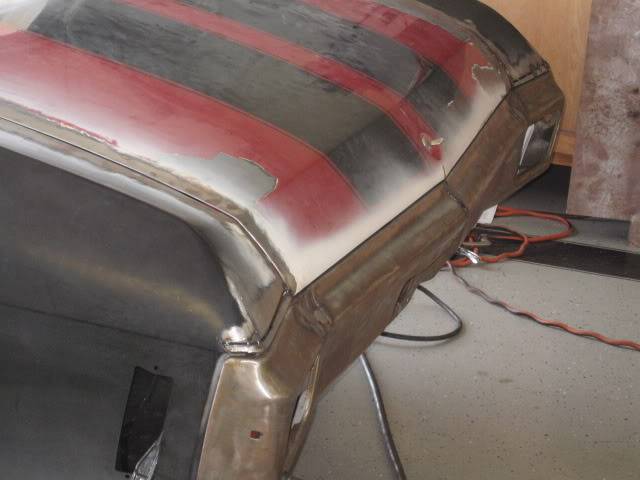
but, i got both quarters roughed in to the bumper. both sides needed to be extended out and down to get the gap a little better. i also smoothed the bumper brackets after final welding them to their new size. i started smoothing the welds on the bumper as well, but these pics were taken before i started on that. so...... i need to fill in the slices/gaps on the quarter, finish smoothing the welds, weld the brackets to the bumpers and smooth the bolt holes and then i need to start on the filler panel that mounts to the bottom of the bumper. i figure i have another 10-15 hours before im finished.
im pretty happy with the results. its been such a long time since i started that its hard to tell how much progress has been made. i wish i would have taken a bunch more before pics, but either way its better. i'd say that with the old being a 1 and a perfect being a 10 that this falls into the 6-7 range. there are a few things that i wish were better, but i dont have the time or skills to make them perfect. most obvious is that the ends of the bumper still dont follow the quarter perfect. its only off about 1/8 - 3/16, but i wish it was 0. when i worked the quarters i could have made it 0, but the transition btwn the deck lid and quarter would have been screwed up. i'll get some more pics once i get it all smoothed out.
 Tim
Tim
The WidowMaker: Garage Built 70 Chevelle
Special Thanks To: Rushforth Wheels, MuscleRodz, Kore3 & SC&C
Build Thread Link
-
05-15-2010 #142
Registered User
- Join Date
- May 2010
- Location
- Florida
- Posts
- 30
Lovin this build. The frame work in particular. I'll have to do something like that to mine at some point. but first I really need to put some miles on the build that is almost done LOL.
86 Regal "Big Red" Iron LS2 t-56 8.8 diff with a carb (FOR SALE https://www.pro-touring.com/forum/sh...ad.php?t=68866 )
-
05-26-2010 #143
Registered User
- Join Date
- Dec 2007
- Location
- Carlsbad, Ca
- Posts
- 1,213
the wheel purchase is DONE!!!
i have to give a big thanks to jon at driverz inc and jason rushforth. ive bugged the crap out of them for the two years since i put my deposit down (no, im not kidding its really been two years) and they are both awesome to work with.
the wheels are going to be 3 piece stepped lip, brushed outers, grey centers and 19x9.5 fronts and 20x11 rears. the stepped lip gives me the same centers as a 18/19 combo and the hoops are a little lighter as well. i also decided to go back to the original 275/35 front to match the sidewalls a little better with the 315/35 rear.
the style? well i'll keep that a secret until i have some pictures. i want people to keep reading my thread so i can get help and advice, and i don't want anyone putting me on their "banned" list. once you see them, i hope you all agree that they fit the car.Tim
The WidowMaker: Garage Built 70 Chevelle
Special Thanks To: Rushforth Wheels, MuscleRodz, Kore3 & SC&C
Build Thread Link
-
05-26-2010 #144
Registered User
- Join Date
- Dec 2007
- Location
- Carlsbad, Ca
- Posts
- 1,213
the plan is to have the frame at the blasters sometime in july and have it painted and assembled by the end of july. because i have to notch the frame a little to clear the 315's i wanted to push forward with the wheel order so i have them to know what needs to be clearanced. i also have to get the exhaust done since it needs to run through a crossmember and another has to be notched as well. in addition, i had never bent up the bars that go between the mid crossmember and the upper control arm crossmember and those have to be welded in. so, i borrowed a coworkers tubing bender and got those done. while i had it, i also rebuilt the tranny crossmember.
the original idea was that i wanted something that tucked up tight for exhaust clearance and didnt require the removal of the exhaust to drop the tranny. but since i was going to have to notch the outer "wings" anyways and i didnt like the amount of meat left for the tabs that sandwiched the drop out piece i just fabbed a new one.
the old was 1.5"x3" .120 wall tube with 1.5" dom in the middle. the new is a double 1" .120 wall all the way across. because there is no hinged joint in the bends, its acutally much stronger than the old one. and since its so small, i think i might still be able to get away with not dropping the exhaust. if i do, the v band clamps will make that pretty simple.
here are some pics. clearance is 1/4" to the floor, and the floor doesnt give when i am sitting in the drivers seat.


 Tim
Tim
The WidowMaker: Garage Built 70 Chevelle
Special Thanks To: Rushforth Wheels, MuscleRodz, Kore3 & SC&C
Build Thread Link
-
06-09-2010 #145
Registered User
- Join Date
- Dec 2007
- Location
- Carlsbad, Ca
- Posts
- 1,213
first, a small update on the wheels. i narrowed my rear more than i thought which left 4.25" bs on an 11" wheel. i do have a 1.5" pad for the z06 brakes but that still left a large lip. since it isnt a stocked size and would take a while to get, plus the fact that it was costing more since its really not that popular right now, i decided to change to the smooth lip wheels. hopefully only a few more weeks. jason is also looking into some extra programming to get the wheels lightened from the rear of the center. my fingers are crossed.
Tim
The WidowMaker: Garage Built 70 Chevelle
Special Thanks To: Rushforth Wheels, MuscleRodz, Kore3 & SC&C
Build Thread Link
-
06-09-2010 #146
Registered User
- Join Date
- Dec 2007
- Location
- Carlsbad, Ca
- Posts
- 1,213
i need to get the exhaust done so i can get the frame to the blasters and get it all in paint by the end of the summer. its taken a lot longer than expected, and my few hours in the garage at a time goes by really fast.
i started with a mix of 3" and 2.5" tubing and transitions from columbia river, and bends from pypes all in 304 stainless. i spent some time polishing all the stuff from CR since it didnt come done. overall, im pretty happy with all the pieces i purchased.
now the issues...... i had debated whether to keep the donut gasketed joint from the edelbrock headers, or cut it off at the collector and do v-bands. im glad i left it alone, but i hope it doesnt leak. assembling and disassembling has really done a number on the gasket. i hope to get some more before its put together for the final time.
issue two.... don't make a 16ga stainless exhaust your first tig project ever. i practiced a little before the tacks, but fitment has to be dead nuts perfect or i blow a hole. and i do mean PERFECT! and i still havent figured out how to fill a damn hole. some pieces are tacked without issue, especially those done on the bench, but it seems that if i blow in one there are a few more holes before it sticks. im still tacking everything together, so hopefully i can practice a little more and maybe the back purge will help things a little. i am AMAZED at how well a tig tack holds though. 2 tacks on a piece and i cant break it apart. i have to knick the tack with a grinding wheel to make it work.
issue three..... maybe i dont understand the mandrel bending process, but i was hoping that if i cut a piece in the middle of a bend that it would be the same size as a piece cut from any other random part of any other tube. its not! the bent piece is smaller and that has led to some fun issues. its not a huge difference, but the extreme ones are about 1/16" different. that means when joined, one has a ring exposed all the way around the joint. i have a feeling these are going to be fun to final weld.
i could talk for hours on the "experience" i have had so far. if you see something, i probably have an answer for it, but id rather not bore you with any more babble. here are the pics of where i am now.
flex joints so that the rest can be solid/poly mounted.


there is more room here than it appears. this was all complicated by flowmaster not having the muffler in a offset in/out. no hangers are in place yet, so its resting on the holes in the mid crossmember. this is the easy side though. the watts link is 6" higher on the other side. its going to be interesting to say the least.

i have it coming under the frame behind the tire now. i just need to decide where to run it, and whether it will come out under or through the rear bumper lower valance.Tim
The WidowMaker: Garage Built 70 Chevelle
Special Thanks To: Rushforth Wheels, MuscleRodz, Kore3 & SC&C
Build Thread Link
-
06-14-2010 #147
Registered User
- Join Date
- Nov 2009
- Posts
- 8
Tim,
I love what your doing with the car. This is exactly what im doing with my 70.
I hope you dont mind me asking a few questions.
First what company did you use for the quarters? and how did you go about mounting it. Im tring to figure out the best way to replace mine. Car had been in an accident at one point and the area where the quarter meets the trunk seal is completely rotted out. So fitment is going to be difficult.
Secondly how did you attach the new tubs to the quarter(Is there a better pic of the inside of the wheelwell)
Thanks
Sean
-
06-18-2010 #148
Registered User
- Join Date
- Dec 2007
- Location
- Carlsbad, Ca
- Posts
- 1,213
i live pretty close to opg, so thats where i picked them up. it helps to have a brother-in-law that worked there back in the day, so i get a little bit of a discount sometimes. plus, i could inspect them without having to worry about sending them back if damaged.First what company did you use for the quarters? and how did you go about mounting it.
i attached them the same way as the factory did, welds around the perimiter.
guys have been asking about this, so i'll see if i can dig up some pics. but, if you look at how it was done stock, its the same way. basically, the tub is 6 pieces. starting on the inside you have the vertical that comes up from around the frame, then the first rounded over section, the main section over the tire, the next rounded section, the drop down towards the quarter lip, then a 90* piece that was formed to fit to the quarter lip. so, the quarter lip extends inward toward the tire (the piece guys usually roll for clearance), and it is sandwiched with the lip from the tub.Secondly how did you attach the new tubs to the quarter(Is there a better pic of the inside of the wheelwell)
i'll look for some pics. im working a 48 and wont be able to get pics until monday if i dont have them already.
TimTim
The WidowMaker: Garage Built 70 Chevelle
Special Thanks To: Rushforth Wheels, MuscleRodz, Kore3 & SC&C
Build Thread Link
-
07-25-2010 #149
Registered User
- Join Date
- Dec 2007
- Location
- Carlsbad, Ca
- Posts
- 1,213
so i had some decisions to make on the mufflers. the wife wanted it quieter than before, but i still wanted it to sound good. i ended up buying the stainless 50 series deltas back in december when bing was giving 20% off ebay purchases. ever since then i have somewhat regretted not going with the 40 deltas like i had before. i figured that the bigger motor and larger piping would make it louder, but that the increased insulation, carpet and x-pipe would mellow it out a little. a wash? im not sure.
since i had to open one up (i'll get to that later) and i had already polished them and couldnt return them, i had three choices. leave them as is, weld up the resonator chamber in each muffler essentially making it just a longer 40, or removing the extra 4" and making a 40 series. i ended up just leaving them as is, but if i want it louder after its been on the road, i will take the full 4" out at that time.
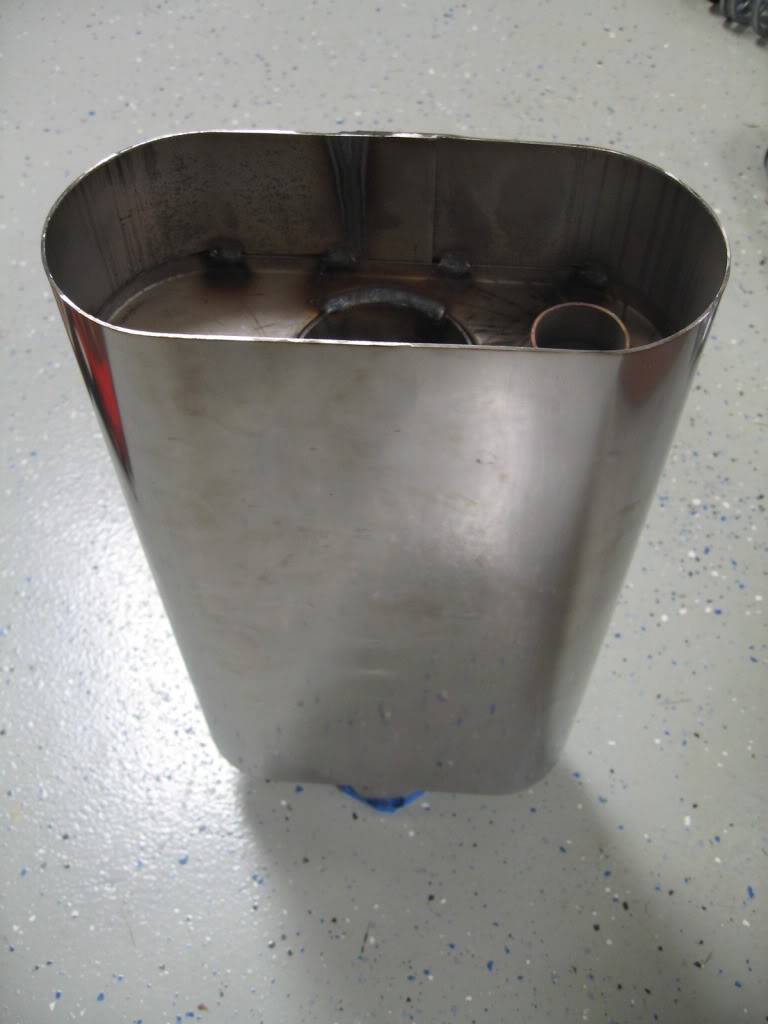
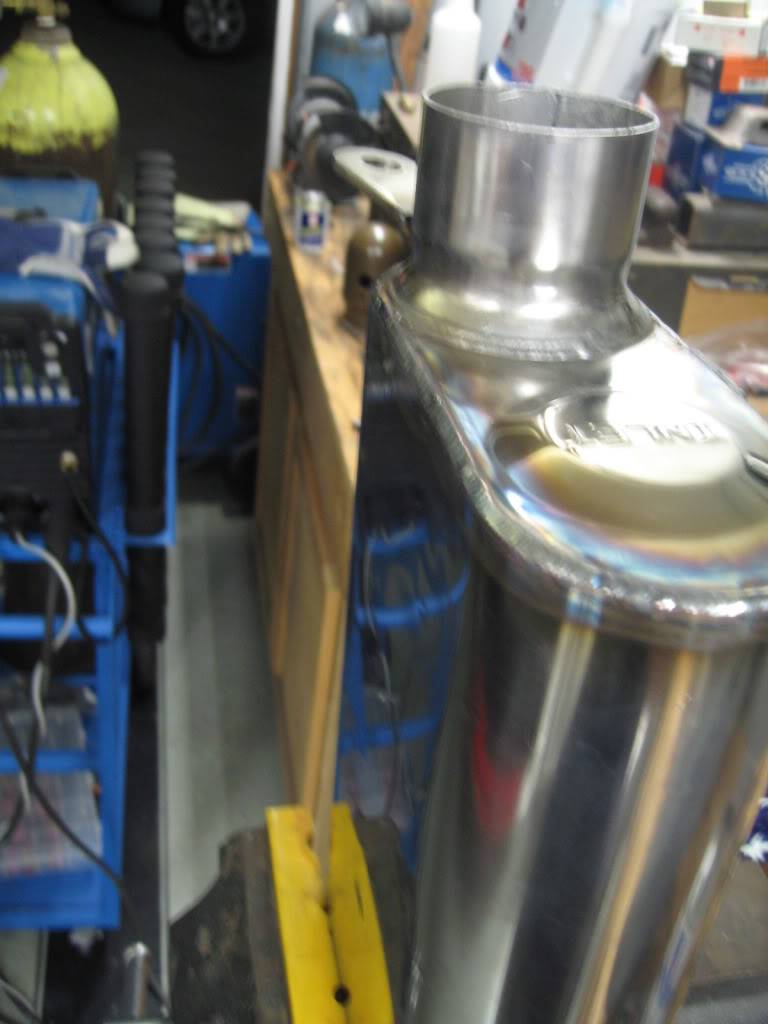
then there was the other issue (the part i said i would get to). flowmaster only makes one part number per style (inlet/outlet) of muffler. so, if you need two mufflers with offset inlets that are next to each other (our chevelles), one muffler has to be flipped over. when you flip a flowmaster, you get the ugly case seam. and since i was polishing them, that wouldnt work. below are the pics of what i ended up doing. cut the end off and grind away their weld until the stamped plug end was back to normal. then just flip, reinsert and reweld. now i have a matched set.......
here you can see the inlet side of the muffler. the small hole to the right is the inlet to the resonator chamber. that is what i had planned to weld up.
here it is flipped and rewelded. i cant get any good pics of the welds. they just look blurry.
 Tim
Tim
The WidowMaker: Garage Built 70 Chevelle
Special Thanks To: Rushforth Wheels, MuscleRodz, Kore3 & SC&C
Build Thread Link
-
07-25-2010 #150
Registered User
- Join Date
- Dec 2007
- Location
- Carlsbad, Ca
- Posts
- 1,213
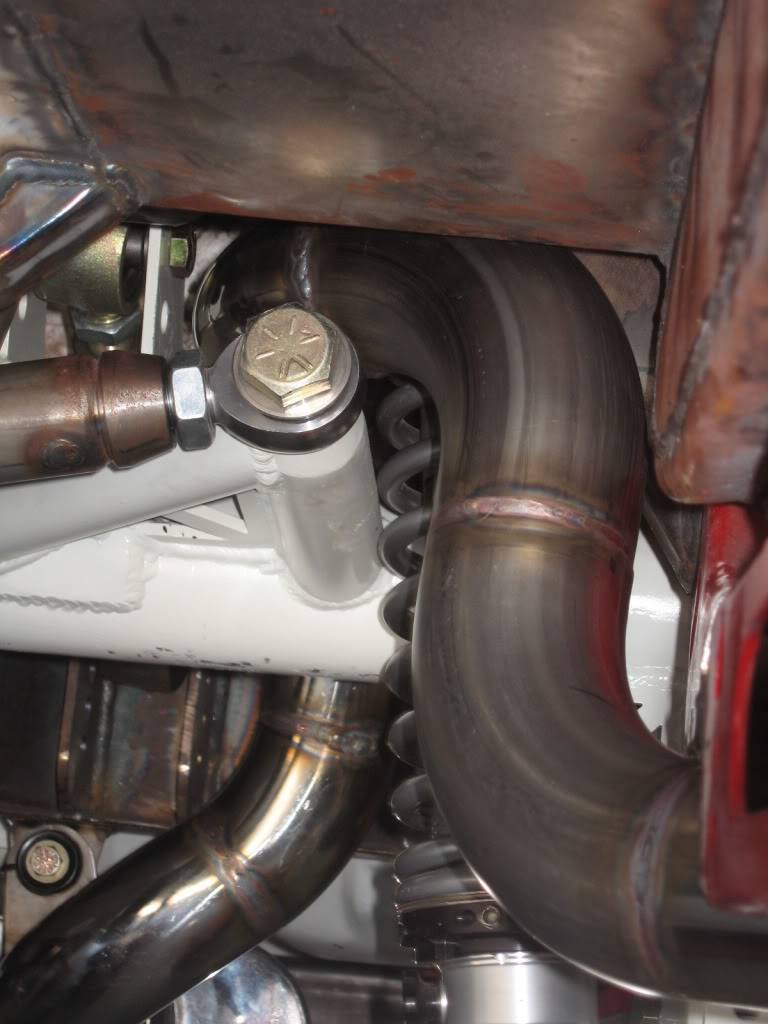
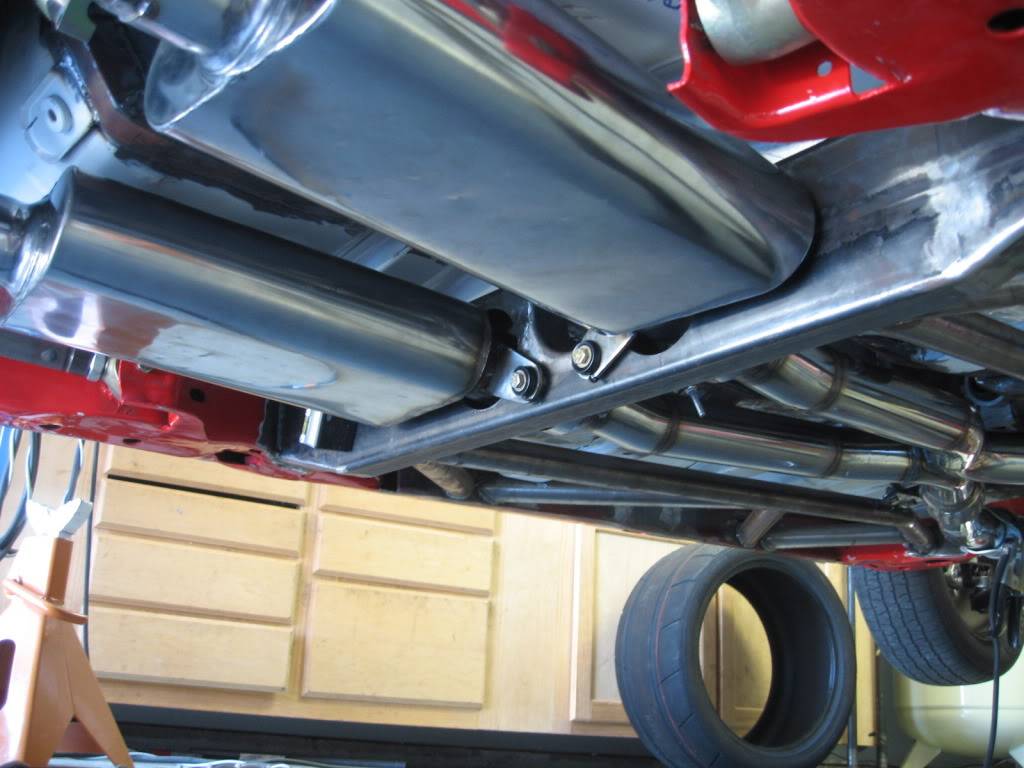
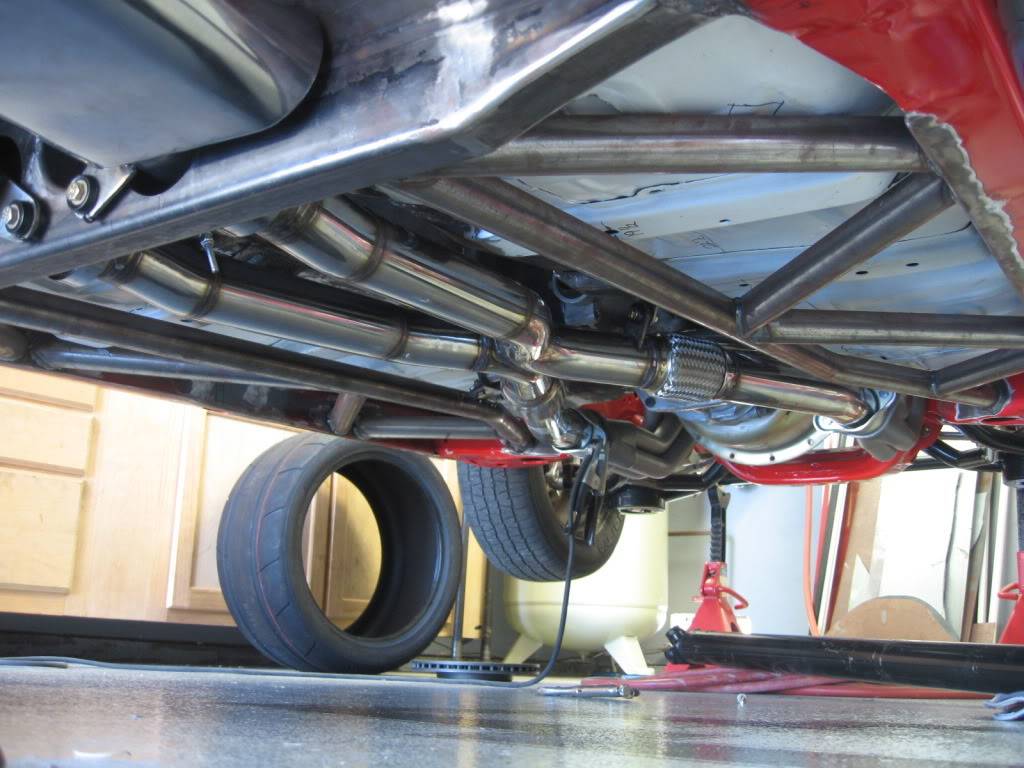
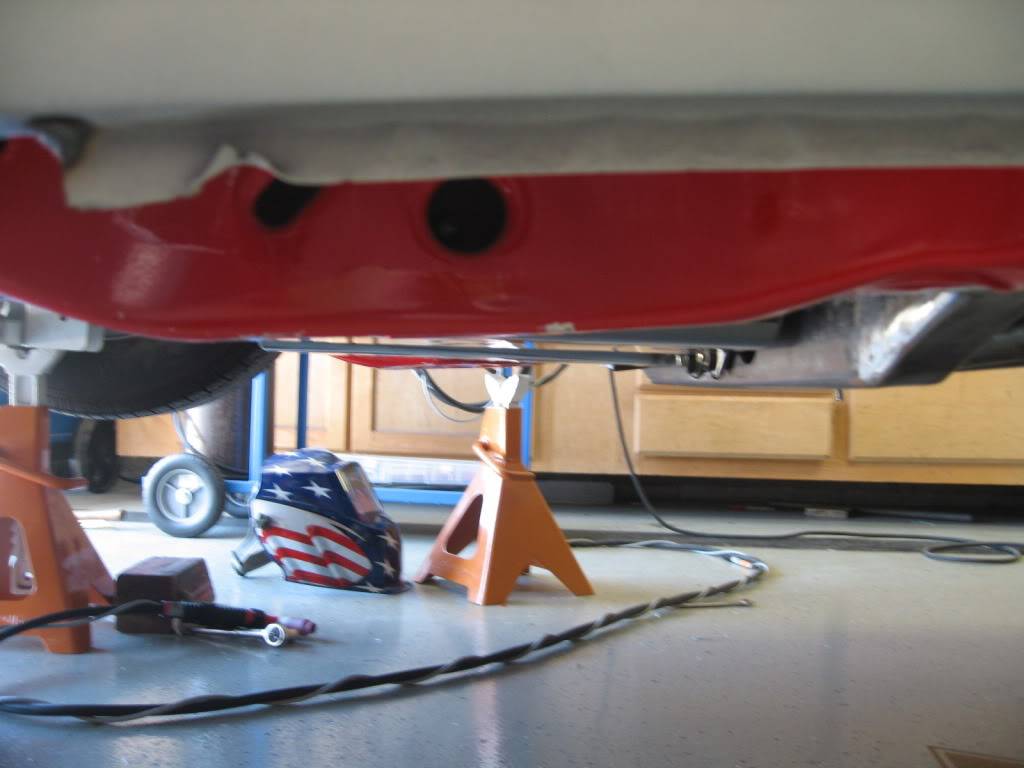
here are the rest of the exhaust pics. like i said before, an average of a B/B+ on weld appearance. some are D's mainly on the right rear tailpipe since i did it first, but there are a few A's as well. did i heat it too much and lose the stainless properties? only time will tell. i have a pretty good rainbow effect, and the haz isnt too wide, so i hope im fine.
the first two show how the frame was cut to allow the exhaust to sit up higher. i would have loved to have made them go through the frame for a little more rigidity, but i would have needed another two vband clamps to make it work and the hole for those flanges needs to be pretty big. i also got the mounts from the roadster shop. im hoping i dont end up melting the ones closer to the motor.
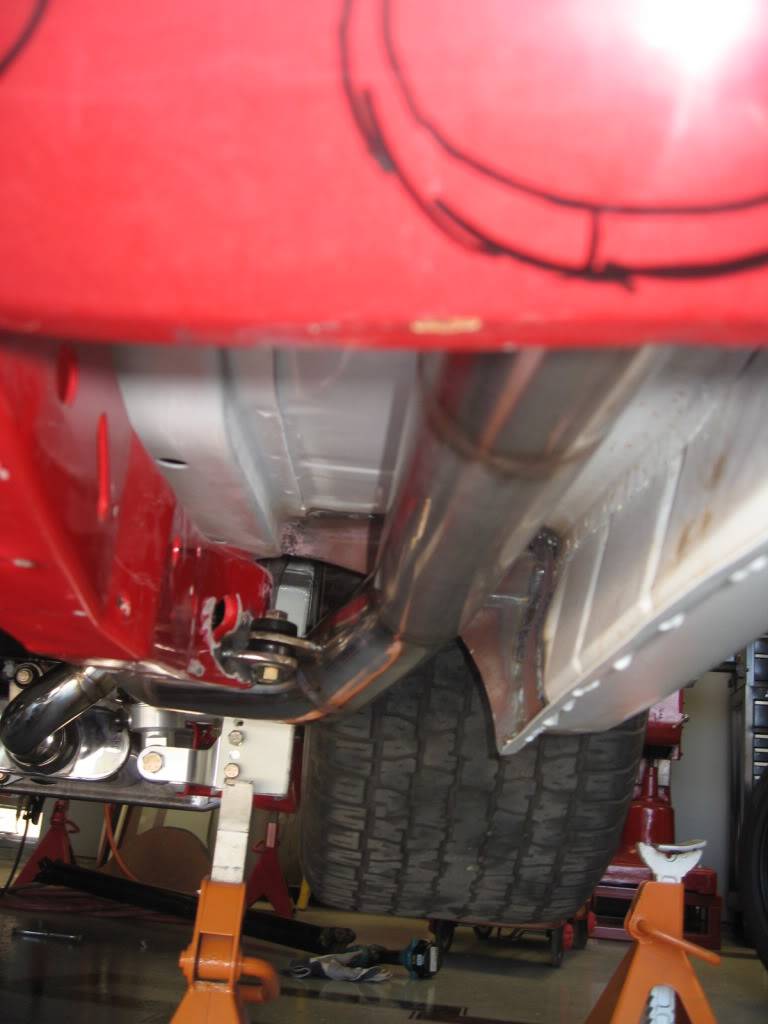
the exhaust will exit through the valance below the bumper. i have some transitions to make the tips 3" and i plan to make them slightly oval. that work will come once the frames done and the bumper gets completed.
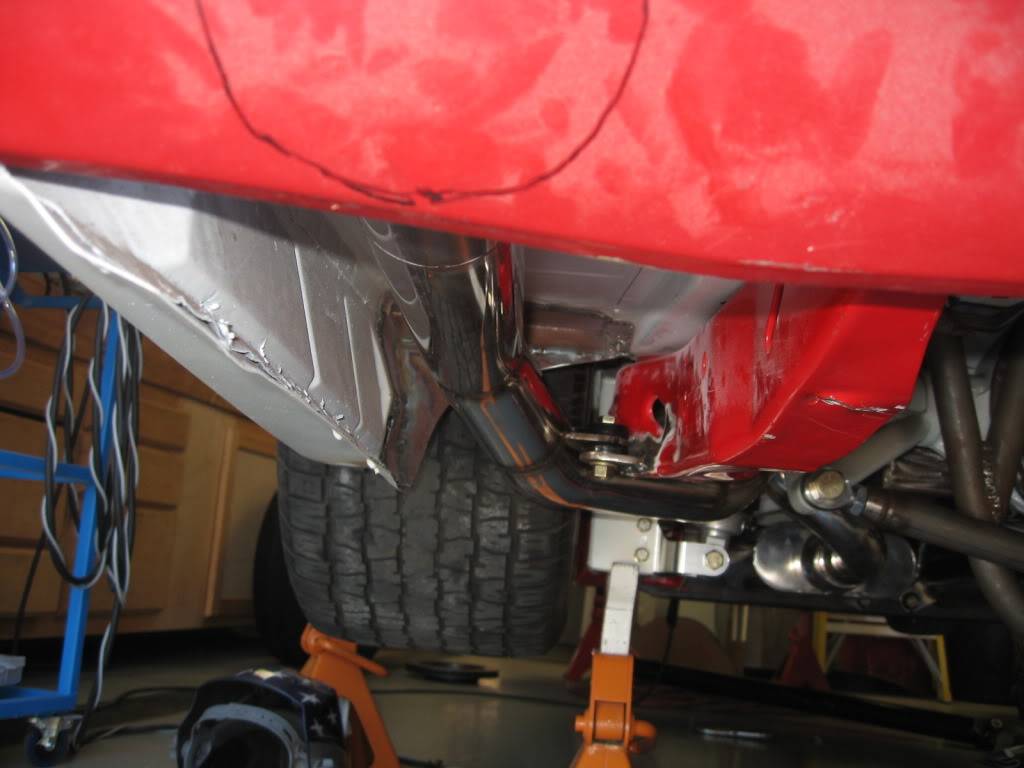
here you can see the tight spot. if i would have welded the watts connector on at more of an angle and given myself another 1" of clearance, i would have saved a few days work. this was a TOTAL PAIN IN THE ASS!!!!! the watts crossmember had to be notched to make it work. this was another time where changing build plans bit me in the ass. i never expected to have the car so low that 1/4" of travel mattered. the rear never went this low when i set up the watts since it wasnt until after that i notched the fram.
 Tim
Tim
The WidowMaker: Garage Built 70 Chevelle
Special Thanks To: Rushforth Wheels, MuscleRodz, Kore3 & SC&C
Build Thread Link
-
07-25-2010 #151
 Registered User
- Join Date
- Sep 2007
- Location
- Southern California
- Posts
- 566
Great work Tim!
Lot of attention to detail to make this look awesome! I love how you are tucking the exhaust up into the pocket under the quarter!
For sound control you could also run a small thru muffler in that pocket area.
favorite pic: Great exhaust routing with beefy tires!
 Originally Posted by The WidowMaker

-
07-26-2010 #152
 Registered User
- Join Date
- Nov 2006
- Location
- Ma.
- Posts
- 5,560
Your exhaust looks awesome you did an excelent job.
Wayne
Car FINALLY home !!!!!! lol
Project FNQUIK https://www.pro-touring.com/showthre...ghlight=FNQUIK
-
07-26-2010 #153
 Registered User
- Join Date
- Mar 2009
- Location
- overseas
- Posts
- 3,434
wow awesome work!
 Kevin S. (overseas in Germany)
1963 Chevrolet Impala 2d ht Coupe
www.CruznArt.com
CRUZN - Automotive Artworks
-
07-26-2010 #154
Registered User
- Join Date
- Dec 2007
- Location
- Carlsbad, Ca
- Posts
- 1,213
wait till you see the real tires on there.favorite pic: Great exhaust routing with beefy tires! Tim
Tim
The WidowMaker: Garage Built 70 Chevelle
Special Thanks To: Rushforth Wheels, MuscleRodz, Kore3 & SC&C
Build Thread Link
-
07-26-2010 #155
 Registered User
- Join Date
- Dec 2009
- Location
- South Florida
- Posts
- 165
You have a nice looking project in the works.
1967 Chevelle SS Convertible
1969 Camaro Ex-Race Car
1967 Camaro RS/SS Top Sportsman (Sold-Now in Australia)
-
07-26-2010 #156
 Registered User
- Join Date
- Aug 2004
- Location
- Paso Robles, CA
- Posts
- 73
Amazing work you're doing there!
I'm saving this for some tips and inspiration.
You hose-draggers have all the time in the world to get stuff done! lol.
-
07-26-2010 #157
New to Pro-Touring
- Join Date
- Aug 2008
- Location
- dytona
- Posts
- 4
very nice fab work
07-26-2010 #158 Registered User
- Join Date
- Jan 2010
- Location
- Houston,TX
- Posts
- 42
Nice project.
When you are taking pictures of the welds are you turning macro on? Symbol looks like a flower on most cameras.
Can you post a picture of your welding cart, I'm trying to get some ideas on making one for my tig welder.
07-26-2010 #159
Registered User
- Join Date
- Aug 2009
- Location
- Guatemala
- Posts
- 23
awesome job!!!
07-27-2010 #160
New to Pro-Touring
- Join Date
- Jul 2010
- Location
- Sweden
- Posts
- 18
Nice work!

 Reply With Quote




