


Results 301 to 320 of 587
-
01-27-2011 #301
 Registered User
- Join Date
- Aug 2010
- Location
- Orange County, Ca
- Posts
- 25
I'm right there in huntington beach also! Awesome build!
-
01-28-2011 #302 Registered User
- Join Date
- Dec 2007
- Location
- Carlsbad, Ca
- Posts
- 1,213

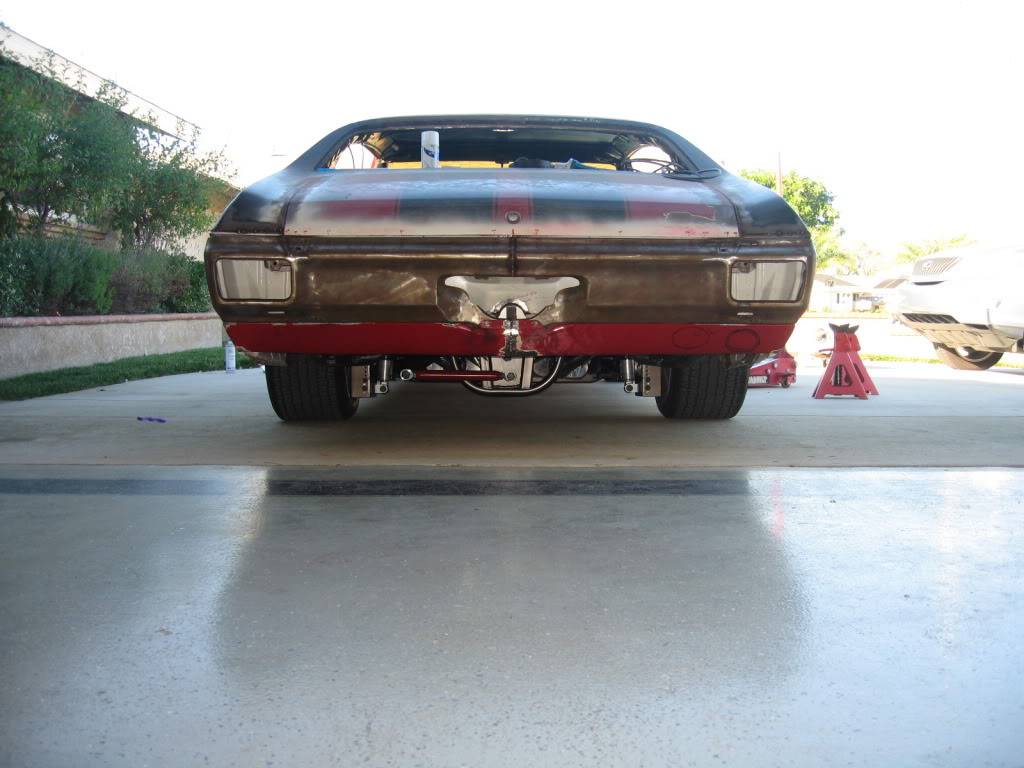
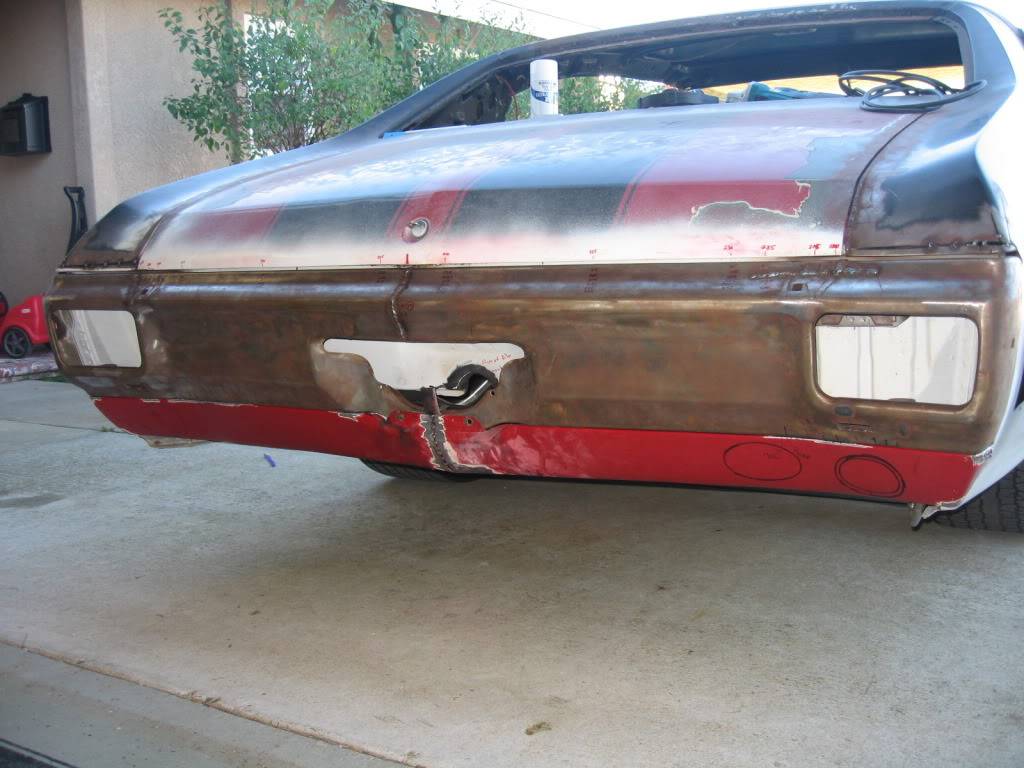
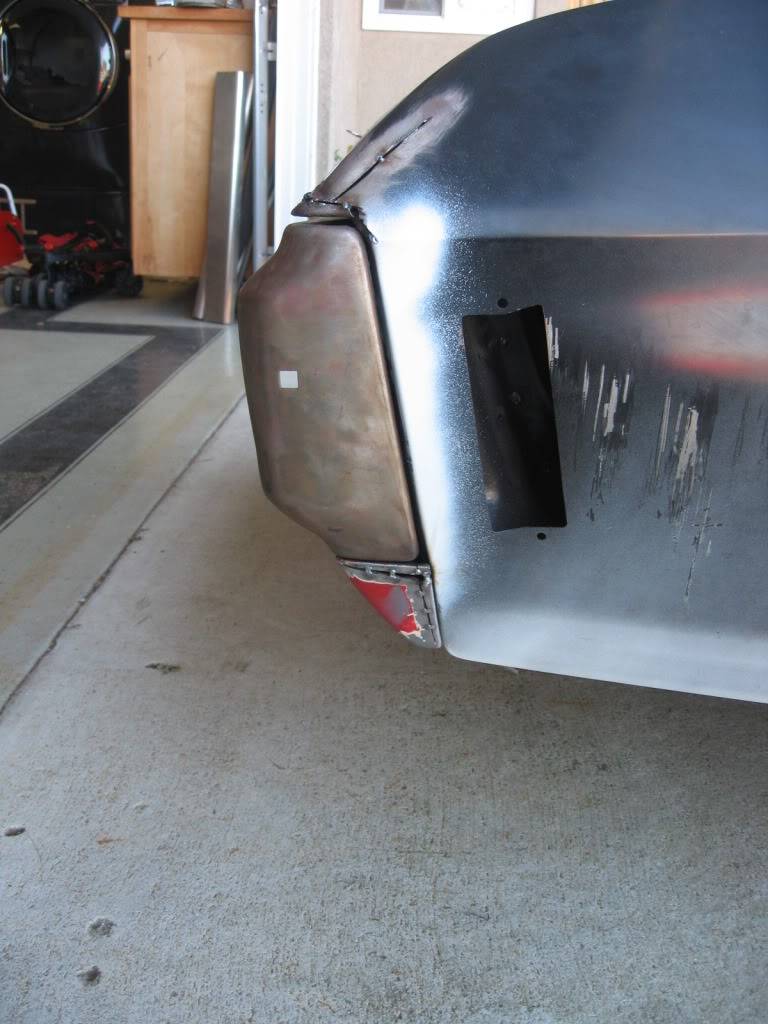
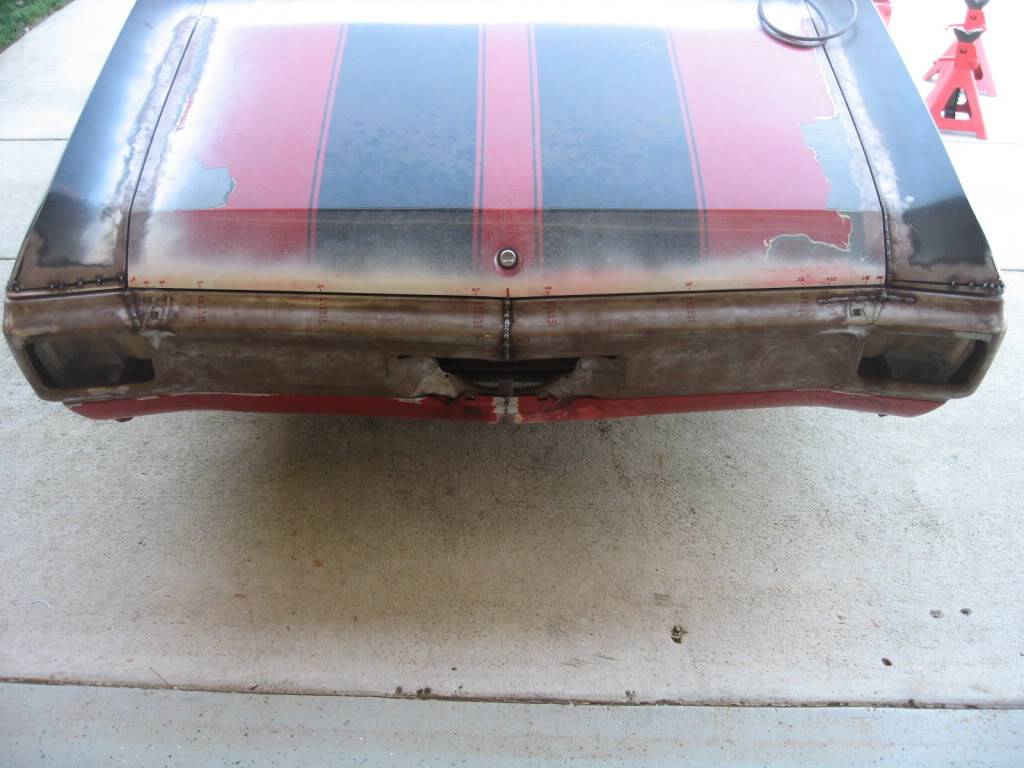
since i finished up the wipers, im back to the bumper again. i finished fitting the lower valance piece today. it has about 20 slits in the top where i was able to reform it to fit correctly, and both ends needed some work to line up correctly. i now just need to drill some holes for some bolts and then finish up the cuts in the quarter panels. both sides need some work where the top corners of the bumpers meet the quarters. i'll post some pics when done.
 Tim
The WidowMaker: Garage Built 70 Chevelle
Special Thanks To: Rushforth Wheels, MuscleRodz, Kore3 & SC&C
Build Thread Link
01-28-2011 #303
Registered User
- Join Date
- Dec 2007
- Location
- Carlsbad, Ca
- Posts
- 1,213
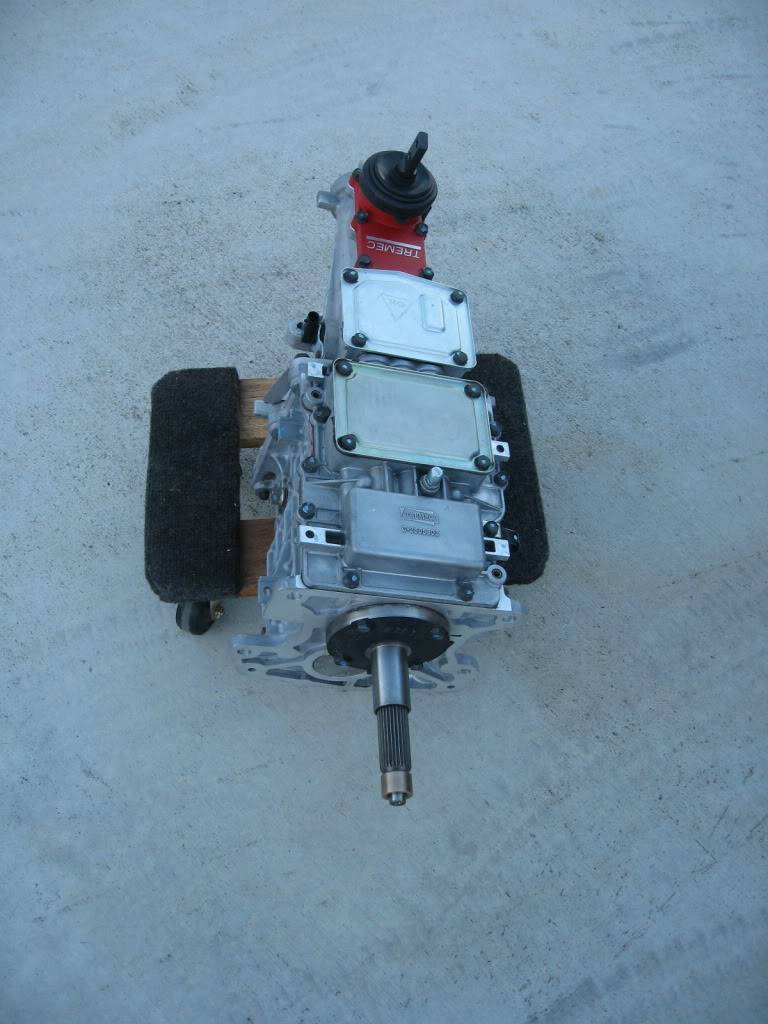
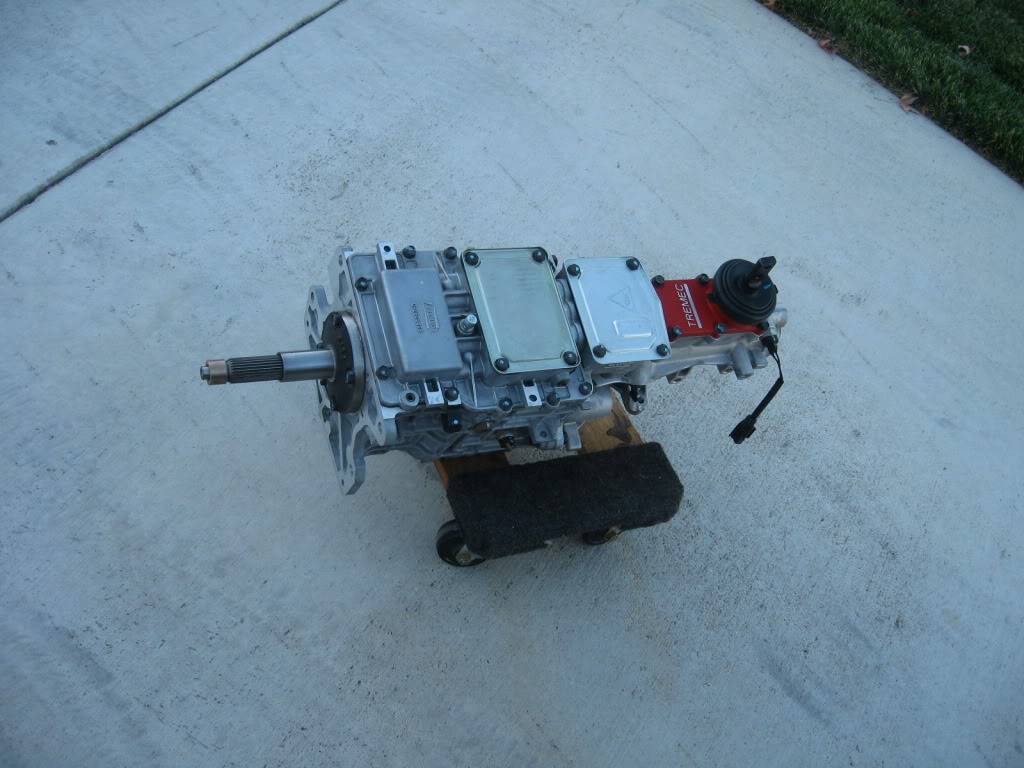
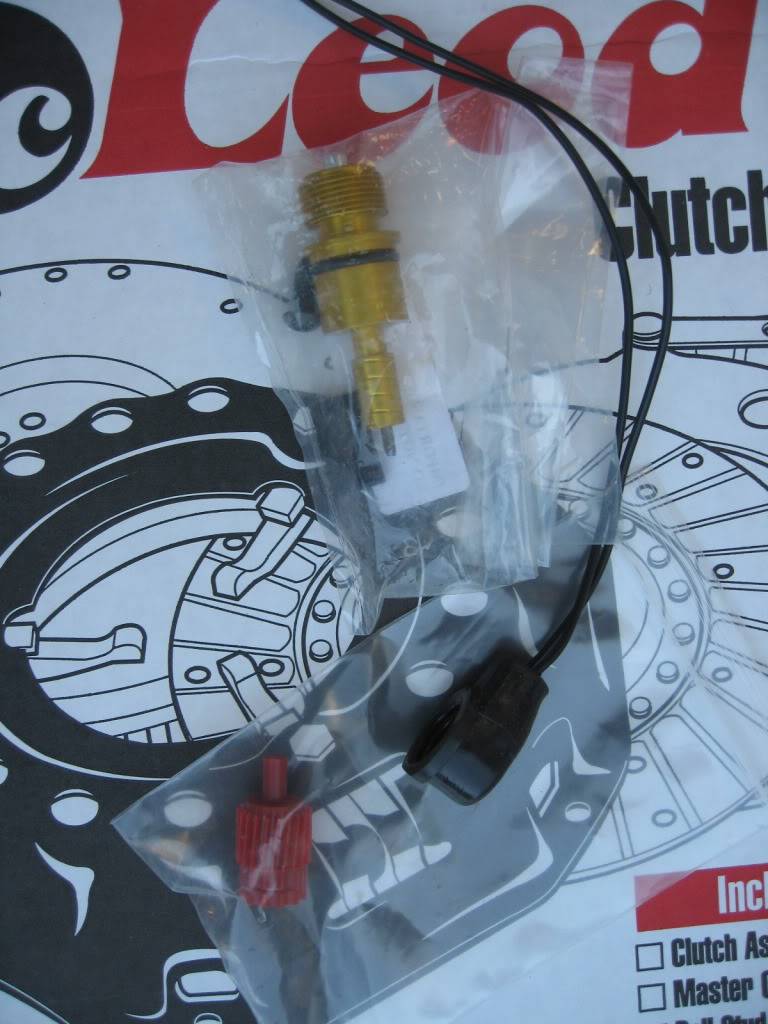
and the tremec is still for sale. i had a couple solid buyers, but nobody has sent the funds yet.
if anybody is interested, i'll sell the trans (tko600 .82 od) for $2000 or with the reverse harness, neutral safety wirng, speedo adapter and pilot bushing for $2050. If you add a mount and yoke from summit for $100, you end up with the basic kit that sells for $2395 new. so basically, this is $250 off on a brand new trans.
 Tim
The WidowMaker: Garage Built 70 Chevelle
Special Thanks To: Rushforth Wheels, MuscleRodz, Kore3 & SC&C
Build Thread Link
01-29-2011 #304
Registered User
- Join Date
- Oct 2008
- Location
- Durham,NC
- Posts
- 664
Looking Awesome Tim! Any tips for bumper work? Hoping to get back on mine next month sometime you know how life throws stuff at you and you have to deal with it while setting some things to side. Well see if I can get back to body work etc since some tax $ should be coming in also to. Brandon
01-29-2011 #305 Registered User
- Join Date
- Nov 2006
- Location
- Ma.
- Posts
- 5,560
Nice work that will make such a difference when your done.
Wayne
Car FINALLY home !!!!!! lol
Project FNQUIK https://www.pro-touring.com/showthre...ghlight=FNQUIK
01-31-2011 #306
Registered User
- Join Date
- Dec 2007
- Location
- Carlsbad, Ca
- Posts
- 1,213
there are a few areas that need to be lined up perfect and thats what made it so difficult. i think the front bumper is going to be much easier. but.....Any tips for bumper work?
i would first straighten everything about the bumper. run a straight edge and make sure everything is good. mine needed a little work along the lower valance area, and my plan is to replace the rubber SS pad with a chunk of aluminum and that needed work as well. the most work was needed up top where the gap between the bumper and trunk lid is formed. the top of the bumper was a little wavy and needed some BFH and dolly work.
i would start by narrowing it. mine was about 3/8". then you need to make the slices and start working the outside "wings". these start to curve too early and end up curving too much. i ended up with 3 slices on each side. the problem is that when you push them in, you also push them down which f's up your straight gap. more work will be needed here. i would then cut the brackets and suck it in as far as you want first. if you do this before cutting the wings, you will make the bumper go in too far and it will hit the quarters. next, work to get your trunk to bumper gap PERFECT and then weld the brackets on. then i would make your quarters match.
i cant tell you how many times i started over. every little tweak changed the gaps .020 to .030 and it was really frustrating. and just when i thought i was done with the brackets tacked on, the final welding changed it again. it looks really good though. its another one of those things you dont pay attention to until you do it yourself. i now notice how every other 70-72 bumper is f'd up. i have close to 100 hours in this thing. i could probably do it in half the time if i did it again. not much less than that though.
TimTim
The WidowMaker: Garage Built 70 Chevelle
Special Thanks To: Rushforth Wheels, MuscleRodz, Kore3 & SC&C
Build Thread Link
02-01-2011 #307
Registered User
- Join Date
- Dec 2007
- Location
- Carlsbad, Ca
- Posts
- 1,213
just a brief update. i finished welding up the quarters today and i also finished up mounting the lower valance to the bumper. i just need to finish grinding the welds and work on the corners a little tomorrow and it should be done.
also, the tko is sold and i plan to purchase the magnum tomorrow. i need a bellhousing as well and since i have a credit with mcleod, i drove down there today to use it towards one of their 8710-00's. while there, i was told that they are redesigning the part and should have the new bell out in a couple months. it will only have the starter pocket on one side and therefore be a little easier to package.
so instead of buying a bell, i ended up swapping out my rst clutch for an rxt. my rst was the first version, and they were actually going to rebuild mine with all the new updated parts for free since its still brand new. after discussing the intentions for the car, they recommended the rxt hands down. with the clutch material of the rst, it has to be rebuilt if you glaze it. the rxt will actually fix itself after a little driving and is meant to take the extra abuse. they are actually in the process of adding a sprung hub to the rxt's, so i was told to bring it back before i installed it and they would update this one as well. i really couldnt believe the customer service and their desire to only have their best product on the road. things would have been slightly different if i was bringing them a used clutch though.
but, i still need a bell. the quicktimes are a little more expensive, but they are lighter and possibly a little smaller as well. im not sure which way im going to go yet.
TimTim
The WidowMaker: Garage Built 70 Chevelle
Special Thanks To: Rushforth Wheels, MuscleRodz, Kore3 & SC&C
Build Thread Link
02-02-2011 #308 Registered User
- Join Date
- Aug 2009
- Location
- Chandler, Az (from west NE)
- Posts
- 240
Coming together real well, Tim. Great detail work, especially in a homebuild. Thanks for sharing.
Ric
2002 s10, DD and AutoX.
1966 Malibu owned since 1971. Drag car converting to track toy!
02-04-2011 #309
Registered User
- Join Date
- Dec 2007
- Location
- Carlsbad, Ca
- Posts
- 1,213
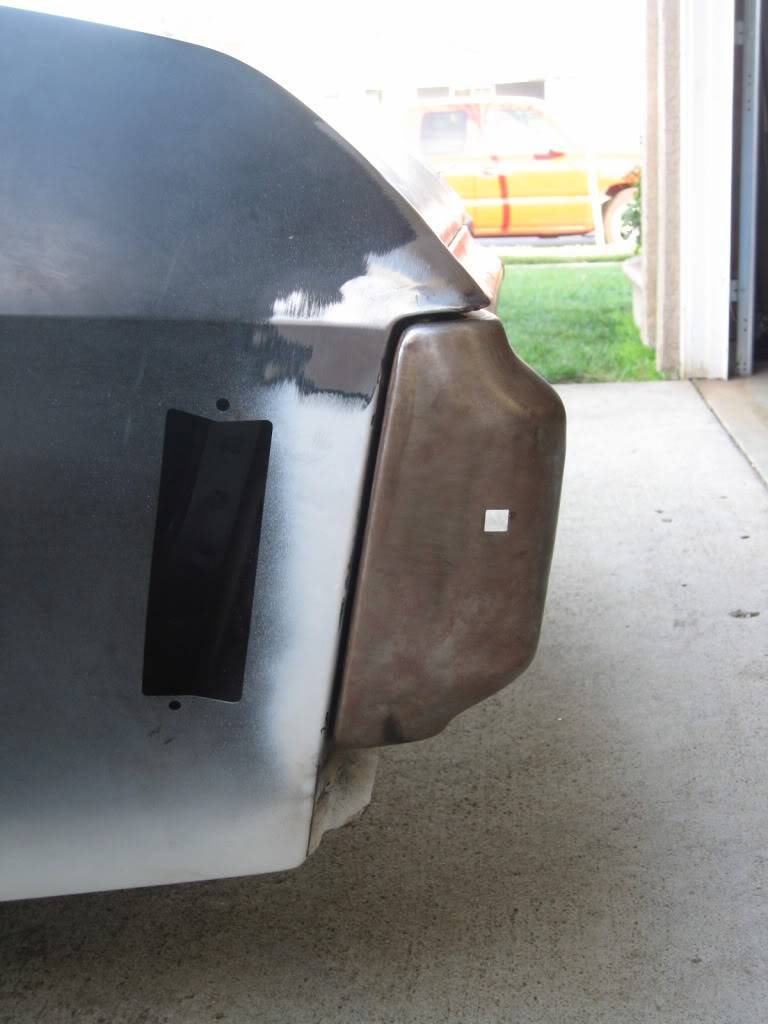
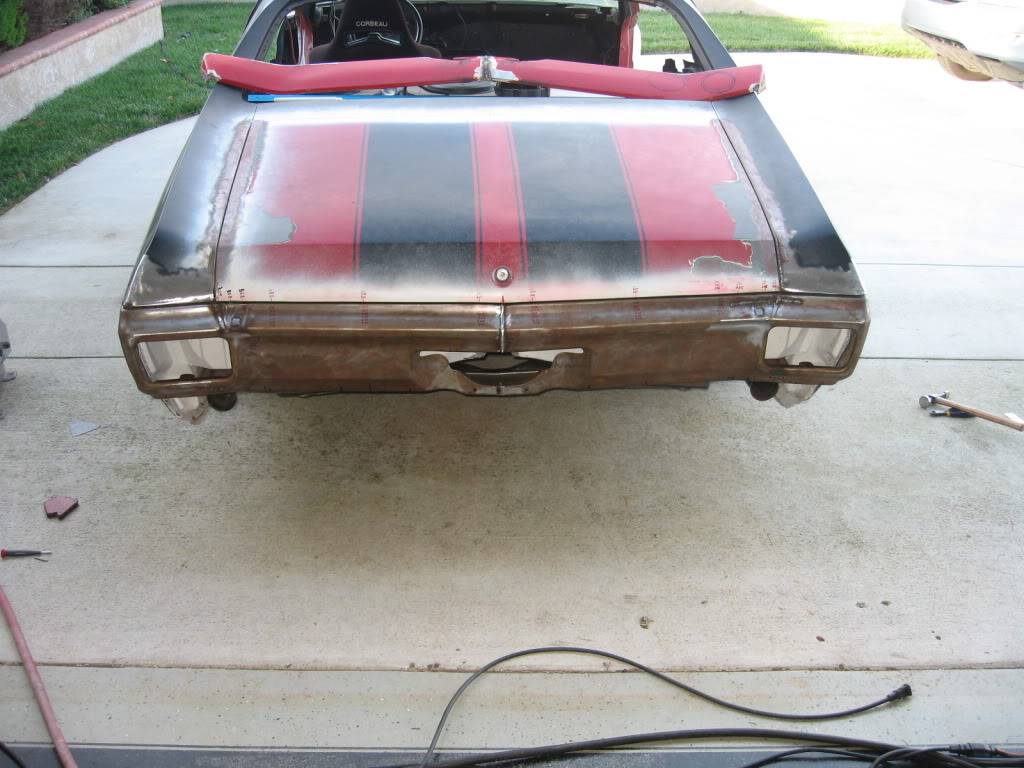
well i wanted to be done with the bumper months ago, and i really thought i would finish it today, but nope. i got the corners finished up and that was about it. now the quarters are done (except a couple tacks underneath the lip that can be seen in the pics), but i need to finish grinding the welds on the bumper and i still need to fill the jack holes. then i have a few more welds to grind on the valance and it should be done. i will make sure a fit the bumper a couple times when blocking the car and make sure the fitment doesnt change very much. there are a couple areas that can be touched up a little. i will also decide how to make the exhaust exit at a later time.
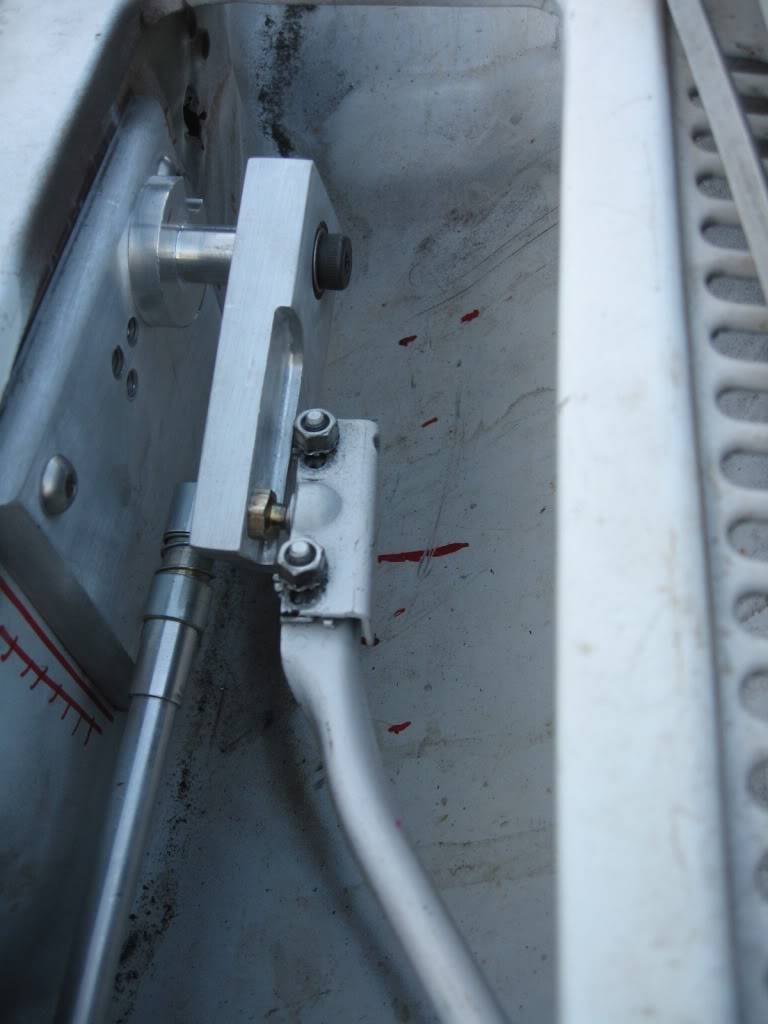
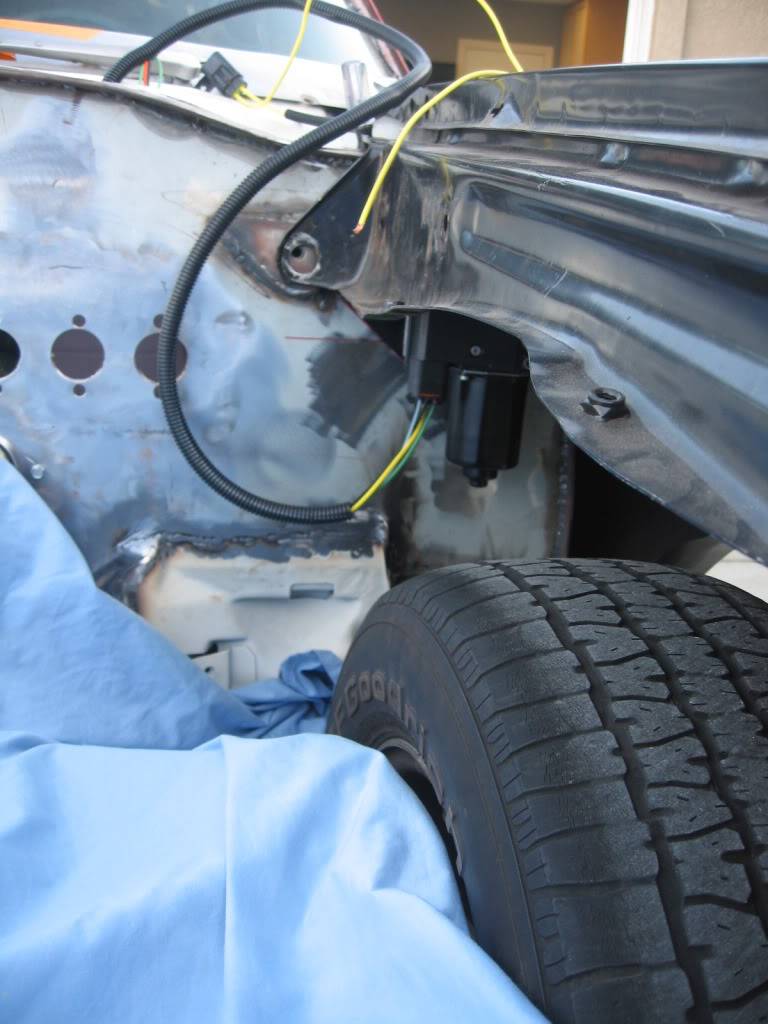
i also took a couple pictures of the newest and final arm on the wipers and another of how it mounts under the fender. i made this arm almost twice as thick where the bearings mount, but the rest is the same. the extra thickness allowed me to retain one bearing with the snap ring, but the second is retained when it is all bolted together. this extra width improved stability at least another 50%. its friggin rock solid now. i still never figured out why the dse cam moves as much as it does, but i came up with my own geometry to work around it.
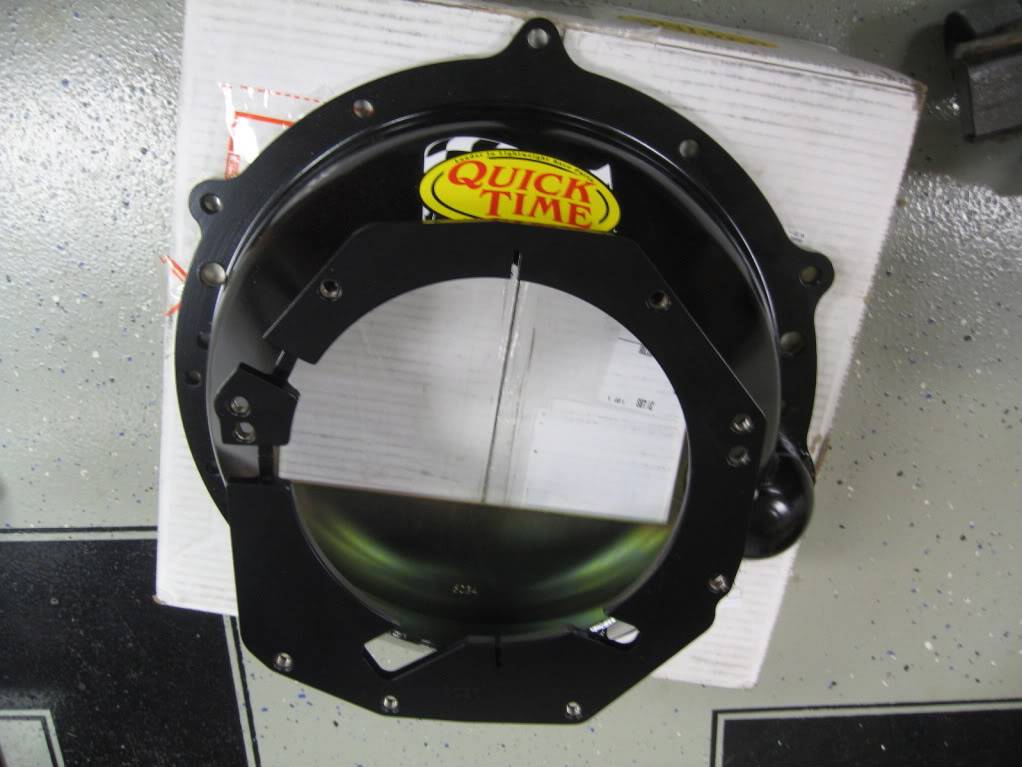
i also called up summit and ordered the quicktime bellhousing part #rm-8020. i had summit price match the best price which i found using the google shopping site. i friggin love them. it even beat summits pro shop price by 20 bucks.
here are a couple pics.
 Tim
The WidowMaker: Garage Built 70 Chevelle
Special Thanks To: Rushforth Wheels, MuscleRodz, Kore3 & SC&C
Build Thread Link
02-05-2011 #310
Registered User
- Join Date
- Oct 2008
- Location
- Durham,NC
- Posts
- 664
now make a double wiper set up and send to ME hahahahaha!!!! Looking good there Tim. I finally told the wife here trucks either gonna run in a few weeks or being pushed out to get back to the Chevelle been sitting way to long even though I am broke. I got sheet metal in garage and welding/body wok I can do without spending $. Brandon
02-07-2011 #311 Registered User
- Join Date
- Jan 2011
- Location
- CENTEX
- Posts
- 67
Very nice.
J. Will.
70 Chevelle Malibu, 69 Cutlass S convertible, 71 Monte Carlo, 16 Chevy SS (yes, that one)
02-08-2011 #312
Registered User
- Join Date
- Dec 2007
- Location
- Carlsbad, Ca
- Posts
- 1,213
i finally got the bumper finished! this has been the most difficult project to date, and it will still need a lot of work when i get the car painted. i really wish i could have sucked the "wings" in a little more or extended the quarters as that would have helped with the illusion created by the depth difference. although the gap measures the same all the way across (+/- .010), the gap at the edges appear larger. its friggin killing me! but i think with color the issue will disappear. i debated actually making the sides smaller but the illusion changes depending on shadows. with the sun to the rear of the car everything actually looks as it measures.
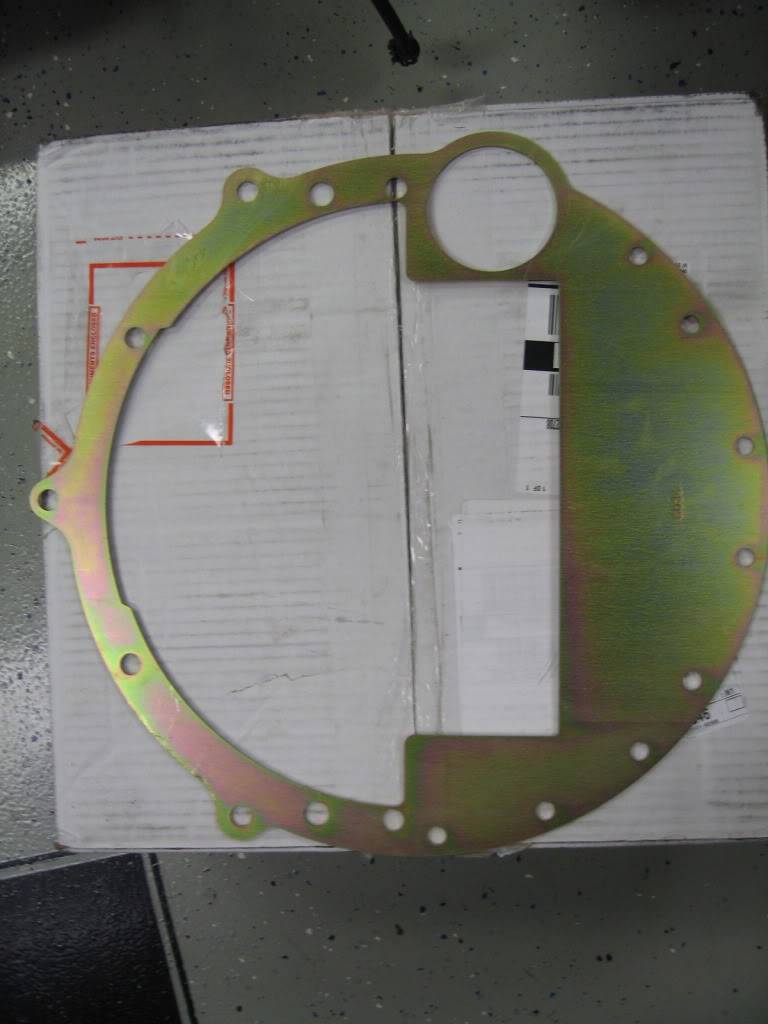
i also got the quicktime bellhousing today. i was really suprised to see the block plate, or lack there of. the mcleod is a solid plate with about a 6" dia hole in the center. the quicktime is about a 1" perimeter strip and some more plate that covers the oil pan and thats it. i have a feeling they use the flywheel to keep material from going into the engine, but that doesnt really make me feel all warm and fuzzy on the inside :noway:. i'll call them tomorrow and see what they say. i saved 14lbs though. 27 vs 41. i have a feeling i'll more than make up for that with the larger magnum.
the radiator also shipped last week. mike at musclerodz is the man. i'll take some pics when it gets here.
im going to spend the next couple days cleaning up the trunk lid a little. the gaps need a little more work and the weather stripping channels need some work as well. then i have to pick up some doors and get the sheet metal all fit.
the new quicktime housing......
 Tim
The WidowMaker: Garage Built 70 Chevelle
Special Thanks To: Rushforth Wheels, MuscleRodz, Kore3 & SC&C
Build Thread Link
02-11-2011 #313
Registered User
- Join Date
- Dec 2007
- Location
- Carlsbad, Ca
- Posts
- 1,213
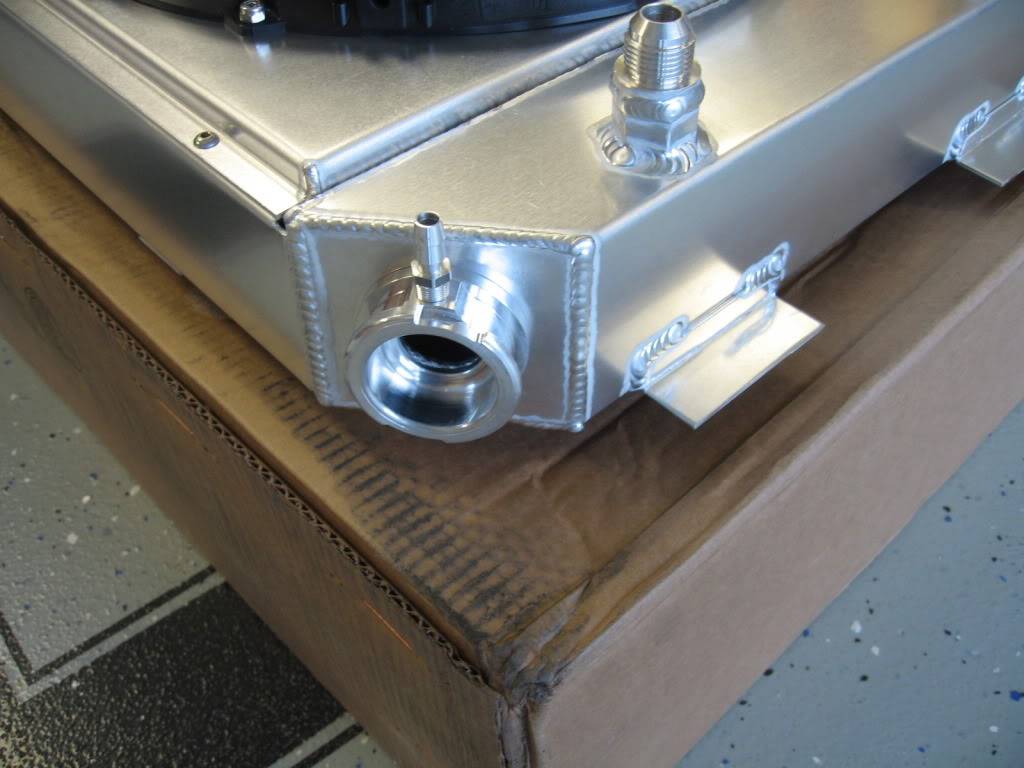
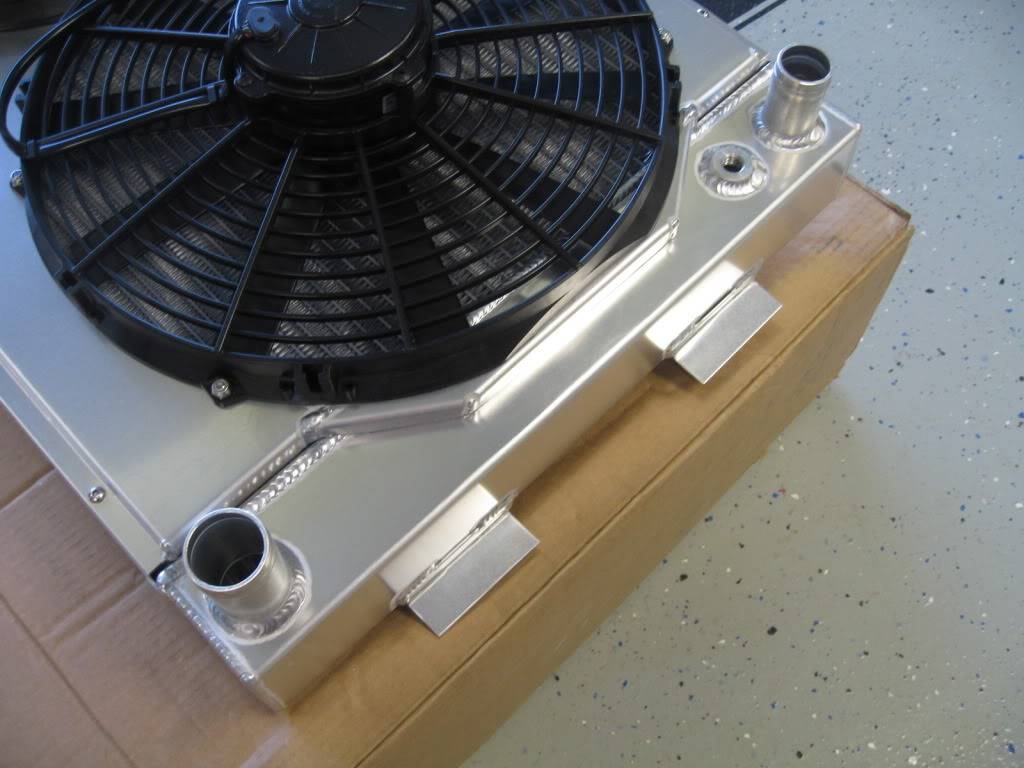
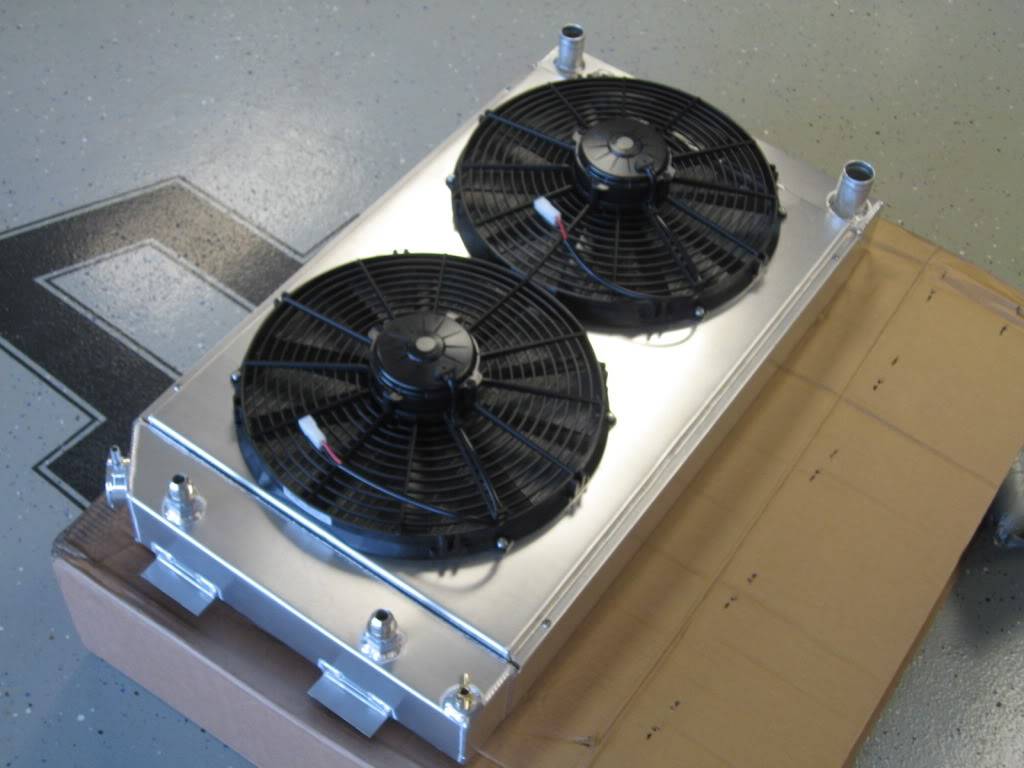
so the radiator shipped out last week and showed up today. a huge thank you for mike at muscle rodz. he was great to work with and his prices are by far the cheapest ive found. for those that have followed, i stressed about the ron davis/prc decision for a long time. i was actually willing to pay the extra money (~$250) for the rd quality welding, but once i decided on an internal oil cooler the decision was made for me. prc was $85 extra and rd was about $800 extra. plus, prc would build whatever i needed for the same charge, and that included welding on the tabs on the side.
im actually really impressed with the welding. could it be nicer? yep. but id still give it an 8.5 out of 10 and considering the linear amount of welding, the quality is VERY good. its going to be a little while before i weld up the mounts for it, but its here and i can mark the purchase off my list.
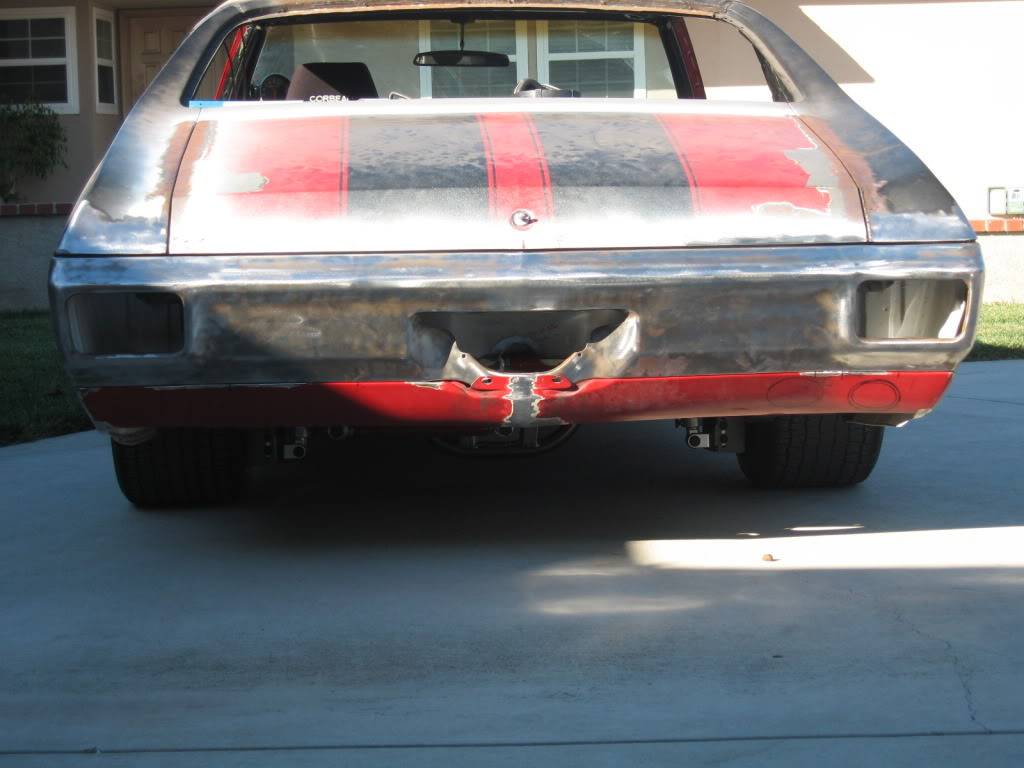
i also rolled the car out for a few more finished pics of the rear. i now need to decide what im going to do for exhaust. it is set up to exit at the outer black oval, just not sure how im going to do it yet. i was hoping that the area would be flat, but that was wishful thinking. im kicking around some ideas, but i would love to hear some opinions.
oh, and just so you guys can see im not crazy. check out the last few inches of the bumper to quarter on the left side of the car. you can see how just a little is shaded, but that part appears like the gap is larger. the entire sides do that when they are completely shaded and its driving me friggin NUTS. put it in the light and it goes away..........
 Tim
The WidowMaker: Garage Built 70 Chevelle
Special Thanks To: Rushforth Wheels, MuscleRodz, Kore3 & SC&C
Build Thread Link
02-11-2011 #314
Registered User
- Join Date
- Feb 2011
- Location
- Chicago
- Posts
- 33
WOW! that about says it all your work is amazing i look forward to seeing the finish product!
02-11-2011 #315 Registered User
- Join Date
- Apr 2004
- Location
- OKC, OK
- Posts
- 3,739
Radiator looks good, and glad to see your happy with it. Thanks again
Mike Redpath
Musclerodz & Customz
405-288-0189
pro-touring parts specialists
Musclerodz.com
facebook page
http://www.facebook.com/#!/pages/Mus...73054649402015
instagram
Musclerodz
02-11-2011 #316 Registered User
- Join Date
- Dec 2005
- Location
- Birmingham, AL
- Posts
- 3,355
That rad looks like a nice piece.
Stephen
02-12-2011 #317
Registered User
- Join Date
- Apr 2005
- Location
- Vail, Arizona
- Posts
- 660
jhbnjmk,l
02-12-2011 #318 Registered User
- Join Date
- Jul 2010
- Location
- OREGON
- Posts
- 364
The radiator looks very nice and as far as the gaps on the rear bumper I see what you mean what the heck is causing that?
02-12-2011 #319
Registered User
- Join Date
- Dec 2007
- Location
- Carlsbad, Ca
- Posts
- 1,213
no, thank you. hopefully you get a few calls for some more combos like this. i do have to give todd the credit for the oil cooler since i copied his.Radiator looks good, and glad to see your happy with it. Thanks again
its shadows and the difference in depth. when its in the light you pick up the vertical gap as if you measured straight down. in the dark my eyes are picking up the gap as measured from edge to edge. since the quarters dont come all the way out to the edge of the bumper, the measurement is larger since its on an angle. hard to explain in type.The radiator looks very nice and as far as the gaps on the rear bumper I see what you mean what the heck is causing that?Tim
The WidowMaker: Garage Built 70 Chevelle
Special Thanks To: Rushforth Wheels, MuscleRodz, Kore3 & SC&C
Build Thread Link
02-13-2011 #320 Registered User
- Join Date
- Mar 2009
- Location
- overseas
- Posts
- 3,434
amazing work Tim!
Kevin S. (overseas in Germany)
1963 Chevrolet Impala 2d ht Coupe
www.CruznArt.com
CRUZN - Automotive Artworks

 Reply With Quote



