


Results 381 to 400 of 587
Hybrid View


-
07-30-2011 #1

 Registered User
- Join Date
- Dec 2007
- Location
- Carlsbad, Ca
- Posts
- 1,213

does anybody have any info on leds? my plan is to use 1" of the 3.5"s in the inserts for for amber led light strips that will function as my forward turn signals. ill then cover that with some sort of prismatic diffuser and then a clear plexiglass. this will all be behind the hexagon mesh. currently im looking at the smd5050's and will run 2 6" strips per light. this will get me 18 leds of ~6 lumens each for ~110 total (2000-2500 mcd 120* conversion). the best info i could find put the stock amber bulb or the white bulb through the amber lense at ~80 lumens. the mesh is only 70% open so it will kill some light. im trying to come up with the best design possible that will get me the most visible forward projection. ive also looked at the side projection strips that would either allow more leds, or possibly building in some sort of reflector behind the leds since they wont take up as much space.
also, any good sources? i found these and they have good reviews, just not really sure. http://www.ledlightsworld.com/smd-50...eds-p-135.html
Tim
The WidowMaker: Garage Built 70 Chevelle
Special Thanks To: Rushforth Wheels, MuscleRodz, Kore3 & SC&C
Build Thread Link
-
08-01-2011 #2
Registered User
- Join Date
- Dec 2007
- Location
- Carlsbad, Ca
- Posts
- 1,213
i bought the leds last night. i ended up getting them from ledlightsworld.com. i looked into superbrightleds and found a bunch of people unhappy with the length of time they would last. no bad reviews on the other company. they should be here some time early next week.
i taped (literally) in the inserts this afternoon. i could have cut the hole around the existing one, but i wanted them centered in the bumper a little more. i will have to come back and fill in the top. i am also trying to decide how to mount them. the two choices are either a visible fastner from the front, or hide them all in the back. after that, the outside corners need to be rounded and i need to figure out what sort of profile i want on them.
i started on the second piece of the inserts today. i will cut them to size and get them mounted to the first piece on wednesday. i'll have to wait until i get the leds before i hog out the inside.
i also finalized my design for the grille. like anything and everything else, its way more complicated than i initially thought. if you view it from the side its actually tilted ~6.5* forward at the top. i knew this going in but the plan was to build it vertical since i thought the outsides were vertical. turns out the outsides are also tilted forward the same amount, so the grille is getting built with that angle in mind. it now means instead of setting up the mill vertical, i have to mill everything on an angle. i'll take a bunch of pics and let you all know how it goes.
here are some pics of the inserts. there is a little slop to get them straight. still not sure what i want to reference level off of. the bumper on the inside edge of the inserts is taller than 8" further out. this keeps screwing with my eyes and making me think theyre crooked.
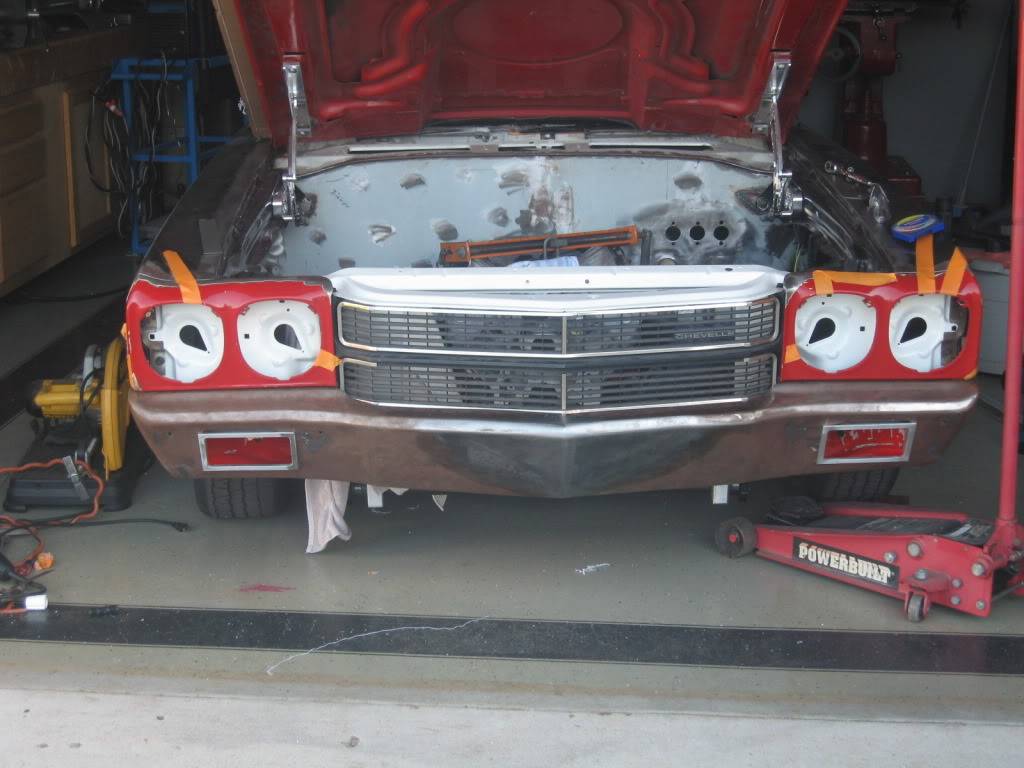
you can see they arent perfectly flush and the top portion of the original hole needs to be filled. the bumper will need a little work until it is.
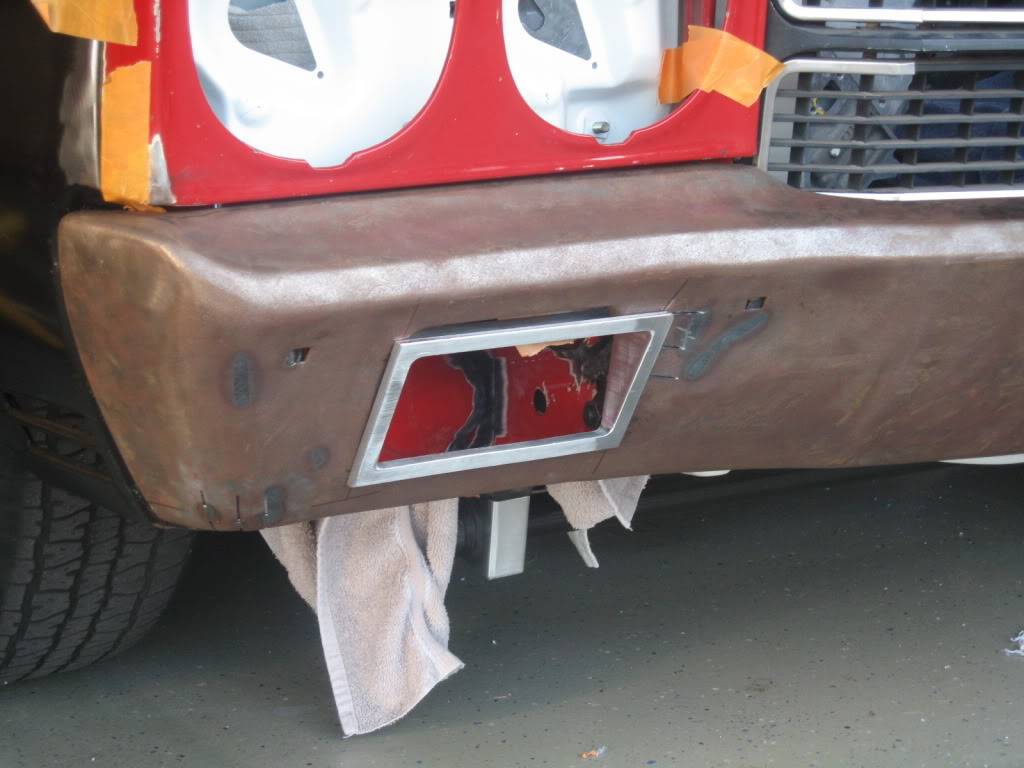 Tim
The WidowMaker: Garage Built 70 Chevelle
Special Thanks To: Rushforth Wheels, MuscleRodz, Kore3 & SC&C
Build Thread Link
08-02-2011 #3
Registered User
- Join Date
- Aug 2007
- Location
- Albemarle, NC
- Posts
- 1,171
id say go with what looks right to the eye for setting them up. if theyre level, but look crooked, theyre still crooked to the eye. get what i mean?
Michael Crawford
1970 plymouth Duster back under construction:
https://www.pro-touring.com/showthre...uring-makeover
1987 GMC S15 https://www.pro-touring.com/showthre...ct-drivabeater
08-02-2011 #4 Registered User
- Join Date
- Apr 2009
- Location
- Fort Worth, Texas
- Posts
- 158
08-06-2011 #5
Registered User
- Join Date
- Dec 2007
- Location
- Carlsbad, Ca
- Posts
- 1,213
completely. problem was my wife thought they were tipped one way and my eyes saw another. and i thought we'd finally agree on something.if theyre level, but look crooked, theyre still crooked to the eye. get what i mean?Tim
The WidowMaker: Garage Built 70 Chevelle
Special Thanks To: Rushforth Wheels, MuscleRodz, Kore3 & SC&C
Build Thread Link
08-08-2011 #6 Registered User
- Join Date
- Nov 2009
- Location
- Bakersfield Ca.
- Posts
- 167
Man that bumper looks AWESOME Tim!!!
'70 SBC 383 Stroker - Rushforth Rated X wheels - 14" Wilwood - Anvil Carbon Fiber hood/deck lid - Fesler billet - Corbeau Sport Seats, and still building....
Youtube & Instagram - @nick.v70 & @ChevelleFactory
08-08-2011 #7
Registered User
- Join Date
- Dec 2007
- Location
- Carlsbad, Ca
- Posts
- 1,213
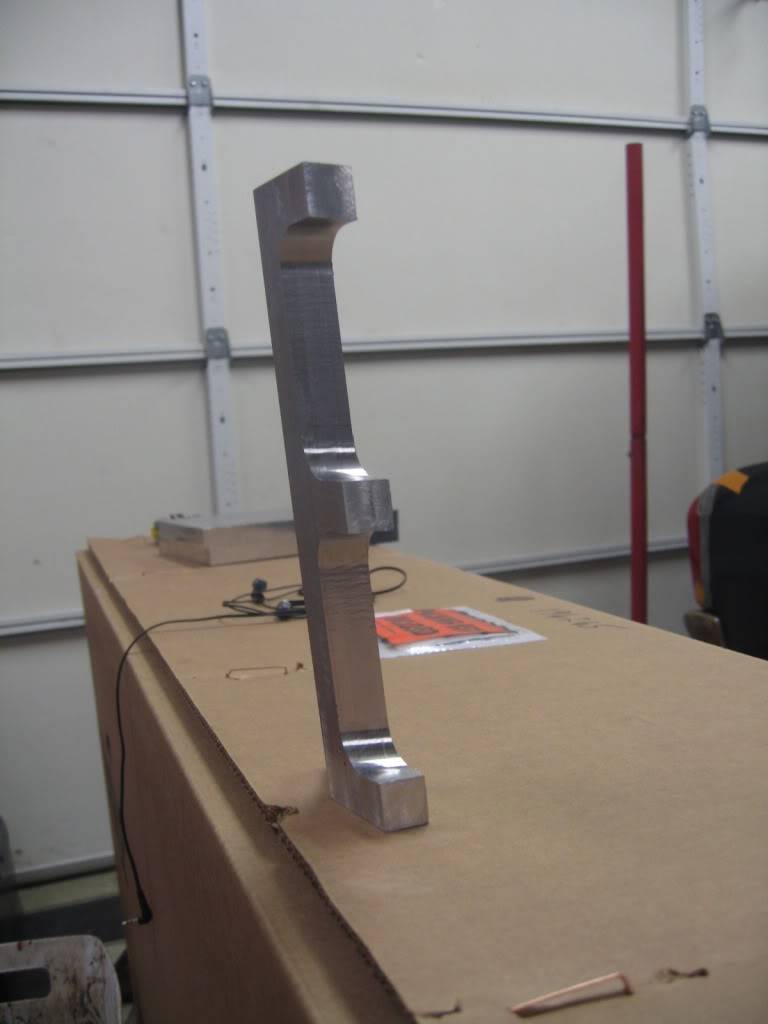
heres the first piece of the grille. now i just need to makes the sides and i can start assembly. i also wish i had a mill (or talent) that allowed me to make pieces that didnt need any cleanup. theres obviously very little slop in the mill, but very little is still too much.
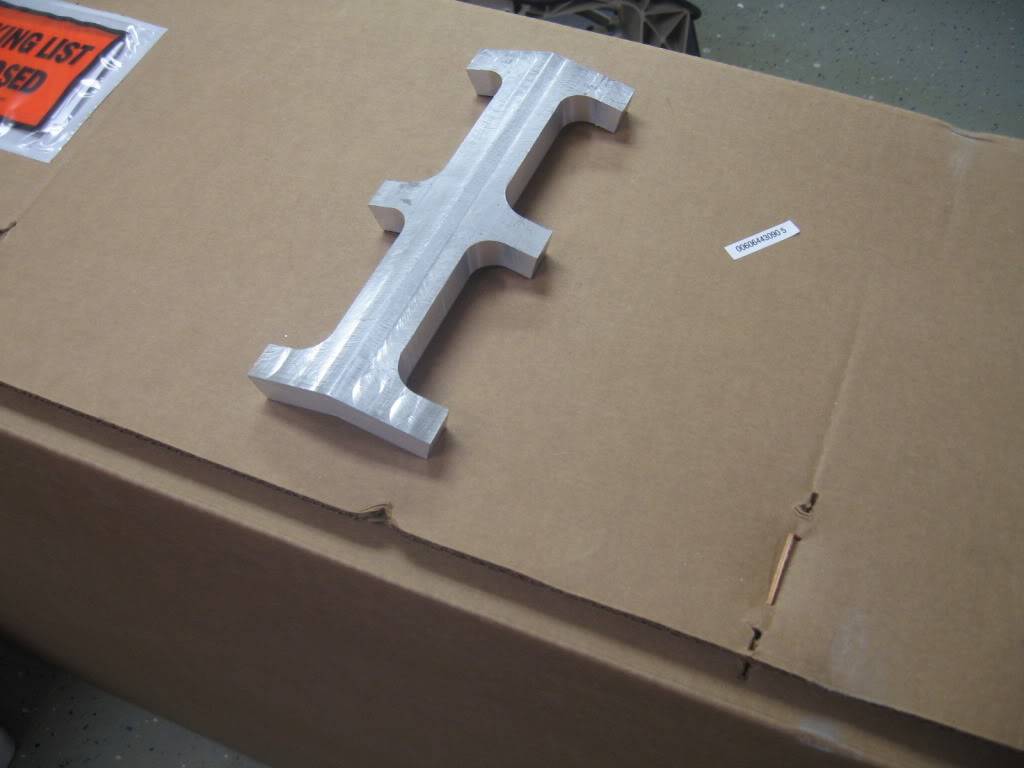
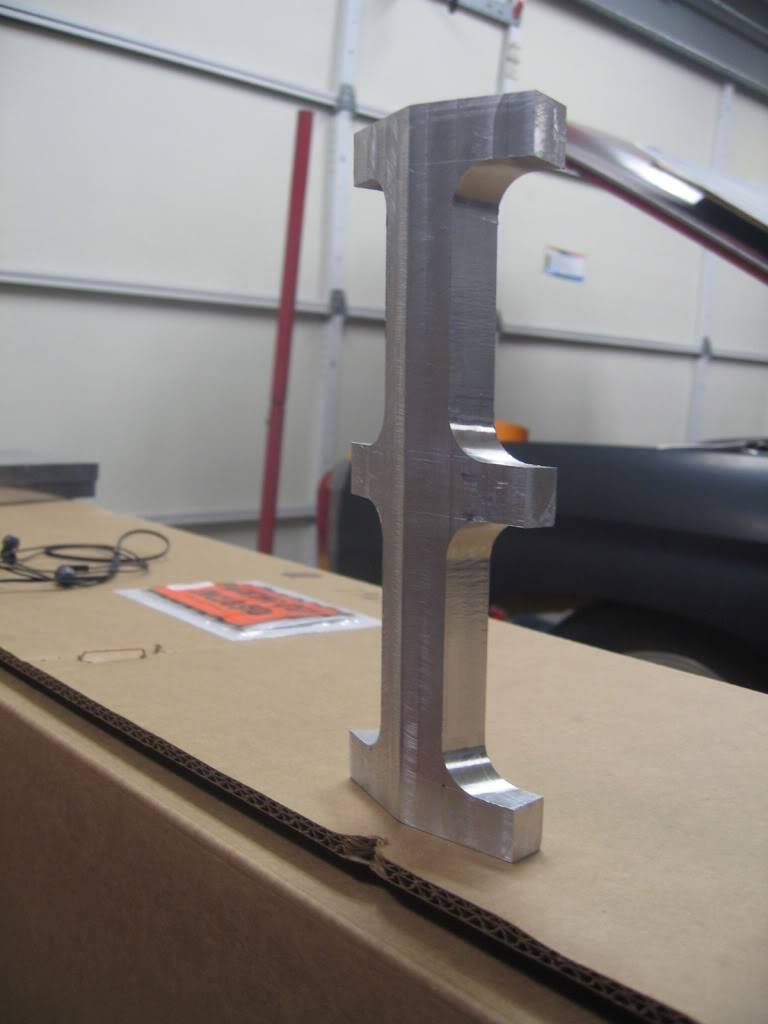
 Tim
The WidowMaker: Garage Built 70 Chevelle
Special Thanks To: Rushforth Wheels, MuscleRodz, Kore3 & SC&C
Build Thread Link
08-09-2011 #8 Registered User
- Join Date
- Dec 2004
- Location
- California
- Posts
- 794
P.S. The majority of mills I have ever come across have "split nuts" that allow for tightening of the ways and drive/lead screws to take the "slop" out of the mill
08-09-2011 #9
Registered User
- Join Date
- Dec 2007
- Location
- Carlsbad, Ca
- Posts
- 1,213
thanks for the suggestions. im still learning so any and all tips really help. ive looked into the indexable insert cutters and im thinking about picking one up. unfortunately i cant turn the speed up any more. i need to do some calcs and find the actual speed now. ive been trying to use a 1" cutter to take advantage of a little more speed as well.If you want less cleanup and a cleaner finish you should look into a larger face mill with replaceable inserts. Then turn the RPM's up a little remember (cutting speed x4 /diameter). Also check the index of the mill head, and ensure it is within .0005 of the opposite side. Just remember your not a CNC, manual machining always takes some polishing. A indexible insert with a larger cutting edge radius will produce a smoother finish.
P.S. The majority of mills I have ever come across have "split nuts" that allow for tightening of the ways and drive/lead screws to take the "slop" out of the mill
i do have the abilty to adjust the table, but they are worn where they were heavily used (1943 machine for hughes aircraft). if i tighten them up too much in the middle they are tight on the outside. my quill and knee are VERY good though, at least for my specs.Tim
The WidowMaker: Garage Built 70 Chevelle
Special Thanks To: Rushforth Wheels, MuscleRodz, Kore3 & SC&C
Build Thread Link
08-09-2011 #10
Registered User
- Join Date
- Dec 2004
- Location
- California
- Posts
- 794
If you want less cleanup and a cleaner finish you should look into a larger face mill with replaceable inserts. Then turn the RPM's up a little remember (cutting speed x4 /diameter). Also check the index of the mill head, and ensure it is within .0005 of the opposite side. Just remember your not a CNC, manual machining always takes some polishing. A indexible insert with a larger cutting edge radius will produce a smoother finish.
08-09-2011 #11
Registered User
- Join Date
- Dec 2004
- Location
- California
- Posts
- 794
If you can look into a 4" face mill. The diameter would bring your speed up a lot, and you can get a used one on ebay for a pretty reasonable price. Unfortunately thats the problem with any machinery, not just old stuff. The ways get worn in the typical spots. You should ask at one of the machine shops that rebuilds them. To have the ways scraped (ground) may only cost a few hundred bucks, but its cheaper than buying a different mill. Machinery isnt that hard to rebuild either. If you have any questions or need a few tips and cheats let me know. Im only down in San Diego so if you needed the help im only a short ride away. Plus I wanna see this car up close.
08-09-2011 #12
Registered User
- Join Date
- Jul 2011
- Posts
- 15
great job documenting all of the fab work youve done! the car is truly going to be a one of the kind!
keep up the good work!
-Andy
08-09-2011 #13
Registered User
- Join Date
- Dec 2004
- Location
- California
- Posts
- 794
Tim,
When you did the drive shaft loop on the #2 crossmember how tall did you make the loop? I am going a similiar way but dont have the time to put the body back on th eframe and take it off again.
08-10-2011 #14
Registered User
- Join Date
- Jun 2010
- Location
- Georgia
- Posts
- 2,178
really cool build, would love to see it finished
08-11-2011 #15
Registered User
- Join Date
- Dec 2007
- Location
- Carlsbad, Ca
- Posts
- 1,213
thats a good question. short answer is probably 7-8" although i dont remember for sure. i had the frame set at ride height, allowed for +/- 3" of travel and added a little more to either end. i then took the ds measurement, how far back the loop was and accounted for the 3" dia of the shaft itself. you also have to remember that i dont have a stock ds tunnel so mine could be taller.Tim,
When you did the drive shaft loop on the #2 crossmember how tall did you make the loop? I am going a similiar way but dont have the time to put the body back on th eframe and take it off again.Tim
The WidowMaker: Garage Built 70 Chevelle
Special Thanks To: Rushforth Wheels, MuscleRodz, Kore3 & SC&C
Build Thread Link
08-11-2011 #16
Registered User
- Join Date
- Dec 2004
- Location
- California
- Posts
- 794
I forgot your tunnel was modified. I guess Im shooting from the hip on this one.
08-13-2011 #17
Registered User
- Join Date
- Dec 2007
- Location
- Carlsbad, Ca
- Posts
- 1,213
its going to be tough without the body. i know that my ds hit the floor way before my suspension bottomed out though. that was the main reason for the taller tunnel.I forgot your tunnel was modified. I guess Im shooting from the hip on this one.
the only thing i can think to do is use the body mount holes to try and get a close enough measurement.Tim
The WidowMaker: Garage Built 70 Chevelle
Special Thanks To: Rushforth Wheels, MuscleRodz, Kore3 & SC&C
Build Thread Link
08-17-2011 #18
Registered User
- Join Date
- Dec 2007
- Location
- Carlsbad, Ca
- Posts
- 1,213
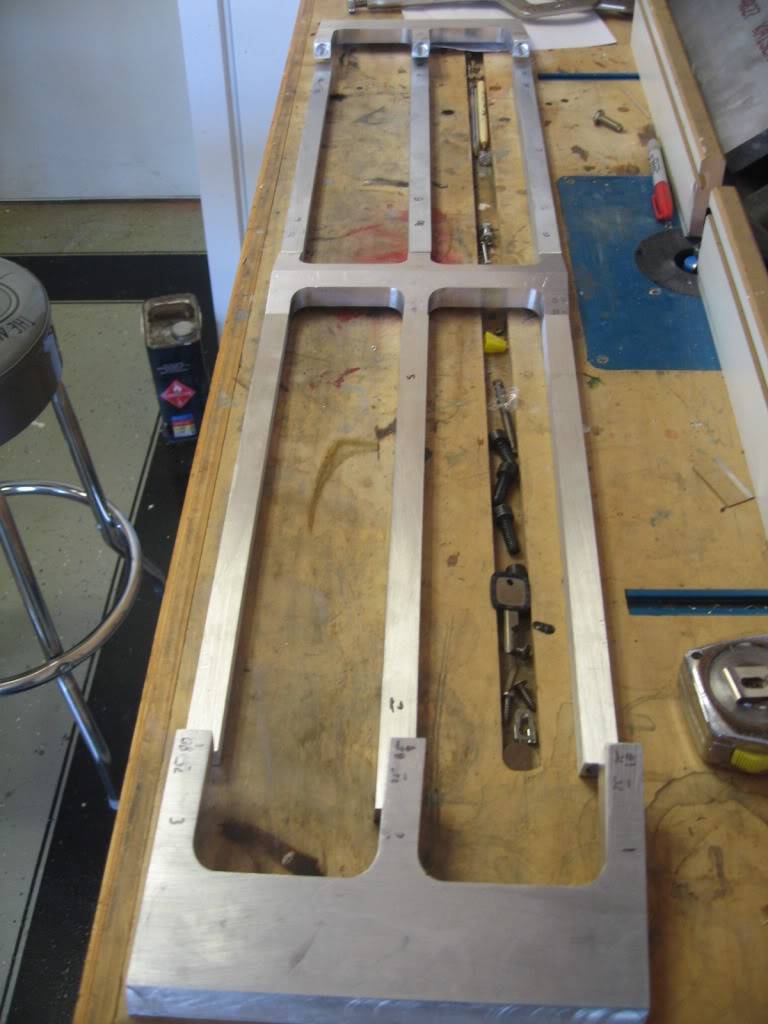
heres a pic of the grille. i still have to cut the middle bars to length and it obviously still needs to be welded. i hope to have it done by the end of next week.
im also gathering quotes right now on the motor. im still not settled on a builder, but mast, wegner and hke are the front runners. if anyone has any reviews or advice id love to hear it. if you'd rather not post, shoot me a pm.
 Tim
The WidowMaker: Garage Built 70 Chevelle
Special Thanks To: Rushforth Wheels, MuscleRodz, Kore3 & SC&C
Build Thread Link
08-18-2011 #19 Registered User
- Join Date
- Jul 2008
- Location
- ohio
- Posts
- 1,135
grill looks cool but not seeing what it looks like in my head lol
keep the wheels a spinning and the Beavers a grinning (burt reynolds-smokey and the bandit)
08-20-2011 #20
Registered User
- Join Date
- Aug 2010
- Posts
- 8
just spent the last three days reading a lil at a time like i was reading an internet book, great job and a great spot to find motivation for all our personal projects, for learning as you go you do a damn well job at it, keep it up the car looks great..

 Reply With Quote