


Results 161 to 180 of 412
Thread: '66 Pontiac Resto-Mod Update
-
12-24-2009 #161

 Registered User
- Join Date
- May 2007
- Location
- Houston, Tx
- Posts
- 2,200

looking awesome! keep it up!
Colin Russ
-
12-24-2009 #162
 Registered User
- Join Date
- Dec 2009
- Posts
- 7
All I can say is WOW! I love it.
-
12-24-2009 #163
 Registered User
- Join Date
- Aug 2008
- Location
- Pgh, PA
- Posts
- 2,177
Xmas eve status....
Thanks for the compliments, guys. Still making progress. Countdown to the show is ticking away fast!
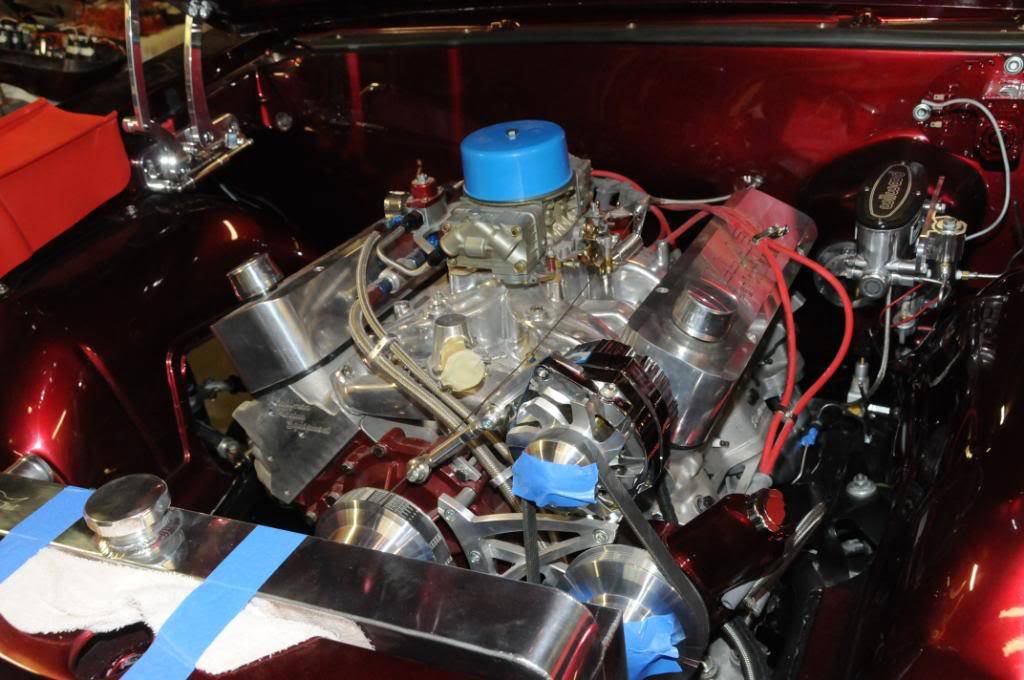
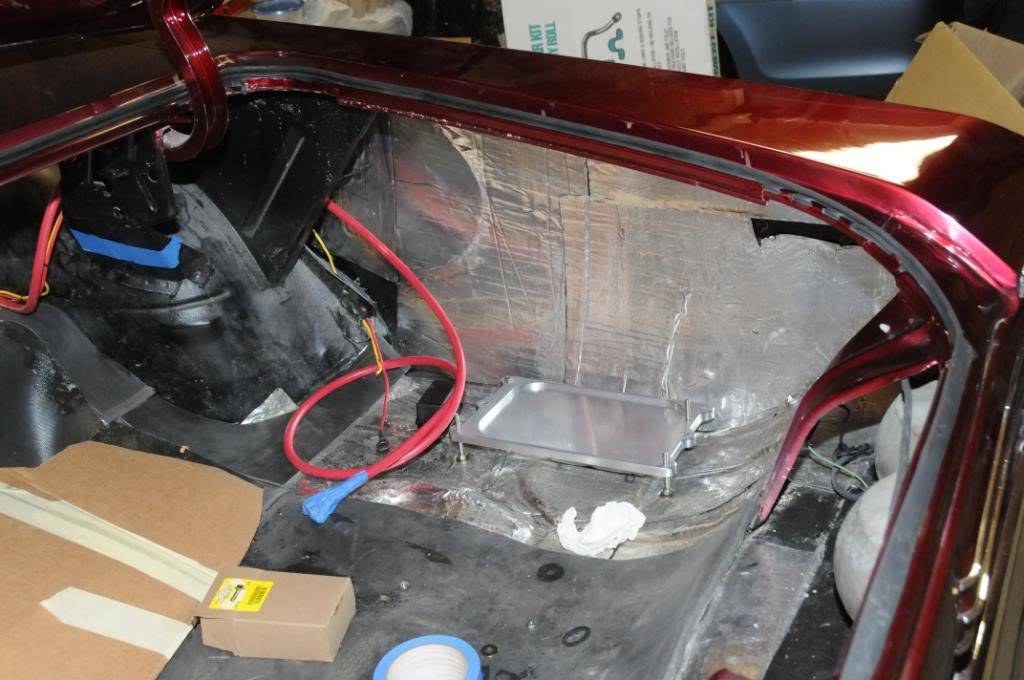
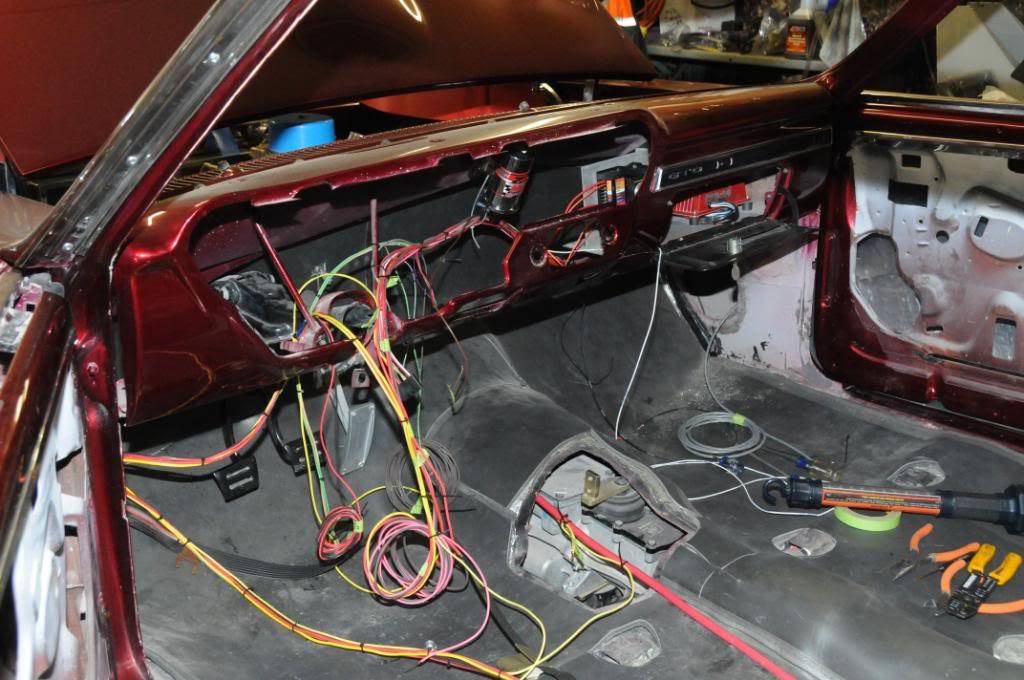
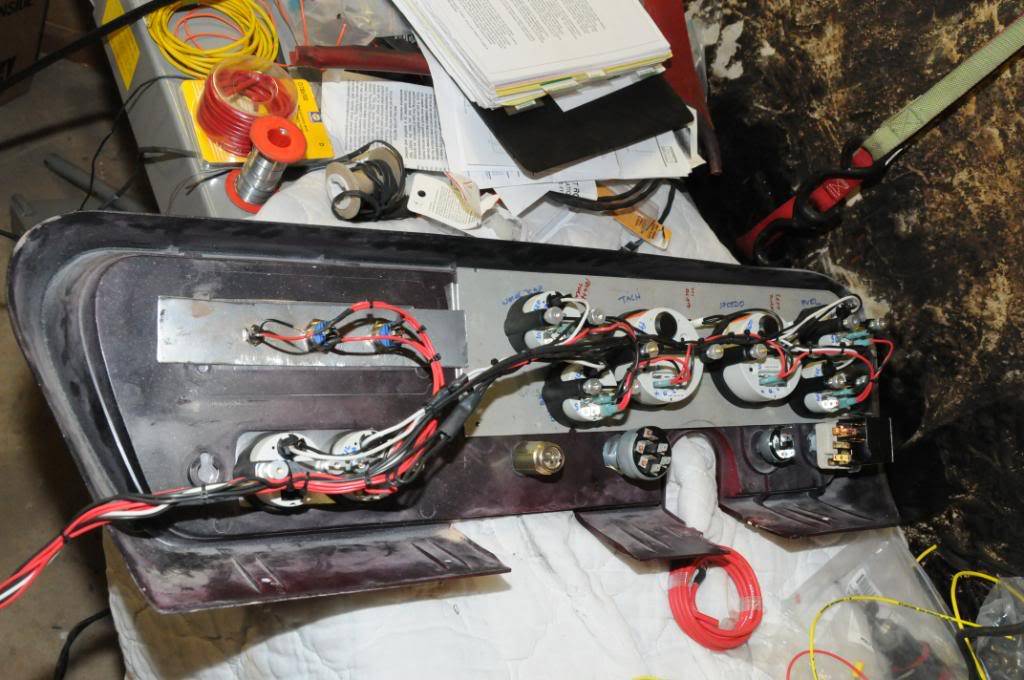
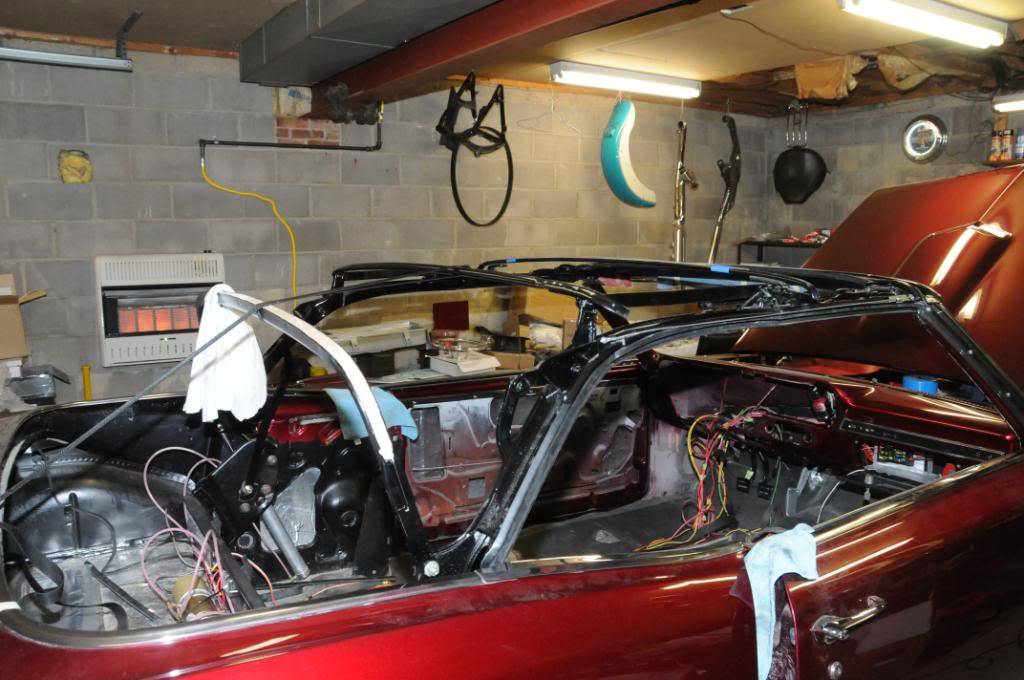
Front end and engine compartment is just about done with wiring. Headlights done, markers/turn signals wired - just need to put the plugs on. Starter, alternator, fuel pressure and water temp sending unit wires are routed and attached, with some "round-it" black fabric covers. Just need the wiper motor, oil pressure, line lock and oil temp to finish up in the front. When done, you'll see almost no wires whatsoever. Rear end is also well along. Remote battery plate temporarily mounted - still need to make some bushings for final mounting due to the irregular floor height. Need to install the remote solenoid and the master switch along with the main power fuse. All quick work. Almost all wires going from either the front or the rear of the car to under the dash are routed. Some are already tied into the fuse box. Instrument panel is almost wired, with quick disconnects.
-
12-24-2009 #164
Registered User
- Join Date
- Aug 2008
- Location
- Pgh, PA
- Posts
- 2,177
Also - don't focus on either the dust - or the unfinished trunk, etc. The trunk side upholstery panels already have forms, and the front and rear should be done sometime next week. The battery will be hidden behind the passenger panel.
The convertible top frame is now ready - with the exception of one bushing I need to swap. A 2 minute job. Rear bow is filled and ready for staples. Inserts are in the front bow, and weather stripping is on.
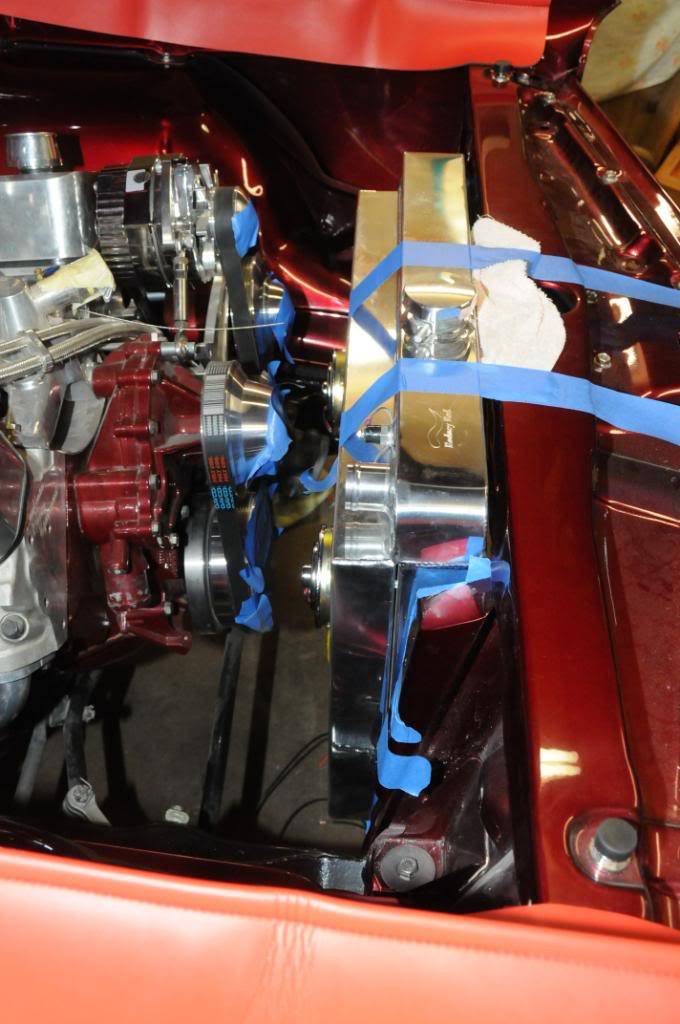
The new radiator is mocked in place. I still need to finish the mounting brackets (they'll be on the sides, to mount to the boxed core support mounting surfaces - all fabricated. The Rodney Red radiator is a very nice piece, and the fitment and quality are excellent.

I've got an appt to install glass on Jan 4th. The glass is already there and prepped. Should be done by close of business on the 5th. Exhaust is a bigger problem. I got the materials from Ram Air Restorations. 3" at the header flanges going to 3" oval X-pipe, to 3" spintech mufflers, to 3" round tail pipes. All mandrel bent - nice stuff. Problem is that there are only a couple "good" exhaust guys around here. One guy can't fit me in for several months. The other guy is a bit harder to work with. Plus, ideally I want him to mount the exhaust and fit it, then I'd like to remove it, finish the welds, and have it ceramic coated and polished. We'll see how that works out.
My goal over the next week is to finish the wiring, get the steering and dash back in, install the gas tank, and do some more detailing. I have some bolts on the core support (all stainless) that I want to polish also.
-
12-24-2009 #165
Registered User
- Join Date
- Aug 2008
- Location
- Pgh, PA
- Posts
- 2,177
Thanks, Jim. I found the product you're talking about, and I'm going to take a hard look at it. I'm not sure I want the cross shafts anything but black, but I'm thinking about it. Originally Posted by Jim Nilsen

There may be a few opportunities to get some pics of the car outside in the next few weeks as I'm loading/unloading it in the trailer to take it for glass, exhaust, and then back to the paint shop for final detailing before the show. Of course, getting a sunny day here in the Pittsburgh area in the winter at the same time I'm loading the car may be a long shot....
-
12-24-2009 #166
Registered User
- Join Date
- Aug 2008
- Location
- Pgh, PA
- Posts
- 2,177
One last thing before Santa shows up...
I'm also working on some graphics and display stuff for the show, and everybody kept hammering me that I needed to name the car/project for the display. I never really thought about it, and finally caved.
Based on the color of the car, and the way the build is progressed, I think I found a very appropriate name.
"Project Red Ink"
Merry Christmas!
-
12-25-2009 #167
 Registered User
- Join Date
- Nov 2006
- Location
- Ma.
- Posts
- 5,560
Your doing an awesome job!!
Wayne
Car FINALLY home !!!!!! lol
Project FNQUIK https://www.pro-touring.com/showthre...ghlight=FNQUIK
-
12-26-2009 #168
 Registered User
- Join Date
- Mar 2009
- Location
- overseas
- Posts
- 3,434
looks good
 good work!
Kevin S. (overseas in Germany)
1963 Chevrolet Impala 2d ht Coupe
www.CruznArt.com
CRUZN - Automotive Artworks
-
12-27-2009 #169
Registered User
- Join Date
- Aug 2008
- Location
- Pgh, PA
- Posts
- 2,177
Hey Jim, thanks for the idea - but I went ahead with paint. It really looked to me like the Calyx stuff worked best with more porous materials such as cast. These arms are pretty dense hardened steel, and may be the wrong application - plus it would be next to impossible to get the stuff in the cracks down the road without getting it all over the black frame and arms. Originally Posted by Jim Nilsen
However, I'm getting started helping my pap with a '54 Chevy 3100, and we'll be getting some of this stuff for the Felton split manifolds for the stovepipe 6 in it - so thanks for the tip!
-
12-27-2009 #170
 Registered User
- Join Date
- Apr 2001
- Location
- Rockford Illinois
- Posts
- 3,949
You are correct about the finish being better painted, I have sprayed lint free wrags before with paint from a can and wiped it on in thin coats in a pinch to look good but it still doesn't get to the nooks and crannies that you can with the Calyx. It would look better than rust and cast rust is what it covers best but it does cover just about anything. Originally Posted by wmhjr
It's perfect for the manifolds on the Chevy and a whole bunch of other parts if you are going original look ,you will use a container of it by the time you are done. A little goes a long way but you do have to touch it up from time to time which is just like doing the detail for a show anyway.
I hope you enjoy the show .May The Horsepower Be With You !!!
-
12-27-2009 #171
Registered User
- Join Date
- Aug 2008
- Location
- Pgh, PA
- Posts
- 2,177
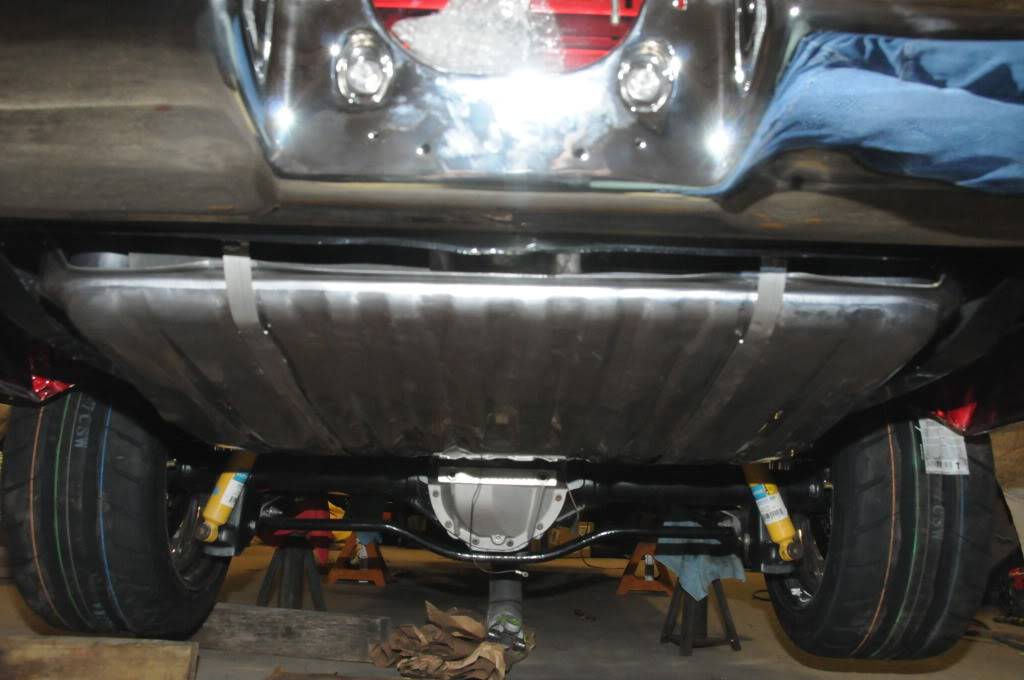
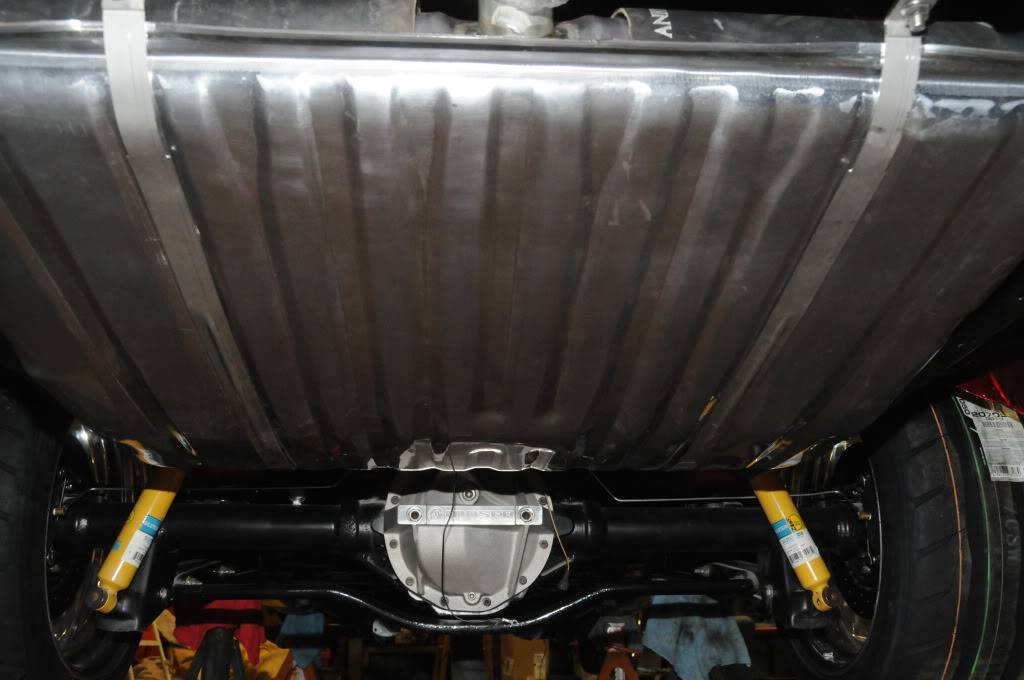
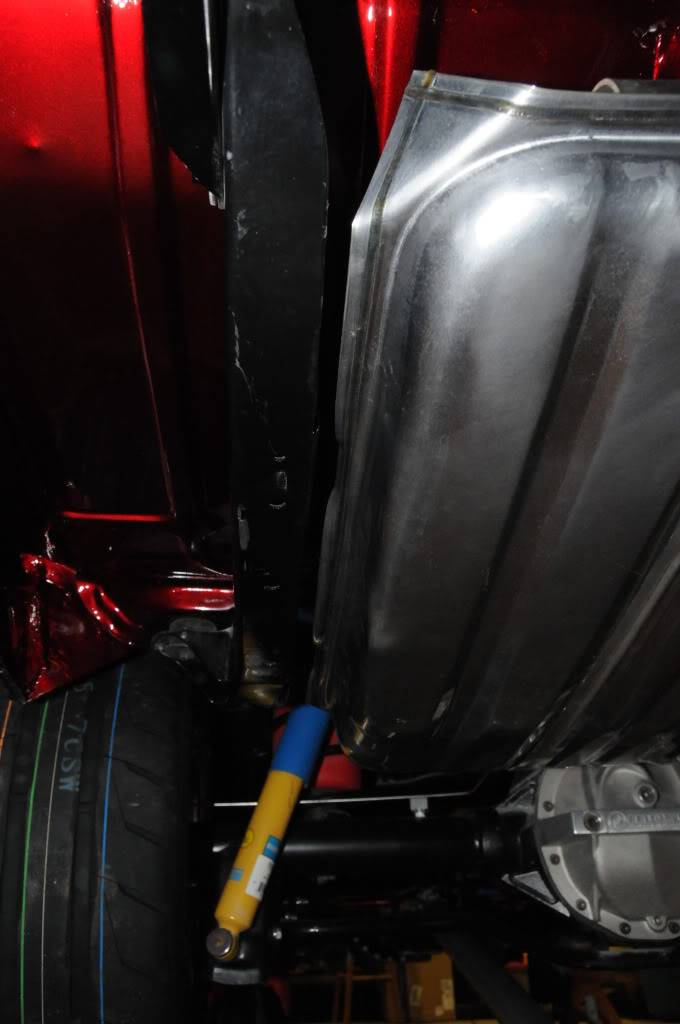
Got a little more done. Fuel tank is in - man the stainless straps were tight! Tank is clear powder coated. Doesn't look too bad.
-
01-02-2010 #172
 Starting The Transformation
- Join Date
- Nov 2006
- Location
- NH
- Posts
- 269
Hey Bill,
I've looked over you entire post and I am truely amazed as what you have done in little over a year!
Fantastic job!
Let me know if you'd like to hook up once the car is running in the spring and maybe we can arrange for me to do a final live tune to your combo in person.
When is your WW show?
Jeff
-
01-02-2010 #173
Banned
- Join Date
- Aug 2003
- Location
- Orlando, FL
- Posts
- 8,745
Just poped in to catch up on this one. Lookin good man.
Can't wait to see it done.
-
01-02-2010 #174
Registered User
- Join Date
- Aug 2008
- Location
- Pgh, PA
- Posts
- 2,177
Frank and Jeff - thanks! Jeff, the WW show is Jan 22-24. As you can imagine, I'm busier than I'd like to be right now. Just shut down the shop for tonight. Back at it in the AM. Here are some more update pics...
Radiator is in, and connected
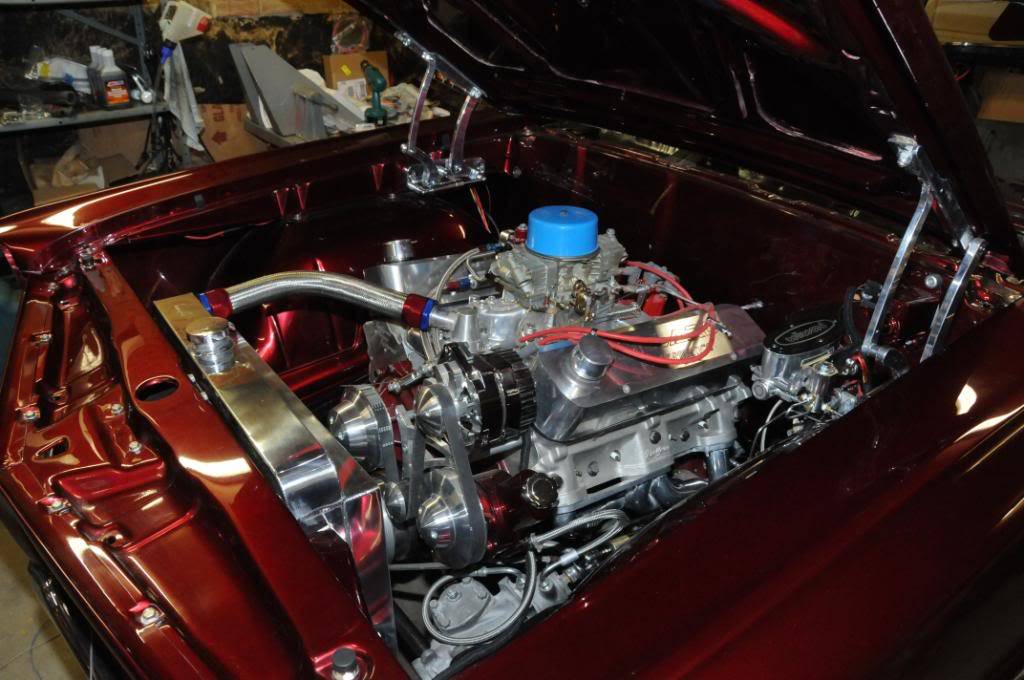
I don't like where the clamp head is on the water pump connection, but...
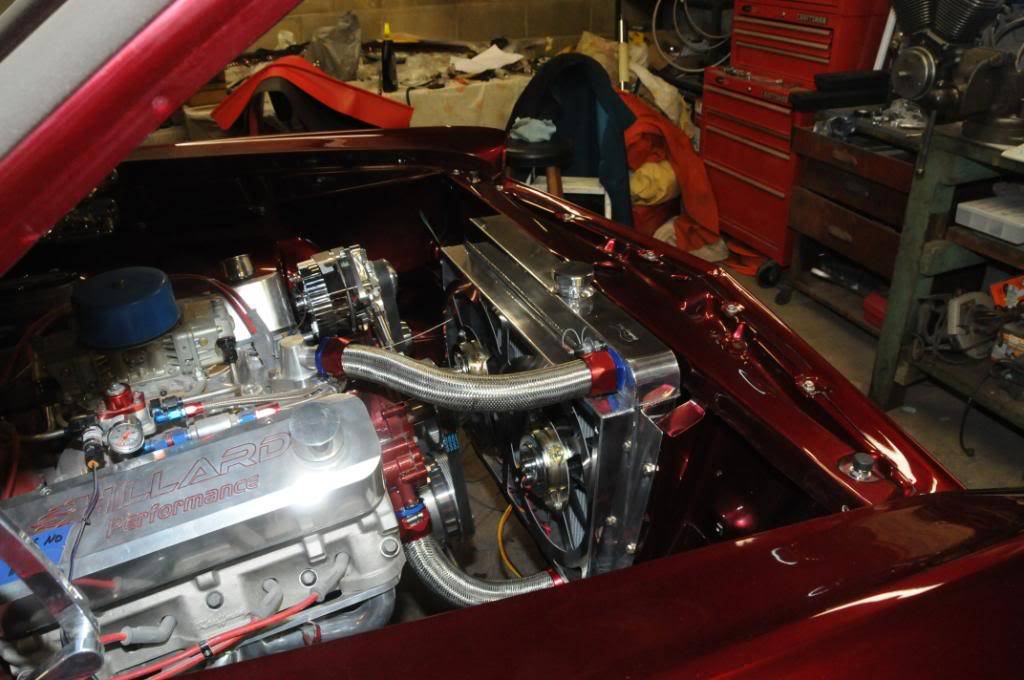
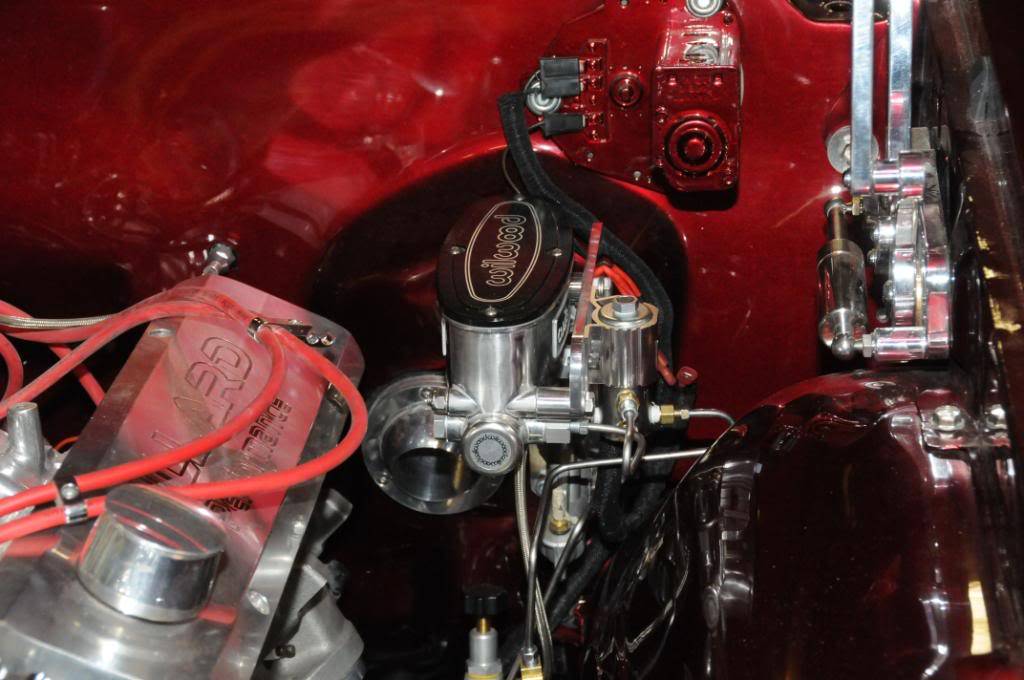
I don't like how I've run the brake lines. This will do for the first show, but I'm going to redo this. Also, billet reservoir for the clutch master cylinder mounts on the same billet plate I made that is attached to the Wilwood master. I still have to make the braided stainless line for it. I've already drilled and tapped the plate to mount it.
Trunk forms are coming along.
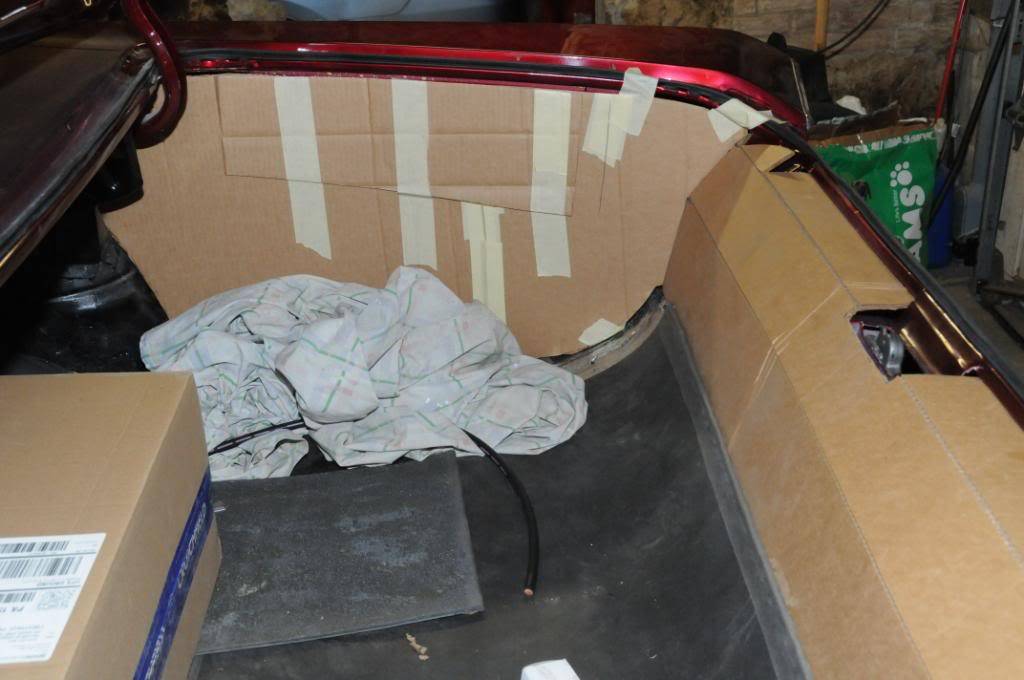
Disregard the dust in my shop - but believe it or not, the wiring is almost complete.

Tomorrow is a big day. Need to finish almost all the wiring (there are a few things that aren't critical behind a trunk panel). Need to finish the fuel tank plumbing. Install the vents, connect the driveshaft, and load the car in my trailer. Monday morning I drop it off for all the glass to be installed, and then the (already completed) interior goes in. It'll come back on Friday.
-
01-02-2010 #175
Registered User
- Join Date
- Aug 2008
- Location
- Pgh, PA
- Posts
- 2,177
Oh, a couple other things. I also installed the Hellwig front sway bar tonight. Really nice item, though I just might have a slight clearance issue with my passenger side heavy duty tie rod adjuster. It "barely" touches the sway bar. I'm going to talk to Marcus about it and look a little closer when I'm not as tired.
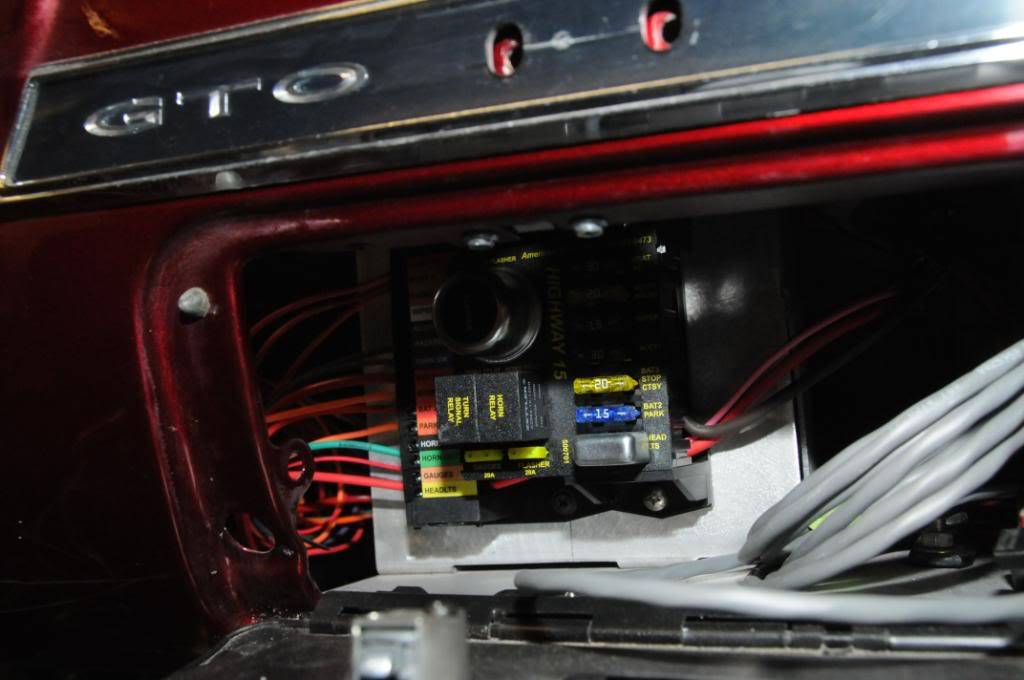
Also, I've used the AAW Highway 15 wiring harness mainly in this car - though it's been modified a bit. But, I have to say it's been pretty good to work with, and the box is a nice form factor, well laid out and marked
Here you can see the aluminum bracket assembly I built for in the glove box. On the left you see the box, nice and neat. To the right the pic doesn't show the MSD 6AL-2 ignition mounted on the same panel. It's turning out real nice. Oh, and disregard the black "GTO grab bar" plate in the pic. That won't be there, and I have something nice to replace it with
-
01-02-2010 #176
Registered User
- Join Date
- Nov 2006
- Location
- Ma.
- Posts
- 5,560
Nice progress its looking good.
Wayne
Car FINALLY home !!!!!! lol
Project FNQUIK https://www.pro-touring.com/showthre...ghlight=FNQUIK
-
01-02-2010 #177
 Registered User
- Join Date
- Nov 2008
- Location
- Lawrenceville, Ga.
- Posts
- 128
Great job so far ...... I can't say enough about the direction & exicution on this project.
Keep it roll'n
Ratty 46 aka/ Paul
-
01-04-2010 #178
Registered User
- Join Date
- Aug 2008
- Location
- Pgh, PA
- Posts
- 2,177
Thanks guys. Yesterday was a little bit of a disappointment. My buddy who is helping me with the wiring came over, but almost immediately got called away to work. As a result, my work force was cut by 50% and it had an impact. The wiring is hopefully done at this point to allow the carpet and interior to be installed. I'll know more later today. I have some concerns - normally a non-issue but timing is really becoming critical. Because the car absolutely must be delivered today for glass to be installed, and the trunk upholstery to be finished so that we'll make the show, time is critical. I didn't want to load the car after dark since I've not hooked up my interior trailer lights and didn't want to risk damage in the dark, which required me to call off work today so I can load and deliver.
So the next problem was the weather. It's been snowing, and the roads are ice covered. My daughter got stuck in my driveway this morning - almost sliding into a tree. There is ice under the snow, so even the plow isn't having much of an effect. I'm going to try and load the car after lunch and transport it then. It's only about 8 miles of a drive, but the roads really suck.
An additional problem is that the brake controller failed in my truck, AND that the washer fluid in the reservoir must be really crap because it froze the reservoir like a brick. Also, the Dodge 2500 Diesels have a reservoir that is trapped by the wiring box and the radiator/intercooler assembly that makes removing it a ridiculous job. After about 6 hours I got it thawed :(
I'm currently waiting for an announcement of the plague and am only happy because at this time of year it is unlikely that swarms of locusts will appear. Everything else seems to be happening.
-
01-04-2010 #179
Registered User
- Join Date
- Feb 2006
- Posts
- 478
Man, your car is looking great! Please don't rush and do it less than perfect. Screw the show, there will be hundreds of shows and trophies on your wall if you keep focused on doing a perfect job like you have been all along.
I love love love what you have done!!!!!!
Alex Godsey
Somerset, KY
Pro Touring 67 GTO
461 Pontiac Power
-
01-04-2010 #180
Registered User
- Join Date
- Aug 2008
- Location
- Pgh, PA
- Posts
- 2,177
Thanks for the kind words. Don't worry, I'm not reallly rushing anything any more than I would otherwise. Scheduling is just an issue. Rather than rush some things I'm actually doing some things (like some of the brake lines) now for appearance sake but will immediately remove them after the show and spend the next couple months figuring out a different routing. So, I just wasted a little tubing. The wiring that has to be done for the interior to go back in is effectively done. Stuff in the trunk around the remote solenoid and battery will be behind a bulkhead anyway and not visible, so I'm not even touching it. In other words, the car will "look" ready for the show but I'm not even going to start it. I'm driving my rig right up on the floor, and winching the car out and back in my trailer. At first it felt a little like cheating, but then I was reminded that a bunch of the cars there on display have never ever been driven, so... Originally Posted by gearbanger
Anyway, thanks. It's nice to see another early GTO guy around here who like the same stuff. BTW, keep your eyes peeled for some pics in a couple weeks. I'm putting a small touch on the car that you might appreciate - and that could maybe work for you also.....

 Reply With Quote



