


Results 61 to 80 of 412
Thread: '66 Pontiac Resto-Mod Update
-
04-27-2009 #61

 Registered User
- Join Date
- Aug 2008
- Location
- Pgh, PA
- Posts
- 2,177
Thanks for the compliments, guys.
jackfrost, if you look carefully at the rendering, you'll see it's missing a few things. I ought to make a "where's waldo" out of it!
No interior door panels, no front seats, no steering wheel, no badging at all, no rocker trim on the front fender or quarter panel... Though it's already on the body itself (in the center). The wheel sizing needs to change a little, and decisions still to be made about which wheels. And, there will be a similar rear/quarter view similar to this one but from the opposite angle.
-
04-28-2009 #62
Registered User
- Join Date
- Aug 2008
- Location
- Pgh, PA
- Posts
- 2,177
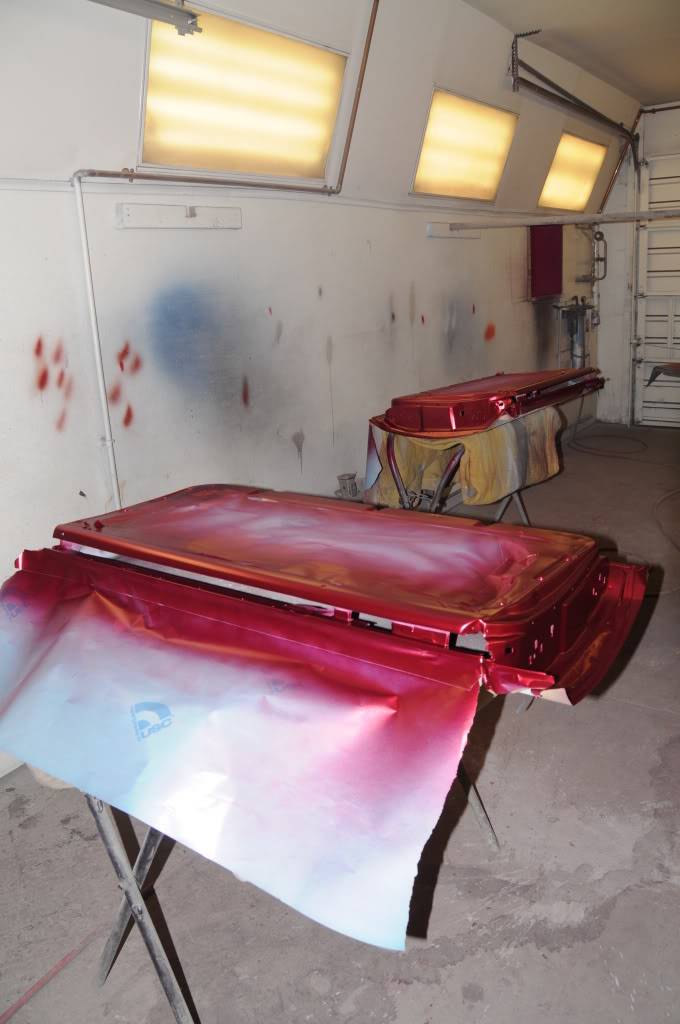
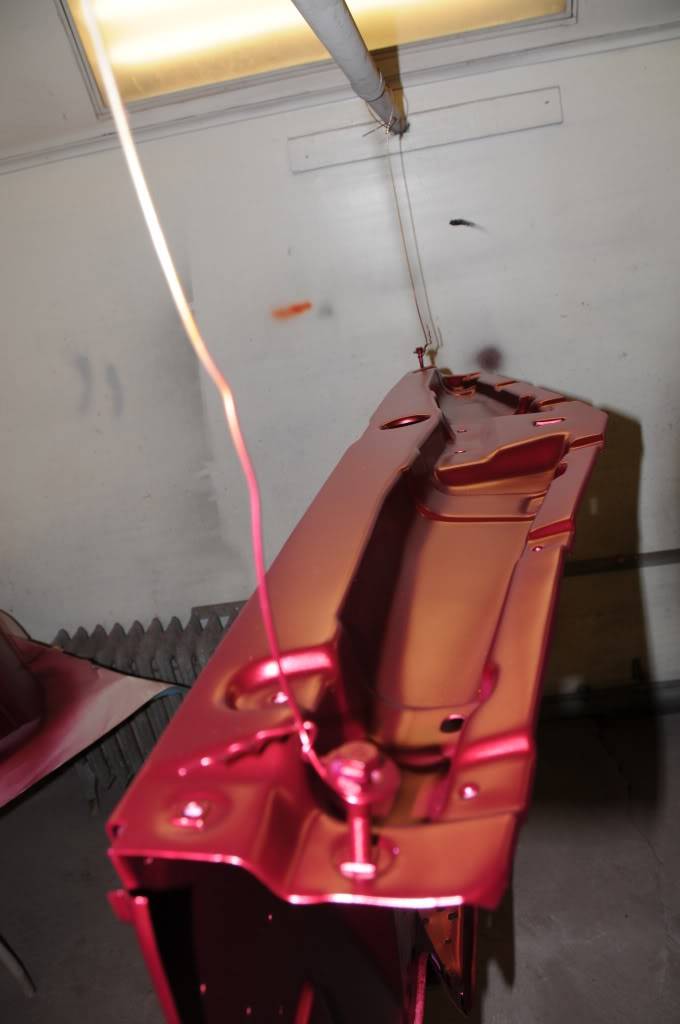
Another short update....
First basecoat for the Tri-Coat cabernet is being laid down on the inner fenders, core support, and inside of doors. The pics aren't that accurate. It really looks kind of "rose" colored. It's amazing how much it changes with the tint coat (2nd color) and then again when you lay clear on it.
04-28-2009 #63
Registered User
- Join Date
- Aug 2004
- Location
- Dunwoody, GA
- Posts
- 4,983

The rendering looks great. I love the color choice and your plans. This car will turn heads. Good job.
Trey
"The early bird may get the worm, but the second mouse gets the cheese."
~ Jon Hammond
1979 WS6 Trans Am stock LT1/T56 drive train out of my Formula. BMW M-parallel rims. C5/C6 brakes
build thread https://www.pro-touring.com/showthre...ghlight=begins
05-05-2009 #64
Registered User
- Join Date
- Aug 2008
- Location
- Pgh, PA
- Posts
- 2,177
Tuesday 5 May 09 update
Well, lots of block sanding and finishing going on right now. My paint guy is so paranoid about the car being perfect that he's wanting to spray the entire car with a coat or two of black later this week in order to be able to check for any imperfections in either being straight or any blemishes. By the end of the weekend, then jamb it and do the windshield frame, etc, with the Cabernet - and then next week move on to the entire car.
Hopefully the new steering wheel will arrive by the weekend. I'll then take a front seat, the column/shaft/u-joint and the new wheel and adapter to mock up the column and cut the shaft. I made a clay molding of the aluminum plate for the firewall where the column comes through and where the clutch master cylinder will mount. I'll make another one after the column is in so I know what to machine out of the plate.
Also mocked up a set of shelf/brackets for behind the glove box, where I'm mounting the AAW Highway 15 box and the MSD 6AL2 ignition box.
I'm also hoping that the new Wilwood setup will arrive by the middle of next week. After the car is painted, it needs to "cure" a couple weeks. I'm hoping to swap the new Wilwood brake setup in, and get the wiring mostly done, during that 2 week window. We'll see - it's a pretty aggressive schedule.
05-05-2009 #65
Registered User
- Join Date
- Feb 2006
- Posts
- 478
What is a AAW Highway 15 box?
Alex Godsey
Somerset, KY
Pro Touring 67 GTO
461 Pontiac Power
05-06-2009 #66
Registered User
- Join Date
- Aug 2008
- Location
- Pgh, PA
- Posts
- 2,177
Fuse box for wiring harness. Since this is a ground up, frame off, build I'm not using the original wiring harness. I'm using an American Auto Wire Highway 15 setup. I've also welded shut the square opening in the firewall where the junction connector for all the wires went through, and will be hiding most of the wiring. Instead, I'm going to put the fuse box (and the MSD 6AL2 ignition) in where the glove box would normally go, and run the wires through the firewall in a different spot and then between the fenders and inner fenders to get them forward where required. Hoping to keep the engine bay as clean as possible. Originally Posted by gearbanger

05-06-2009 #67
Registered User
- Join Date
- Aug 2008
- Location
- Pgh, PA
- Posts
- 2,177
Getting ready to head out of town for a couple days. But as of today, almost everything is ready for paint after a bit of cleanup and assembly. Block sanding pretty much done, just need the inside of the trunk lid finished up. Modified dash pad complete. Here are some pics of it. Everything you see will be body color. Dash face is clear-coated engine turned aluminum with Autometer gauges.
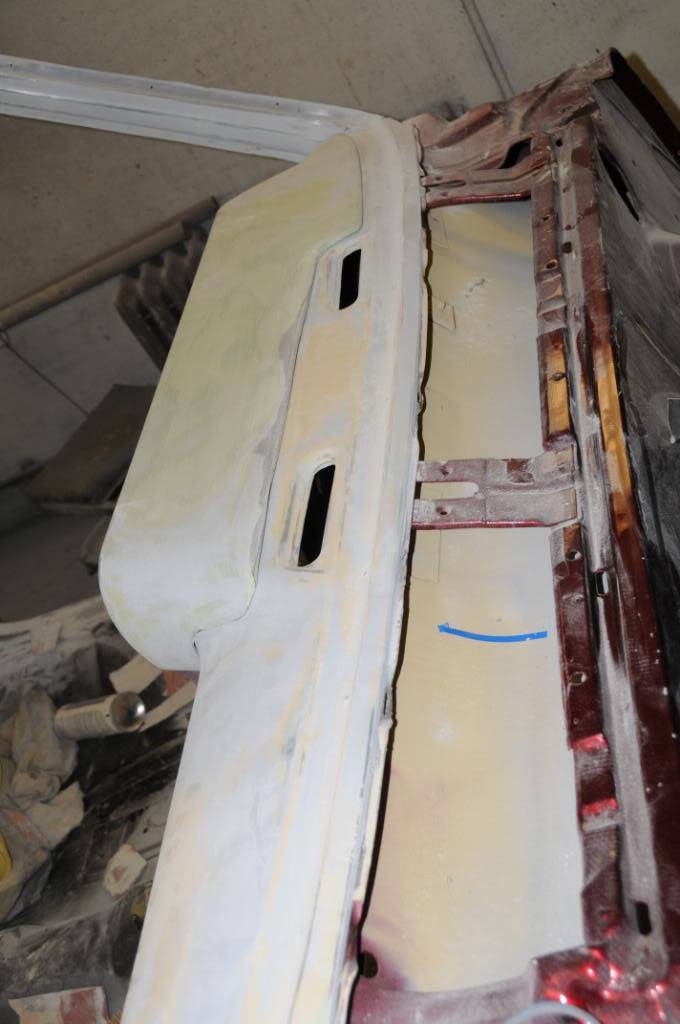
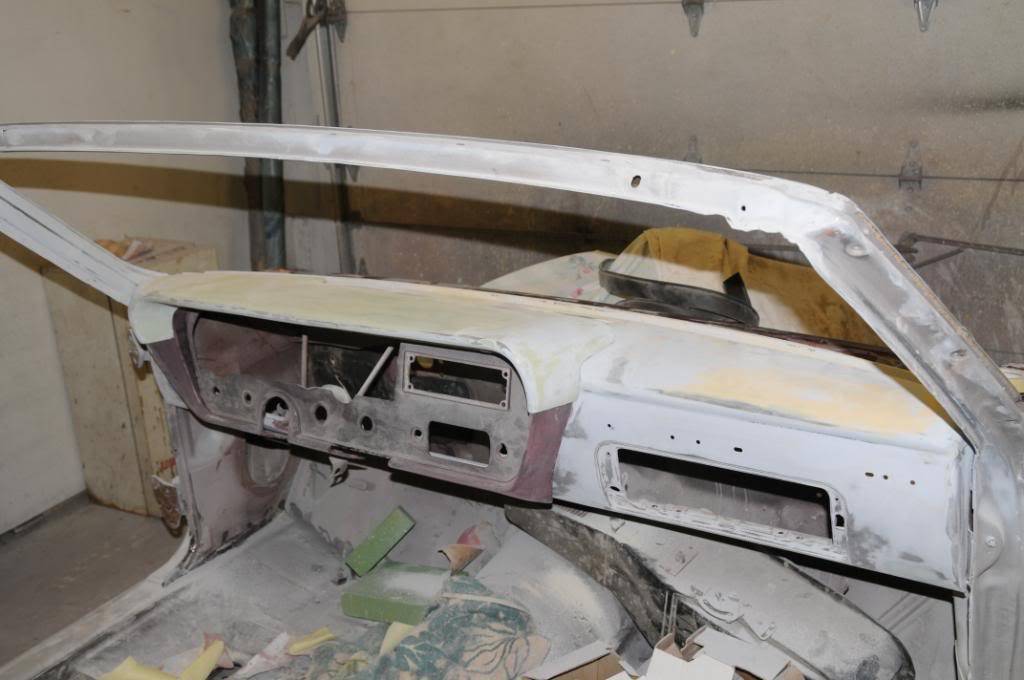
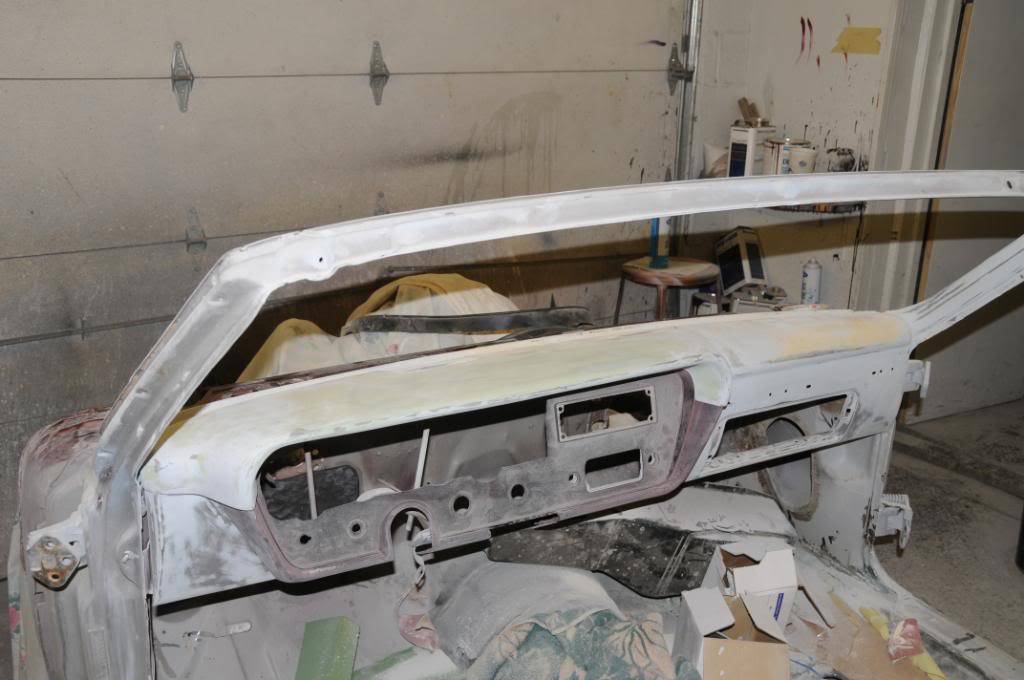
Body looks straight and smooth
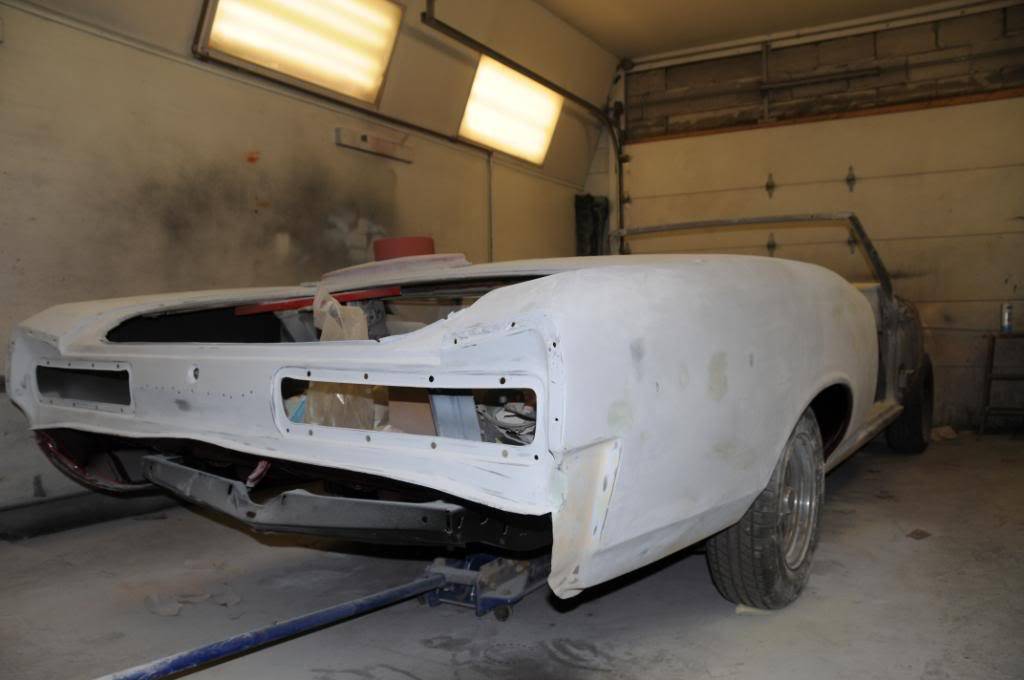
Using "self hardening" clay to make a mold for the aluminum piece on the firewall. Only problem is that it ain't hardening much :( Will still need to machine for the Ididit steering column and hydraulic clutch master cylinder
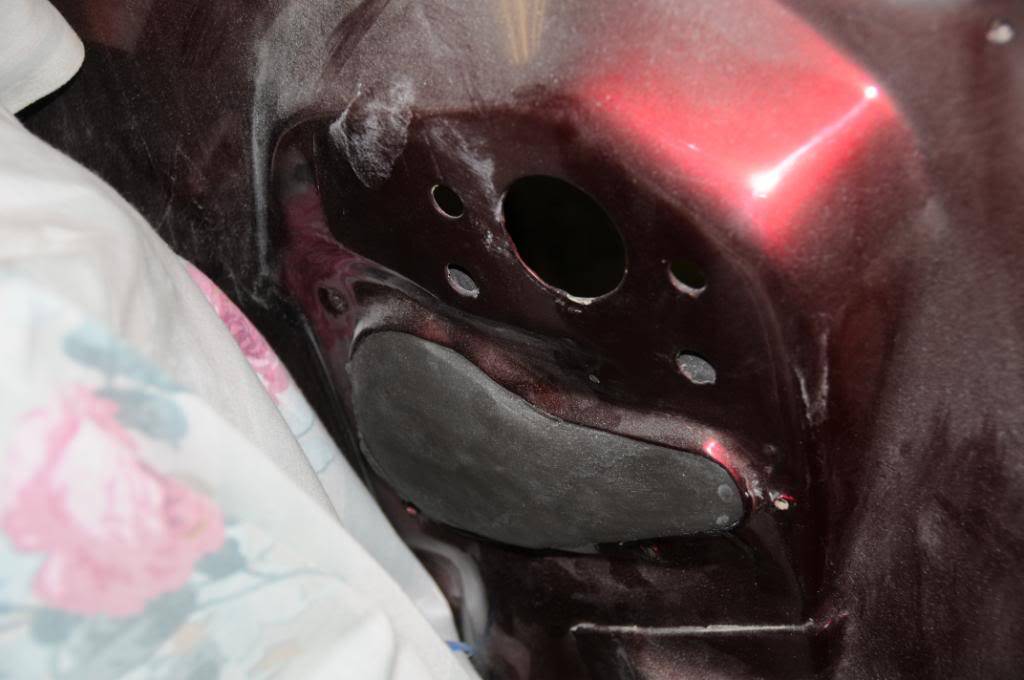
Inside of fenders are done, and if you ignore the dust, look great. Outside are ready for paint.
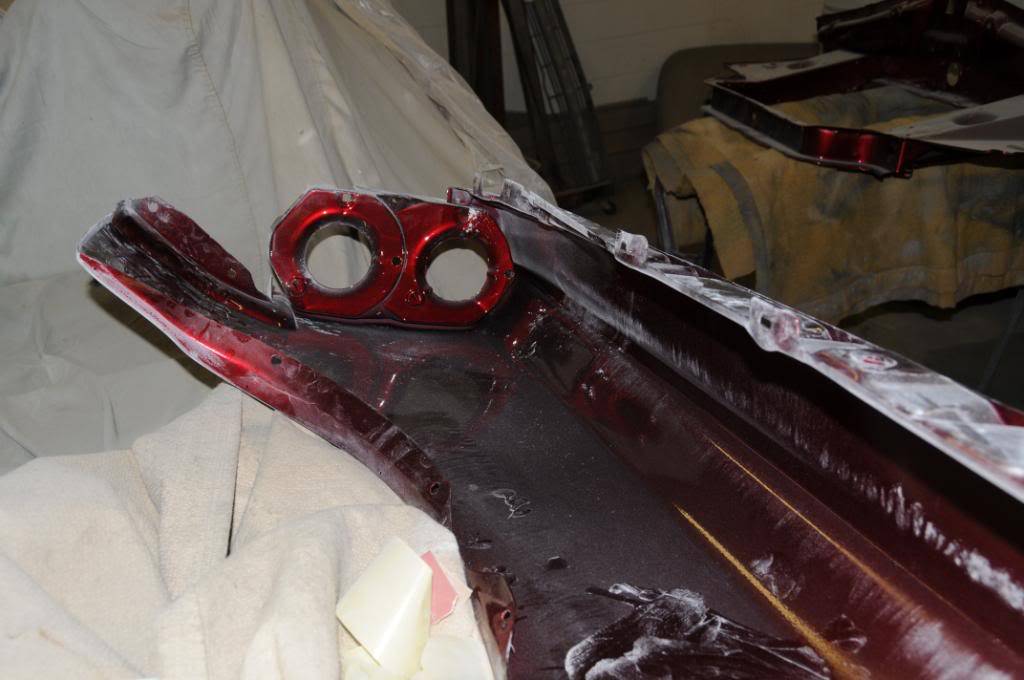
Hoping that by the end of next week, things are going to be looking REAL purty.
05-10-2009 #68
Registered User
- Join Date
- Aug 2008
- Location
- Pgh, PA
- Posts
- 2,177
Progress continues
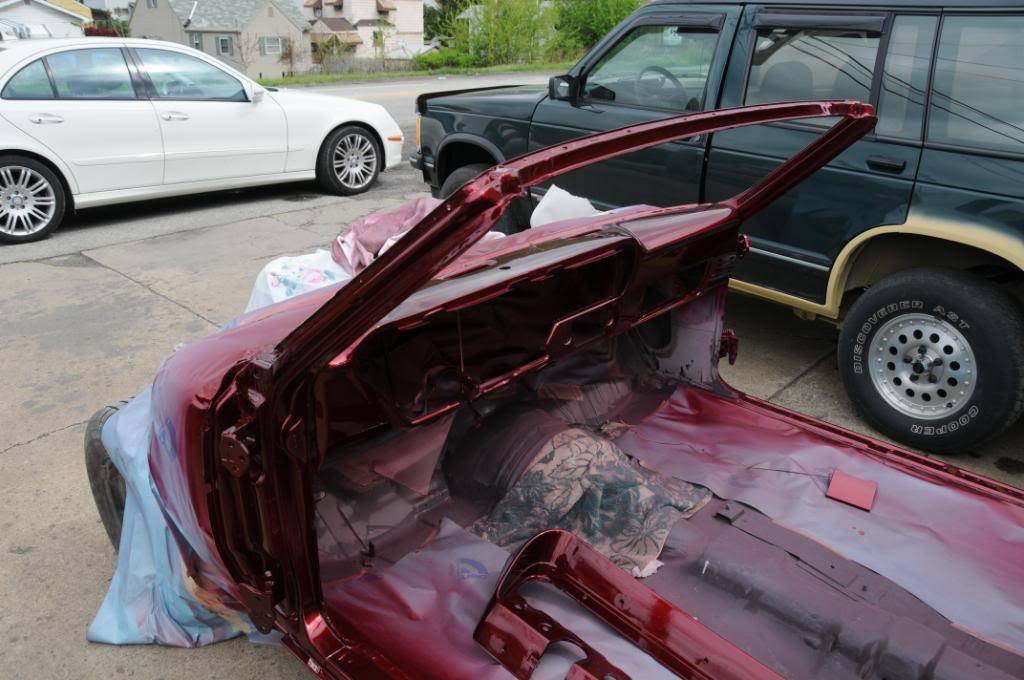
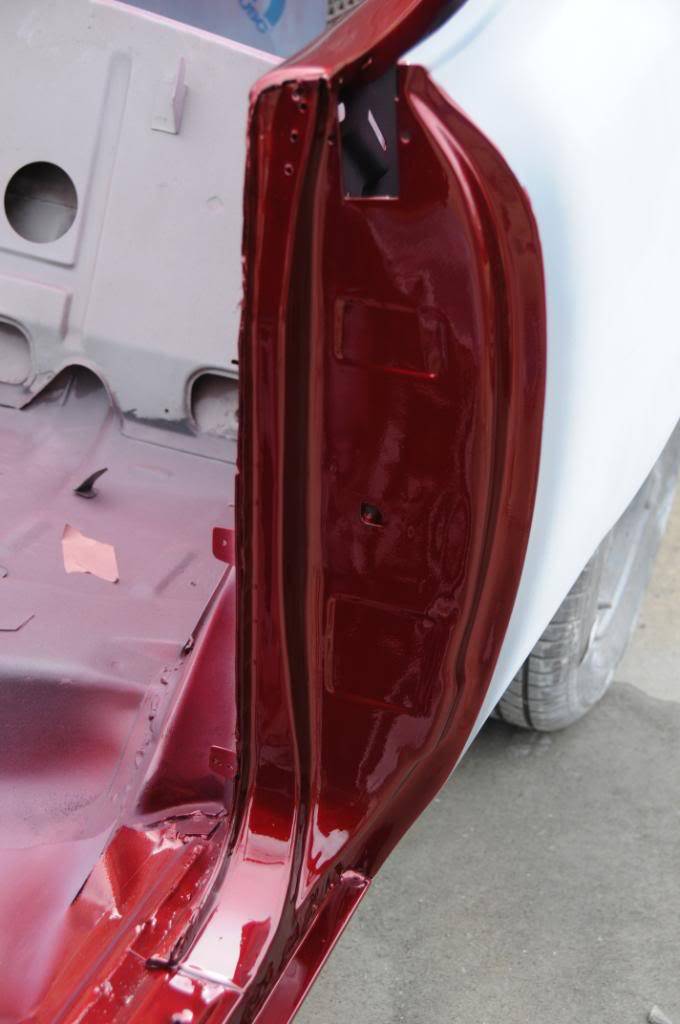
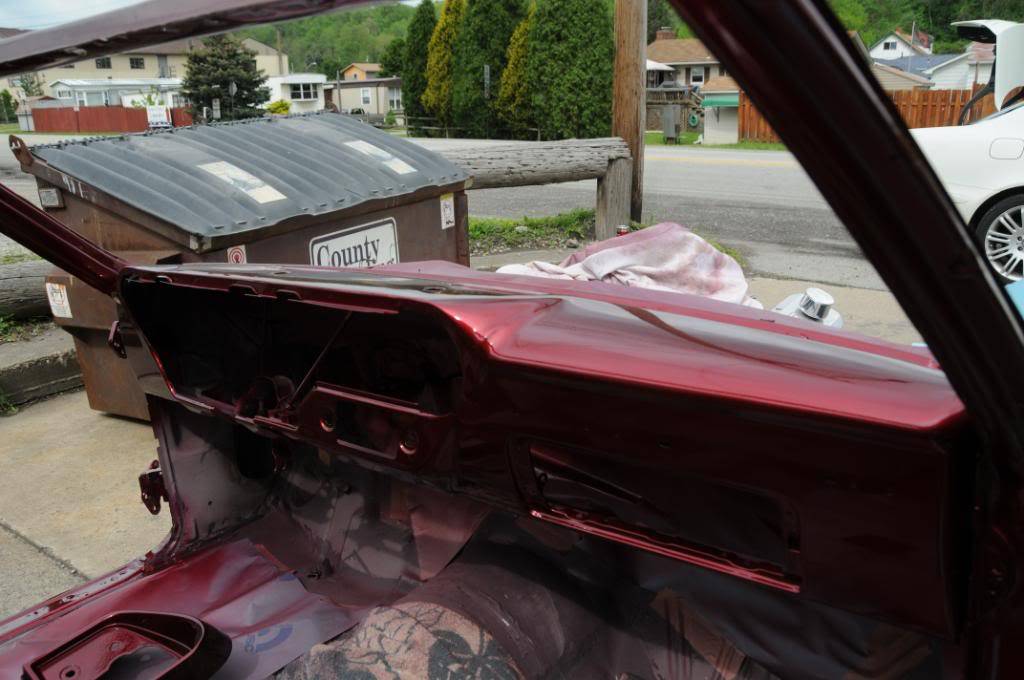
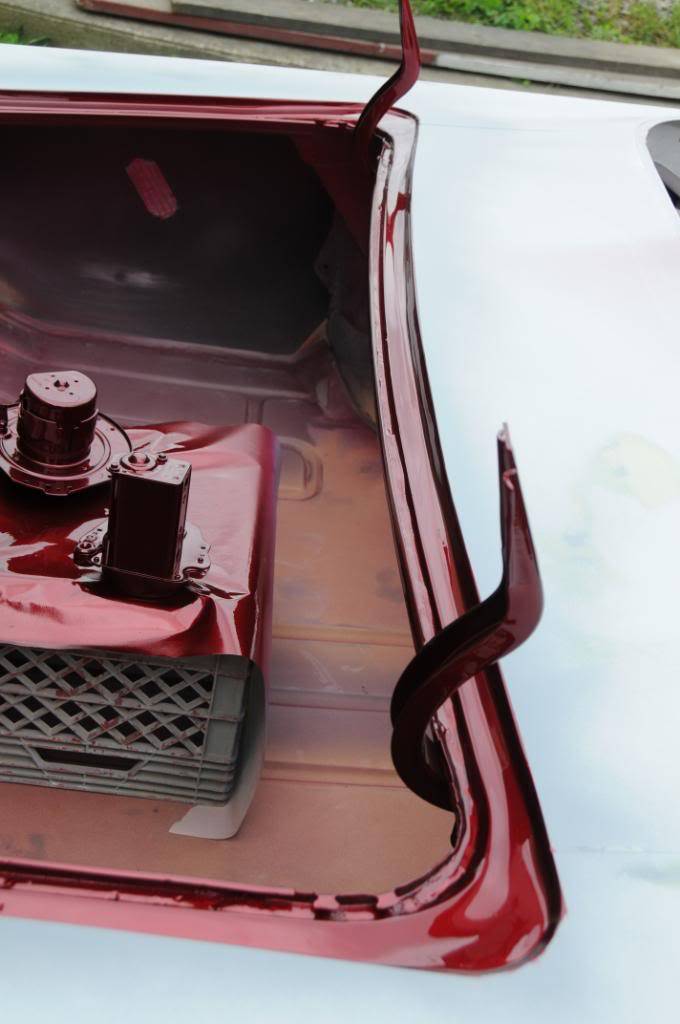
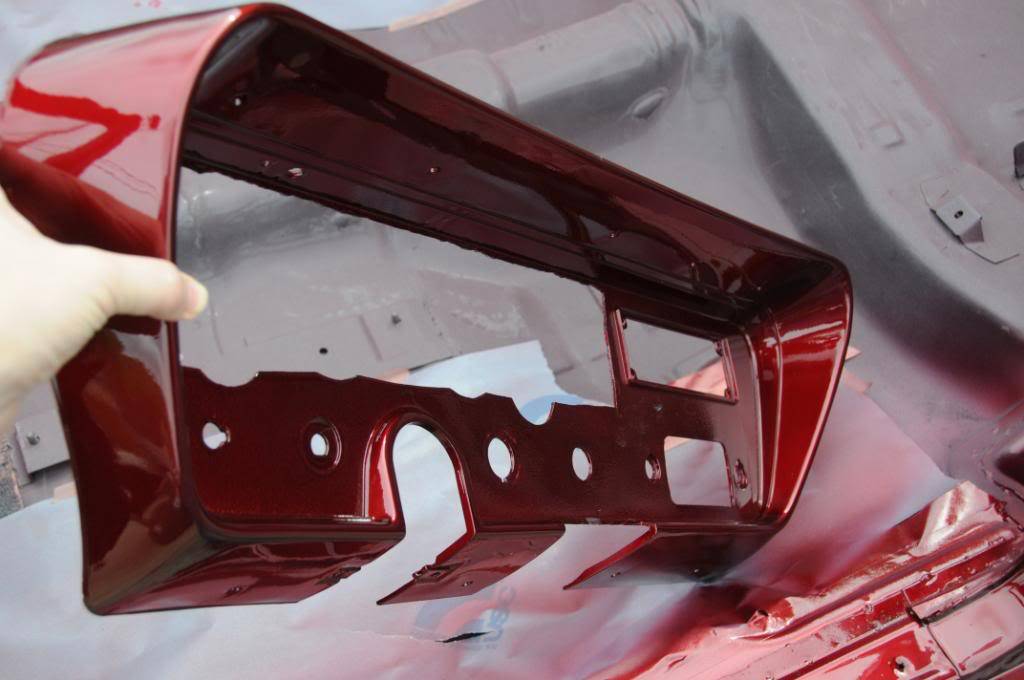
Mocked up the new Ididit steering column, the Billet Specialties wheel and adapter yesterday as well as taking a look at the progress. Door jambs, dash, dash bezel, trunk lip, windshield frame all painted. Starting to look really nice. The paint here is about a day old. Obviously it hasn't been sanded or buffed. The more I see the paint the more I like the color.
05-10-2009 #69
Registered User
- Join Date
- Jan 2005
- Location
- Dallas TX
- Posts
- 1,633
looking really good

05-10-2009 #70 Registered User
- Join Date
- Dec 2006
- Location
- summerville,sc
- Posts
- 160
loving the color and the big boat pontiac.

05-10-2009 #71 Registered User
- Join Date
- Nov 2006
- Location
- Ma.
- Posts
- 5,560
Your car is looking great. nice color
Wayne
Car FINALLY home !!!!!! lol
Project FNQUIK https://www.pro-touring.com/showthre...ghlight=FNQUIK
05-11-2009 #72
Registered User
- Join Date
- Aug 2008
- Location
- Pgh, PA
- Posts
- 2,177
"Big boat"? You realize it's an A-Body, right? I mean, it's bigger than an F, but not much. Weight wise it's about the same. Originally Posted by GM_muscle
05-14-2009 #73
Registered User
- Join Date
- Aug 2008
- Location
- Pgh, PA
- Posts
- 2,177
Progress as of May 14th
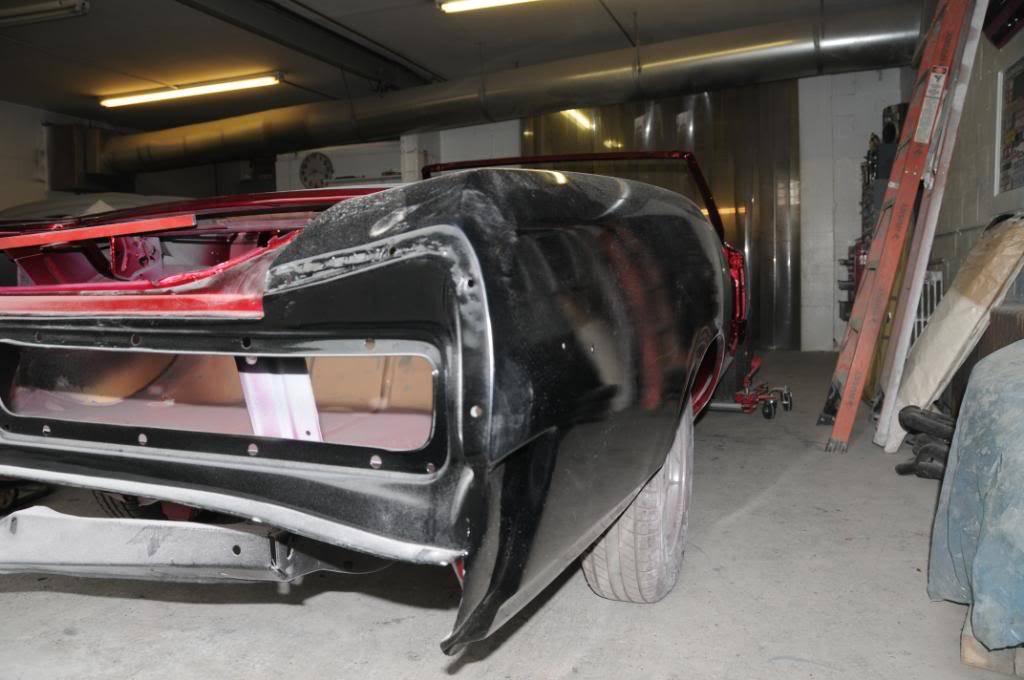
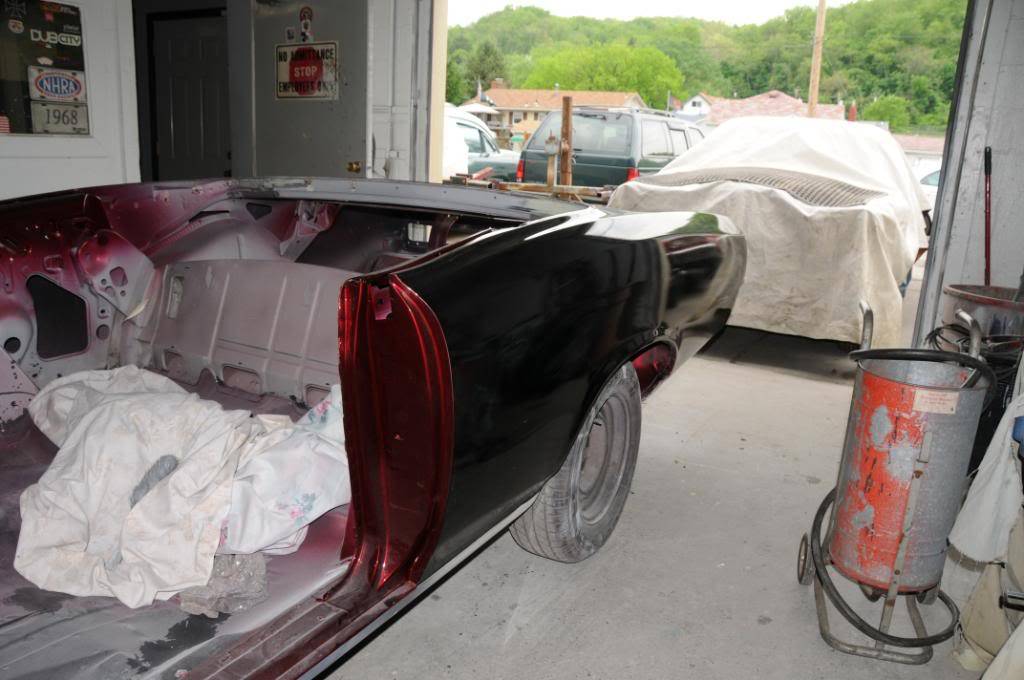
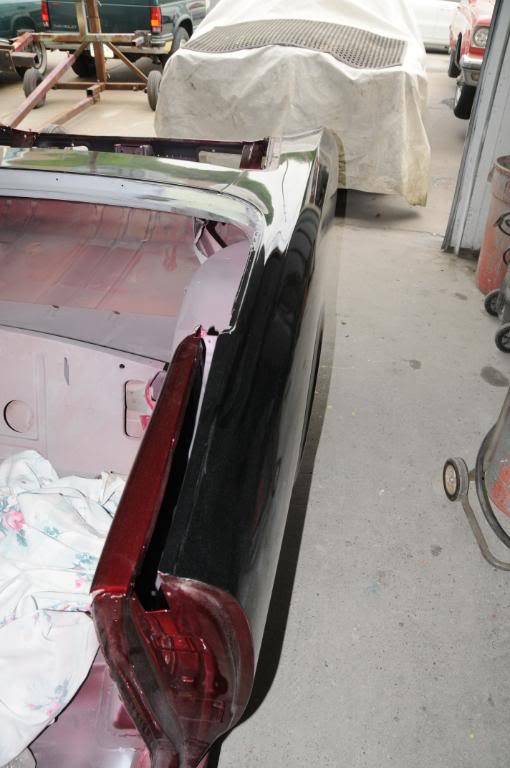
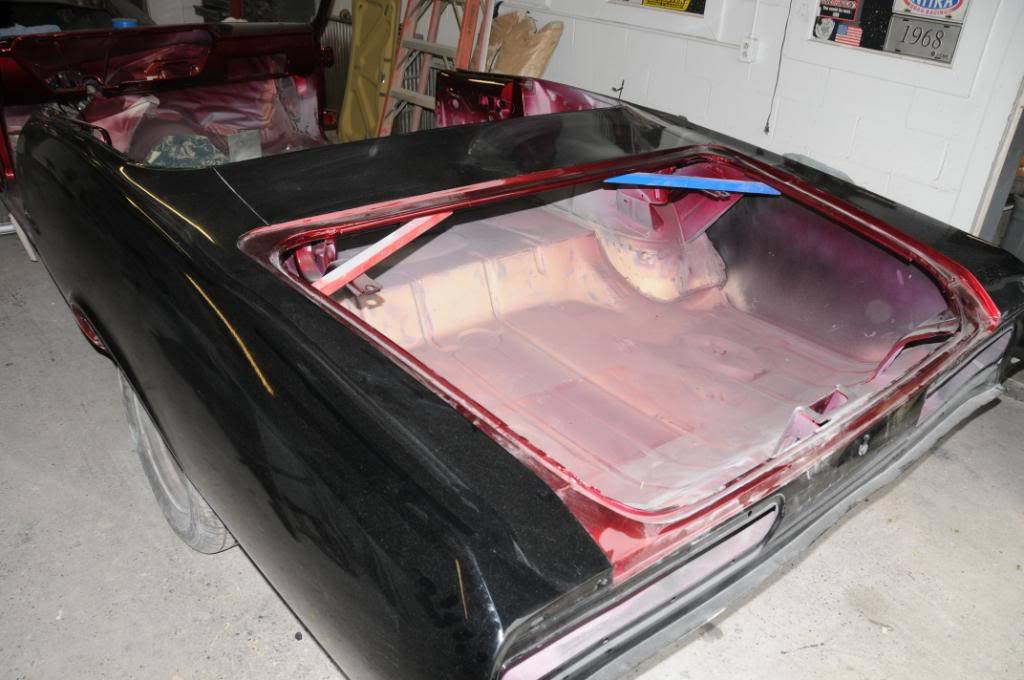
Got the bracket fabbed for mounting the fuse box and MSD 6AL2 ignition in the glove box area. Body panels have been painted black. Glad we did that. Though honestly everything looks really good, there is a spot on each quarter that isn't exactly perfect, and you just couldn't see it that well before the black was on. It's very minor and we'll be able to correct it with a small amount of blocking. The next couple days should fix that up, and then it's prep time for final paint. I got a box with some brake stuff delivered, but am waiting on the bulk of the Wilwood setup. Before making any wheel decisions, I want to get the rear hubs swapped so I can verify that backspacing isn't changed at all. The way it is, I think I can get a Nitto 555 in 295-45-18 on the back, but it's tight enough that I've got to insure the measurements are perfect. Also got another draft of the rendering.
Here's the newest rendering - obviously still not done...

An inside view - if you look on the floor kind of below the glove box you can see the shelf/bracket for the fuse box and ignition. The fuxe box will mount vertically with wires to the left on the upright part of the bracket. The MSD 6AL2 will mount flat to the right of that.
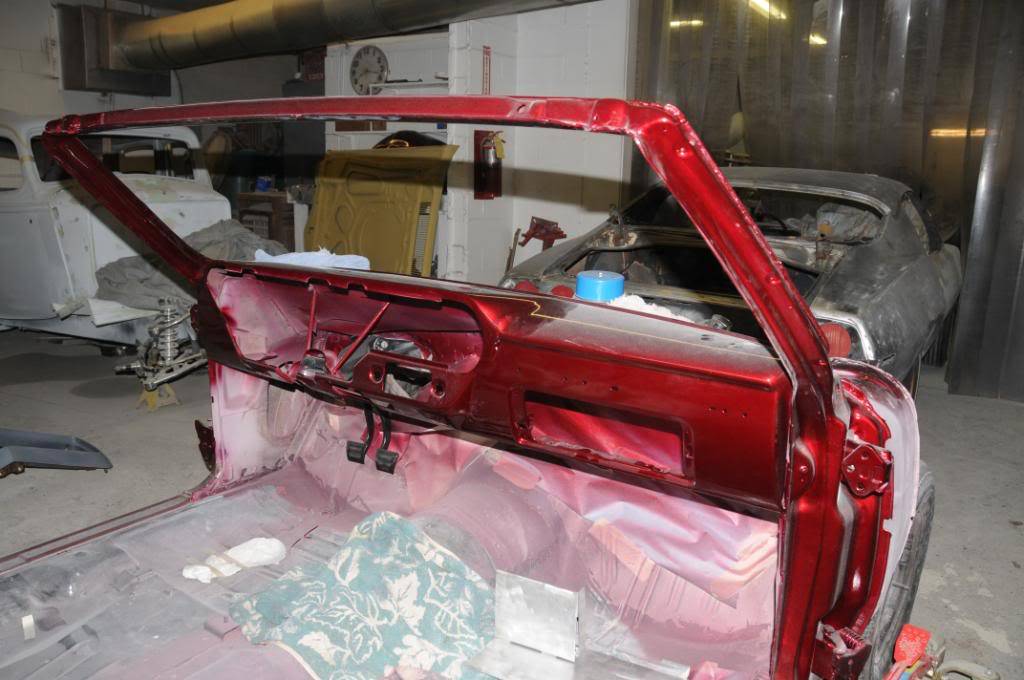
Some shots of the (now temporarily black) body work
05-17-2009 #74
Registered User
- Join Date
- Aug 2008
- Location
- Pgh, PA
- Posts
- 2,177
Well, some progress - and minor setbacks.
First, the progress. The dash bezel is done, and the engine turned aluminum panel is as well. Mocked up the assembly to insure correct fitment before putting adhesive to secure the aluminum to the plastic bezel. Here's a quick look:
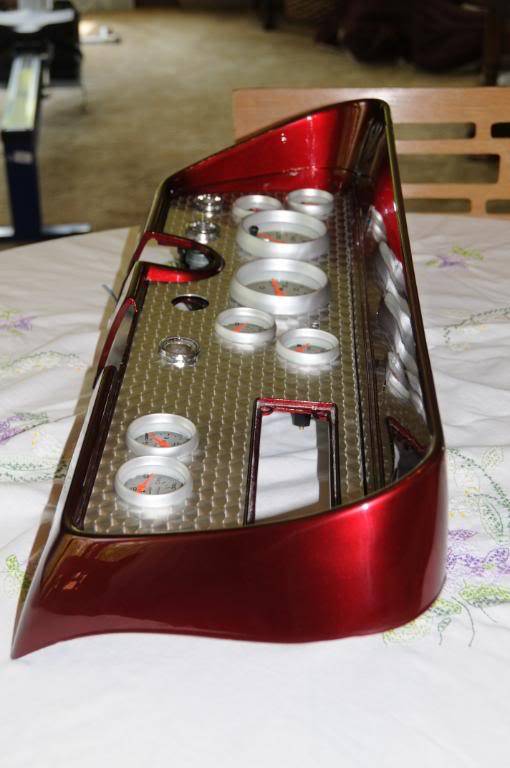
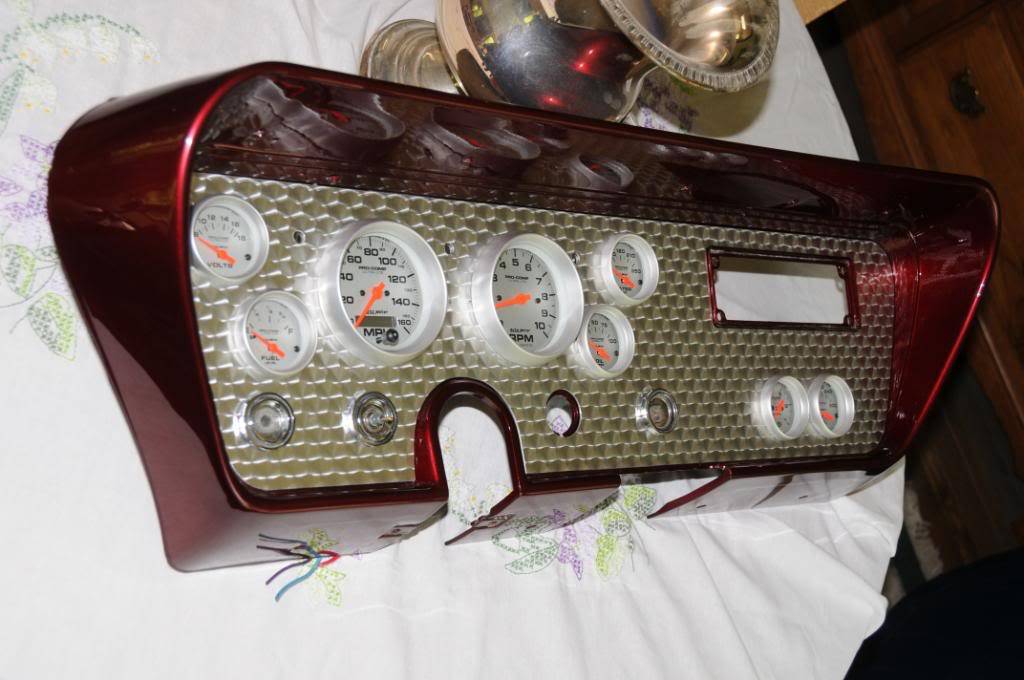
I need to check and fix a couple switch related things, but for the most part I'm ready to glue the front panel in, and start wiring the assembly. I'm pretty happy about how it turned out. To be honest, the pics don't do the finished product justice. The contrast of the cabernet tri-coat and the aluminum w/clearcost really pops.
The minor setback is that when continuing to work on the steering, I discovered that the "vibration resistant u-joint" is actually too long and there are clearance issues with it and the front crossmember. There's really nothing I can do about it - not enough clearance to move anything. Here are a few pics:
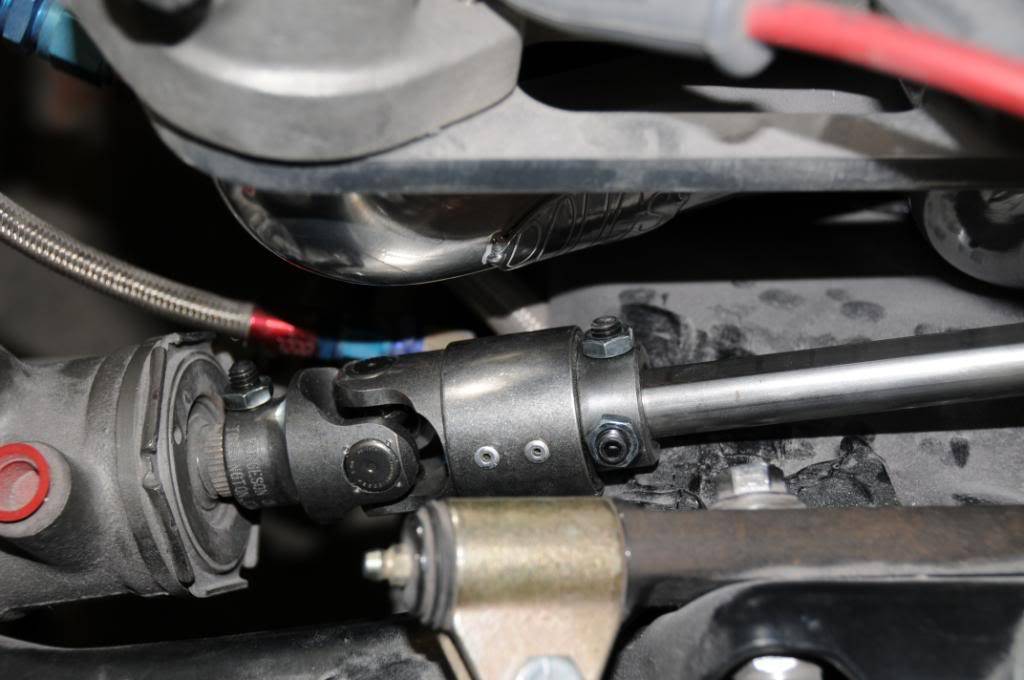
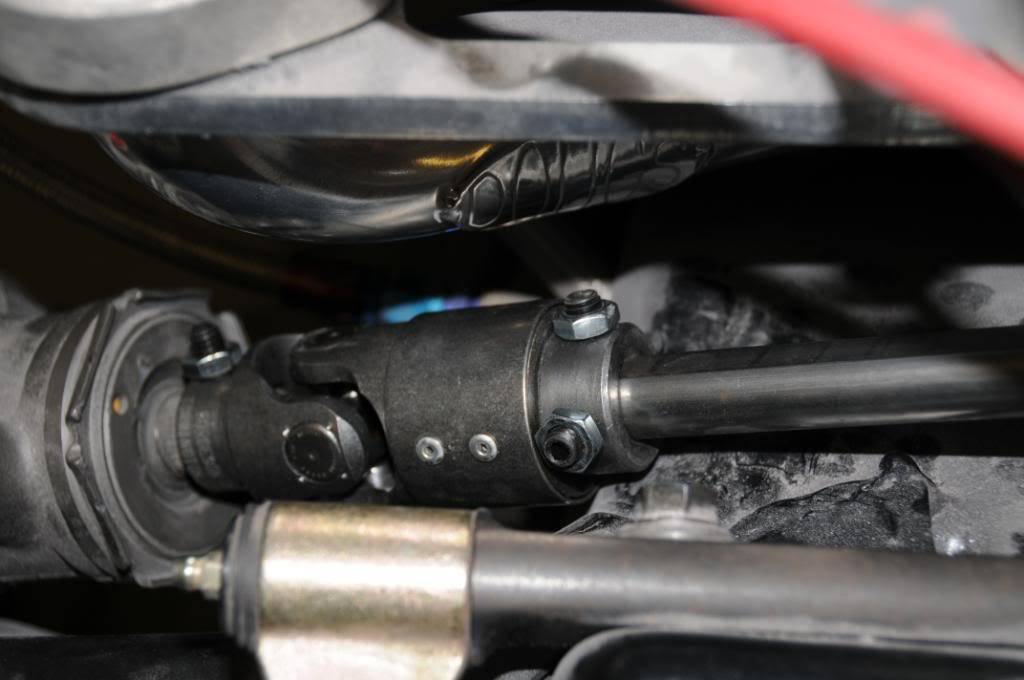
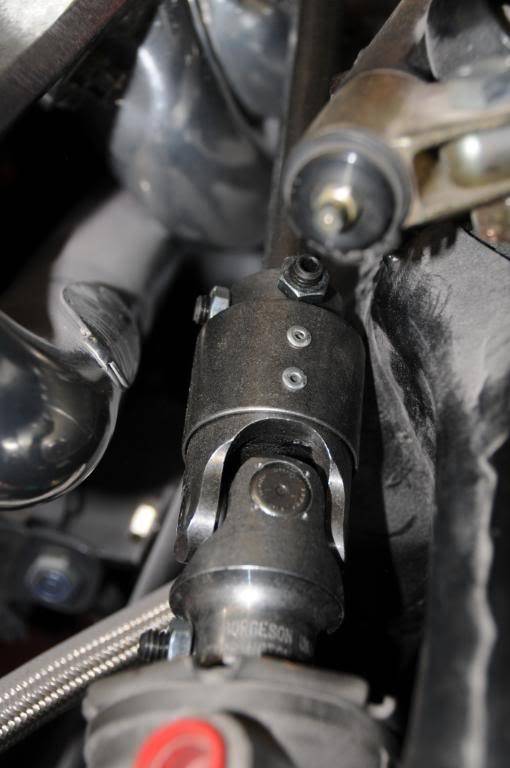
I think I'm going to have to replace that joint either with a "standard" u-joint, or a rag joint. The "vibration resistant" one I have is 4.5" long. A "standard" one is 3.5" long Obviously a rag joint is even shorter. The advantage is that I was forced to go with raw steel because Borgenson didn't offer the vibration joint in stainless. Now I can go with stainless if I want. My concern is that especially since I'm using a hydrotech brake booster coupled to the steering pump, usint a "standard" u-joint could result in feeling pump pulsing through the wheel.
05-17-2009 #75
Registered User
- Join Date
- Aug 2004
- Location
- Dunwoody, GA
- Posts
- 4,983
That dash looks fantastic. Did you turn it yourself? Mind if I ask how? I've seen it done a couple different ways and am just curious to your method.
Trey
"The early bird may get the worm, but the second mouse gets the cheese."
~ Jon Hammond
1979 WS6 Trans Am stock LT1/T56 drive train out of my Formula. BMW M-parallel rims. C5/C6 brakes
build thread https://www.pro-touring.com/showthre...ghlight=begins
05-17-2009 #76
Registered User
- Join Date
- Aug 2008
- Location
- Pgh, PA
- Posts
- 2,177
I started out planning to turn it myself. But, while planning the setup and looking at the Eastwood site for the turning materials, I found I could buy sheets of it directly from Eastwood. If you're careful, it's not terribly bad. I would probably have gone with 1/2" turns but the 3/4" was a whole lot cheaper. It saved a bunch of time, and I didn't have to worry about making sure everything was aligned, etc - obviously except for when cutting the holes, etc. It really did turn out great. Originally Posted by WS6
05-18-2009 #77 Registered User
- Join Date
- Apr 2005
- Location
- dayton, oh
- Posts
- 952
it looks great, but could you use black bezels on the gauges? or even paint them the red. for me, the silver bezels kind of clash w/ the aluminum panel. maybe it's just the picture.
05-18-2009 #78
Registered User
- Join Date
- Aug 2008
- Location
- Pgh, PA
- Posts
- 2,177
I actually spent some time on that myself. I originally thought a more contrasting bezel would work, but when I initially mocked it up, the silver seemed to fit best. This is actually the 3rd gauge type I tried. Like I said before, I don't think the photos reallly do it justice. I think the flash puts more glare on the surface of the aluminum panel and makes the gauge bezel look out of place. In person the differences appear more subtle. It's a good thought, though. Originally Posted by jackfrost
05-19-2009 #79
Registered User
- Join Date
- Jan 2005
- Location
- Dallas TX
- Posts
- 1,633
dash looks killer
05-19-2009 #80
Registered User
- Join Date
- Nov 2006
- Location
- Ma.
- Posts
- 5,560
I Love the dash.
Wayne
Car FINALLY home !!!!!! lol
Project FNQUIK https://www.pro-touring.com/showthre...ghlight=FNQUIK

 Reply With Quote



