


Results 281 to 300 of 1589
Thread: Modern Bullitt Charger build
-
08-27-2015 #281
 Registered User
- Join Date
- Apr 2014
- Posts
- 803

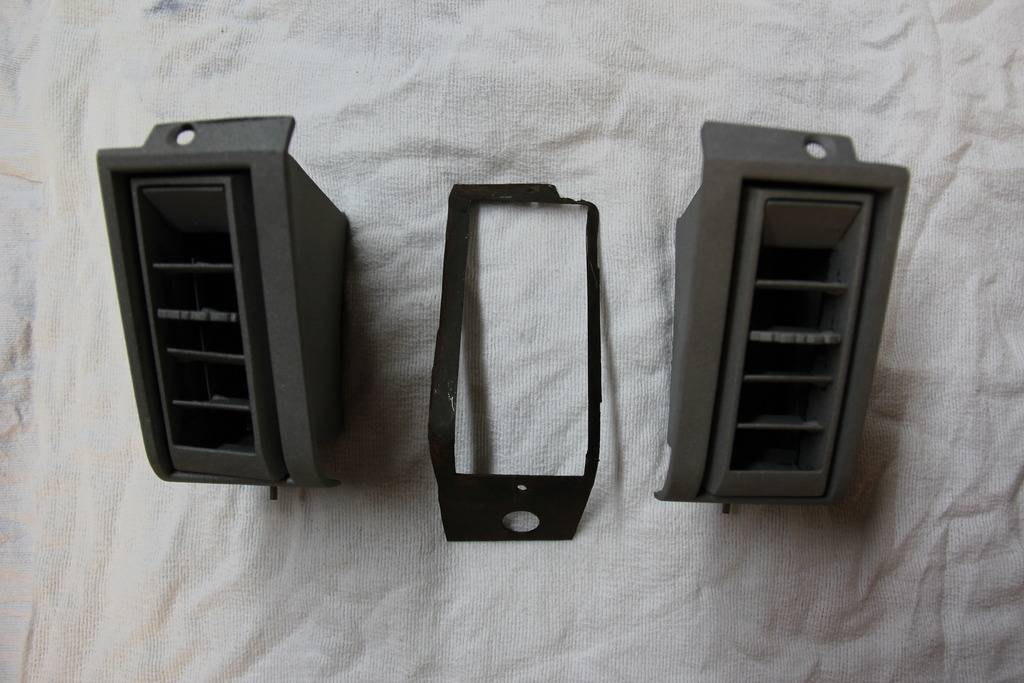
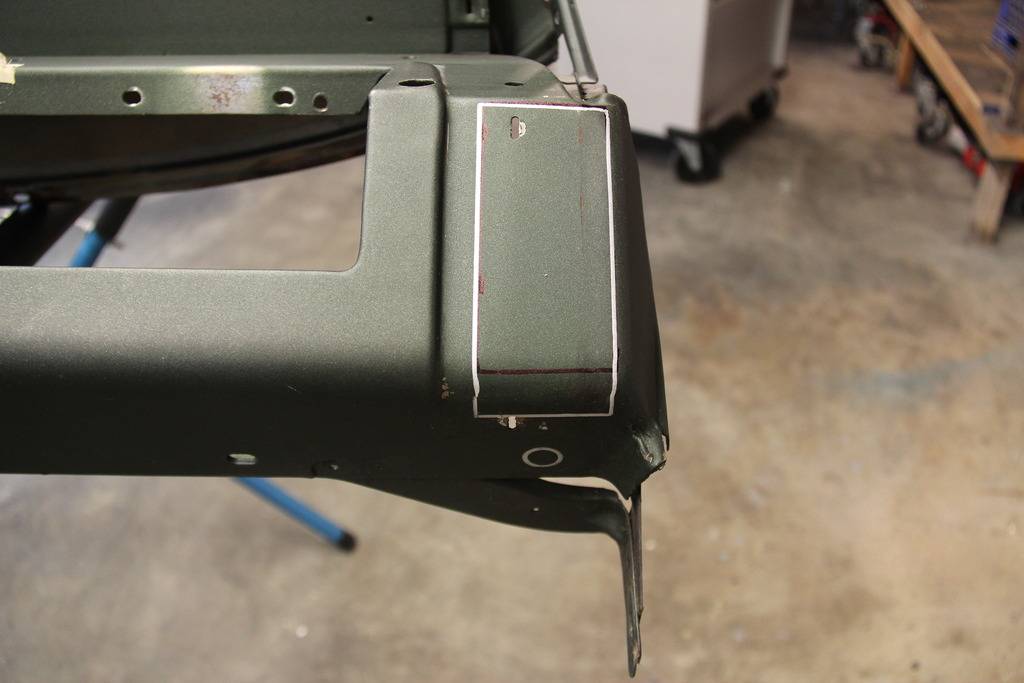
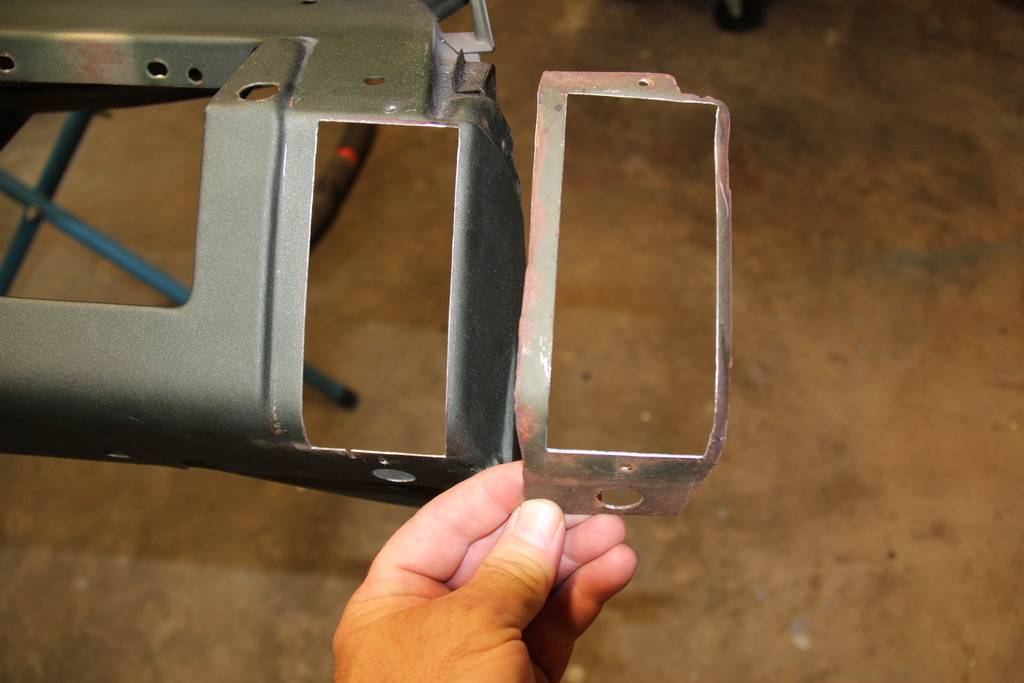
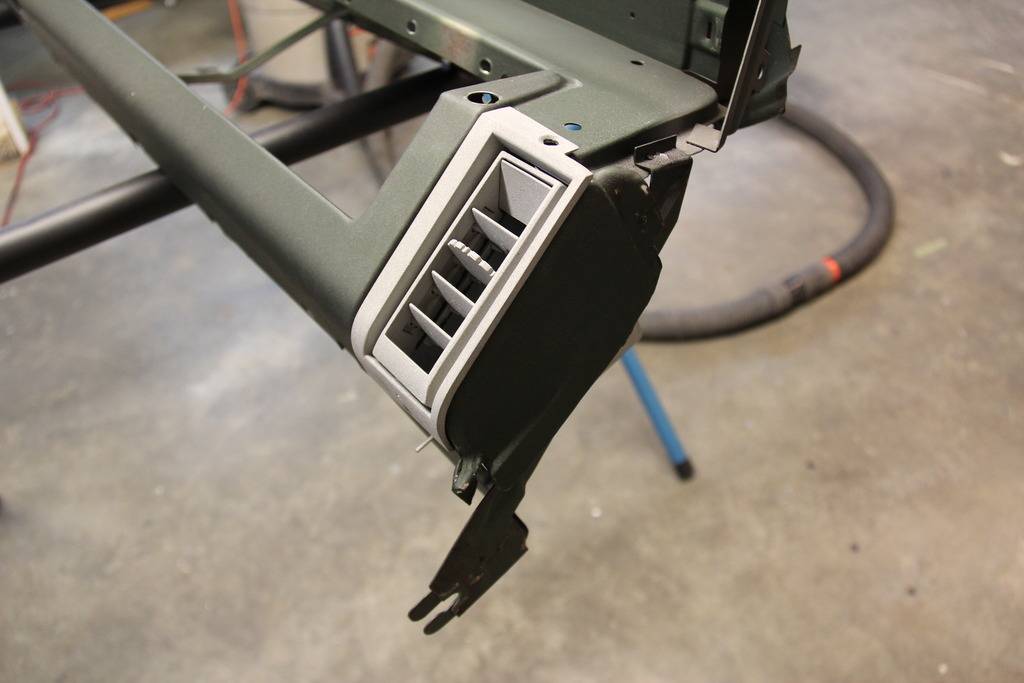
With the help of a few of the members from the DC forum I cut in the outboard dash AC vents use some great measurements, pictures, and part of an AC dash for an original template.
Thanks
Pat
-
08-28-2015 #282
Registered User
- Join Date
- Apr 2014
- Posts
- 803
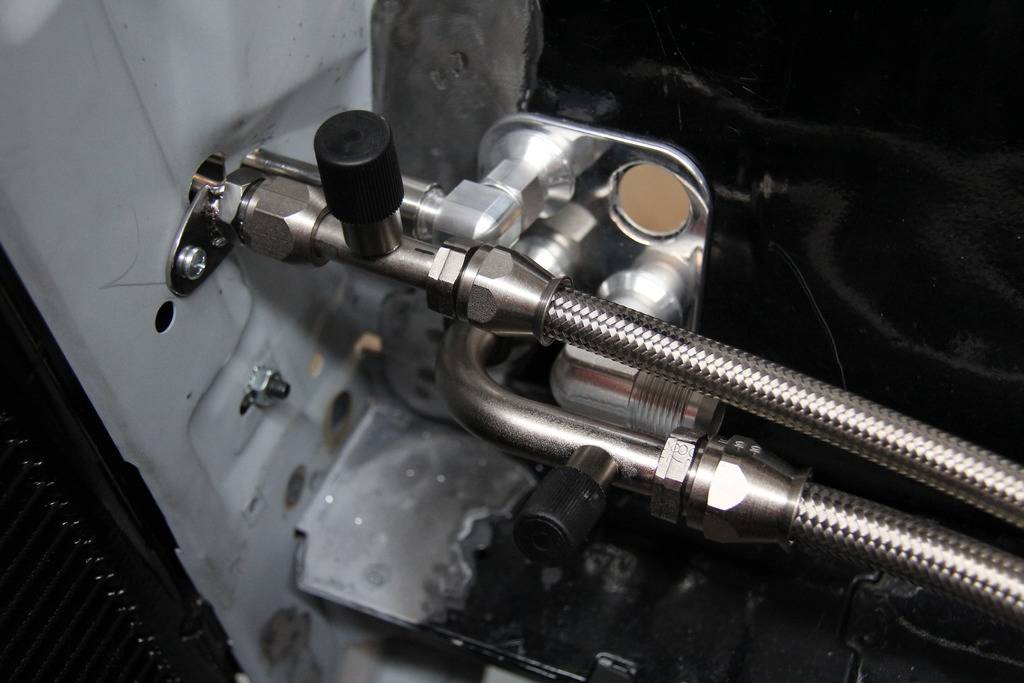
Finished the AC and heater lines at the motor, all that is left is one short line to make from the drier to the inter fender bulkhead fitting.
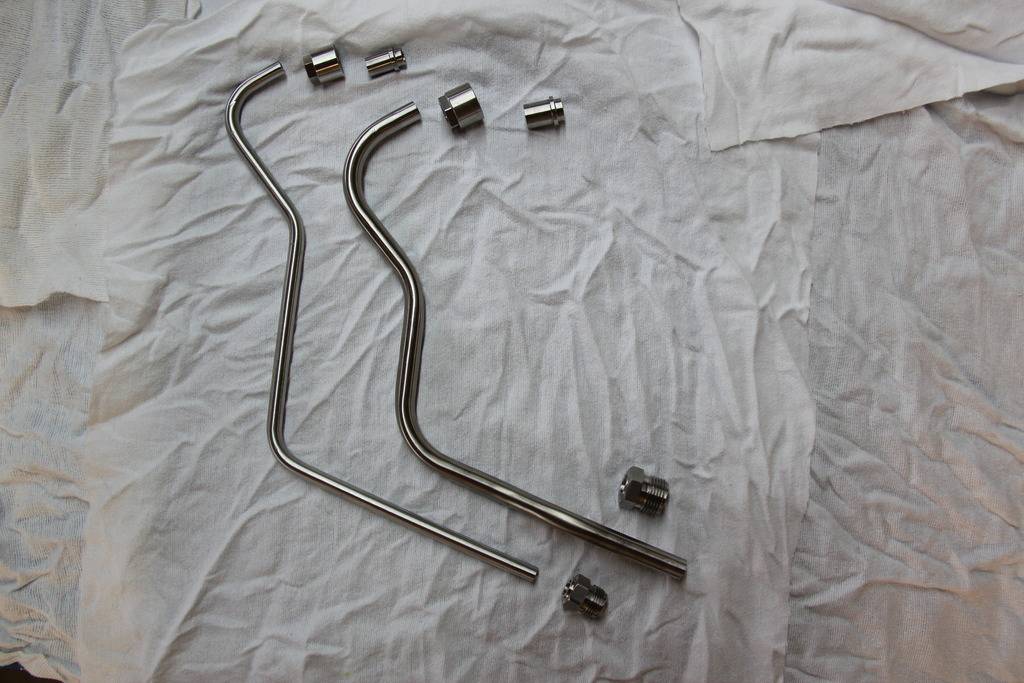
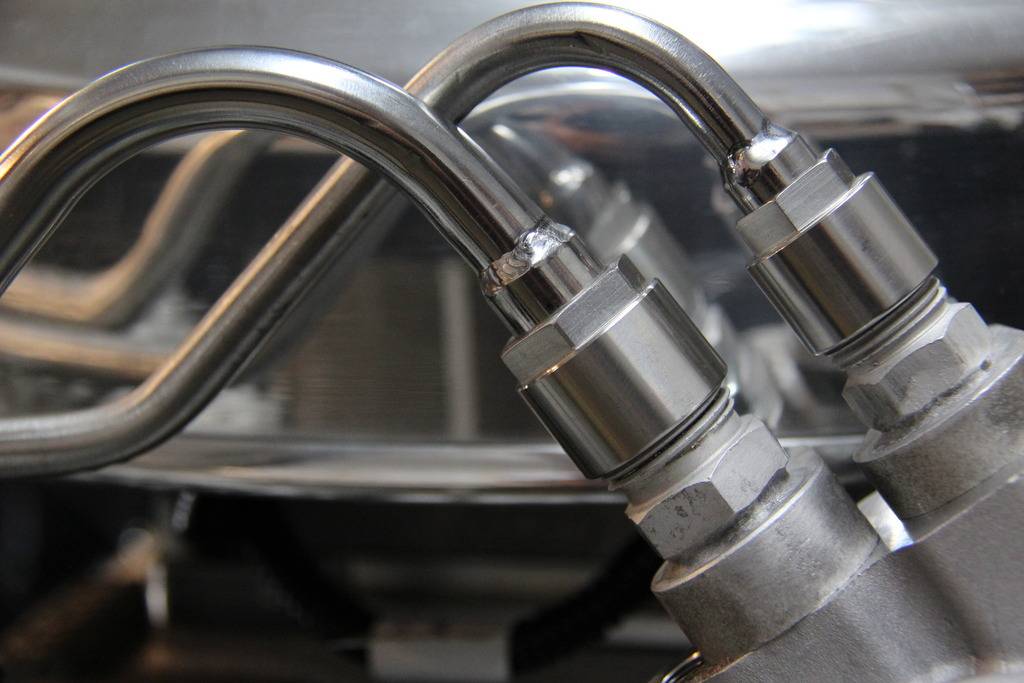
After bending the S/S line I had a friend weld the fitting on instead of silver soldering them on.
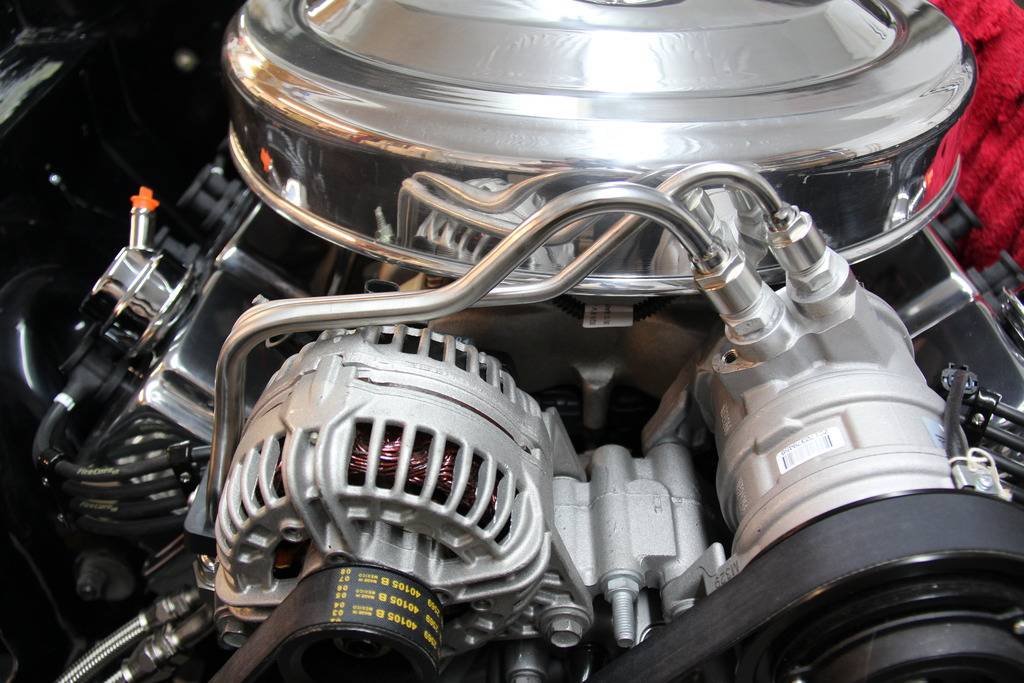
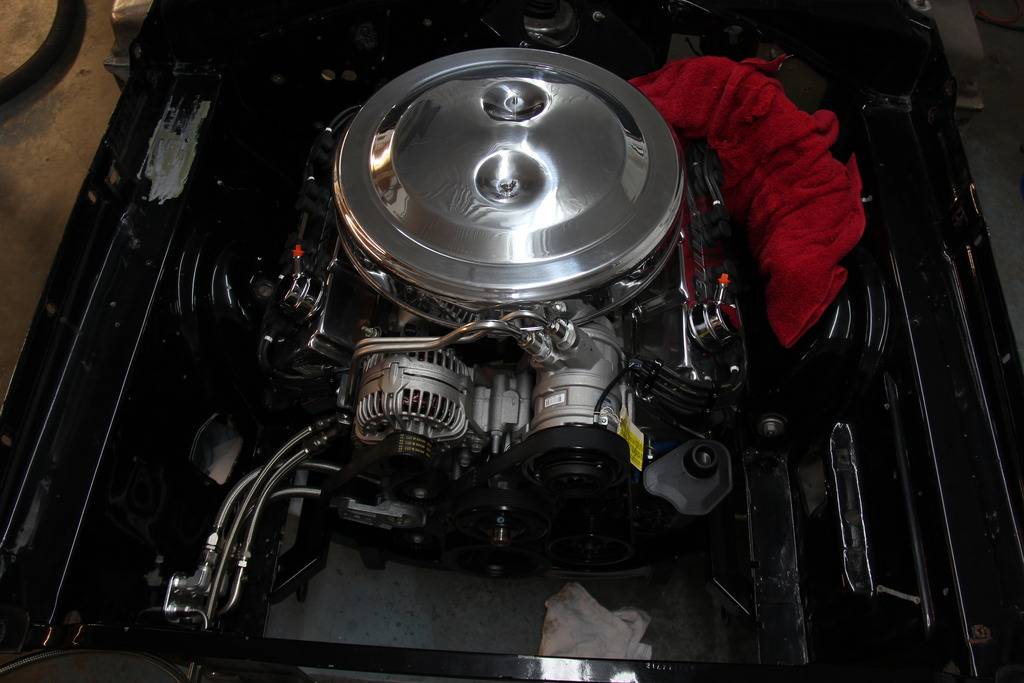
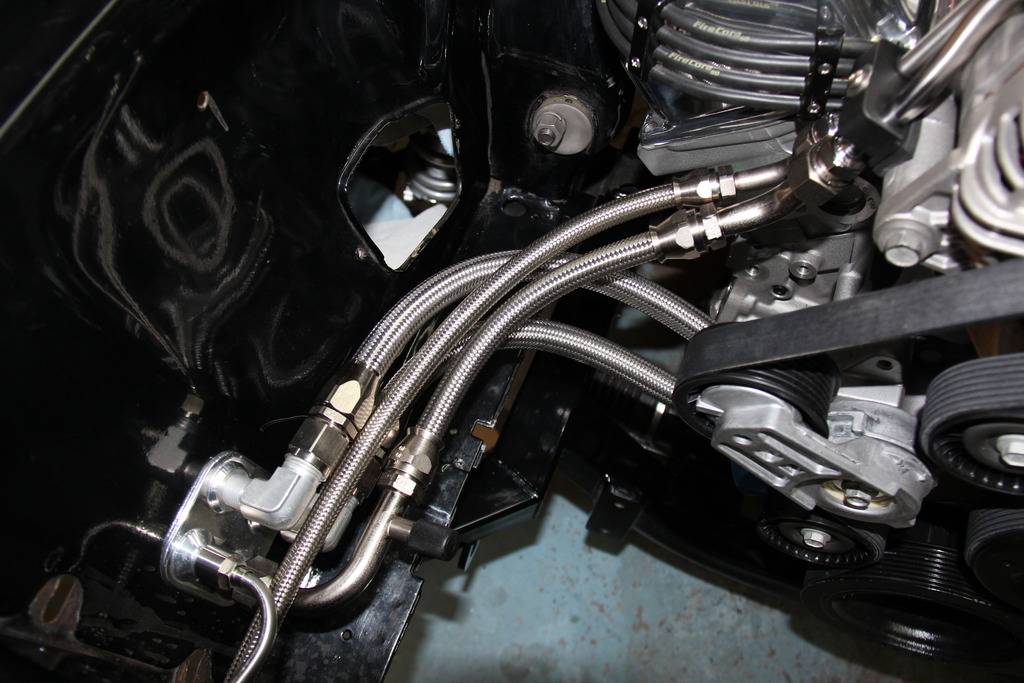
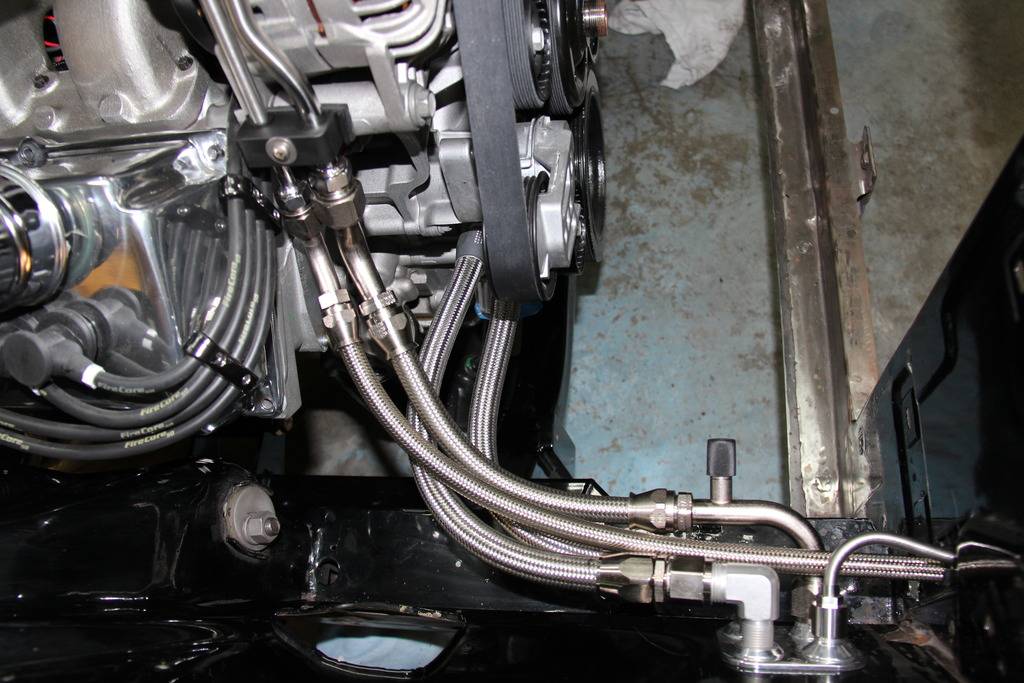
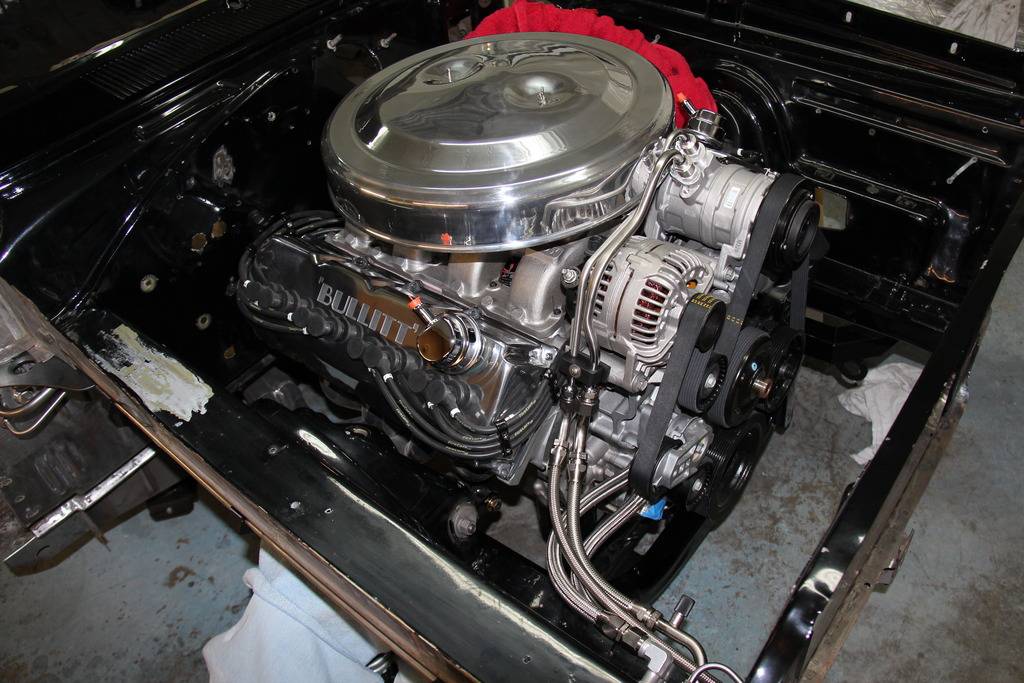
The short braided soft lines for the heater and AC running forward and down will help to de-clutter the engine bay.
Thanks
Pat
-
08-28-2015 #283
 Registered User
- Join Date
- Aug 2011
- Location
- North Platte,NE
- Posts
- 876
That is really slick! I want to add ac to mine later on when everything else is sorted.
-
08-28-2015 #284
 Registered User
- Join Date
- Nov 2006
- Location
- Ma.
- Posts
- 5,560
You did a nice job on the lines.
Wayne
Car FINALLY home !!!!!! lol
Project FNQUIK https://www.pro-touring.com/showthre...ghlight=FNQUIK
-
08-30-2015 #285
Registered User
- Join Date
- Apr 2014
- Posts
- 803
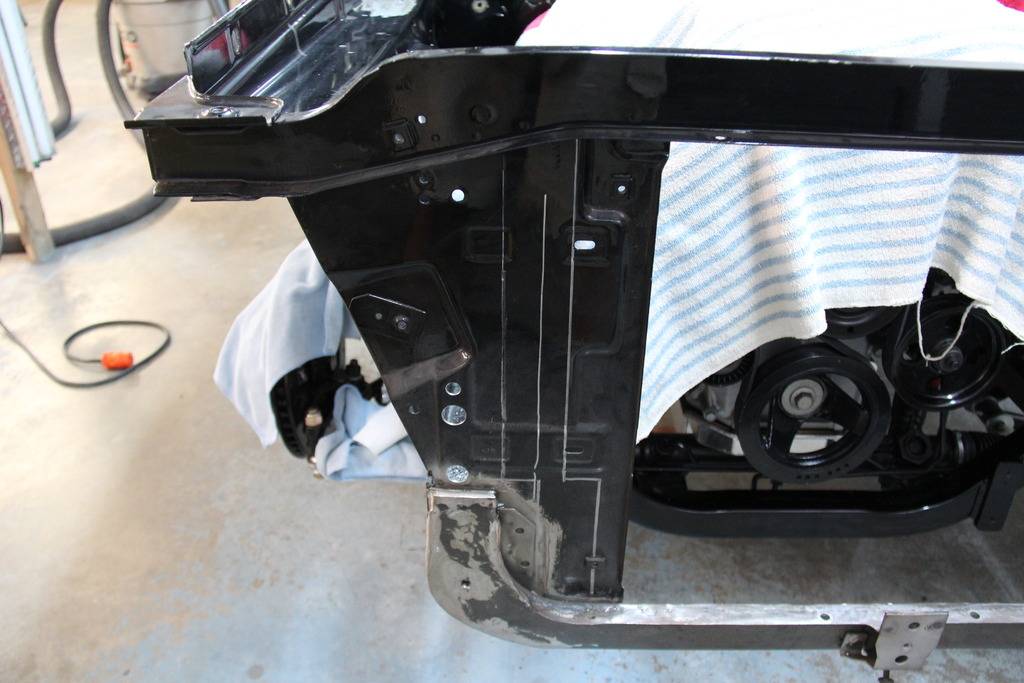
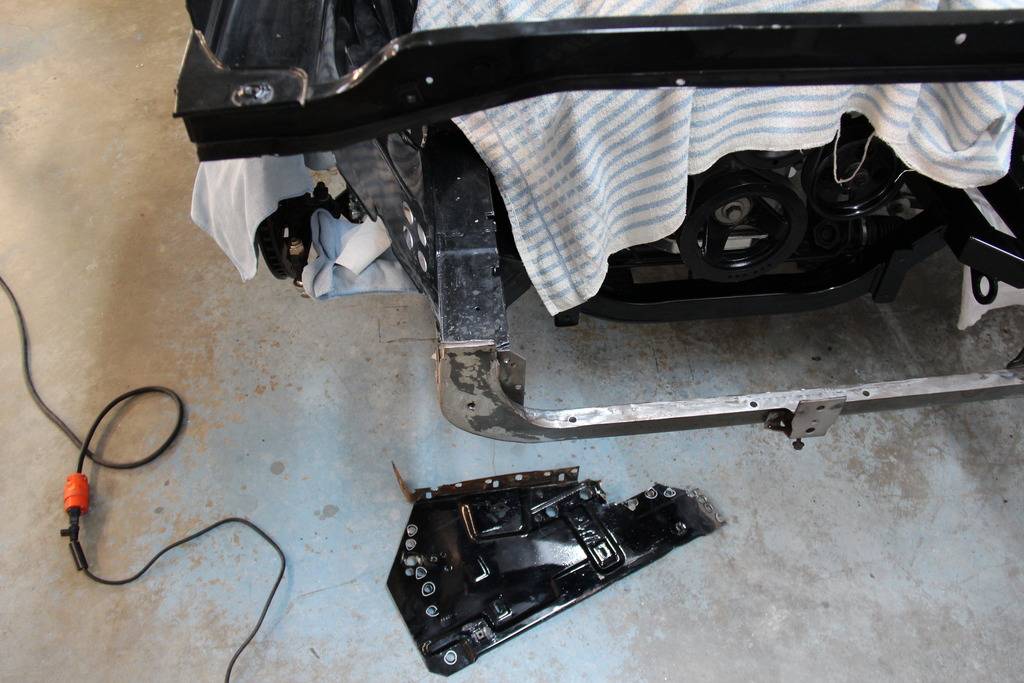
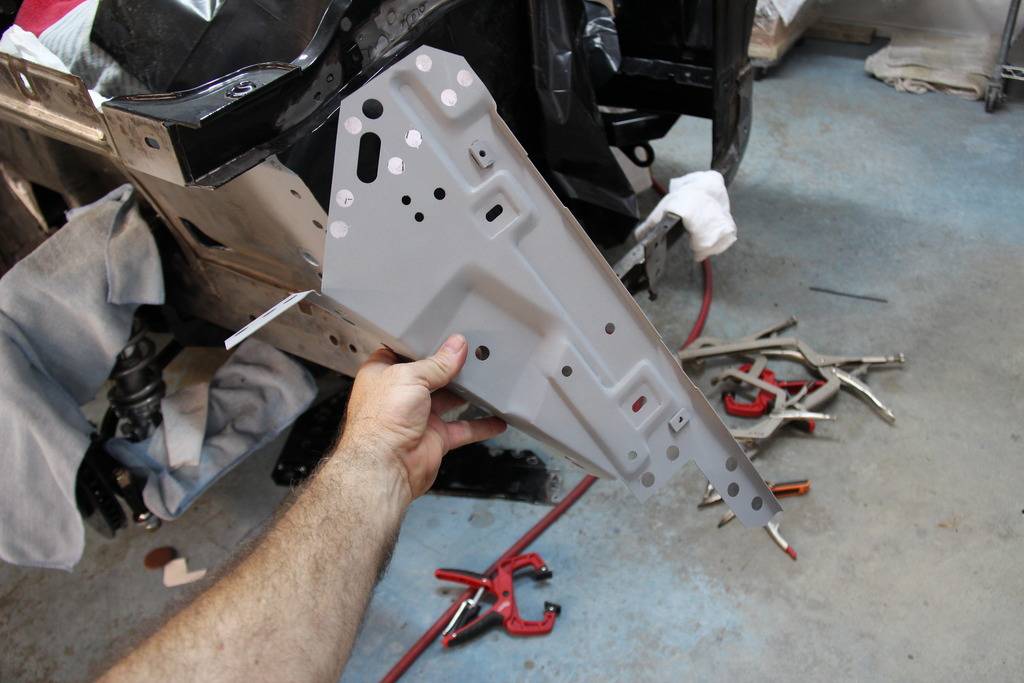
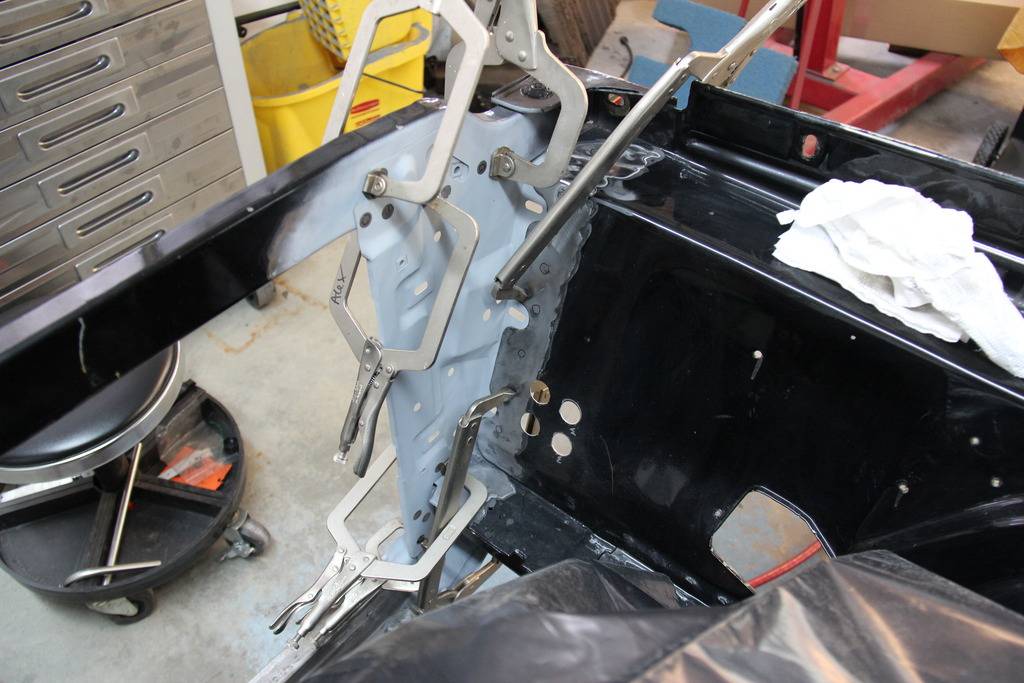
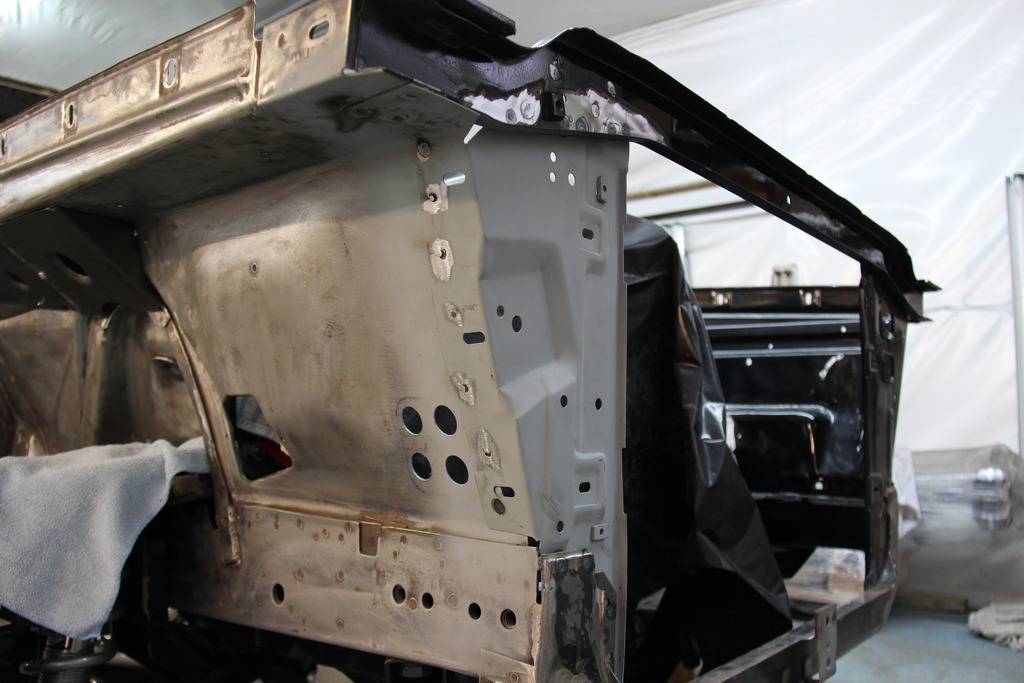
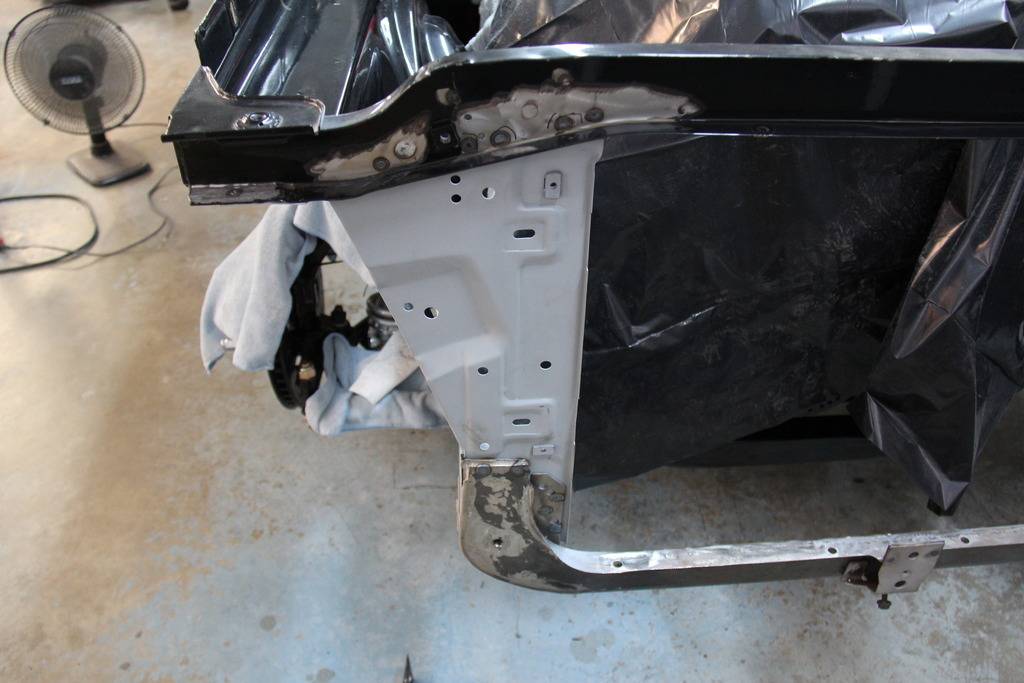
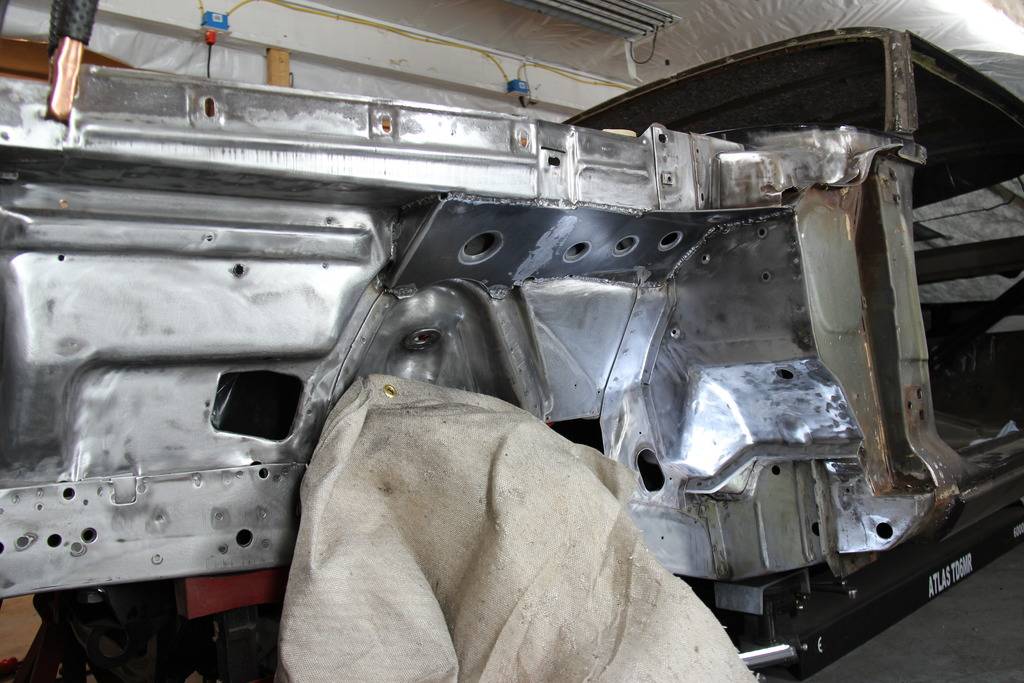
Today I replaced the right side radiator core support so I can use the larger radiator. The new part fit nice and I spot-welded it in place. I hope to test fit the new radiator next week.
Thanks
Pat
-
08-30-2015 #286
Registered User
- Join Date
- Nov 2006
- Location
- Ma.
- Posts
- 5,560
Nice! I would have loved to have that done to my support for a bigger Radiator, but I had it powder coated long ago. Great build.
Wayne
Car FINALLY home !!!!!! lol
Project FNQUIK https://www.pro-touring.com/showthre...ghlight=FNQUIK
-
08-30-2015 #287
Registered User
- Join Date
- Sep 2013
- Location
- sw Kansas
- Posts
- 1,661
I know the ac lines were pricey but they look real nice. Do you own a spot welder?
-
08-30-2015 #288
Registered User
- Join Date
- Apr 2014
- Posts
- 803
Yes they are a little pricey but so is most everything I put on this car unfortunately. I have a Miller spot welder and it works great. Originally Posted by wfo guy

Thanks
Pat
-
09-04-2015 #289
Registered User
- Join Date
- Apr 2014
- Posts
- 803
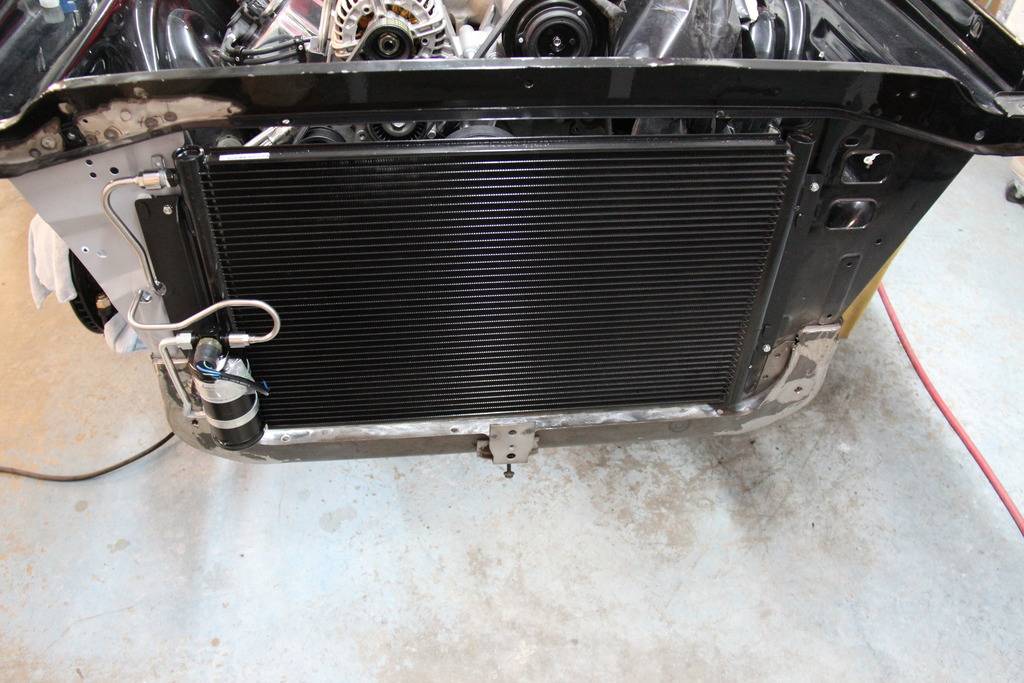
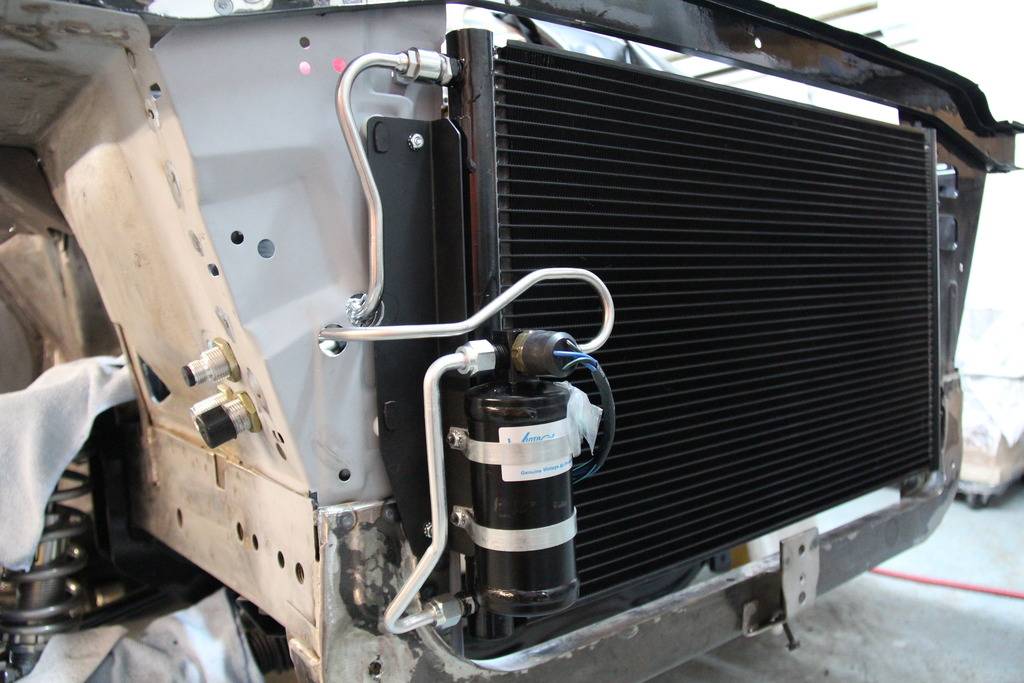
All the AC lines are finished and the drier & condenser have been test fit. So far I’m very happy with the Vintage Air Mopar B Body system. I’m getting closer to putting the car on the rotisserie.
Thanks
Pat
-
09-04-2015 #290
Registered User
- Join Date
- Nov 2006
- Location
- Ma.
- Posts
- 5,560
The lines look sweet! Nice job on them.
Wayne
Car FINALLY home !!!!!! lol
Project FNQUIK https://www.pro-touring.com/showthre...ghlight=FNQUIK
-
09-06-2015 #291
Registered User
- Join Date
- Apr 2014
- Posts
- 803
Thank you sir! Originally Posted by Motown 454
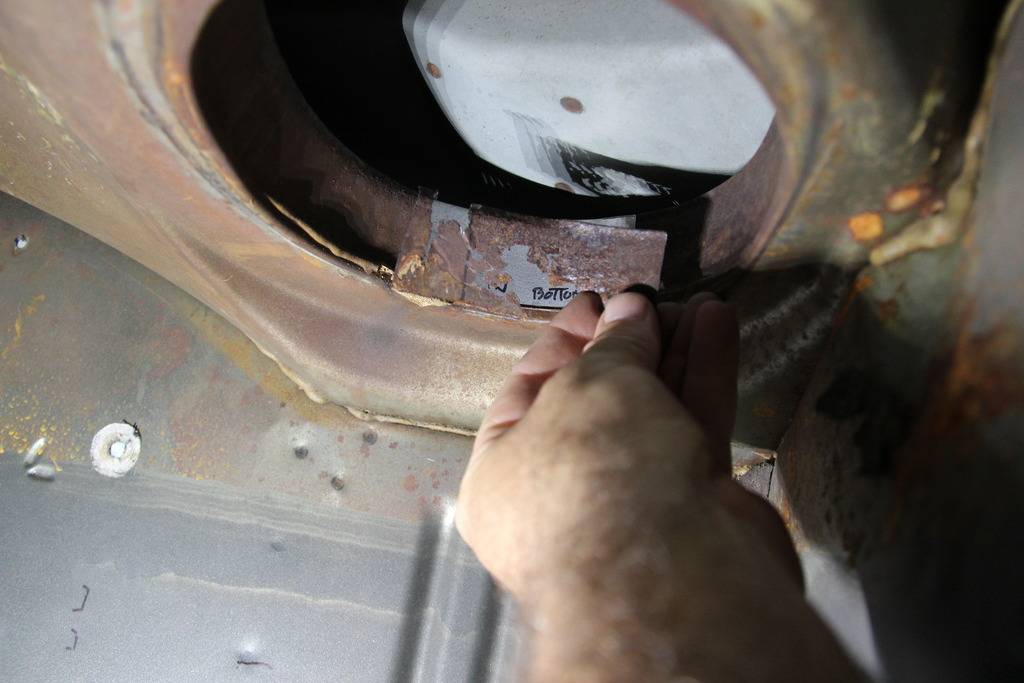
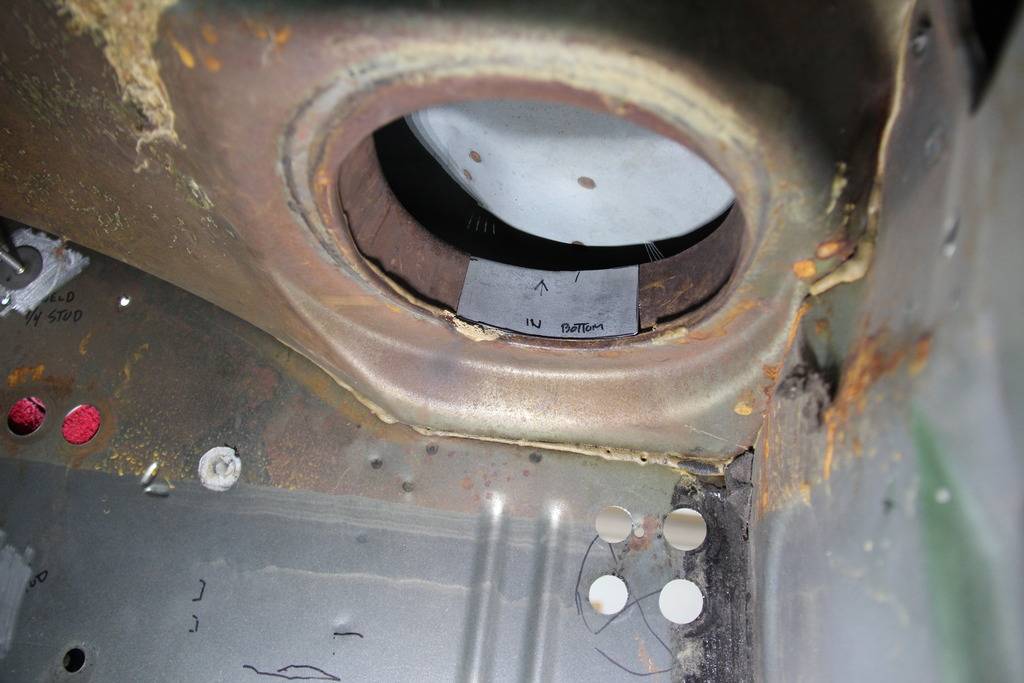
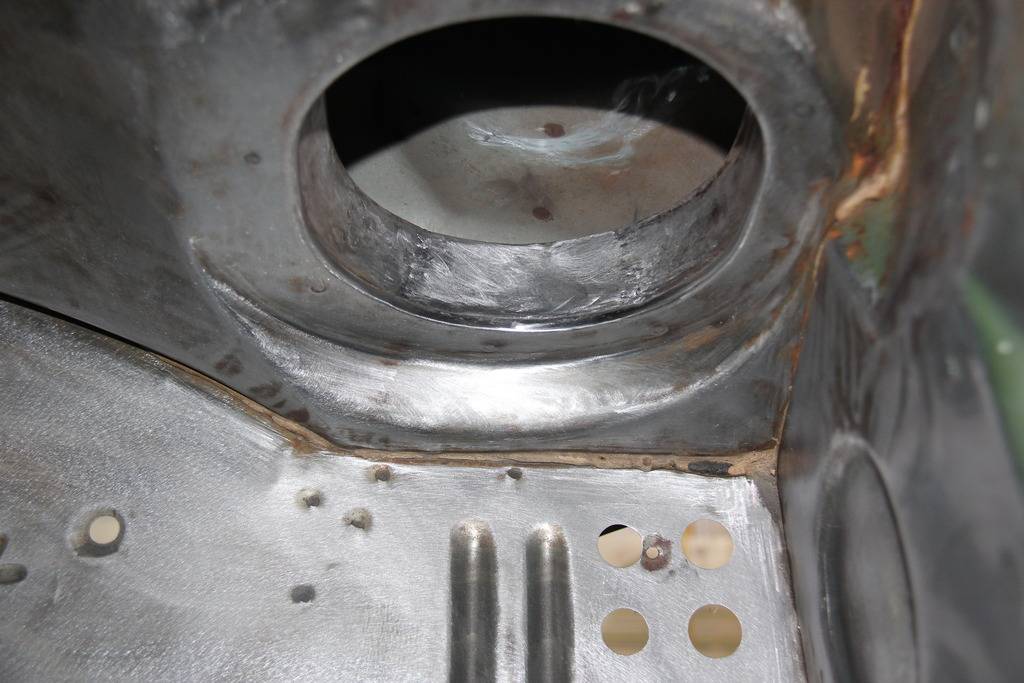
I had one bad spot in the right side cowl vent that needed a small repair, but fortunately it was accessible. The right side cowl vent is not used with new Vintage Air system; there is a plate that will cover it. Now I can water test it with a rust converter and spray it down with sealer. If anyone has a proven method for access, cleaning, and coating the inside of the cowl please let me know.
Thanks
Pat
09-08-2015 #292
Registered User
- Join Date
- Apr 2014
- Posts
- 803
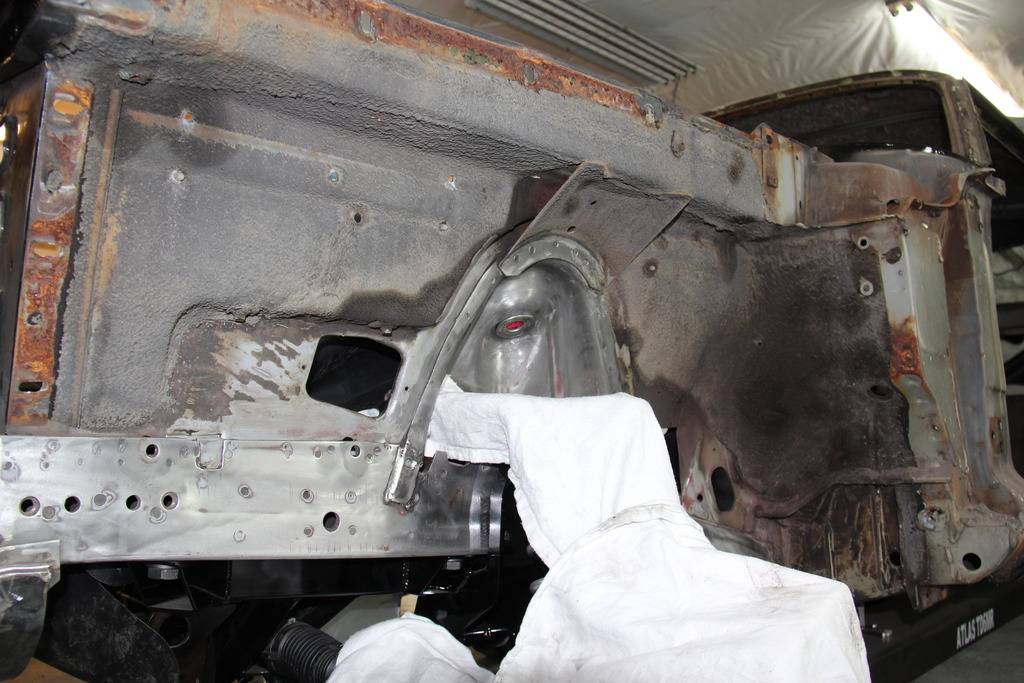
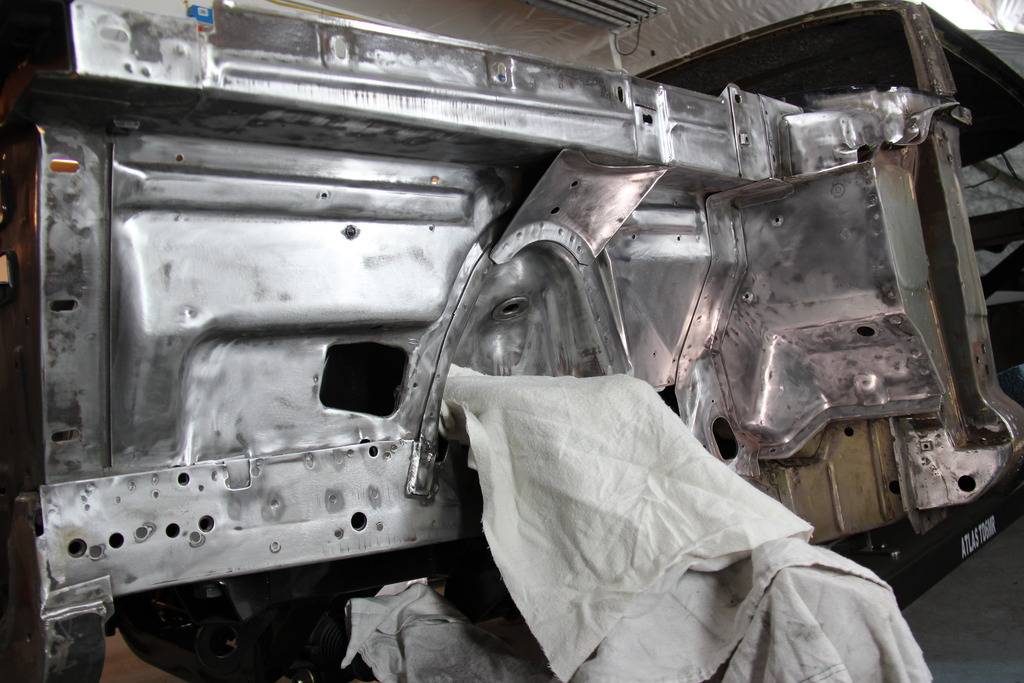
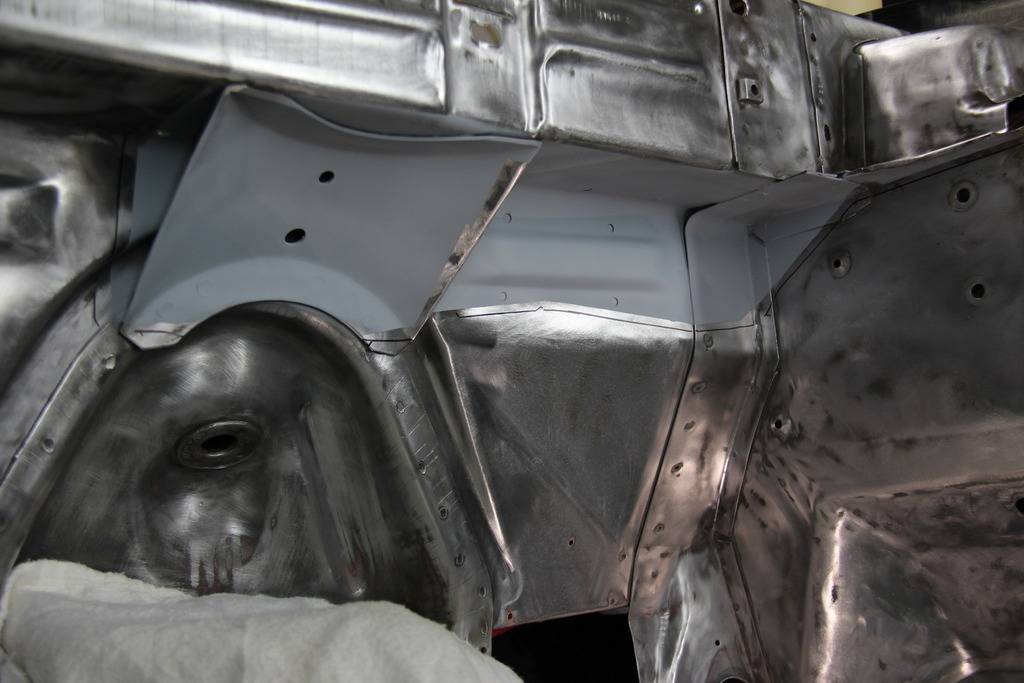
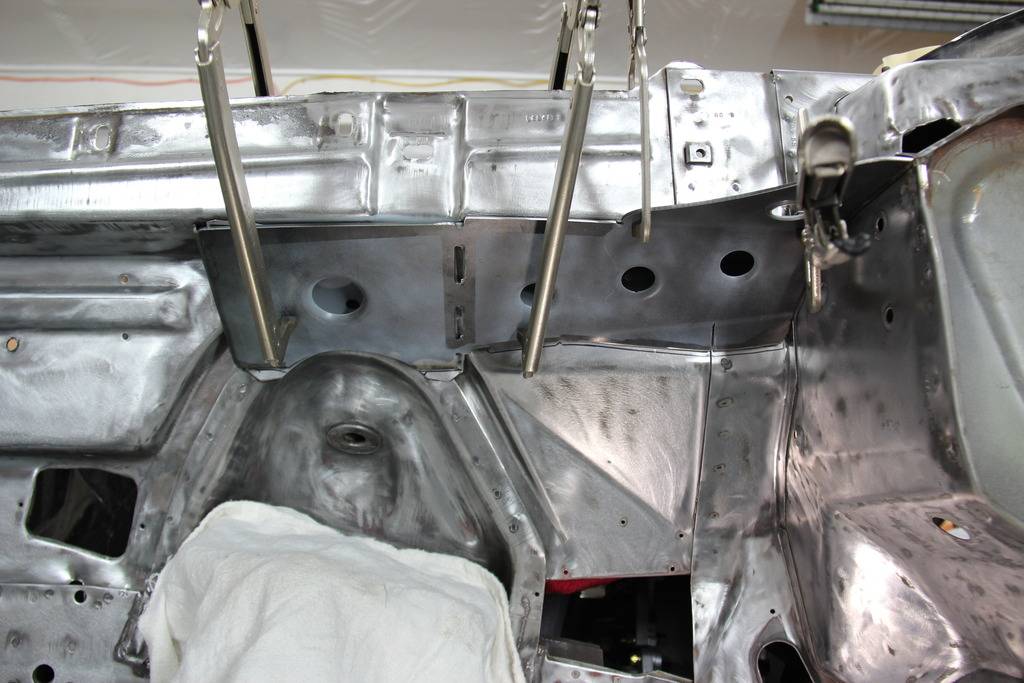
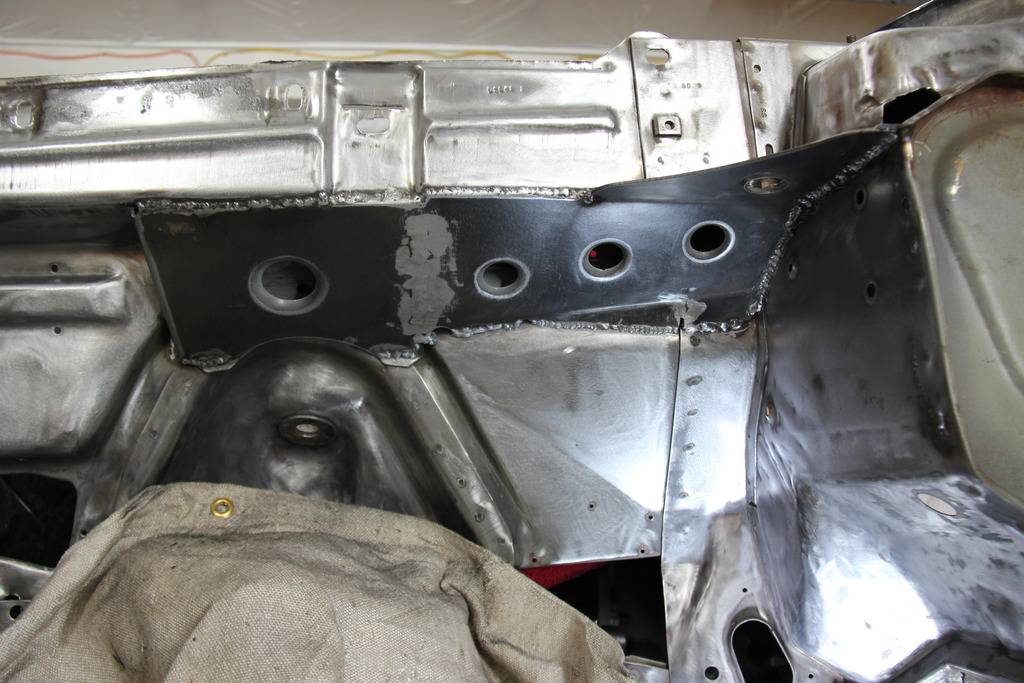
I fitted and welded in the left side US Car Tool inner fender brace. It needed a little massaging but fit really nice. Right side is next!
Thanks
Pat
09-10-2015 #293
Registered User
- Join Date
- Apr 2014
- Posts
- 803
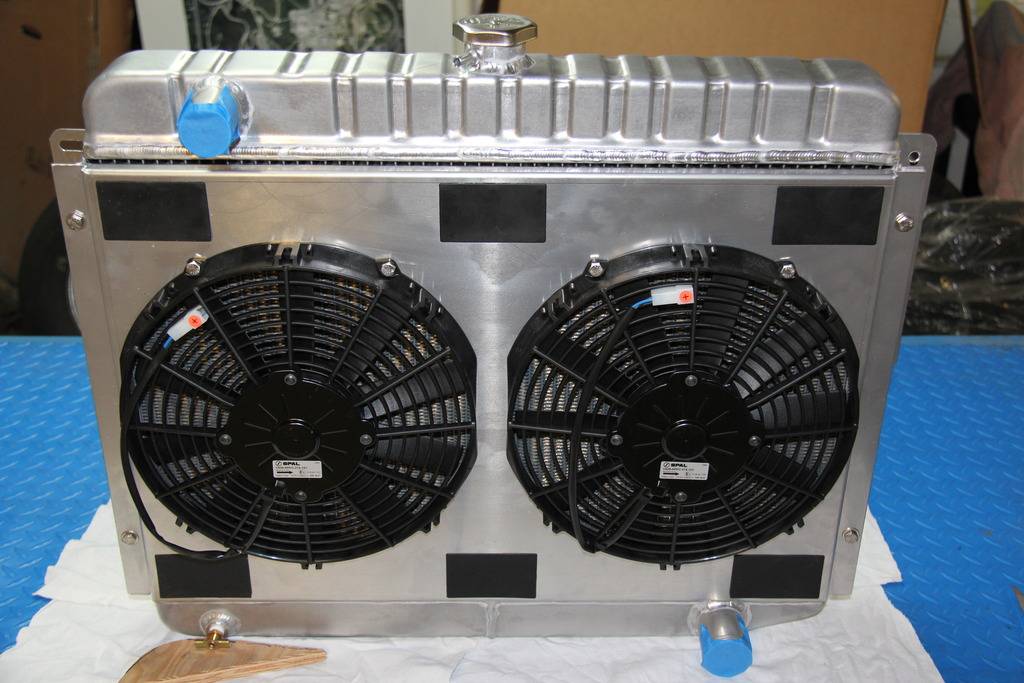
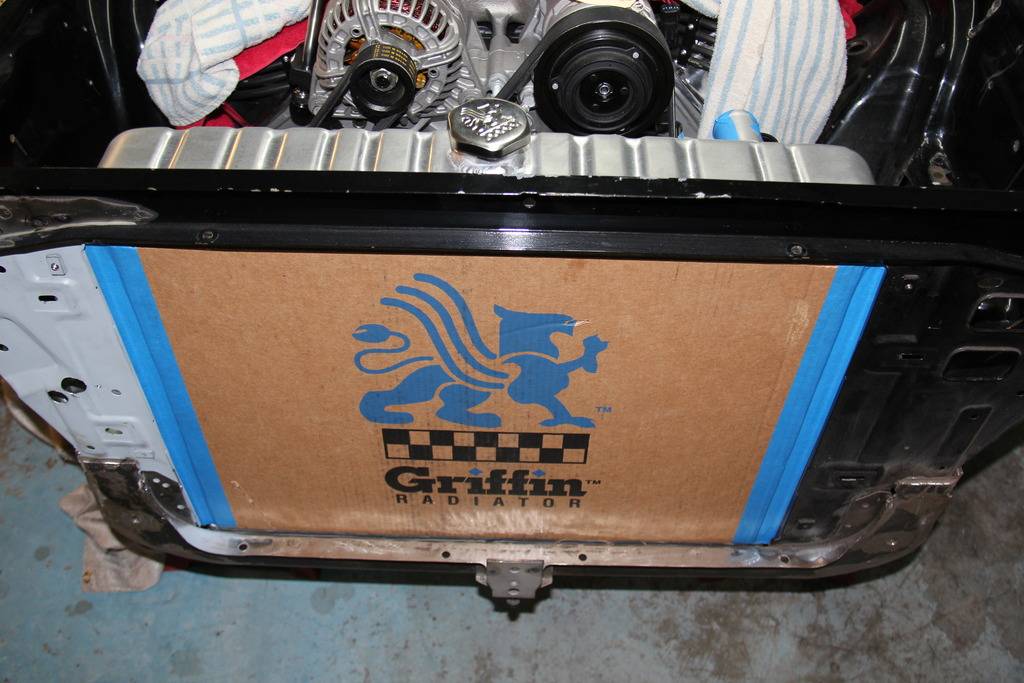
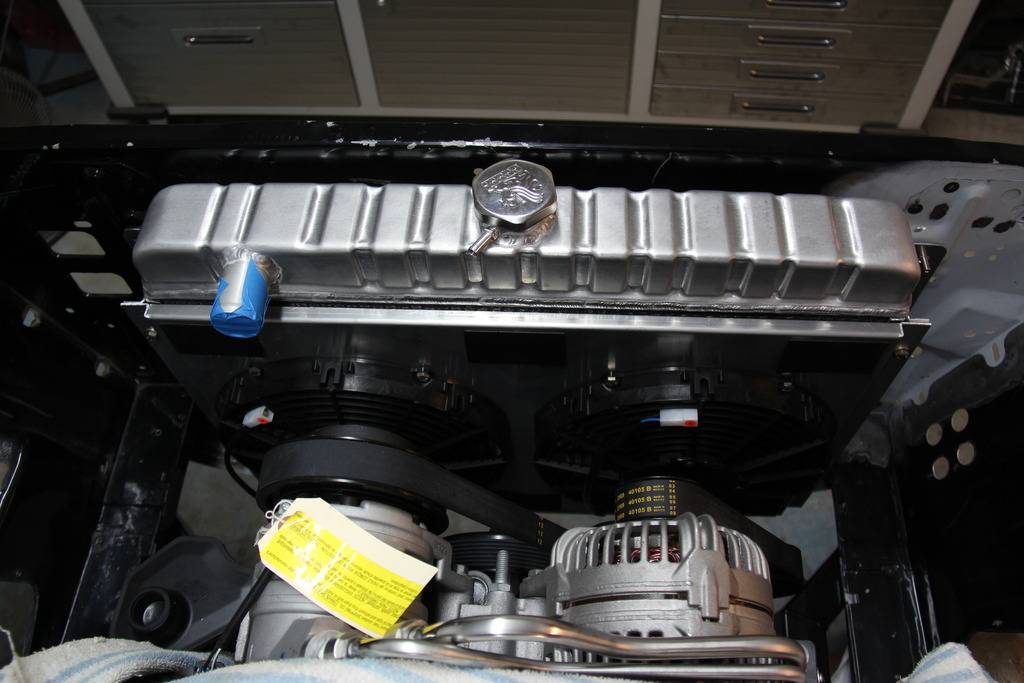
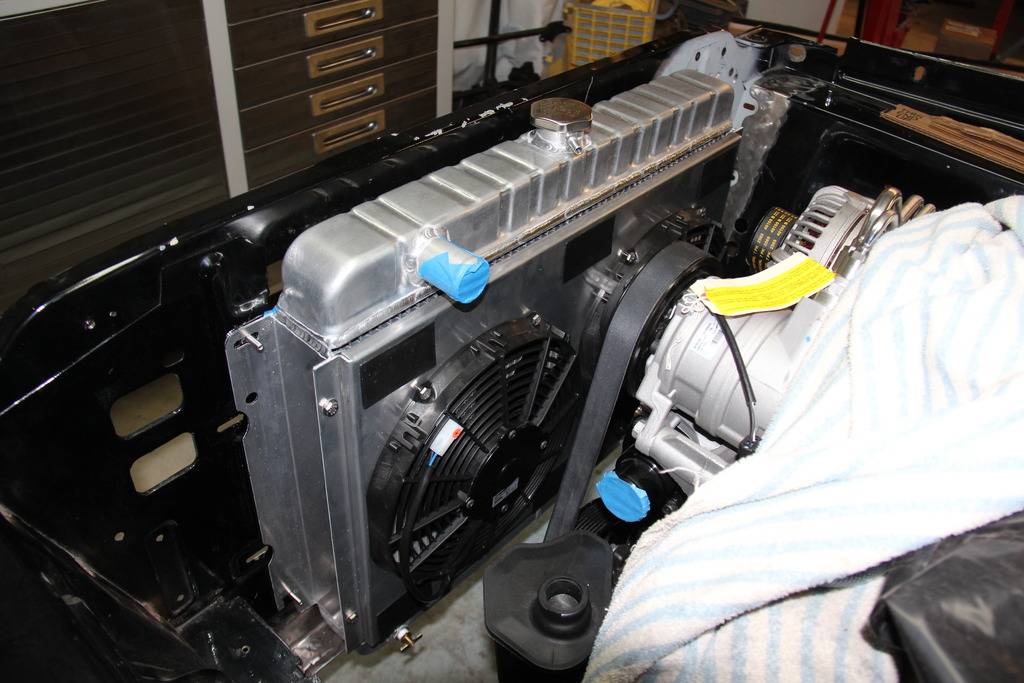
I received my Griffin radiator yesterday so with the motor still in the car I test fitted it. I’m going to weld a 90 degree pipe on the thermostat housing so it will have a short top hose.
Thanks
Pat
09-10-2015 #294 Registered User
- Join Date
- Nov 2009
- Location
- the dirty mitten
- Posts
- 1,217
Loving your work as always! I had to remove my cowl due to some damage and replace it with a donor panel. You would not like what I found under there, a lot of leaves and dirt. From what I could see, there is no good way to clean that stuff out without removing the cowl panel. Or go at it from the underside. If you are going to seal off that cowl vent to the passenger compartment anyway, maybe just cut out that riser and then just put a shop vac hose up there. Of course that will not clean out the other side but maybe you can get the hose over to that side.
I had my new cowl painted with epoxy primer top and bottom. I also painted the under cowl panel area to keep it protected in the future. I had painted it orange because I had thought about having the car that color, I changed it to black before the new cowl went on just in case I didn't end up going orange. Glad I did because now I'm wanting blueSteve
1968 Dodge Charger All Wheel Drive project Red Bull<script type="text/javascript" src="safari-extension://com.ebay.safari.myebaymanager-QYHMMGCMJR/5cce6da5/background/helpers/prefilterHelper.js"></script><script type="text/javascript" src="safari-extension://com.ebay.safari.myebaymanager-QYHMMGCMJR/85dc54c0/background/helpers/prefilterHelper.js"></script><script type="text/javascript" src="safari-extension://com.ebay.safari.myebaymanager-QYHMMGCMJR/85dc54c0/background/helpers/prefilterHelper.js"></script>
09-12-2015 #295
Registered User
- Join Date
- Nov 2009
- Location
- the dirty mitten
- Posts
- 1,217
Found the pics of when I removed my cowl panel
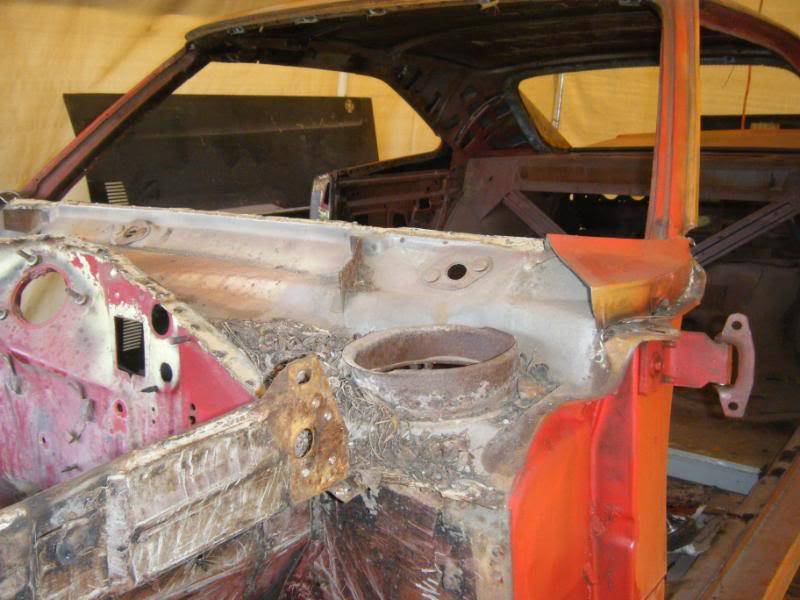
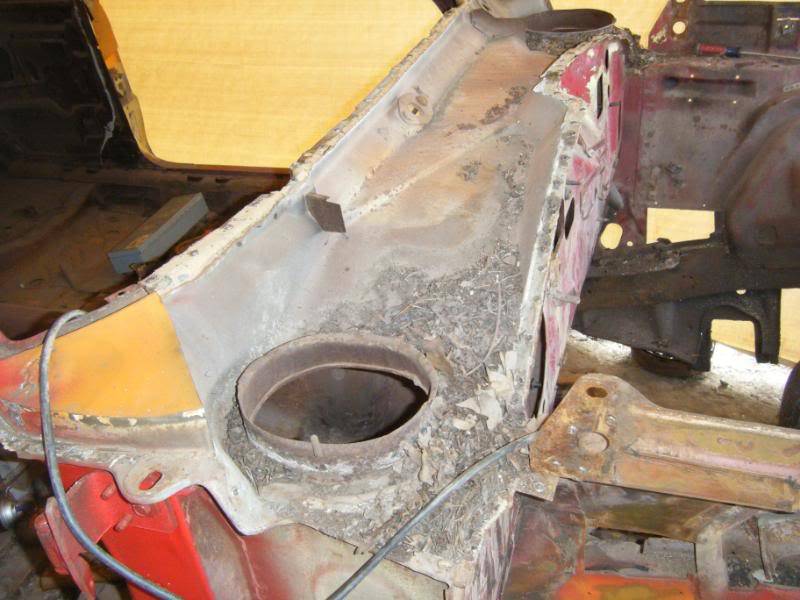
Hand sanded and cleaned up, its a once every 40 some years chance to clean this thing up so I took full advantage of it
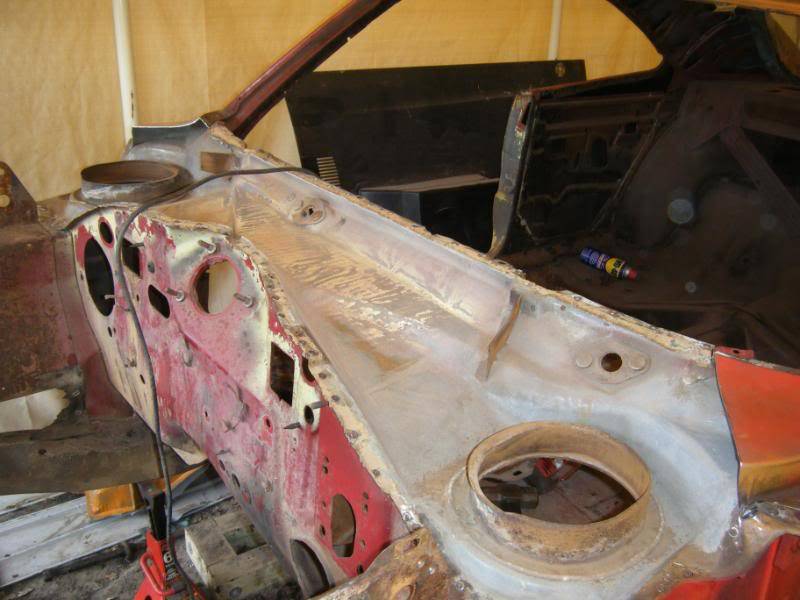
Primed up all nice
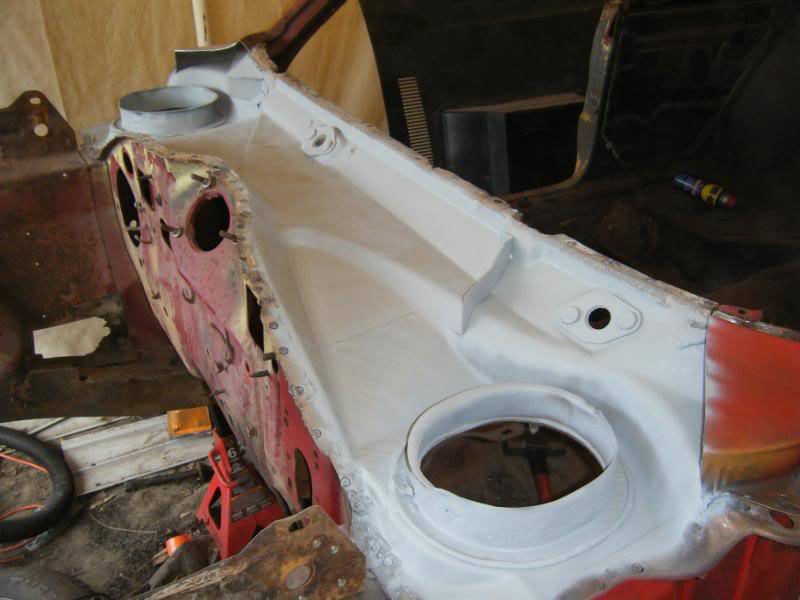
This is where I had painted it all orange, I changed my mind and made it black before i put the new piece on for good
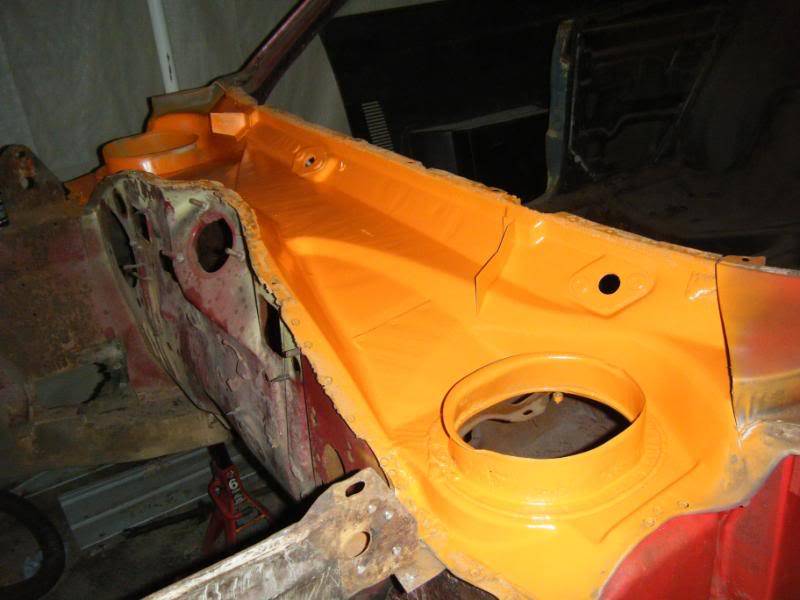 Steve
Steve
1968 Dodge Charger All Wheel Drive project Red Bull<script type="text/javascript" src="safari-extension://com.ebay.safari.myebaymanager-QYHMMGCMJR/5cce6da5/background/helpers/prefilterHelper.js"></script><script type="text/javascript" src="safari-extension://com.ebay.safari.myebaymanager-QYHMMGCMJR/85dc54c0/background/helpers/prefilterHelper.js"></script><script type="text/javascript" src="safari-extension://com.ebay.safari.myebaymanager-QYHMMGCMJR/85dc54c0/background/helpers/prefilterHelper.js"></script>
09-16-2015 #296
Registered User
- Join Date
- Apr 2014
- Posts
- 803
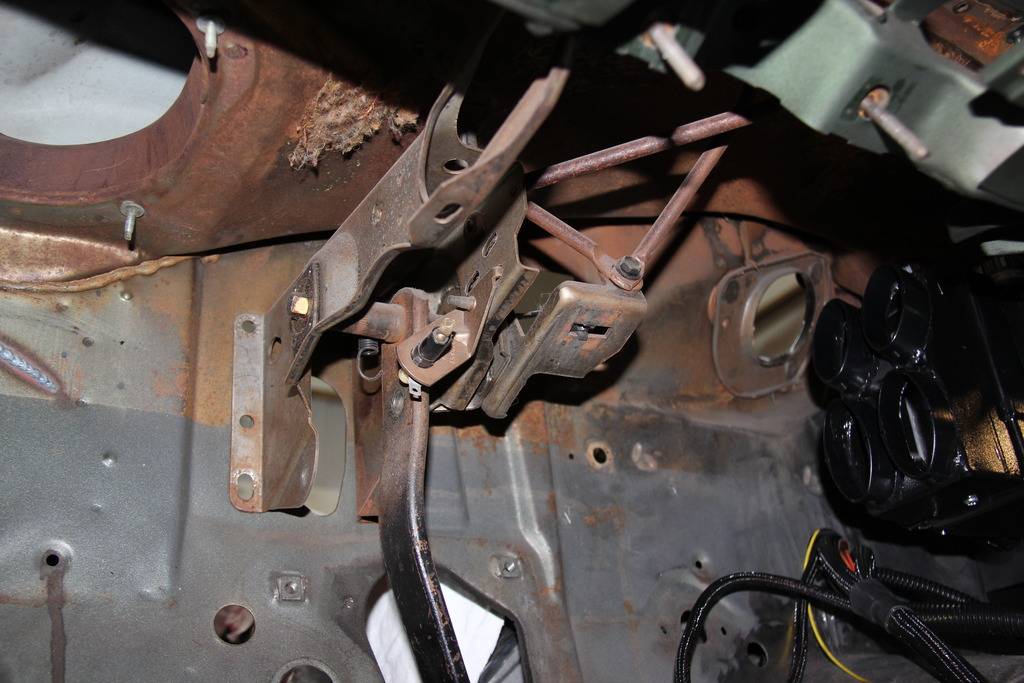
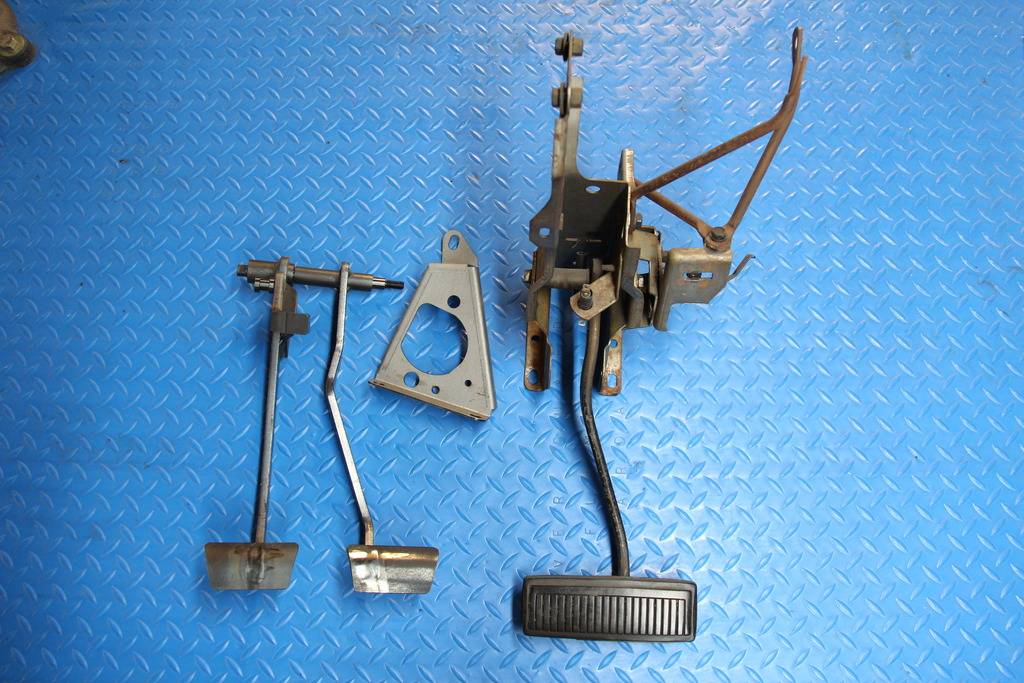
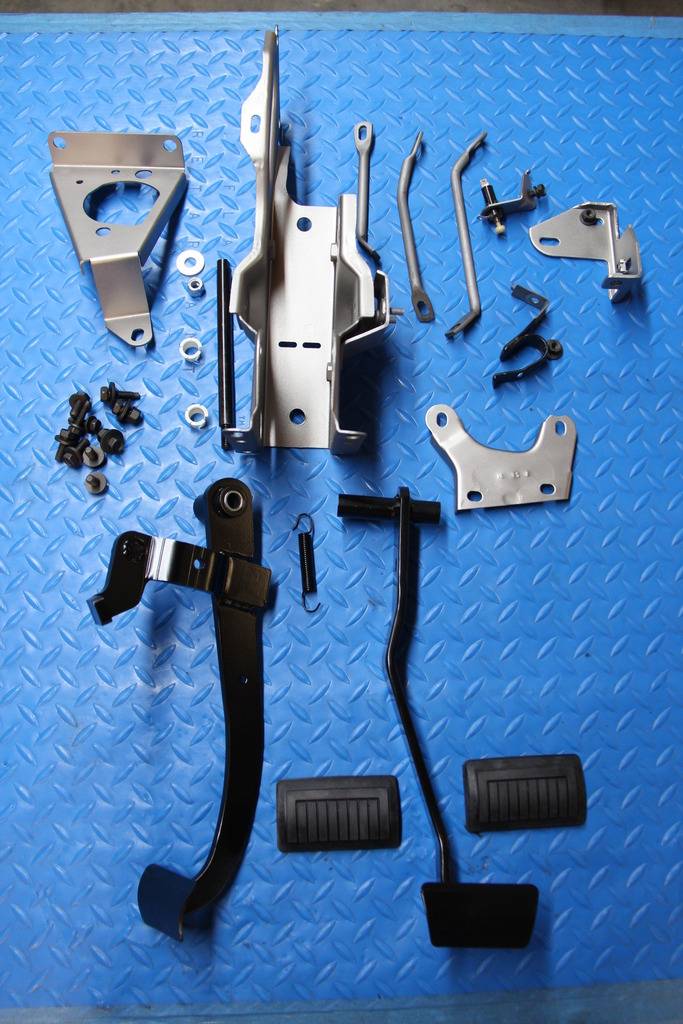
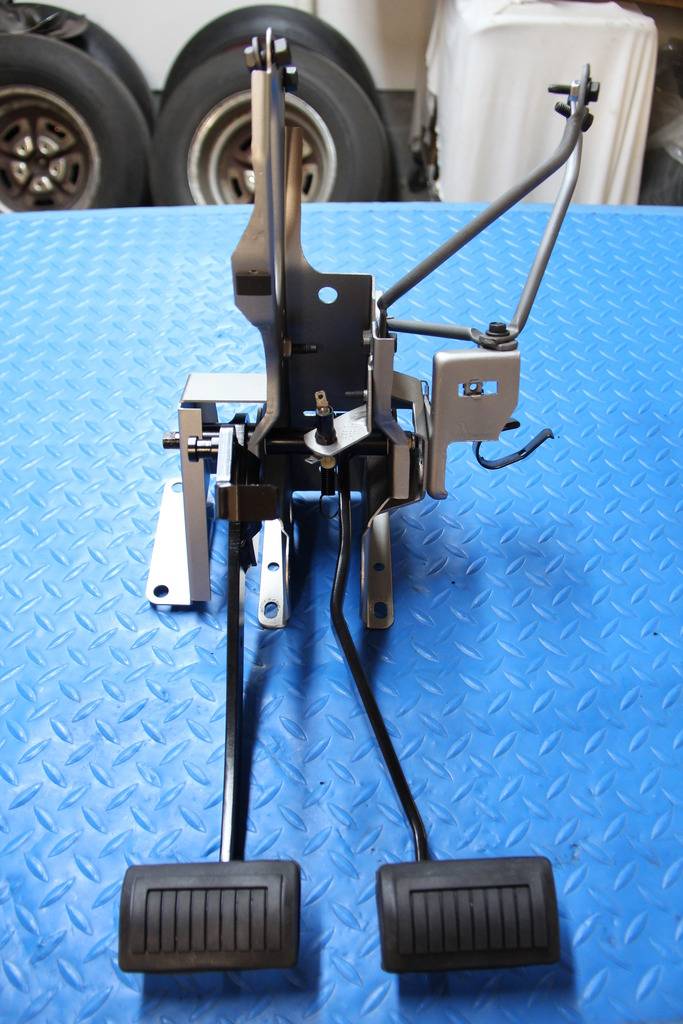
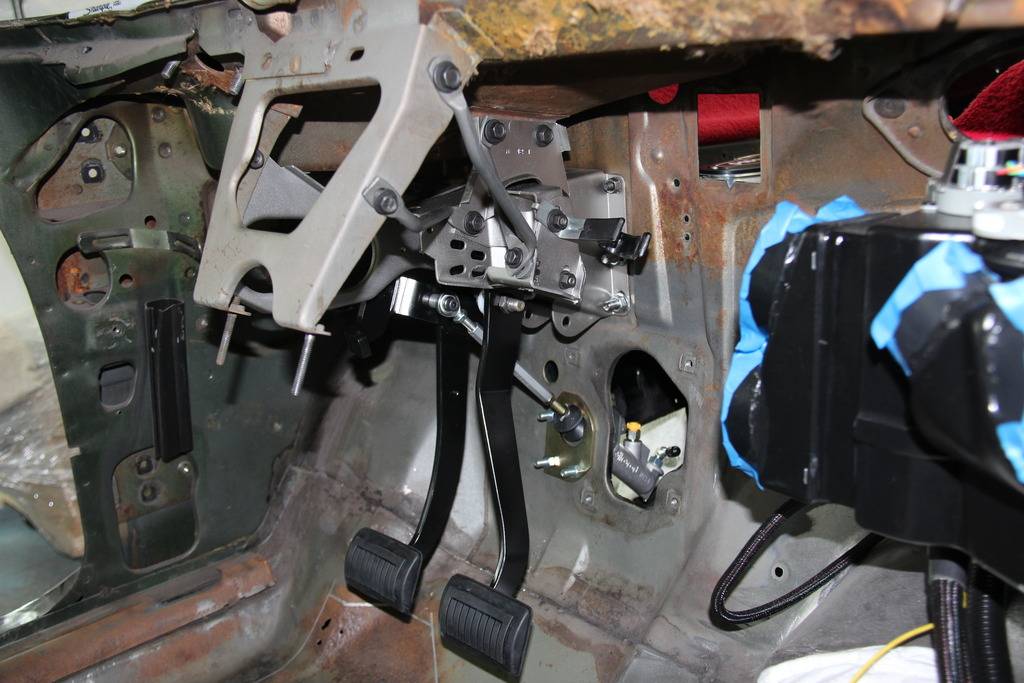
Disassembled the brake pedal assembly and added the clutch pedal. Next I will fit the assembly to the Hydroboost and hydraulic clutch.
Thanks
Pat
09-16-2015 #297
Registered User
- Join Date
- Nov 2006
- Location
- Ma.
- Posts
- 5,560
It cleaned up nice.
Wayne
Car FINALLY home !!!!!! lol
Project FNQUIK https://www.pro-touring.com/showthre...ghlight=FNQUIK
09-16-2015 #298
Registered User
- Join Date
- Apr 2014
- Posts
- 803
Steve, Originally Posted by Motorcitydak
Thanks for the pictures and the info, fortunately my cowl is really in good shape and I'm just trying to figure out how to make paint it as nice-looking as yours with out removing the cowl.
Thank you
Pat
09-19-2015 #299
Registered User
- Join Date
- Apr 2014
- Posts
- 803
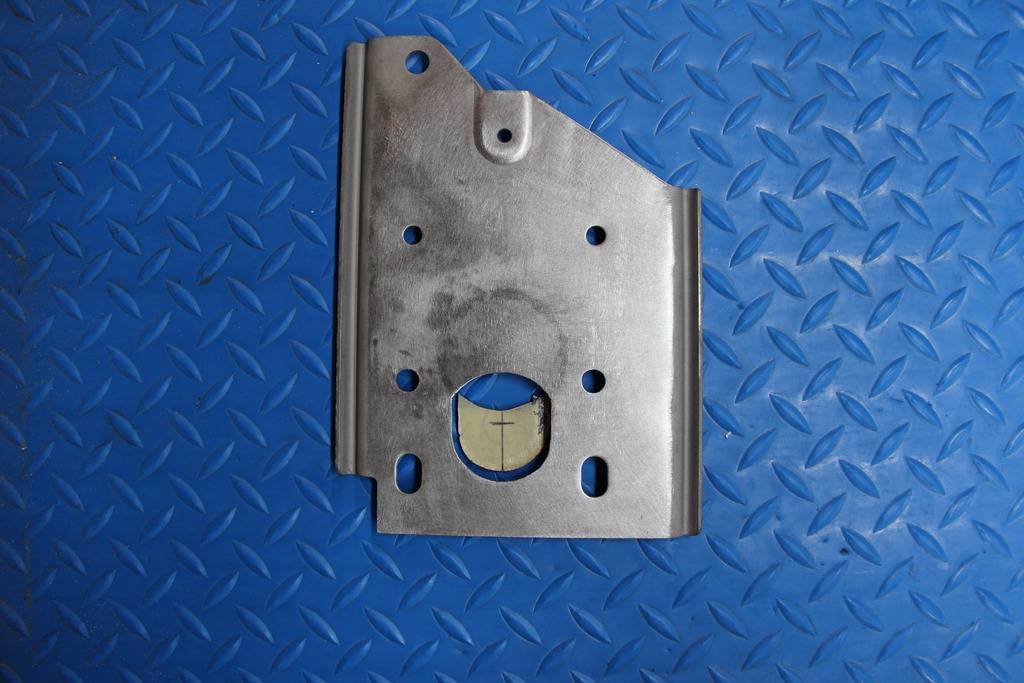
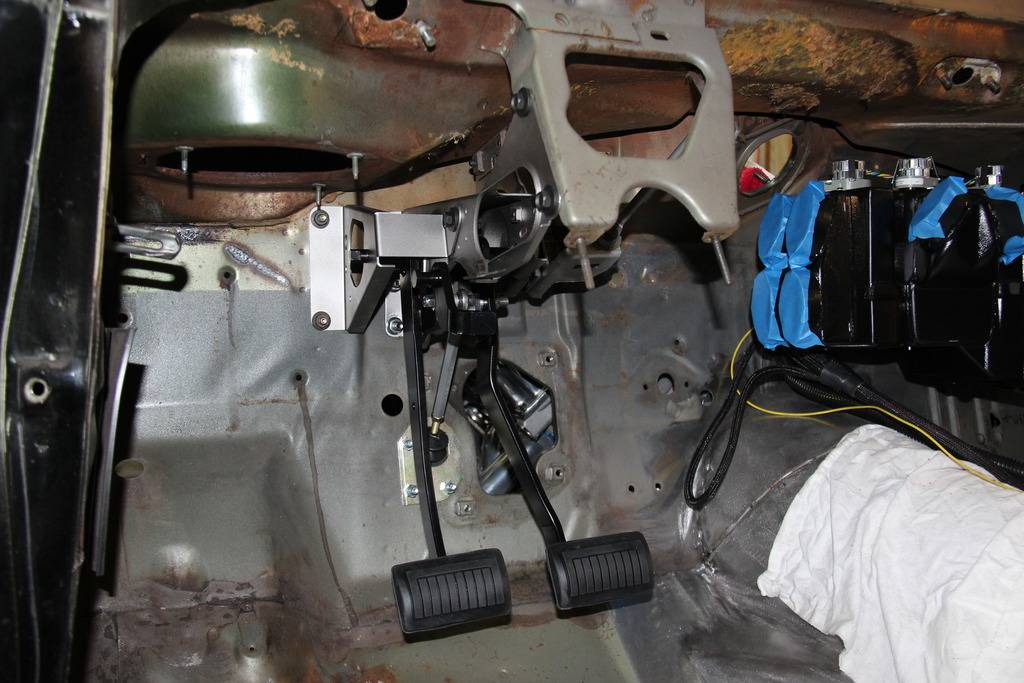
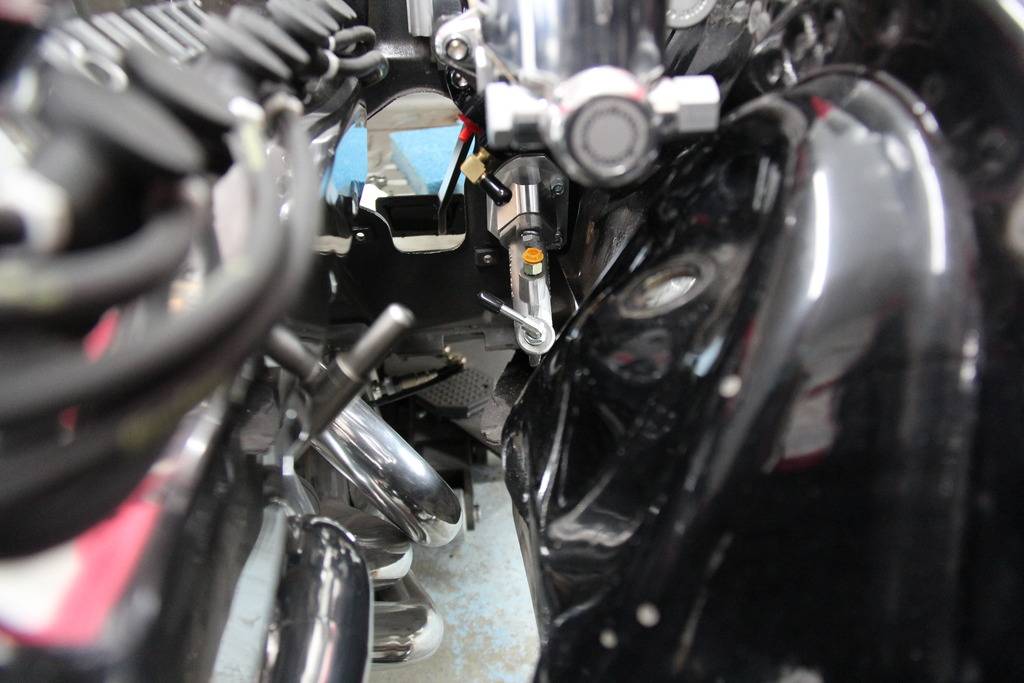
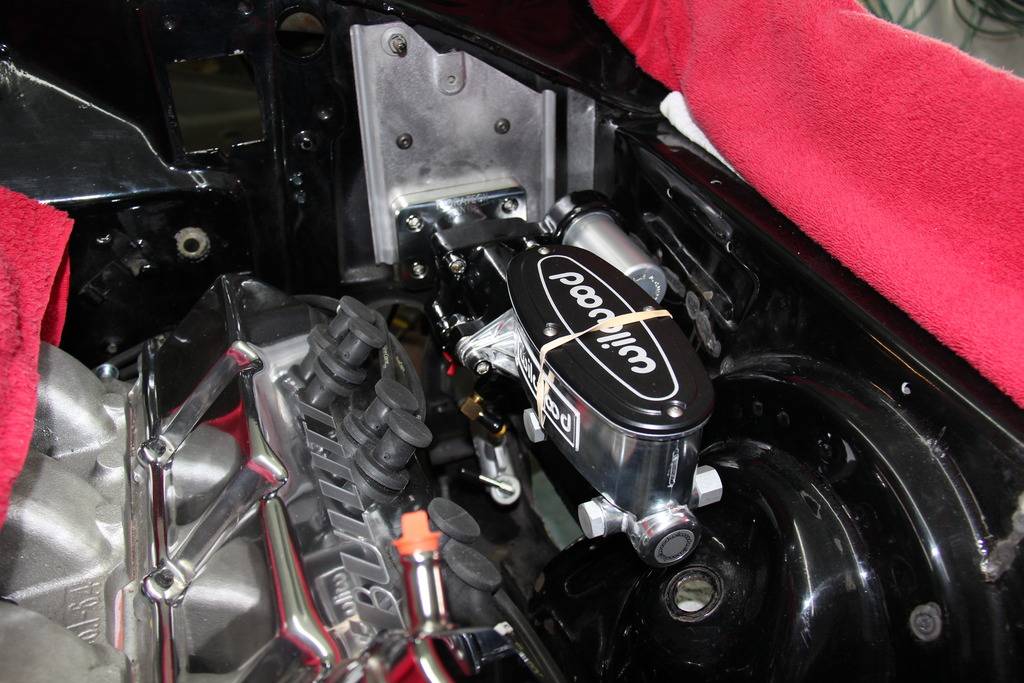
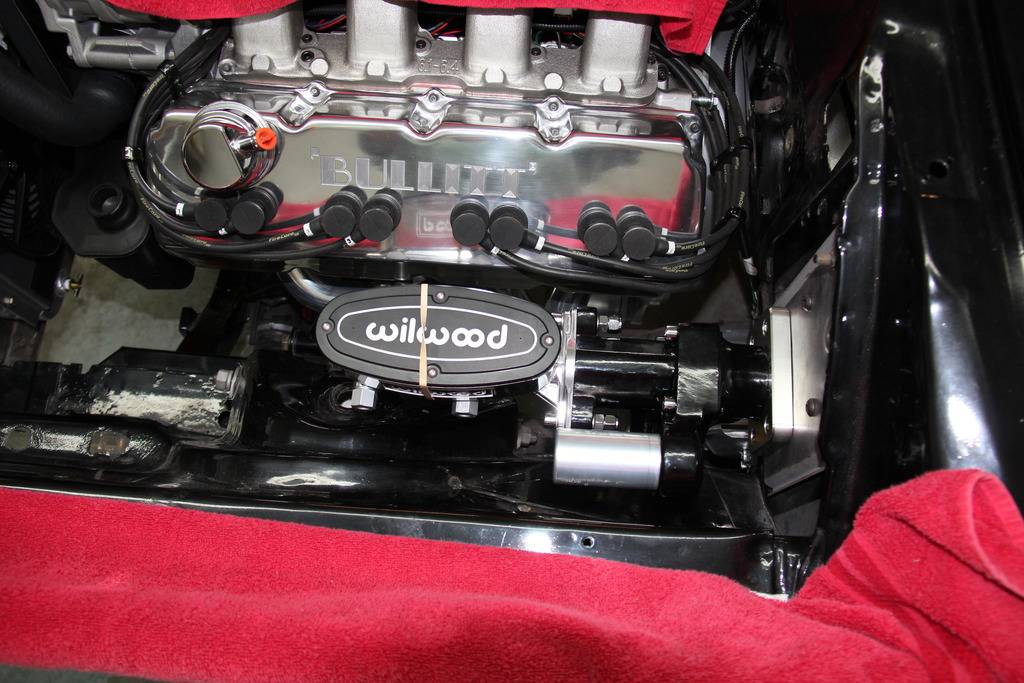
I test fitted the pedal assembly and had to weld over the original brake booster hole and cut a new hole in the firewall reinforcement mount. Also test fit the hydroboost and clutch master cylinder. I need to make the hydro boost and brake lines next.
Thanks
Pat
09-19-2015 #300
Registered User
- Join Date
- Sep 2013
- Location
- sw Kansas
- Posts
- 1,661
Good progress!


 Reply With Quote





