


Results 221 to 240 of 451
Thread: TwinTorino
-
06-14-2010 #221

 Registered User
- Join Date
- Jan 2010
- Location
- SLC. UT
- Posts
- 368
Nice progress Craig!

Jeff -- 96 Mustang - 2V Stroked Modular Turbo // 13 RAPTOR // 67 Mustang Fastback build - Coyote 5.0
-
06-23-2010 #222 Registered User
- Join Date
- Sep 2009
- Posts
- 2,997

Looking good. When will you get a video of the cars running?
1955 Nomad project LC9, 4L80e, C5 brakes, Vision wheels
1968 Camaro 6.2 w/ LSA, TR6060-Magnum hybrid and etc SOLD
1976 T/A LS1 6 Speed, and etc. SOLD
Follow me on Instagram: ryeguy2006a
07-19-2010 #223
Registered User
- Join Date
- May 2007
- Posts
- 10
Any updates on this project? Torinos look sooo much better than mustangs in my opinion. Just saw this on my local craigslist: http://omaha.craigslist.org/cto/1850326536.html
07-24-2010 #224 Registered User
- Join Date
- Nov 2005
- Location
- Motorcity, Canada
- Posts
- 292
Been too long since I have posted. Made lots of progress on the car since last time. Firewall is complete, heater box now fits like a glove, A/C condenser and radiator are mounted as well. All the wiring is in the car and all the parts and pieces to make the engine run. Just need to get the brakes so we can actually go somewhere once we get it running.
Car is very close to starting - just have to get past the PATS (passive anti theft system) on the car. All the parts and pieces came from different cars so the keys don't match the ones stored in the cluster etc. I just need to reflash the PCM and turn it off for now. The engine cranks over and everything else on the car works. The PATS system won't allow the injectors to fire because it thinks the car is being stolen. I expect we will have it running this coming week.
08-01-2010 #225
Registered User
- Join Date
- Nov 2005
- Location
- Motorcity, Canada
- Posts
- 292
Finally got the PATS thing figured out. Surprisingly enough, with that out of the way, car fired right up on the first crank. Needed a motivational point along the way. Too bad we don't have functioning brakes and a driveshaft.. otherwise we could go for a lap around the block.
Open exhaust is music to my ears . Motor mounts are shot.. polyurethane ones will fix that.
http://www.youtube.com/watch?v=YCKnn4SFFaI
08-01-2010 #226 Registered User
- Join Date
- Mar 2009
- Location
- overseas
- Posts
- 3,434
sounds greeeeeaaat!!!!!!!!!
Kevin S. (overseas in Germany)
1963 Chevrolet Impala 2d ht Coupe
www.CruznArt.com
CRUZN - Automotive Artworks
08-02-2010 #227 Registered User
- Join Date
- Nov 2008
- Location
- TN
- Posts
- 959
Nice!
Benjamin
Twin Dusters
'72 Plymouth Duster "Aero Duster" project
'72 Plymouth Duster "Daily Duster" project
https://www.pro-touring.com/showthre...RO-DUSTER-quot
08-02-2010 #228 Registered User
- Join Date
- Aug 2004
- Location
- Rustburg, Virginia
- Posts
- 3,436
Sweet music!
1970 RS/SS350 139K on the clock:
89 TPI motor w/ 1pc rear seal coupled to a Viper T56 via Mcleod's modular bellhousing w/ hydraulic T/O bearing from the Viper, 12 bolt rear w/ 3.73 gearing, SC&C upper control arms, factory lowers with Delalums, C5 brakes at all four corners, Front Wheels 17x8's with Sumi 255/40/17 and Rear Wheels 17x9's with Sumi 275/40/17.
Brief description of the work done so far can be found here: http://www.nastyz28.com/forum/showthread.php?t=112454
08-02-2010 #229 Registered User
- Join Date
- Jan 2008
- Location
- Charlotte
- Posts
- 1,295

DAMNNNNNNNNNNNNNNNNNNNNNN!2005 LeMans Blue Corvette w/ T56 & Z51 & C6Z06 Brakes, Build Thread: https://www.pro-touring.com/showthread.php?64496
2005 GMC Sierra 2500HD LLY / Allison
2014 Chevy SS LS3 / 4 Door
09-17-2010 #230
New to Pro-Touring
- Join Date
- Aug 2010
- Posts
- 4
Any new work on these cars. Great work so far.
09-17-2010 #231 Registered User
- Join Date
- Dec 2006
- Location
- oshawa ontario
- Posts
- 1,607
 you are such a Canadian......man I can relate!
 Originally Posted by SVTforme

probably has something to do with the 13% sales tax we have to pay on new items....
keep diggin' brawtha.....!Nascar 69 Chevelle project, 1999 Hutch Pagan Nascar chassis, 69 Chevelle body,700hp, Penske's, slicks, roadrace track day https://www.pro-touring.com/showthre...le-Cup-project
89 Iroc 406 Fitech 5 spd
01 chevy 2500HD 4x4 8.1 Allison
31 Scarab 2 x 454
09-17-2010 #232
Registered User
- Join Date
- Mar 2006
- Posts
- 136
Joys of Alberta no PST just the damn federal tax. Never has stopped me ffrom spending cash though.
09-18-2010 #233
Registered User
- Join Date
- Nov 2005
- Location
- Motorcity, Canada
- Posts
- 292
Suppose it is about time to post some updates. Making some decent progress lately.
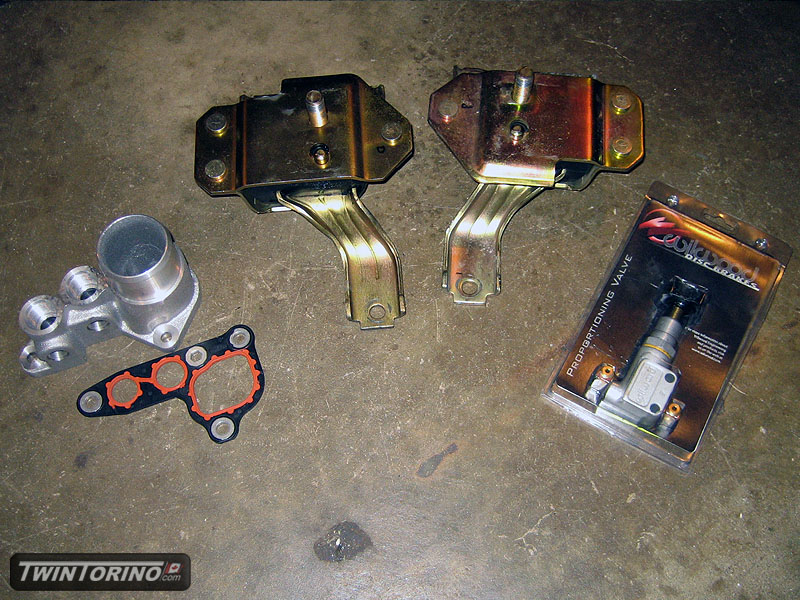
Keeping in the theme of used parts.. picked up some more of them. Found a set of nearly new Energy Suspension 4.6L motor mounts and also a Wilwood proportioning valve. Had to buy the oil filter adater new though - the one from Ford Racing is a nice piece (M-6881-C). Planning on running a remote oil filter w/t-stat and also an oil cooler in front of the cooling module. This part also increase the block inlet hose to 2" to further reduce the possibility of water pump cavitation.
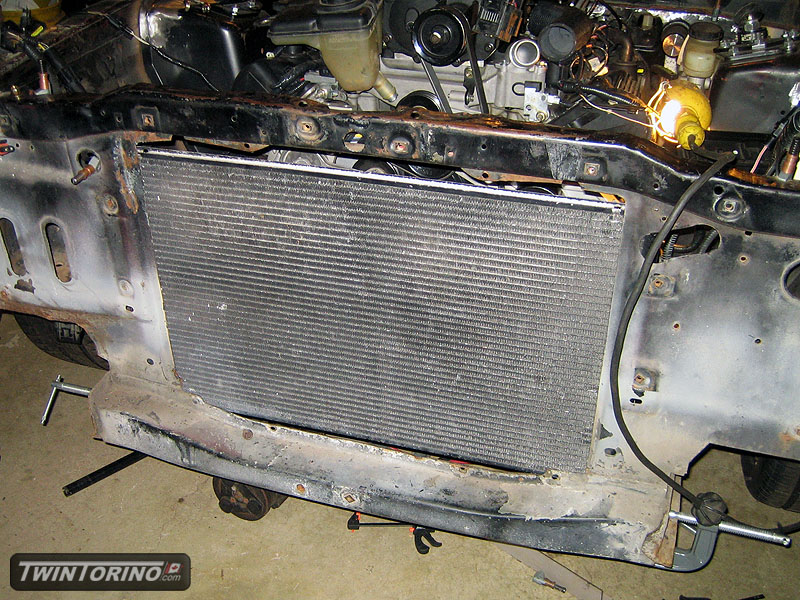
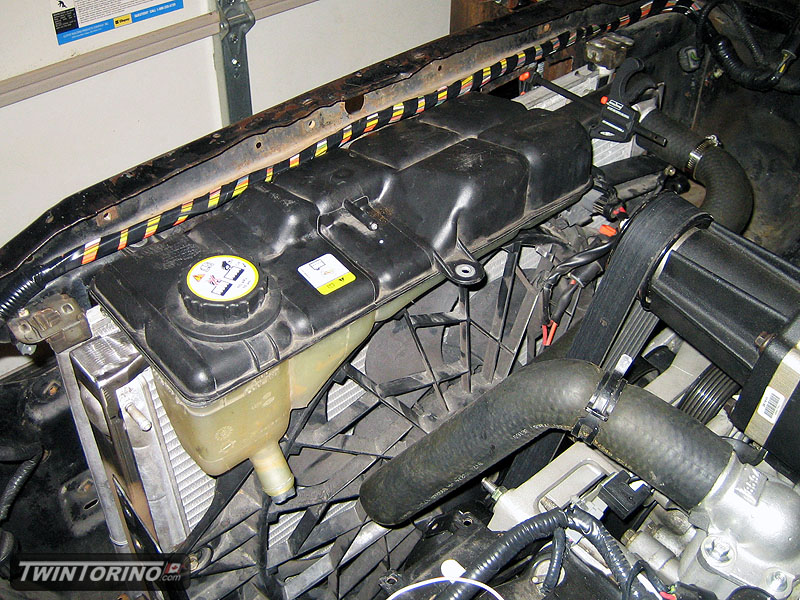
We made up custom radiator and condensor mounts which allow us to get them both between the frame rails to keep them as low as possible. This way the degas bottle can be mounted where it was intended to go and remain the highest point in the cooling system, but at the same time being low enough to clear the hood which is does nicely. All these parts are from a 2004 Cobra which uses a 36mm all aluminum radiator. All other Mustangs except the Mach 1 have plastic end tanks. A/C compressor is now in and the new Mustang heater box also fits on the firewall. Just need to run the lines and the A/C system will be complete.
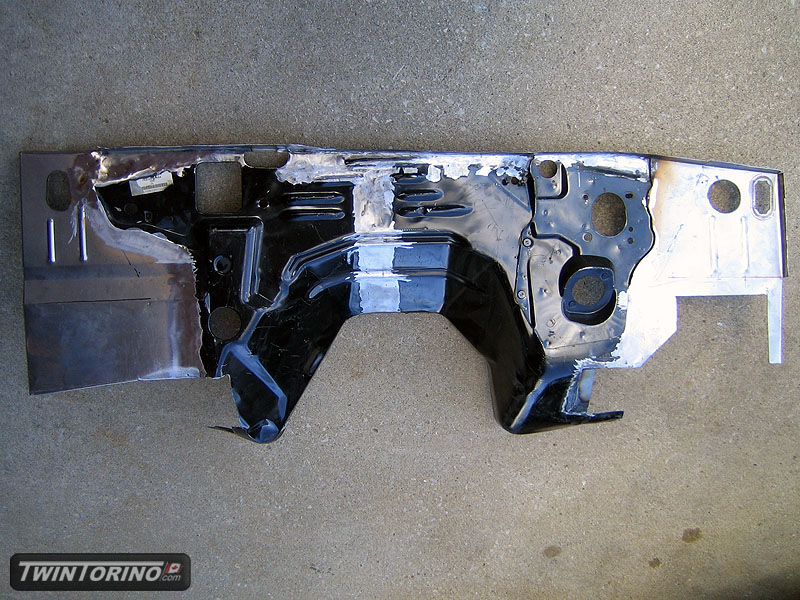
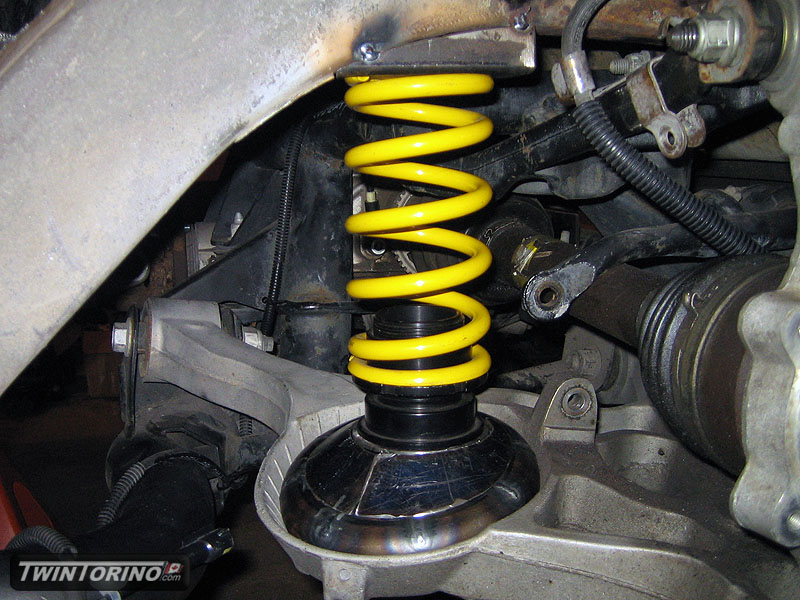
The firewall has been completed and is ready to install along with the floor pans. Rear suspension is nearing completion and just needs to be final welded. The only thing missing in the pic is the upper coil spring retainer. ABS wiring is now in place. Last thing to do is run the hard lines which will come next.
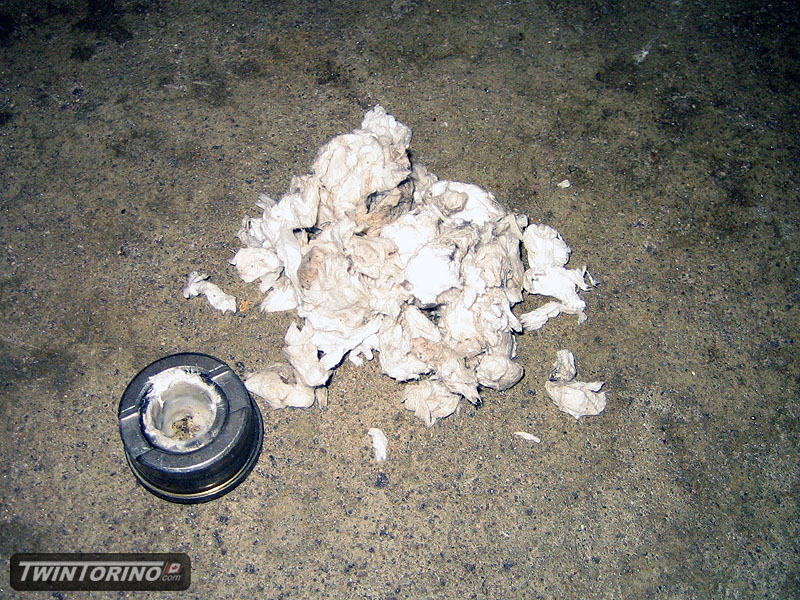
As an aside - I had never used the wet toilet paper trick to remove a pilot bearing so I figured I would give it a try. I am used to the messy grease trick. Surprisiningly this worked like a charm and clean-up is a breeze. You sure can fit a lot of paper in there! Installed a resurfaced 2004 Cobra aluminum flywheel, clutch, pressure plate, throwout bearing and clutch cable. Trans side of things is ready to go. Just need to get the mounts in.
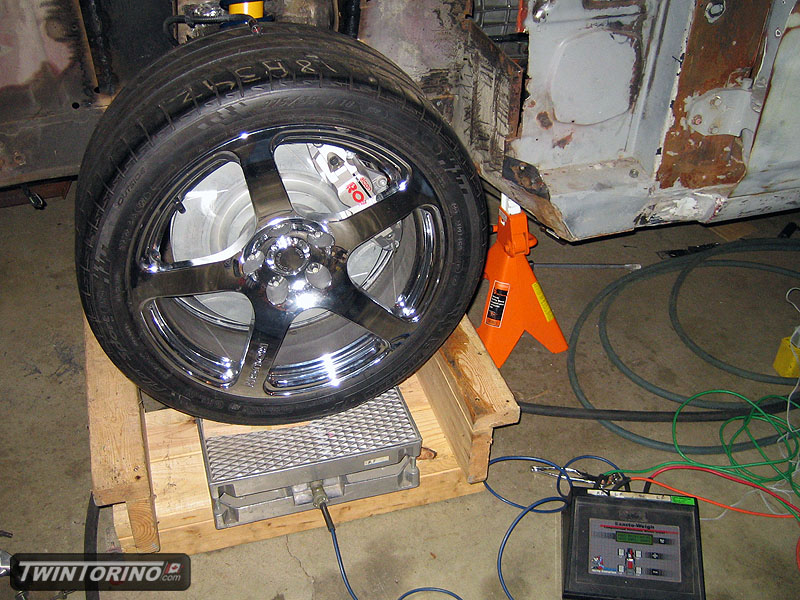
We put the car on the scales and put every part and piece we planned on putting on the car. Looks like the car will come in at around 3450lb curb weight (56%ft/44%rr). With driver and gear we are looking at around 3650lb track weight. We put the car in the air and measured all of the corner weights and using the motion ratios front and rear figured out what spring rates to use. We are using 2.5" ID front springs and 60mm rear springs from Hypercoil. The target is to run a front ride frequency of ~1.55Hz and 1.7Hz in the rear for the street. For the track the ride frequencies will be similar front to rear.
09-18-2010 #234
Registered User
- Join Date
- Aug 2004
- Location
- Dunwoody, GA
- Posts
- 4,983
Looking great Craig. This is one of my favorites to watch because you guys are so inventive and this is such a different build.
Trey
"The early bird may get the worm, but the second mouse gets the cheese."
~ Jon Hammond
1979 WS6 Trans Am stock LT1/T56 drive train out of my Formula. BMW M-parallel rims. C5/C6 brakes
build thread https://www.pro-touring.com/showthre...ghlight=begins
09-20-2010 #235
Registered User
- Join Date
- Aug 2004
- Location
- Rustburg, Virginia
- Posts
- 3,436
Sweet...thanks for the update...glad to see this project still moving along nicely.
1970 RS/SS350 139K on the clock:
89 TPI motor w/ 1pc rear seal coupled to a Viper T56 via Mcleod's modular bellhousing w/ hydraulic T/O bearing from the Viper, 12 bolt rear w/ 3.73 gearing, SC&C upper control arms, factory lowers with Delalums, C5 brakes at all four corners, Front Wheels 17x8's with Sumi 255/40/17 and Rear Wheels 17x9's with Sumi 275/40/17.
Brief description of the work done so far can be found here: http://www.nastyz28.com/forum/showthread.php?t=112454
11-03-2010 #236
Registered User
- Join Date
- Nov 2005
- Location
- Motorcity, Canada
- Posts
- 292
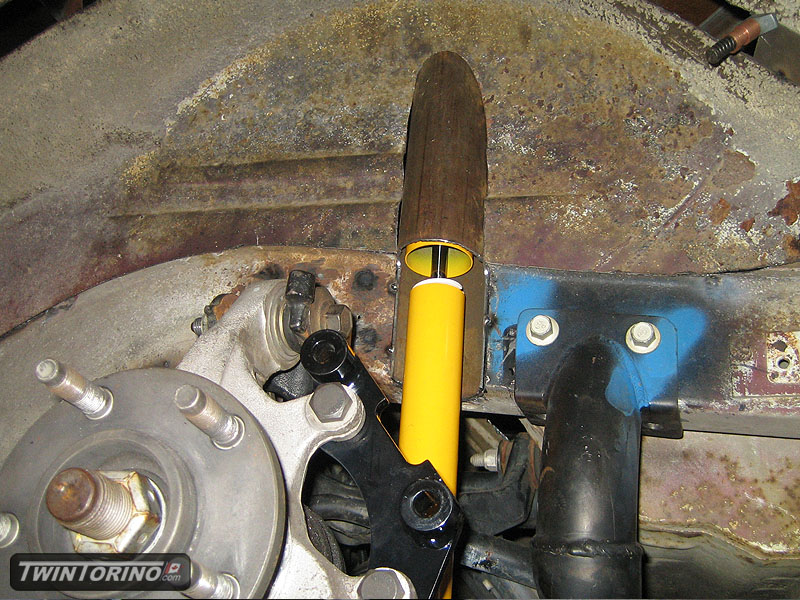
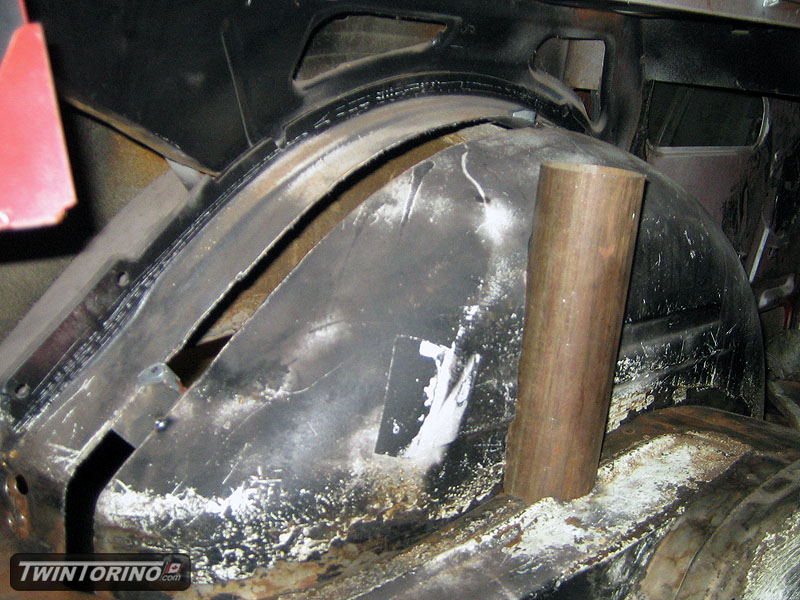
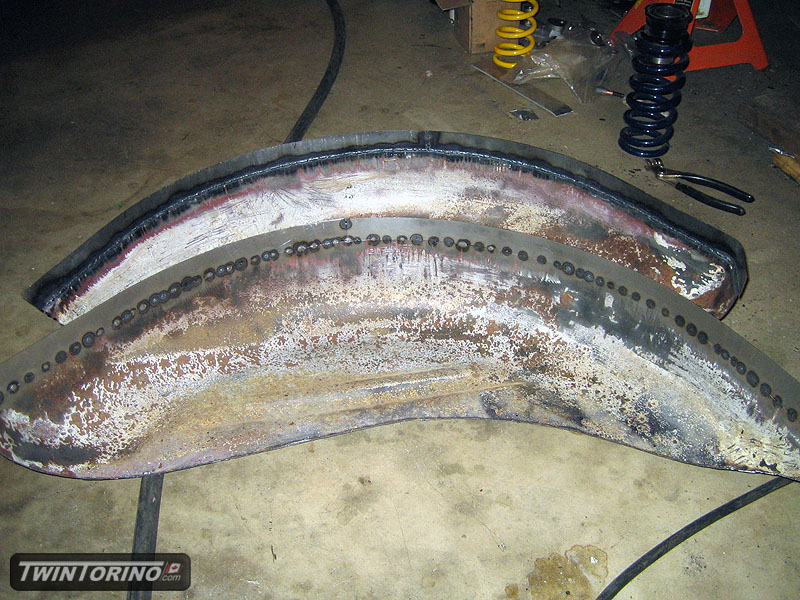
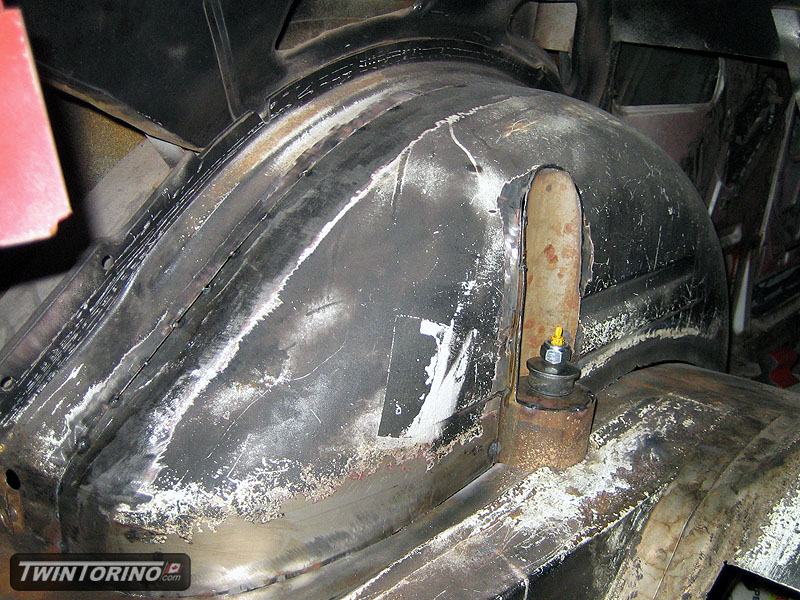
Managed to get some things done over the past month or so. Floors are in the car and basically done and now ready to weld in. Decided to move back to the rear suspension and things back together for good. First step was to add 1.5" to the rear wheel wells to make them clear the tires, and then notch the frame out for the 2.75" shock mount tubes. Once the shocks were in, we were able to confirm the shock jounce and rebound travel and everything looks OK clearance wise. Wheel wells are now tacked into place and ready for final welding. Sure would be nice if someone out there made Torino sheet metal parts
. Still lots of welding to do here, but getting much closer by the day.
11-05-2010 #237
Registered User
- Join Date
- Oct 2010
- Location
- Cincinnati
- Posts
- 13
OK, explain the toilet paper trick....I have used grease and a punch before and frankly didn't have a lot of luck with it.
11-06-2010 #238
Registered User
- Join Date
- Nov 2005
- Location
- Motorcity, Canada
- Posts
- 292
I had only used the grease method in the past, and although it worked - it was a pain to clean up in the end. I was somewhat skeptical with this technique but I figured I would give it a try. All you do it tear up pieces of toilet paper into small strips and soak them before packing them behind the bearing. Take a piece of steel or something along those lines that has an OD similar to the ID of the bearing and keep packing the pieces in until the bearing comes out. After that you just clean up the mess of paper and water which takes all but a minute. Originally Posted by U_SAY_GO
There are tons of videos on Youtube of the process.
11-28-2010 #239
Registered User
- Join Date
- Nov 2005
- Location
- Motorcity, Canada
- Posts
- 292
Finished tacking in the pass side wheel well and made up the shock mount for that side too. Everything is ready for final weld. Time to move back to something we have been putting off for a while now - spring mounts, spring sizing and locking in the ride height with all these parts which turned out to be easier said than done. As you can see - we ended up making a new upper spring mount to clean things up and transition it into the existing frame.
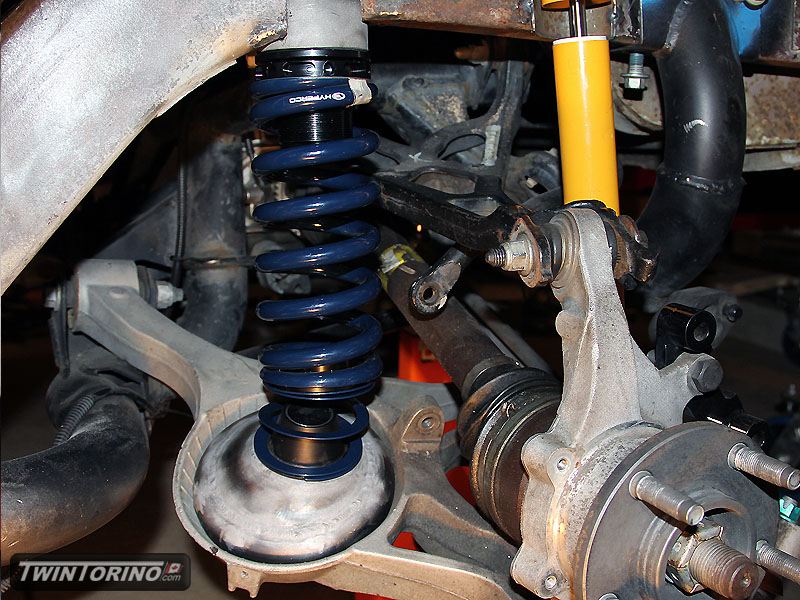
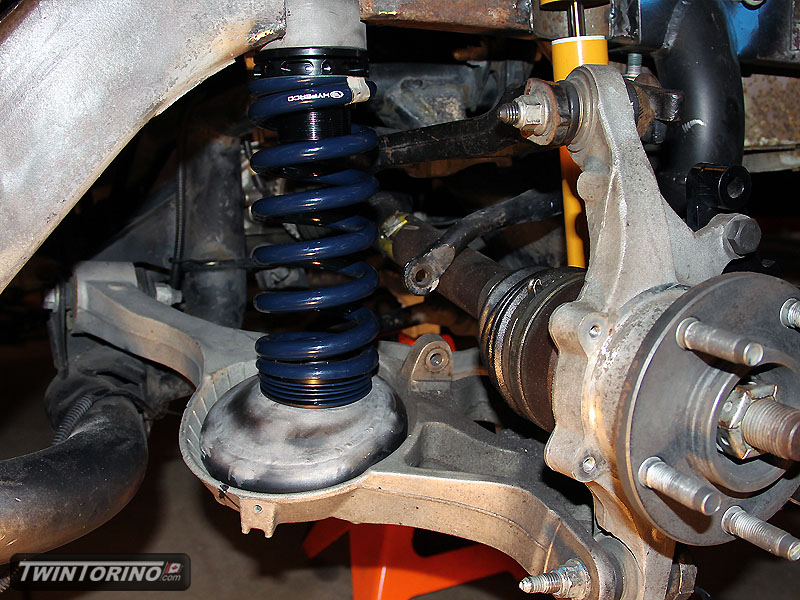
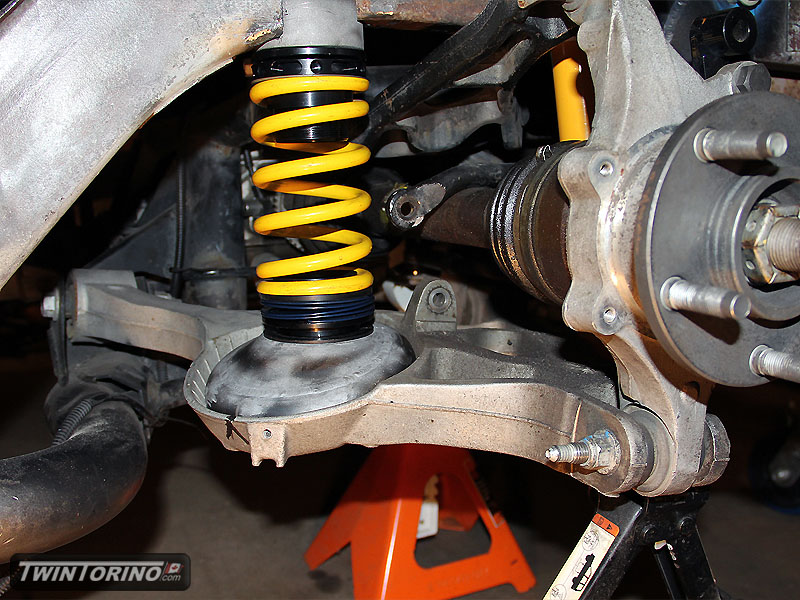
Three main parts to the rear suspension travel - and each stage has it's own issues:
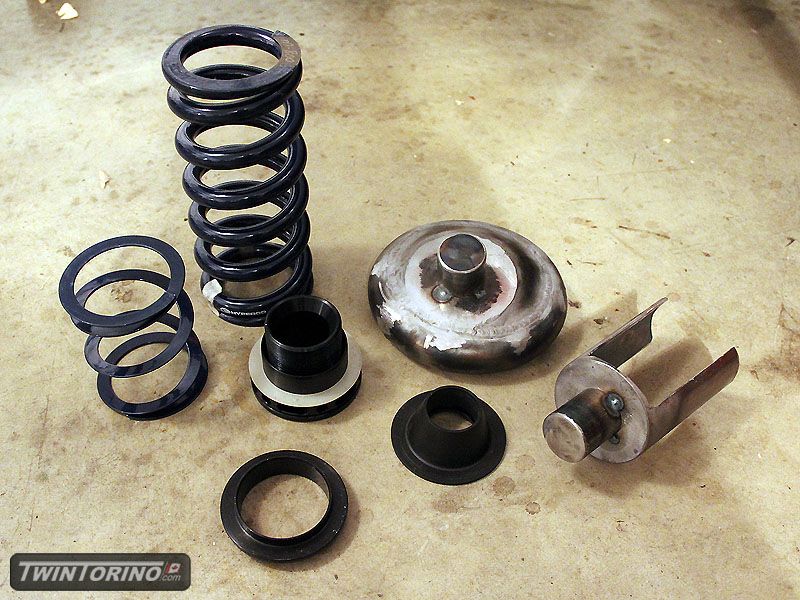
Rebound/full droop position - this is with the wheel pushed all the way down. The car will rarely see this position, but is is possible and will always occur when lifting thcar in the air using a hoist. The first issue we ran into is that our springs are too stiff and the spring will just fall out of the car as is as they are all their free length at this position. Simple solution - just buy longer springs right? Unfortunately not that easy - if you get longer springs, the car will just sit that much higher. Since the motion ratio is approx 0.5, if you make the spring .5" longer, the car rides 1" higher. Solution here is to run Hypercoil helper springs. You can completely compress these springs by hand, but there is enough spring force to keep the main sping in place. They compress to a mere 0.3". The keep the lower spring in place on the lower mount - we opted to use a nylon part made by Vorshlag which some may recognise as a BMW parts supplier. To keep these in place, we just made up 1 3/8" posts as you can see in one of the final pics. We also used a similar sized spacer to keep the ride height adjuster in place. The other key point about this position is still being able to get the spring adjuster in position on the top post.
Design position - this is the position the car naturally sits at full of fluids on the ground. To fine tune the ride height, we opted to use 60mm ride height adjusters made by AST - yet other BMW part. Based on the second picture - you can see that the helper springs are full compressed and the entire weight of the car is now in the springs. To get the car at the correct height was a combination of spring length selection (since the rate was fixed to achieve a certain ride frequency), helper spring height, coil spacer height, and ride height adjuster overall height. The goal was to have the height adjusters at their midpoint at design position (which they actually sit at although not shown in the picture).
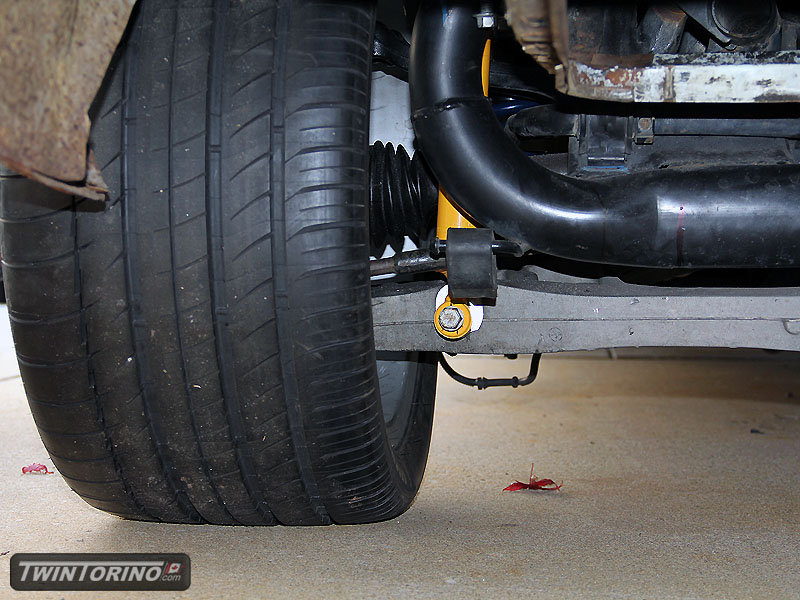
Jounce position - this is with the wheel pushed all the way up and riding on the jounce bumpers, which in this case are built into the shocks. Couple of issues you have to watch out for here - coil bind on the springs, control arm contact to the frame, and upper and lower spring seat misalignment. For the purpose of illustration, I stuck another spring on the car as compressing the other springs would require anchoring the car to the ground.
With all this in place and all the issues worked out (for now), the rear suspension design is complete and just needs to be final welded in place. This will make the process much easier on car #2.
Only thing left in the rear suspension area now are the brake line routing and getting all the ABS parts in place.
11-29-2010 #240 Registered User
- Join Date
- Apr 2009
- Location
- san diego
- Posts
- 5,101
Nice progress!
My build thread: https://www.pro-touring.com/showthre...ing&highlight=
The mustang build thread: https://www.pro-touring.com/showthre...el)&highlight=

 Reply With Quote


