


Results 321 to 340 of 451
Thread: TwinTorino
Hybrid View


-
12-04-2011 #1

 Registered User
- Join Date
- Nov 2005
- Location
- Motorcity, Canada
- Posts
- 292
OK - this all sounds great in theory.. but how do we make it work?
Largest challenges include:
- Making up transparent faces with LED backlighting.. and on a budget
- Reversing the direction of the gas gauge and oil pressure gauge on the cluster so they follow a logic direction of rotation
- Packaging everything together
- Remotely connecting gauges and odometer to circuit board. This has to be done since the gauge spacing is different.
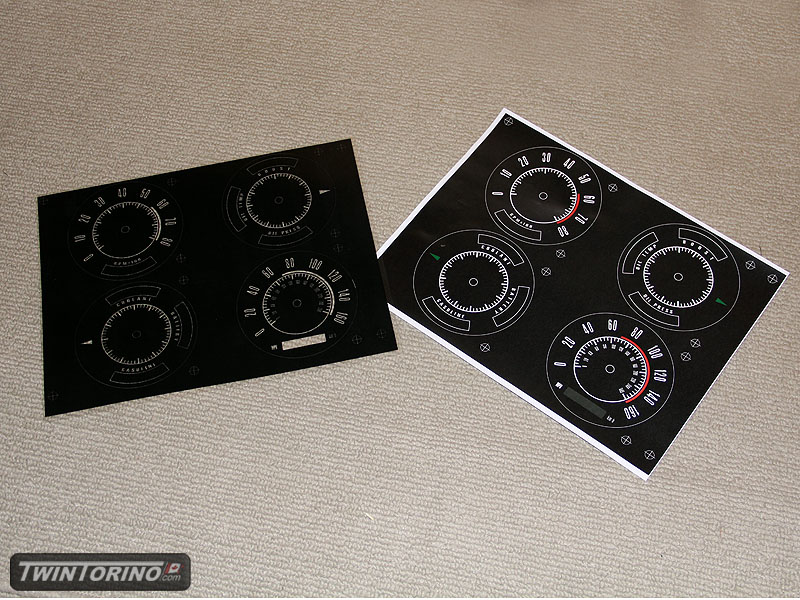
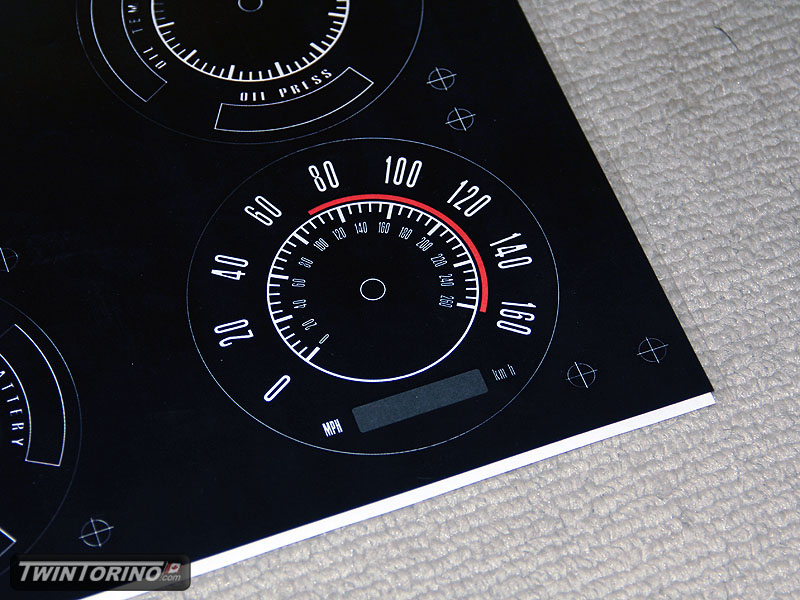
First task is working with gauge faces. After doing some extensive research on the web.. we came up with this solution. Since everything is done in Illustrator, it exists as a vector graphic. In a nutshell this means that you can increase the size of the images as large as you want an they will not distort (unlike normal rasterized images). In theory I could print this out large enough to put on the side of a building if I really wanted to ). This provides for some very sharp images which is necessary for print out things like the text and tick marks.
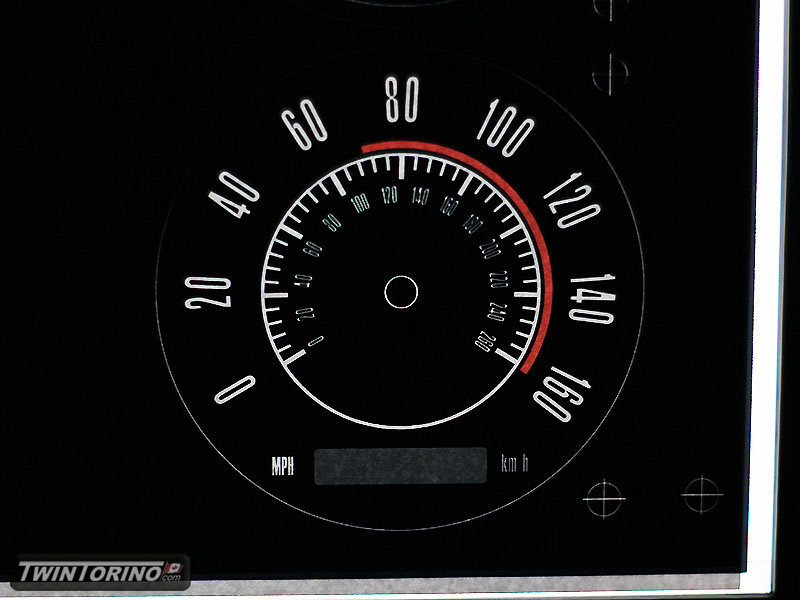
By making up a set of layered images with a high res laser jet printer, we can get the transparent/opague effect. Top layer is a standard transparency sheet printed on the backside (image reversed). The bottom layer is a standard 20lb piece of white paper. Both of these sheets are bonded together to make one piece. Since I did not have the photo mount spray adhesive at the time of making these pictures up, you will have to use your imagination of what things will look like when they are perfectly aligned.
The final picture shows using an LCD computer monitor at night for backlighting. Little to no light passes through the black sections. Looks very similar to a modern cluster. This was relatively easy for the effect it gives. Ideally, we would silkscreen the parts on appropriate materials like auto manufacturers would.. but this will have to do for now until we lock in the design. For under $10, it sure does the trick.
For adding the check engine, ABS lights etc, we will simply add another transparency sheet and omit these images from the front layer. This way you will not be able to see them unless they are illuminated.
More to come as we progress.
-
12-04-2011 #2
 -Moderator/Sponsor-
- Join Date
- Apr 2001
- Location
- The City of Fountains
- Posts
- 16,129

Very nice work with the gauges. I have been trying to bring a more modern touch to my older Autometer gauges without having to replace the gauges which are working perfectly. I contacted Autometer and of course they weren't incredibly helpful since they just want to sell more gauges. I was thinking of going down the same path as you and doing custom faces, etc....
Can you please offer up some of the web links that you found helpful?
Andrew1970 GTO Version 3.0
1967 Cougar build
GM High-Tech Performance feature
My YouTube Channel Please Subscribe!
Instagram @dr__efi
I deliver what EFI promises.
Remote Holley EFI tuning.
Please get in touch if I can be of service.
"You were the gun, your voice was the trigger, your bravery was the barrel, your eyes were the bullets." ~ Her
12-04-2011 #3 Registered User
- Join Date
- Nov 2008
- Location
- TN
- Posts
- 959
I would be interested as well... Originally Posted by andrewb70
 Benjamin
Twin Dusters
'72 Plymouth Duster "Aero Duster" project
'72 Plymouth Duster "Daily Duster" project
https://www.pro-touring.com/showthre...RO-DUSTER-quot
12-04-2011 #4
Registered User
- Join Date
- Nov 2005
- Location
- Motorcity, Canada
- Posts
- 292
For DIY gauge faces, I found these helpful. This obviously requires some knowledge in graphics software and patience/time more than anything. You can print the faces at any printing place if you don't have access to a laser jet printer. Getting into the more complicated and detailed faces will require Illustrator knowledge. For the first round, I actually found that Solidworks (or any other CAD program) was really handy until I got the hang of Illustrator. The nice thing is you can import 2D CAD drawing files into Illustrator.
http://revlimiter.net/mods/gauges.php
http://www.cubefx.com/smart/speedo/
http://forums.acuralegend.org/custom...les-t7422.html
For custom LED backlighting, this is the one I found to be the best. Most others just involve taking a string of LED's and packing them behind the cluster. This requires you to make your own PCB (printed circuit board). Still well within the DIY catagory, just a little more complicated. Once I get the faces figured out, I will move onto something like this. I will run a string of LED's in the meantime as there are plenty of other things to do on the car.
http://www.escape-city.com/viewtopic.php?f=13&t=1361
All of this is much easier if you are simply replacing newer backlit gauges as you have something to go by. The older front lit gauges on 60's/70's cars throw in a twist as you have to re-do all of the lighting and backing to the faces. You have to switch to something clear instead of the existing metal for obvious reasons. Older clusters also have plastic closeouts behind them to divert light to things such as high beams, which makes backlighting even more challenging.
Once I get this all figured out and have something that is near completed and presentable - I will put together a how-to.
12-06-2011 #5
Registered User
- Join Date
- Nov 2005
- Location
- Motorcity, Canada
- Posts
- 292
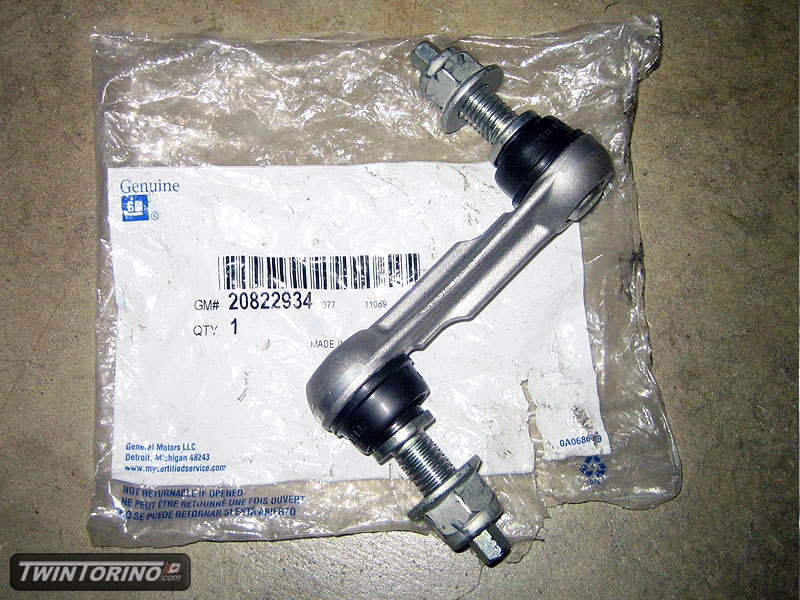
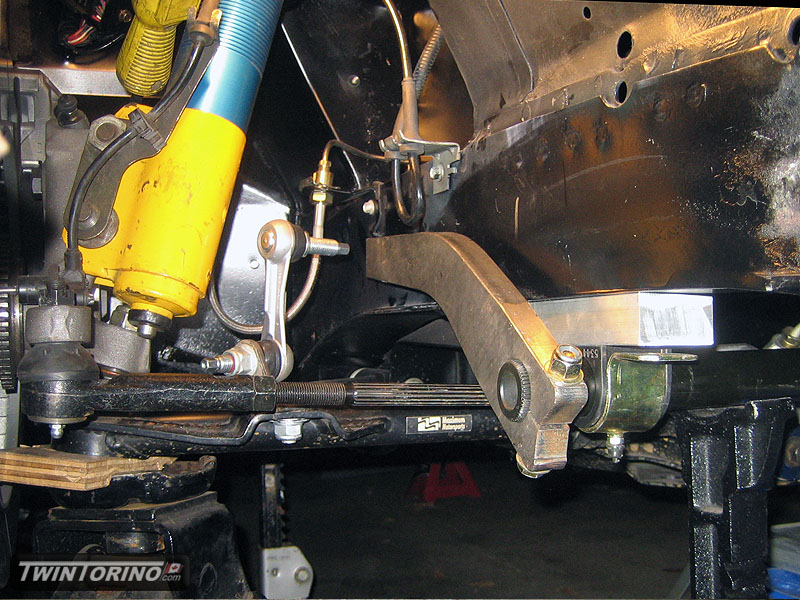
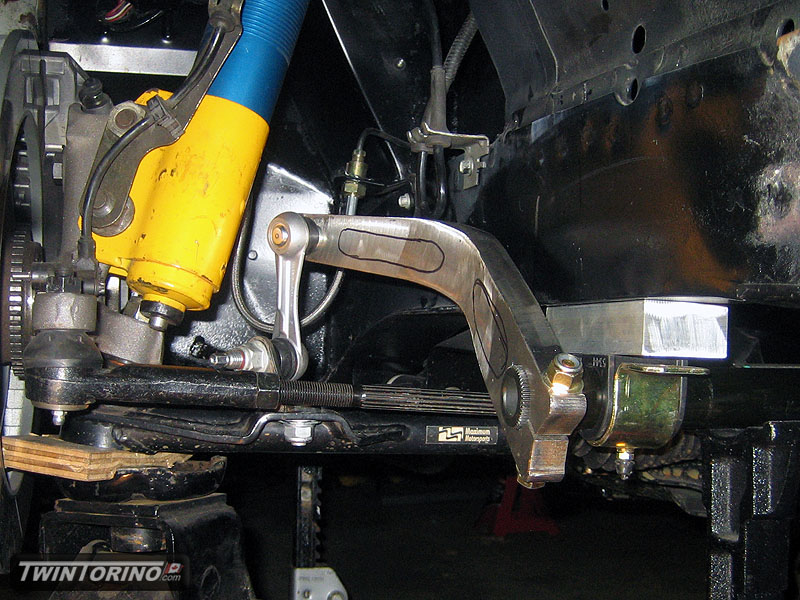
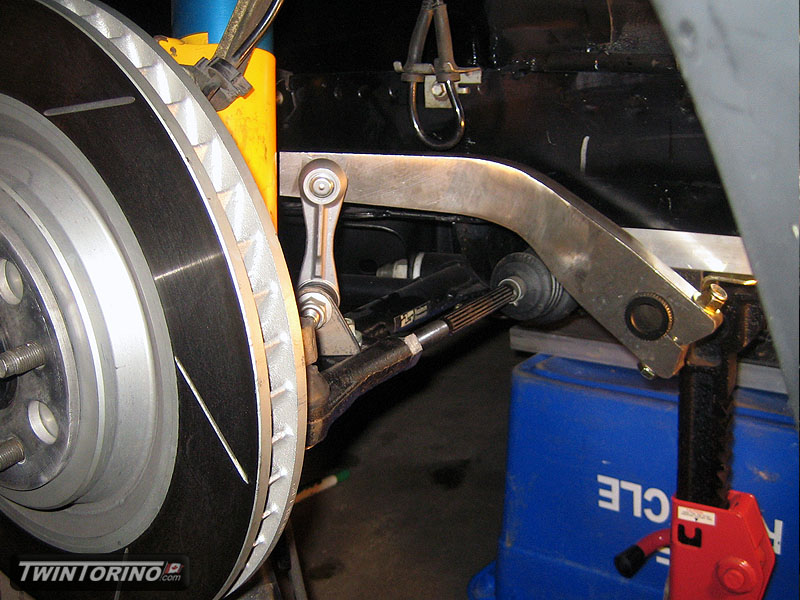
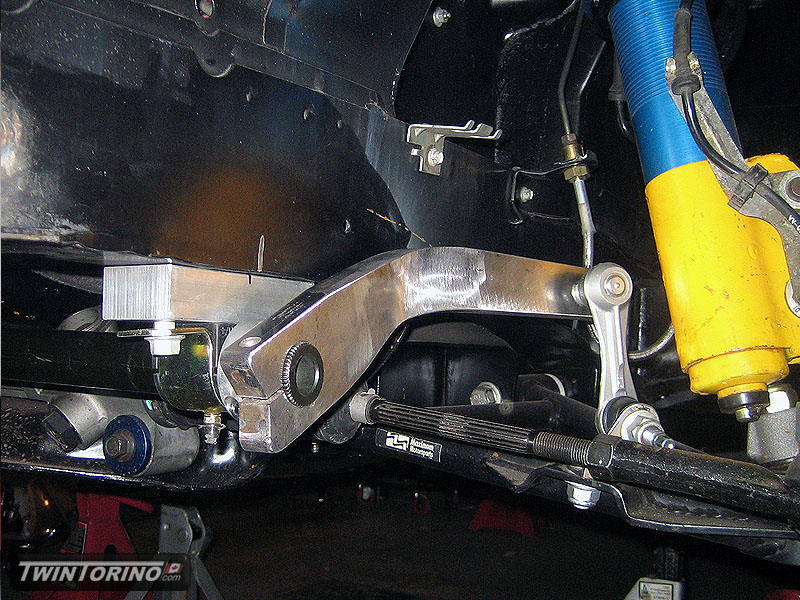
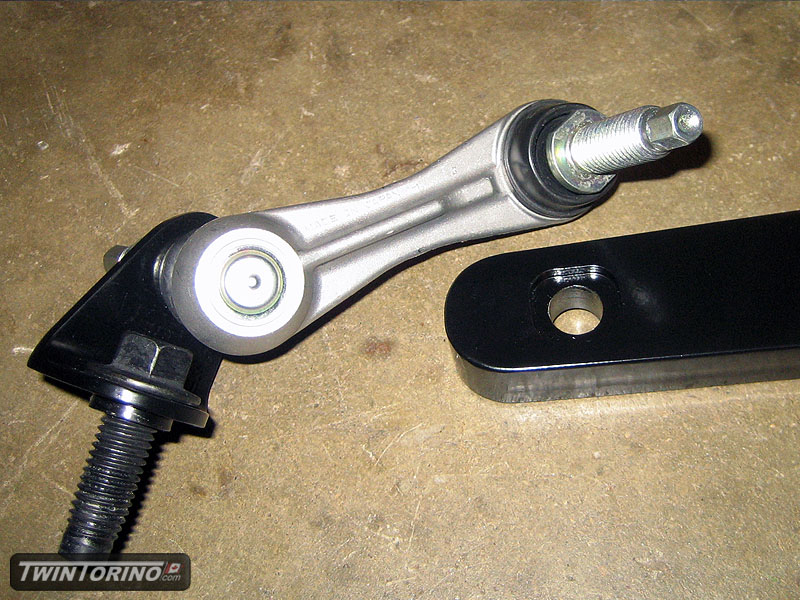
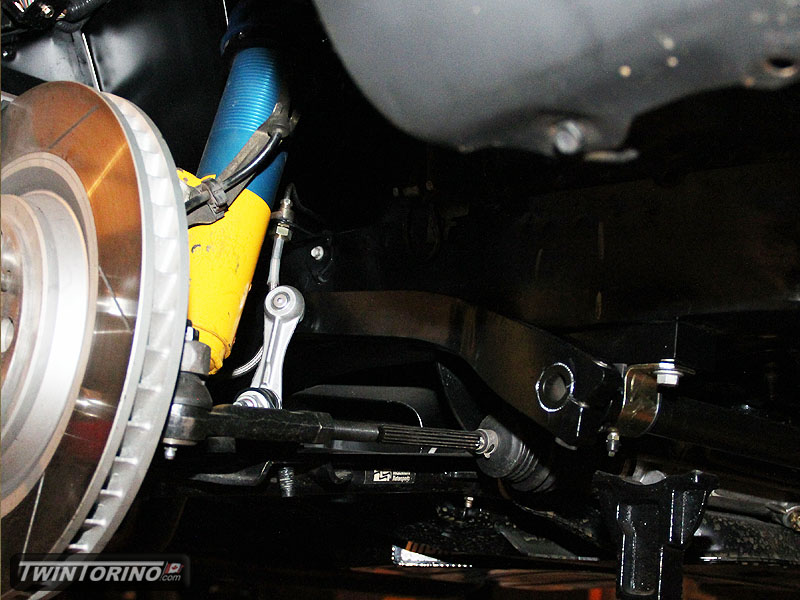
Back to the front suspension once again.. one last item to take care of - the sway bar. Since there is clearly nothing out there that would bolt right up.. we had to modify one to make it work. We are using a Speedway swaybar setup with 30deg steel arms. We have upgraded to using one of our first GM parts on this build. In this case, and aluminum C5/C6 Corvette end link. Since they do not bolt up directly to the control arms (of course not), we had to make up some interface brackets. The arms fit quite well, the only mod we really had to make is bending them 30deg to mate up with the end link. To clear the 275 tires up front, we had to notch the frame to be able to go full lock. After some cutting, v-notching, bending and welding, they kinda look like they came like that.
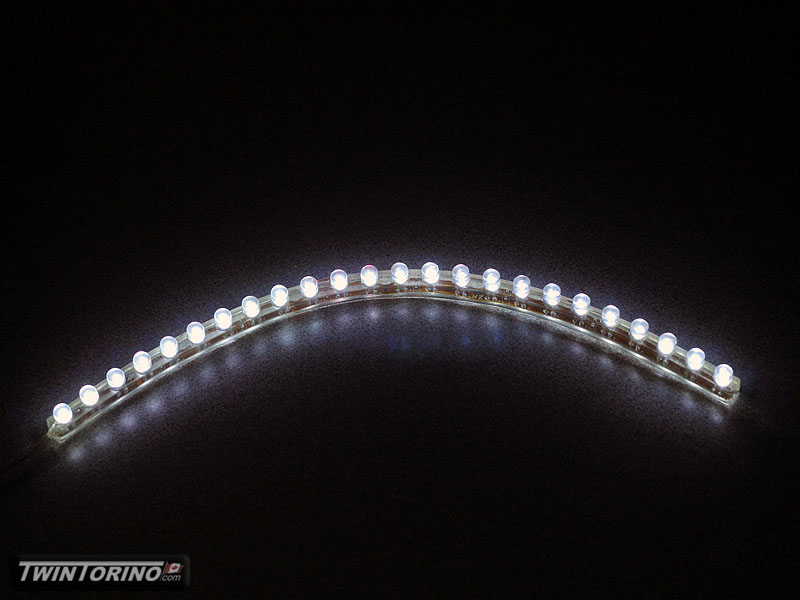
Also got in some LED's for cluster backlighting. Will be interesting to see how they illunimate things.
12-07-2011 #6 Registered User
- Join Date
- Aug 2004
- Location
- Rustburg, Virginia
- Posts
- 3,436
sway bar and end links....Nicely done!
1970 RS/SS350 139K on the clock:
89 TPI motor w/ 1pc rear seal coupled to a Viper T56 via Mcleod's modular bellhousing w/ hydraulic T/O bearing from the Viper, 12 bolt rear w/ 3.73 gearing, SC&C upper control arms, factory lowers with Delalums, C5 brakes at all four corners, Front Wheels 17x8's with Sumi 255/40/17 and Rear Wheels 17x9's with Sumi 275/40/17.
Brief description of the work done so far can be found here: http://www.nastyz28.com/forum/showthread.php?t=112454
12-07-2011 #7 Registered User
- Join Date
- Mar 2008
- Location
- Brisbane Australia
- Posts
- 410

I agree the sway bar and end links look the biz
Hot rodder's recycle, wheres those prius' going when the tree huggers have a new fad.
12-07-2011 #8 Registered User
- Join Date
- Jan 2008
- Location
- Charlotte
- Posts
- 1,295
Wooohooo.... Corvette parts on your Torino! LOL - looking great!
2005 LeMans Blue Corvette w/ T56 & Z51 & C6Z06 Brakes, Build Thread: https://www.pro-touring.com/showthread.php?64496
2005 GMC Sierra 2500HD LLY / Allison
2014 Chevy SS LS3 / 4 Door
12-09-2011 #9
Registered User
- Join Date
- Nov 2005
- Location
- Motorcity, Canada
- Posts
- 292
If an LS9 didn't cost more than I have into the entire car.. I would have one of those under the hood too
.
12-09-2011 #10
-Moderator/Sponsor-
- Join Date
- Apr 2001
- Location
- The City of Fountains
- Posts
- 16,129
Ha! I can definitely understand that... Originally Posted by SVTforme
Andrew1970 GTO Version 3.0
1967 Cougar build
GM High-Tech Performance feature
My YouTube Channel Please Subscribe!
Instagram @dr__efi
I deliver what EFI promises.
Remote Holley EFI tuning.
Please get in touch if I can be of service.
"You were the gun, your voice was the trigger, your bravery was the barrel, your eyes were the bullets." ~ Her
12-14-2011 #11
Registered User
- Join Date
- Nov 2005
- Location
- Motorcity, Canada
- Posts
- 292
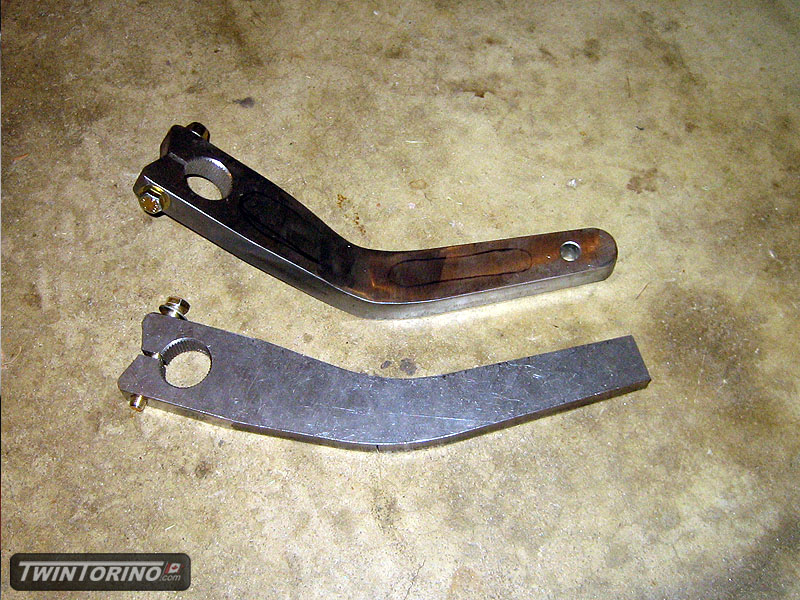
Drivers side sway bar bend up and completed. Sway bar mounts attached, collars installed and ready to go.
With this.. front and rear suspension design and fabrication = DONE! Finally.
12-15-2011 #12 Registered User
- Join Date
- Mar 2005
- Location
- Texan Back in Texas!
- Posts
- 675
Awesome work, does bending the arm change the effective swaybar stiffness or is it so minor as not to be of concern?
1965 Falcon Hardtop
However long you think your project will take, double it and you might be halfway right.
Build Thread: https://www.pro-touring.com/showthre...847#post798847
12-15-2011 #13
Registered User
- Join Date
- Nov 2005
- Location
- Motorcity, Canada
- Posts
- 292
It will definitely change the effective rate of the bar since it will shorten the distance from the end link pivot point to the centerline of the bar. It will increase the stiffness slightly since you are reducing the length.
We had two targets here - first was the motion ratio of the pivot point of the end link (amount it moves relative to the movement of the wheel center). The second is the distance from the centerline of the swaybar to the pivot point of the end link. Using these dimensions, the overall effective length of ther bar and ID/OD of the sway bar, we calculated what bar size to order and how far away the bar needed to be from the pivot points.
The target was ~1250lb/in using the same motion ratio as a base 2004 Mustang Cobra.
12-15-2011 #14 Registered User
- Join Date
- Dec 2006
- Location
- SF Bay Area
- Posts
- 463
Craig, a question on these splined anti-sway bars. Are they inherently 'better' than the standard curved solid or hollow bars? Or did you guys end up using it as there was nothing off the shelf to fit?
chunger
'68 Ranchero 500
'70 Cougar XR-7 Convertible
'98 Mustang GT Convertible
12-15-2011 #15
Registered User
- Join Date
- Nov 2005
- Location
- Motorcity, Canada
- Posts
- 292
At the end of the day it is a piece of spring steel with a certain rate - so not really any better I guess. The thing I like about them is you can change the rate simply by changing out the bar with another with different wall thickness. The OD stays the same so you don't have to change out anything else.
As you can image - there is nothing that really was meant to fit this application. New Mustang ones would not clear the tires/and or the frame rail locations since they sit much lower on a Torino than on a Mustang.
02-07-2012 #16
Registered User
- Join Date
- Nov 2010
- Location
- Mooresville, IN
- Posts
- 21
I pulled up this thread as I am thinking about putting a cobra irs in an alston back-halved 67 mustang notchback. I am so ashamed to think that it might be "too much work". Completely insane build and only hope I get the opportunity to see these things in person one day. Keep the pics coming!!
02-21-2012 #17 Registered User
- Join Date
- Jan 2010
- Location
- SLC. UT
- Posts
- 368
Wow Craig, you've made some awsome progress!
i'm a lil jealous of your press....
What is going on with your gauges? looks very Interesting...
Sounds really good
Jeff -- 96 Mustang - 2V Stroked Modular Turbo // 13 RAPTOR // 67 Mustang Fastback build - Coyote 5.0
03-03-2012 #18
Registered User
- Join Date
- Nov 2005
- Location
- Motorcity, Canada
- Posts
- 292
I would definitely say this is not a quick weekend job that is for sure. With a DVS kit, you can likely put something together in a week or two.. although depends on what your suspension goals are for tuning etc. Once we get these done - we will hit the circuit.. so hopefully will see us around someday. Originally Posted by femurphy77
Yeah.. most of this will likely not make sense until they are done and working.. stay tuned! Press.. who said I used a press Originally Posted by Dalamar
.
03-03-2012 #19
Registered User
- Join Date
- Nov 2005
- Location
- Motorcity, Canada
- Posts
- 292
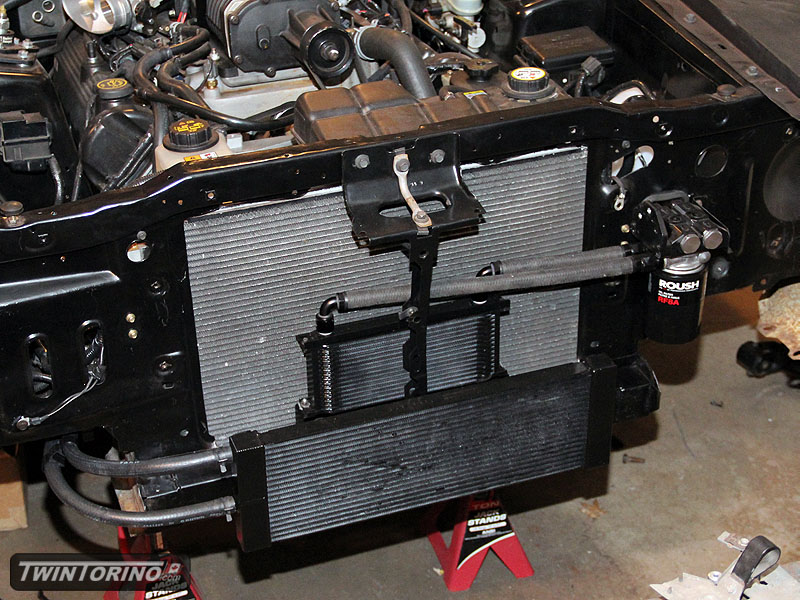
Been a while since I have had time to put together a post. We have been quite busy working on the car.. although most of the things like electrical etc don't really provide for exciting progress pictures. Cooling system is basically wrapped up. Intercooler heat exchanger is in and ready to run, as is the oil cooler system. For the supercharger, we ended up going with a dual pass heat exhanger. It works more efficiently and is much easier to package, also looks much nicer plumbing wise.
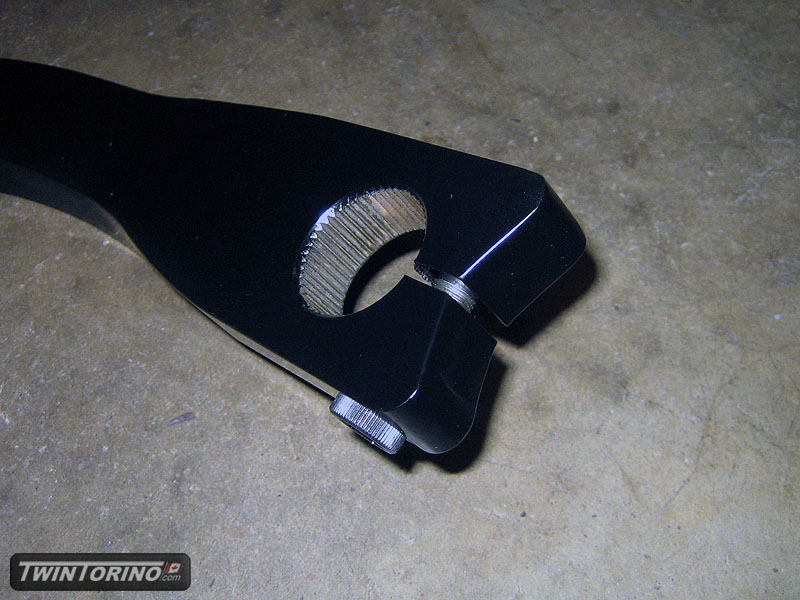
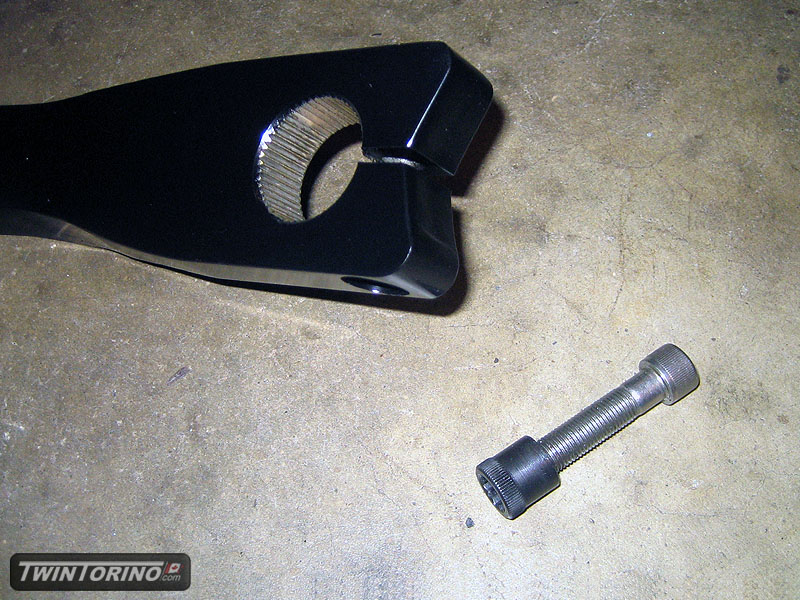
Sway bar is now in and complete. Did some machining on the arms to make them easier to assemble and to clean them up a bit. After that, powdercoated everything and installed. Can't wait to actually try this thing out on a corner.
03-03-2012 #20
Registered User
- Join Date
- Nov 2005
- Location
- Motorcity, Canada
- Posts
- 292
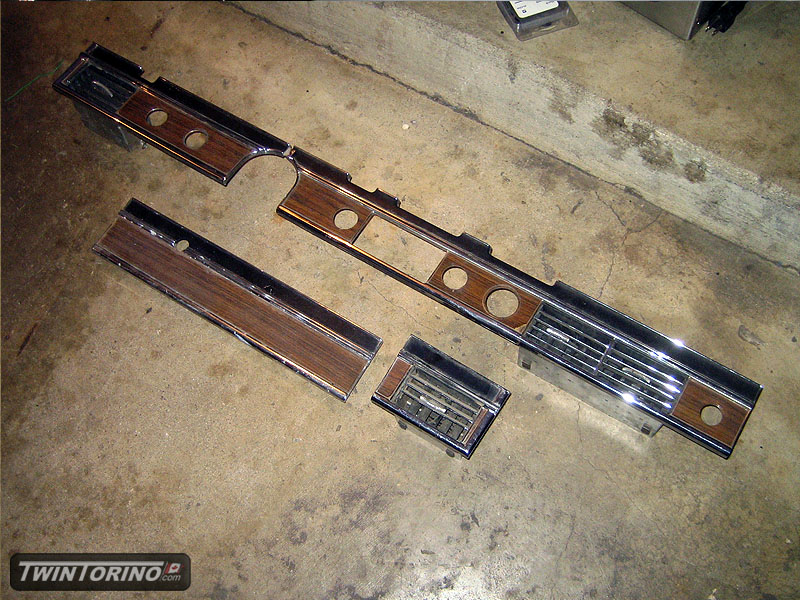
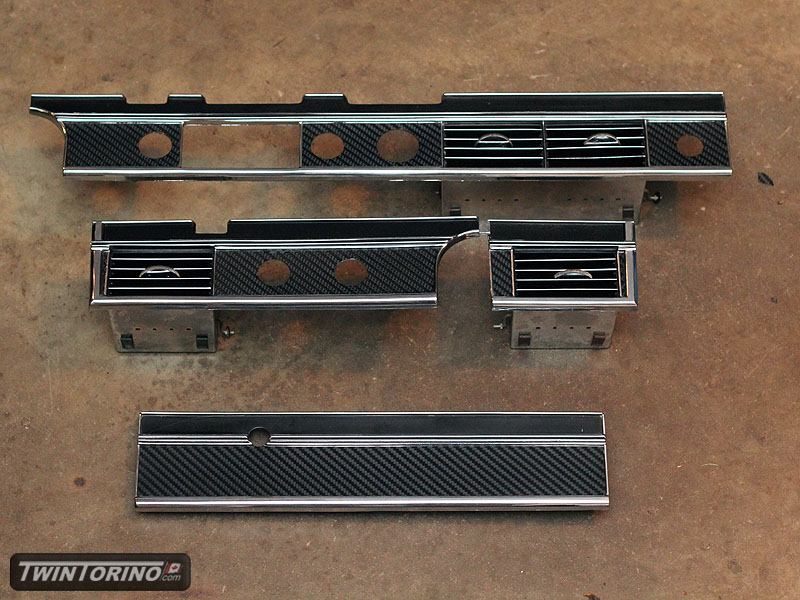
Most of the work has been going on in the interior. This is the downfall to not using a modern mustang dash on the car, although I think this will be pretty slick when completed.
Decided to switch to a 1969 dash so it could be modernized a bit. We stripped off the old weatherend woodgrain, cleaned/polished everything up and added a carbon fiber accent to the dash. Came out better than I was expecting - not too over the top.
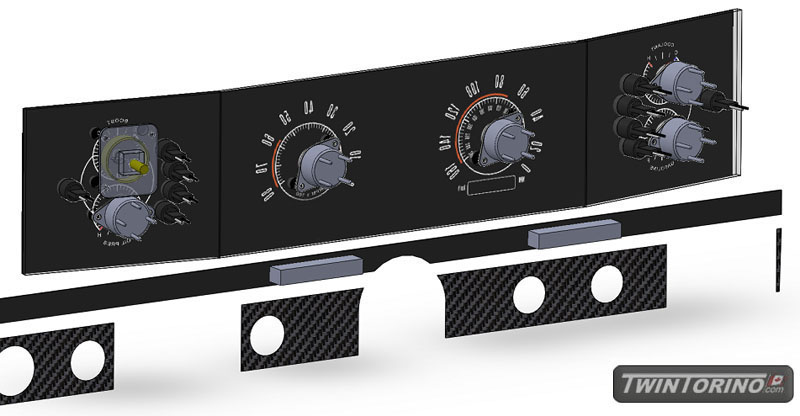
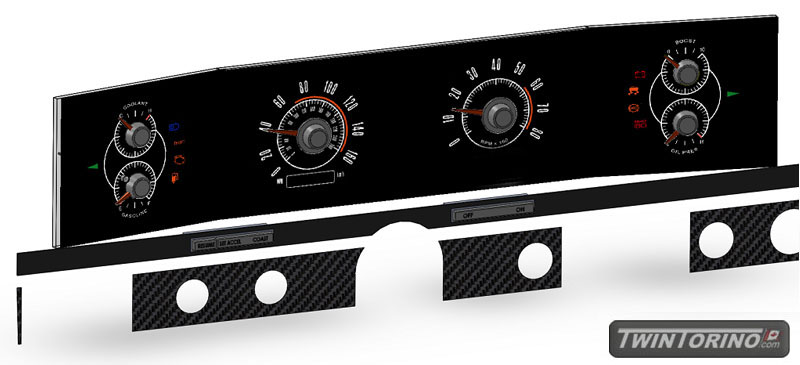
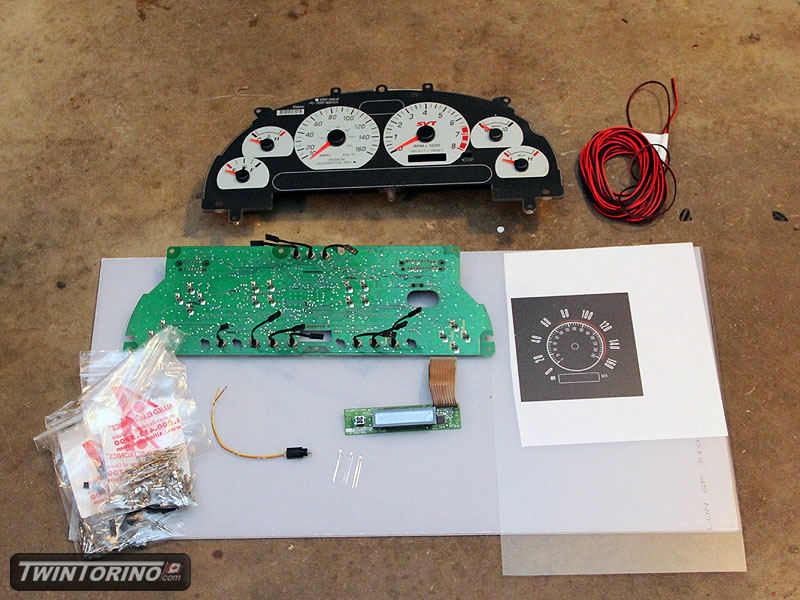
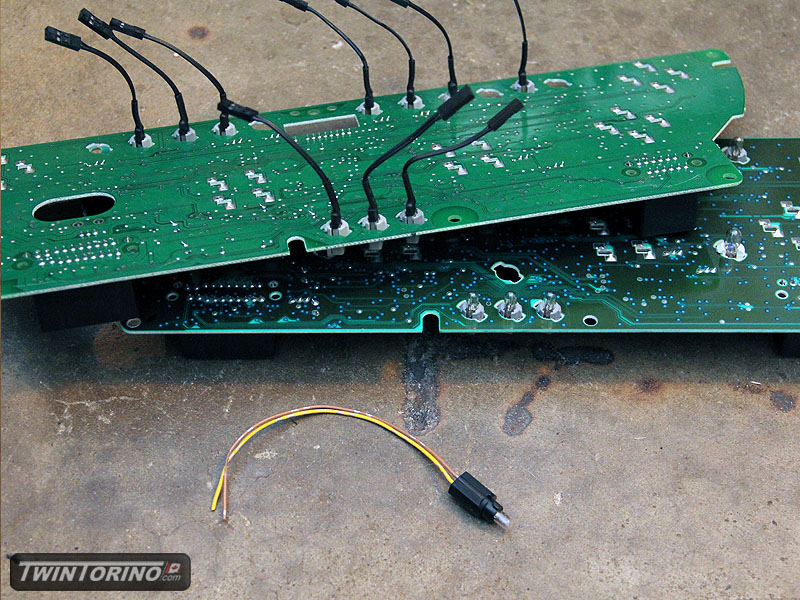
Instruement cluster design is basically complete - we ordered all the necessary parts and electrical pieces and are now ready to build everything up. This sure takes a lot more time than a person would think. Things like MIL lights, signal lights, backlighting should all make the cluster look like one from a brand new car when done. For the MIL lights, we found a harness than can be put in place of a std T5 dash bulb. By using another remote socket, we can put the light wherever we want.. in this case on the outer gauges. To mount everything, we are going to take 2 original clusters and merge them to get a setup with 4 gauges (originals had 3, and a 4th was screwed into the dash).
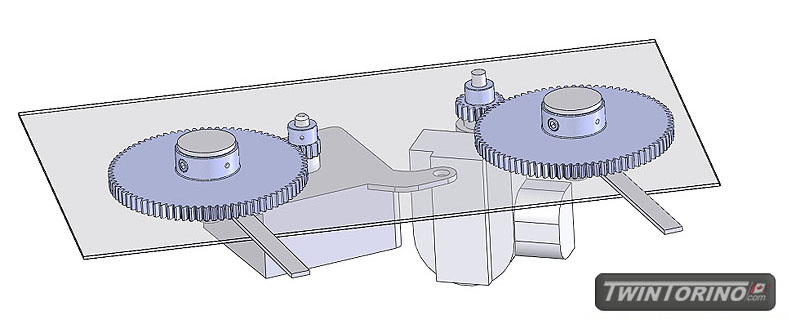
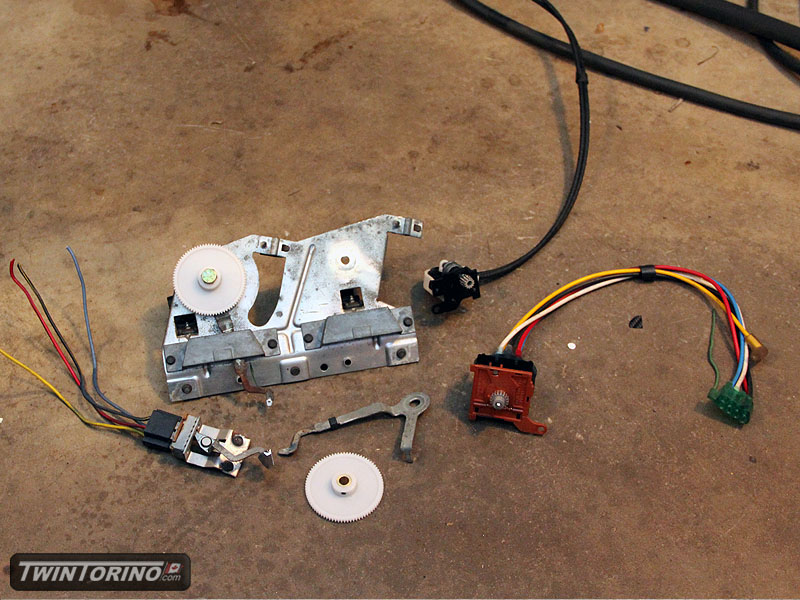
Heater controls are also a PITA - trying to convert linear motion to rotary motion so the original dash controls can operate the rotary dials from a new Mustang when done. Have ell the ratios figured out, ordered the parts and should have this done soon. With some rewiring, the original switch can be used to control the modern setup.

 Reply With Quote


