


Results 121 to 140 of 451
Thread: TwinTorino
Hybrid View


-
01-27-2010 #1

 Registered User
- Join Date
- Nov 2005
- Location
- Motorcity, Canada
- Posts
- 292
Chunger - to answer your question, yes we are adding some stiffening elements under the upper fender mounts (aka shotguns) to tie the shock towers into the main body structure a little better. We will also be connecting the subframe connectors to the front k-member. Should not take too much. May add strut tower brake in if we can get it to clear the blower, but I am not sure how effective they will really be. Once the k-member is welded in.. it will stiffen that area up nicely.
Dalamar - It is debatable whether or not is was worth spending all this time on fabricating the suspension for the car.. but it sure was a great learning experience and we get exactly what we want in the end. Unfortunately, there is not really any great aftermarket suspension kits out there for Torinos (not as lucky as the Camaro guys ). For the record - brand new firewalls are really cheap from Ford. I can dig up the part number if need it. You have a thread going for your car - sounds interesting.
Thanks to everyone else. Build site is already up and running - www.twintorino.com .
-
01-27-2010 #2
Registered User
- Join Date
- Nov 2005
- Location
- Motorcity, Canada
- Posts
- 292
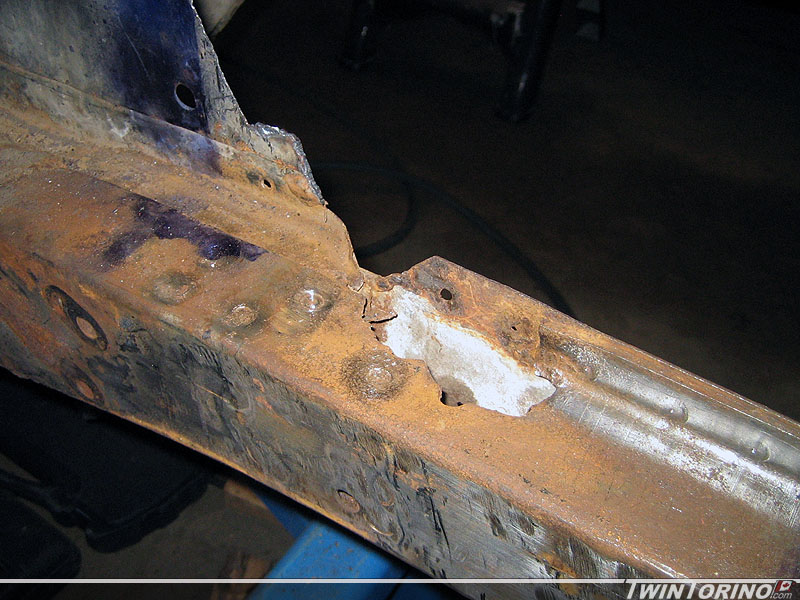
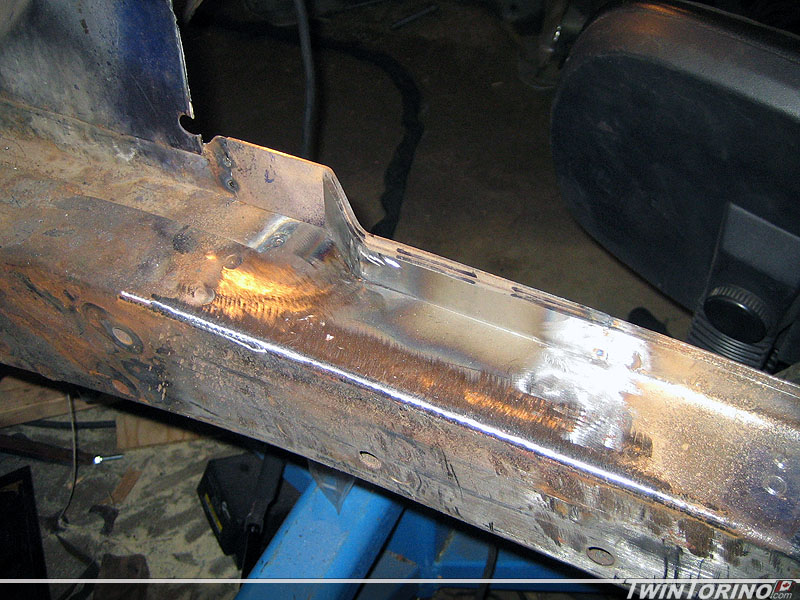
When we removed the shock towers the steel was flaking away a bit, but I thought it was nothing out of the oridinary. The more I picked away at it.. the larger the hole got. Have to attack this before the towers go back in. Should last a couple more years now. This also brings up the question - how the heck do you get at this area if the stock towers are still in the car? Most people do not have the novelty we do by not having them in the way. Still have to fix the underside where the rest of the water went and rotted things away. Once this is done, front suspension is ready to be welded in for good (finally).
Since the front suspension is finishing up, time to move back to the rear once again. Had a lot of time to think about this one now, so time to put it in action. Biggest issue with designing anything in the rear is the tire clearance. Fitting the 315's back there requires lots of room. Couple of constraints here - the outer fender lip since the tire will sit within it, the springs and the shocks. We went back and forth on coil over shocks, but in the end they are expensive and take up precious tire clearance. The Koni 3012 dual adjutables we wanted were $500 each alone + springs and they are impossible to find used. As you may have noticed, we likely to track things down at discount prices. They also do not provide the most desirable load path as the shock mounting holes are outboard of the frame rail. Many of the aftermarket kits out there use single shear mounts on the outside of the frame rail which we are not big fans of. The shocks even without the coil-overs will require notching the frame, although very minimally. The result here.. the springs and shocks will mount in separate locations like the stock Mustang.
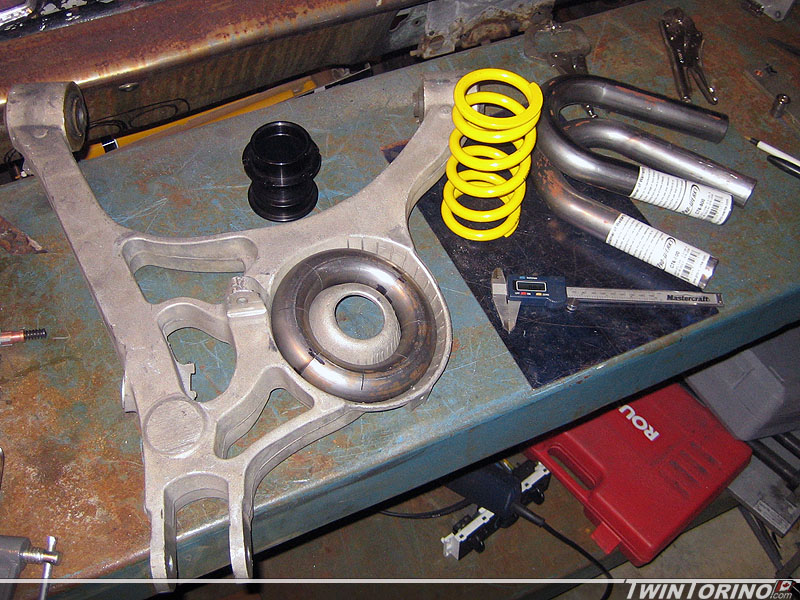
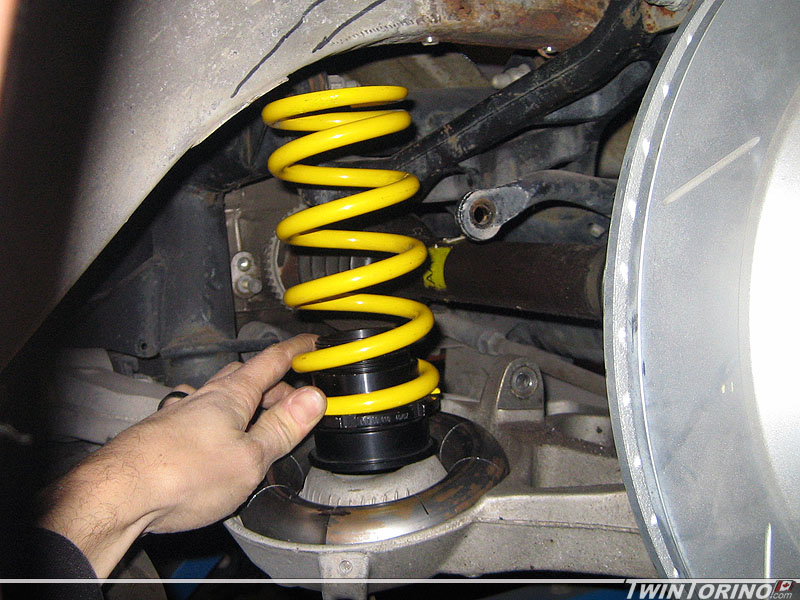
In the end, this is how we decided to mount the spring. We are using the stock spring pocket on the lower control arm, but using a much smaller spring. We started with 2 u-bends as you can see, and turned them into a doughnut. This way we maximize surface area to distribute the load. Just need to add a flat plate in the middle and a small wedge to angle the spring as required. In this configuratins, the springs sit directly under the frame rails. Then we simply add a mount to the frame rail. Notice we are also adding an adjustable sleeve for fine tuning the ride height. Since we are running fairly stiff springs all around, we will be using helper springs (very low stiffness) to keep the springs in place when the suspension goes into full rebound.
02-08-2010 #3
Registered User
- Join Date
- Nov 2005
- Location
- Motorcity, Canada
- Posts
- 292
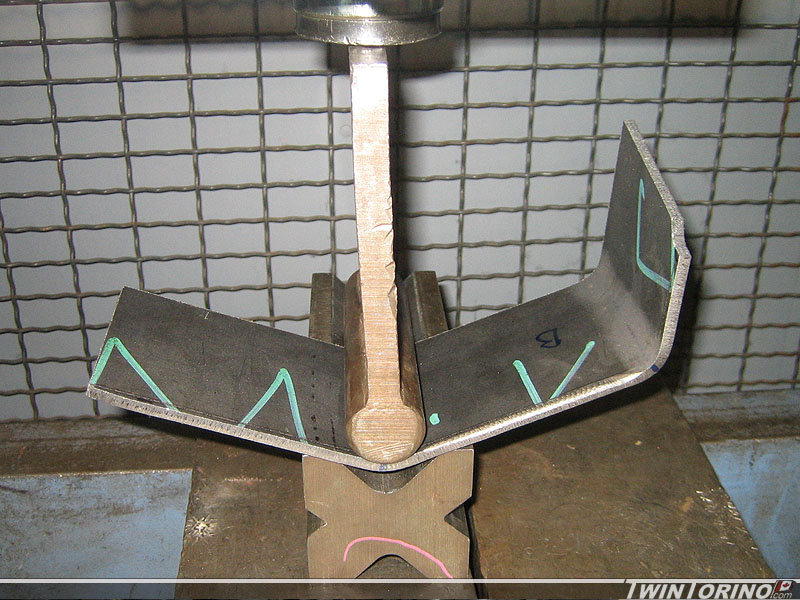
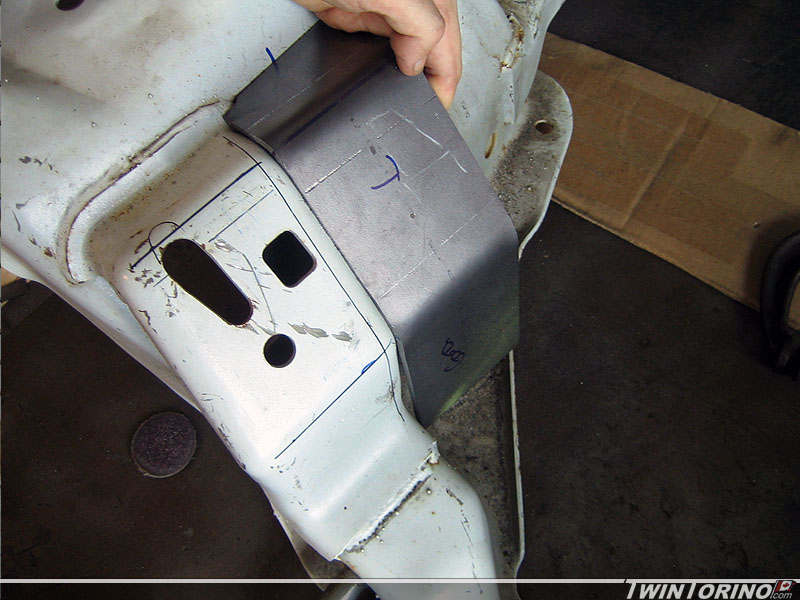
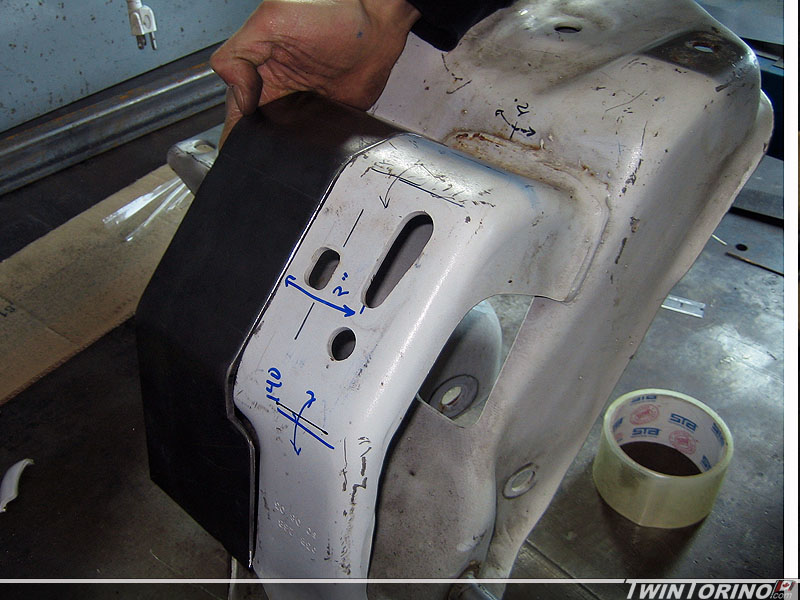
Moving right along - have the Mustang K-member mounting tabs completed. Only thing left to do it shift the engine mounts back 3" to get the engine as far back as possible. Since the steel on the stock mounts is 3/16" thick, this means the std brake won't cut it. Have to move the the hydraulic press for these bends. Got them ready to weld in over the weekend. Will get them welded in this week and then it is finally time to weld the front suspension permanently into the car.
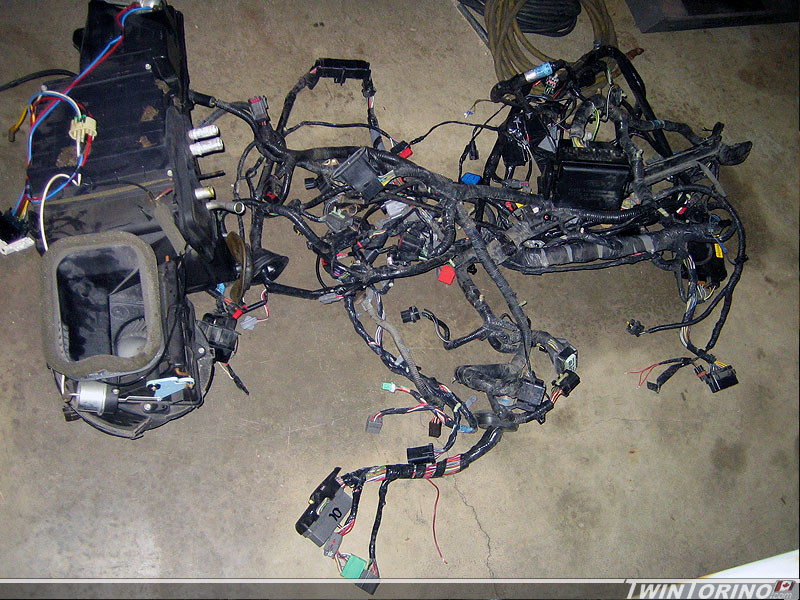
Also found a complete vehicle wiring harness set from a Mustang GT and heater box / ducting parts.
02-14-2010 #4 Registered User
- Join Date
- Sep 2009
- Location
- Hopkinsville KY
- Posts
- 17
Just read the whole thread...amazing build!!!!!! Cannot wait to see it finished..
Brian Embry
LIVE FREE, LIVE HARD, DRIVE FAST!!!!
02-24-2010 #5
Registered User
- Join Date
- Apr 2002
- Posts
- 777

What's this?
Nice Fab work. What's the solid X shaped piece on the bottom called? Is it a V Block? I think I might need to get one.
--JMarsa
02-24-2010 #6 Registered User
- Join Date
- Jan 2010
- Location
- SLC. UT
- Posts
- 368
Nice finds.
I've got the same air box, along with the dash.
We rebuilt the IRS we got with the Maximum Motorsports bushing kit. as you probably know the stock rubber bushings are too soft.
Have you decided what ring gear you want, and what to do with that IRS?
Jeff -- 96 Mustang - 2V Stroked Modular Turbo // 13 RAPTOR // 67 Mustang Fastback build - Coyote 5.0
02-24-2010 #7
Registered User
- Join Date
- Nov 2005
- Location
- Motorcity, Canada
- Posts
- 292
Good eye - that is a 68/69 Racnhero tailgate just taking up space in the garage. Not really sure why I have not moved it elsewhere yet. Originally Posted by chunger

I have been meaning to comment on your build and let you know a couple of things I have learned along the way that will likely help you. I'll post it over on your thread. Looks great so far though. Originally Posted by Dalamar
As for the dash - I think I am doing the opposite to what you are doing. I will have a stock looking dash that will have all the modern Mustang electroinics behind it. Have a plan for everything that we are going to do.. just have to get to that stage.
I'll be putting in the Delrin bushings eventually to match the front. Will be moving onto the rear IRS mounting within the week. Have that all planned out - just have to do the mods and make up the parts. Goal is to make it look completely stock. The hardest part as you know is to get the same stock suspension position as a stock non-lowered Mustang, and lowering the body on top of it to suit. Everything was driven by suspension geomemetry, distributing the forces correctly and fitting a set of 315's in the rear without adding any type of fender flares. IRS and wheel wells sure make that part difficult as you know. That forced us to move the mounting points inward. Also made using coil-over shocks not possible due to tire clearance, although we were trying to avoid putting the spring load in single shear to the control arm anyway.
Not sure what to do with the IRS - it will find a home eventually though. That is IRS #4 for us.. so it is spare number 2. Not sure on the gearing. Since we are running the 6 speeds with 2 overdrive gears, we may step up to 3:73's or 4:10's - not sure yet. Will have to see what speed that puts us in for 2nd gear at high RPM.
02-24-2010 #8 Registered User
- Join Date
- Nov 2008
- Location
- TN
- Posts
- 954
It looks like a really heavy v-block to me.
Looking good svt!Benjamin
Twin Dusters
'72 Plymouth Duster "Aero Duster" project
'72 Plymouth Duster "Daily Duster" project
https://www.pro-touring.com/showthre...RO-DUSTER-quot
03-04-2010 #9 Registered User
- Join Date
- Dec 2006
- Location
- oshawa ontario
- Posts
- 1,607

amazing build....wow!.....Motorcity Canada??.....wherebouts in Oshawa are you guys???
Nascar 69 Chevelle project, 1999 Hutch Pagan Nascar chassis, 69 Chevelle body,700hp, Penske's, slicks, roadrace track day https://www.pro-touring.com/showthre...le-Cup-project
89 Iroc 406 Fitech 5 spd
01 chevy 2500HD 4x4 8.1 Allison
31 Scarab 2 x 454
03-06-2010 #10
Registered User
- Join Date
- Nov 2005
- Location
- Motorcity, Canada
- Posts
- 292
You got it. It is a v-block specifically for bending various radii on a hydraulic press. The v-block most people are used to are the ones that are used to drill holes in a cylinder and keep the piece from moving. Wouldn't want to use one of those in a press Originally Posted by Bjkadron
.
Well.. we are closer to the US Motorcity actually. Originally Posted by shortrack
03-06-2010 #11
Registered User
- Join Date
- Nov 2005
- Location
- Motorcity, Canada
- Posts
- 292
Couple more updates..
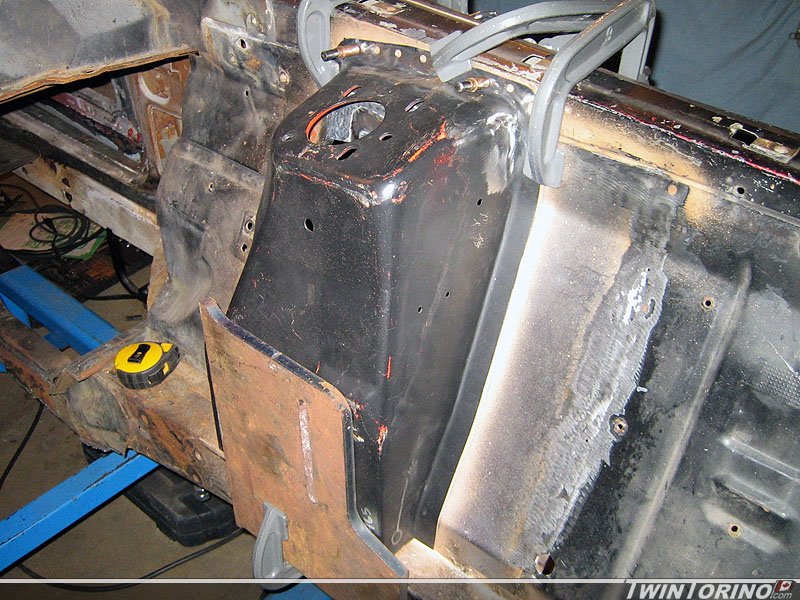
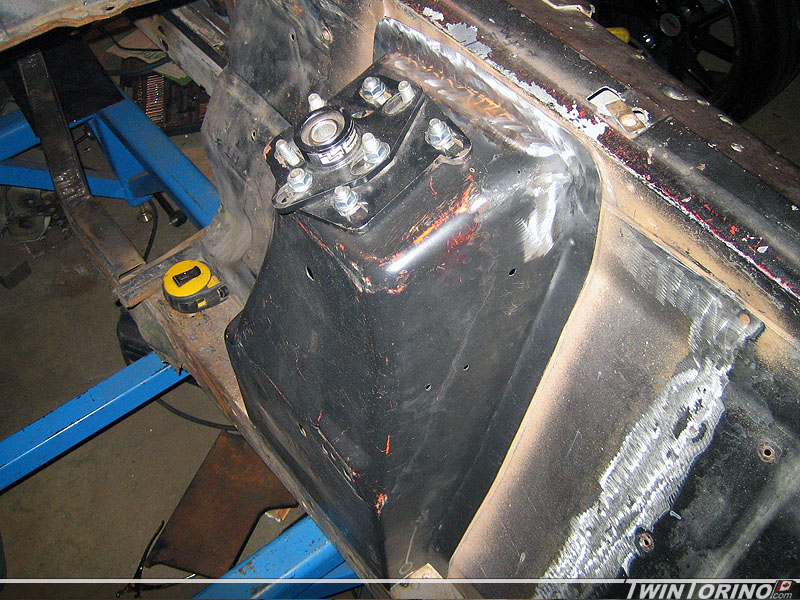
Finally stuff on the front suspension is going in for good. Final prepped everything on the drivers side strut tower, drilled all kinds of holes for plug welds and welded everything in. We will wait until we get the car on a rotisserie to well all the way from top to bottom. With the plug welds ground down, it looks like the pieces were supposed to be there. Just need to weld in the pass side and it will be time to put the k-member in for good. Almost done with the front - hard to believe.
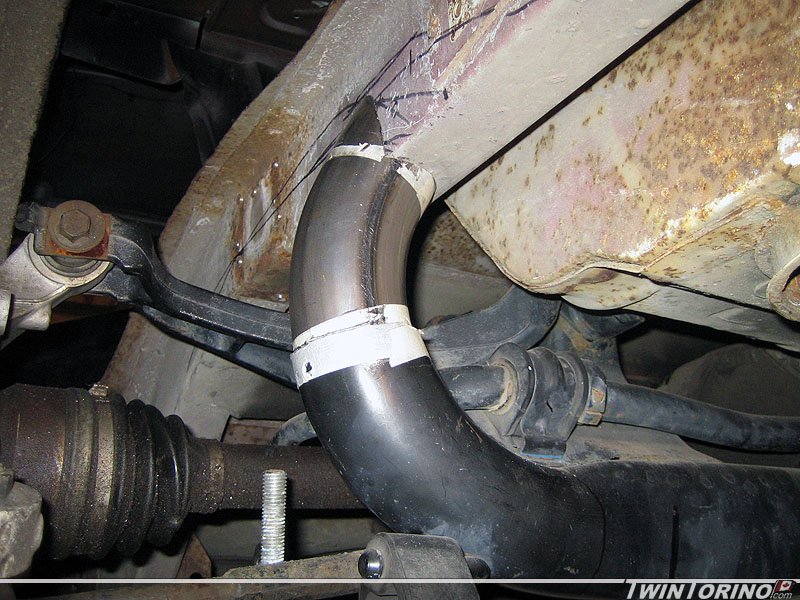
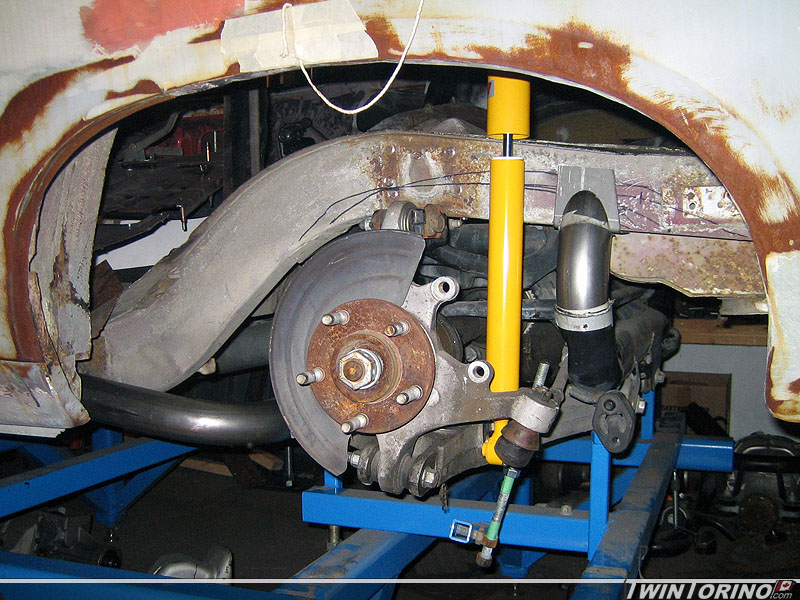
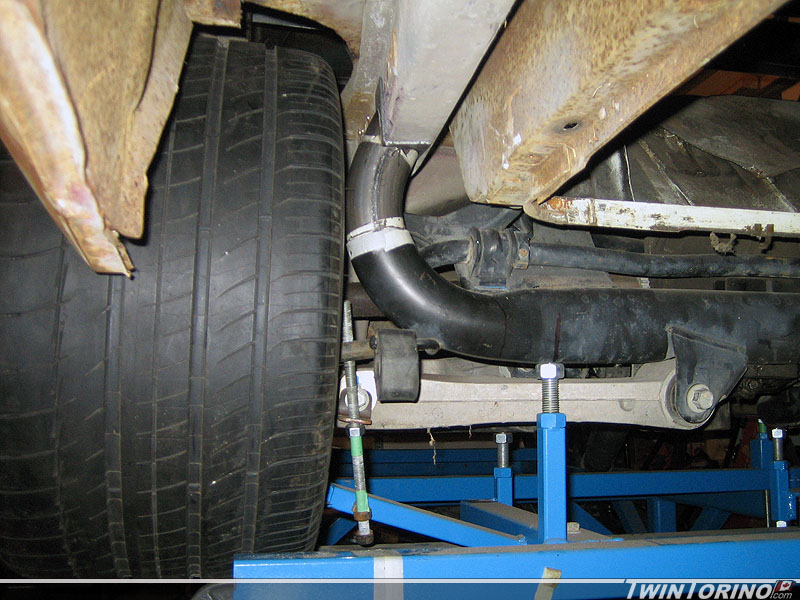
On that note - time to catch up on the rear suspension. Finally decided how to do the rear mounts on the IRS. We used one of the 2.5"x1/8" tubes we have made up for the front mounts, cut one in half and will use the 2 pieces to make up both rear mounts. We lucked out and it looks as though the rear tubes use the same 5" radius as our bends do. Big thing is the rear mount will still clear the 315's with stock wheel lips. Just need to go grab some more steel to make up the actual brackets that bolt to the frame as we used a scrap piece for now that was a bit too small. Next we need to make up pockets in the frame for the shocks and clearance for the upper control arms. We'll be on the ground in no time.
03-06-2010 #12 Registered User
- Join Date
- Dec 2006
- Location
- SF Bay Area
- Posts
- 462
SVT - Looking good, man. It's going to feel great to get it back on the ground!
One question - it appears that you're going to need to remove about half of the existing frame rail to clear the upper arm - that's easy enough to box in. BUT any concern over the loss of strength? Will you be sistering another piece on the inside to support it?
03-07-2010 #13
Registered User
- Join Date
- Apr 2002
- Posts
- 777
Could you provide a source for these?
--JMarsa
Originally Posted by SVTforme
03-14-2010 #14
Registered User
- Join Date
- Nov 2005
- Location
- Motorcity, Canada
- Posts
- 292
I'll have to check on this one - I borrowed it from work. I would think someone like MSC Industrial Supply or Production Tool Supply would have something along those lines. Originally Posted by JMarsa
03-08-2010 #15 -Moderator/Sponsor-
- Join Date
- Apr 2001
- Location
- The City of Fountains
- Posts
- 16,120
This project continues to amaze me!
Andrew1970 GTO Version 3.0
1967 Cougar build
GM High-Tech Performance feature
My YouTube Channel Please Subscribe!
Instagram @dr__efi
I deliver what EFI promises.
Remote Holley EFI tuning.
Please get in touch if I can be of service.
"You were the gun, your voice was the trigger, your bravery was the barrel, your eyes were the bullets." ~ Her
03-14-2010 #16 Registered User
- Join Date
- Mar 2010
- Location
- Central IL
- Posts
- 258
Amazing stuff both the car and rotisserie.
How much do you estimate you will have invested in the rotisserie?
03-15-2010 #17
Registered User
- Join Date
- Nov 2005
- Location
- Motorcity, Canada
- Posts
- 292
Goal is under $400-500 everything included. Should be pretty close to that. Originally Posted by LSx_88_Ciera
03-16-2010 #18
Registered User
- Join Date
- Feb 2010
- Location
- Plainfield, IN
- Posts
- 99
That is one hell of a rotissery!
I remember when CAD was just wire frame. Amazing...1969 1/2 Maverick
4.6 DOHC, Mustang II front, T56, & Cobra IRS
Custom Interior in the works.
http://www.cardomain.com/ride/2200206
03-16-2010 #19
Registered User
- Join Date
- Feb 2008
- Posts
- 29
I learned CAD on DOS with digitizers... Release 10. Guy I work with messed with AutoCAD beta. 5 1/4" bliss!!!! I have not meesed with much of the newest Solidworks, mostly CADWorx on my end (MEchanical Design/Piping/Pressure Vessels).
NICE RENDER. I take it that will BOM all the parts you created and all that good stuff huh?
Keep posting...63 1/2' Galaxie 500
03-24-2010 #20 Registered User
- Join Date
- Aug 2004
- Location
- Rustburg, Virginia
- Posts
- 3,436
LOL...me too, and nobody here to teach me, so I had to fumble around until I got the hang of it...then it was off to the races when the windows based clickable icons were worked into Autocad 11 or 12...(I forget it's been awhile) Originally Posted by cl08
This has been some interesting reading. I read through the whole thread today...can't wait to see this baby on the ground.1970 RS/SS350 139K on the clock:
89 TPI motor w/ 1pc rear seal coupled to a Viper T56 via Mcleod's modular bellhousing w/ hydraulic T/O bearing from the Viper, 12 bolt rear w/ 3.73 gearing, SC&C upper control arms, factory lowers with Delalums, C5 brakes at all four corners, Front Wheels 17x8's with Sumi 255/40/17 and Rear Wheels 17x9's with Sumi 275/40/17.
Brief description of the work done so far can be found here: http://www.nastyz28.com/forum/showthread.php?t=112454

 Reply With Quote


