


Results 101 to 120 of 366
Thread: Introducing - Project 1/2-TRAK
-
11-06-2008 #101

 Rat Pack Member

- Join Date
- Nov 2004
- Location
- LYNCHBURG,OHIO
- Posts
- 512

Good job detailing your install. I like your appproach to the different ways of going about it. We have the same plasma cutter at work,it makes a huge difference over the air tools and we have a huge compressor at work.
Greg Tholen
GT Motorsports
Dealer for Wilwood,Baer,Viking,Moser,BMR,Earl's
(937)763-7272


-
11-06-2008 #102 -Moderator-
- Join Date
- Jul 2005
- Location
- Mountain View, CA
- Posts
- 9,583
Thanks. The plasma was waaaay easier. But, it can totally be done w/o it. It just takes a little more time & patience.
True T.
Whats new with Project 1/2-Trak?
Follow my wisecracks on Sports, Food, Politics and other BS on Twitter.
My blog
When they kick out your front door, How you gonna come?
With your hands on your head, Or on the trigger of your gun?
11-10-2008 #103
-Moderator-
- Join Date
- Jul 2005
- Location
- Mountain View, CA
- Posts
- 9,583
I'm about 1/3 done painting the subframe and it's lookin purty!
I should have pics in a day or two.True T.
Whats new with Project 1/2-Trak?
Follow my wisecracks on Sports, Food, Politics and other BS on Twitter.
My blog
When they kick out your front door, How you gonna come?
With your hands on your head, Or on the trigger of your gun?
11-10-2008 #104
Rat Pack Member
- Join Date
- Aug 2002
- Location
- Waleska Ga.
- Posts
- 2,723
Cool nice detail!
Keep up the good work. David Sloan
If you’re suggesting sending men with weapons of war to take my weapons of war,then I’m fairly certain that’s what’s called an act of war… and the definition of tyranny.which coincidentally is the reason for the second amendment to begin with!
https://www.pro-touring.com/showthre...ght=fun+camaro
https://www.pro-touring.com/threads/...lcamino-build!
11-14-2008 #105
-Moderator-
- Join Date
- Jul 2005
- Location
- Mountain View, CA
- Posts
- 9,583
I'll have some photos later but just wanted to post this while I was thinking about it.
I've been using Eastwood products to paint the front subframe. The "rust encapsulator" and the "Chassis Black" in gloss. These are IMO the best freakin rattle-can products I have ever used. The nozzles have a fan pattern to them, and they really apply the material uniformilly.
I'm really pleased with the result thus far.True T.
Whats new with Project 1/2-Trak?
Follow my wisecracks on Sports, Food, Politics and other BS on Twitter.
My blog
When they kick out your front door, How you gonna come?
With your hands on your head, Or on the trigger of your gun?
11-14-2008 #106 New to Pro-Touring
- Join Date
- Nov 2008
- Posts
- 42
Looking good!
11-15-2008 #107 Registered User
- Join Date
- Aug 2005
- Location
- Hamilton, NJ
- Posts
- 4,317
On the side topic of the playboy pink cars, I just tripped on this one, of all places a site dedicated to the old Batman tv show. I present a pink AMC and the lovely Angela Dorian (google that name, I can;t post that here, lol).

http://www.1966batfan.com/gueststar19.htm
..I now return you to your regularly scheduled thread...
Oh yeah, nice car. Scott from NJ.
Vent Windows Forever! ...
Feather-light suspension, Konis just couldn't hold
I'm so glad I took a look inside your showroom doors
11-15-2008 #108
-Moderator-
- Join Date
- Jul 2005
- Location
- Mountain View, CA
- Posts
- 9,583
Very cool. I wonder if there is a similar photo of the '68 playmate of the year with the requisite Camaro?
True T.
Whats new with Project 1/2-Trak?
Follow my wisecracks on Sports, Food, Politics and other BS on Twitter.
My blog
When they kick out your front door, How you gonna come?
With your hands on your head, Or on the trigger of your gun?
11-20-2008 #109
-Moderator-
- Join Date
- Jul 2005
- Location
- Mountain View, CA
- Posts
- 9,583
Ok, brief update.
Topic: Fitting new suspension bits on 40 year old subframes.
As previously mentioned, the tolerances on 40 year old cars are......not good. You saw above how fitting of the ATS coil over brackets required widely disparate adjustments to the brackets to get them to fit in the UCA mount stands. The brackets were identical, the mount stands.....not so much. I guess that explains the goofy mix of alignment shims that were in the car when I disassembled it.
So the new challenge is fitting the Speed-Tech lower control arms. I attempted to test-fit them prior to painting the subframe. To say that they required "persuasion" would be a gross understatement. I thought for a second that I had gotten arms for the wrong year Camaro. I measured everything, twice and it wasn't the arms. It was the LCA mount pockets. They varied in width by as much as 3/16" and the angles relative to each other were off as well.
I spoke to Blake at Speed-Tech about this and his reply was that this was fairly common. Though more common in LA vs Norwood cars.
His suggestion:
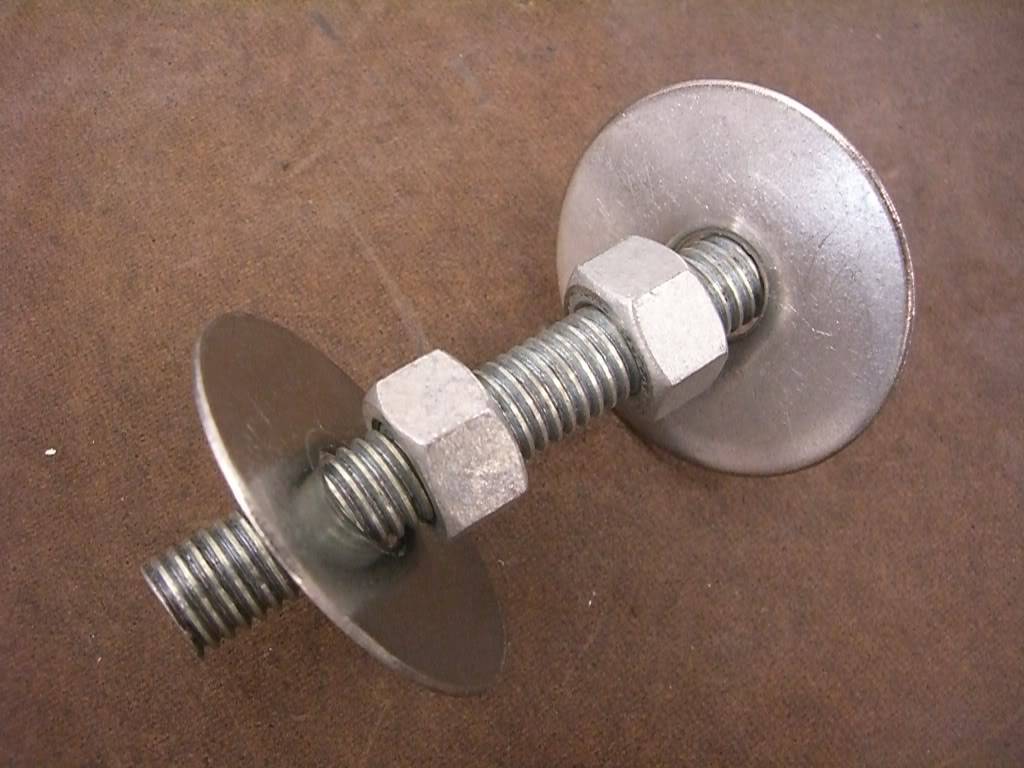
A 4" length of 1/2" all-thread
Two 1/2" nuts
Two fat washers
This nifty little device is used to "adjust" the width of the LCA mount pockets so that the LCA bushings will slip into place. Like so:
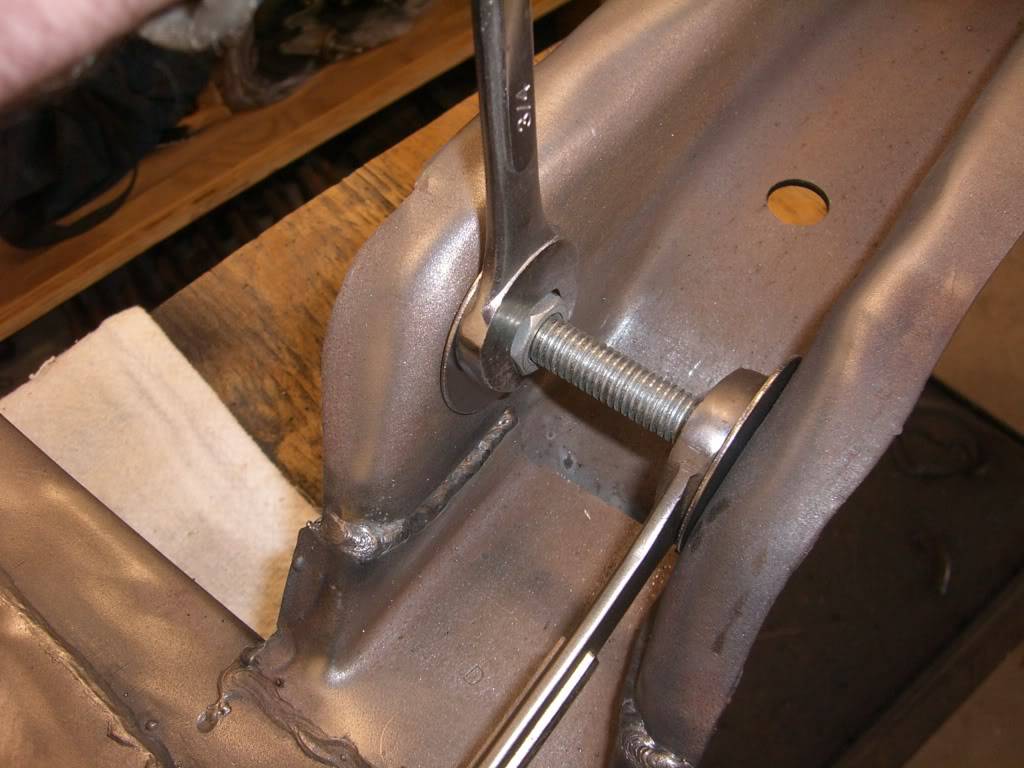
The end result is that the LCA now slips easily into place w/o the need to force, sweat, curse, cajole or grab a BFH to get it in place.
The subframe and core support are now painted. I have a few more photos to take and I'll post an update on that and a more complete review of the Eastwood products in a couple of days.....maybe tonight....depends on what my wife has planned for me after work.True T.
Whats new with Project 1/2-Trak?
Follow my wisecracks on Sports, Food, Politics and other BS on Twitter.
My blog
When they kick out your front door, How you gonna come?
With your hands on your head, Or on the trigger of your gun?
11-20-2008 #110
-Moderator-
- Join Date
- Jul 2005
- Location
- Mountain View, CA
- Posts
- 9,583
Well, I couldn't get to an update last night. Had to go buy a new mattress last night. Those things have gotten EXPENSIVE!
Anyway....
Topic: Subframe and Core Support Paint, review of Eastwood products and installation of DSE subframe mounts.
So here is what we began with on the subframe. 40 years of gunk, thankfully no rust though.
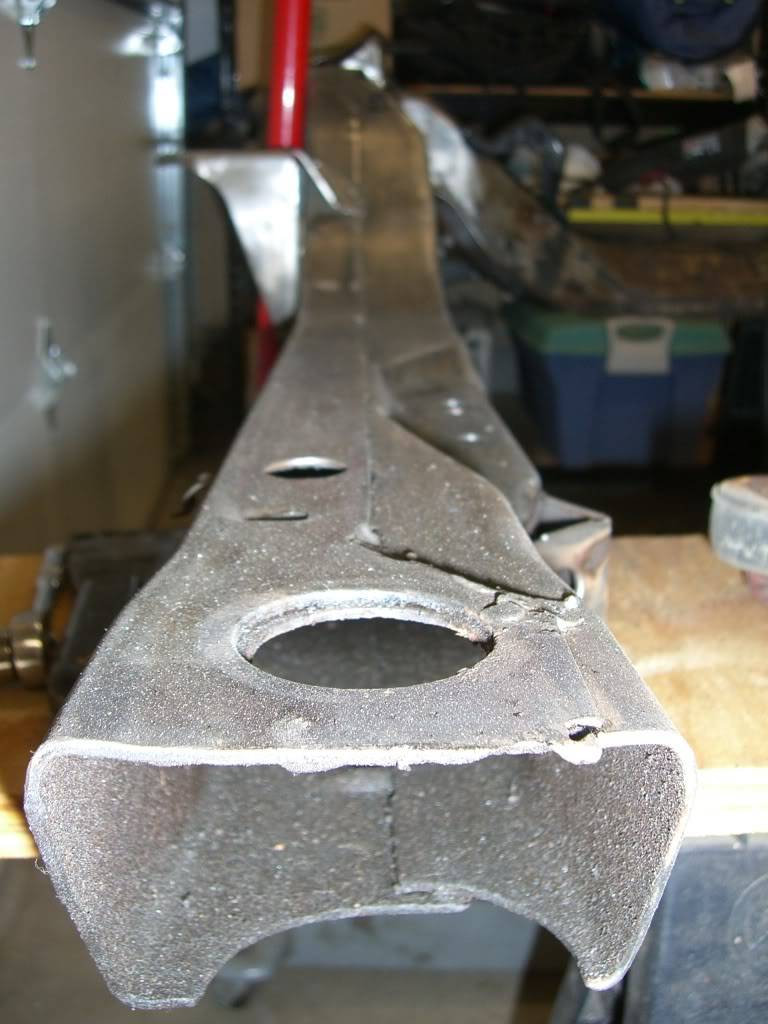
A bit of time spent with the wire brush prior to sandblasting allowed me to inspect for cracks to make sure the subframe was still useful.
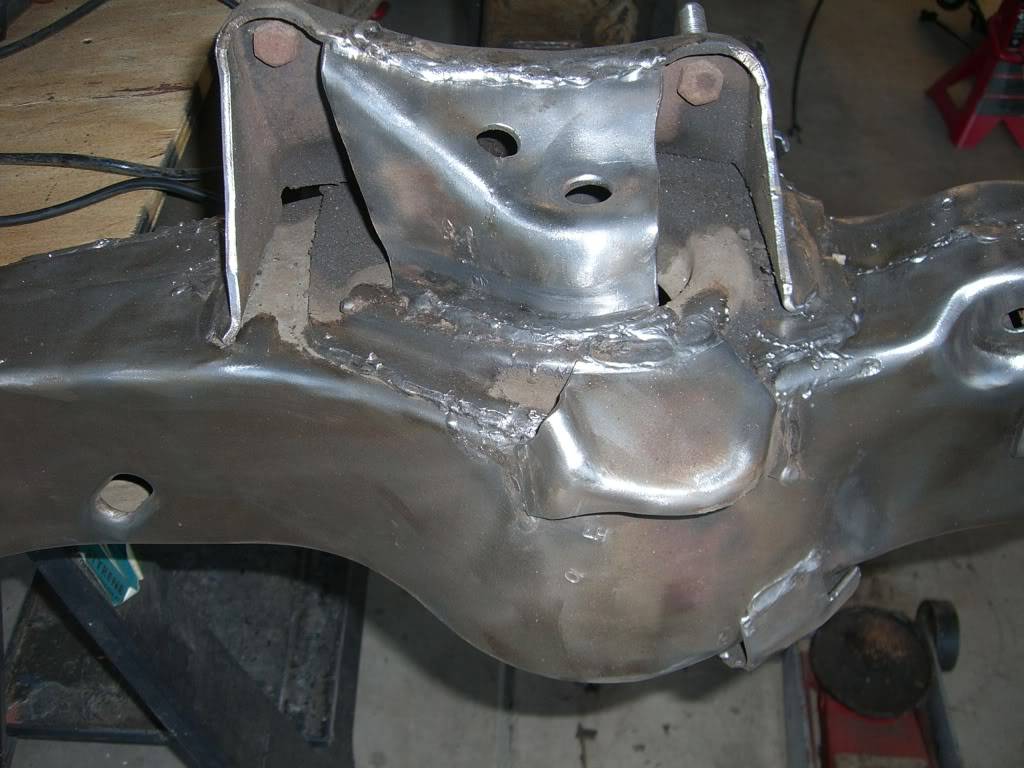
I did find a couple of cracks in the welds surrounding the Upper Control arm mount stands so if you are going this route check there first. Pretty simple though to grind out the old weld and into the substrate a bit to find fresh steel and re-weld it. YMMV of course.
After sandblasting and all the welding I've outlined previously the material on the subframe looked like this.
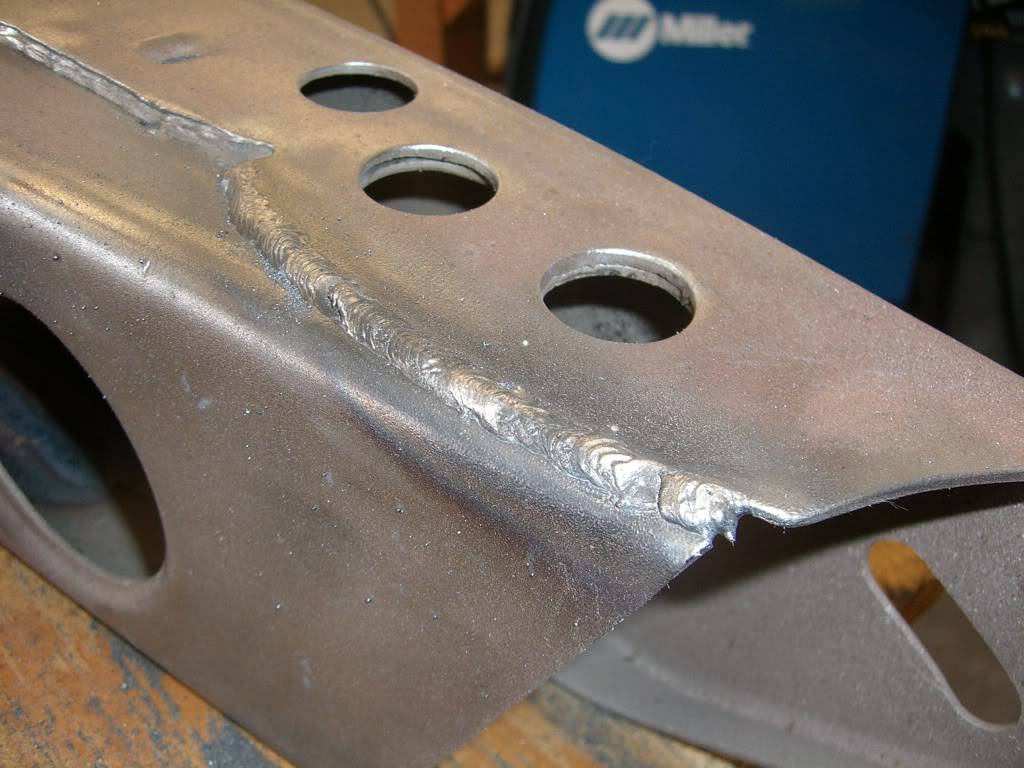
and the core support (also sandblasted) looked like this...
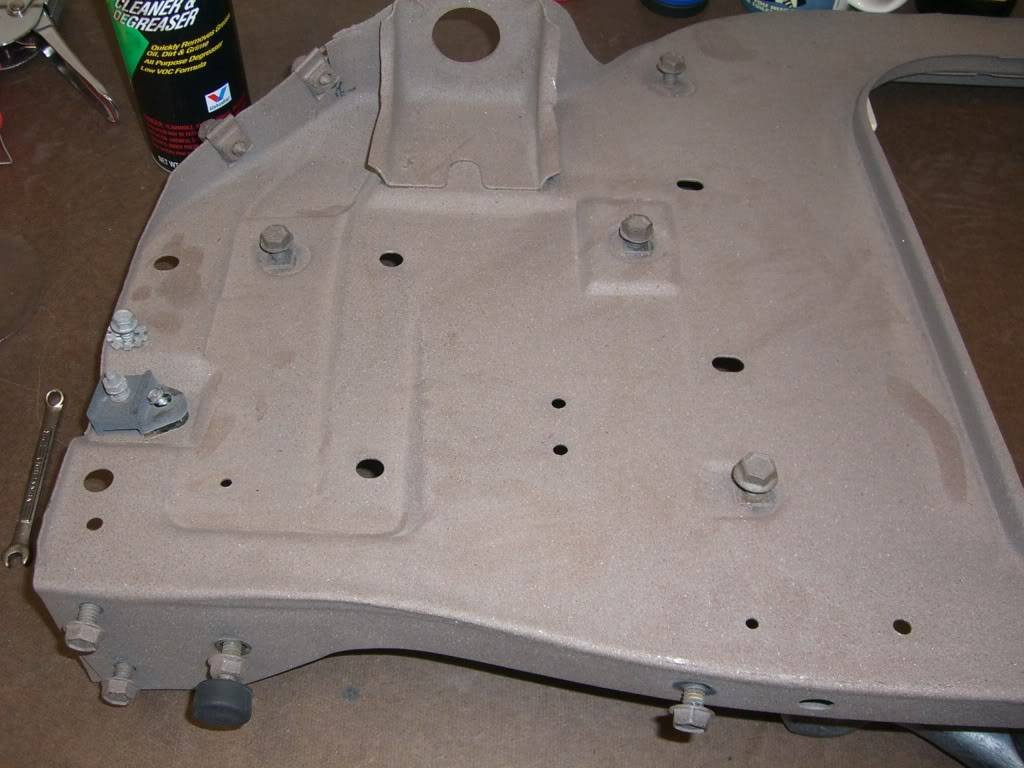
Hindsight being 20/20 I should have painted the core support as soon as I got it back from the sandblaster. It would have saved me some time. It sat for a few weeks and developed a bit of surface rust. Nothing bad at all, but it cost me some wire-wheel time that I would have preferred to spend in other ways. Oh well, it's an opportunity to further evaluate the Eastwood stuff right? I'll keep telling myself that.True T.
Whats new with Project 1/2-Trak?
Follow my wisecracks on Sports, Food, Politics and other BS on Twitter.
My blog
When they kick out your front door, How you gonna come?
With your hands on your head, Or on the trigger of your gun?
11-20-2008 #111
-Moderator-
- Join Date
- Jul 2005
- Location
- Mountain View, CA
- Posts
- 9,583
So....on to the Eastwood stuff. I ordered the following material from Eastwood:
- "Pre" surface cleaner/degreaser
- Eastwood "Rust Converter"
- Eastwood "Rust Encapsulator"
- Eastwood "Chassis Black" (gloss)
- Eastwood "Underhood Black" (satin)
- One of those "Can-gun" gizmos
Really easy to order from them. I used their online ordering this time and it was pretty painless. I have ordered by phone from them as well and it went well too. You get a confirmation email with tracking number so you know when the stuff will arrive.
After calling them for more info about the rust treatment products I felt that I didn't have any rust that I felt worthy of using the Rust Converter on. So for these two bits I used the Rust Encapsulator, Chassis Black and Underhood Black only. I have some deeper surface rust in a couple of places that I'll try the Converter on later. Nothing serious though....I may blow it off and just flap-disk it down to fresh steel. We'll see.
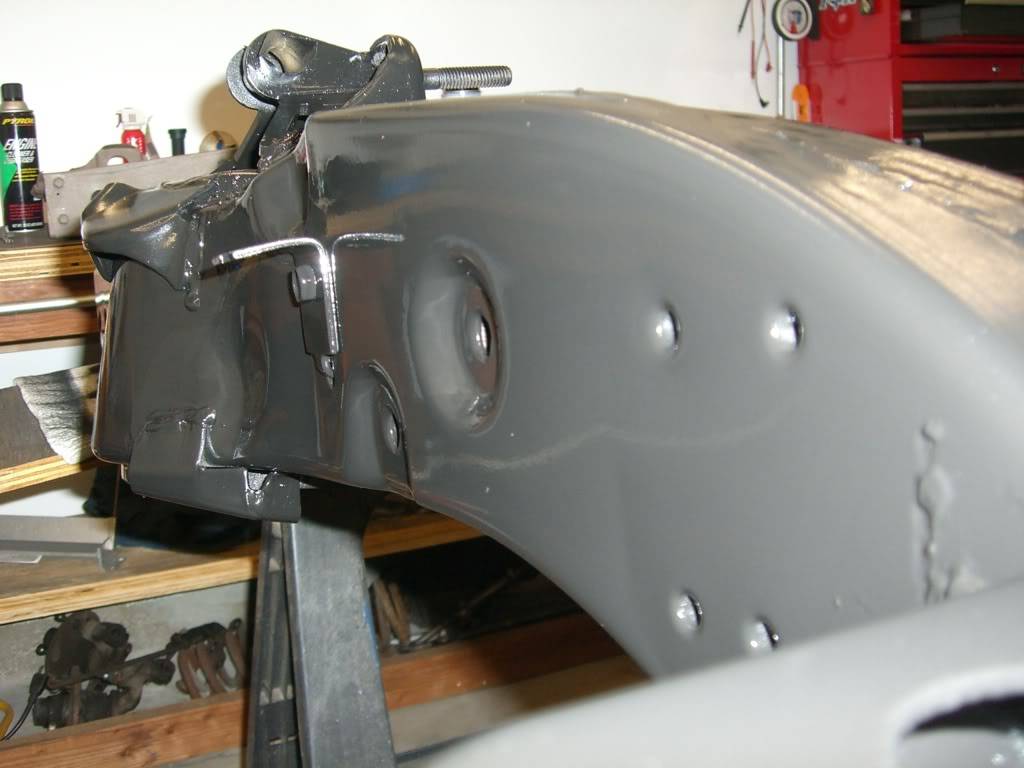
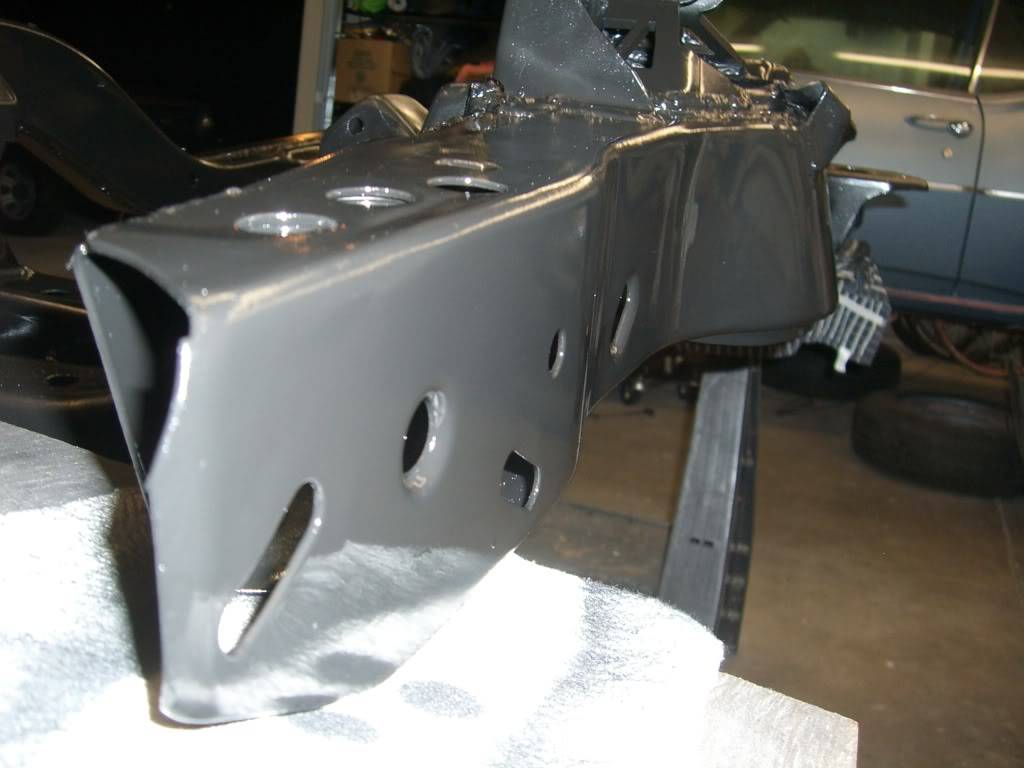
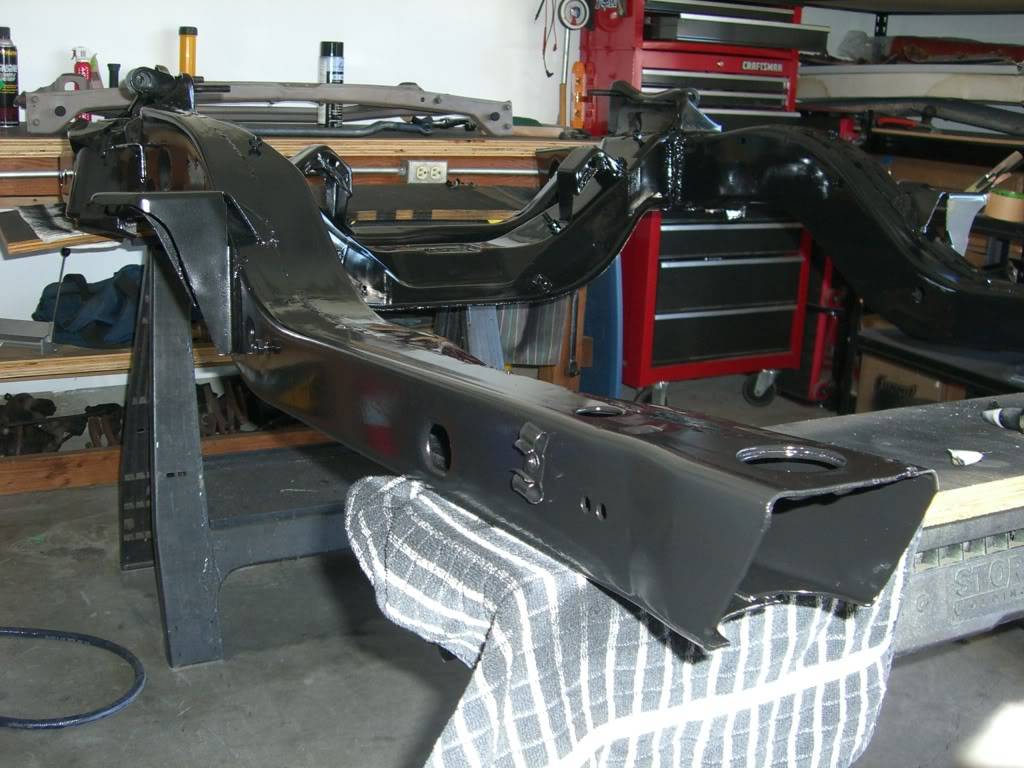
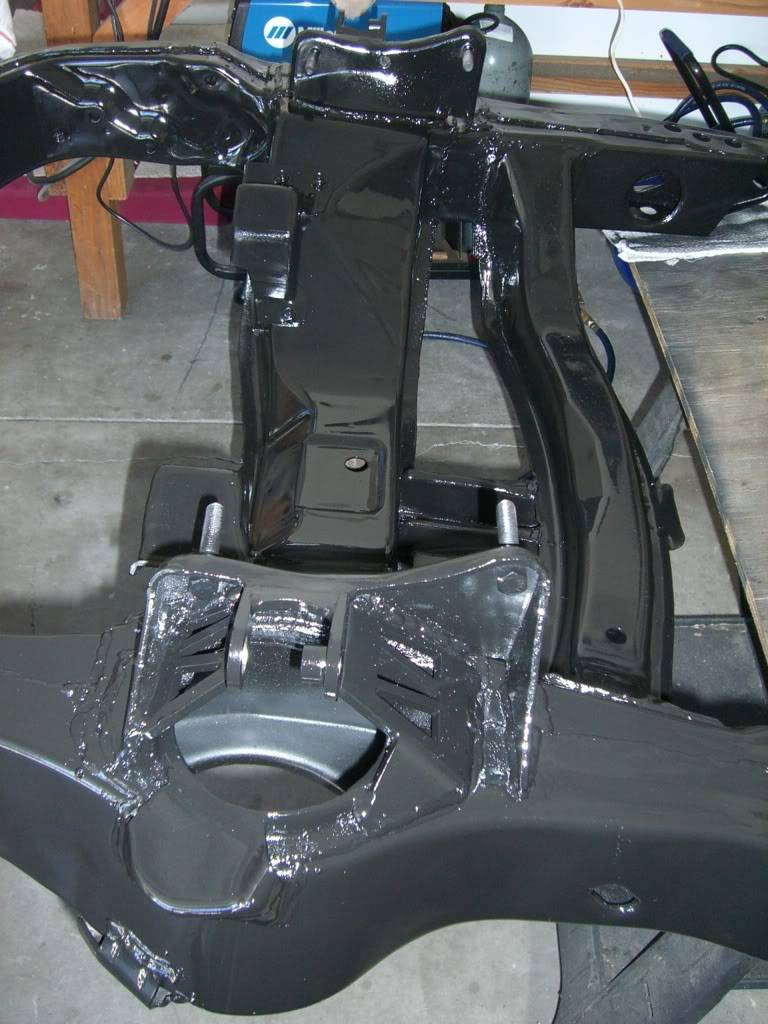
Anyway, I am really pleased with the stuff. As I mentioned previously this stuff is better than any rattle-can material I have ever used. The "Rust Encapsulator" was used as a primer and I followed that with the Chassis Black on the subframe and the Underhood Black on the Core Support.
The Encapsulator and Chassis Black cans both have spray nozzles that project the material in a nice, tight 5" fan pattern at the 8"-10" spray distance called out in the instructions. There is really minimal overspray and it's very easy to control where the material goes, especially with the use of the "can-gun". Additionally, it was easy to ensure that enough material was deployed for coverage w/o getting so much as to experience runs.
Overall I am really happy with the result. Yes, a pro with a paint gun could get better results. Nit-pickers will see the occasional bit of dust in the paint. Yup, my garage isn't 100% clean. But this is the subframe and core support on a track/auto-x car. It's more than good enough for me.
So let's have a look at the results:
After two coats of the "Rust Encapsulator" the subframe looked like this...
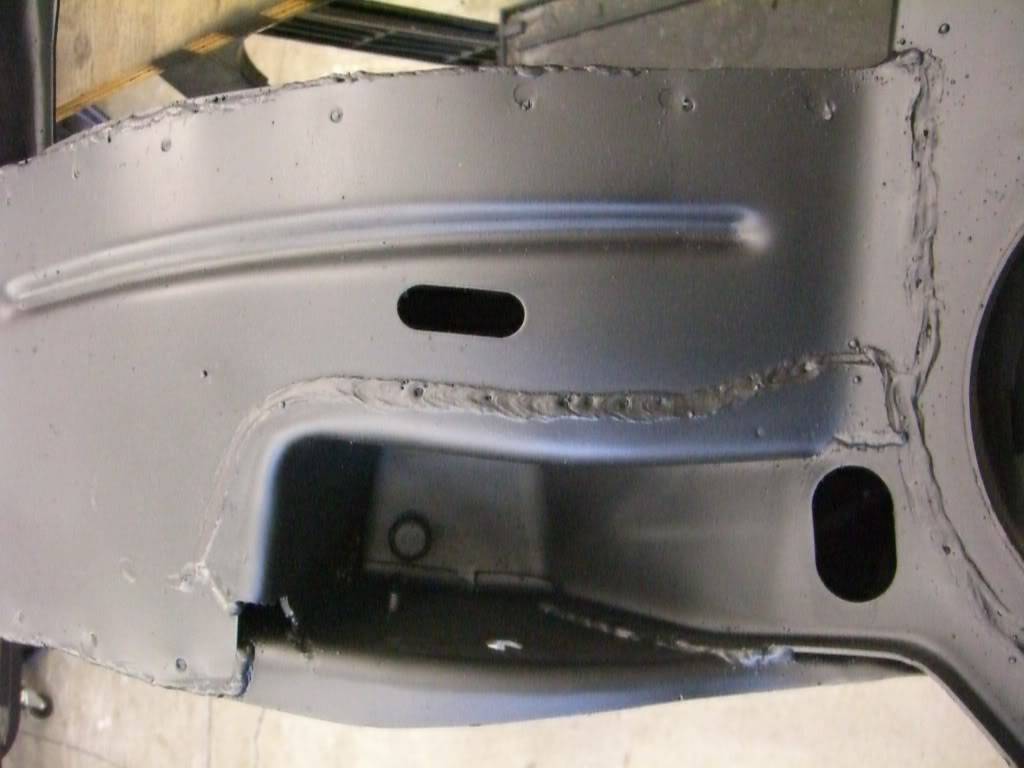
It lays on shiny when wet but dries to a flat black finish. If you top-coat within 36 hours you can spray right over it. Longer than that and Eastwood recommends a light scuff with 300 grit or a red scotch-brite pad. I wound up having to do both due to time constraints and in each case the top coat turned out pretty darn nice.
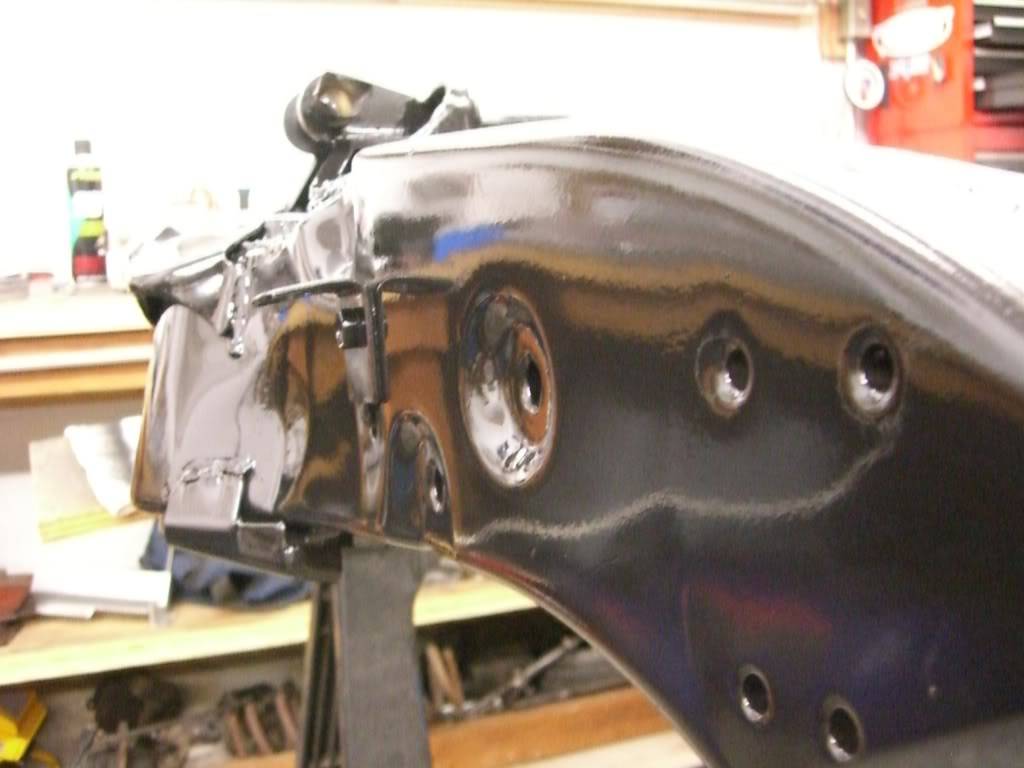
The flash and the florescent lights in my garage conspire to play hell with the color rendering in a few of these photos so some, like this next one look a bit grey. The surface is a uniform, gloss black though.
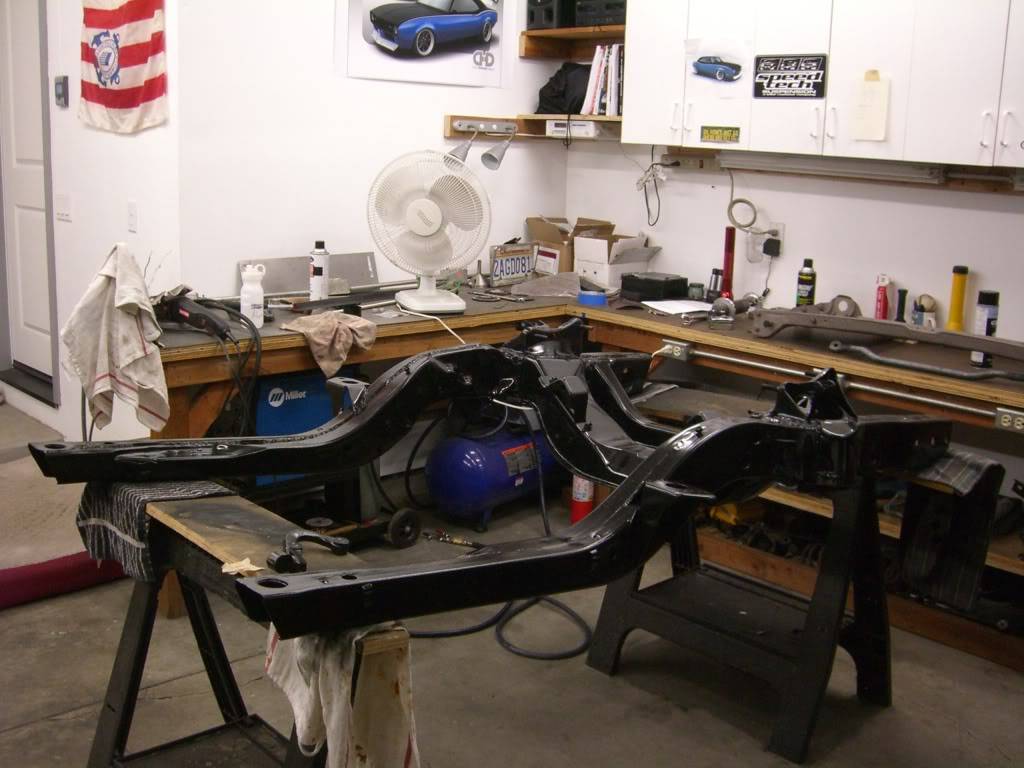
One other thing about the Eastwood stuff.....since the overspray is minimal the dusting of "other stuff" in the garage is nil and the airborne material is minimal as well. There is a bit of "solvent smell", but with the garage door open while spraying it was not oppressive at all and after 1hr was difficult to detect. Good stuff. Especially if your wife has concerns about such things or you have kids or animals around.Last edited by Damn True; 11-20-2008 at 03:33 PM.
True T.
Whats new with Project 1/2-Trak?
Follow my wisecracks on Sports, Food, Politics and other BS on Twitter.
My blog
When they kick out your front door, How you gonna come?
With your hands on your head, Or on the trigger of your gun?
11-20-2008 #112
-Moderator-
- Join Date
- Jul 2005
- Location
- Mountain View, CA
- Posts
- 9,583
....and onto the Core Support.
Again, I coated the Core Support first with the Rust Encapsulator and then the Underhood Black.
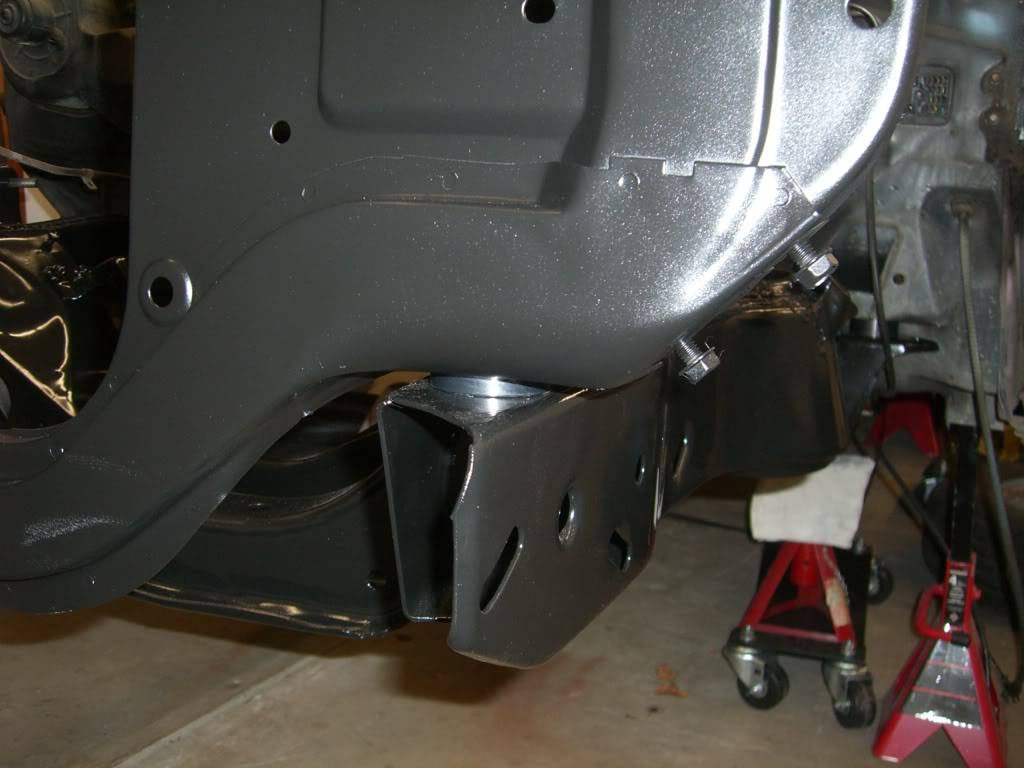
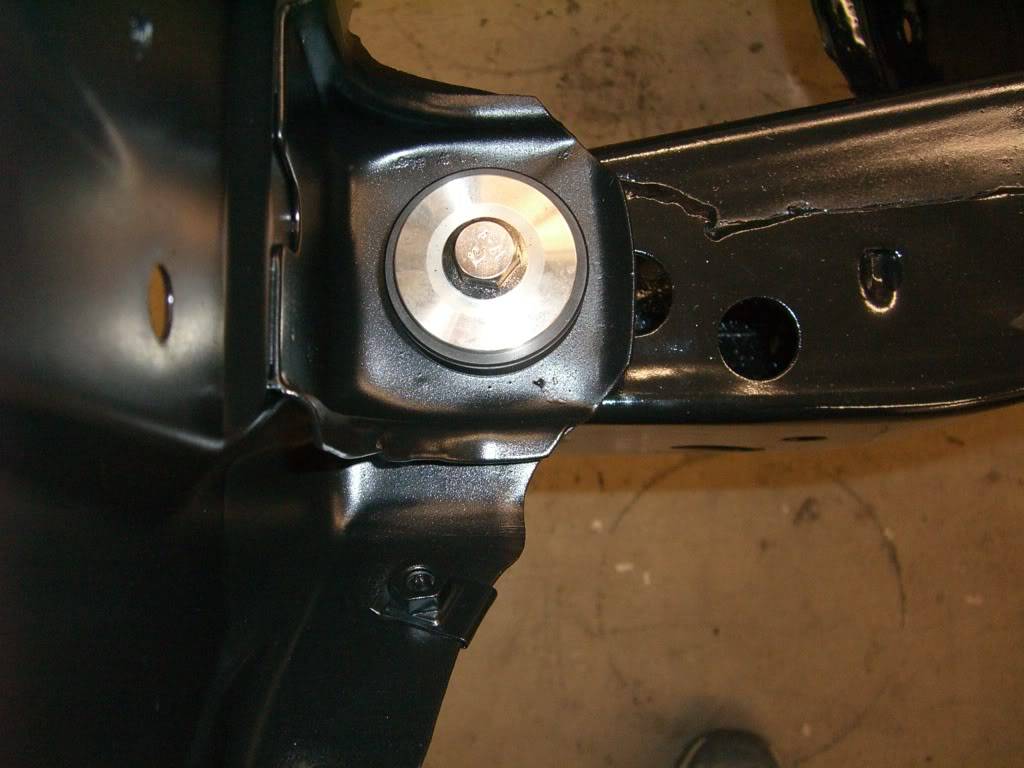
The Underhood Black lays out in a nice satin finish. It does not appear to have a porosity though so I'm thinking it will be pretty resistant to the "greasy fingerprint" that some flat/satin finishes are susceptible to. I did accidentally grab the core support with some oil on my hands. I was able to wipe the oil off with a bit of alcohol on a rag. No mark remained.
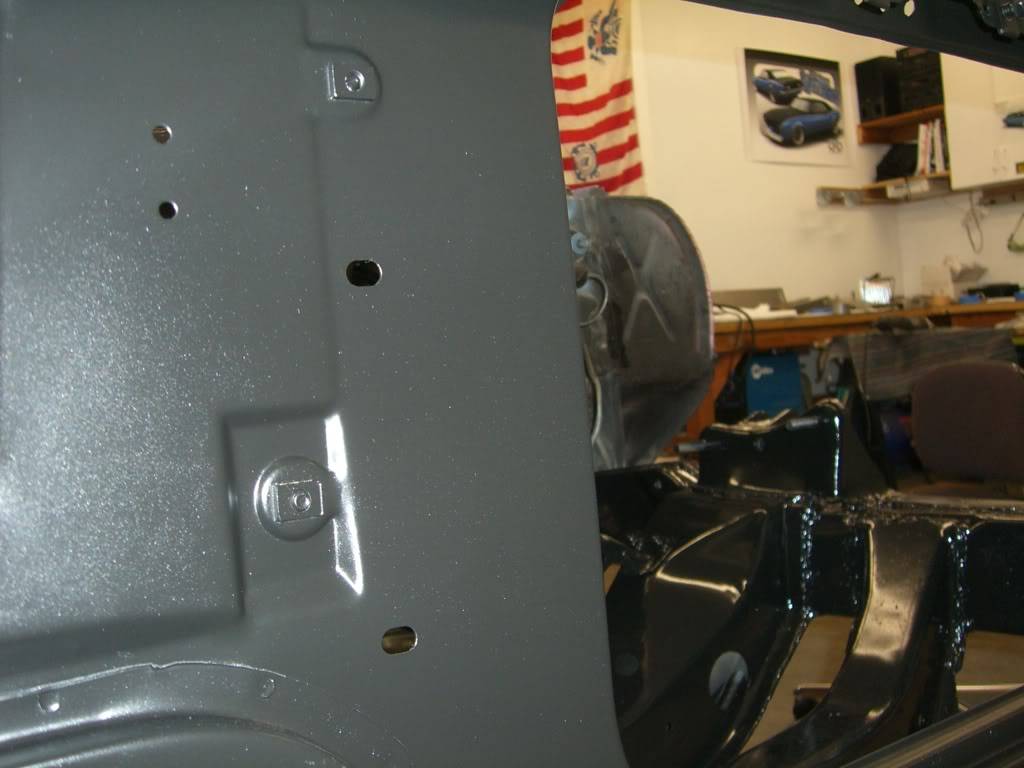
And in the following photos you can see the difference between the satin Underhood Black and the gloss Chassis Black.
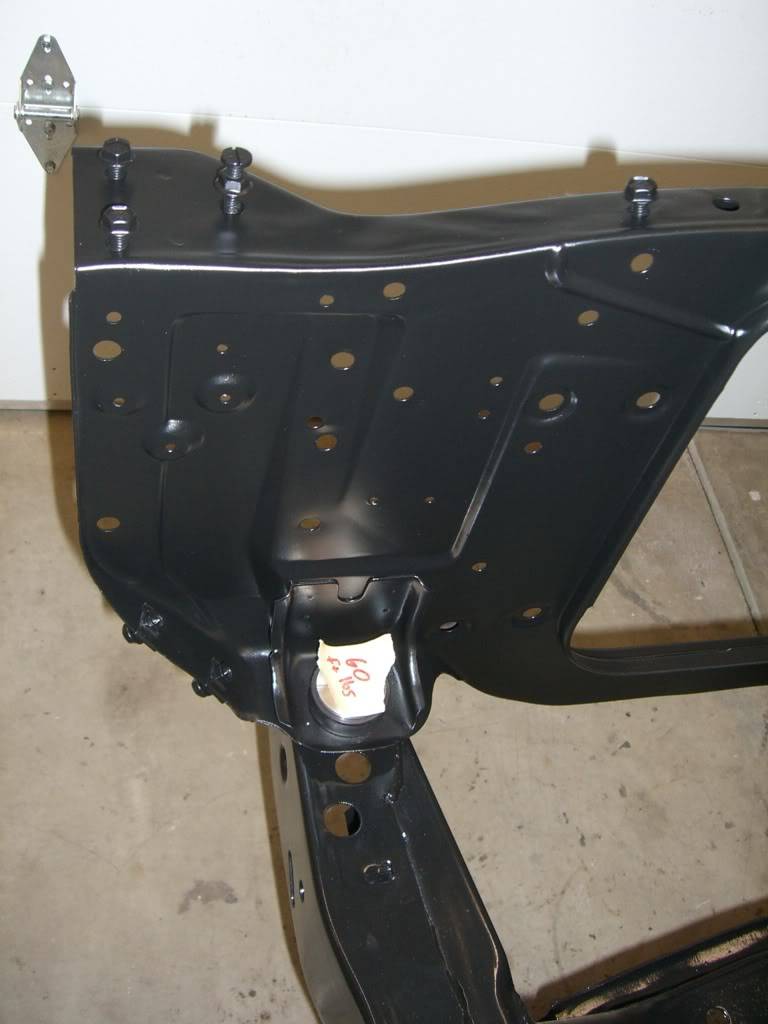
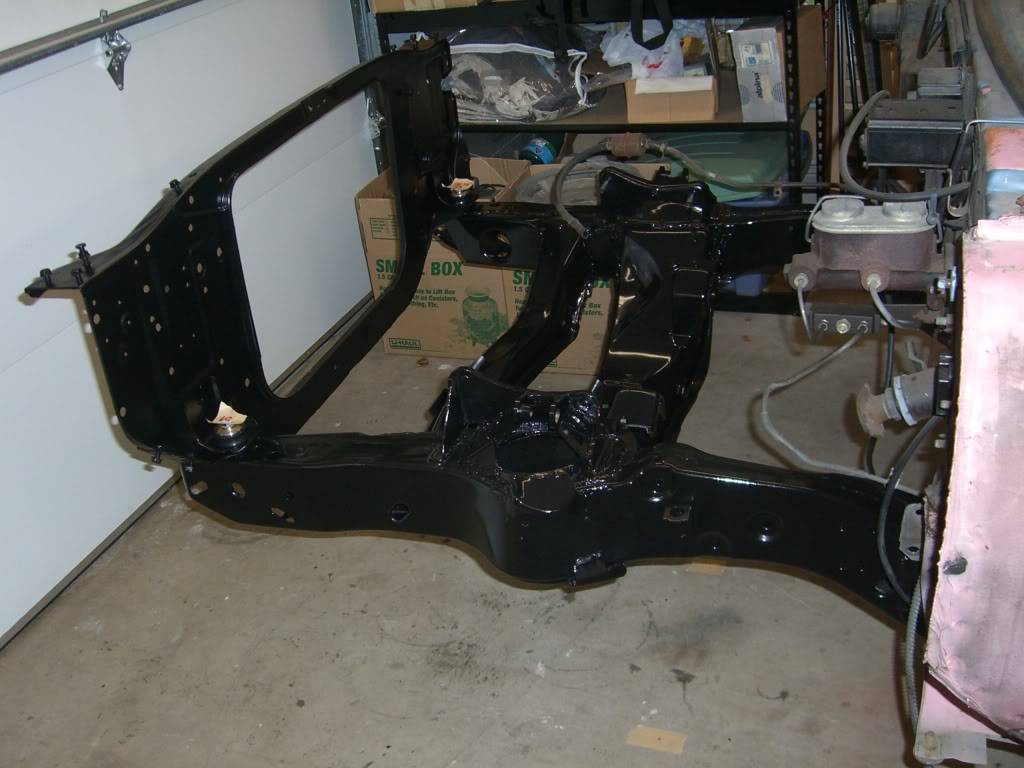 True T.
Whats new with Project 1/2-Trak?
Follow my wisecracks on Sports, Food, Politics and other BS on Twitter.
My blog
When they kick out your front door, How you gonna come?
With your hands on your head, Or on the trigger of your gun?
11-20-2008 #113
-Moderator-
- Join Date
- Jul 2005
- Location
- Mountain View, CA
- Posts
- 9,583
....and finally, the installation of the DSE (Detroit Speed & Engineering) solid body bushings.
From DSE:
Detroit Speed and Engineering's solid body mounts provide a simple approach to eliminating the flex that occurs between the body and subframe connection. This will improve vehicle handling response by increasing chassis stiffness. These mounts should be used when installing subframe connectors for maximum torsional rigidity.
Detroit Speed and Engineering's uniquely designed body mounts are CNC machined from billet aluminum. The mounts are then hardcoated, not bright anodized. The hardcoating process resists corrosion that can occur between steel and aluminum surfaces with regular bright anodizing. CNC machined stainless steel bevel washers are included. 17-4 stainless steel flanged body bolts are also available as an option.
Our mounts are available in either 1/2 height or stock height.
The body mount kit includes:
- 2 core support mounts with stainless steel bevel
washers
- 4 body mounts with stainless steel bevel washers
Optional stainless body bolt kit includes:
- 2 polished 17-4 stainless steel bolts and nuts for
core support mounts
- 4 polished 17-4 stainless steel bolts for body
mounts
I opted for the standard height units. A lot of folks go for the 1/2-height but from what I've seen the 1/2-height mounts often cause interferance problems between the transmission and tunnel and between engine and hood if you aren't using a cowl induction hood....which I am not. So full height bushings it is. I don't want the car too low anyway. Real life includes driveways, speed bumps, rough roads and trailer ramps. I'll leave the "slammed" look to the fairgrounds guys.
The install of these things is really dead simple and a one-man job as well provided your back/shoulders will allow you to bench press the subframe. The interlocking bushings install above through the subframe mount pads sandwiching the subframe material and providing a rigid interface between the subframe and the body tub. A bit of anti-seize on the stainless bolts is a good idea.
I installed the bushings and bolts hand tight and pulled the jack out of the way.
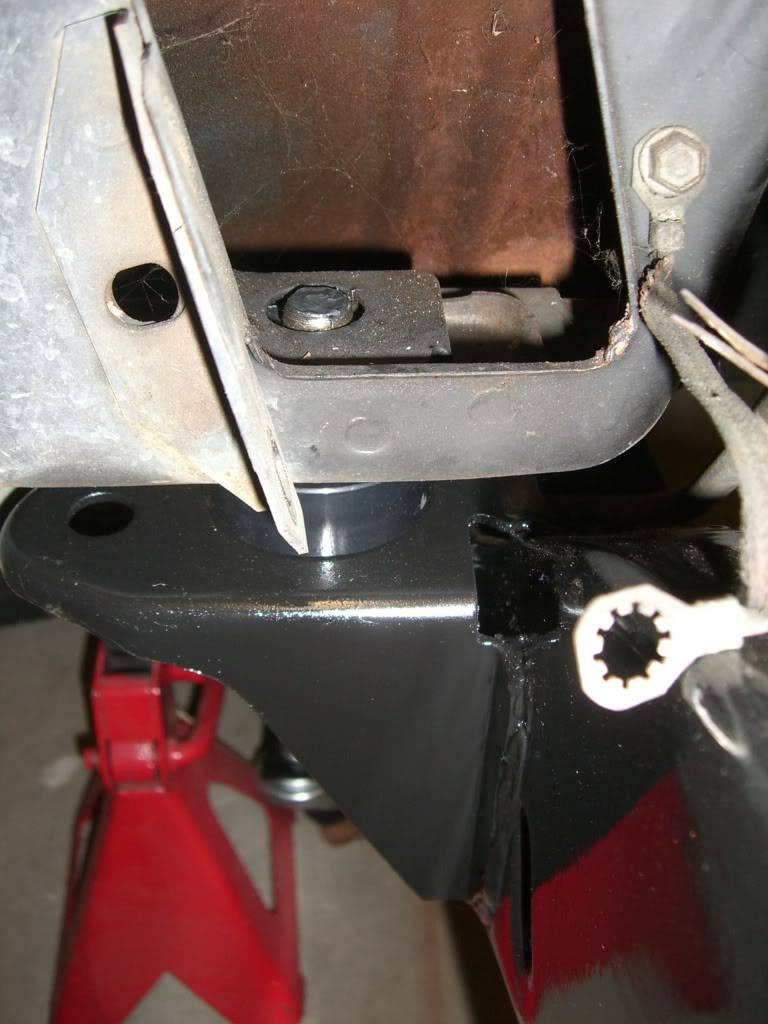
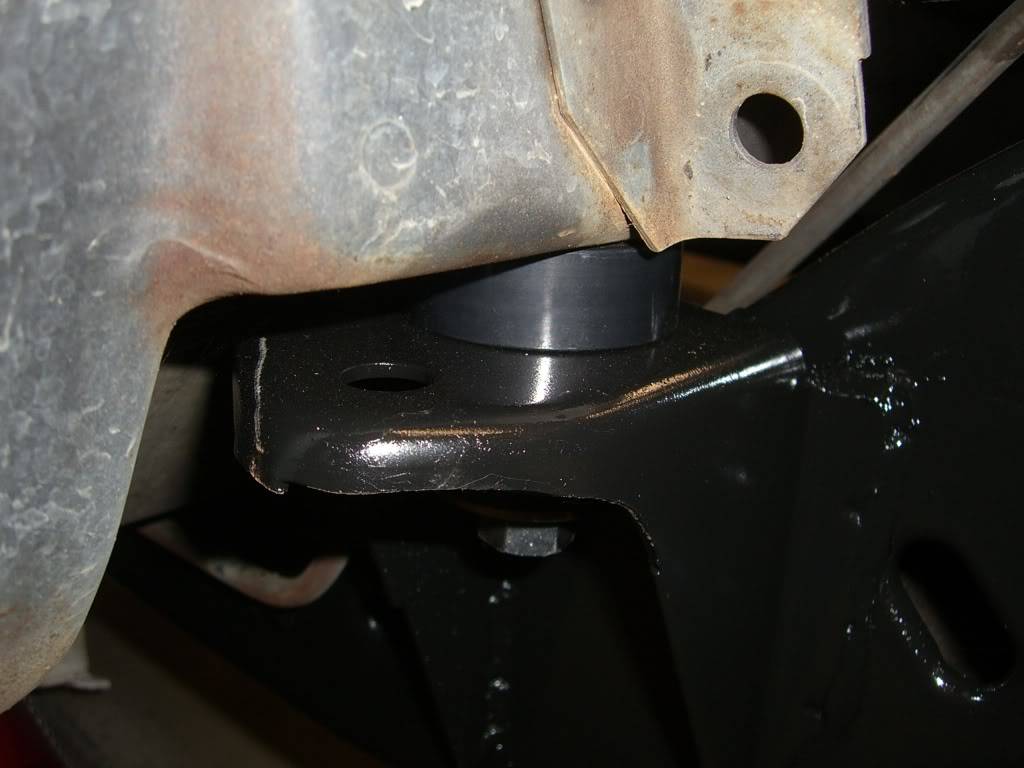
The next step is to align the subframe to the body tub so that the chassis is square. Also a simple task.
Start by dropping a plum-bob from the aft most mount hole for the lower control arm and make a mark on the garage floor. You can see the red marks here on bits of tape placed on the floor. Repeat this on both the left and right side of the subframe.
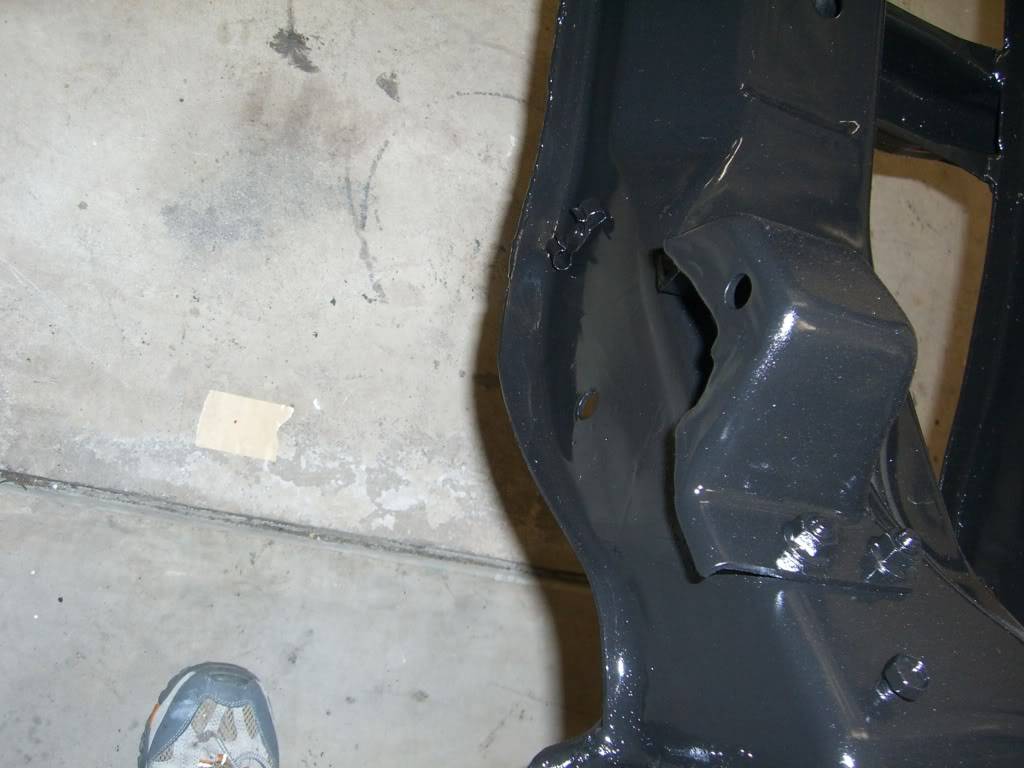
At the rear of the car, just aft and outboard of the forward leaf spring eye is a flanged oval shaped hole. Drop a plum-bob from this point and again, mark the spot on the floor.
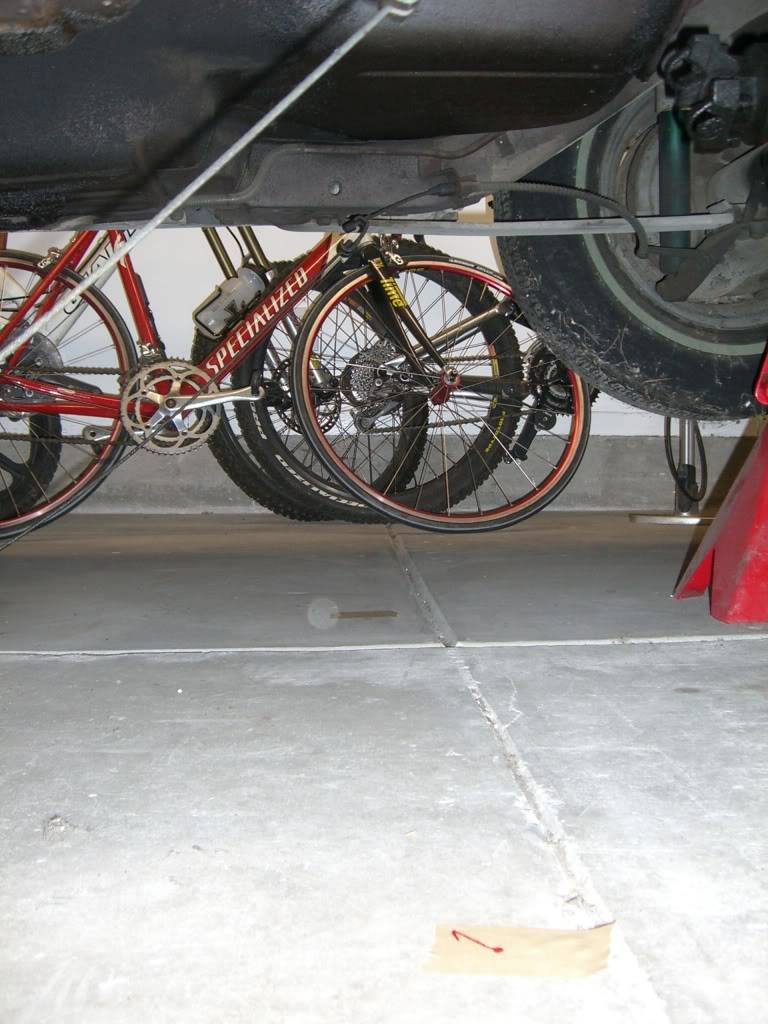
[roadbike, mountain bike and downhill bike gathering dust in the background....they hate me]
Once you have your marks you then measure diagonally between the marks (left-rear to right-front & right-rear to left-front). The values are sure to be different at first which is why I left the body bushing bolts hand-tight above. You'll have to bump, tweak and nudge the subframe around until the measurements are close to or equal. It'll take a few times to get it right but be patient and make small adjustments. Mine came out exactly equal at 90 1/16" from corner to corner.
I compared this to the measurements I took when I disassembled the car. The factory left the differential at 90 3/16" and 89 15/16". A 1/4" out of square condition. I guess that too explains the disparate alignment shim stacks.
I left the bushing at the Core Support hand tight to allow me to nudge it around when I put the bodywork back on the car at a later date.
Next step will be the installation of the DSE subframe connectors. I'm starting on that tonight so we should have at least a preliminary update to this thread in a few days.True T.
Whats new with Project 1/2-Trak?
Follow my wisecracks on Sports, Food, Politics and other BS on Twitter.
My blog
When they kick out your front door, How you gonna come?
With your hands on your head, Or on the trigger of your gun?
11-20-2008 #114
-Moderator-
- Join Date
- Jul 2005
- Location
- Mountain View, CA
- Posts
- 9,583
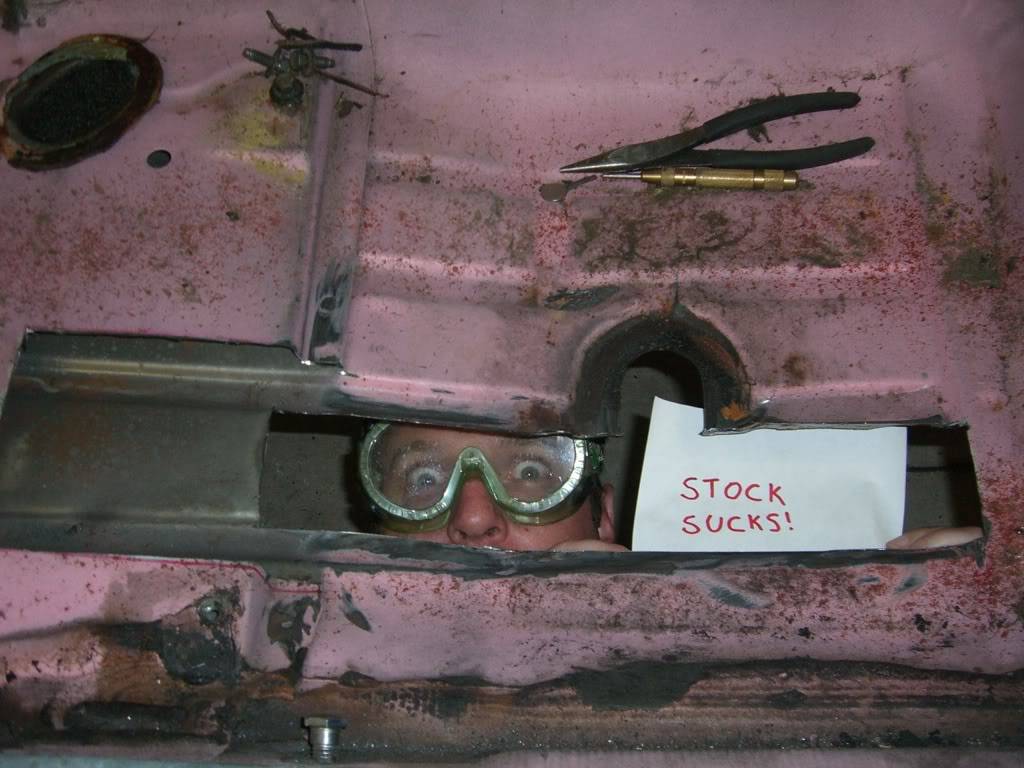
If you've never cut a big freakin hole in a somewhat valuable car you should try it. It's a rather liberating experience.
 True T.
Whats new with Project 1/2-Trak?
Follow my wisecracks on Sports, Food, Politics and other BS on Twitter.
My blog
When they kick out your front door, How you gonna come?
With your hands on your head, Or on the trigger of your gun?
11-20-2008 #115
Registered User
- Join Date
- Aug 2004
- Location
- Dunwoody, GA
- Posts
- 4,984
haha awesome! Good work True
Trey
"The early bird may get the worm, but the second mouse gets the cheese."
~ Jon Hammond
1979 WS6 Trans Am stock LT1/T56 drive train out of my Formula. BMW M-parallel rims. C5/C6 brakes
build thread https://www.pro-touring.com/showthre...ghlight=begins
11-20-2008 #116
Registered User
- Join Date
- May 2005
- Location
- St. Augustine, FL
- Posts
- 1,529
Lookin good True! I defiantly appreciate all the info your putting in your thread. I'm pulling my car apart kinda soon and this is the kinda info I need.
Andrew Petty

11-20-2008 #117
-Moderator-
- Join Date
- Jul 2005
- Location
- Mountain View, CA
- Posts
- 9,583
Thanks Andrew.
I stickied a really great tutorial on mini-tubs in the suspension forum. This guy did a great job explaining the process.
https://www.pro-touring.com/forum/sh...ad.php?t=46900
I won't go into detail on that bit in my thread. No need to duplicate the info but where there are holes in the tech on this site I'll try to fill them where applicable.True T.
Whats new with Project 1/2-Trak?
Follow my wisecracks on Sports, Food, Politics and other BS on Twitter.
My blog
When they kick out your front door, How you gonna come?
With your hands on your head, Or on the trigger of your gun?
11-21-2008 #118 Registered User
- Join Date
- Apr 2005
- Location
- dayton, oh
- Posts
- 952
 Originally Posted by Damn True

quote of the day. nice pic, too.
11-21-2008 #119
New to Pro-Touring
- Join Date
- Sep 2007
- Location
- sandy oregon
- Posts
- 95
done it before and you could have put it better Originally Posted by Damn True

11-21-2008 #120 Registered User
- Join Date
- Aug 2004
- Location
- Ontario, Canada
- Posts
- 2,314
 There's some more of that pinkpaint ... Originally Posted by Damn True
 LOL.
LOL.
You're doing an excellent job on both the buildup and documentation True.
It's probably to late now, and probably not that important, but the sub frame in my '71 Nova had a slight twist in it. If I remember right it was about 3/8" to a 1/4" . I always assumed that was the reason for more alignment shims in one side than the other. Your measurements before disassembly pose another possible cause.
Keep up the good work.
And take it easy on that new mattress .
.
KenIf there is a hard way to do something, I'll find it!
My other car is a Vega.

 Reply With Quote


