


Results 321 to 340 of 862
Thread: The BAD AST Project - Faze II
-
11-21-2011 #321
 Registered User
- Join Date
- Aug 2007
- Location
- Albemarle, NC
- Posts
- 1,170

that does look really good.
and i think i spied a late 90's suburban console in there.
also, on drilling and tapping your poly bushings for zerk fittings: did you drill the poly to let grease to the inside as well? cut any grooves or anything for the grease the flow into?
like to have some more info on this, as im about to do non=greasable poly bushings o my daily. love to make them greasable.
michael
Michael Crawford
1970 plymouth Duster back under construction:
https://www.pro-touring.com/showthre...uring-makeover
1987 GMC S15 https://www.pro-touring.com/showthre...ct-drivabeater
-
11-22-2011 #322
 Registered User
- Join Date
- Mar 2004
- Location
- Mid-Michigan
- Posts
- 2,764
Thanks guys, there is still a long ways to go. I hope I can keep moving forward.
Michael,
I bought the bushings and sleeves from Suicide Doors as a unit. The bushings are molded with grease grooves and, when they are pressed into the sleeves, there is about an 1/8th inch gap left between them. I just drilled and tapped for the zerk at the mid-point of the sleeve to "hit" that gap. There should be no issues keeping these greased.
If you look close at the pic you can see the grooves in the bushings.
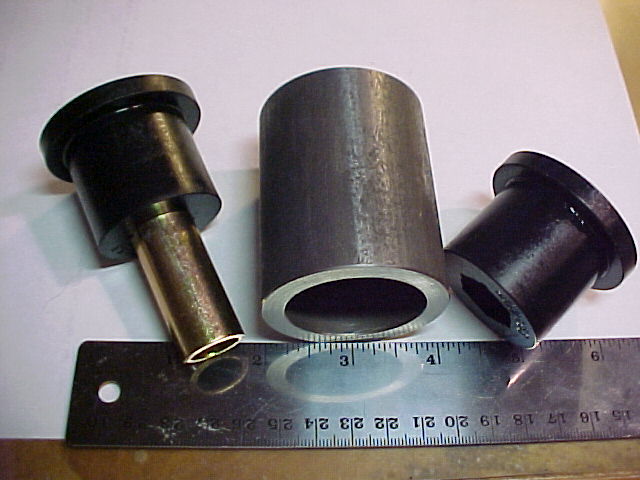
As far as the non-greasable style goes I've had full poly bushings on my '95 GMC since 1999. I greased them very well during assembly and have had zero squeaking or binding from them in 12 years.Mark:
"Bad Ast" Astro Van. Just because I did it... Doesn't mean it's possible...
This my Bad Ast thread...
https://www.pro-touring.com/showthre...roject-Faze-II
This is my Fotki album...
http://astroracer.fotki.com/
11-27-2011 #323
Registered User
- Join Date
- Mar 2004
- Location
- Mid-Michigan
- Posts
- 2,764
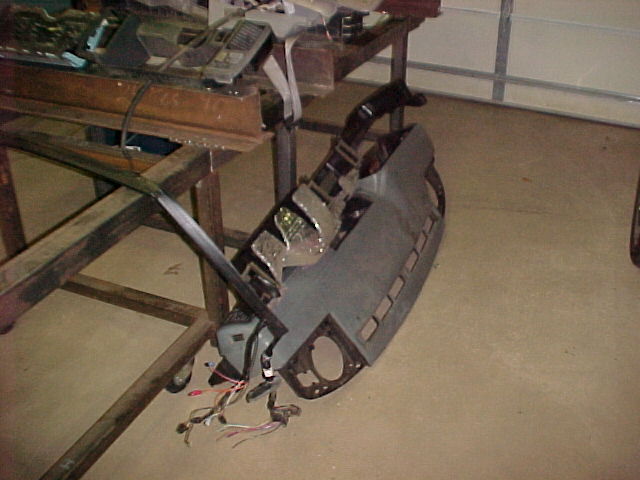
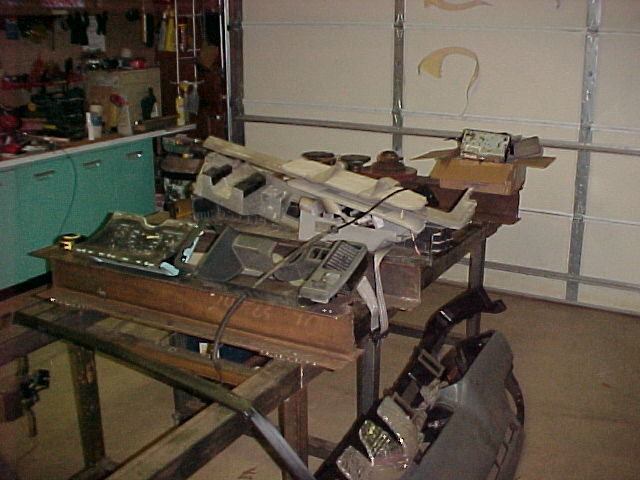
Got a little bit done (and "undone") this past weekend. I worked a bit of O.T. during the week so I didn't get much done other then Wednesday afternoon which I spent stripping parts off the donor van. Thursday was spent doing the Turkey Day stuff and I worked Friday so, out of a "four day" weekend I had Saturday and Sunday to work in the shop. Saturday Mel came out and he worked on stripping the rest of the interior out of Bad Ast and I stripped the dash, wiring harness, interior door trim, brake pedal and bracket and a bunch of little things off the donor van. We have quite a pile of parts for me to organize. I need to buy some more storage tubs.
Some of the stuff off the donor van.
Bad Ast is pretty well gutted right now. Once the seats were out we got the rubber floor mat and all of the interior door trim removed.
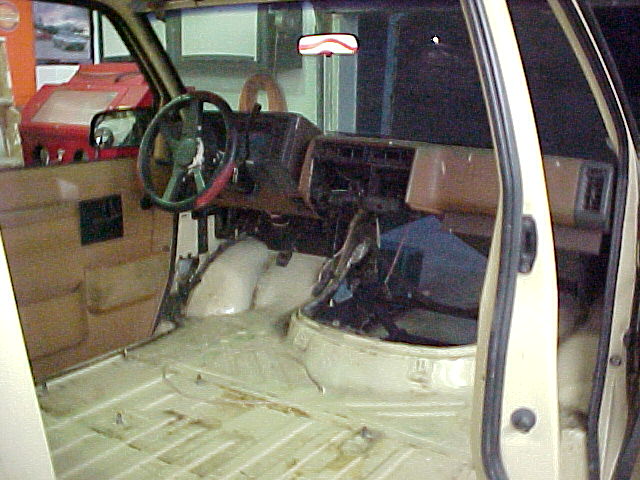
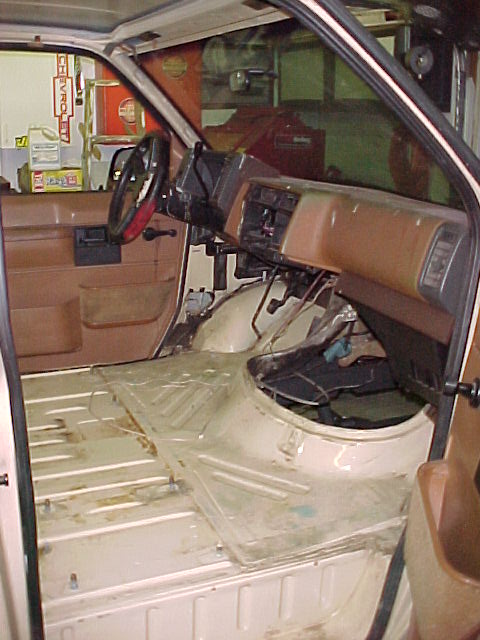
All of that was Saturday's work.
Today we worked on a plan for the cage and tin work. we measured the inside of the van for the "C" and "B" pillar hoops. I will model those in UG to get the cage designs going.
I also welded some nuts to the upper front fender bolts as that is the only way to get them off after the torx bolts take a set...
We also dropped the jack stands a bit to make getting in and out a little easier and got the van leveled up side to side and front to rear. We also put another set of stands in the middle of chassis so it is sitting on six stands now instead of just four.
Did some cutting also. We laid out the cut lines to reposition the doghouse for the new motor location. You can see them in black felt pen in this pic.

Aftercutting out the piece we will reuse I cut out the rest of the floor as it will be when we start to rebuild it.
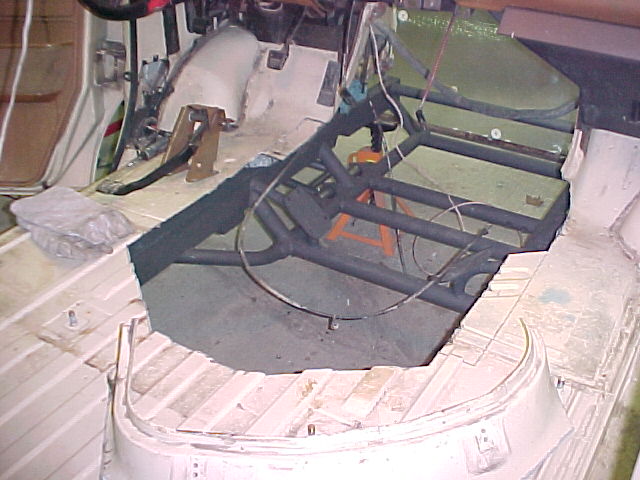
Here you can see the new location for the back of the doghouse. I have moved it 18.5 inches rearward and 3 inches to the drivers side. It looks like a lot and it is.
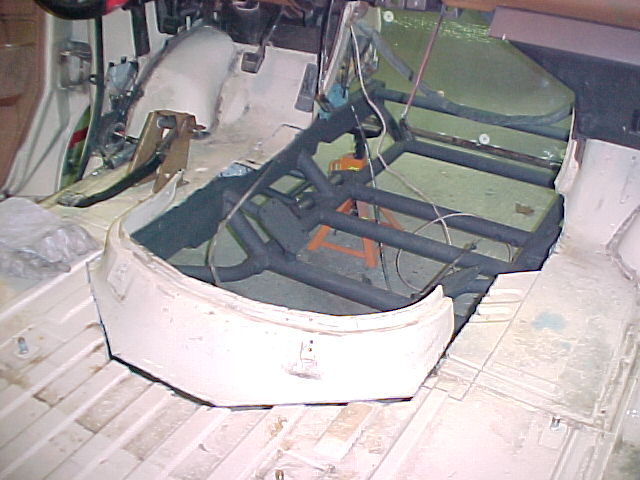
You can see here where I cut the flange up near the throttle pedal. This is about as far forward as it needs to go for rocker cover clearance. I will reshape the throttle lever and brake pedal arms to move them three inches to the left. There is nothing there to get in the way so I should have plenty of foot room after the work is done.
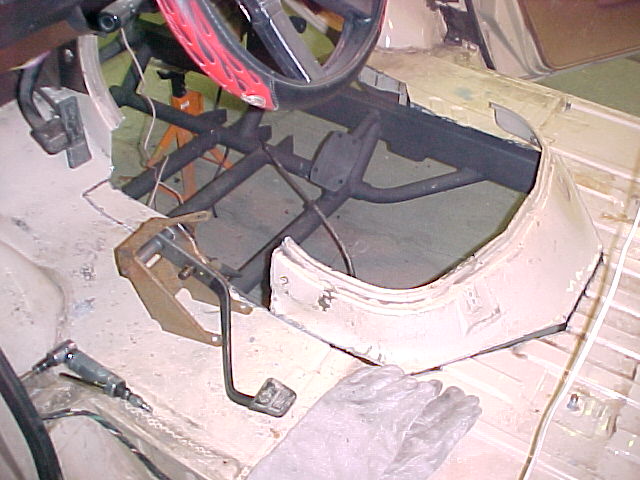
Had a good weekend, I hope everyone had a nice Turkey Day and I thank you for looking.
MarkMark:
"Bad Ast" Astro Van. Just because I did it... Doesn't mean it's possible...
This my Bad Ast thread...
https://www.pro-touring.com/showthre...roject-Faze-II
This is my Fotki album...
http://astroracer.fotki.com/
11-27-2011 #324 New to Pro-Touring
- Join Date
- Nov 2008
- Posts
- 42
This build is great, its always nice to see something no one has done before!
 Originally Posted by Damn True

11-27-2011 #325 Registered User
- Join Date
- Jul 2009
- Location
- Grand Rapids, MI
- Posts
- 1,559
Looking good Mark. Keep it up!
11-28-2011 #326
Registered User
- Join Date
- Mar 2004
- Location
- Mid-Michigan
- Posts
- 2,764
I am going to try Will, there is a lot to do and here it is December already! I am back working some O.T. at the real job so I don't get home at night until after 6. I will try to avoid working weekends so I can get some work done on the van.
I did my cyber shopping part today. With the start of the floor work I decided to look into getting a pair of seats to build around. I had been looking and knew what I was going to get so I was surprised to see Summit had the seats on sale for 156 and change down from 189.99! I pulled the trigger on them during lunch. Scat ProCars in black. THEN... I thought I would check Jegs.... Criminy! Jegs had the same seats on sale for 141.99!!!! Crap. I called Summit to see if they would match Jegs price and the salesman said he couldn't match the price BUT! He would let me have them for 140.99. WOW! I was happy. And with free shipping other then having to pay an oversize fee I think I got a pretty nice deal. I also ordered two sets of seat mounting brackets that will probably end up in pieces, but they are a start anyway.
Here are the seats I got. One driver & one Passenger. i know they are pretty basic but they will do the job for now.


Thanks for looking
MarkMark:
"Bad Ast" Astro Van. Just because I did it... Doesn't mean it's possible...
This my Bad Ast thread...
https://www.pro-touring.com/showthre...roject-Faze-II
This is my Fotki album...
http://astroracer.fotki.com/
12-01-2011 #327
Registered User
- Join Date
- Mar 2004
- Location
- Mid-Michigan
- Posts
- 2,764
Haven't got much done the past couple of evenings other than unpacking boxes and checking parts for shipping damage. The radiator from Speedway looks very nice as do the seats. I sat on one of the seats on the living room floor for a while and it was fairly comfortable. The back cushion seems a little stiff but I really can't complain for what I paid for them. They look nice and will do the job I need them to do. We'll just have to take it from there. I'll get some pics tonight with them sitting in the van.
Thanks for looking
MarkMark:
"Bad Ast" Astro Van. Just because I did it... Doesn't mean it's possible...
This my Bad Ast thread...
https://www.pro-touring.com/showthre...roject-Faze-II
This is my Fotki album...
http://astroracer.fotki.com/
12-01-2011 #328
Registered User
- Join Date
- Jul 2009
- Location
- Grand Rapids, MI
- Posts
- 1,559
Cool! I've got two weeks before I'm opening all kinds of new (and some used) goodness. Looking forward to your pics.
12-11-2011 #329
Registered User
- Join Date
- Mar 2004
- Location
- Mid-Michigan
- Posts
- 2,764
Haven't updated the build in a while.
Been busy at work during the week so I only get the weekends to get anything done.
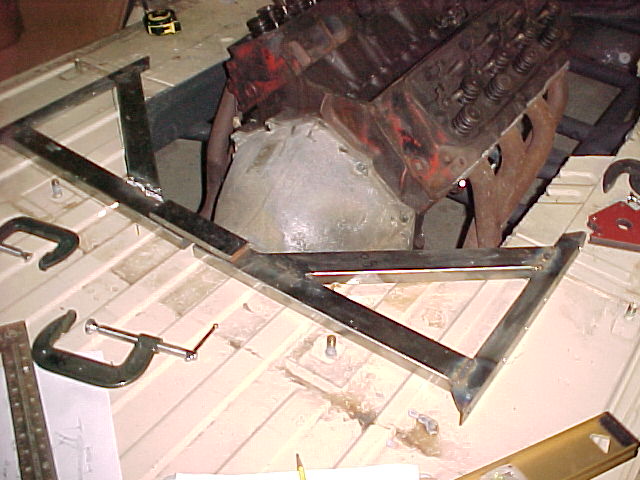
Last weekend Mel and I built a K member to support the floor under the new doghouse location and to carry the repositioned front inner seat bolts.
We also set the mock up motor and trans in place. We will be building the new floor and doghouse around it.
Bolted the heads and headers on so we know exactly what we need for clearances.

Here is the K member. It is built from 1 x 2 x .083 Rect tube with angle on each end to attach to the rail.
Yesterday I layed out the bolt pattern on the floor and drilled the holes out with a step drill. With the brace clamped under the floor in the correct location the drilled holes marked where all of the AVK's will go.
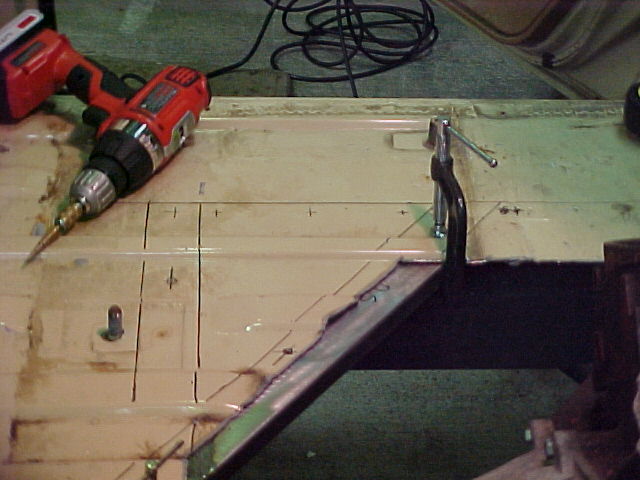
I drilled the tubing out to .391 for the AVK's.
This is the installation tool. Thread the insert onto the mandrel, put the insert in the hole and tighten the setting tool with two 3/4" wrenches. Setting 14 inserts took about 1/2 an hour.

I also made a tapping plate to carry the load at the middle of the floor. 1/2" plate with 3 1/4-20 tapped holes for each side of the brace.
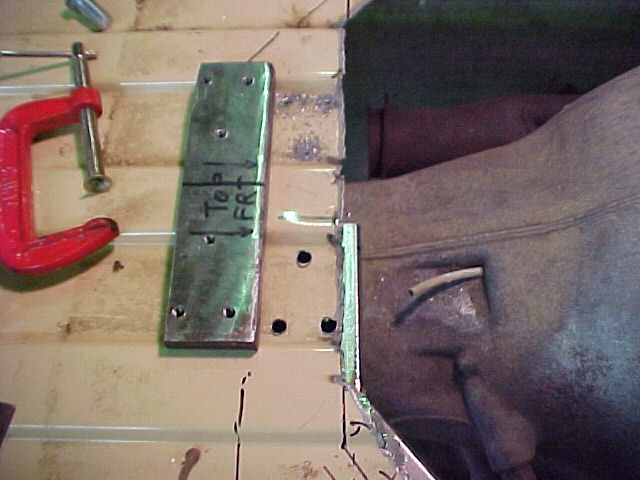
It took about an hour to tap all six holes. It fit very well and adds a LOT of support at the middle of the floor
Here you can see it being bolted in. It slides into place between the tubes and clamps everything together.

All bolted in making for a VERY stout floor...
 Mark:
Mark:
"Bad Ast" Astro Van. Just because I did it... Doesn't mean it's possible...
This my Bad Ast thread...
https://www.pro-touring.com/showthre...roject-Faze-II
This is my Fotki album...
http://astroracer.fotki.com/
12-11-2011 #330
Registered User
- Join Date
- Mar 2004
- Location
- Mid-Michigan
- Posts
- 2,764
I also trimmed down the doghouse from the donor van. Cut it off about in the middle. I will use this half to rebuild the center once all of the floor work is done.
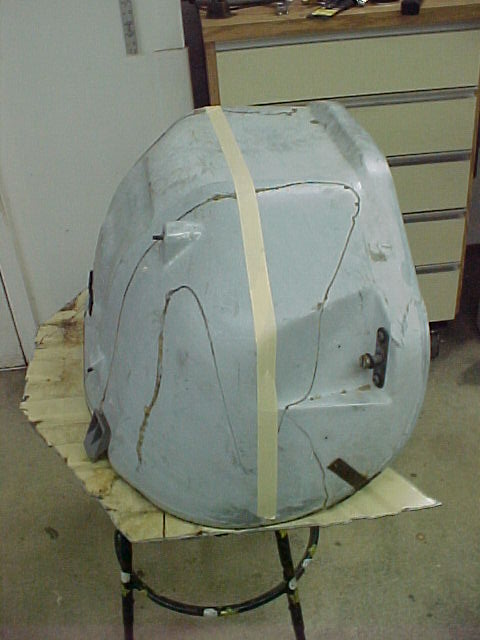
After the sawsall had its way with it...
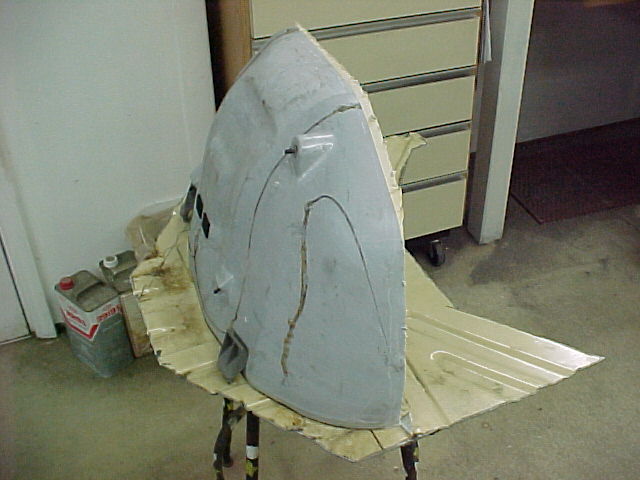
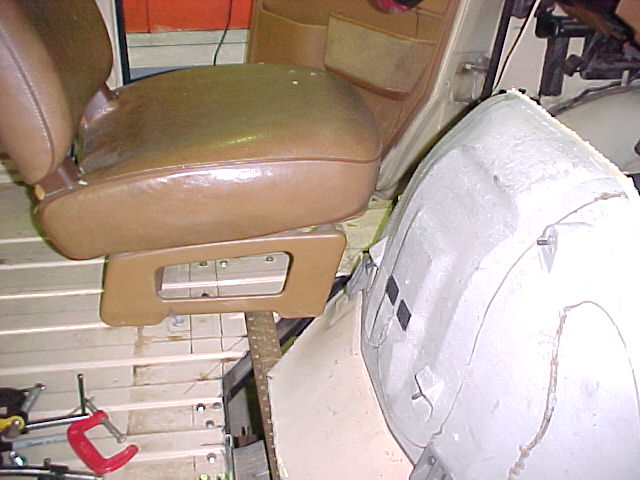
Today we got a lot of "stuff" done. Stripped out the column, dash, wiring harness, brake booster, HVAC stuff, doors... basically there is nothing left that will bolt on...

Mocking up the doghouse with the rocker covers in place. There is a lot more room than I had anticipated. I will need to move the throttle and brake pedals a bit but that is easy.

With a seat in place.
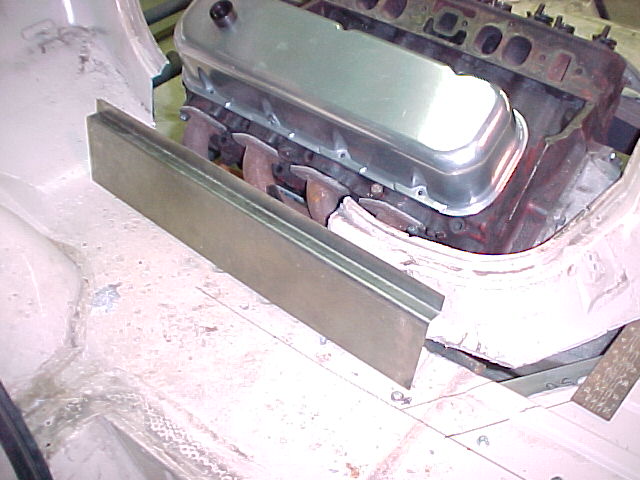
Also got the 3 in 1 machine working today. Bent up a piece of 18ga to use to stretch the seal flange for the doghouse. I will be using this and some separate pieces to smooth the transitions.
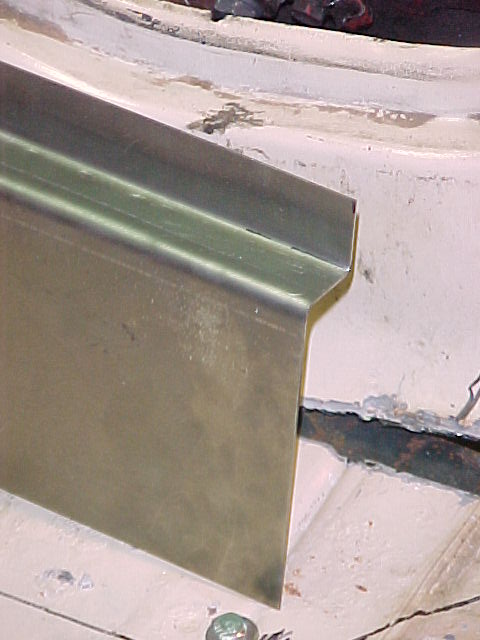
A close up of the bends. I had to sweeten these up a bit with a hammer but they turned out pretty good.
I started working on the transition in front of the drivers cylinder head. I cut the pieces with a cutoff wheel in a die grinder so I could do a little bending. This will be reworked to smooth out the bends.
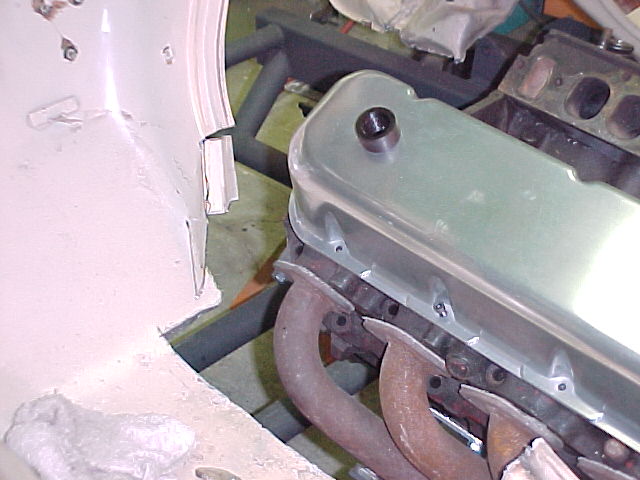
Well, that's about it for the last two weekends. I hope to have a lot of the tinwork well on it's way next weekend.
Thanks for looking.
MarkMark:
"Bad Ast" Astro Van. Just because I did it... Doesn't mean it's possible...
This my Bad Ast thread...
https://www.pro-touring.com/showthre...roject-Faze-II
This is my Fotki album...
http://astroracer.fotki.com/
12-11-2011 #331
Registered User
- Join Date
- Jul 2009
- Location
- Grand Rapids, MI
- Posts
- 1,559
Nice work Mark. Love the progress. Seems to be moving right along now.
12-15-2011 #332
Registered User
- Join Date
- Mar 2004
- Location
- Mid-Michigan
- Posts
- 2,764
I have gotten out to the shop a couple nights this week. Tuesday night I bent up some test pieces to start developing the new flange area by the drivers foot. I need to put an "S" bend into it to walk it around the cylinder head. I kerfed out the piece I made so it could be bent into shape without kinking. I will make a hammerform to bend the real piece to fit.
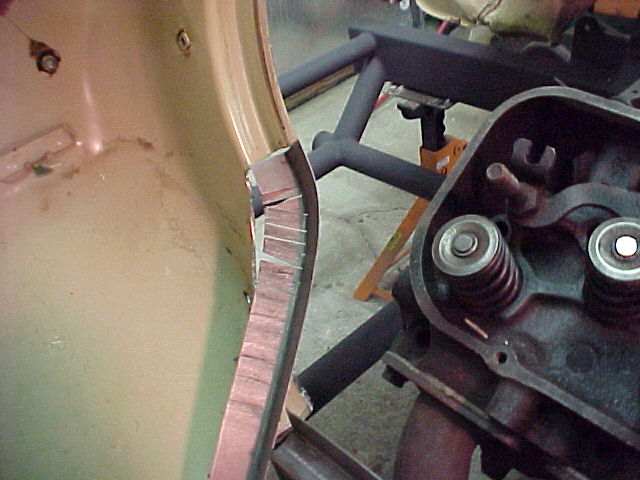
I also put a nice roll into the new flange section I made Sunday. This will blend down into the floor nicely.
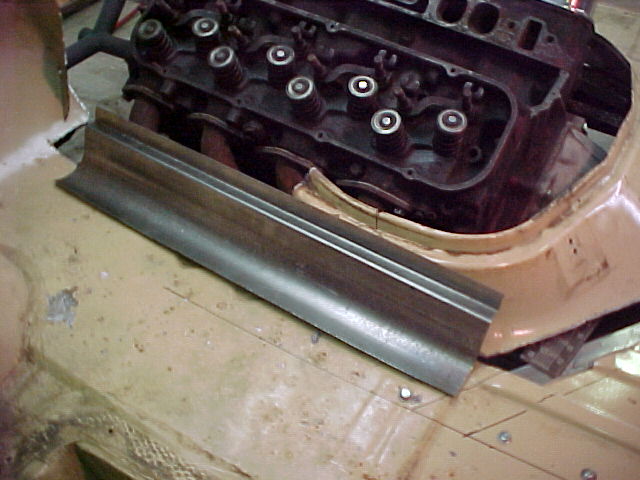
Tonight I puttered around for an hour or so. I cut the original engine cover in two and bolted the front half in place. This is the gap I have to fill.
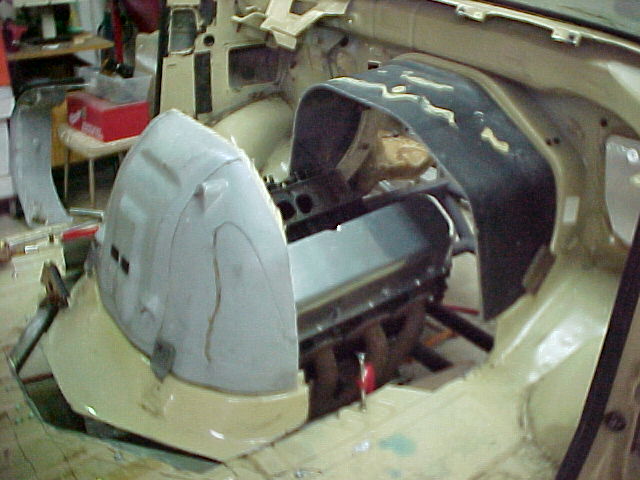
It's really not that bad, it will get kinda tricky on the drivers side but once the floor and flange area's are rebuilt, making a new glass cover is pretty simple.
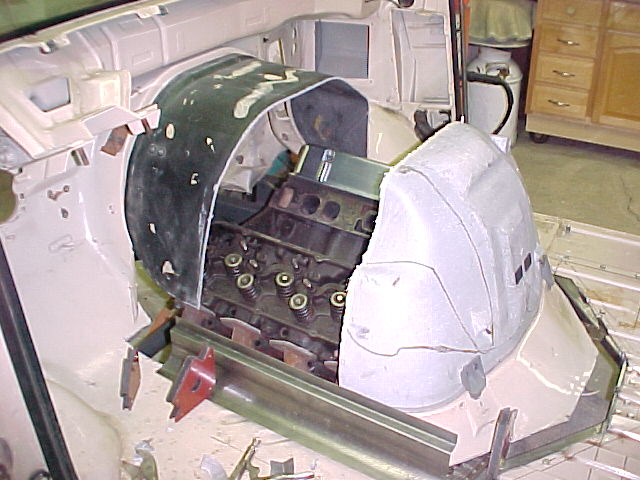
Any design suggestions? I should probably keep it simple but it would be easy to go a little wild here...
Got one of the new seats set into place.
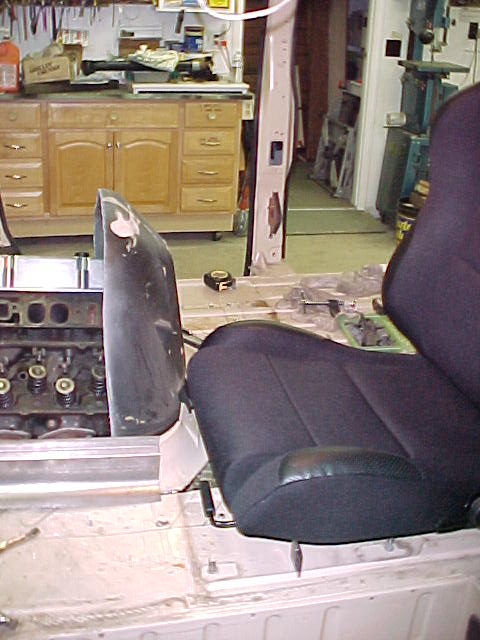
There is a lot more room than I thought there would be.
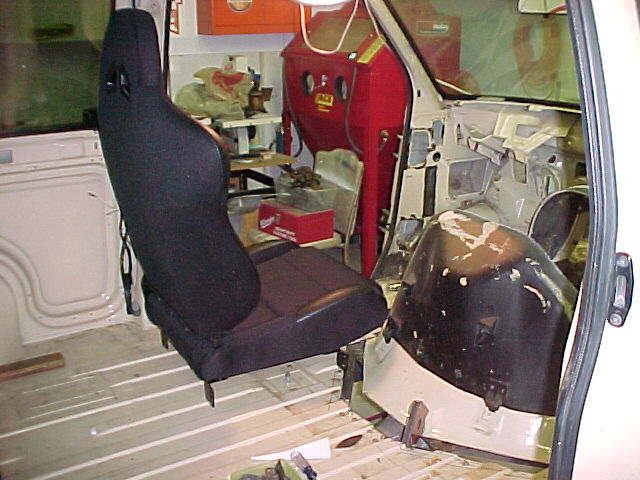
The bend I am putting in the cover at the firewall actually lets my foot snuggle right down to the throttle pedal. I will still move it outboard an inch or two but even that wouldn't be necessary.
The shifter is going to be a problem though. I ordered a TCI Outlaw shifter today. I hope to have it tomorrow or saturday. Proper placement is getting real close to the back of the cover and routing the cable will be a trick...
I hope to get the hammerform started tomorrow night. I would really like to be welding the floor together Saturday.
Thanks for looking.
MarkMark:
"Bad Ast" Astro Van. Just because I did it... Doesn't mean it's possible...
This my Bad Ast thread...
https://www.pro-touring.com/showthre...roject-Faze-II
This is my Fotki album...
http://astroracer.fotki.com/
12-22-2011 #333
Registered User
- Join Date
- Mar 2004
- Location
- Mid-Michigan
- Posts
- 2,764
Got a bit more done over the weekend and tonight. I am forming the blend area out of cut and bent strips and welding them together. I was planning to make a hammerform to do this work but was unable to cut the glued up MDF. The "little" wood bandsaw was not up tot he task and the big saw broke a lower blade guide...
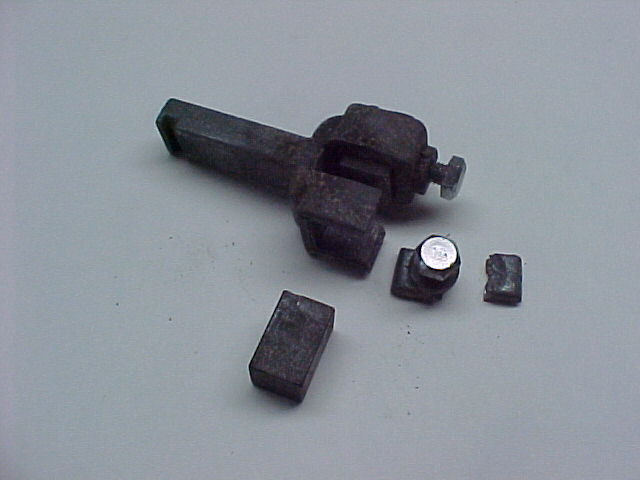
Back to the drawing board. We basically wasted 3 hours dinking around with saws.
We made some flat paper templates and cut out the steel strips with my beverly shear. After some tacking and bending you wouldn't believe how strong this piece is. And it's not even fully welded.
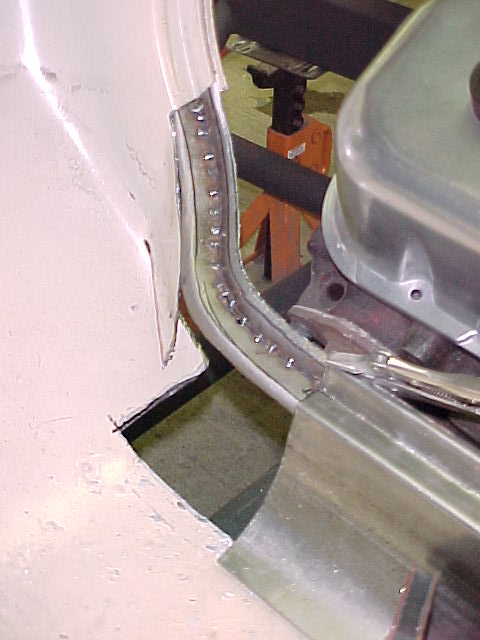
Added the drop side down to the floor. The floor radius still needs bending but you can see what it will look like.

Here it is with a little more trimming and fitting. I decided to move it down a bit to smooth the transition with the original flange.
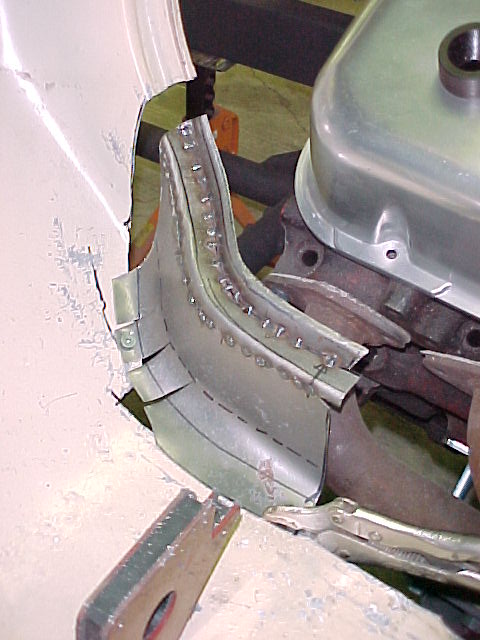
Here is a bit of development on the right hand side. This is a little simpler then the drivers side. It's all flat.
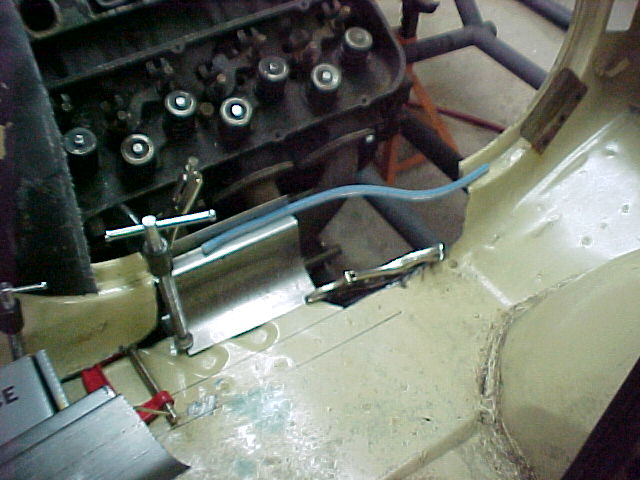
That is a "flexible" ruler in the pic. It is bendable and retains it shape. I'll use it to layout the flat stip for the flange.
Check out my shifter "console"
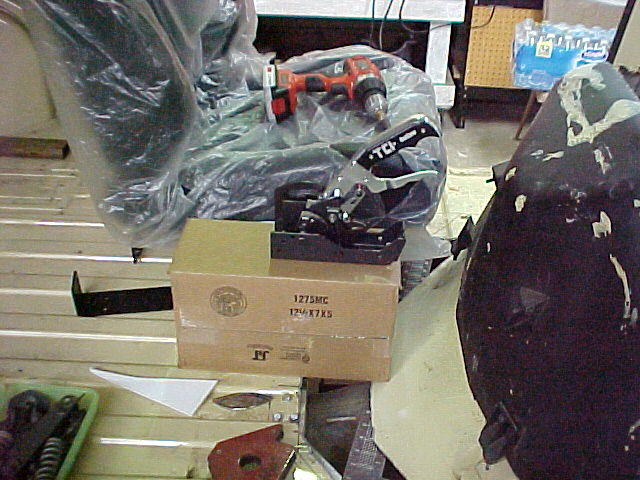
I will be doing a lot of measuring and mocking up to get a comfortable shifter location AND workable cable route.
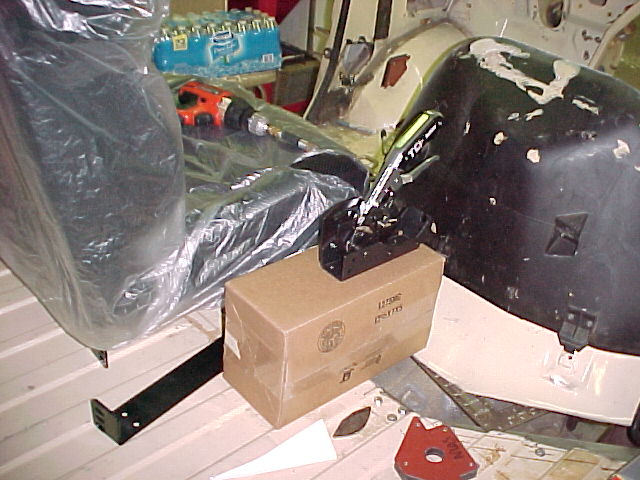
Got a lot of stuff coming together. I hope to have most of this doghouse rebuilt this weekend.
Thanks for looking
MarkMark:
"Bad Ast" Astro Van. Just because I did it... Doesn't mean it's possible...
This my Bad Ast thread...
https://www.pro-touring.com/showthre...roject-Faze-II
This is my Fotki album...
http://astroracer.fotki.com/
12-23-2011 #334
Registered User
- Join Date
- Jul 2009
- Location
- Grand Rapids, MI
- Posts
- 1,559
Very nice Mark! You are doing some great work there.
12-24-2011 #335
Registered User
- Join Date
- Mar 2004
- Location
- Mid-Michigan
- Posts
- 2,764
Thanks Will, I don't know how great it is but it is good to be getting the work done... If you know what I mean.
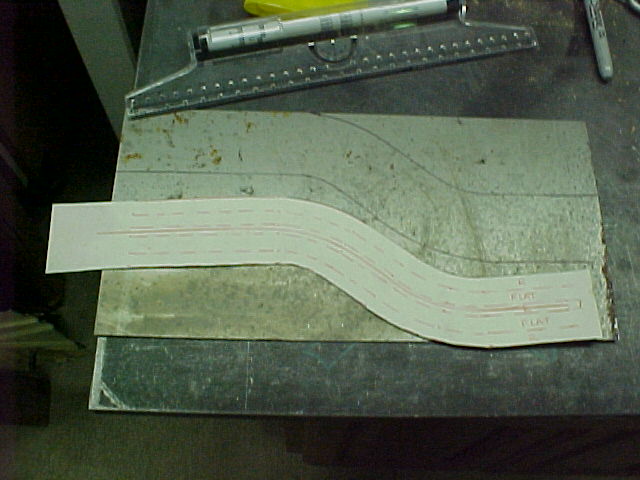
Got some done last night and today. Spent yesterday afternoon and evening making the "S" shaped piece I was developing the other night.
Made a template using the bendy ruler and cut the piece out with the beverly shear.
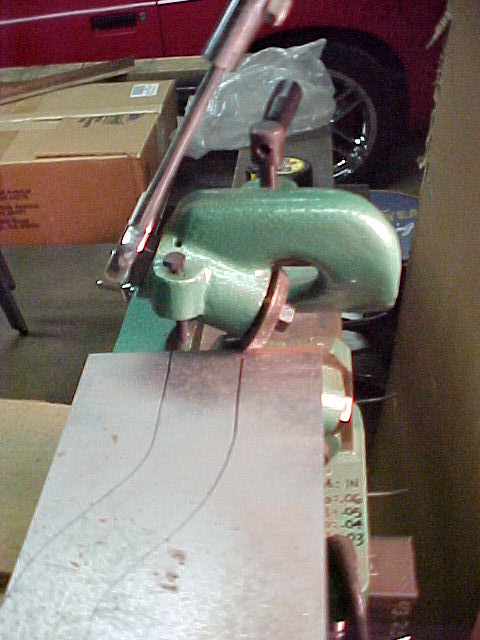
Cutting it out. If you haven't used one of these shears you are in for a treat. Very nice to use and so much quicker than snips...
Did a little bending and hand forming to get the flanges rolled over. I made this out of one piece rather then two like the drivers side. This piece is flat so it was a little easier to work the radii. The drivers side went uphill while transitioning into the "S" shape. Pretty tough to form off-hand.
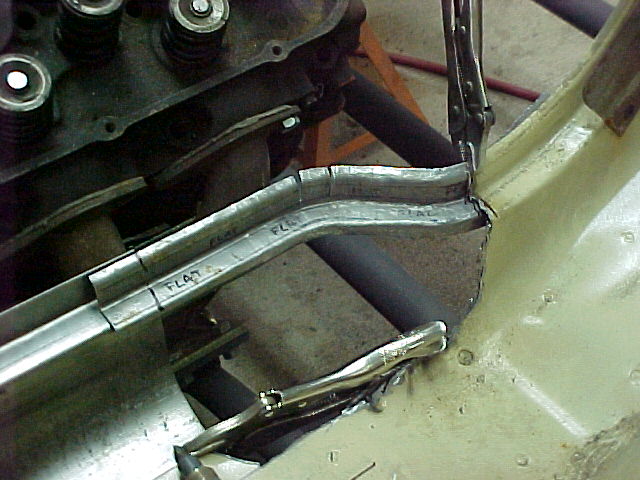
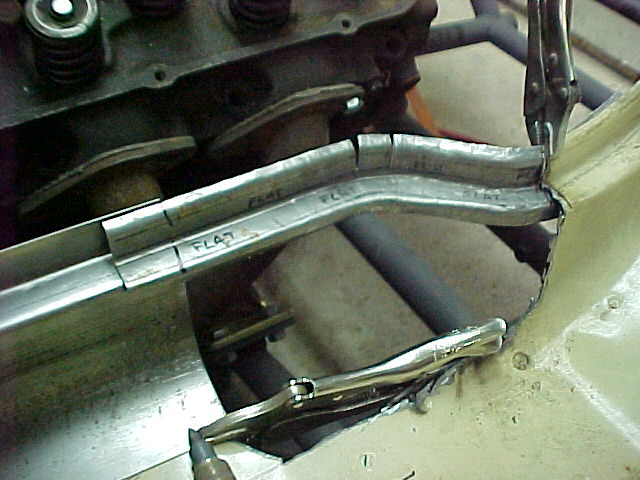
Mel was out today and we got a lot done. I was working on the drivers side filler piece while he was cleaning up and fitting the doghouse pieces together. I got the drivers side piece trimmed and fit well enough that I could start welding it in.
This was during the fitting process.
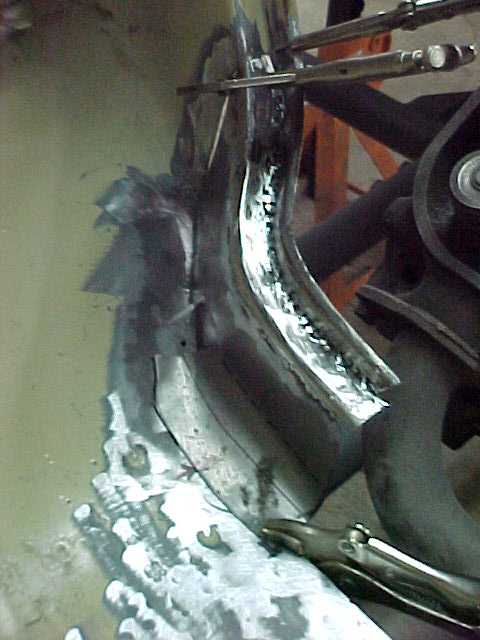
Doing some tacking...
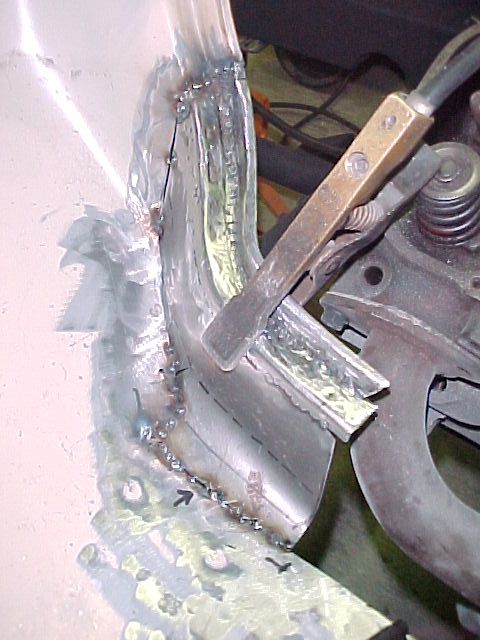
We added some extra length to the doghouse piece to fill the gap back to the floor brace.
We carried the floor ribs up into the doghouse piece.
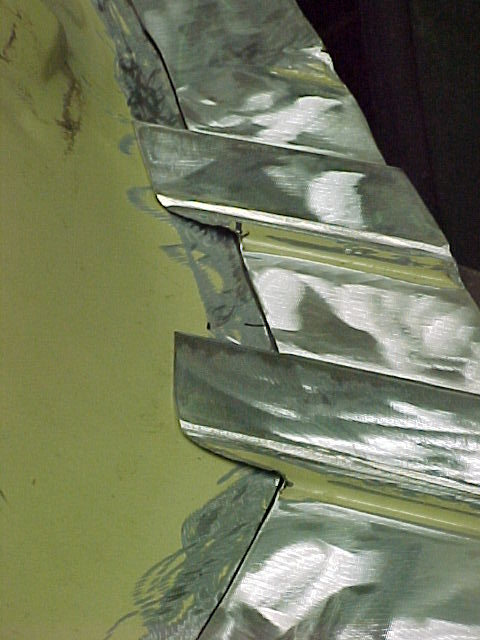
These are all welded up now and I have a little grinding left to do to finish it up.
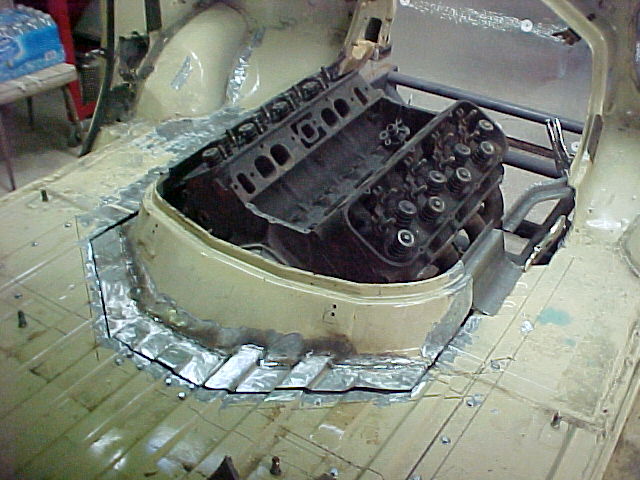
The new floor piece, as you see it, will be removable for engine and trans access. I drilled holes and installed 10-32 threaded inserts into the floor brace and the cover is bolted in right now. I will finish developing the passenger side filler pieces tomorrow....
Thanks for looking.
MarkMark:
"Bad Ast" Astro Van. Just because I did it... Doesn't mean it's possible...
This my Bad Ast thread...
https://www.pro-touring.com/showthre...roject-Faze-II
This is my Fotki album...
http://astroracer.fotki.com/
12-25-2011 #336 Registered User
- Join Date
- Apr 2001
- Location
- The Netherlands
- Posts
- 1,507

I like the attention to detail...like where the floor ribs continue in the doghouse piece

12-30-2011 #337
Registered User
- Join Date
- Mar 2004
- Location
- Mid-Michigan
- Posts
- 2,764
Thanks Martin. It was one of those things we just had to do. Was a lot easier than any other solution and you can't beat the look. It looks like it should, no other way to describe it.
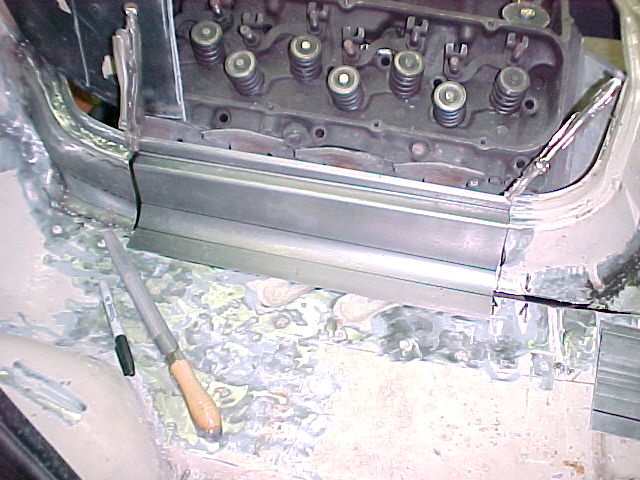
The passenger side is done and I'll have the drivers side wrapped up tomorrow. This was a LOT of work!!! I still have a bit of cleanup work to do but the passenger side looks great and it all unbolts for easy engine access. Read that plugs and header bolts.
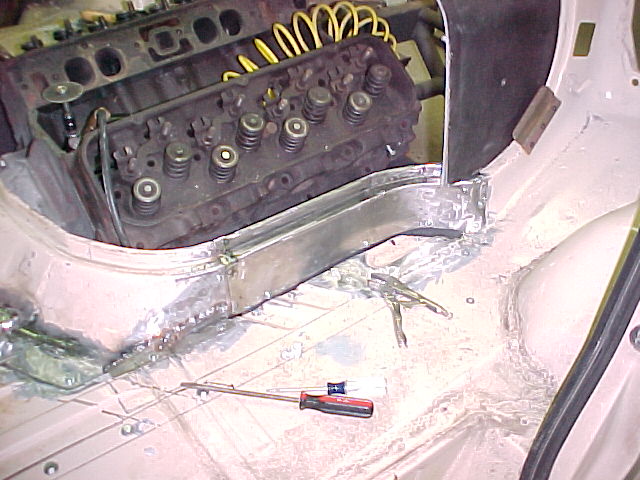
Some "during" shots.
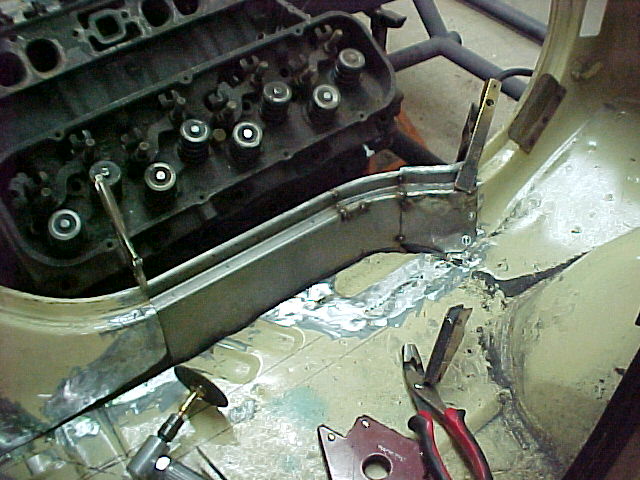
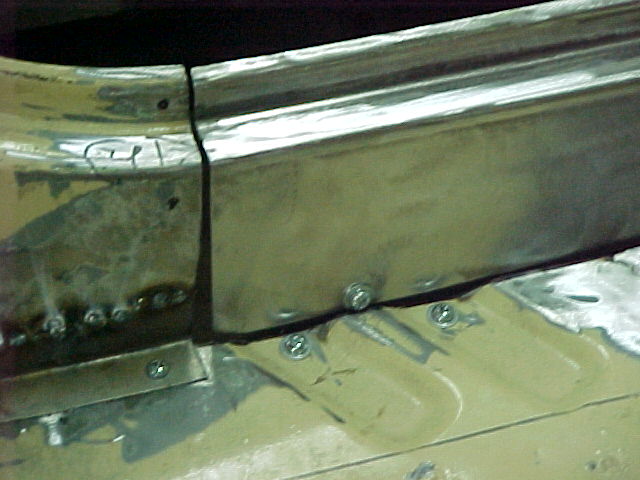
The drivers side will have the same removable panel. I will fab up the rivnut tabs tomorrow and get that stuff welded up. Should have a complete doghouse flange by noon.
Thanks for looking.
MarkMark:
"Bad Ast" Astro Van. Just because I did it... Doesn't mean it's possible...
This my Bad Ast thread...
https://www.pro-touring.com/showthre...roject-Faze-II
This is my Fotki album...
http://astroracer.fotki.com/
12-30-2011 #338 Registered User
- Join Date
- Nov 2008
- Posts
- 63

Awesome job! Subscribing!
12-31-2011 #339
Registered User
- Join Date
- Jul 2009
- Location
- Grand Rapids, MI
- Posts
- 1,559
Very nice Mark! Keep it up.
12-31-2011 #340 Registered User
- Join Date
- Apr 2009
- Location
- san diego
- Posts
- 5,101
Mark,
I hate doing body work and sheetmetal stuff, you do great work, if you are ever in San Diego I will have to put you to work. HAHA.My build thread: https://www.pro-touring.com/showthre...ing&highlight=
The mustang build thread: https://www.pro-touring.com/showthre...el)&highlight=

 Reply With Quote


