

Results 401 to 420 of 862
Thread: The BAD AST Project - Faze II
-
04-08-2012 #401

 Registered User
- Join Date
- Mar 2004
- Location
- Mid-Michigan
- Posts
- 2,764

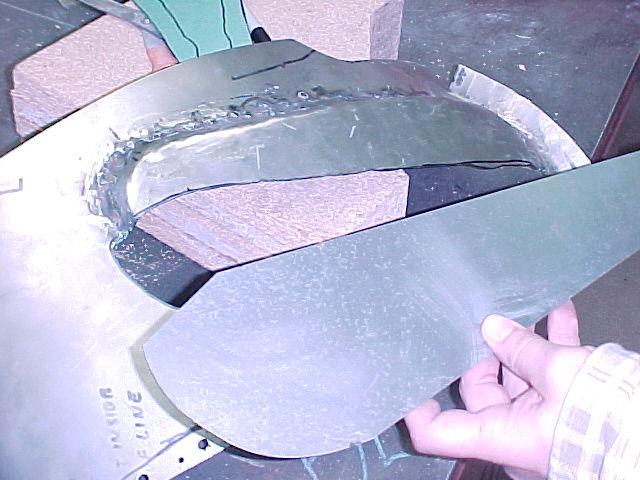
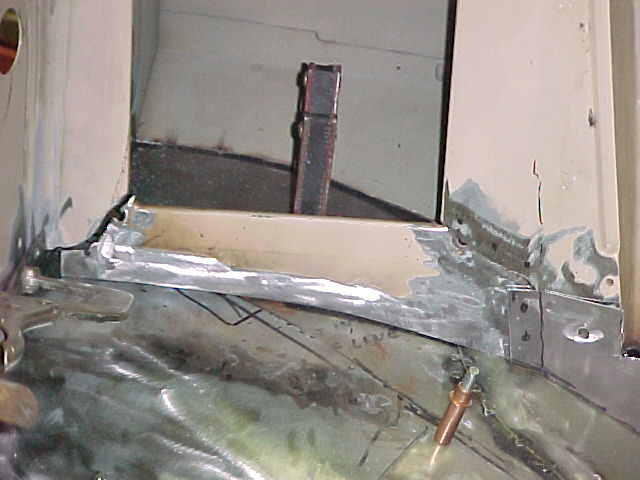
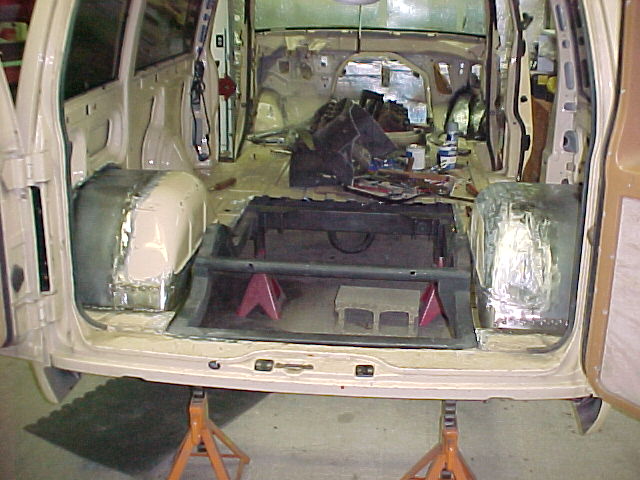
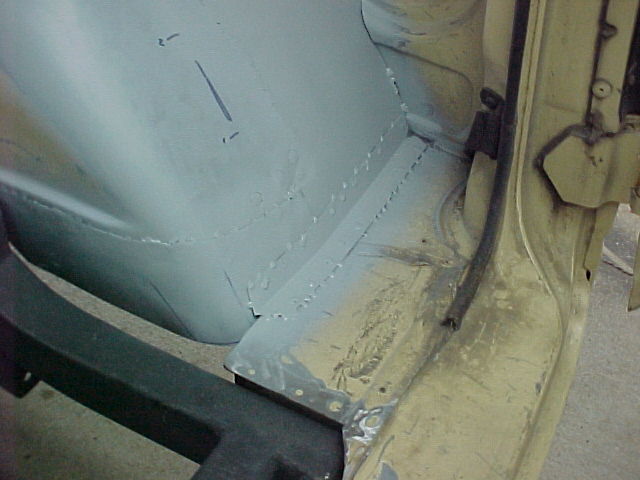
Friday and Saturday we spent working on fender wells. The Right front is just about ready to weld in as are both rear tubs. I want to do some major cleaning and painting in the rear before we get those in for good and the right front has just a bit of tweaking to get it ready for welding...
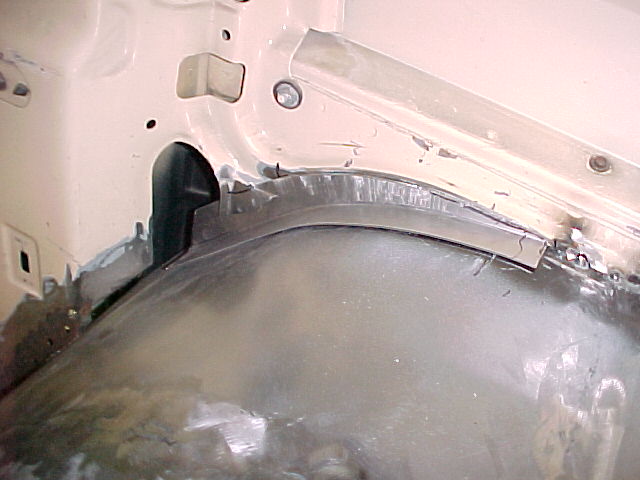
Here you can see the front clearance pocket tacked in place. I am developing a reinforcement for the outside edge.
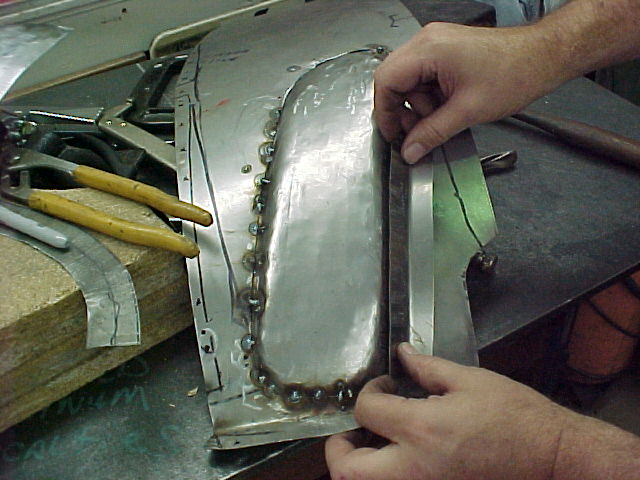
The dogleg piece above the tire is the new closeout for the firwall to inner well joint. This is on the inside. The holes you see are for spot welding the piece in place.
Here it is from the front. This new ledge will carry the front edge of the inner well along with the rear of the forward closeout as soon as we get it developed. We are working around the HVAC box on the front of the firewall. We had to do a little trimming on that to get it to fit. I need to get pics of that. Didn't think to take any while we were trimming...
This is without the new dogleg piece. You can see the two pieces we have coming together below it. Thes will be spot welded to the new piece from underneath.
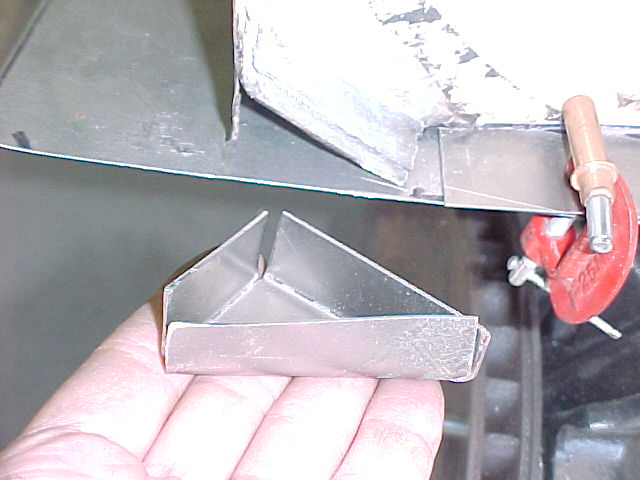
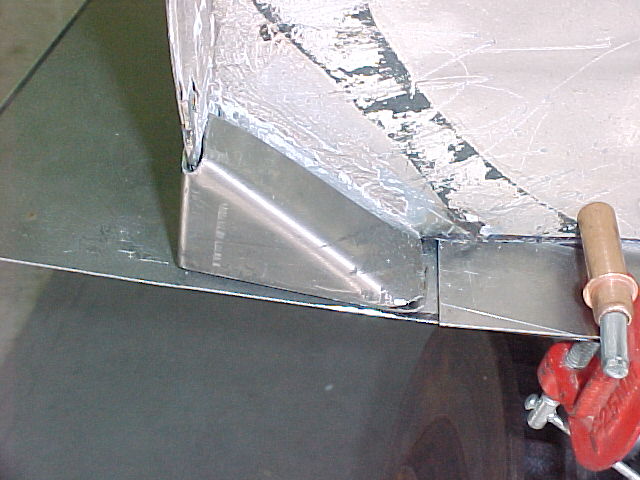
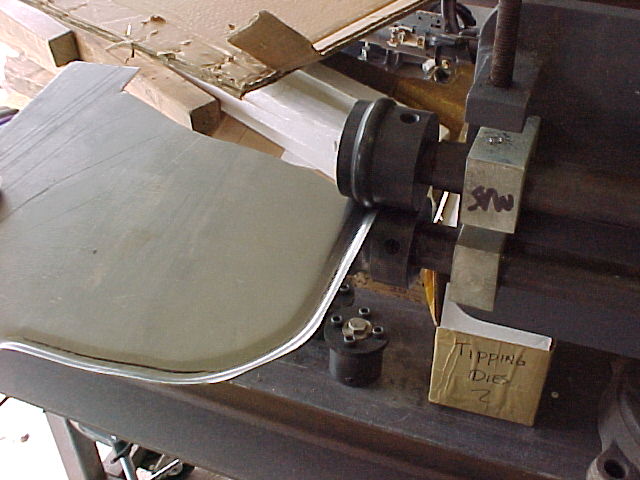
This is the outer corner of the "chopped off" front fender. See the little triangle area I need to fill?
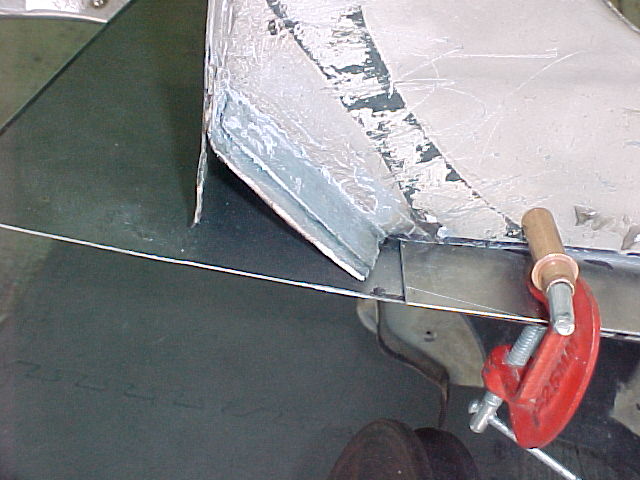
I made a greenboard template and bent up this little cover that will get welded in and seam sealed with the rest of this mess.
Snapped in place...
Here is all of the pieces clecoed in place.
We actually used most of the old inner pieces we cut out. Just moved them inboard and up a bit to make room...
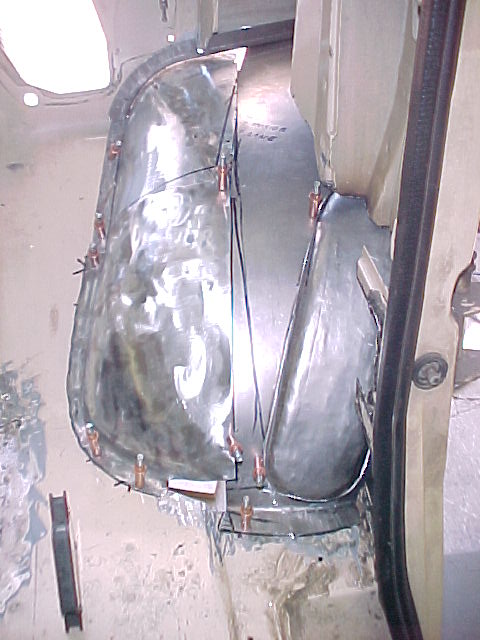
Looking from the drivers side. I have to admit we cut out more than we needed too. We will be adding some of the pieces back in as we weld it up.
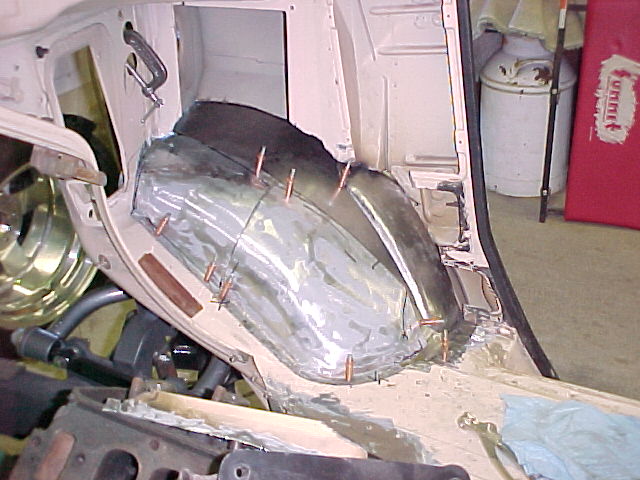
I am very surprised the HVAC unit fits as well as it does. Just a little trimming on the bottom flange and heater core box and we have plenty of room for tire.
Mark:
"Bad Ast" Astro Van. Just because I did it... Doesn't mean it's possible...
This my Bad Ast thread...
https://www.pro-touring.com/showthre...roject-Faze-II
This is my Fotki album...
http://astroracer.fotki.com/
-
04-09-2012 #402
Registered User
- Join Date
- Mar 2004
- Location
- Mid-Michigan
- Posts
- 2,764
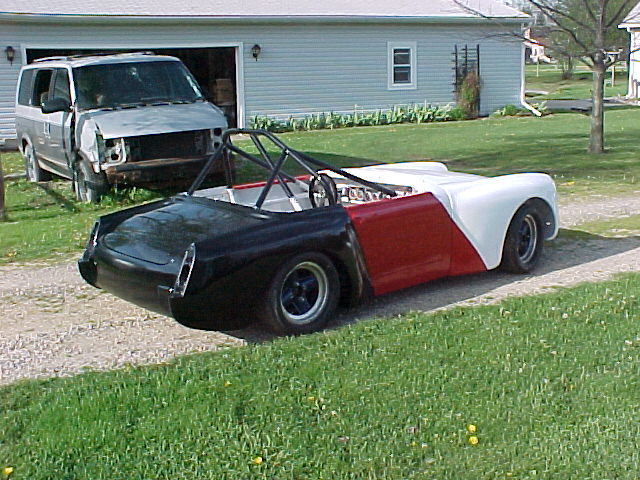
Kind of took the day off yesterday. My back was very tight and we had a family brunch at the wifes folks. In the afternoon I worked on getting a new air filter/regulator installed and set up for spraying. Running big 3/8th inch fittings and half inch hose for the HVLP guns. Should do the job. I had a little paint project coming into the shop today so I was getting things set-up for that.
This is what I'll be spraying.
He wants it tri-colored. White/flame red/black and he ordered all of the paint from Summit so I'll get a first hand experience with their line in a few days. Two part Urethane so it will be pretty tough for this little race car.
I'll start a project thread for this in a day or two.Mark:
"Bad Ast" Astro Van. Just because I did it... Doesn't mean it's possible...
This my Bad Ast thread...
https://www.pro-touring.com/showthre...roject-Faze-II
This is my Fotki album...
http://astroracer.fotki.com/
04-09-2012 #403
Registered User
- Join Date
- Mar 2004
- Location
- Mid-Michigan
- Posts
- 2,764
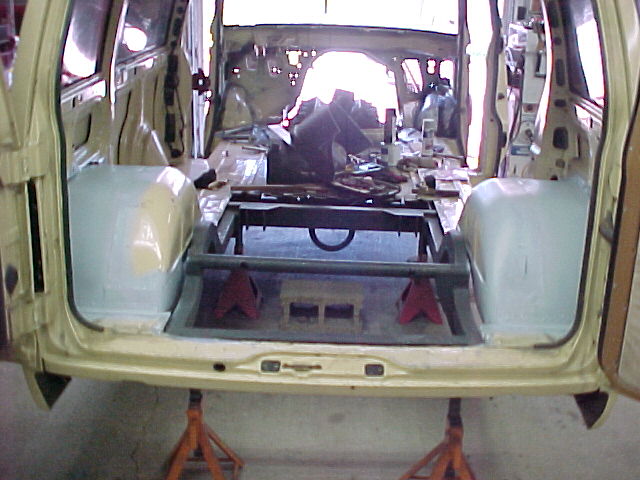
We got a lot of little things done today. Mel worked on the rear tubs and inner fenders. Getting the inner sheet metal cleaned up and ready for self-etching primer. I want to get all of the inner sheet metal primed and painted before we weld the tubs in for good.
The right side is just about ready.
I still need to finish up the welding on the drivers side. It'll get there...

I was doing the same thing up front. I did make a change to the clearance pocket though. I cut out the inside edge of the pocket and smoothed it out with a flat piece of steel to get rid of the hard edge. Now, if the tire hits it, it will only see a flat surface. Much easier on the tire and wheel well.
This is the piece I made to smooth out the clearance bump.
Here it is all tacked in and cleaned up, ready for some primer and seam sealer...

Thanks for looking... I am kind of concerned though. My build thread gets a ton of views but no one says anything... Why is that?
Hello?
Guys?
Gals?Mark:
"Bad Ast" Astro Van. Just because I did it... Doesn't mean it's possible...
This my Bad Ast thread...
https://www.pro-touring.com/showthre...roject-Faze-II
This is my Fotki album...
http://astroracer.fotki.com/
04-09-2012 #404
New to Pro-Touring
- Join Date
- Jan 2012
- Location
- london, Ontario, Canada
- Posts
- 48

you leave us speachless with your talents !
04-09-2012 #405 Registered User
- Join Date
- Mar 2008
- Location
- Brisbane Australia
- Posts
- 410

Yep looks great, good to see you closing in on the main goal too.
Other little car looks neat as wellHot rodder's recycle, wheres those prius' going when the tree huggers have a new fad.
04-09-2012 #406 Registered User
- Join Date
- Aug 2004
- Location
- Ontario, Canada
- Posts
- 2,314
 What he said!!
You also do a very good job explaining what you are doing and have shown yourself to be a capable fabricator which tends to keep questions, suggestions, and corrections to a minimum.
Don't feel discouraged by the low number of posts. There are plenty of people watching your progress.
KenIf there is a hard way to do something, I'll find it!
My other car is a Vega.
04-10-2012 #407
Registered User
- Join Date
- Mar 2004
- Location
- Mid-Michigan
- Posts
- 2,764
Thanks guys. Thanks Ken. I'll keep plugging along and stop my whining.
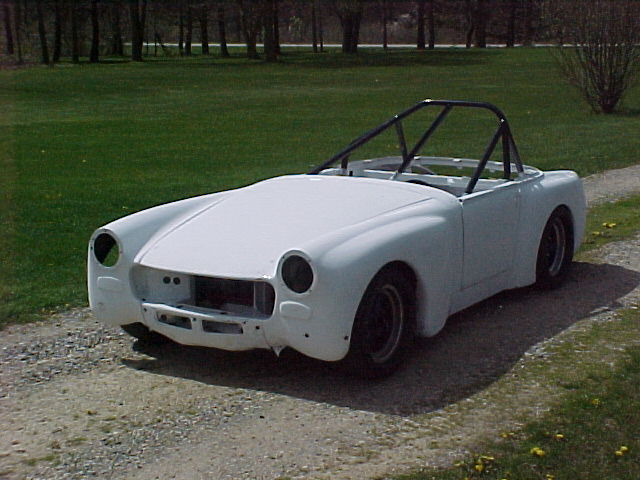
The MG is a co-workers and will be a cool little car after he gets the new engine and trans installed.Mark:
"Bad Ast" Astro Van. Just because I did it... Doesn't mean it's possible...
This my Bad Ast thread...
https://www.pro-touring.com/showthre...roject-Faze-II
This is my Fotki album...
http://astroracer.fotki.com/
04-10-2012 #408 Registered User
- Join Date
- Aug 2006
- Location
- Easton, PA
- Posts
- 989
I just like reading about your progress and don't want to clog it up with lots of
"hey that's cool!'
it's irritating (to me at least) to see a watched thread has an update and its only some random dude giving a thumbs up.Keith C.
04-29-2012 #409
Registered User
- Join Date
- Mar 2004
- Location
- Mid-Michigan
- Posts
- 2,764
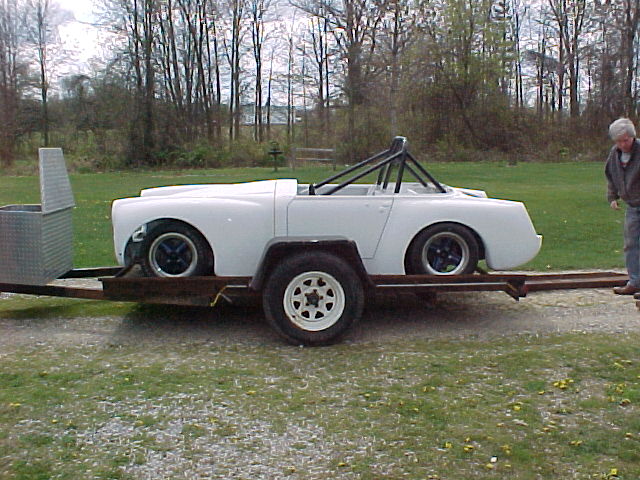
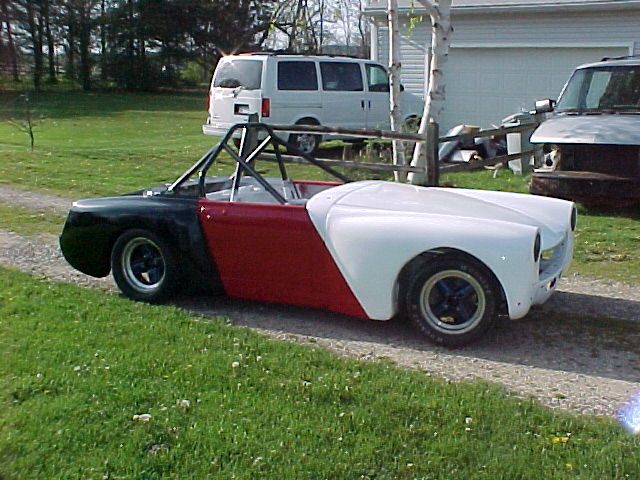
Haven't update the thread in a while. Been busy painting the MG and putting in some O.T. at the real job.
Here are a few shots of the MG after I finished it up last weekend.
I worked yesterday morning and puttered in the shop in the afternoon. I got my new Alston Varishocks last week and also the rebuilt Corvette rack so I got the new rack and shocks mocked up. It looks like I will have to do a little clearancing on the upper arm to clear the spring at full rebound, not much, just a bit.
Mel came out this morning, said he was going stir-crazy waiting to get back on the van. I said me too...
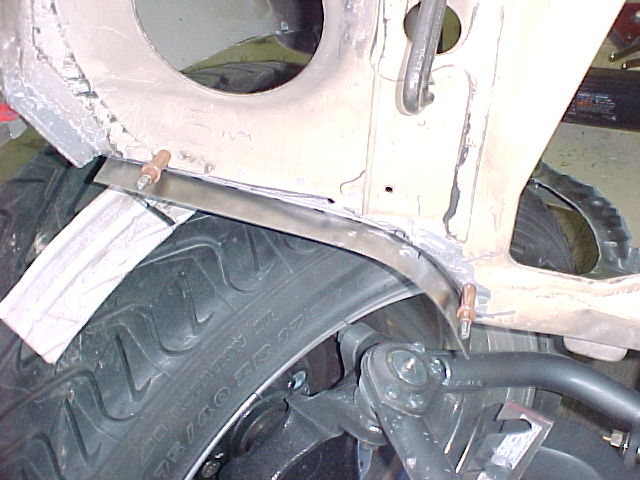
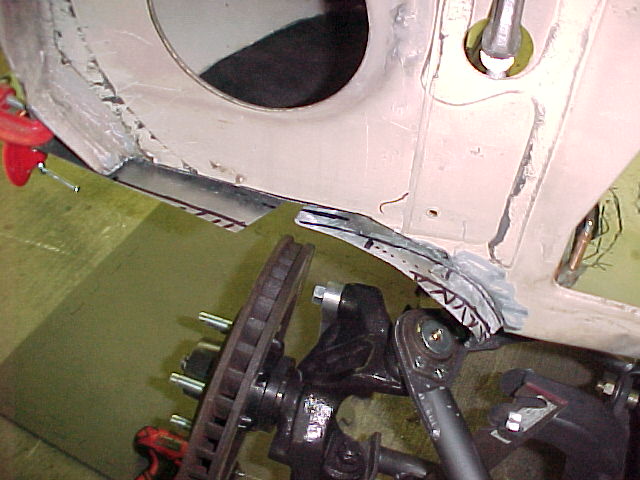
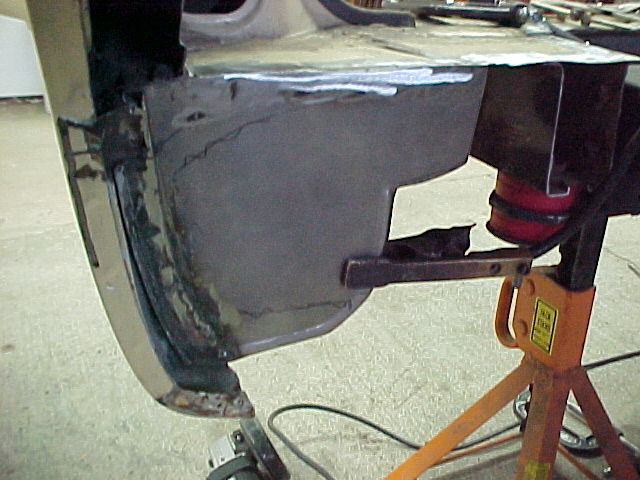
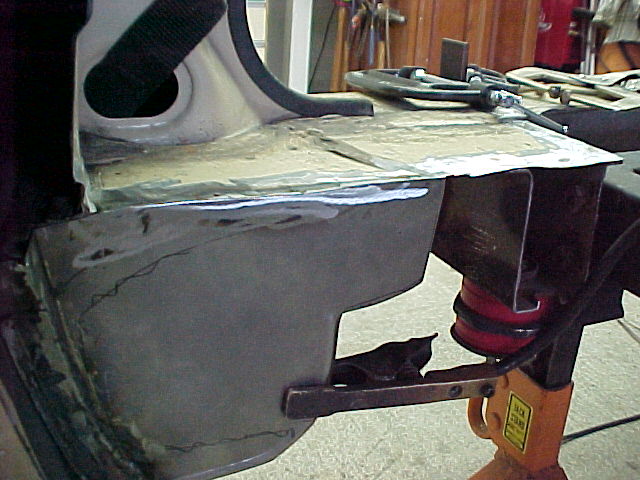
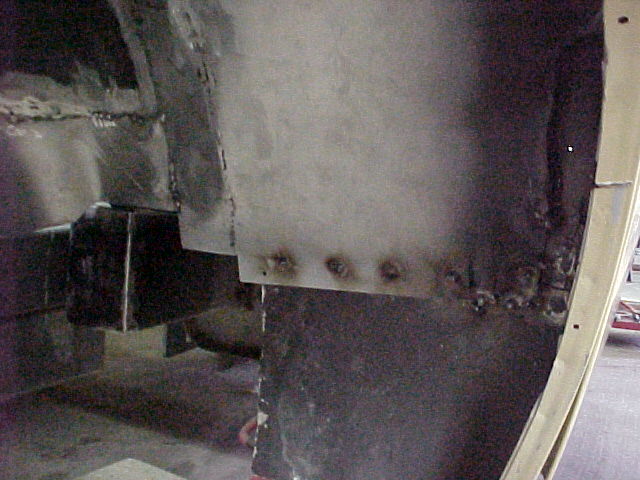
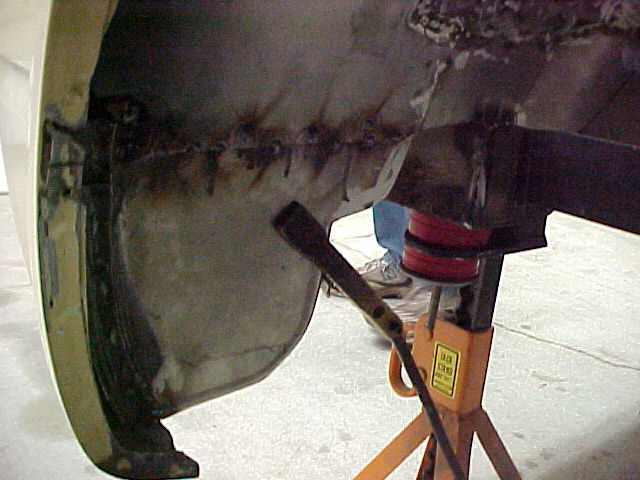
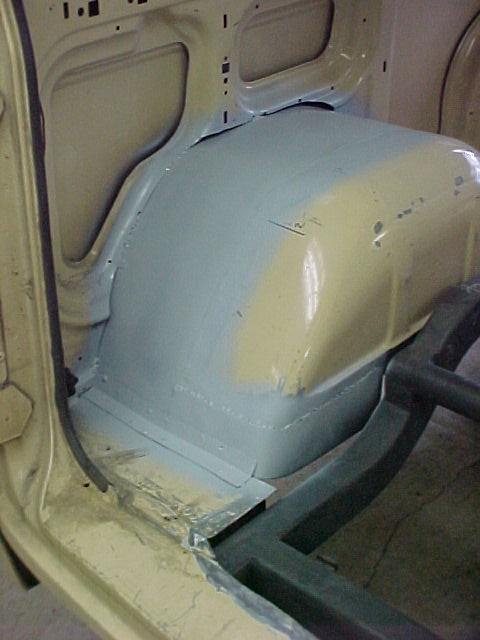
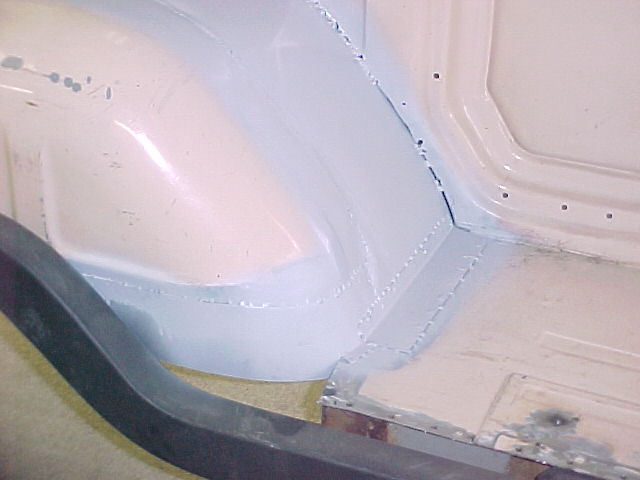
We worked on the right front wheel well today. It is all welded in tonight and ready for primer and seam sealer... It's not perfect but it will do the job and it is super solid after being welded in.
Welding in the inner half. This is all spot welded in from the top.
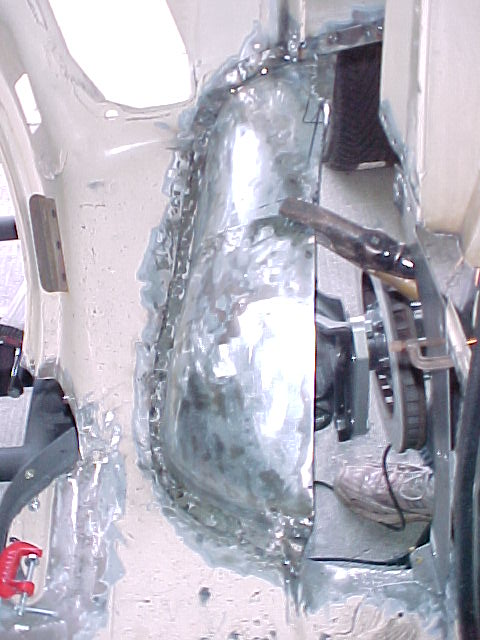
Working on the outer half. The lower flange is spot welded to the floor and the underside is welded to the inner half.

Mel worked on "fixing" some of the booboo's we made while cutting out the inner. We did not need to go as high as we did so some of this stuff is getting put back in.

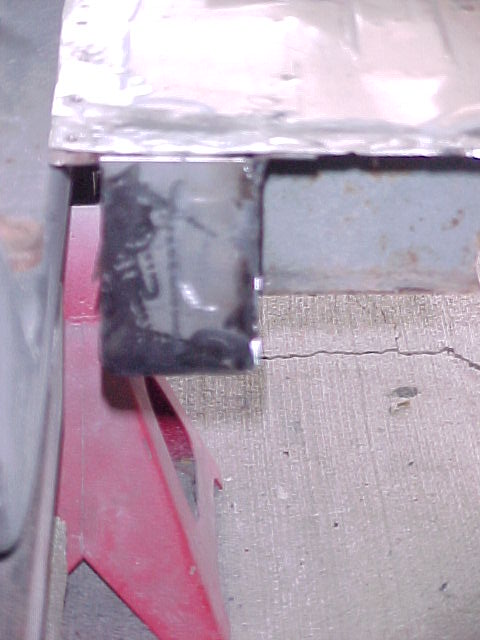
This will get spot welded in AFTER I have all of the seam sealing done on the outer panel.
 Mark:
Mark:
"Bad Ast" Astro Van. Just because I did it... Doesn't mean it's possible...
This my Bad Ast thread...
https://www.pro-touring.com/showthre...roject-Faze-II
This is my Fotki album...
http://astroracer.fotki.com/
05-06-2012 #410
Registered User
- Join Date
- Mar 2004
- Location
- Mid-Michigan
- Posts
- 2,764
I worked at the paying job all day Saturday but I got out in the shop at 4:30 or so. Did some cleanup work on the rear tubs and finished up most of the welding on the driver side. I think I got a blister from all of that dang trigger pulling...
Have any of you used Eastwoods Metal Prep? I highly recommend it for taking off surface rust and general cleanup on "weathered" steel. I sprayed a bit of it on the finger print rust on the tubs and wiped it down with a ScotchBrite pad and it looks better then new.
Before the cleanup
You can see my "hand prints" on the steel from working with it.
After about 2 minutes of work... Shiny clean. And the Metal Prep leaves a phosphate coating so this will not rust from finger print acid again.

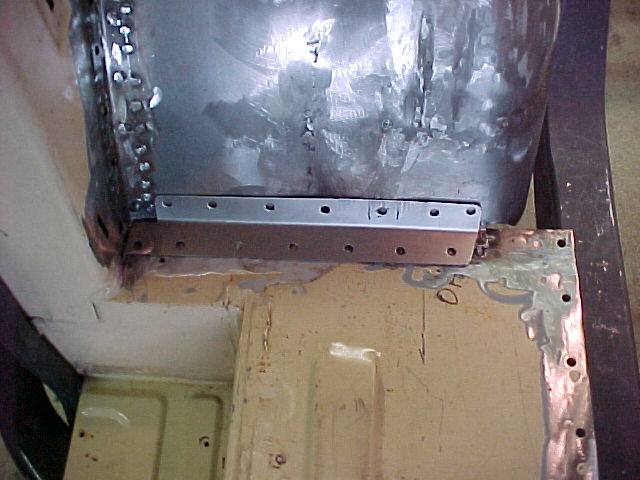
Mel came out today and we hit it kinda hard... We had a few small panels to make to get the body ready tto weld in the tubs so we started doing that. Mel made a pattern to replace the rear mud "skirt" at the rear of the wheel well. This is a flat panel that we put a nice bead rolled edge on to stiffen it up and add some strength back into the lower rear fender.

This is where it goes at the bottom of the rear tub.

Welded in place. Now the lower fender doesn't flop around....
We also made some little cover plates to weld over the open ends of the original rails where we cut them out for tire clearance.
After taking care of all this little stuff we finally got the Pass side tub WELDED IN PLACE!!!! Still have to make some small brackets and closeouts but this is already pretty strong. Even for simple spot welds...
This is the front underneath.
And this is the rear. You can see where it welded over the top of the "skirt". This made an excellant weld point and adds a lot of strength into the tub mounts
I'll do a little more welding but once the top gets welded into the side panel and we finish the rear floor flange this will be very strong.
Hopefully next weekend will be a two dayer. I would like to finish up the rears and get going on the left front.
Thanks for looking.
MarkMark:
"Bad Ast" Astro Van. Just because I did it... Doesn't mean it's possible...
This my Bad Ast thread...
https://www.pro-touring.com/showthre...roject-Faze-II
This is my Fotki album...
http://astroracer.fotki.com/
05-12-2012 #411
Registered User
- Join Date
- Mar 2004
- Location
- Mid-Michigan
- Posts
- 2,764
Got a few parts back from the fab shop at work. They have been super busy out there also so it took a few weeks for them to get to this "govment" work.
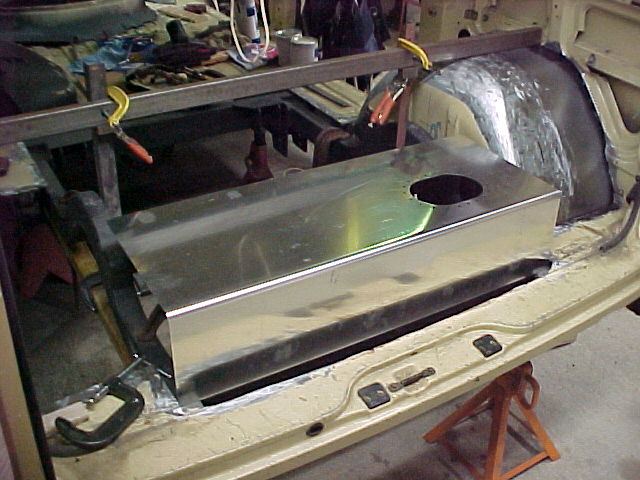
My friend Daryyl in the shop bent this up for the fuel tank. He also runs the laser cutter.
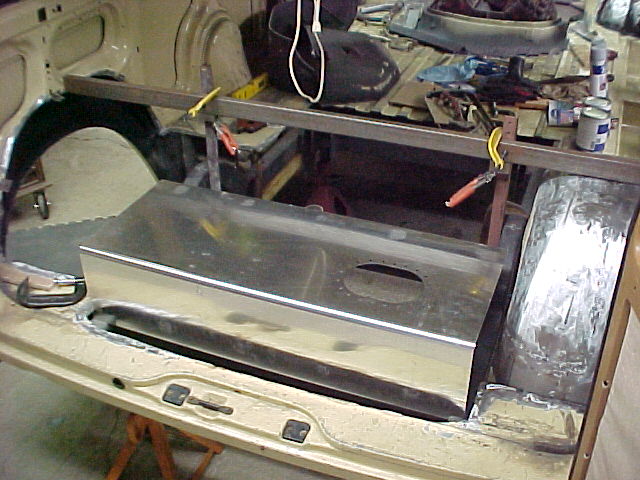
This is just sitting on the frame but you can see what it will look like.
He also cut out the alternator brackets.

The little one is 3/8ths steel and the adjuster bracket is 1/4".
Very nice clean cuts.
A little work with the sander/grinder and these will be ready for paint.
I hope to get started assembling the tank in a week or so.Mark:
"Bad Ast" Astro Van. Just because I did it... Doesn't mean it's possible...
This my Bad Ast thread...
https://www.pro-touring.com/showthre...roject-Faze-II
This is my Fotki album...
http://astroracer.fotki.com/
05-12-2012 #412
Registered User
- Join Date
- Mar 2004
- Location
- Mid-Michigan
- Posts
- 2,764
This is the first full weekend I've had off in a while. Been busy at work, but I won't complain. The work is pretty easy and the money is good, upper management just wants thing done yesterday...
Mel came out this morning and we got started on the drivers side rear tub. He made the little mud skirt at the back.

I have to admit these pieces look pretty cool down there. Kind of finishes off the back of the tubs.
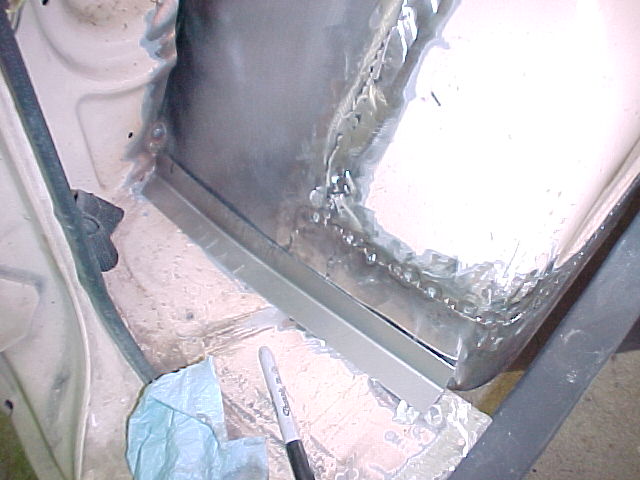
We also made some angle plates to spot weld in over the floor and tub joint.
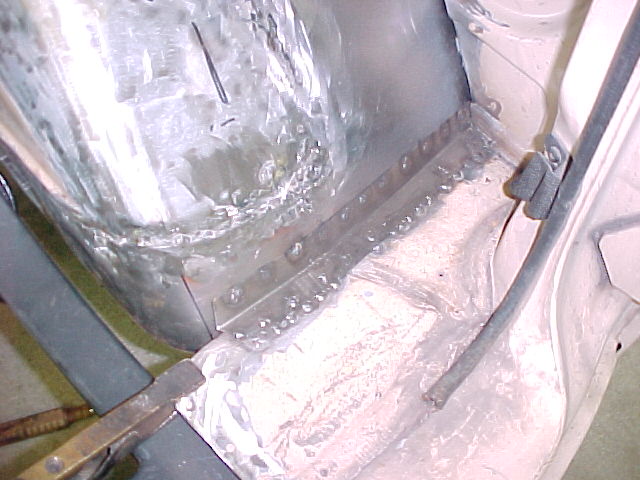
These will add a LOT of strength to the tub joints, I could have left the joints as a single weld but it just made sense to do this to reinforce these joints.
After we got all of the little things taken care of we got the driver side tub re-installed FOR THE LAST TIME!!!!. We got that welded in along with one of the reinforcements.

Do you see anything missing?
The "bridgework" is gone... The tubs are welded solid and the supporting structure is no longer needed...
Tomorrow we will finish up some of the welding and install the rest of the reinforcements.
Finally! Some real progress!
Thanks for looking.
MarkMark:
"Bad Ast" Astro Van. Just because I did it... Doesn't mean it's possible...
This my Bad Ast thread...
https://www.pro-touring.com/showthre...roject-Faze-II
This is my Fotki album...
http://astroracer.fotki.com/
05-12-2012 #413 Registered User
- Join Date
- Jul 2009
- Location
- Grand Rapids, MI
- Posts
- 1,559
Looks great Mark. I really like those mud skirts Mel built. I need to remember those. Very nice!
05-13-2012 #414 Registered User
- Join Date
- Apr 2001
- Location
- The Netherlands
- Posts
- 1,509

wow, a lot of progress :-) Good to see you were able to make some time for Bad Ast again.
05-14-2012 #415
Registered User
- Join Date
- Mar 2004
- Location
- Mid-Michigan
- Posts
- 2,764
Thanks guys, The last two weekends have seen some actual progress. I guess it is all progress but when you are welding things back together it just seems like you got more done, know what I mean?
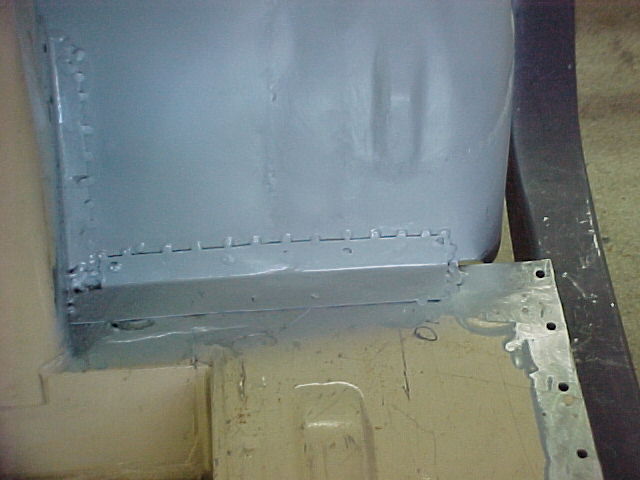
Sunday was another good day. We made up a bunch of reinforcement plates. Most of these were not straight and flat fits. A lot of shrinker/stretcher work and a ton of hole punching!
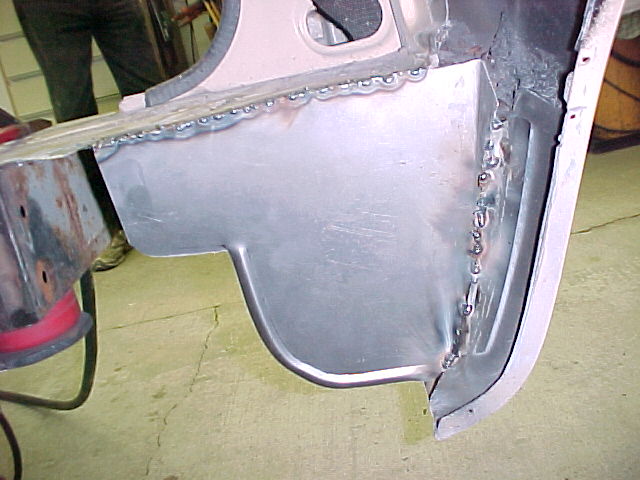
This is in the passenger side dogleg area at the back of the slider door. Lots of jigs and jogs...
After punching a few holes.

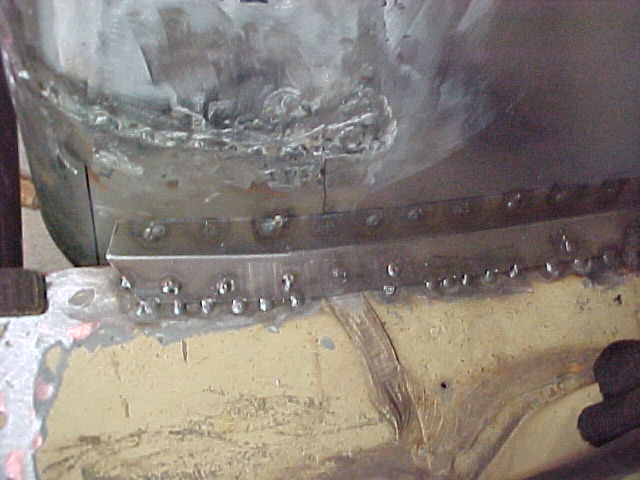
This is at the front of the pass side tub.
This is the strip at the rear of the drivers side during fitting. Made a few trips back and forth to the shinker/stretcher for this one.
Decent fitup with all of the spot welding holes punched. We got the floor side welded down then used a little pressure to push the top flange tight to the tub.
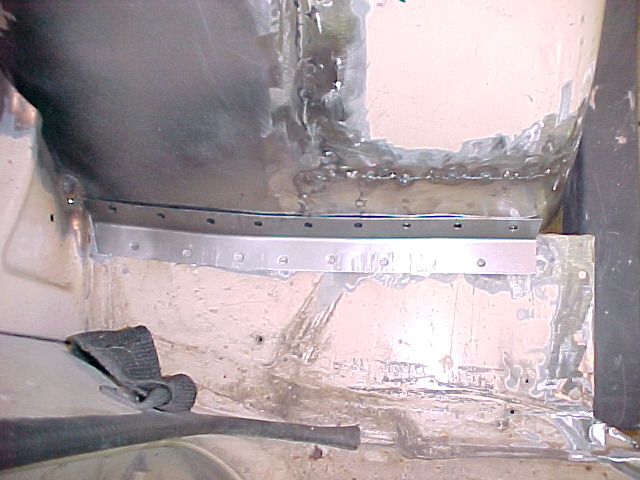
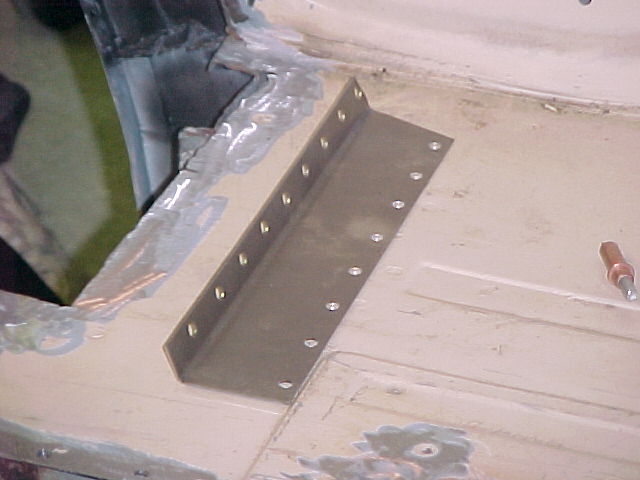
Here it is all welded in and primed.
As well as the right side front
Left side front
And right side rear.
Here is an overall rearview with some paint in the picture.
All of these seams will get sealed with Eastwoods grey seam sealer and then top coated black.
These guys are in there plenty solid. The whole van rings when I tap on them with a hammer...
Thanks for looking
MarkMark:
"Bad Ast" Astro Van. Just because I did it... Doesn't mean it's possible...
This my Bad Ast thread...
https://www.pro-touring.com/showthre...roject-Faze-II
This is my Fotki album...
http://astroracer.fotki.com/
05-14-2012 #416
Registered User
- Join Date
- Mar 2004
- Location
- Mid-Michigan
- Posts
- 2,764
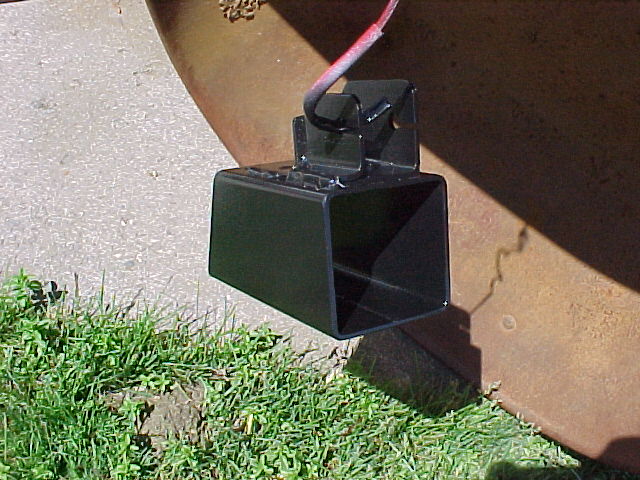
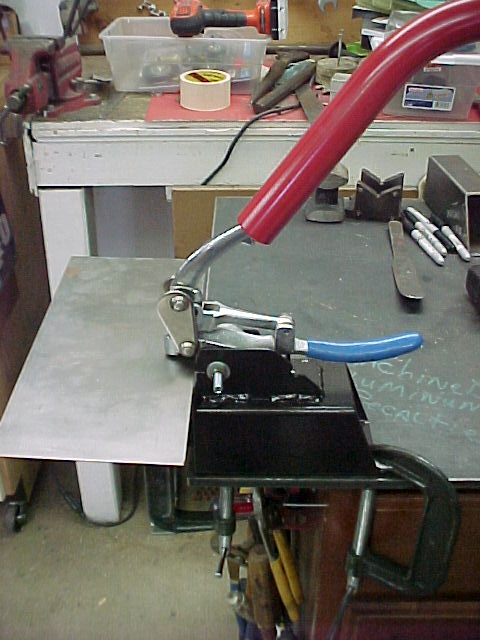
Due to all of the hole punching we were doing (my hands were aching Saturday night after all of the holes I punched) we designed and built a little fixture to bolt my hand held hole puncher into. This clamps to the grinding table or the jig tables and sure does make 18ga. an easy job...

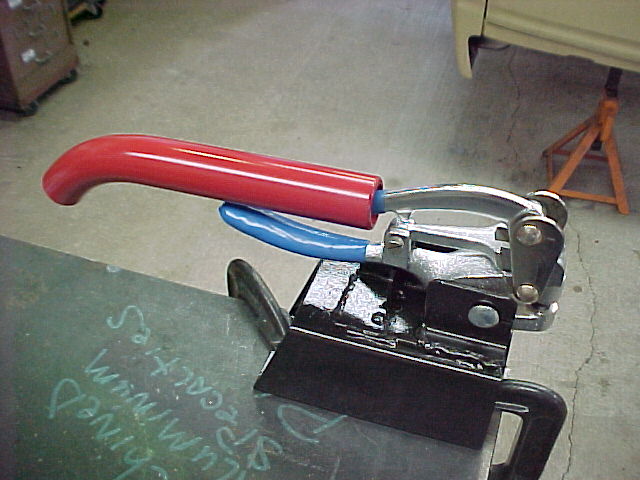
It's just some scrap 1/4" angle and plate and a 4 x 4 drop. The verticle plate under the handle keeps the punch from rotating.
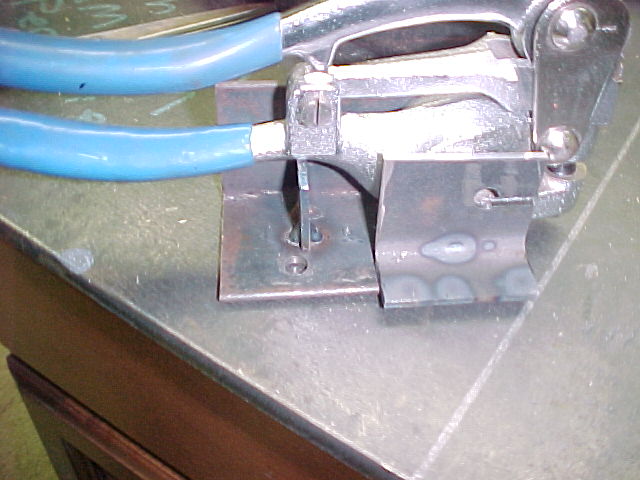
Set on the base
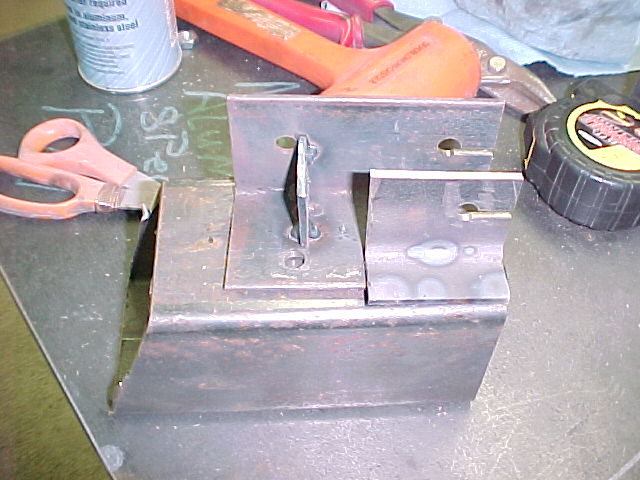
Welded up and primed with the Eastwood self-etching primer.

I sprayed the base with some of my "signature" Hammered Black from Rustoleum.
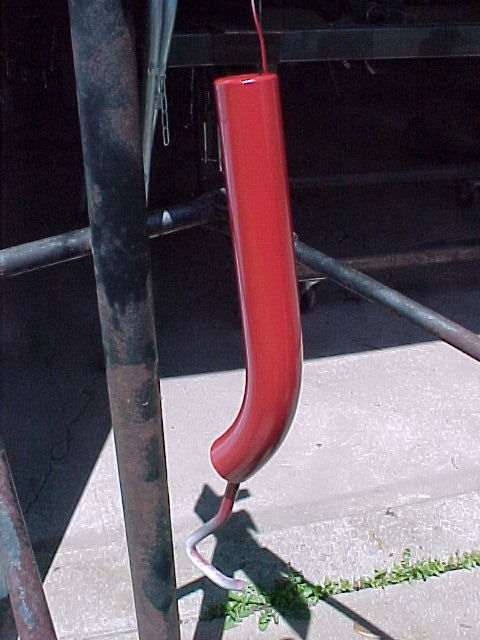
The handle is a left-over chunk of 1 1/4 tube (with a bend on it). I painted it red (for effect).
All set up and ready to go! This makes punching holes FUN!
 Mark:
Mark:
"Bad Ast" Astro Van. Just because I did it... Doesn't mean it's possible...
This my Bad Ast thread...
https://www.pro-touring.com/showthre...roject-Faze-II
This is my Fotki album...
http://astroracer.fotki.com/
05-14-2012 #417
Registered User
- Join Date
- Jul 2009
- Location
- Grand Rapids, MI
- Posts
- 1,559
No shortage of creativity out of the shop for sure. Very nice Mark.
05-20-2012 #418
Registered User
- Join Date
- Mar 2004
- Location
- Mid-Michigan
- Posts
- 2,764
Thanks Will, we have a few more things we are going to build when we get a little time.
Last week was pretty busy for the van. Lots of things coming together. The fuel tank is all tacked up (and it looks pretty cool...). I wish I could take some pictures but cameras are not allowed in the fab shop.
I brought the bottom home to add some holes for the fuel pickup sump and build the inner baffles for the fuel sump and fuel level sender.
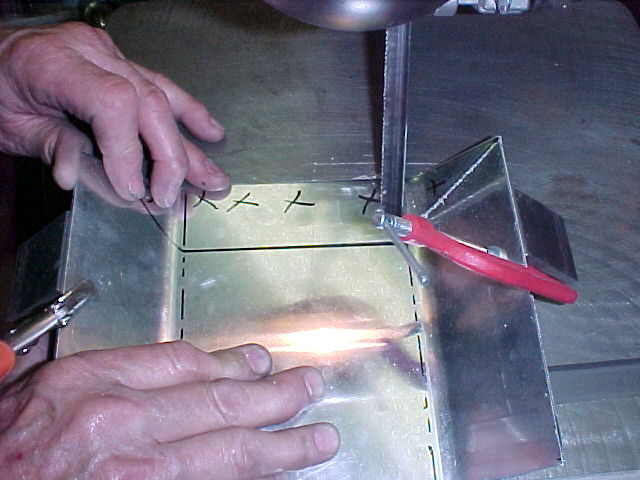
We bent the sump up using pieces of scrap leftover from cutting out the tank. Lots of aluminum to play with.
We cut an angle on the front side of the sump. We had to clamp some steel angles to the bent sides to support them during cutting.
Here is the hole pattern laid out and I have drilled one hole. You can see the internal baffles mocked into position. These will be welded inside the bottom of the tank.

And all of the holes drilled and deburred. I used one of those step drills. I should have waited for the Rotobroaches I ordered last week to come in but I wanted to get this done.
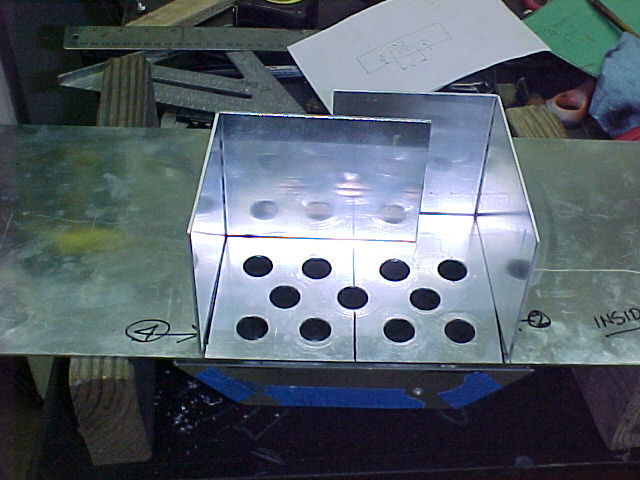
What you see here is the pick up sump set on the bottom of the tank. This will collect fuel thru all of those drain holes I drilled and should be very effective as an anti-starvation device. The pick up fittings will be welded into the left hand verticle wall of the sump. This will be at the very rear of the van.

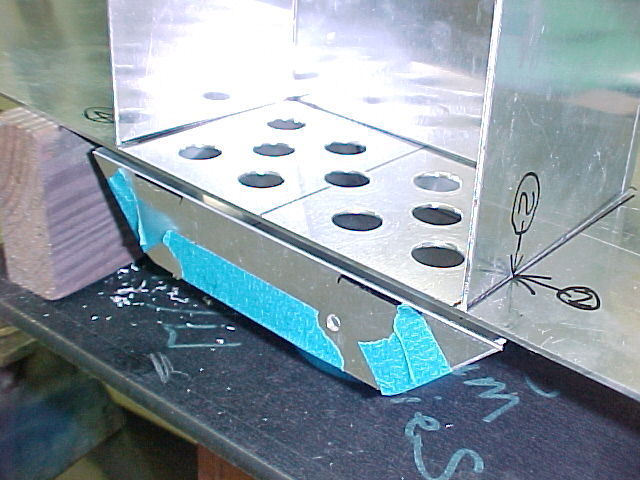
Another angle. This is the "front" of the sump looking at the angled face we cut in the bandsaw pic.

This pic shows the sump and tank bottom mocked up as they will be in the van. The two small holes are where the weld bungs will be. I'll drill those out after I get the bungs I ordered from Summit this morning.
With this stuff done I will hual it all into work tomorrow and let the fab shop have their way with it. The tank is going to look very nice. I just hope it works...
MarkMark:
"Bad Ast" Astro Van. Just because I did it... Doesn't mean it's possible...
This my Bad Ast thread...
https://www.pro-touring.com/showthre...roject-Faze-II
This is my Fotki album...
http://astroracer.fotki.com/
05-20-2012 #419
Registered User
- Join Date
- Mar 2004
- Location
- Mid-Michigan
- Posts
- 2,764
Saturday we did some running. We loaded up the 509 into my Astro and hauled it up to Pat in Kawkawlin. He is going to crack it open and check all of the bearings and re-torque everything just so I know what AND where is before I fire it up.
We are also discussing hydraulic roller cams. I really don't know if I want to hassle with the solid roller that's stabbed in there right now...
We did most of the tank work after we got back from Kawkawlin yesterday. I laid out and drilled the holes this morning but we also hit the tinwork hard today.
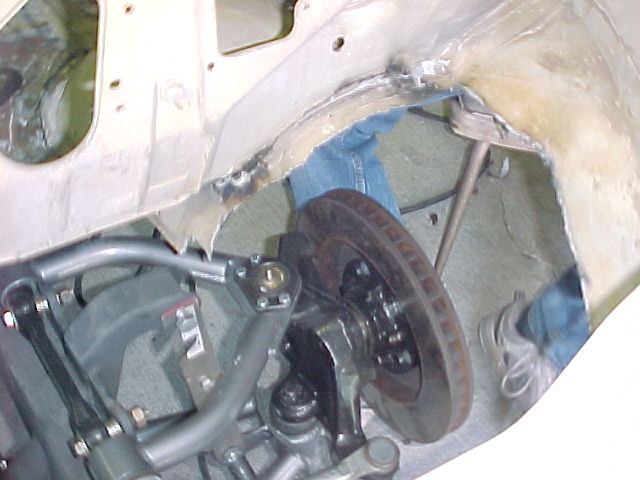
Mel worked on cutting out the left front wheel well. It's all cut out here and you can see we already have the left front suspension assembled.
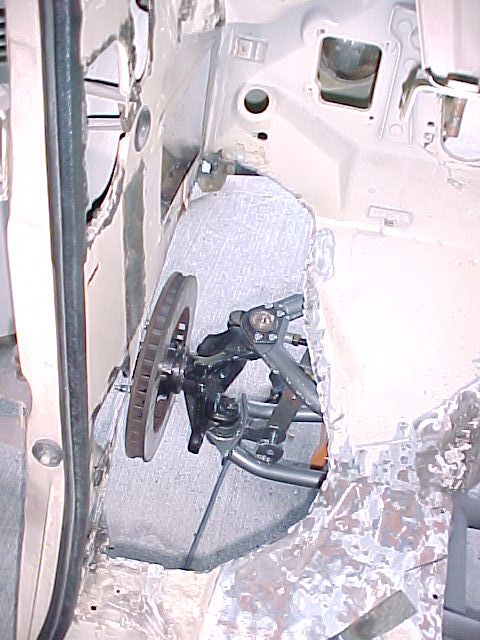
This is on the front side of the firewall.
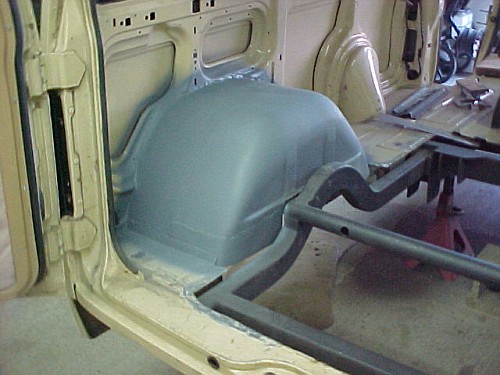
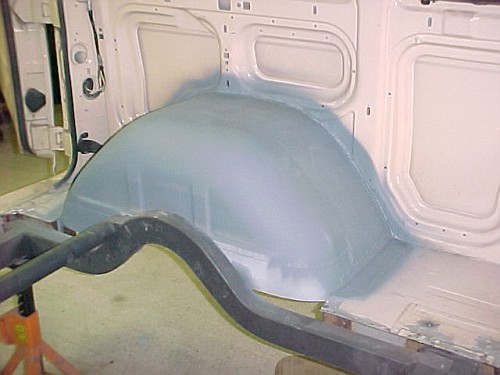
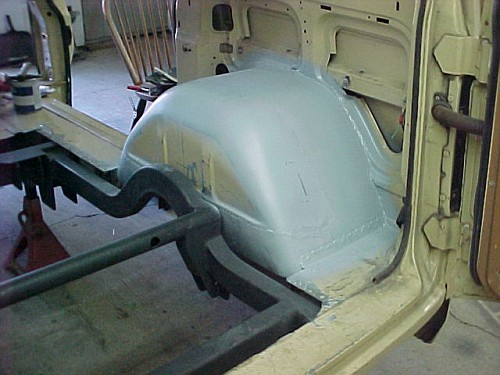
While Mel picked away at that I worked my way around and seam sealed all of the COMPLETED wheel houses... Seam sealed AND primed mind you..
A few pics of the tubs after priming.
The right front

The left rear.
The front of the left rear
The right rear

Got a lot done this weekend. I also have all of the new steering parts coming from Borgeson and I am working on power steering pump and brackets.
Thanks for looking
MarkMark:
"Bad Ast" Astro Van. Just because I did it... Doesn't mean it's possible...
This my Bad Ast thread...
https://www.pro-touring.com/showthre...roject-Faze-II
This is my Fotki album...
http://astroracer.fotki.com/
05-20-2012 #420 Registered User
- Join Date
- Mar 2009
- Location
- overseas
- Posts
- 3,434
looking good! nice fab work for sure!

 Kevin S. (overseas in Germany)
1963 Chevrolet Impala 2d ht Coupe
www.CruznArt.com
CRUZN - Automotive Artworks

 Reply With Quote


