

Results 421 to 440 of 862
Thread: The BAD AST Project - Faze II
-
05-22-2012 #421

 Registered User
- Join Date
- Mar 2004
- Location
- Mid-Michigan
- Posts
- 2,764

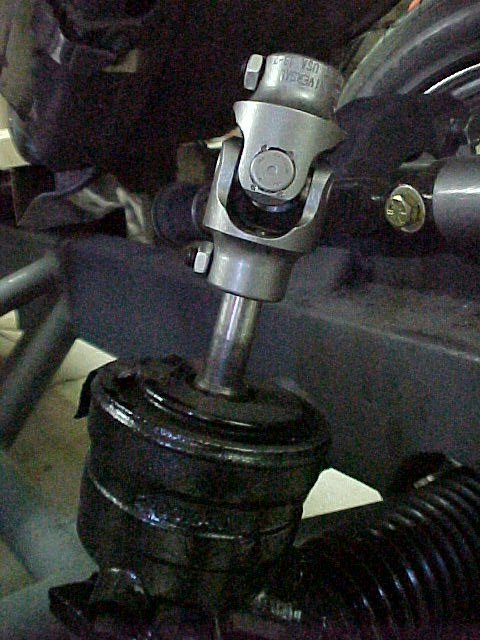
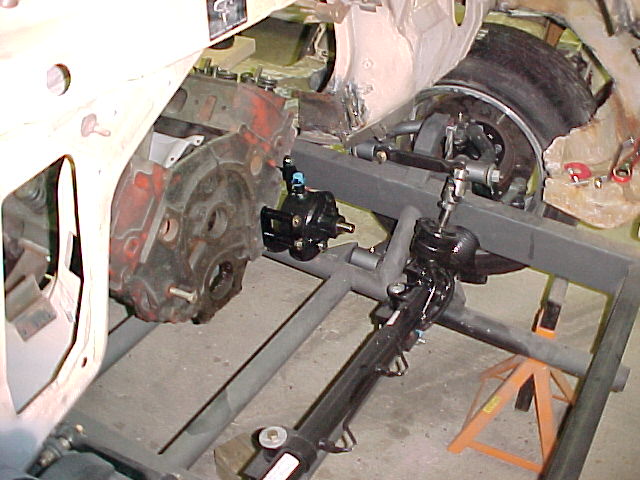
I am pulling all of the stuff together for the van's steering system.
Last week I ordered all of the universal joints and DD shaft I need to build the intermediate shaft from the column to the gear.
It's all Borgeson stuff. Excellant pieces! Very beefy.
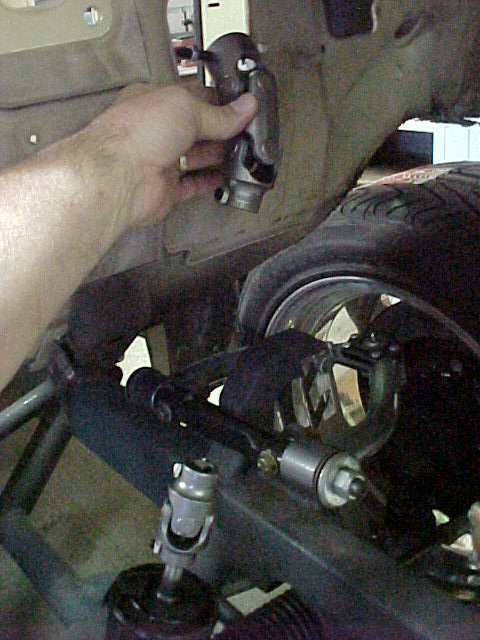
This is the lower single. 3/4 DD to 17mm DD (Corvette)
This is the upper double joint 1"DD to 3/4" DD with the shaft and support bearing

Here is the upper and lower "kinda" mocked into position
I posted the stuff below in the suspension forum to get a question answered but I'll post here to just to keep continuity.
I picked up an '86 Chevy 1 ton hydroboost power steering pump and it is hanging on the front of the mock up block.
Tuff Stuff brackets. Bolted right up. I just need to get a pulley and a pressure fitting.
I have two Astro van boost units. One from a '95.
You can see it sticks straight out from the fire wall.
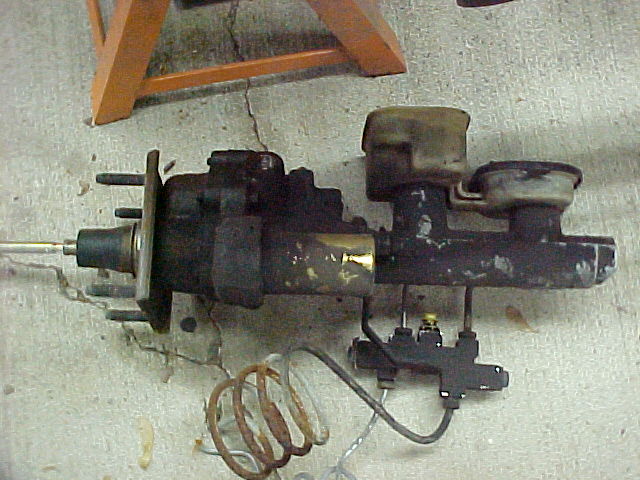
And one from a '98 which angles down at quite a steep pitch.
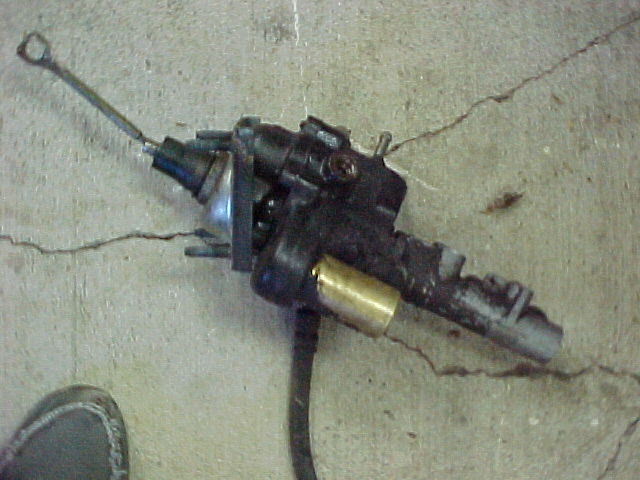
Is either one better then the other? I don't care either way as far as looks or fitment goes, they are both off Astro's so I know they fit, just wondering if, operationally, one is better than the other.
Paul, What do you think?
I like this shot.
You can see just how far back the front of the motor is from the wheel centerline.... God! This thing better handle as well as it says it will on paper... Right Katz?
Mark:
"Bad Ast" Astro Van. Just because I did it... Doesn't mean it's possible...
This my Bad Ast thread...
https://www.pro-touring.com/showthre...roject-Faze-II
This is my Fotki album...
http://astroracer.fotki.com/
-
05-22-2012 #422
Registered User
- Join Date
- Mar 2004
- Location
- Mid-Michigan
- Posts
- 2,764
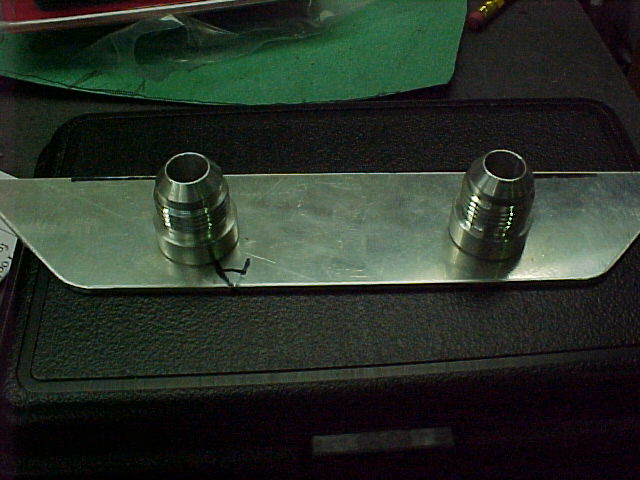
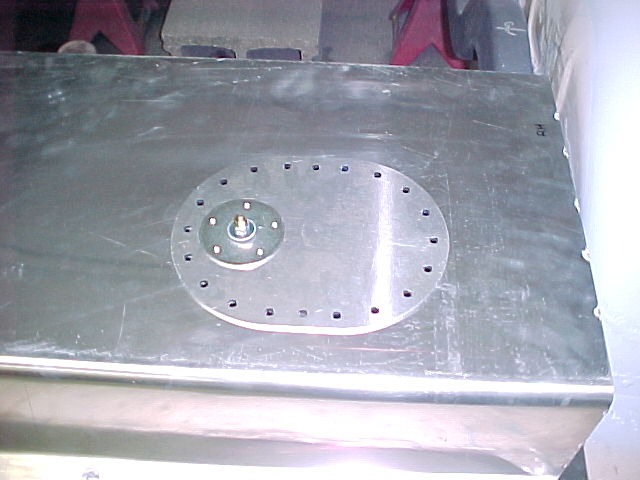
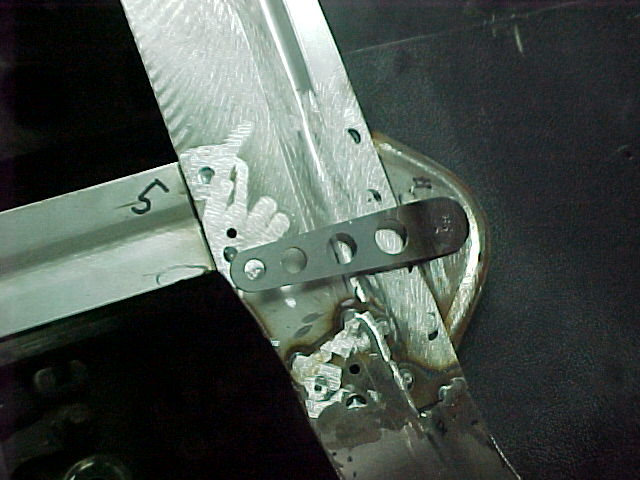
I also got some work done on the final loose piece of the fuel cell. This is the lower sump rear plate that will get a couple of -8 bungs welded to it.
With the fittings in place over the holes.
Lots of stuff coming together! I am kind of seeing a light at the end of the tunnel... That's a good thing.
MarkMark:
"Bad Ast" Astro Van. Just because I did it... Doesn't mean it's possible...
This my Bad Ast thread...
https://www.pro-touring.com/showthre...roject-Faze-II
This is my Fotki album...
http://astroracer.fotki.com/
05-23-2012 #423
Registered User
- Join Date
- Mar 2004
- Location
- Mid-Michigan
- Posts
- 2,764
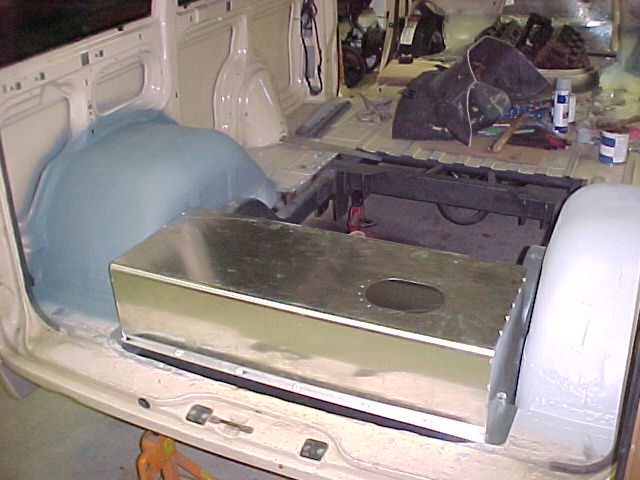
Well I hauled the tank home tonight for a trial fit. It is all tacked together except for the bottom panel. That was intentional so I could test fit the fuel sender. I wasn't sure if the sender arm would clear the baffles and it didn't. I had to put a bit of a notch in the right hand wall of the baffle. The tank plugged the hole just fine though and there are no fitment issues.
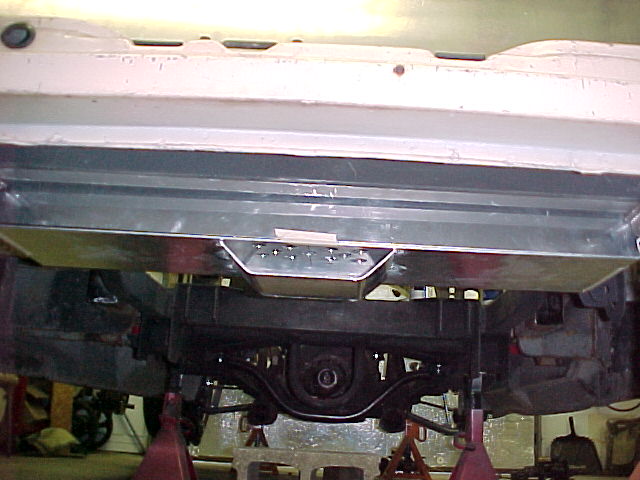
Looking at the fuel pickup underneath. The plate with the fuel bungs needs to be welded up yet.
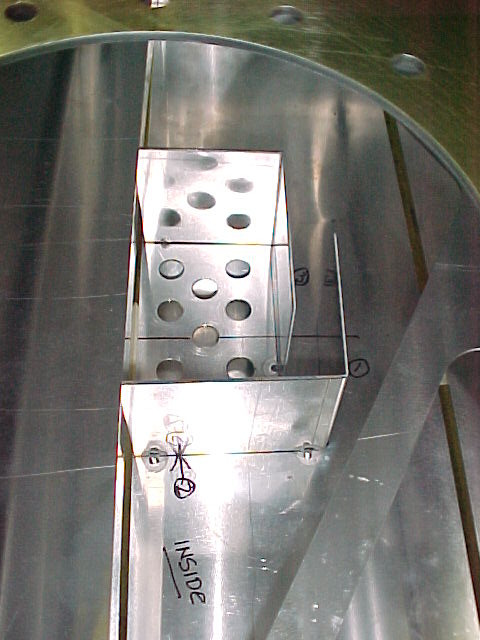
Looking inside the tank at the baffles and fuel drain holes to the pick up sump. The baffle closest to us is the one I had to put a small notch into.
Here you can see the cover panel with the fuel sender in place.
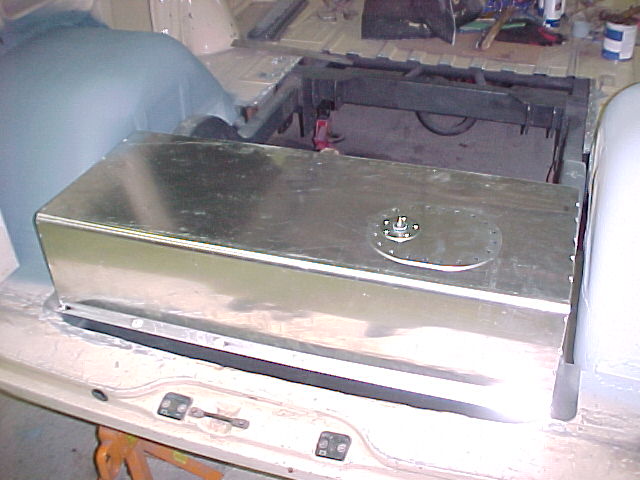
The tank fits so Jesse can finish the welding. I will make the filler panels at the back of the floor and hopefully get the left front wheel well rebuilt next week. I took next week off so I plan to hit the van hard.
Thanks for looking
MarkMark:
"Bad Ast" Astro Van. Just because I did it... Doesn't mean it's possible...
This my Bad Ast thread...
https://www.pro-touring.com/showthre...roject-Faze-II
This is my Fotki album...
http://astroracer.fotki.com/
05-23-2012 #424 Registered User
- Join Date
- Aug 2004
- Location
- Ontario, Canada
- Posts
- 2,314

Good progress. You'll have it goin' down the road in no time.
KenIf there is a hard way to do something, I'll find it!
My other car is a Vega.
06-19-2012 #425
Registered User
- Join Date
- Mar 2004
- Location
- Mid-Michigan
- Posts
- 2,764
Thanks Ken, I sure hope so....
Haven't updated the thread in a while. W have been busy though. Getting a bunch of things done the last month or so.
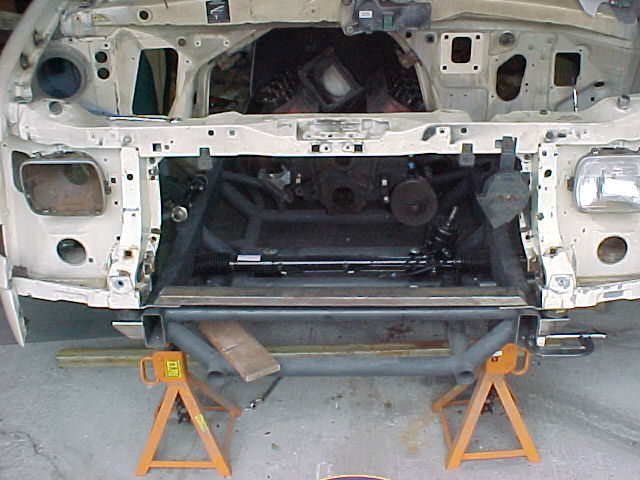
The front clip is back on with new body mounts mocked in place. We rebuilt the lower front radiator support using 1 x 2 rec tubing and some 3/16ths plate. I used some nova subframe mounts that I had on hand.
Even with everything simply clamped in place this is very solid.
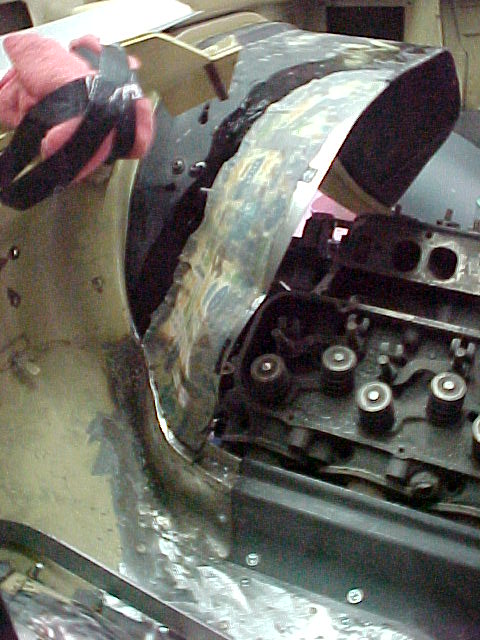
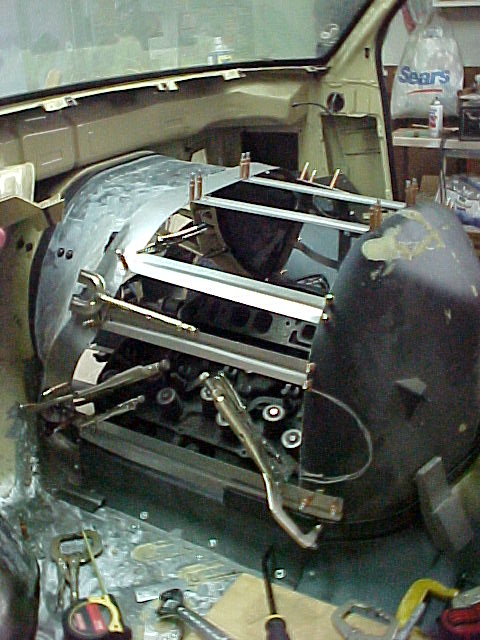
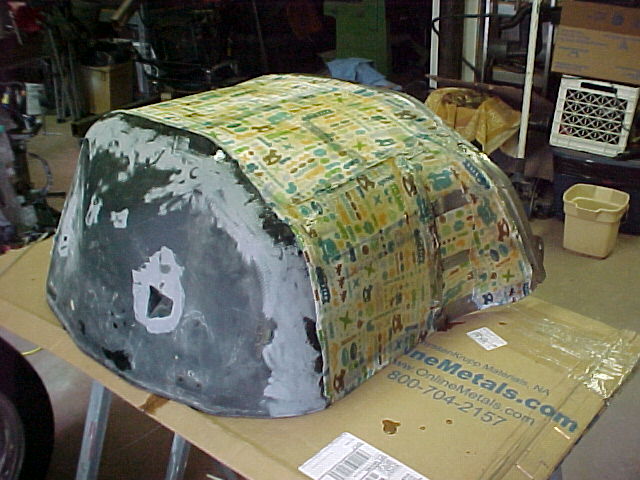
We have also been working on the engine cover. This turned out to be a LOT more work then I thought it would be.
This is the front half as we rebuilt it with steel strips and 'glass. We added a clearance bulge to the drivers side to clear the left rocker cover.
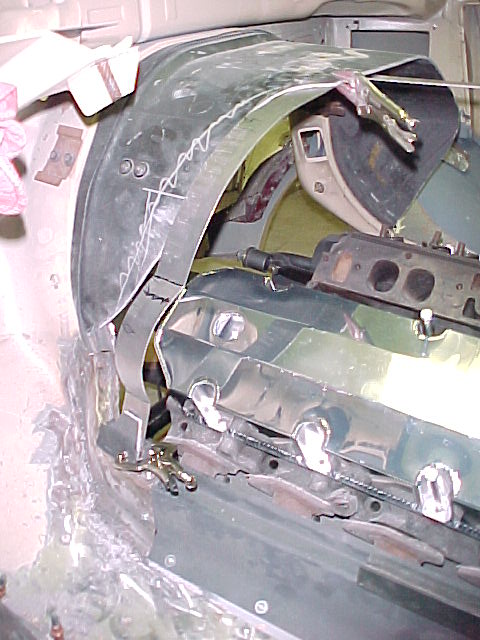
After glassing. The "colorful" material is cheap t-shirt material we stretched over the form. We hit this with some resin which, after it hardened, was a perfect surface to lay glass on.
After a bit of sanding with a D/A and mocking up the "door" seal.

The plan is to leave this front half bolted to the firewall most of the time. The removable cover was developed to attach and seal to the floor in the usual way with retention at the front, gloving over the seal, using 1/4 turn Dzus fasteners. We robbed a door seal off the donor van to use to seal this edge.
More later, I have to go to bed.
MarkMark:
"Bad Ast" Astro Van. Just because I did it... Doesn't mean it's possible...
This my Bad Ast thread...
https://www.pro-touring.com/showthre...roject-Faze-II
This is my Fotki album...
http://astroracer.fotki.com/
06-20-2012 #426
Registered User
- Join Date
- Mar 2004
- Location
- Mid-Michigan
- Posts
- 2,764
A lot of thought and fab work will be going into the dash. I have stripped down the stock '88 unit and have trimmed it (had to cut off most of the lower half of the center stack) to fit with the revised engine cover.
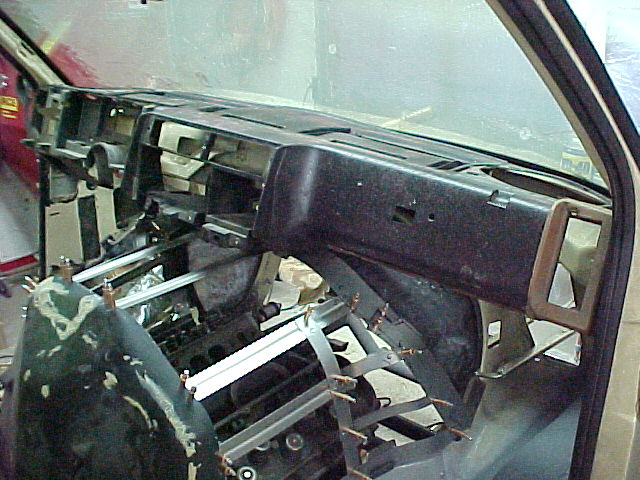
I want to update the look to the later '98-'05 dash. like this.

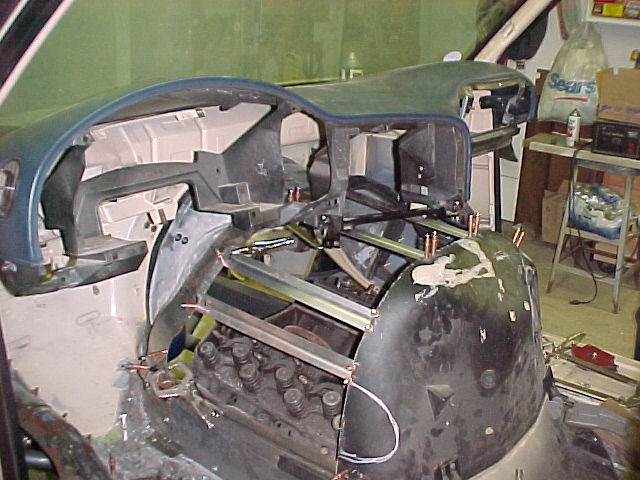
You would think this would be a simple swap but GM changed the entire mounting system inside that 10 year span. The original dash bolts in along the front, under the windshield while the '98 was carried on a magbeam that bolted in on the ends. Plus the HVAC stuff is all redone and won't fit together. I want to maintain the '88 mounting scheme and defrost ducts so I will be cutting the fronts off both IP's and then blending the '98 front to the '88 rear, if that makes sense...
The original defrost duct will work with no mods but the dash vent ducting from the '98 will need to be adapted to the '88 outlet. Heavy sigh...
I will also rebuild the '98 center stack to accomodate all of my gauges and still carry the HVAC controls. Lots of time consuming work to be done...
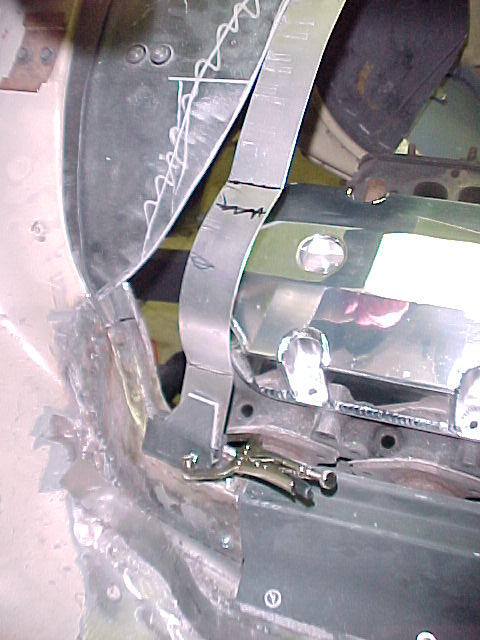
Here are a few pics of the removable cover after we got it fleshed out with some steel strips. We used 18 ga. steel to make the strips and ran a bead down the center to stiffen them up.
My daughter said it looked like pinhead with all the cleco's holding it together...
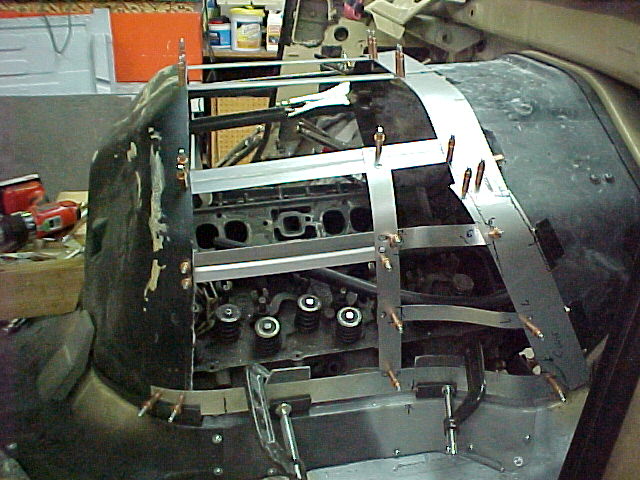
After it was all welded and riveted together. You can see the clearance bump for the rocker cover in this pic.


The band at the front gloves over the rear seal on the stationary half and is held on with 1/4 turns. We made the tabs from 18 ga and ran a bead around the edge. You can also see the bead we ran around the front band to glove over the rubber seal. We clamped all of this in place, over the seal, while we were building it so the fit is good-n-tight and there should be no leakage.

The strips are riveted to the rear half of the original cover and we spot welded all of the steel. This thing is stout and will get even better once the 'glass is added.

Other than cleaning some brake parts and a LOT of measuring and thinking that's what Mel and I have been doing the last few weeks. The next step is to get the dash built and mock up the seats for console, pedals and shifter placement.
Thanks for looking.
MarkMark:
"Bad Ast" Astro Van. Just because I did it... Doesn't mean it's possible...
This my Bad Ast thread...
https://www.pro-touring.com/showthre...roject-Faze-II
This is my Fotki album...
http://astroracer.fotki.com/
06-20-2012 #427 Registered User
- Join Date
- Aug 2006
- Location
- Easton, PA
- Posts
- 989
reminds me of the old 'mid engine' chevy vans in the '60's. I worked for a guy who had one, the engine cover was like a picnic table between the seats!
I look forward to your updates, one of my favorite threads on here.Keith C.
06-20-2012 #428 Registered User
- Join Date
- Aug 2007
- Location
- Albemarle, NC
- Posts
- 1,157
if you put a cupholder in the center of the engine cover, itll keep your coffee warm.....
and its looking great.
ive noticed with all the GMS ive done, that they never changed the body, but changed everything that was bolted to it in some subtle way to make it togh to interchaneg things.Michael Crawford
1970 plymouth Duster back under construction:
https://www.pro-touring.com/showthre...uring-makeover
1987 GMC S15 https://www.pro-touring.com/showthre...ct-drivabeater
06-21-2012 #429
Registered User
- Join Date
- Mar 2004
- Location
- Mid-Michigan
- Posts
- 2,764
Thanks guys, I'm glad someone is enjoying all of the work we are doing. I know I am having a blast!
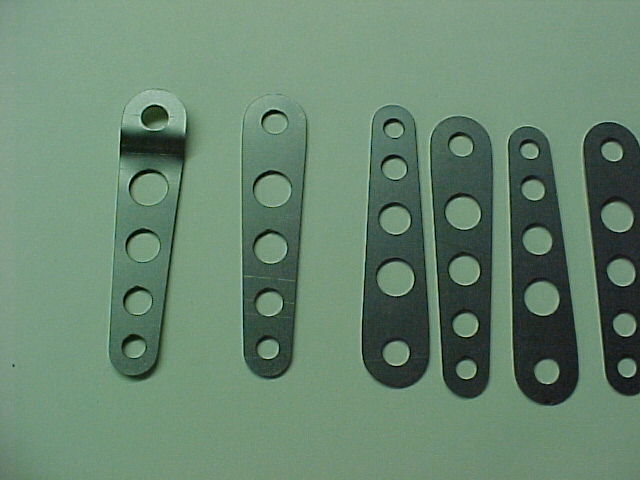
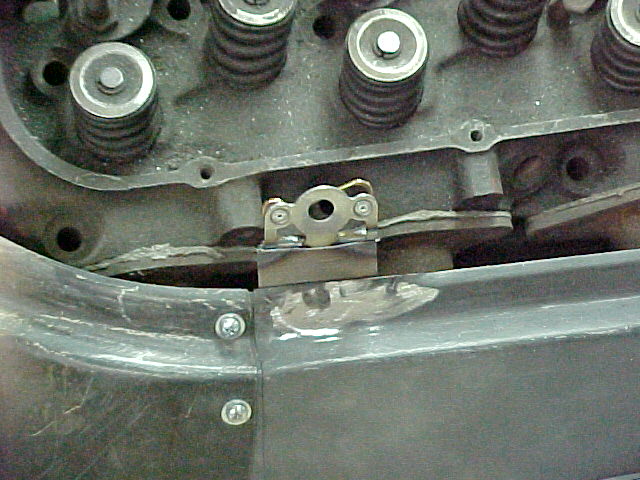
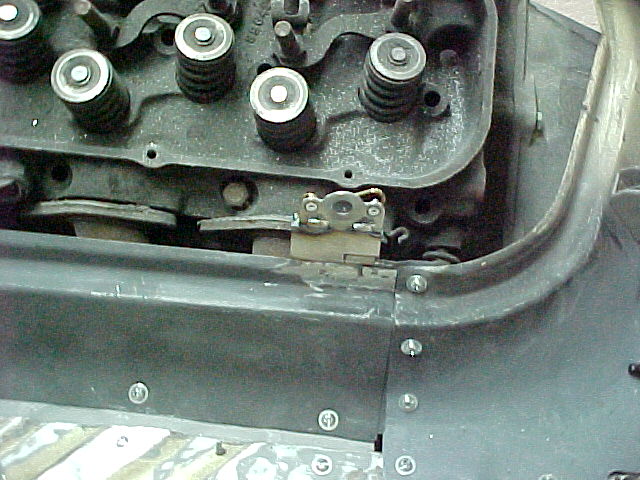
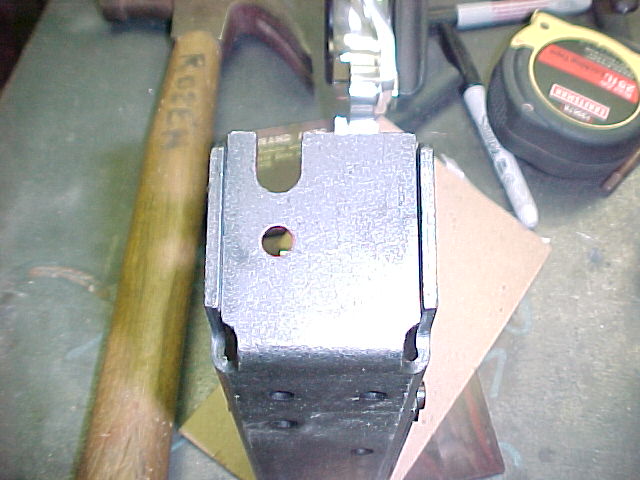
Here are some pics of a little handle I designed last night in the shop. The need for this handle is to access a Dzus button at the front of the dog house. It is right under the duct for the HVAC. No way to reach it other than with this little "extension".
I roughed it out in steel, took those numbers to work and modeled it up in UG. I then sent the file to my pal in the fab shop and I had parts in my hand at lunch time!!!!
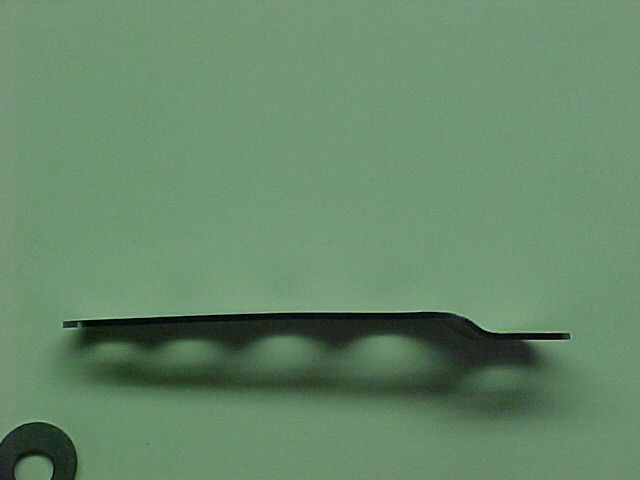
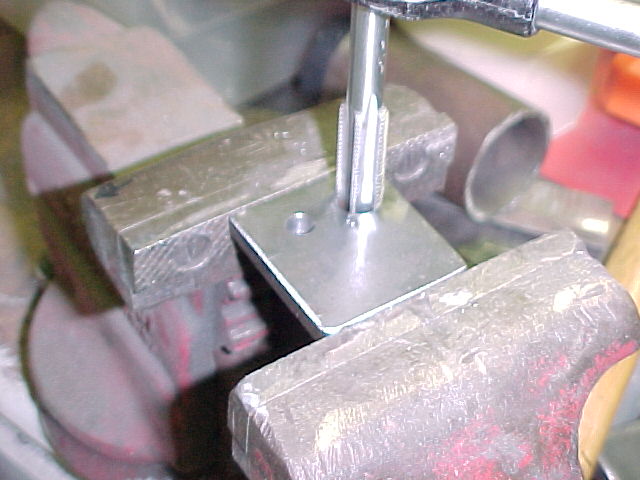
Here is the handle as I modeled it in UG. It's about three inches long.
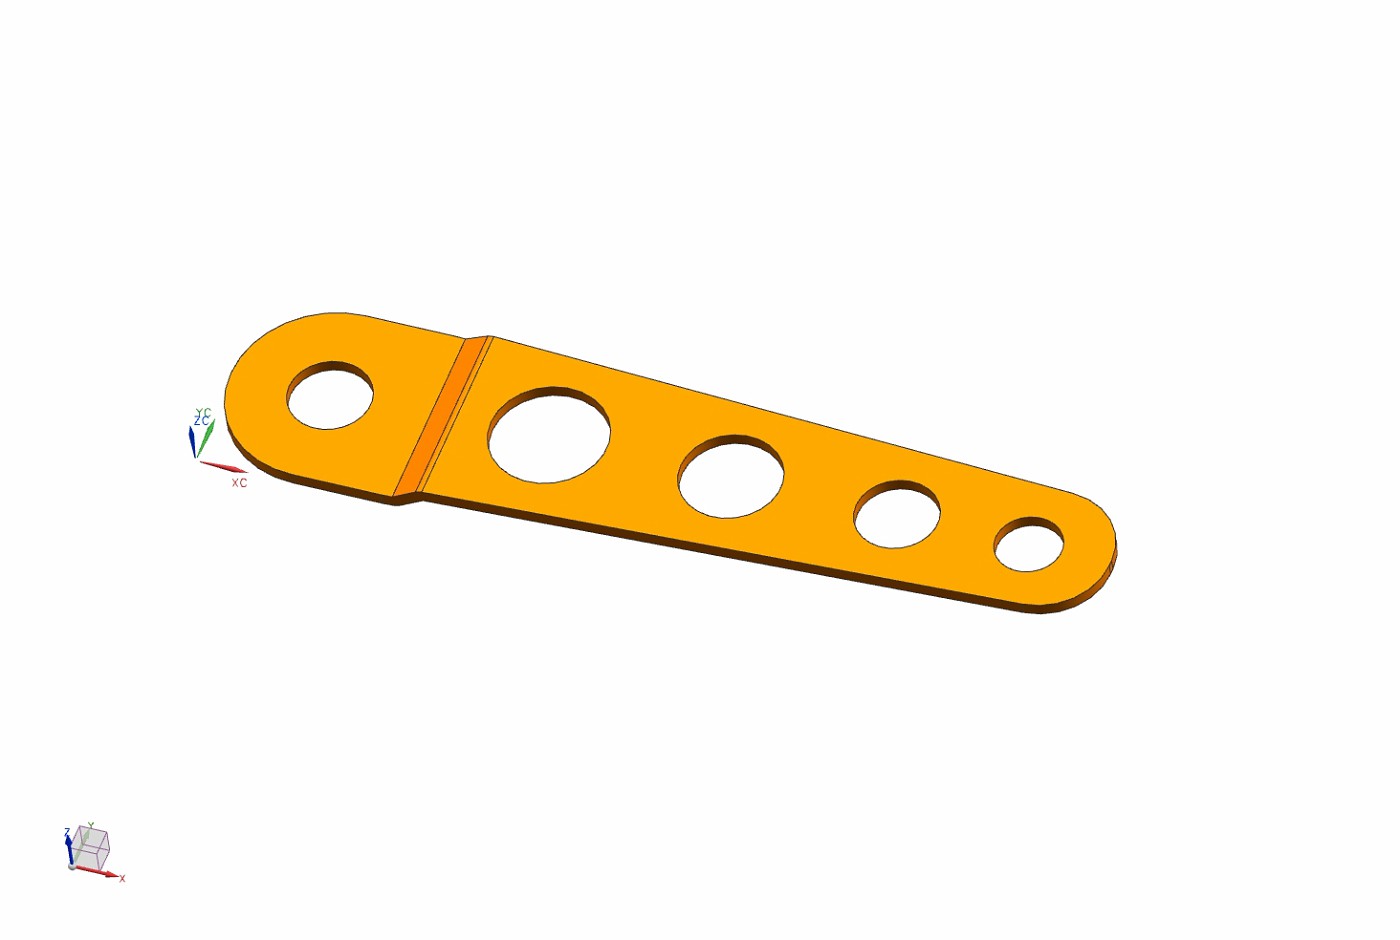
A few hours later I had parts in my hand.

After I got home from a VERY long day at work I put a bit of a bend on the handle.
I ground a flat spot on the button (mostly to remove the galvanizing) and spot welded the handle in place.
Prior to welding.
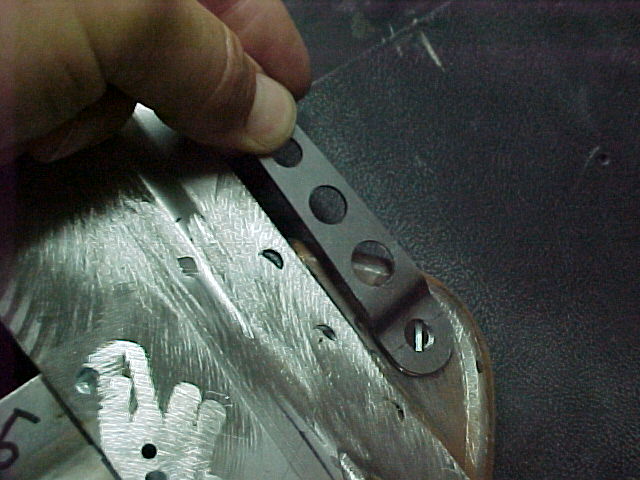
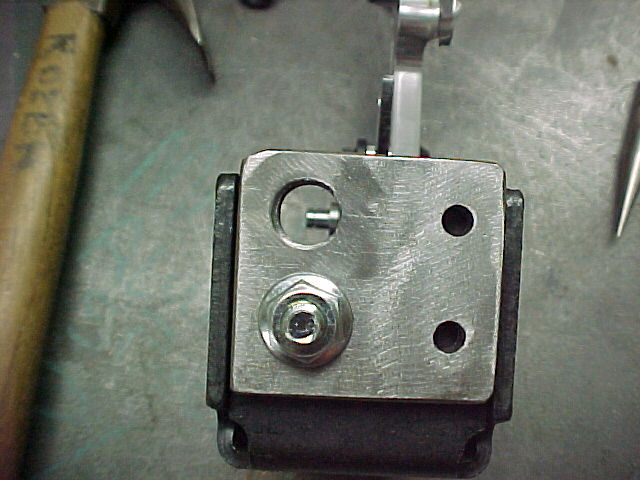
After welding and a little clean up with the grinder. This position is the open position
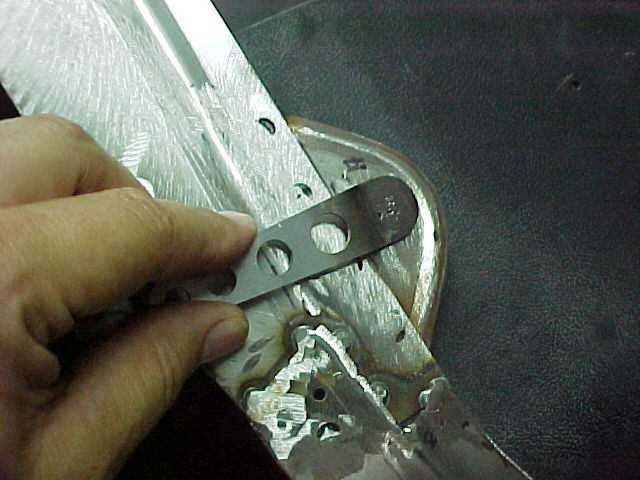
Here is a shot with the button closed. With the handle like this it will be tucked up under the air duct, out of sight.

And one with it open for removal. This is easily reached as it sticks out past the duct. I'll get some more pics later.
This makes it real simple to get the buttons out for doghouse removal. I plan to add this handle to all of the buttons on the cover. They will get painted black and most of them you won't be able to see anyway. I think they look pretty cool...
MarkMark:
"Bad Ast" Astro Van. Just because I did it... Doesn't mean it's possible...
This my Bad Ast thread...
https://www.pro-touring.com/showthre...roject-Faze-II
This is my Fotki album...
http://astroracer.fotki.com/
06-24-2012 #430
Registered User
- Join Date
- Mar 2004
- Location
- Mid-Michigan
- Posts
- 2,764
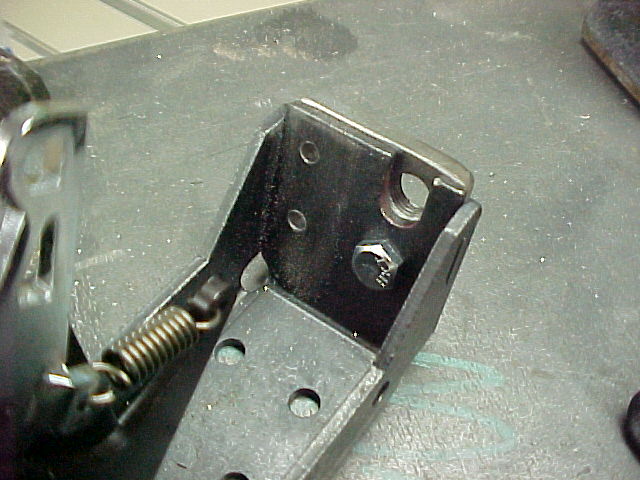
Got a bit done this weekend. I was up at 4 am Saturday and out in the shop before 5. I had stuff running thru my head. Dash, doghouse, HVAC ducts, ALL KINDS OF STUFF!!! I bolted the stock HVAC unit in place to check install clearances for the doghouse. Installation is okay, there was no way to reach that handle I designed the other night thoiugh. We ended up moving it reward a bit so we can get to it.
Here is the stock dash stripped of all of it's vinyl covering
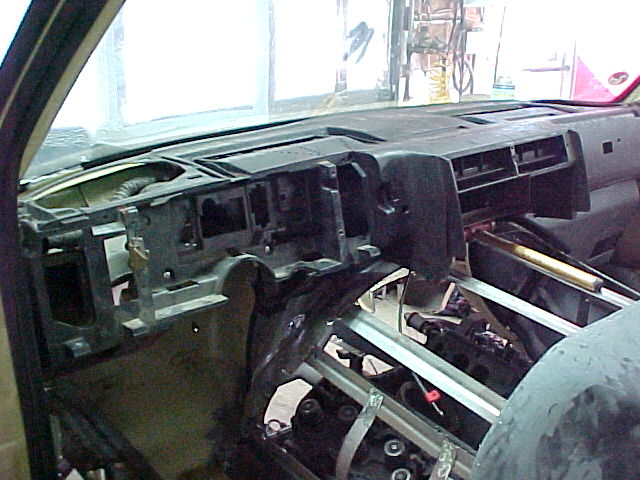
I have decided to rebuild the front of the dash to replicate the late model (98 to '05) shape.
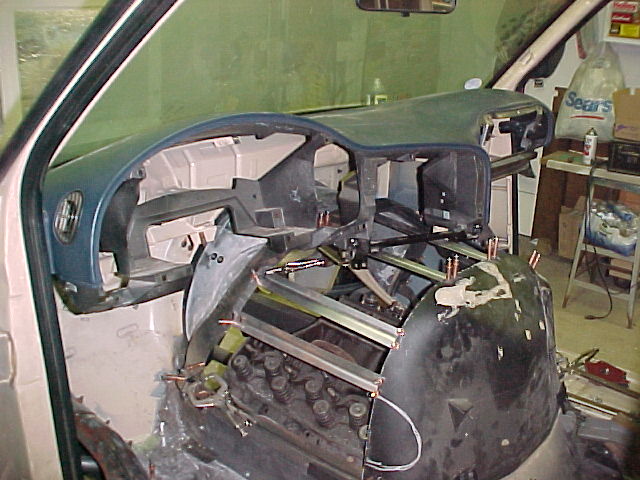
I will cut up the '98 dash I have and use the front pieces to make the shape I want. This will leave the HVAC stuff alone and make for a simpler job.
Did a lot of work getting the 1/4 turns intalled. A little bit of head scratching but we got her done...
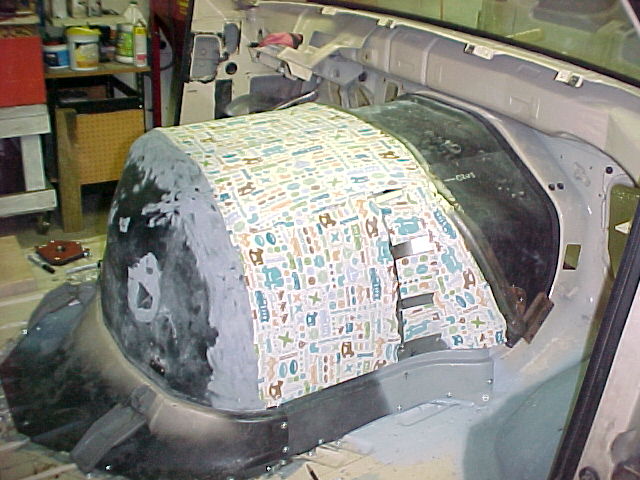
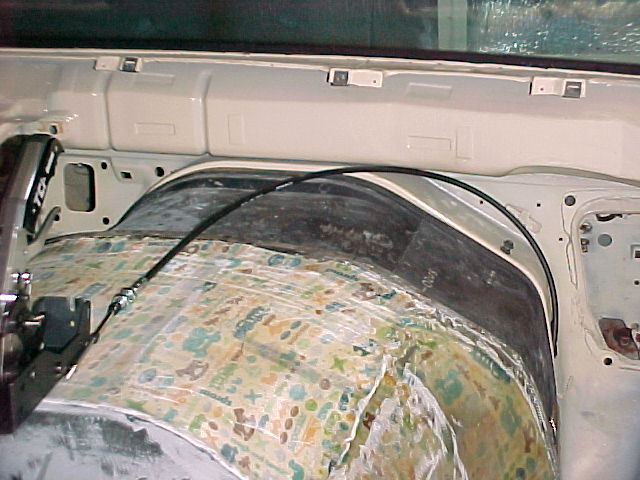
We got the doghouse all fleshed out and covered with some t-shirt material Saturday. We stuck on a layer of thin cardboard to give the t-shirt material some structure.

We used a hot glue gun to stick the material down on one edge. We then pulled it across the sruface, stretching it, which really smoothed out the transitions.
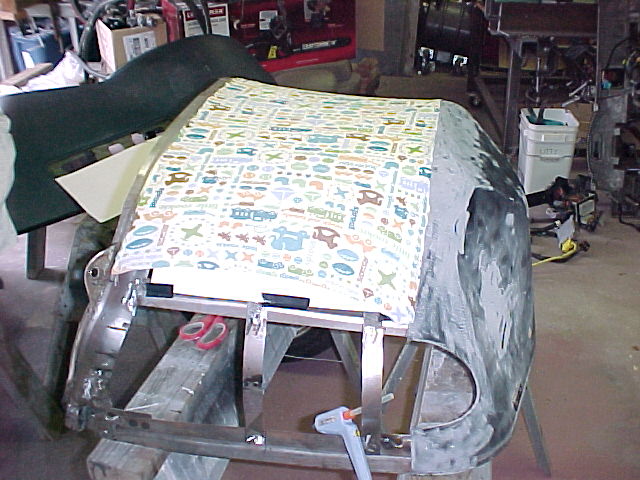
Back in place. Looks pretty good, we'll finish up the material tomorrow and thru on some resin.
 Mark:
Mark:
"Bad Ast" Astro Van. Just because I did it... Doesn't mean it's possible...
This my Bad Ast thread...
https://www.pro-touring.com/showthre...roject-Faze-II
This is my Fotki album...
http://astroracer.fotki.com/
06-24-2012 #431
Registered User
- Join Date
- Mar 2004
- Location
- Mid-Michigan
- Posts
- 2,764
Out in the shop at 7 this morning. Modifying a dzus plate to weld to the new reward location and bending up a couple more of the handles. Mel got here at about 8 and we finished covering the doghouse with material.
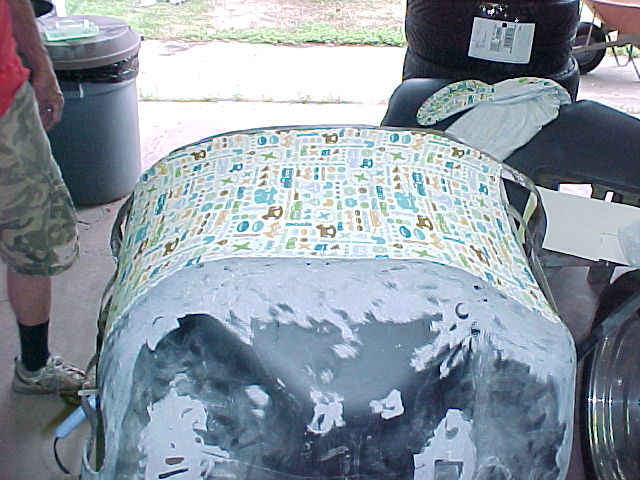
This is a pic after the first coat of resin. This stiffened up the material enough that we could start laying some 'glass on.

We let the piece cook in the sun for a few hours, did a little grinding to start smoothing things out and then bolted it back into the van so it can cure in the shape it needs to be...
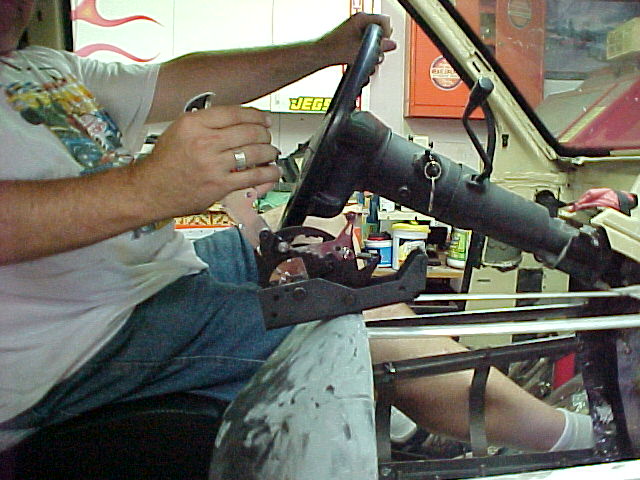
We also mocked up the seats where they need to be, threw in the column for driver position and also worked out the shifter position. The shifter is going to live up on the back edge of the doghouse.
We'll have to be VERY creative with the cable routing as well as building the shifter into the top of the cover. This will all have to come out when the cover is removed....
See the "divot" in my leg from the band of steel in the doghouse? We cut that down a bit before we glassed it. Let me tell you there is NOT a lot of room over here for feet and legs.Mark:
"Bad Ast" Astro Van. Just because I did it... Doesn't mean it's possible...
This my Bad Ast thread...
https://www.pro-touring.com/showthre...roject-Faze-II
This is my Fotki album...
http://astroracer.fotki.com/
06-26-2012 #432
Registered User
- Join Date
- Mar 2004
- Location
- Mid-Michigan
- Posts
- 2,764
Design-wise I will drop the shifter into a pocket, built into the cover, so the cable comes out level with the top of the doghouse, I can run the cable straight forward, over the top of the doghouse. I will then make a closeout panel to cover the cable (and wiring) which will pull off with a couple strips of velcro. Making the closeout panel out of the same carbon fiber that I use on the cover will make it all but disappear...
Mounting the shifter with some quick release pins will allow me to easily remove it and set it on the floor or in a seat to pull the cover.
Here is the solution in a nut shell...
" While looking at photos of the cover installed, I noticed, on the right side of the engine cover flange, there is a square hole which was the old computer connector pass-thru. I can route the cable in a big loop over the doghouse, vertically down thru that hole and then rearward toward the tailshaft. This will be one huge loop, no tight bends at all. I will route some romex along it tonight ,if I get time, but I thinking I may be able to get away with a 10 foot cable. I plan to hard mount the cable as much as possible to keep loss of travel to a minimum."
added a quick photoshop for cable routing
When I got home last night I ran the short cable I got with the shifter along my "path".
Up on top, the cable naturally falls down thru the pass-thru.

Underneath it sweeps right back toward the rear of the van. Mind you this is all natural, there are no forced bends in the routing.
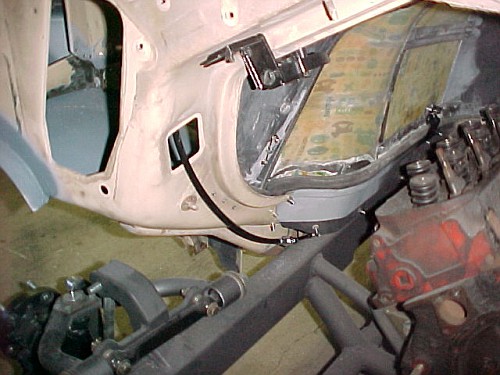
This routing will work perfectly and it tucks the cable right alongside the old frame rail, well away from the headers and exhaust heat.
Thanks for looking!
MarkMark:
"Bad Ast" Astro Van. Just because I did it... Doesn't mean it's possible...
This my Bad Ast thread...
https://www.pro-touring.com/showthre...roject-Faze-II
This is my Fotki album...
http://astroracer.fotki.com/
06-27-2012 #433 Registered User
- Join Date
- Apr 2001
- Location
- The Netherlands
- Posts
- 1,509

Nice progress!! I used the stretch fabric/resin trick on some kickpanels...works great indeed to get curved shapes.
06-27-2012 #434 Registered User
- Join Date
- Nov 2009
- Location
- the dirty mitten
- Posts
- 1,217
Online metals FTW!!
I like that t shirt material you are using there, seems really easy to use. Can you say just what it is? and are you using for the resin? Are you concerned about the heat from the motor getting to something like that?Steve
1968 Dodge Charger All Wheel Drive project Red Bull<script type="text/javascript" src="safari-extension://com.ebay.safari.myebaymanager-QYHMMGCMJR/5cce6da5/background/helpers/prefilterHelper.js"></script><script type="text/javascript" src="safari-extension://com.ebay.safari.myebaymanager-QYHMMGCMJR/85dc54c0/background/helpers/prefilterHelper.js"></script><script type="text/javascript" src="safari-extension://com.ebay.safari.myebaymanager-QYHMMGCMJR/85dc54c0/background/helpers/prefilterHelper.js"></script>
06-27-2012 #435
Registered User
- Join Date
- Mar 2004
- Location
- Mid-Michigan
- Posts
- 2,764
Thanks guys,
The t-shirt material is just that... T-shirt material. It's something my wife picked up at a garage sale. I think it was .50 cents... For a yard of it. Fugly but it does the job. This stuff isn't that expensive at a material store like JoAnn's.
The t-shirt material works really well for doing this knid of work. It stretches a large amount in one direction while the other direction is fairly stable and doesn't stretch much. You can see some of that in my pics where the "sides" suck in a bit.
I am using a polyester resin for this base work. Once we do the whole cover I will use an epoxy resin so it will bond with the SMC the original cover is made out of.
I ordered the carbon fiber for the cover, dash and console today. Fiber Glast had a 20% off code for today only so I jumped on it. I ordered five yards of their Roswell patterned CF. probably be enough to do all of the fixed glass too. I think this will look pretty kool....Mark:
"Bad Ast" Astro Van. Just because I did it... Doesn't mean it's possible...
This my Bad Ast thread...
https://www.pro-touring.com/showthre...roject-Faze-II
This is my Fotki album...
http://astroracer.fotki.com/
06-28-2012 #436
Registered User
- Join Date
- Mar 2004
- Location
- Mid-Michigan
- Posts
- 2,764
I worked on shifter placement a bit last night. Mounted the short cable to the shifter body and started laying out where I will be cutting the cover to make the shifter pocket. I am thinking I will design a little control panel into the shifter closeout to contain the Gear Vendor switches. May as well keep that stuff close to the shifter anyway.
I also mocked up the dash and started looking at gauge placement and shifter cable clearance. The dash sits about an inch over the top of the cover so there is no issue, height-wise, and it comes out over the cover enough that there is only a couple of inches of cable that you can actually "see" between the shifter and dash. I will probably hard mount the shifter cable to the metal cross beam that runs under the dash. That will get it up out of the way for removal and installation of both covers.
If I do the gauge layout I am thinking of I can hide all of this cable and wiring stuff with the dash. I'll get some pics loaded later, didn't get on the computer last night.Mark:
"Bad Ast" Astro Van. Just because I did it... Doesn't mean it's possible...
This my Bad Ast thread...
https://www.pro-touring.com/showthre...roject-Faze-II
This is my Fotki album...
http://astroracer.fotki.com/
06-30-2012 #437
Registered User
- Join Date
- Mar 2004
- Location
- Mid-Michigan
- Posts
- 2,764
It's been a bit hectic around home the last half of the week. My dad was in the hospital since Tuesday for an infection (his kidneys are bad and he is doing home dialysis) anyway he got an infection and had to have some heavy antibiotics pumped into him to clear it up. They took care of it though and he came home Friday afternoon, fit as a fiddle.
We worked in the garden for an hour or so this morning. He was glad to be back home...
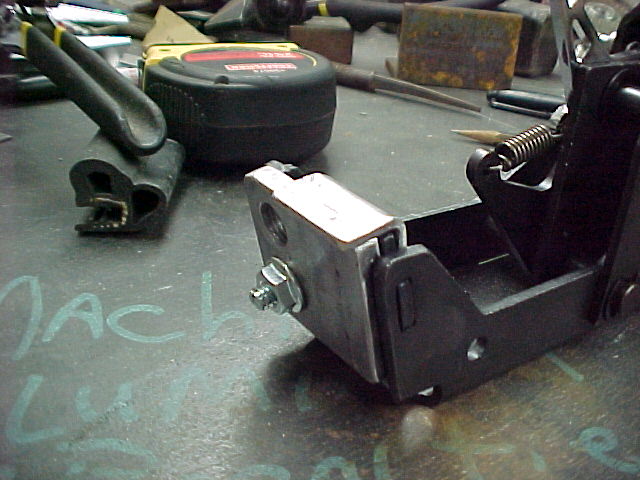
Didn't get a lot of physical work done but I did get a quick release for the shifter cable designed in my head. Because I am bolting the shifter right to the engine cover it HAS to come out with the cover for engine access. Removing the cable from the shifter seemed about the only way to make this an easy task. The cable for the Outlaw shifter actully bolts to a little block that then bolts to the front of the shifter. This is why I was able to do what I did.
I made a new block for the cable to thread into. A bit bigger than the original.
Here is the front of the shifter.. The old block was held on with the lower bolt and the cable went thru the slot above it.
Here is the new block (1/4" plate) being drilled and tapped to replace the original. The size is 1 1/2 X 1 5/8ths.
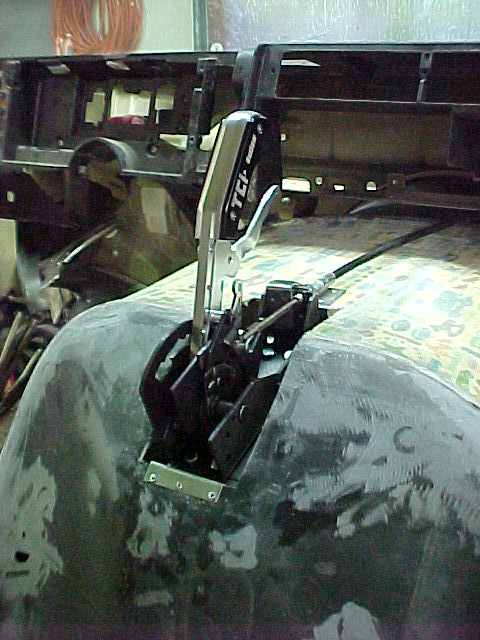
Mounted on the shifter. The two holes on the right are for a couple of quick release pins.
Stll bolted in place with the QR holes drilled thru the shifter body.
Not done yet! In order for this bracket to do it's job I have to make another piece that will "clam" over the front of the shifter. This will keep the cable from moving back and forth on the quick release pins.
Here is the little "L" bracket that slides down inside the shifter body to capture the shifter and maintain the cable alignment.
From the front of the shifter. This was taken before the pin holes were drilled... Sorry.
I welded the L bracket to the new block and then thru drilled the pin holes.
Here is the new "Quick Release Bracket" with a couple of #10 allen screwss I used for mock-up. I will order some pins from McMaster Carr.
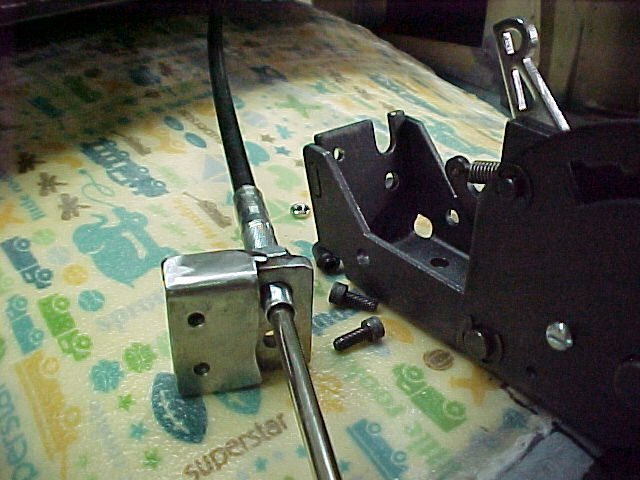
This works pretty slick. I will do some fine tuning when I get the actual pins but this will work great!

Thanks for looking!
MarkMark:
"Bad Ast" Astro Van. Just because I did it... Doesn't mean it's possible...
This my Bad Ast thread...
https://www.pro-touring.com/showthre...roject-Faze-II
This is my Fotki album...
http://astroracer.fotki.com/
06-30-2012 #438
Registered User
- Join Date
- Mar 2004
- Location
- Mid-Michigan
- Posts
- 2,764
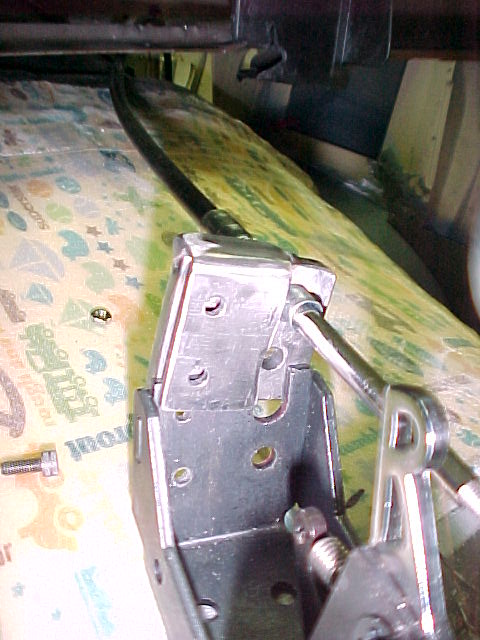
I also got the doghouse notched out to drop the shifter cable level with the top
I started small and worked my way up to something that fits the shifter well. I will probably open this up a bit more on the sides but for right now it does the job.

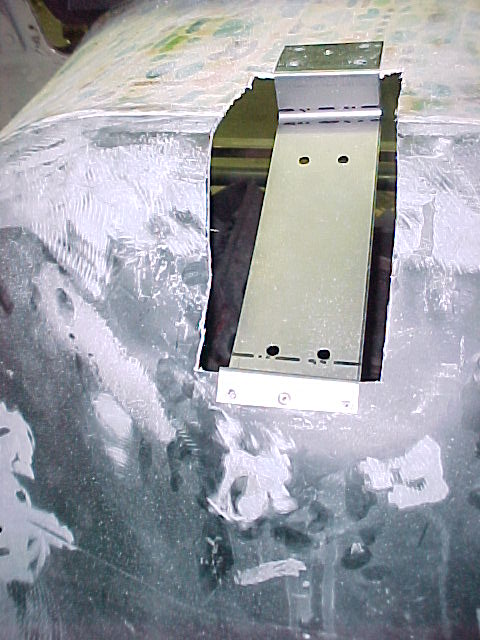
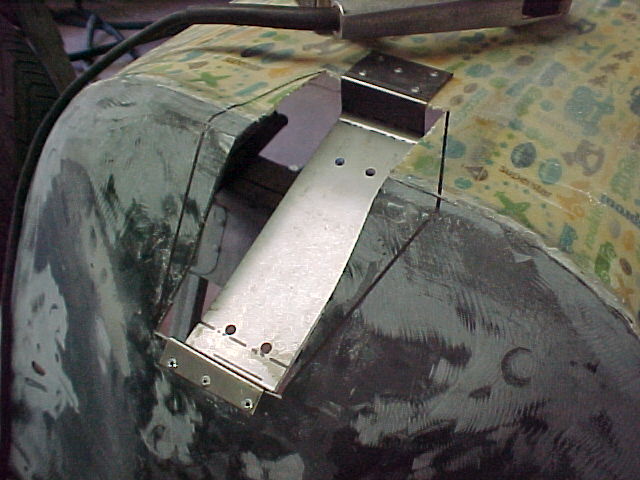
Here is a shot of the steel bracket that the shifter bolts to. I made this out of some 20ga. sheet. It will get some reinforcment underneath before it gets 'glassed in.

Set in place. This locates the shifter and gives me four thru bolts for attachment.
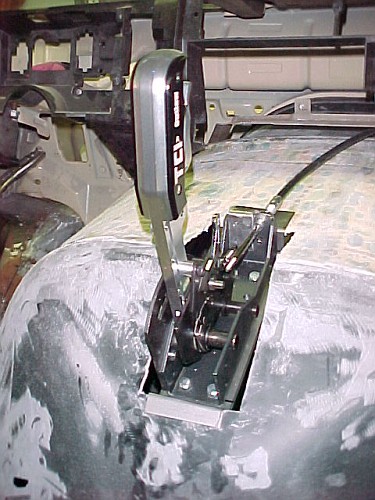
Here is the bracket all riveted in. This is plenty stout as it is but I'll throw some 18 ga. gussets in there before glassing...
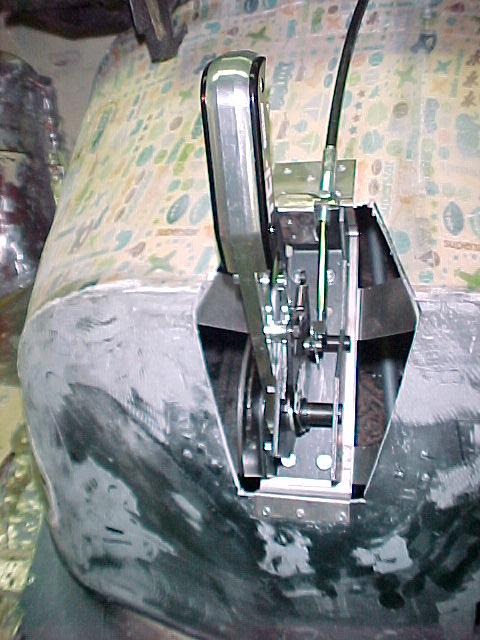
Looking at the shifter all bolted in...
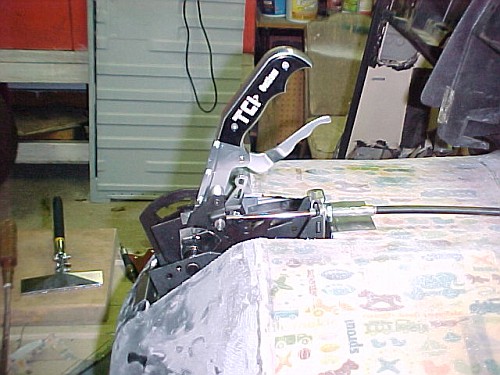
The cable bracket removes very easily and I have an S clip on the linkage to hold it in. I will end up drilling a 1/16th inch hole thru the post for that.
What do you think?
Thanks for looking
MarkMark:
"Bad Ast" Astro Van. Just because I did it... Doesn't mean it's possible...
This my Bad Ast thread...
https://www.pro-touring.com/showthre...roject-Faze-II
This is my Fotki album...
http://astroracer.fotki.com/
06-30-2012 #439
Registered User
- Join Date
- Aug 2004
- Location
- Ontario, Canada
- Posts
- 2,314
Your shifter cable quick release is pretty slick.
KenIf there is a hard way to do something, I'll find it!
My other car is a Vega.
07-01-2012 #440
Registered User
- Join Date
- Mar 2004
- Location
- Mid-Michigan
- Posts
- 2,764
Thanks Ken, I had to do something to package the shifter and have it removable. Unhooking the cable by pulling two pins works like a charm. I have a selection of pins coming from McMaster Carr so I'll get it tuned up when I get those.
Got a bit more done today. i opened up the clearance hole fro the shifter body. It now has a bit of a taper from top to bottom. You can see my layout lines here.
I made two strips of 20 ga. to tie the mounting plate down crosscar. Made a couple of cardboard templates and bend them up on the 3 in 1.
This the front strip. It will get riveted into the doghouse and spot welded to the shifter plate.

Here is the rear strip. This one worked out, position wise, that I could bolt thru it with the two bottom shifter bolts. I have started riveting this one in.

All riveted in and welded up. This is plenty strong right now and once the glass work done it'll be even better. I was kind of worried about stability of the shifter during operation but that isn't a concern anymore.
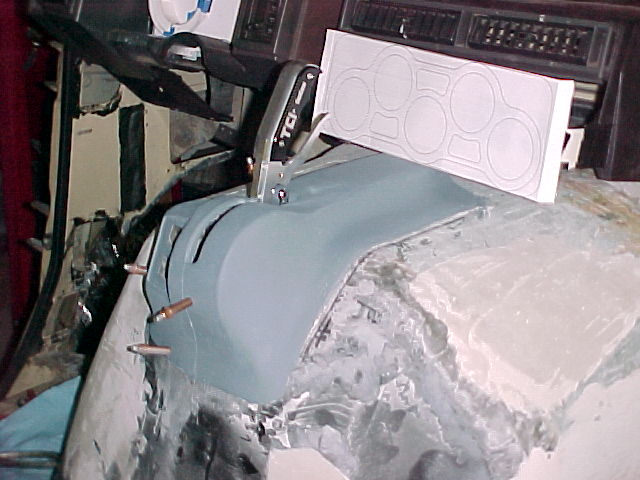
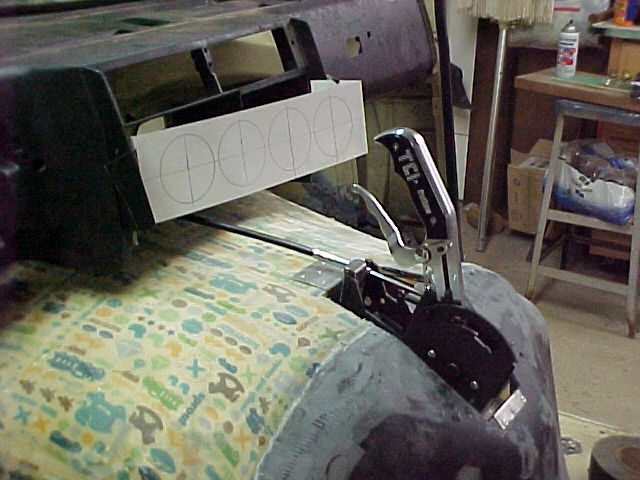
I also did a little mocking up of the gauges. I made a cardboard facsimily of the lower gauge cluster and taped it in just to get a feel for their placement.
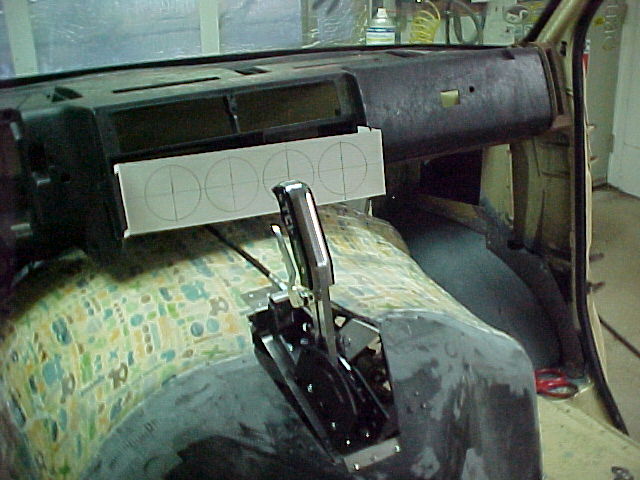
I'll do a little more looking at this. I will probably end up moving the whole panel down a bit to close the gap to the cover. I also have to develope the closeout for the cable and switch wiring.
I got my carbon fiber yesterday! It looks pretty darn kool! I'll get some pics of it but I didn't want to open up the packaging until I really need to.
MarkMark:
"Bad Ast" Astro Van. Just because I did it... Doesn't mean it's possible...
This my Bad Ast thread...
https://www.pro-touring.com/showthre...roject-Faze-II
This is my Fotki album...
http://astroracer.fotki.com/

 Reply With Quote


