

Results 361 to 380 of 862
Thread: The BAD AST Project - Faze II
-
01-20-2012 #361

 Registered User
- Join Date
- Mar 2004
- Location
- Mid-Michigan
- Posts
- 2,764

Thanks for the positive comments guys, and Tech Rod? You have quite a build going on there also. Don't cut yourself down, very respectible, the work you are doing.
I have the final tank design and have filed it out in dxf format for laser cutting. I got the okay from our fab dept that my files are good so we are waiting on material. I did ge the call from my supplier the sheet is in but I won't get it picked up till next week.
Here are a few screen shots of the final tank design. Any comments or concerns?

The top flange will bolt in on a crossmember I will fab up from 18ga.steel. It will span between the wheel houses and carry the tank and floor loads.

A shot with the top outer panel blanked. you can see the inner panel that bridges across and supports the front panel and creates the flange that will bolt the tank to the existing floor.
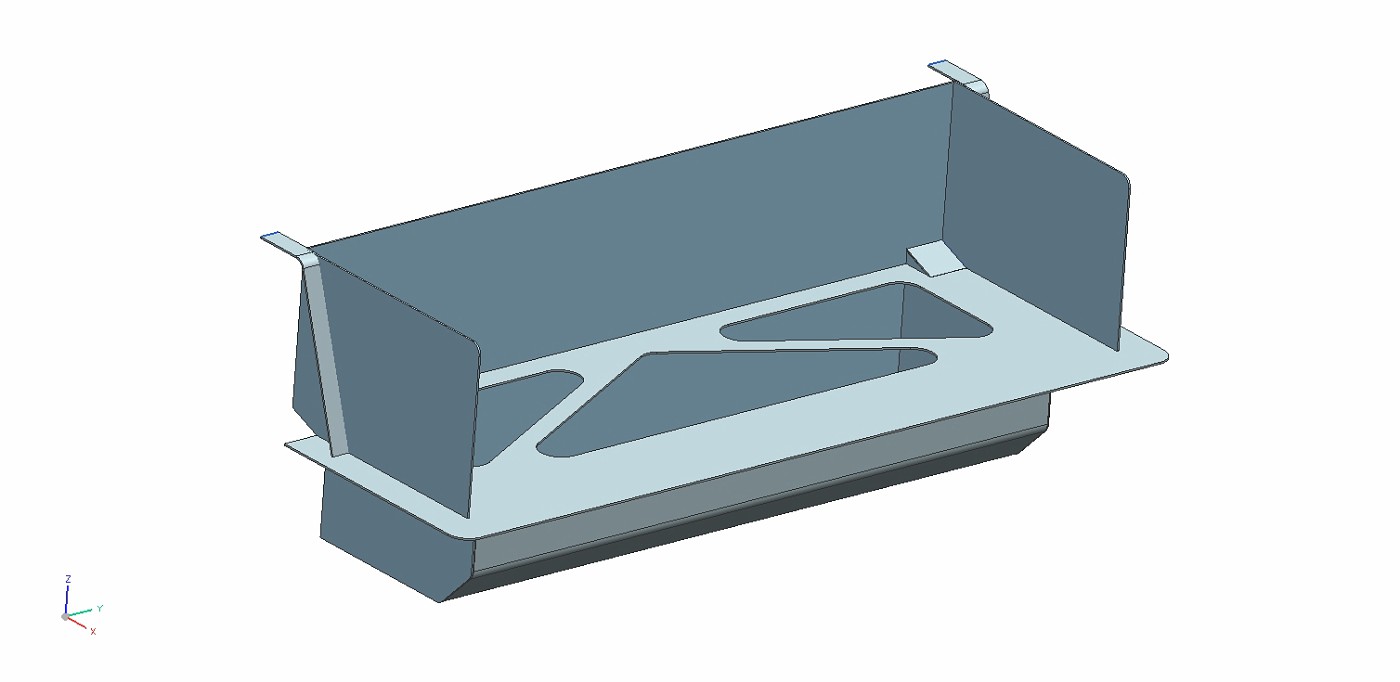
I still need to come up with a sender and all of the fittings. I will have the close out plate cut at the same time as the rest of the panels.

My only real concern is getting this welded up. I will be using most of the cut-offs to practice my aluminum welding.
Thanks for looking
Mark
Mark:
"Bad Ast" Astro Van. Just because I did it... Doesn't mean it's possible...
This my Bad Ast thread...
https://www.pro-touring.com/showthre...roject-Faze-II
This is my Fotki album...
http://astroracer.fotki.com/
-
01-20-2012 #362
Registered User
- Join Date
- Mar 2004
- Location
- Mid-Michigan
- Posts
- 2,764
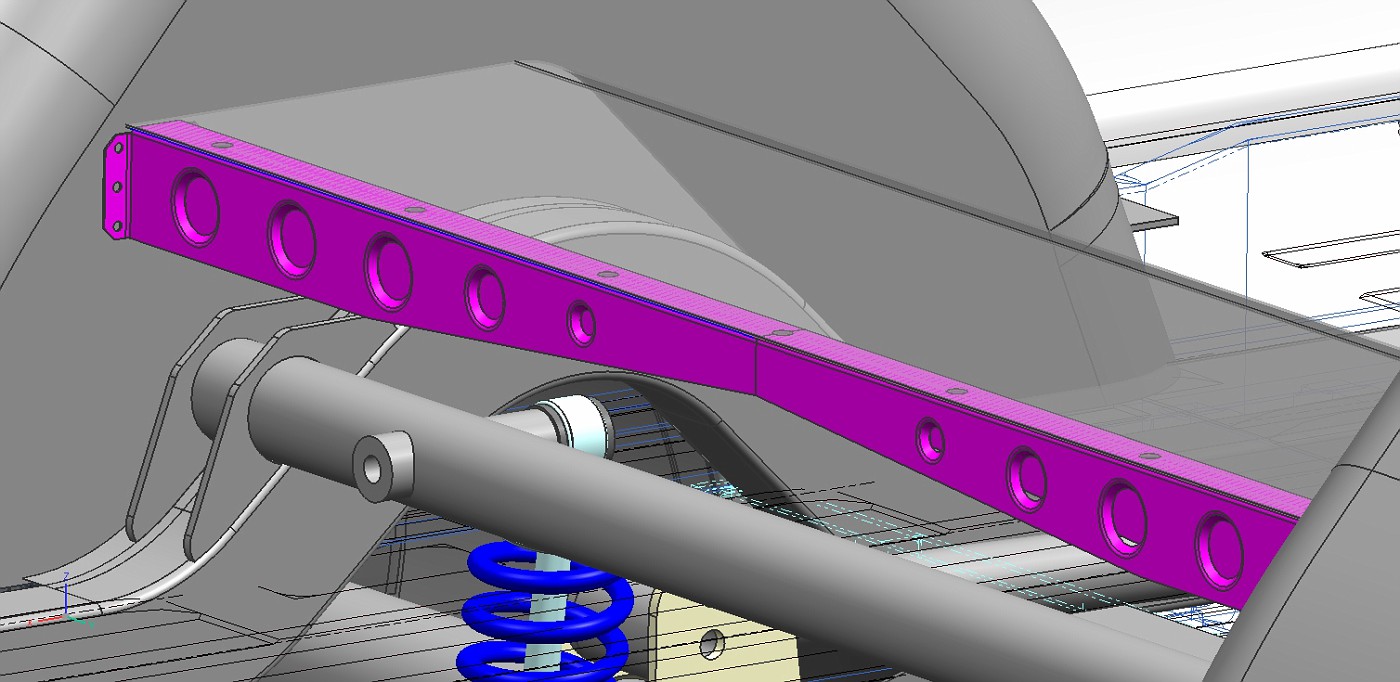
I did a quick design for a tank crossmember. I will have to make this out of two pieces as my brake only goes to 30 inches and this piece is 39. No biggie, lets me get creative with the shape.

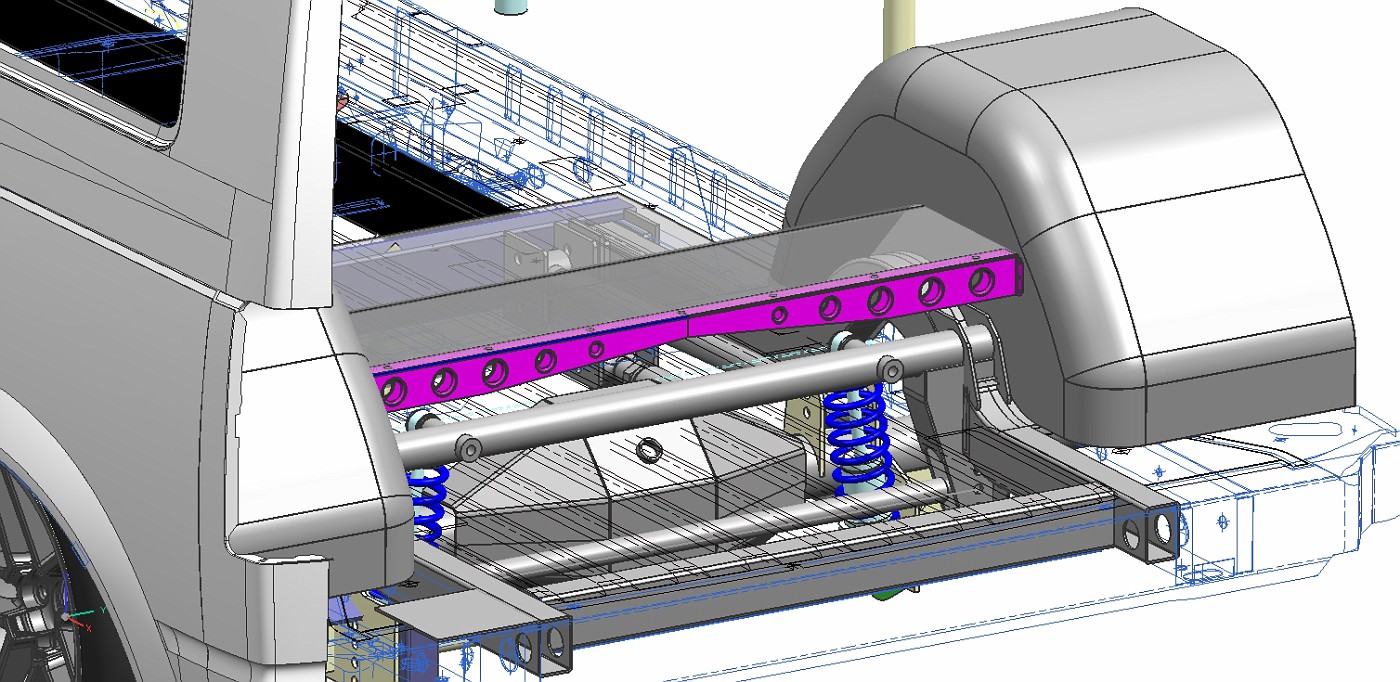
I'll put some 1/4-20 AVK's in the top of the rail to attach the floor and upper tank flange.
MarkMark:
"Bad Ast" Astro Van. Just because I did it... Doesn't mean it's possible...
This my Bad Ast thread...
https://www.pro-touring.com/showthre...roject-Faze-II
This is my Fotki album...
http://astroracer.fotki.com/
01-20-2012 #363
Registered User
- Join Date
- Oct 2011
- Location
- NE Ohio
- Posts
- 2
Thanks for the kind words astroracer.
I have recently reached driveability, still lots to do but it feels good to roast some 245/50-16's ;)
I opened my big mouth, I think I should start a build thread here now.
01-20-2012 #364 Registered User
- Join Date
- Jul 2009
- Location
- Grand Rapids, MI
- Posts
- 1,559
Looking forward to seeing how it comes out Mark.
01-21-2012 #365
Registered User
- Join Date
- Mar 2004
- Location
- Mid-Michigan
- Posts
- 2,764
Thanks Will, me too, I have been chomping at the bit all week to get out to the shop. We got about 3 inches of snow last night so I blew off drining 65 miles into work today. Stayed home and worked on the van. (After shoveling walks and driveways of course...)
TechRod, by all means get a thread going! Some of the computer and electrical stuff you are doing is crazy!
Mel came out after I called him. He worked on the floor patches, notching the old xmbr so it will fit over the K braces and making plug weld flanges. he layed out the notches and cut them out with the sawzall and plasme cutter.

He cut a piece of 2" DOM down the middle and fit the halfs into the notches he made.

All welded up and grinding down the high spots.
While Mel was working on all of that I was building this contraption to set the height for the top of the new inner wheel houses. This gives me a hard reference point for height AND a place to clamp too.
It will stay in place while I build both sides.
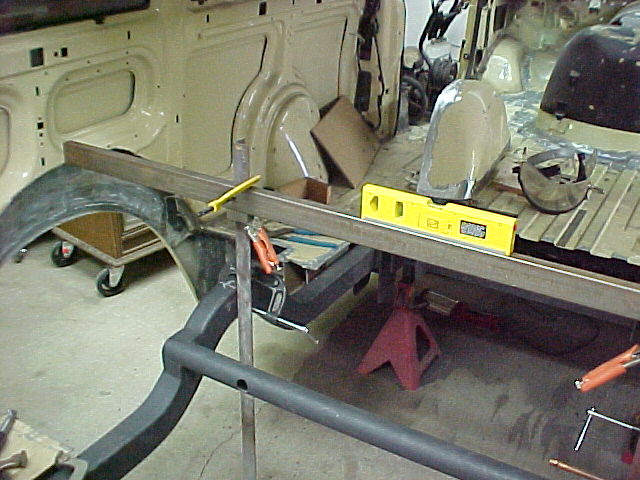
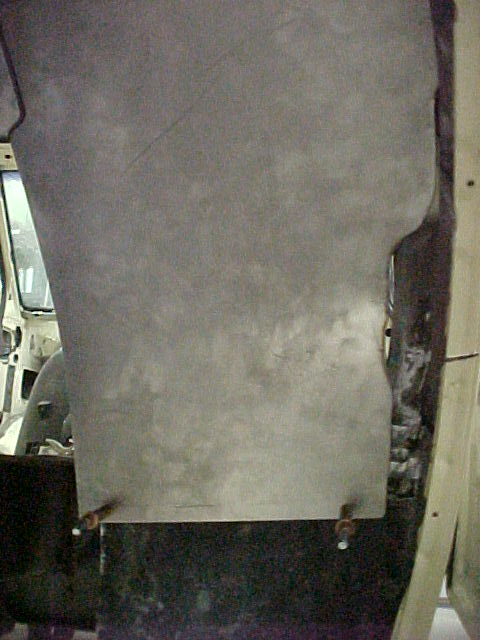
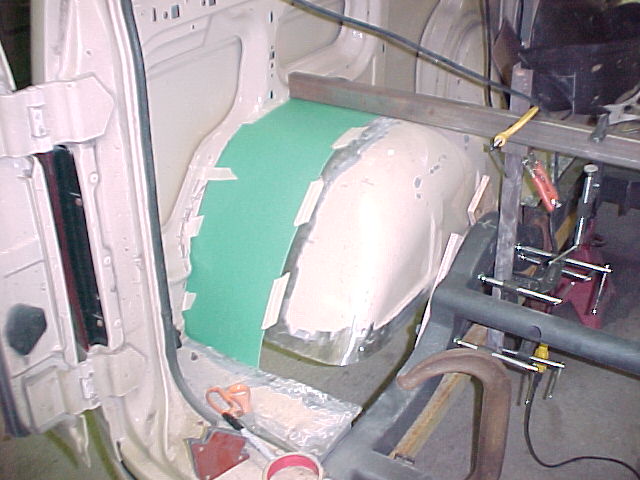
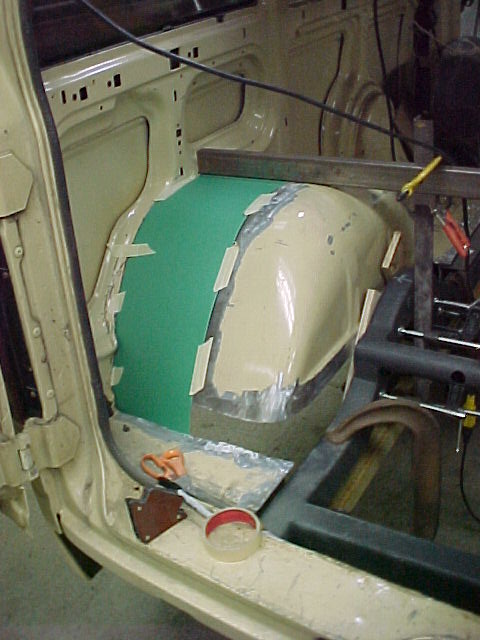
I used posterboard to make the RH pattern. This is the difficult side because I have to work around the bottom of the slider door track. It is directly behind the inner sheet metal and protrudes into the wheel well about an inch and a half.
This pic is from underneath so you can see the track and how I had to jog the panel around it.
This is the fit I am looking for. It won't be welded to the outer. The inner panel will get welded and this gap will get filled with seam sealer.


Once the pattern was made I could start cutting steel. I cut a hunk of 18ga with the old Pexto. That machine handles the heavier gage a bit easier than the 3 in 1 does...
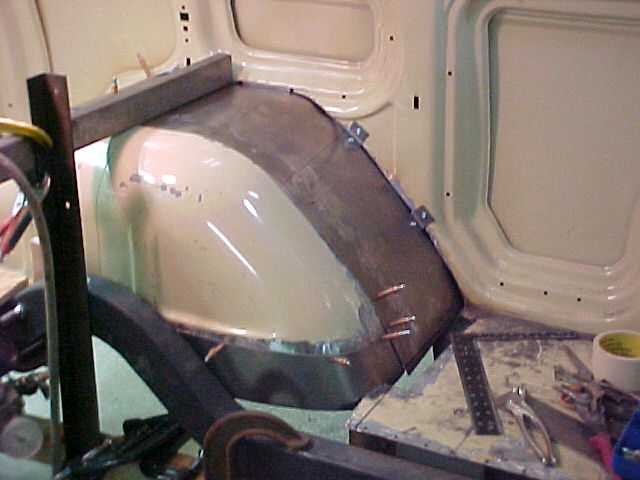
Laid out the pattern, cut out the shape, put a bit of a bend on it to conform to the old inner well and set it in place for a look see...

After a couple more ins-n-outs I had the shape real close.
This is the fit-up underneath. I wanted to keep the new steel away from the outer by about an 1/8th inch. It's real close to that and it will seal up nice.
There is a little more finagaling to do but I think it's real close right now. I put in a few Cleco's and called it a day.
The Cleco's are half an inch from the edge of the inner. The new panel will get trimmed to this edge and welded in once I have all of the fabricating on both tubs complete.
Thanks for looking
MarkMark:
"Bad Ast" Astro Van. Just because I did it... Doesn't mean it's possible...
This my Bad Ast thread...
https://www.pro-touring.com/showthre...roject-Faze-II
This is my Fotki album...
http://astroracer.fotki.com/
01-21-2012 #366
Registered User
- Join Date
- Mar 2005
- Location
- Just North of NYC
- Posts
- 312
Great project, man. Keep it up and keep posting.
01-22-2012 #367 Registered User
- Join Date
- Apr 2009
- Location
- san diego
- Posts
- 5,101
Nice CAD work. The tank looks good!
My build thread: https://www.pro-touring.com/showthre...ing&highlight=
The mustang build thread: https://www.pro-touring.com/showthre...el)&highlight=
01-22-2012 #368
Registered User
- Join Date
- Apr 2009
- Location
- san diego
- Posts
- 5,101
be careful with laser cutting aluminum with all the heat going into it, the aluminum likes to warp. I would suggest water jet cutting.
My build thread: https://www.pro-touring.com/showthre...ing&highlight=
The mustang build thread: https://www.pro-touring.com/showthre...el)&highlight=
01-22-2012 #369
Registered User
- Join Date
- Mar 2004
- Location
- Mid-Michigan
- Posts
- 2,764
Thanks Ken, I plan on hitting this hard every weekend. Don't get the time I would like during the week but That lets me do some CAD work and planning so it all works out.
And Bryce, thanks! I think the tank will work out well. Much better then a blow molded one. Lazer cutting is my only "free" option. The guy who runs ours at work is good and he is aware of the warping issue so no worries there. I am taking in my files tomorrow and hope to get the aluminum picked up this week.
Mel worked his ASS off on the floor patch this weekend. We had an issue where the two pieces we are welding together were mis-matched.
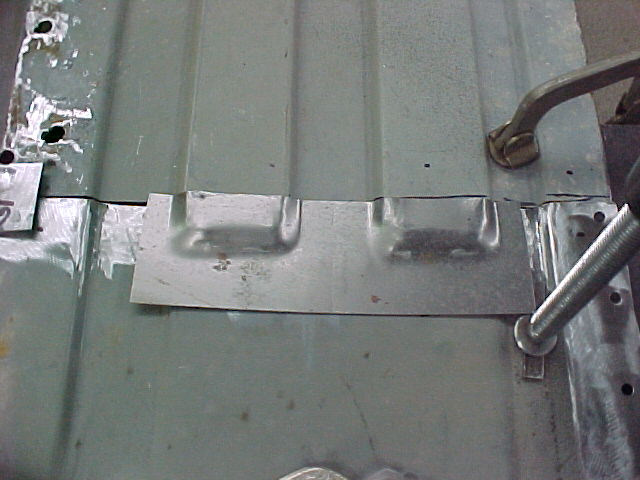
One section had floor ribs and the other didn't. Mel made a die from some 1/4" plate and made a couple of ribs that we welded into the floor to "terminate" the other set... Incredible. Here is the die and the 1st test "stamping".
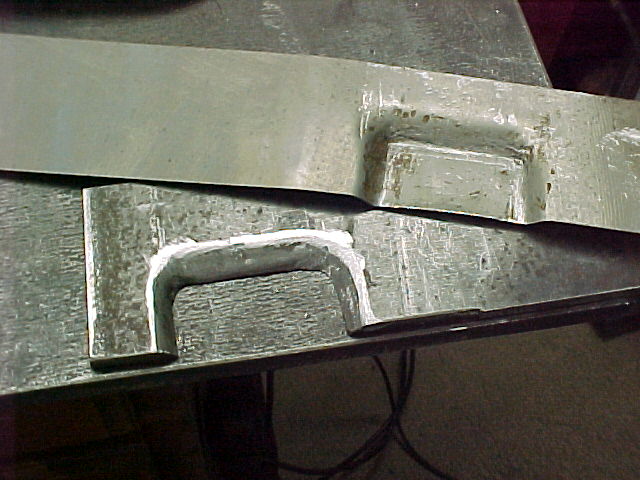
The lessons learned from that were applied to the die block. A little bigger radius at the back and some blending on the corners gave him the 2nd test stamping.
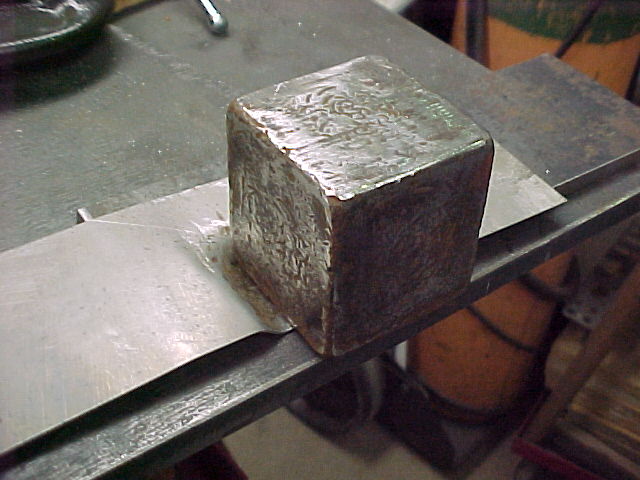
That's a winner!

He cut and fit them to the patch panel. Once these are weleded in you will never know.
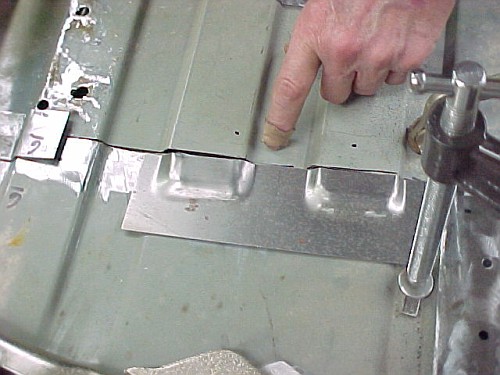
Tacked in and looking good. Thanks Mel!
Mark:
"Bad Ast" Astro Van. Just because I did it... Doesn't mean it's possible...
This my Bad Ast thread...
https://www.pro-touring.com/showthre...roject-Faze-II
This is my Fotki album...
http://astroracer.fotki.com/
01-22-2012 #370
Registered User
- Join Date
- Mar 2004
- Location
- Mid-Michigan
- Posts
- 2,764
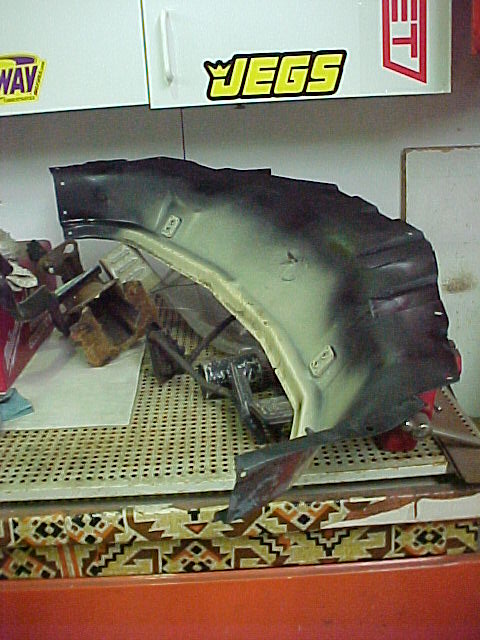
While MEl was finagaling with the floor stuff I was making patterns for the front of the Pass side wheel tub. Yesterday I got the back half done.
Pattern and wheel tub.

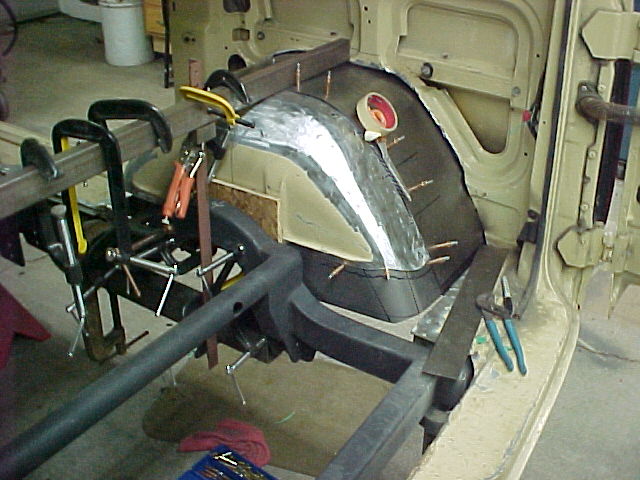
After a bit of rolling and hand bending I had it fitting well enough I could put a couple of cleco's into it.
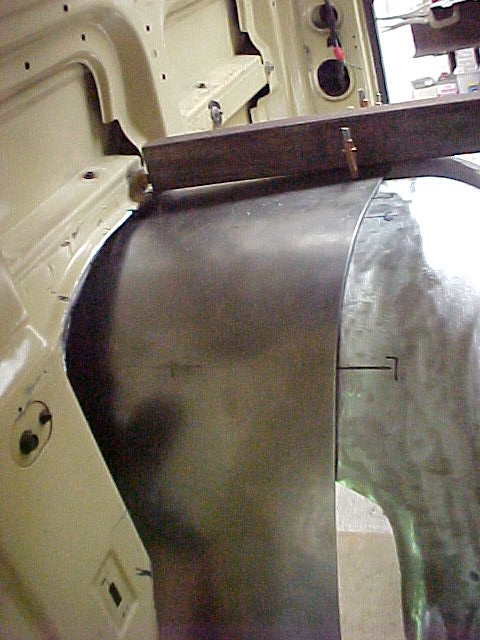
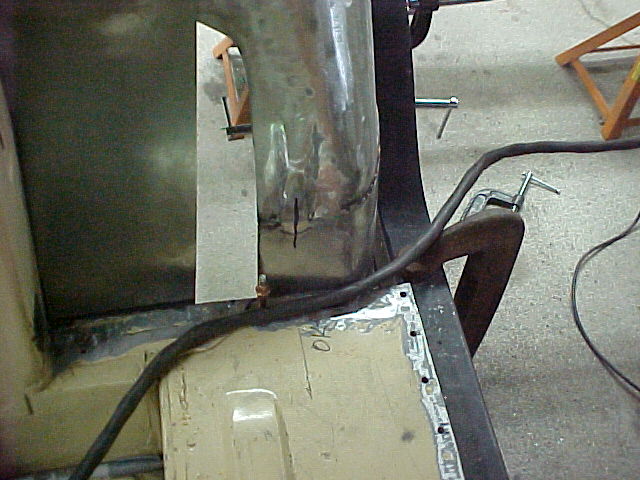
Had to do a bit of trimming at the lower right front corner. Three pieces of steel came together here and the outer jamb for the slider protruded inside as well so there was some work to do....
Both halfs are fitting fairly well right now. I still have abit of forming to do but I will take care of that when I start welding them together.
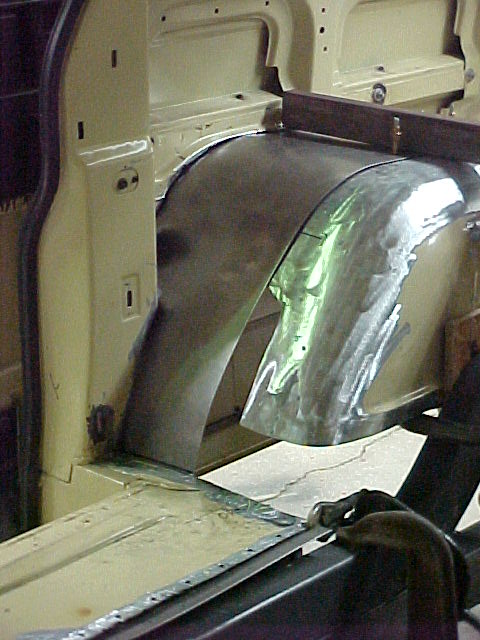
I also made the rear inner piece that wraps around to the side. This piece will get welded to the old tub and I will build a flange to recreate the floor that was cut out.

Still have a lot to do to wrap up the passenger side. I hope to get this done next weekend and have a good start on the drivers side.
Thanks for looking!
MarkMark:
"Bad Ast" Astro Van. Just because I did it... Doesn't mean it's possible...
This my Bad Ast thread...
https://www.pro-touring.com/showthre...roject-Faze-II
This is my Fotki album...
http://astroracer.fotki.com/
01-29-2012 #371
Registered User
- Join Date
- Mar 2004
- Location
- Mid-Michigan
- Posts
- 2,764
I worked all day yesterday at the real job so we didn't get out in the shop until this morning. Mel worked on the floor sections, doing a lot of grinding and cleaning up (read that making LOTS of noise and dust...)
He pulled out all of the engine cover panels and cleaned those up, finished some grinding and welding and got all of them primed. They look pretty good with some paint on them.

I made the template for the RH front filler panel


and got that cut out and fit in. Put a roll in it for the corner and put a little dink in it to finish a rib that was in the old panel.

Got it tack welded in and did a little cleanup grinding. I need to pull the tub out to finish the "dink" but this is well on it's way.


Getting the LH side set up for fabricating.
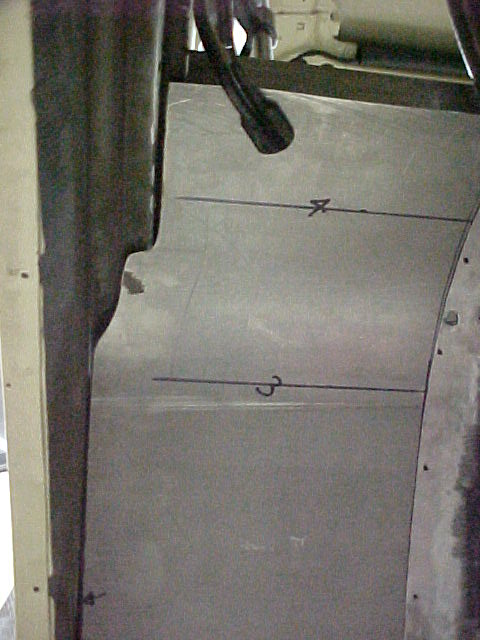
After the set up I got the rest of the old tin removed off the inner wall. To mark the outline I ran a straightedge across the gap and marked out the cut line with a marker.
I made another template out of the greenboard.
Fitting it to the outer sheetmetal.
This is where we knocked off for the day. We went in the house, had some cake and Mel headed home. Thanks Mel!Mark:
"Bad Ast" Astro Van. Just because I did it... Doesn't mean it's possible...
This my Bad Ast thread...
https://www.pro-touring.com/showthre...roject-Faze-II
This is my Fotki album...
http://astroracer.fotki.com/
01-30-2012 #372 Registered User
- Join Date
- Feb 2010
- Location
- ARIZONA
- Posts
- 139
Looks great. I really like the punch and die set. It's amazing what a little ingenuity can get you. That extra effort makes the project.
Larry
67 Camaro, 350 SB, Custom A-Arms & 3-Link
My Build https://www.pro-touring.com/showthre...LOVE-67-Camaro
01-30-2012 #373
Registered User
- Join Date
- Jul 2009
- Location
- Grand Rapids, MI
- Posts
- 1,559
Looking real good Mark.
02-15-2012 #374
Registered User
- Join Date
- Mar 2004
- Location
- Mid-Michigan
- Posts
- 2,764
Thanks Larry, thanks Will,
Haven't gotten much done on the van in the last few weeks. To much overtime and, if you've seen my "bad news" thread, dealing with a sick dog.
I did get the parts for the fuel tank. We cut them out yesterday. I'll get some pics shortly. I should be really excited about getting this stuff but things are pretty subdued around here right now. I'll get out to the shop this afternoon to take my mind off things.
MarkMark:
"Bad Ast" Astro Van. Just because I did it... Doesn't mean it's possible...
This my Bad Ast thread...
https://www.pro-touring.com/showthre...roject-Faze-II
This is my Fotki album...
http://astroracer.fotki.com/
02-15-2012 #375
Registered User
- Join Date
- Mar 2004
- Location
- Mid-Michigan
- Posts
- 2,764
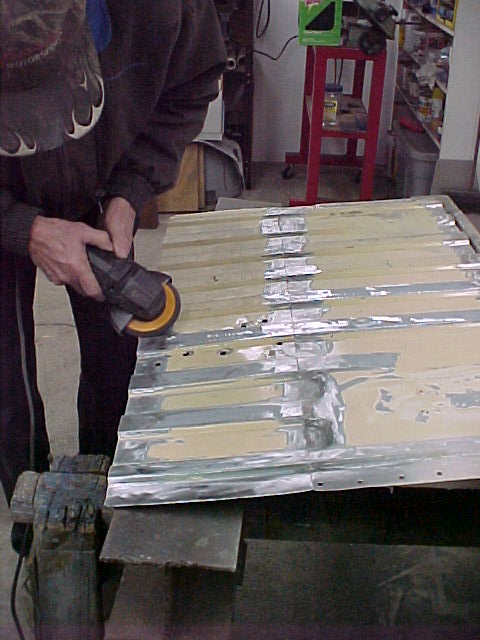
Got out in the shop for a bit and took some photos of the tank parts. These were all cut out on the CNC laser where I work. Took less then 20 minutes. I had multiples of the filler cover made so I can reconfigure it if necessary.

These pieces are ready to weld up after a little deburring.
Here is a pic of the "left overs". I'll have plenty of scrap for a while.
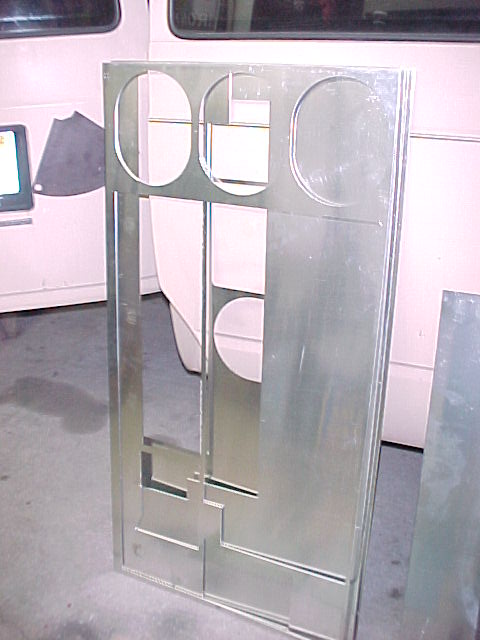
I also have to fab the anti-slosh plates for the fuel pick up and a couple of little filler pieces during assembly.
I have some trimming to do on the mid-plate for it to fit between the wheel tubs. I'll get all of this done and the tank completely mocked up before any welding begins.
Thanks for looking
MarkMark:
"Bad Ast" Astro Van. Just because I did it... Doesn't mean it's possible...
This my Bad Ast thread...
https://www.pro-touring.com/showthre...roject-Faze-II
This is my Fotki album...
http://astroracer.fotki.com/
03-04-2012 #376
Registered User
- Join Date
- Mar 2004
- Location
- Mid-Michigan
- Posts
- 2,764
After a month or so of Over Time I finally got a full weekend off from the money job and got some stuff done on the van.
Saturday I worked on the front half of the left rear tub, getting that cut out and fit to the outer wheel well.
Here it is on the bench after I had run it through the rollers. I found it was easier to put a bit more bend into the panel then it actually needed and then sneak up on the fit by slowly unbending it...

Things went fairly smooth and it was clecoed in quickly.
You can also see the lower "skirt" piece is made and clipped in at this point.
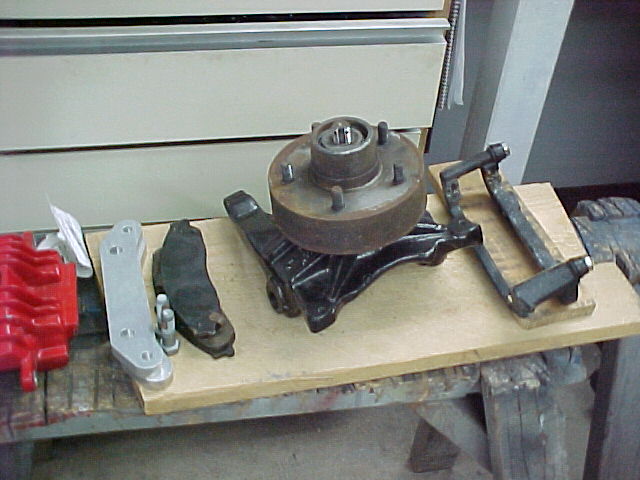
Mel worked on the front brake hubs.... This was a job. He used the trusty sawzall to remove the rotor from the hub.

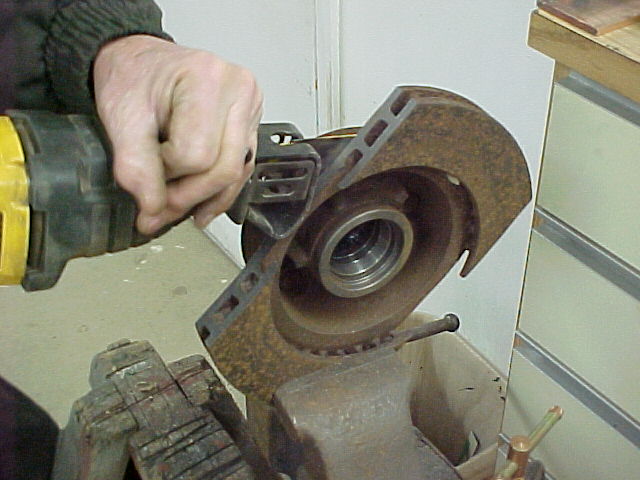
All cut down and ready for the lathe. These need to be reduced in diameter to 6" so they will fit in the Corvette front rotors. They will be shortened up quite a bit also.
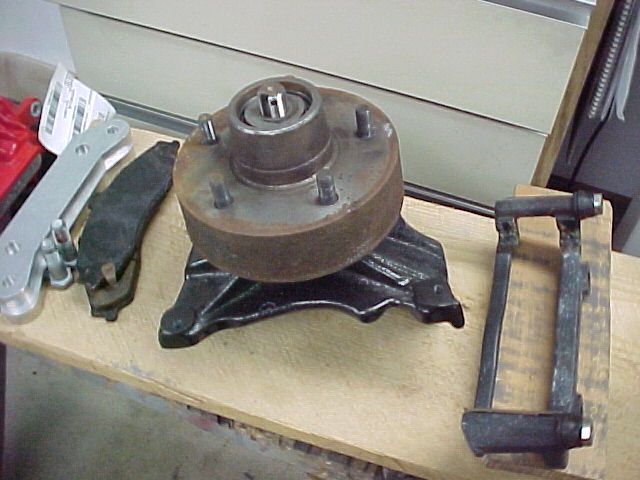
Once this is done we will verify caliper positioning and drill out the spindle for the 7/16-20 bolts that hold on the abutmemnts.
Doesn't look like a lot but we made some progress.
Thanks for looking
MarkMark:
"Bad Ast" Astro Van. Just because I did it... Doesn't mean it's possible...
This my Bad Ast thread...
https://www.pro-touring.com/showthre...roject-Faze-II
This is my Fotki album...
http://astroracer.fotki.com/
03-04-2012 #377
Registered User
- Join Date
- Mar 2004
- Location
- Mid-Michigan
- Posts
- 2,764
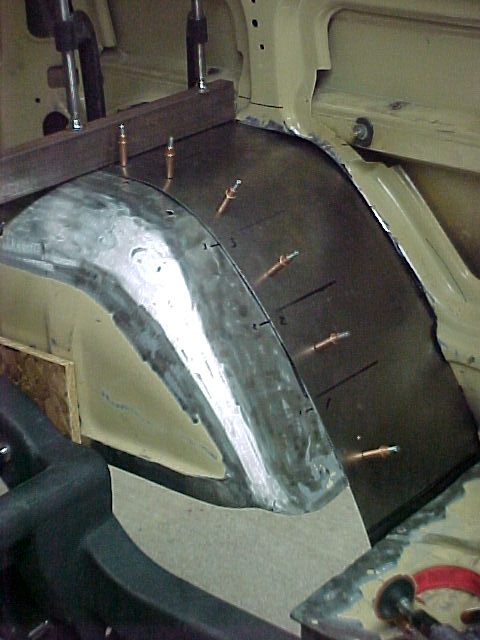
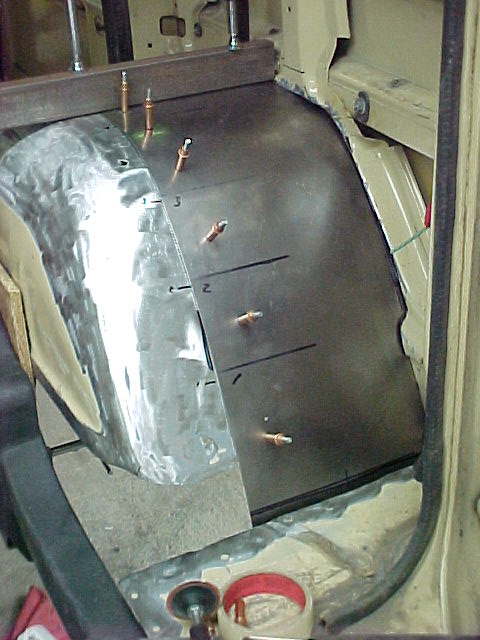
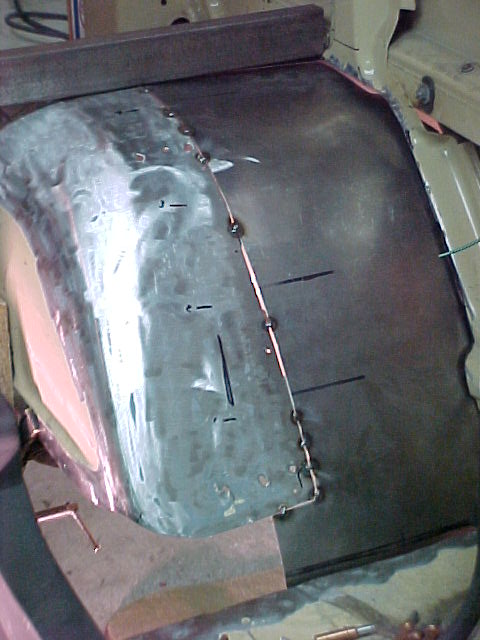
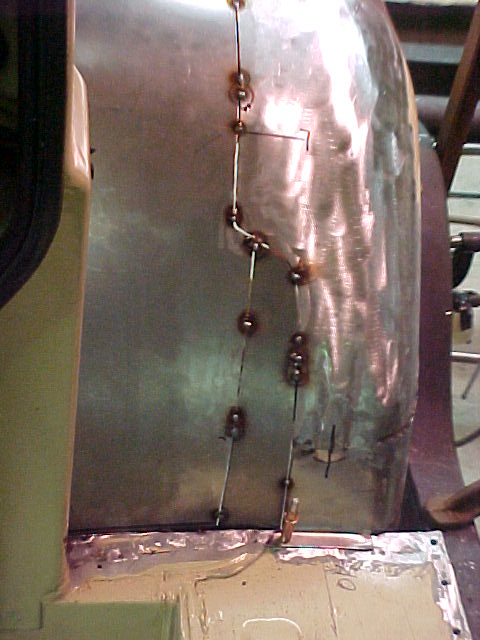
Got to do some tack welding on wheel tubs today! Once we were satisfied with the fit to the outer wheel well all of the new panels were clecoed in place. On the underside I marked the cut lines to trim the new panels for butt-welding to the original wheel well.
Once all of the trimming was done we used those blade style welding clamps to set the gaps and hold the edges of the panels in alignment. You can see a couple in the top of this pic.

They work very well. After a few tacks they come out and we move on to the next panel

This is the right rear.
The right front. We also made the piece to fill the hole from the slider door frame.
Once the tubs were one piece we removed them for finish welding.
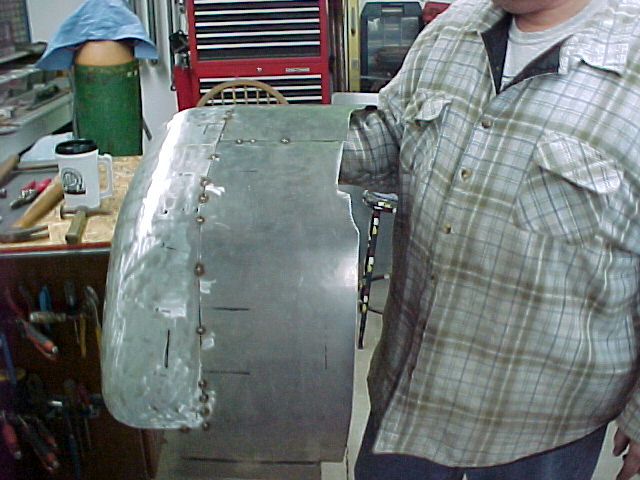
This pic shows all of the contouring invloved working around the slider door track...
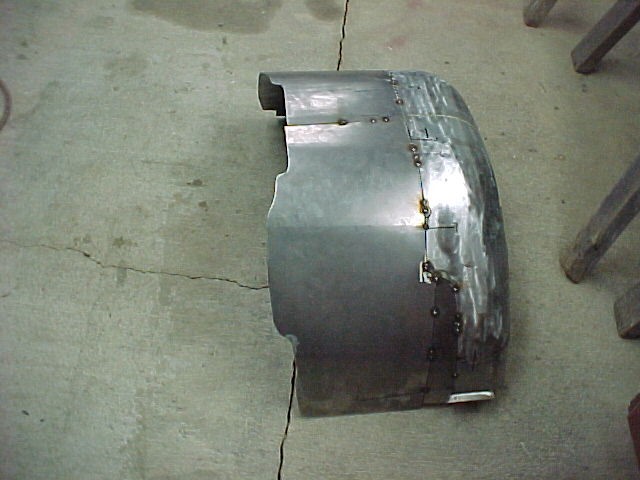
The finish welding will happen later. We were pretty well done in at this point. After a month or so off we lost some stamina...
Thanks for looking. More to come later.
MarkMark:
"Bad Ast" Astro Van. Just because I did it... Doesn't mean it's possible...
This my Bad Ast thread...
https://www.pro-touring.com/showthre...roject-Faze-II
This is my Fotki album...
http://astroracer.fotki.com/
03-04-2012 #378
Registered User
- Join Date
- Jul 2009
- Location
- Grand Rapids, MI
- Posts
- 1,559
Nice progress Mark. It may not look like much, but it takes a lot of time. Keep rolling man!
03-05-2012 #379 Registered User
- Join Date
- Apr 2001
- Location
- The Netherlands
- Posts
- 1,509

Nice! I was waiting for an update:-)
03-06-2012 #380
Registered User
- Join Date
- Nov 2011
- Posts
- 126
holy ****. This thread is a winner. out of all of the build threads I've viewed this one is definitely in my top 5. You do a great job in detailing the work that you did with pictures/text etc. I love it. Not to mention the fabrication you do is very good. I'm very impressed. It's nice that you have a friend that you can trust and seems to have the same attention to detail and idea of where you want to go with the car. What makes it all even better is its an astro van. I guarantee nobody has done this much work to a van! awesome.
I have a couple questions though. What software are you using for all of the modeling? Is that what you do for "real" work? I had a bunch more but I can't recall them. Keep up the good work. I look forward to seeing updates.

 Reply With Quote


