

Results 1 to 20 of 76
Thread: 1971 Pontiac Lemans Convertible
-
06-14-2012 #1
 Registered User
- Join Date
- Nov 2011
- Location
- Springfield, OH
- Posts
- 58
1971 Pontiac Lemans Convertible
I have been lurking on this forum for almost a year now learning an amazing amount of information from all of you and your impressive builds. Thank you for making the effort to publish your experiences, it has been a huge help to me.
To show my appreciation to the Pro Touring community I am starting this build thread for my project to share what I have learned and accomplished with the hope that others can learn from me.
First, some background. I am 52 years old with a mechanical engineering degree. I worked at the Boeing airplane factories for many years where I learned a lot about airplane manufacturing, materials, fasteners, etc. I have also enjoyed my woodworking hobby for many years, for the last several years I turned that into a cabinet-making business. So I am good with my hands making things and figuring things out.
I have had two car projects in the past. The first during high school was a 1978 Plymouth Volare with a V8 and four speed (I know, sounds lame now but Dad worked for Chrysler and I ordered it new with the features I wanted, paid cash saved from after school jobs). I did the usually hot rod stuff, four barrel carb, headers/exhaust, wheels tires, etc. Learned a lot about cars from this effort, especially from my mistakes! Second car was several years later, bought a 1972 Datsun 240Z where I changed carbs to a Holley four barrel, reupholstered interior to black and did a crude red paint job.
Fast forward to last year; kids are teenagers, have time/money/place to do another car project, and divorced so no one to justify spending money to. My 18 year old son and I got to watching Overhaulin episodes on Netflix last year, he would keep asking me if we could do something like that. I initially wasn't real crazy about it, but the more I thought about it the more I liked the idea.
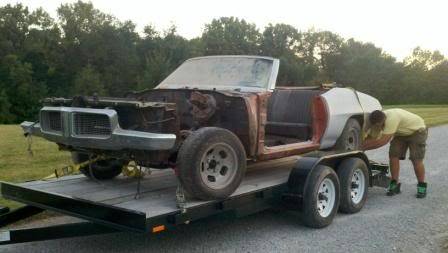
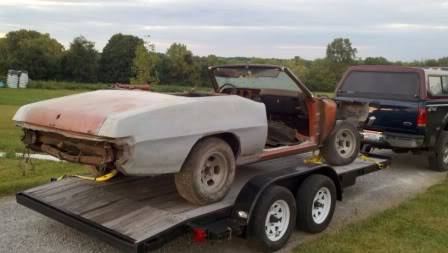
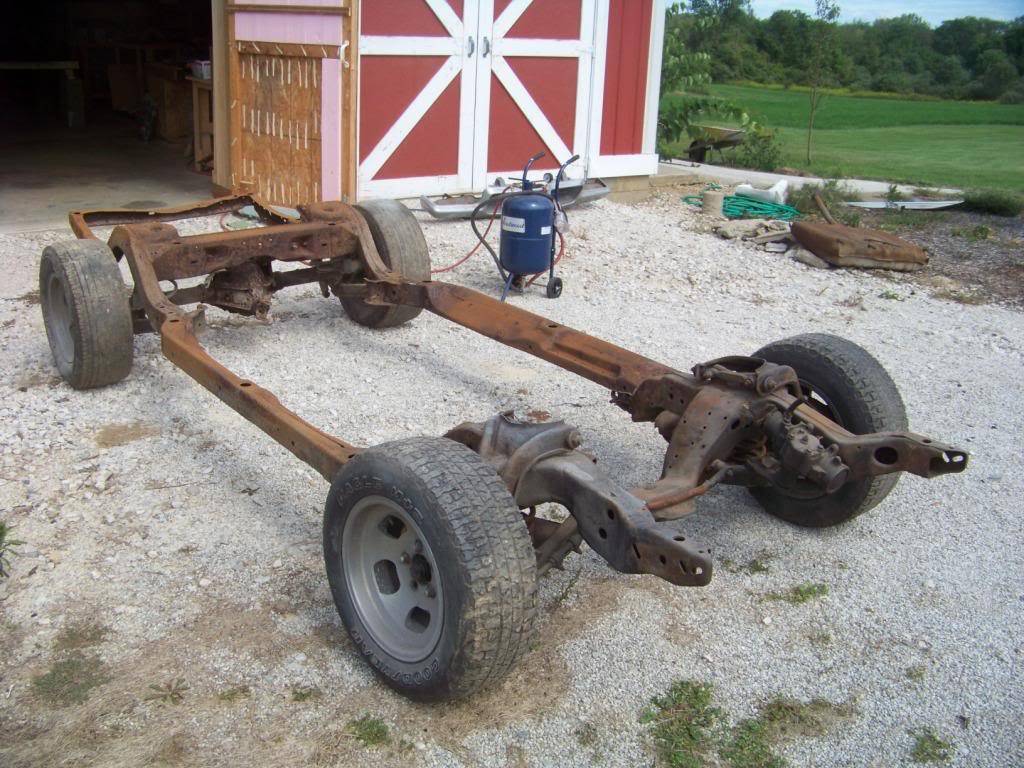
So last summer went searching for a project candidate. Looked for mostly GM (easier to get parts), and something cheap to conserve other money for upgrades. I ended up buying a 1971 Pontiac Lemans convertible. Previous owner and his dad bought it in pieces 10 years ago, it sat in their barn untouched until I bought it. He was asking $2500, I paid $2000. He said "floors are solid", I soon found out as many of you have what a misused phrase that is . . . Being a midwest car it has rust issues, some I was aware of when I bought it, some discovered later.
Pictures below show us bringing it home:
I also got bumpers, front sheet metal, two sets of doors, seats, most of the exterior trim, etc.
Plan is to do a mild Pro-Touring build with LS1 power, and hopefully get my kids involved now and then so they can learn about cars with me.
We started this build last fall and have worked on it steadily since then making a significant amount of progress. I thought I would post an update every few days covering all of my progress made between then and now and then hopefully keep it updated. I will try to include details and part numbers as much as possible.
Thanks for reading.
-
06-14-2012 #2
Registered User
- Join Date
- Nov 2011
- Location
- Springfield, OH
- Posts
- 58
Deconstruction started as soon as we got it home. I took the advice of others and tagged and bagged removed parts and took pictures as much as possible.
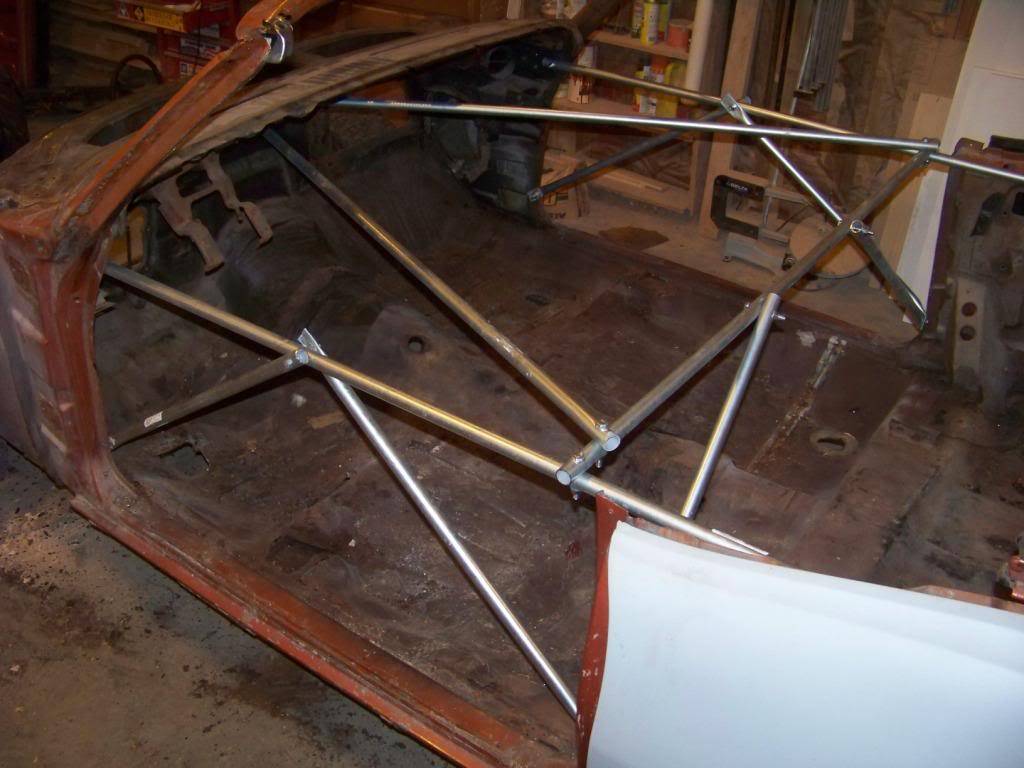
Since it's a convertible I added bracing to the interior to keep it folding up like a taco while it was off the frame. Since my welding skills were zero at that point and steel can be a little pricey I looked for materials that might work and come upon electrical conduit which is relatively cheap and easy to work with. I attached these to the car and to each other with 5/16" bolts. I tried to triangulate the bracing as much as possible to keep the body from flexing too much, it seemed to work really well and kept it rigid for months.
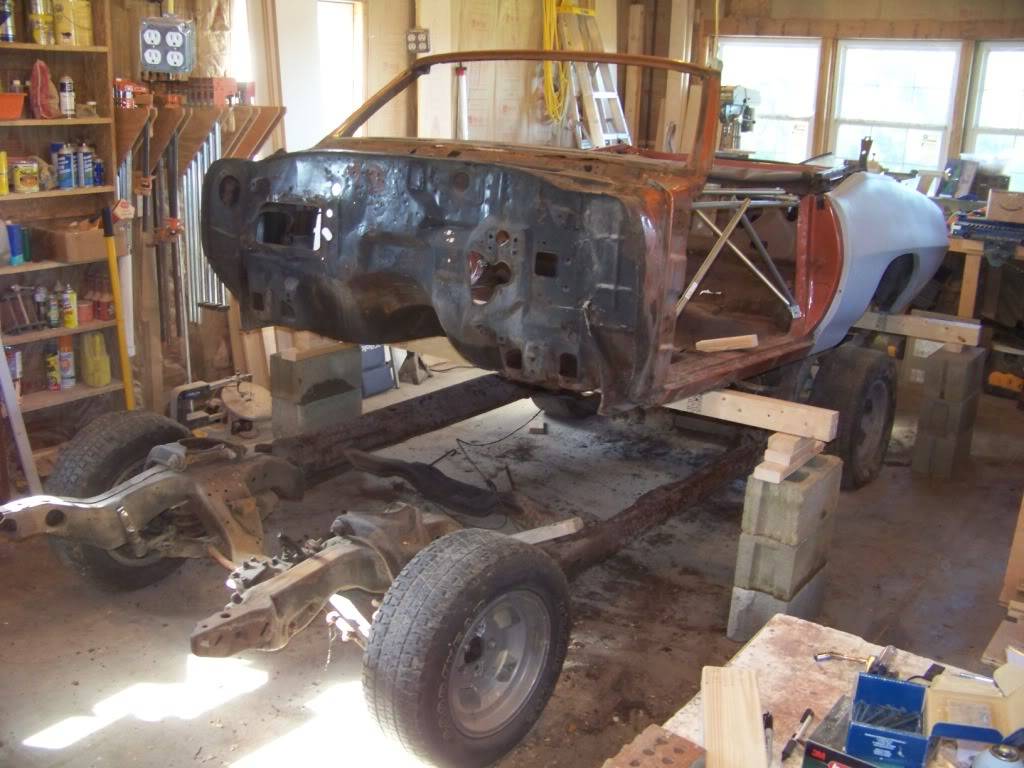
With that done I was ready to remove the body. Removing the body bolts proved to be quite the chore due to rust, I think only one or two came out without damage. Some snapped in the middle, some the welded cage broke off. Those bolts I wasn't able to get off I just cut through. I tried soaking them with PB blaster without much luck. Several of them had rusted to the point they were less than half their original diameter. Once the body bolts were out it was a slow and careful process using wood and concrete blocks and a floor jack to raise the body high enough to roll the frame out.
To sandblast the frame and keep the mess outside I rolled it outside in front of my shop. I bought an Eastwood blaster which I was very happy with. The seller of the car also sold me his old 80 gallon air compressor which was very helpful supplying the large quantities or air required by the blaster.
The frame was in pretty good shape, mostly surface rust with the exception of some rusting out around three body mount holes. I fixed that with the repair "washers" some of the restoration companies sell.
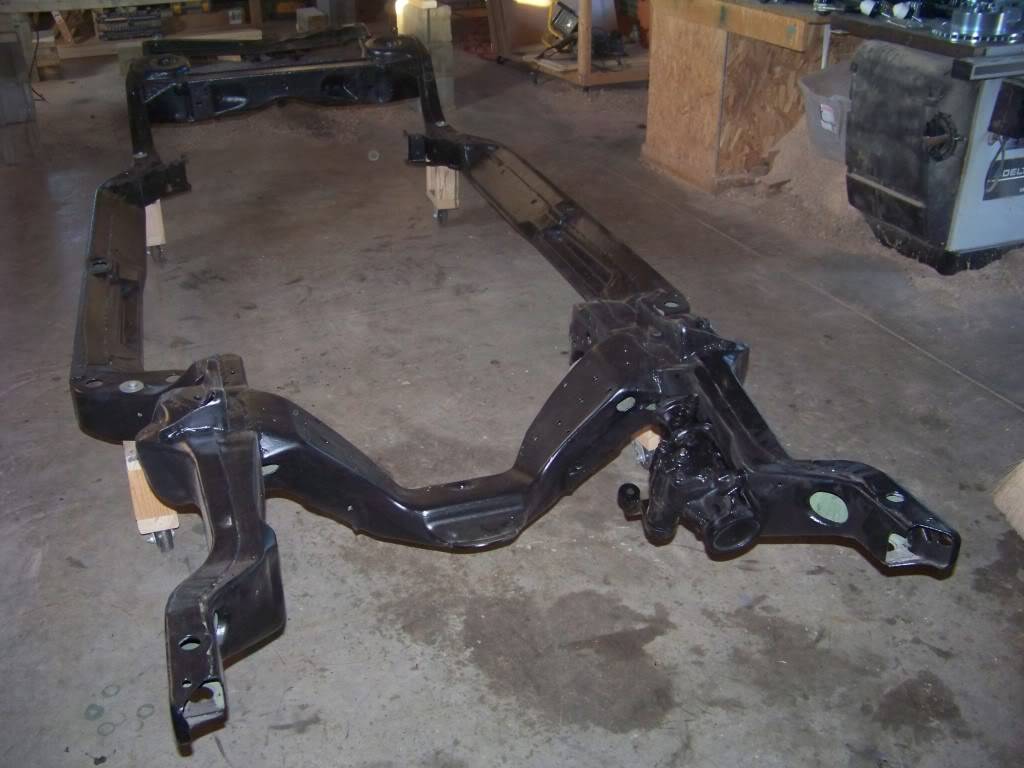
To finish the blasting I removed all of the suspension, brakes, steering, and remaining hardware and tubing. To refinish the frame I used all Eastwood products; Rust Convertor first, then Rust Encapsulator, then two coats of epoxy primer and two coats of their epoxy chassis paint. Internal Frame Coating was sprayed on the inside of the frame. This picture shows the frame refinished and the caster supports I made to make moving the bare frame around easier.
-
06-14-2012 #3
Registered User
- Join Date
- Jun 2012
- Posts
- 427

nice :-) keep it up
-
06-14-2012 #4
Registered User
- Join Date
- Feb 2012
- Location
- Ohio
- Posts
- 129
Im doing a 70 gto... 2010 Camaro LS3 myself...
The body is off to the sandblaster next week, my frame is done also.
-
06-16-2012 #5
Registered User
- Join Date
- Nov 2011
- Location
- Springfield, OH
- Posts
- 58
Now that the frame was done it was time to put suspension and brakes on. The first thing to go on was an updated steering box. I learned from the Chevelles forum a popular and cheap upgrade is to replace the original slow steering box with one from a mid 90s Jeep Cherokee. Surprisingly it bolts right up just like the original, the only thing that has to be done is to remove the Jeep pitman arm and replace it with the original A-body one. The advantage of the Jeep box is a faster gear ratio. You can see the steering box installed in the previous post about the painted frame.
Being the geek/engineer that I am I do a lot of research before I buy something, especially if it's expensive. My research into suspension led me to get the Stage 2 Plus Touring Suspension package from Savitske Classic and Custom. As a lot of you have also found out, Mark Savitske literally "wrote the book" on muscle car suspension upgrades (you can find it on Amazon) and is extremely helpful and enthusiastic with questions. The package is a bit of a hodge podge of suspension bits from different vendors, but Mark apparently has searched the industry and picked the best component of each type that work well together. The package solves the suspension issues these cars come with and work more efficiently with the upgraded brakes, wheels and tires these cars get. After dealing with all the rust I was also motivated to get the stainless suspension bolt upgrade. In fact, I use stainless hardware as much as I can for everything underneath the car and in the engine bay. Picture below shows the suspension bits being organized for installation.
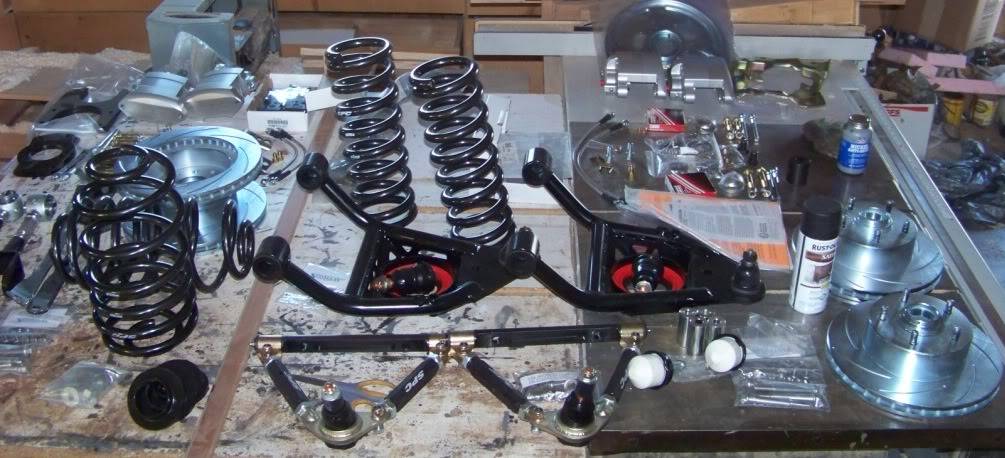
The picture also shows the brake package I got from Stainless Steel Brakes. I ordered package A123-1A for the front and A125-26 for the rear. The fronts appear to use the stock design for things like the brackets, shields, bearings, etc. They are designed to use the stock spindles so I got some new spindles also. The calipers are pretty cool looking - large aluminum billets with a brush finish and SSBC engraved and them. Different powdercoated colors were an option, but I just got them in the natural finish.
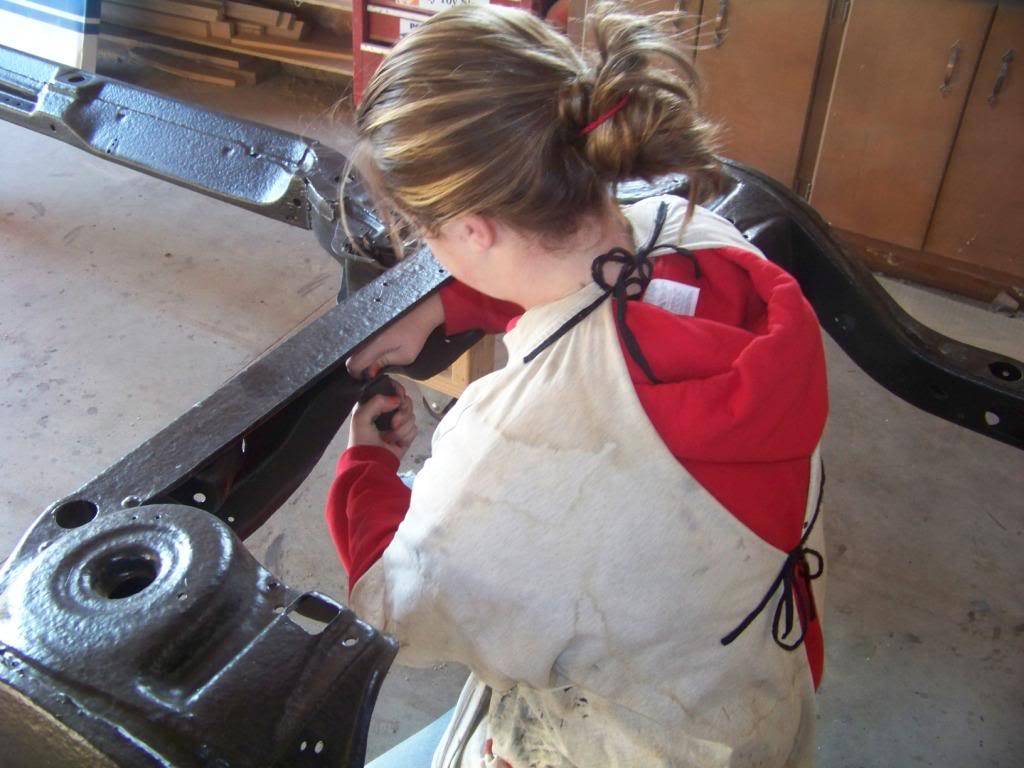
I gave my daughter the honor of putting the first new part on, the rubber jounce bumper in the frame:
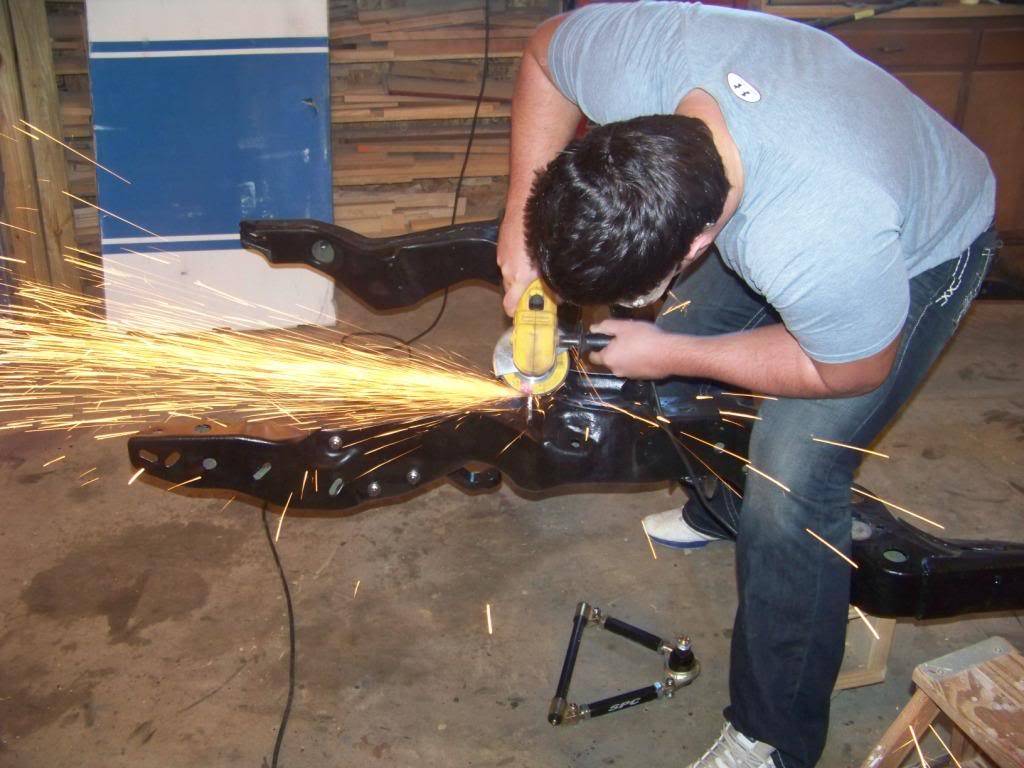
Ove the course of the next couple of months the suspension and brakes were installed. The design of the SPC upper arms requires some grinding for clearance on the frame bracket; my son enjoyed creating sparks while he did that:
I also decided to rebuild the rear end. In doing so I found to my surprise a 12-bolt Chevy rear end. This was a plain Lemans with power drum brakes and no A/C so I'm I don't believe it came this way. I am guessing a previous owner swapped it in the past. It was leaking around the axle seals and I wanted to replace all the bearings so I bought a rebuilt kit and started tearing it apart. On teardown I found the races on the axles were pitted so new axles and studs went in.

Some say to leave rear end rebuilds to the experts, but I thought I would give it a try. One of my goals on this project is to do as much as possible ourselves. It's not so much to save money although that's part of it, it's for the challenge and learning experience gained with doing it myself. I got it back together as best I could, if it ends up not working out I can take it to a shop to get it redone. Plus it has a 2.7 gear and is non-posi so I will probably want to upgrade those in the future also. It's good enough for now. This picture shows the rebuilt rear end going back in with the new suspension and brakes (my son and his friend, high school football players are handy to have around for jobs such as this, that rear end is heavy!)

The final shot of this post shows the new suspension and brakes mostly installed. I also bought and installed the factory braces that go between the rear upper and lower control arm mounts of the frame. All of the work in this post took place over 2-3 months last fall.
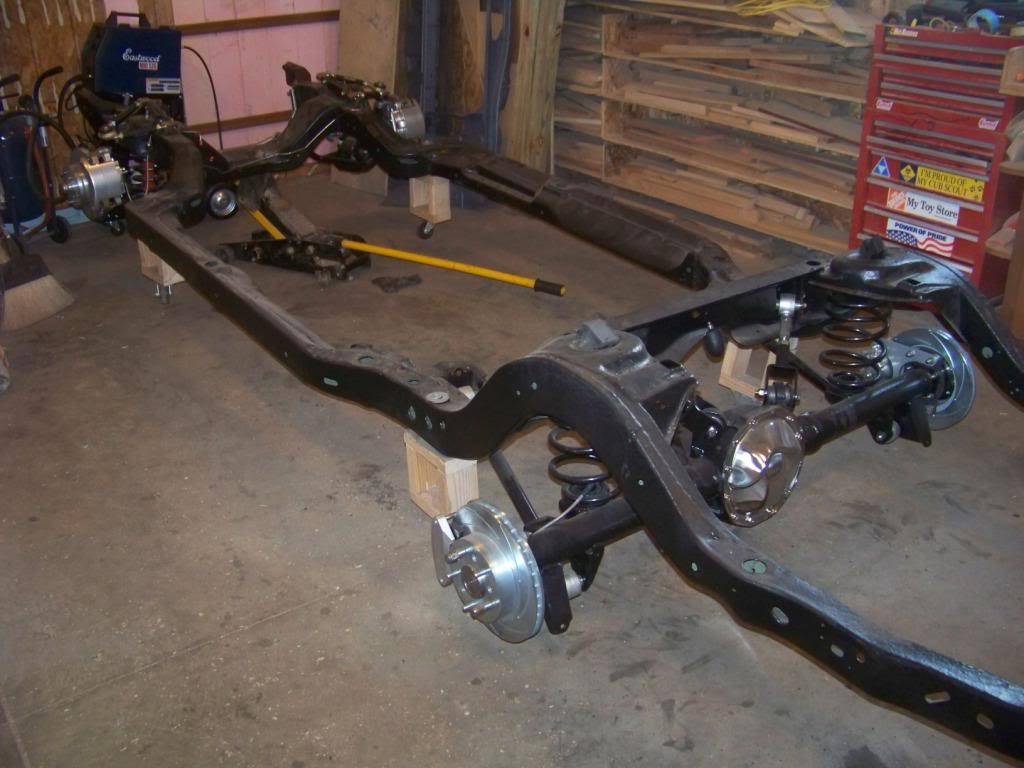
Since then I moved the rear calipers to behind the axle, it worked out better that way for the brake line and emergency brake line hookups.
I STILL haven't installed the triangular rubber bumpers that go into slots on the rear axle (you can see them in the picture on top of the spring pockets), any suggestions on how to get them in?
-
06-16-2012 #6
 Registered User
- Join Date
- Jan 2009
- Location
- Lawrenceville, Ga.
- Posts
- 440
Very cool!
There are 2 factors in Autocross, Tires and the loose nut behind the wheel.
Paul Grala
69 Mach 1 project (For Sale)
78 Cobra
87 GT
98 Expedition
-
06-17-2012 #7
 Registered User
- Join Date
- Feb 2005
- Location
- Sydney, Australia
- Posts
- 1,797

Nice project...I love pontiacs.
If you can get a floor jack under the spot where the bump rubbers go in, get a piece of timber that'll reach up to the rubbers, grease the tab holes where the rubbers go through and press them up from underneath...get those big guys to sit on the chassis for you.Regards,
Leigh
Sydney, Australia
1971 Firebird 455
https://www.pro-touring.com/showthre...Project/page27
-
06-19-2012 #8
Registered User
- Join Date
- Nov 2011
- Location
- Springfield, OH
- Posts
- 58
With the frame in pretty good shape I turned my attention to the body. Of course I found the floors to be in worse shape than I thought. As I tore into it I found amateur repairs such as plates tack welded in and even a repair under the driver's feet composed of foil tape and Bondo. The front and center floor braces were pretty much shot, and the area under the rear seat had significant issues also. The rockers were fortunately mostly intact, just some small holes near where the braces attach. I started on the driver's side by cutting the damage back to good metal. I bought repair sections for the two sides driver's and passenger, the section under the rear seat, and the front and rear braces. This picture shows the driver's floor section fitted in place with clecos.
At that point my welding skills were very much in the beginner stage, especially with sheet metal. That fact and my desire to do as much as I can myself led me to investigate some alternatives. After much research I decided to use 3M Structural Bonding Adhesive. Structural adhesive has been used for many years in the factory, in some cases for the entire car. My 96 Chevy truck has the hinges bonded to the cab structure with no problems. I fit the panels with a 1" overlap, ground the mating pieces to bare metal, applied the adhesive to both sides and installed with stainless steel blind rivets as "clamps". I thought it came out great, for me better and easier than welding. It doesn't look as slick as smoothed butt welds, but the top will be covered and I don't care what the bottom looks like; I am not trying to build a show car. I don't think I would have done this with a unibody car but with this car having a full separate frame I feel comfortable with it.
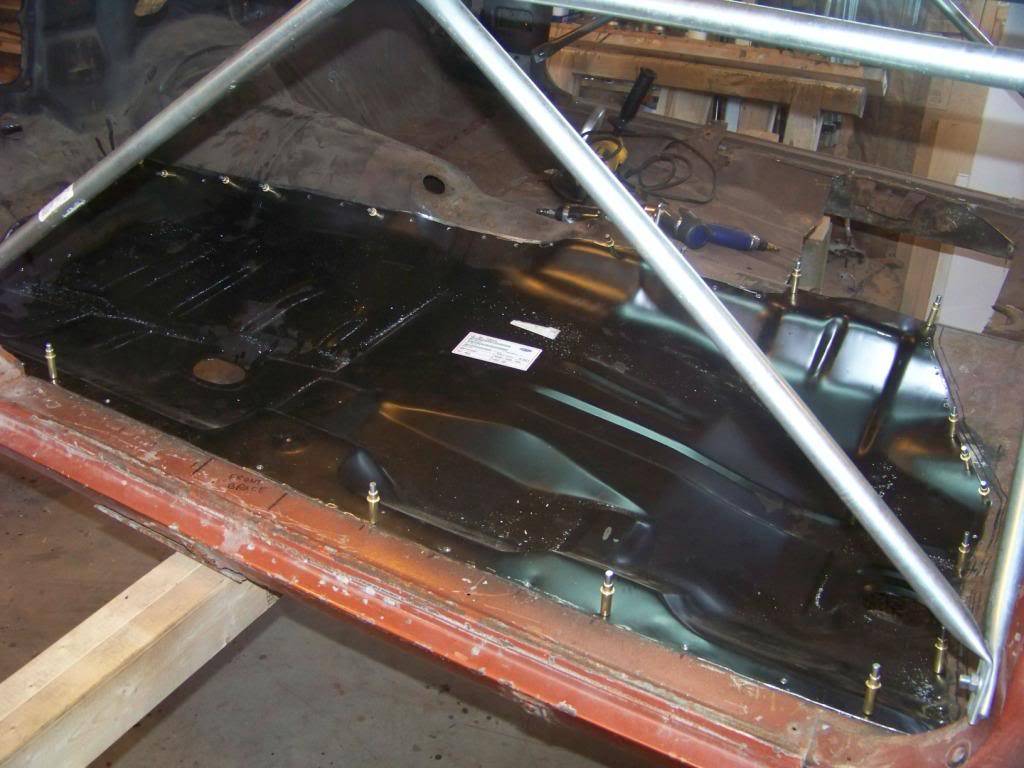
Access to the driver's and passenger side floors were fairly easy with the body on blocks, but installing the new floor braces, repairing under the rear seat and trunk areas was going to be more difficult. I looked into getting a rotisserie but didn't want to spend money for something that would get used for a short time. I again did some research and discovered the wood "rolltisserie" idea on a few other forums. My version is shown below.
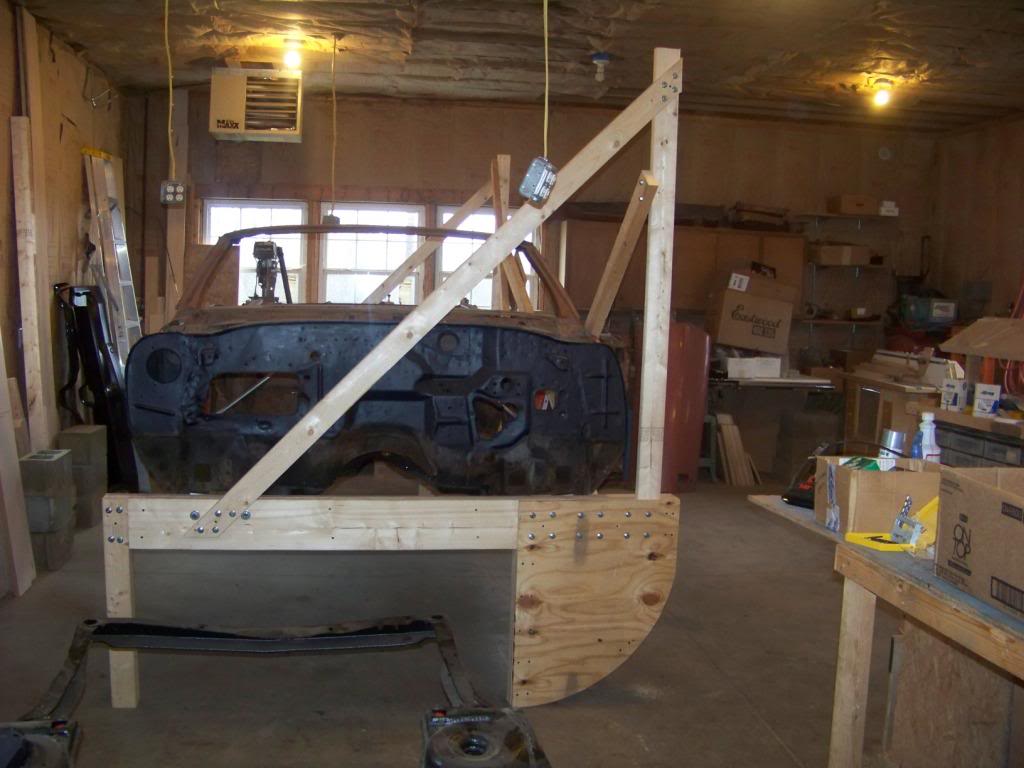
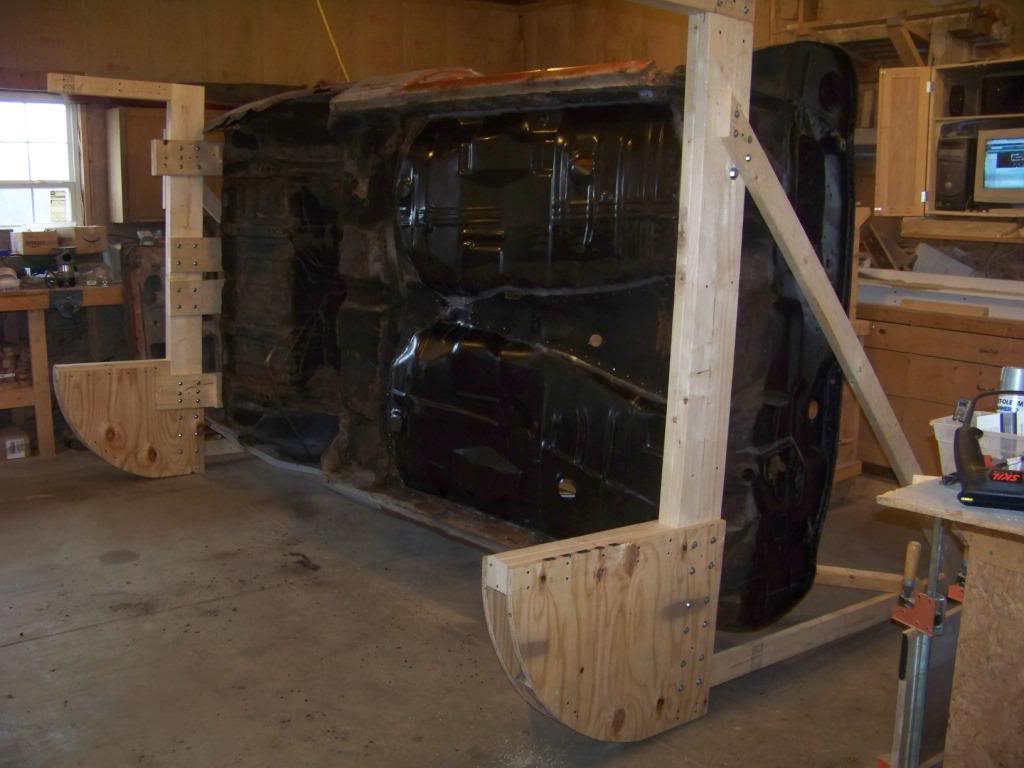
It may look hokey but it actually worked really well, was very stable, and made working on the floors much, much easier. I had my son help me rotate it up and down, but I probably could have handled it by myself; it was that easy. The rolltisserie is attached to the cowl boxes in the front and the bumper bracket bolts in the rear.
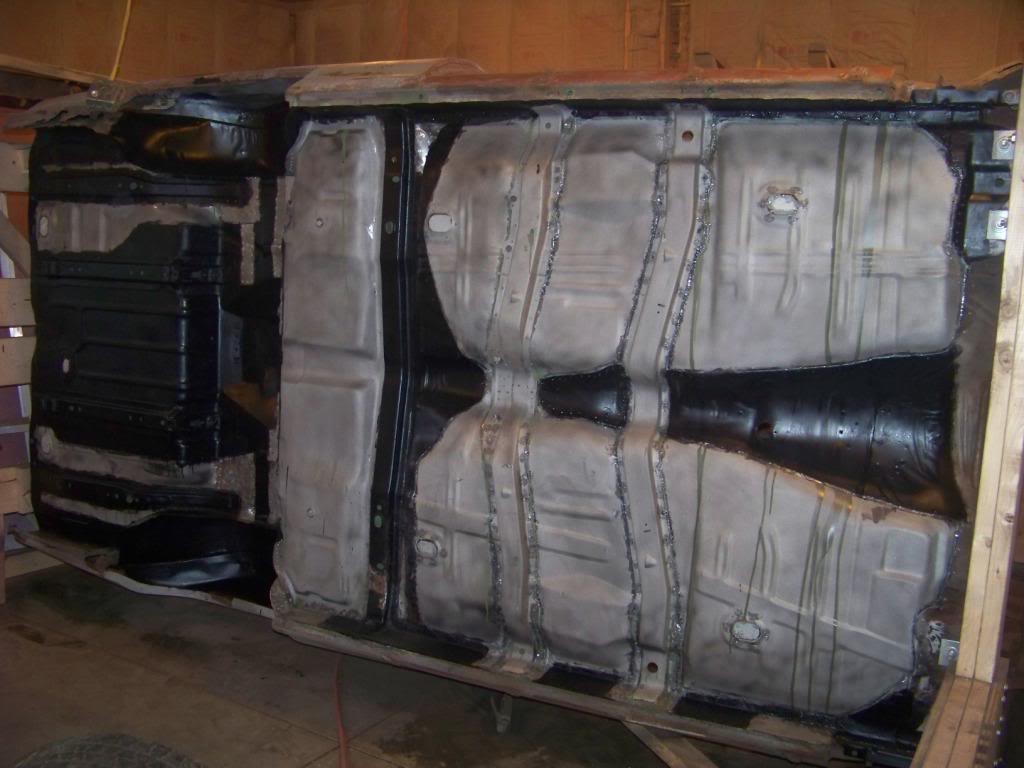
I continued cutting out bad metal from the floor and trunk areas and installed new sheet metal with the same procedure. This next picture shows how much metal I replaced. The black areas are original sheet metal treated with a rust convertor. The bare metal areas are the new sheet metal.
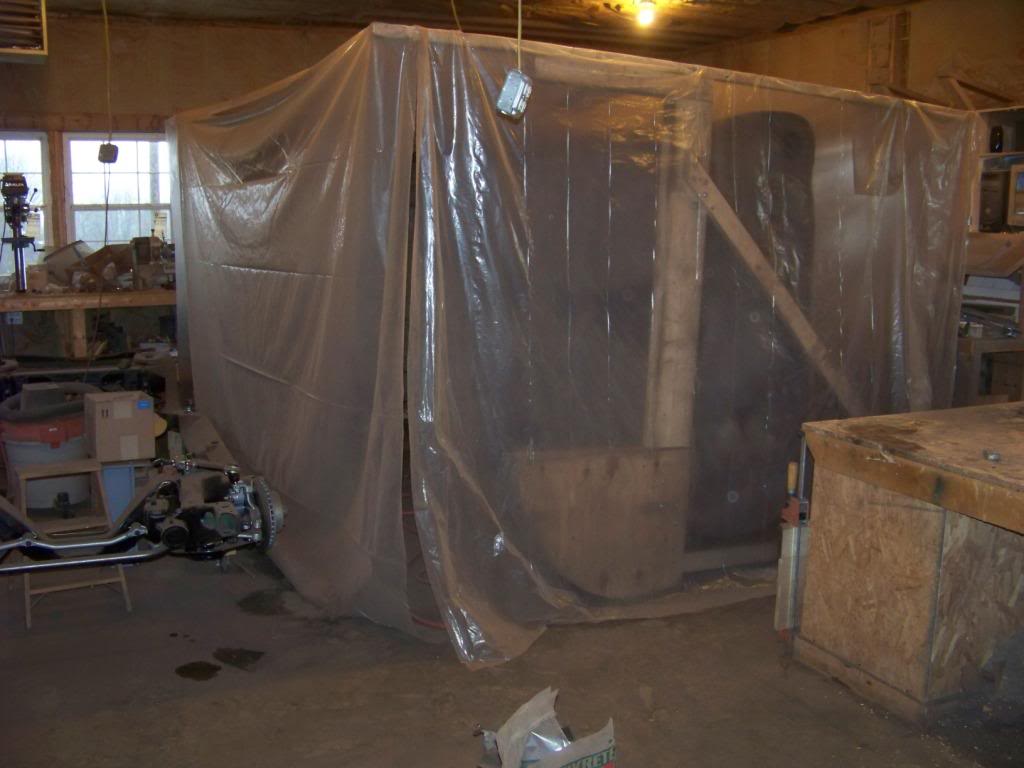
I wanted to blast the metal floor top and bottom to remove the remaining surface rust and prepare for coatings. I didn't want to make a mess of my shop so I make a "tent" over the rolltisserie. It worked great, but was sometimes hard to see through the dusty fog the was created inside. I wore goggles and a respirator when blasting.
Once the repairs and blasting was done I treated the existing sheetmetal with rust convertor and encapsulator. Then all areas got two coats of epoxy primer, seam sealer, and two coats of chassis paint. Then several layers of undercoating were added to the bottom.
LS1 swap coming up next.
-
06-20-2012 #9
Registered User
- Join Date
- May 2007
- Posts
- 10
That would be a 70 front end in your first photo. I had a 71 and loved that car. It was from wisconsin. The frame began to fall apart and I didnt have $ to move forward with it at a young age of 16. Good luck with yours!
-
06-20-2012 #10
Registered User
- Join Date
- Feb 2005
- Location
- Sydney, Australia
- Posts
- 1,797
Nice job on the repairs.... I like your timber body roller.
Regards,
Leigh
Sydney, Australia
1971 Firebird 455
https://www.pro-touring.com/showthre...Project/page27
-
07-03-2012 #11
Registered User
- Join Date
- Feb 2012
- Location
- Ohio
- Posts
- 129
thats ALOT of welding

-
08-05-2012 #12
Registered User
- Join Date
- Nov 2011
- Location
- Springfield, OH
- Posts
- 58
It's been almost two months since I updated this post, I have been busy with work and summer activities.
I wanted to get the frame as complete as I could before I put the body back on it because it's much easier to work on it with the body off. This included things like the engine, transmission, cross member, headers, exhaust, etc. So that meant I needed to source an engine and transmission. I had been looking quite a bit at buying a drop-out engine/trans from a yard, buying an older Camaro or Firebird, trying to find engines and transmissions on craigslist, etc. An idea I came across on other builds that I found very appealing was to buy an entire donor car. As I did my research a logical donor car to me was a 2004-06 GTO. They have newer LS engines, nice interiors, and typically have lower miles than older LS1 Z28s or Trans Ams. Lots of salvage yards have listings on the Internet and I started to search those for a good candidate. I found a 2004 GTO with 60K miles at a yard a couple of states away.
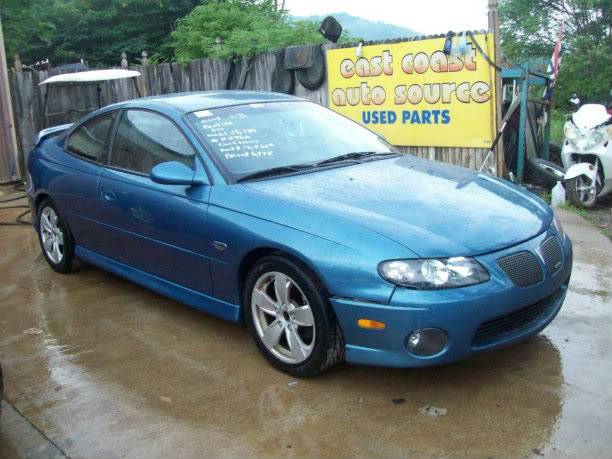
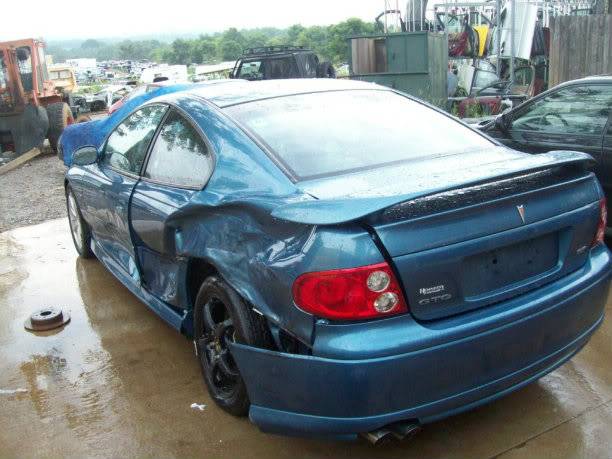
As you can see I bought it from East Coast Auto Source in Virginia. I bought it through phone calls and emails, they were very good to deal with. They even arranged for shipping with a carrier they recommended. It arrived less than a week after I bought it.
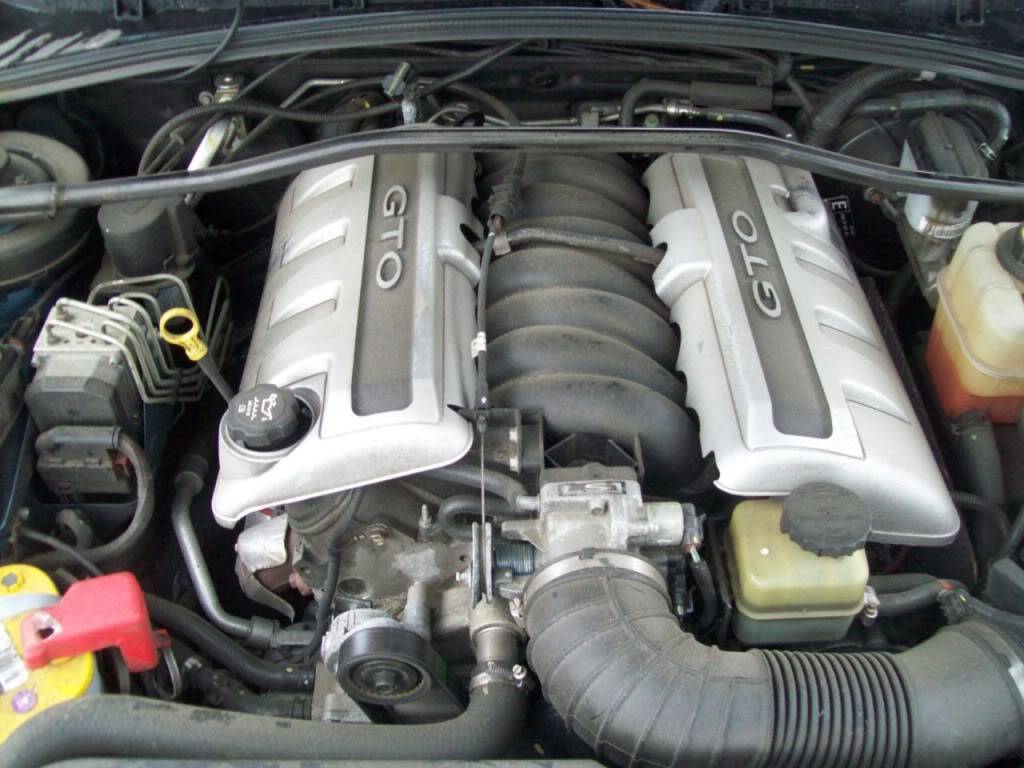
It obviously got hit on the side, which was a plus for me. I was reluctant to buy one that got hit on the front since I didn't want to worry about what was damaged under the hood. It arrived with a broken ignition lock and no battery, after I dealt with those issues I was able to start it. It actually drove just fine (up and down the driveway).
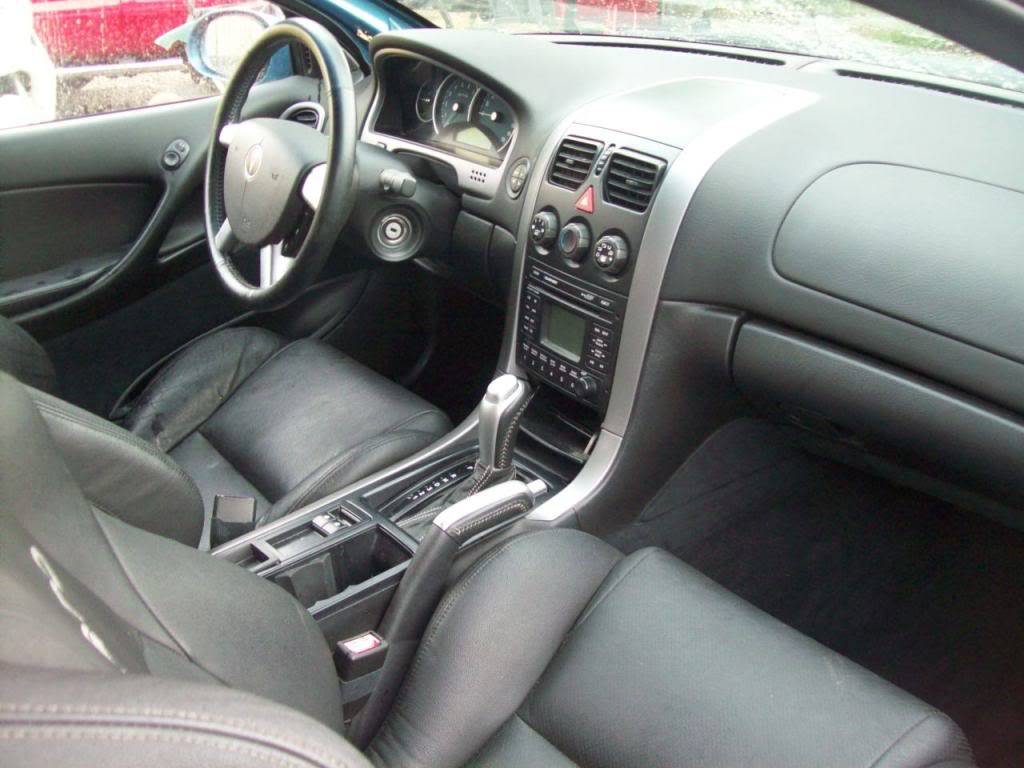
My plan is to get quite a few parts out of this engine, transmission, radiator and cooling fans, wiring harness, most of the interior including the dash, console, front & rear seats, and other miscellaneous bits. Then I will sell whats left (which will be mostly body parts, suspension and wheels/tires) and cut up the carcass and recycle the metal. Based on my research and calculations I should make out pretty well with this, it will be much cheaper than buying all of the parts I need used on ebay and definitely cheaper than buying these parts new. I am hoping there is good karma here also parts from a newer Pontiac going into an older Pontiac.
Next up, disassembly of this donor car.
-
08-05-2012 #13
 -Moderator/Sponsor-
- Join Date
- Apr 2001
- Location
- The City of Fountains
- Posts
- 16,117
Nice buy. Why not try to adopt the ABS as well?
Andrew1970 GTO Version 3.0
1967 Cougar build
GM High-Tech Performance feature
My YouTube Channel Please Subscribe!
Instagram @dr__efi
I deliver what EFI promises.
Remote Holley EFI tuning.
Please get in touch if I can be of service.
"You were the gun, your voice was the trigger, your bravery was the barrel, your eyes were the bullets." ~ Her
-
08-05-2012 #14
Registered User
- Join Date
- Nov 2011
- Location
- Springfield, OH
- Posts
- 58
Andrew,
I would like to be able to transfer the ABS over. I have done some research on it and found very few builds (one?) that have done it. The consensus seems to be that it isn't feasible since the ABS computer has to be programmed for the particular car, taking into account weight, tires, etc. Plumbing in the ABS module wouldn't be too big a deal but the wheel speed sensors would have to be mounted somehow. It's something I may look into deeper later when the car is all done.
By the way, your build was one that inspired me, I read and re-read it several times for ideas. Thanks for making the effort to document what you did.
Phil
-
08-05-2012 #15
Registered User
- Join Date
- Jul 2012
- Location
- Lake Mary, FL
- Posts
- 158
Great build... really like the out of the box approach. Looking forward to following along. I am starting mine soon, so im sure I can pick up a few pointers..
Jack~
1969 Camaro Convertible - In Progress.
Body Mods, LSx TT Setup, T56, 4 Link, Lowered, the works.
-
08-05-2012 #16
-Moderator/Sponsor-
- Join Date
- Apr 2001
- Location
- The City of Fountains
- Posts
- 16,117
Thanks Phil. Glad I could be a source of inspiration. Originally Posted by fsdproject

If you were to do ATS spindles in the front, that solves the speed sensor issue there. In the rear, you can talk to Moser or one of the other rear end vendors and see about having a custom rear made that would incorporate sensors at the wheels. Remember, they make rear ends for 4th gen f-bodies, where the later year cars used a 4 channel ABS system. As far as weight, I'd say that a new GTO is right there along with an old GTO. As for wheels and tires, I see people swapping wheels and tires on new cars without any issues with the ABS. I think that if you were attempting to swap a fancy dynamic control system then this would be a problem, but for ABS, it might be simpler. Again, I don't know all this for sure, but you being an engineer should have a handle on things. Document the ABS swap, and you'll return the favor. :-)
I am looking forward to seeing this project progress.
Andrew1970 GTO Version 3.0
1967 Cougar build
GM High-Tech Performance feature
My YouTube Channel Please Subscribe!
Instagram @dr__efi
I deliver what EFI promises.
Remote Holley EFI tuning.
Please get in touch if I can be of service.
"You were the gun, your voice was the trigger, your bravery was the barrel, your eyes were the bullets." ~ Her
-
08-05-2012 #17
Registered User
- Join Date
- Nov 2011
- Location
- Springfield, OH
- Posts
- 58
Andrew,
Thanks for the information on ABS. I do remember reading about the ATS spindles and the fact they have provisions for wheel speed sensors. I have kept everything I have taken off the GTO donor including the wheel speed sensors so as I said before the ABS swap is something I may do at a later date. I have my hands full now just trying to get the thing on the road! I do like the challenge of doing things that haven't been done before and this project certainly provides many challenges! When the time comes and I do successfully complete the ABS swap I will document it.
I hope to get this build thread up to date over the next few weeks to catch up with my actual progress on the car.
Phil
-
08-05-2012 #18
-Moderator/Sponsor-
- Join Date
- Apr 2001
- Location
- The City of Fountains
- Posts
- 16,117
Good luck on the project Phil. Looking forward to updates! Originally Posted by fsdproject
Andrew1970 GTO Version 3.0
1967 Cougar build
GM High-Tech Performance feature
My YouTube Channel Please Subscribe!
Instagram @dr__efi
I deliver what EFI promises.
Remote Holley EFI tuning.
Please get in touch if I can be of service.
"You were the gun, your voice was the trigger, your bravery was the barrel, your eyes were the bullets." ~ Her
08-08-2012 #19
Registered User
- Join Date
- Nov 2011
- Location
- Springfield, OH
- Posts
- 58
The donor car sat outside for a time while I got the frame ready. I ran stainless steel fuel and brake lines along the frame, I also used stainless vinyl covered clamps and fasteners for the lines to avoid future rust issues. I found these at McMaster, an online hardware store that has an extensive inventory.
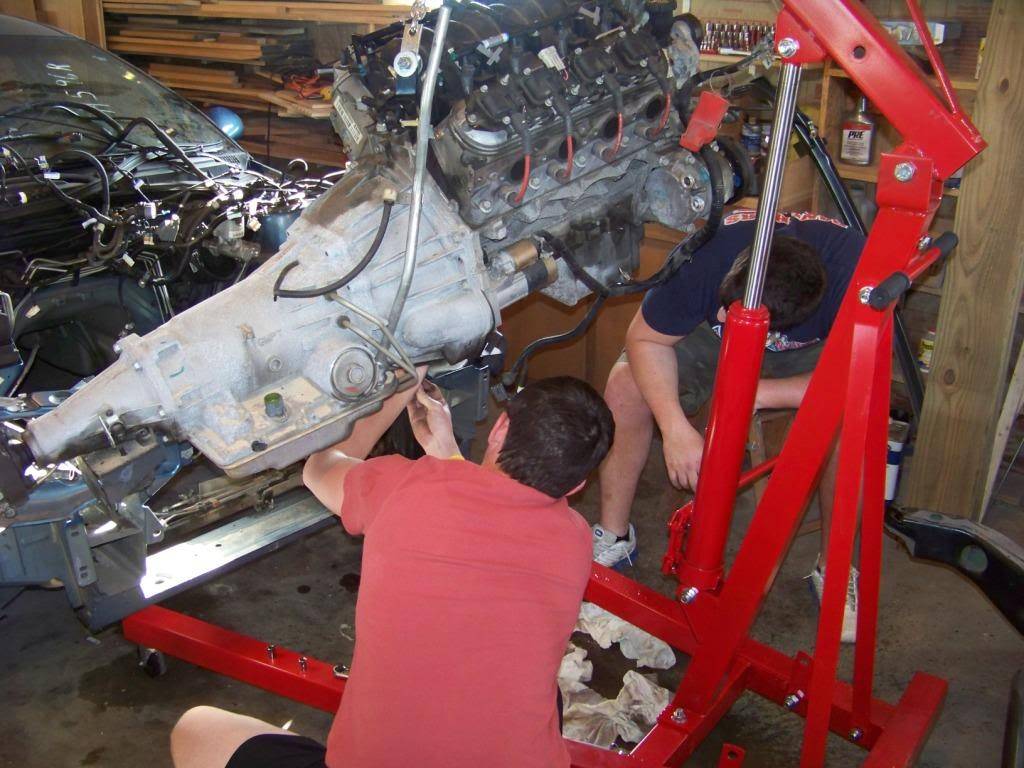
In preparation for the swap I removed most of the front sheet metal from the GTO donor so it wouldn't get damaged. I took me a few days to drain fluids, disconnect things like the driveshaft, fluid hoses and lines, the electrical harness, and the mounts. I also removed the radiator and AC gear in the front so they wouldn't get damaged and I could use them in the Lemans. I couldn't find a hoist to borrow so I bought a 2-ton one at Tractor Supply for $200. It's a cheap Chinese one but it worked well for me. I also bought a engine lifting chain from Summit, part number SUM-G1027. The GTO's motor already had heavy sheet metal lifting brackets on the front of the driver's head and the back of the passenger head so I didn't have to bolt the chain to the engine. I used 3/4" grade 8 bolts with thick fender washers to attached the lifting chain to the lifting brackets on the motor. Lifting the motor was pretty uneventful.

Once the motor was in the air some things had to be done before it could be moved to it's new home. Since the GTO donor has a front sump oil pan, that had to be replaced. I did quite a bit of research into all the options and went with the Holley 302-1 LS Retro-fit oil pan. It's a nicely made and good looking part, it's too bad it won't be noticed where it's going. I paid about $370 at Amazon, no tax or shipping. The pan comes with a new oil pickup tube. I also replaced the windage tray (GM 12611129) and used a new gasket (GM 12612350). This picture shows my son and his friend removing the original oil pan.
One minor unfortunate thing happened during this process, the bolt hole in the block for the pickup tube somehow got stripped, I drilled it out slightly larger and tapped it for a larger bolt.
Another issue with using GTO engines is that the dipstick goes into a hole in the oil pan instead of the side of the block like most other LS applications. A small sheet metal plug in the bottom passenger side of the block needs to be punched out from the inside to allow the installation of a dipstick there. This should be done while the oil pan is off the engine. I installed a dispstick tube (GM 12625031) and dipstick (GM 12634547) after the headers were installed. All of these part numbers are in the instructions that came with the Holley oil pan. Another thing I found was that the Holley oil pan uses a different oil filter than what the GTO requires - a PF48 instead of a PF46. I believe they differ in the thread size and pitch.
Next, motor mounts.Last edited by fsdproject; 08-08-2012 at 03:46 PM. Reason: Correct Part Number
08-08-2012 #20
Registered User
- Join Date
- Nov 2011
- Location
- Springfield, OH
- Posts
- 58
In researching motor mounts and adapter plates it seems like the two choices are normal and one inch setback. I got the impression the one inch setback plates are useful to avoid interference issues with the crossmember and to allow the engine to bolt to an existing transmission. I didn't have either of those issues, and I didn't like having the motor closer to the firewall and making access to the sensors and connections on the back of the motor more difficult. So I went with the normal adapter plates.
For adapter plates and motor mounts I went with the 3-1148G Motor Conversion Set from Energy Suspension. This set includes the adapter plates, short and wide poly engine mounts and all necessary fasteners needed. The parts are well made but the instructions were basically a parts list and torque diagram. I had a couple of issues with them.
The first issue was one of interference of the adapter plates with brackets on the engine that support accessories. The front lower corner of the adapter plate on the driver side interfered with the bracket for the alternator. The front upper corner of the adapter plate on the passenger side interfered with the bracket for the AC compressor. I called tech support for Energy Suspension and was told to just grind the edges of the plate as necessary to gain the needed clearance. Their tech support was very good, I got a person on the phone right away and he was very helpful. The pictures below (driver's side first, then passenger) show the installed plates with grinding done.
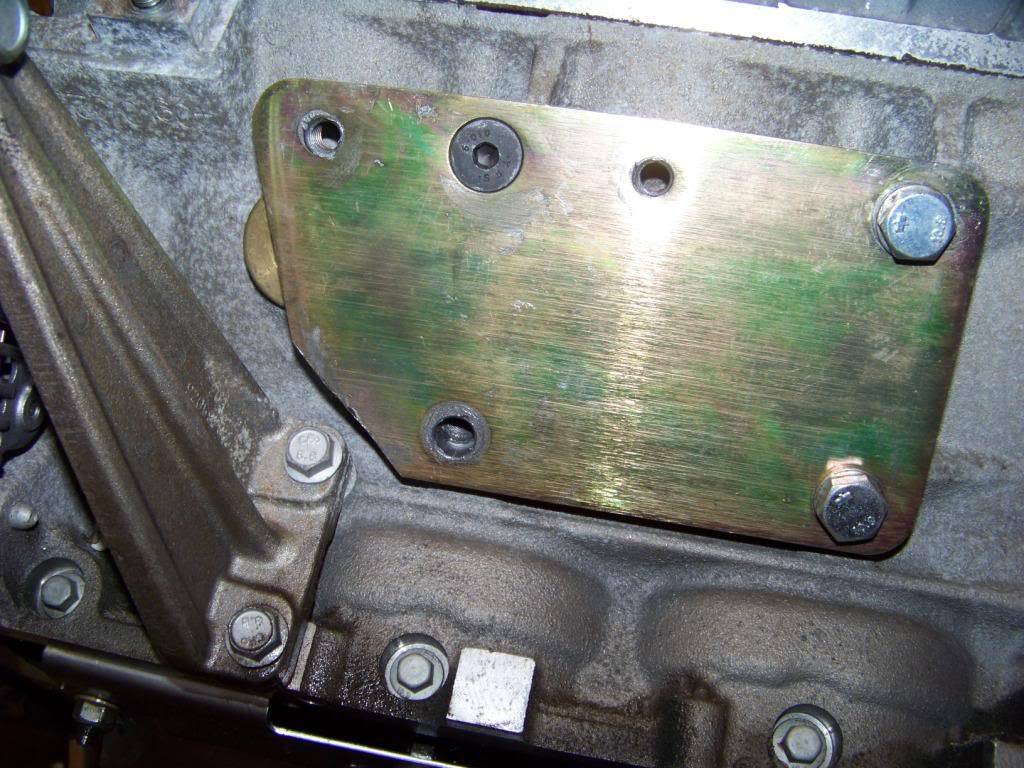

After I got the plates figured out I sandblasted them, primed and painted them so they wouldn't rust and installed them permanently.
The other issue came when I installed the motor mounts onto the adapter plate. On the "back" or upper surface of the mount there is a ridge in the poly that prevents the mount from sitting flush on the plate. When I called and asked about that I was told this area would get compressed when the bolts were tightened and that develops a necessary preload into the mount.
For the frame mounts I went with the Car Shop CSP2380 A Body frame mounts BOP to Chevy. These were attached to the crossmember with a stainless fastener kit from Totally Stainless.
Once all these were in place it was time to lower the engine onto the Lemans' frame.
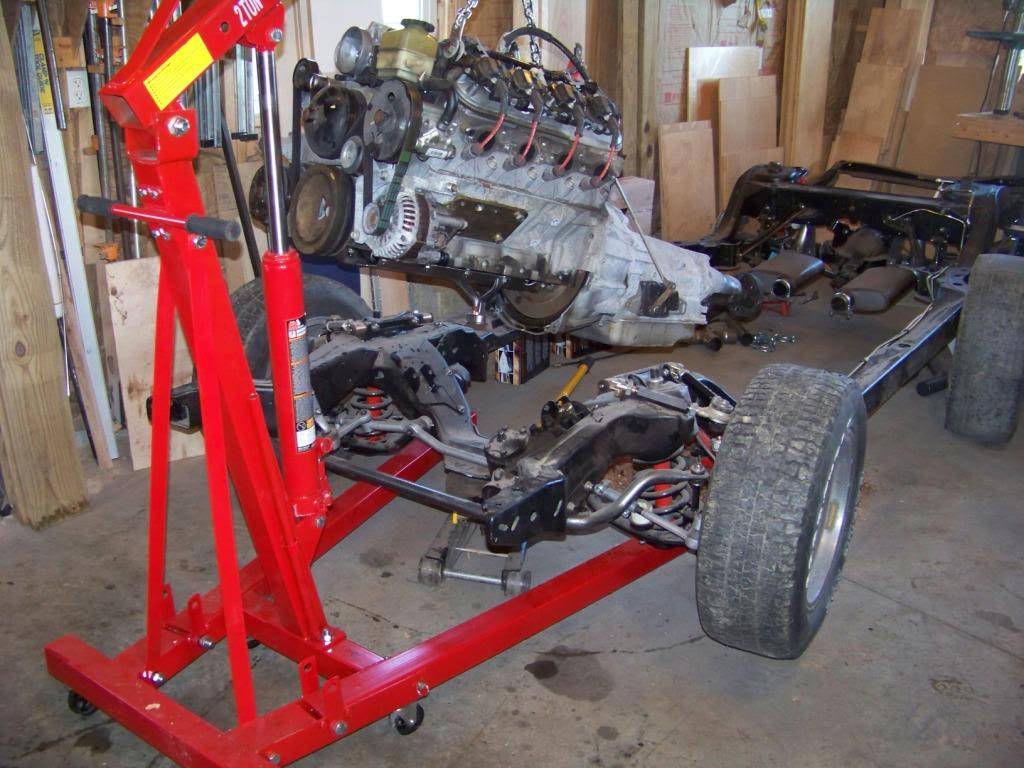
The only interference issue I ran into fitting the engine was between the alternator and steering box. It was pretty much preventing the engine from being bolted in on that side. I knew from my research that was a possible issue so was not surprised. I removed the alternator and it's supporting bracket from the engine to allow me to continue. I know I could have possibly trimmed the steering box, put spacers under the frame mounts, or used the smaller Camaro alternator, but wasn't really interested in any of those options. Plus, it appeared like the alternator would have been very hard to replace in the future if I left it in it's original location. I figured I would look into alternator relocation in the future.
I left the fasteners for the motor and frame mounts loose to help put the cross bolts through the mating holes in both mounts. With a little bit of shoving and pushing I got all the bolts in and tightened everything.
Next, headers and exhaust.

 Reply With Quote


