


Results 61 to 76 of 76
Thread: 1971 Pontiac Lemans Convertible
-
12-10-2013 #61

 Registered User
- Join Date
- Oct 2013
- Location
- H-Town, TX
- Posts
- 356

The car is looking great- I have a 70 LeMans and 70 GTO so I am very partial to this build
-
05-15-2014 #62
Registered User
- Join Date
- Nov 2011
- Location
- Springfield, OH
- Posts
- 58
Haven't posted in several months but I have been working mostly on bodywork during that time. The next several posts will get this thread caught up to where I am now.
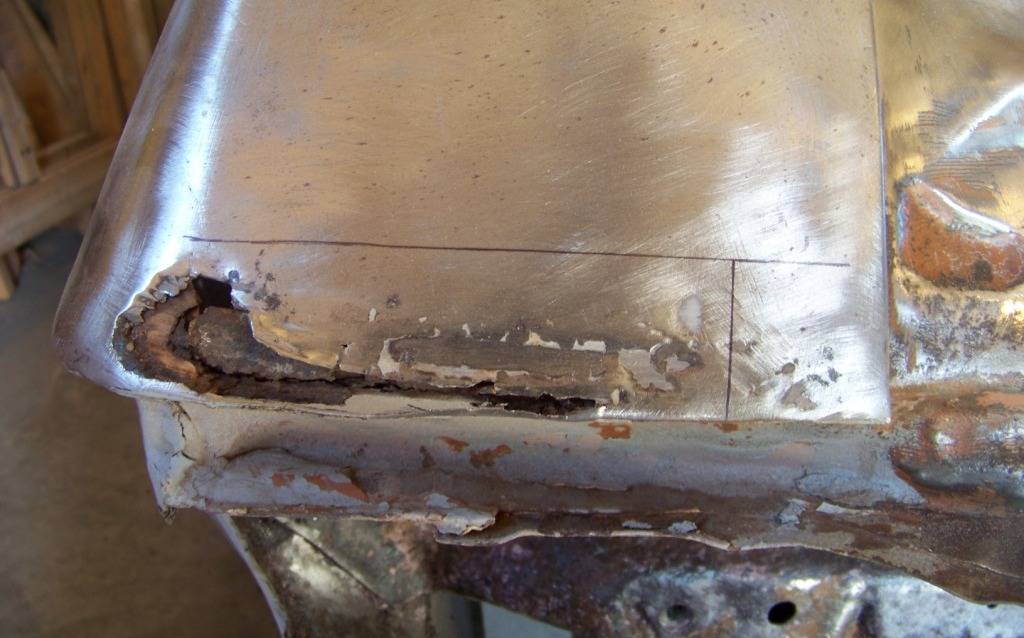
This post will talk about the rust repair I did to the left rear corner. First pic is cutting out the rust:
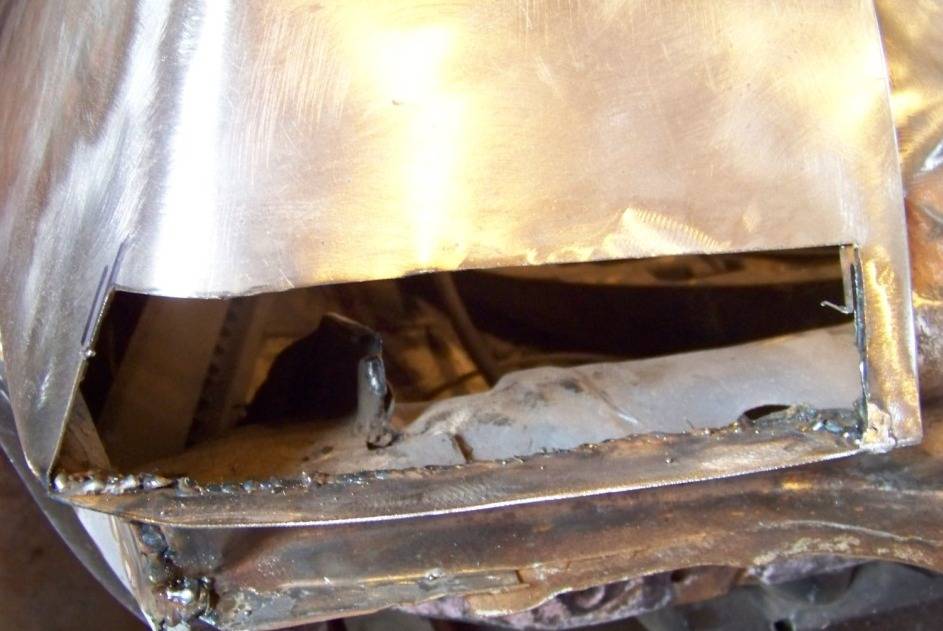
This shows the rust removed and the first lower patch piece welded in:
The main patch was trimmed and shaped to size and tacked in:
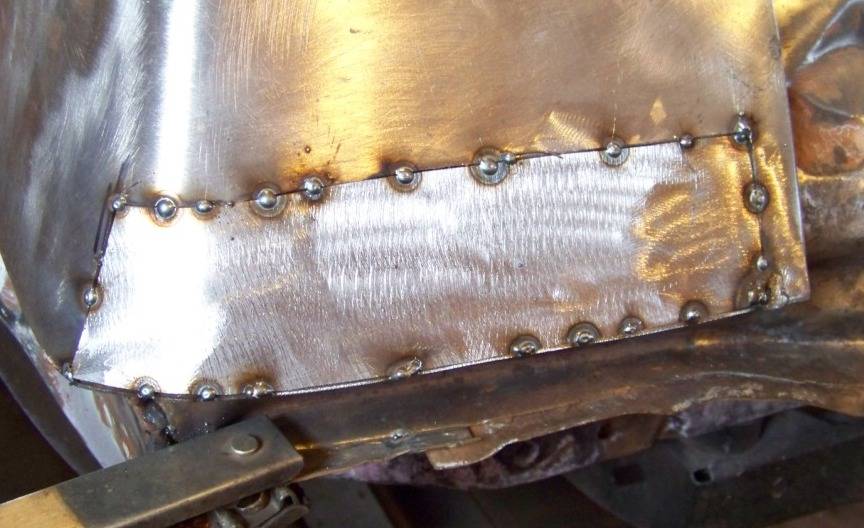
Welding complete:
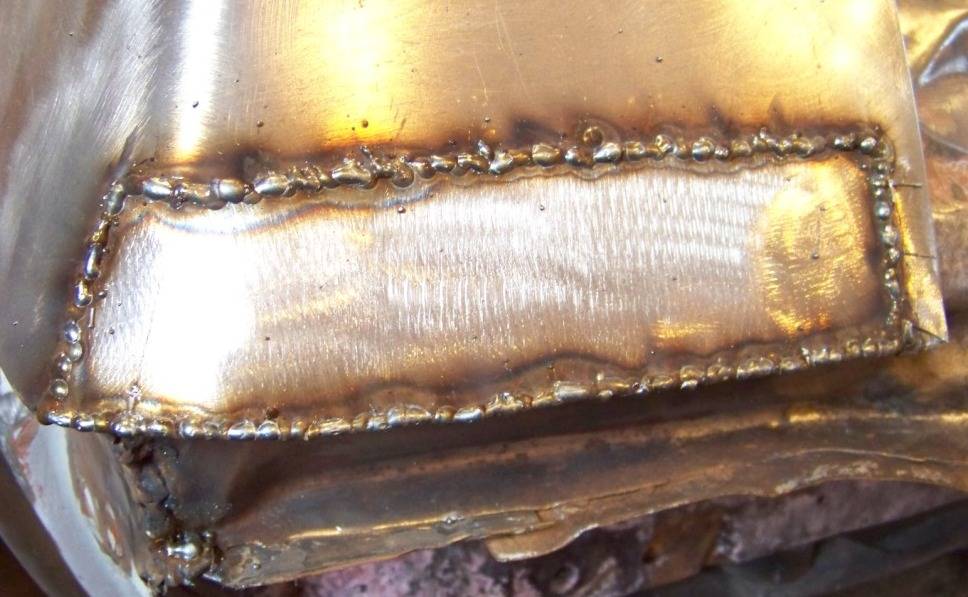
And ground down flat:
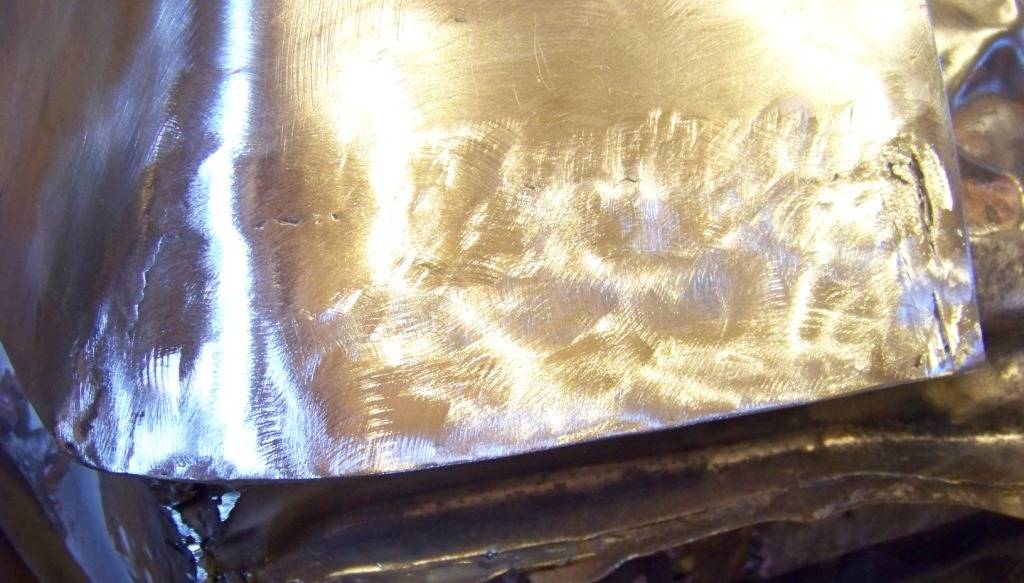
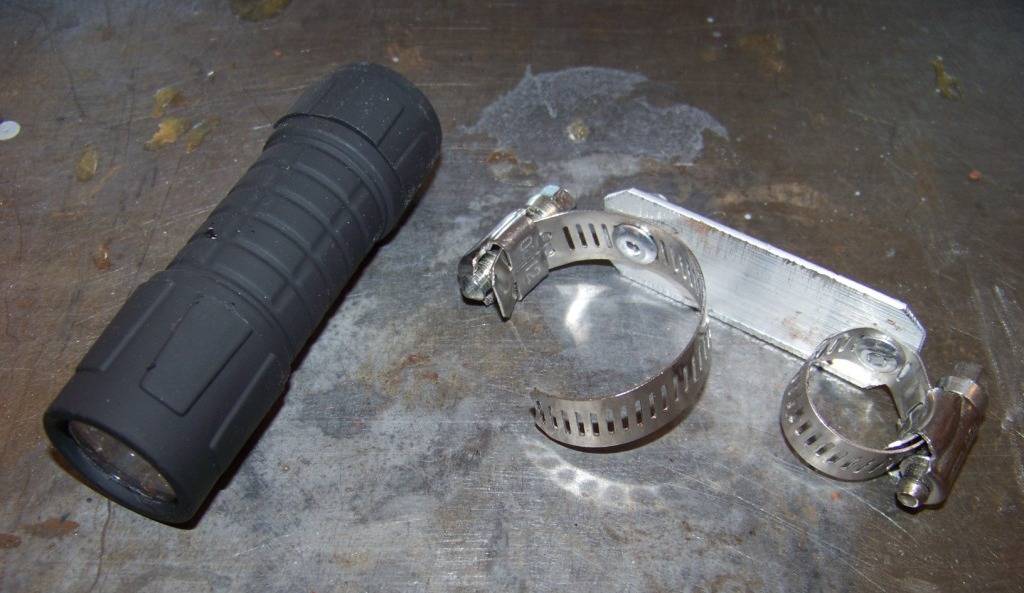
My welding skills have progressed with practice but improving the conditions also helps. I have found seeing the weld area and getting adequate light there is critical. These old eyes don't see as well as they use to and need all the help they can get. I thought about buying a welding light but decided just to make one, it can't be that hard. Here are the parts involved: a small LED flashlight I got on sale for $2, a scrap of aluminum, and two hose clamps.
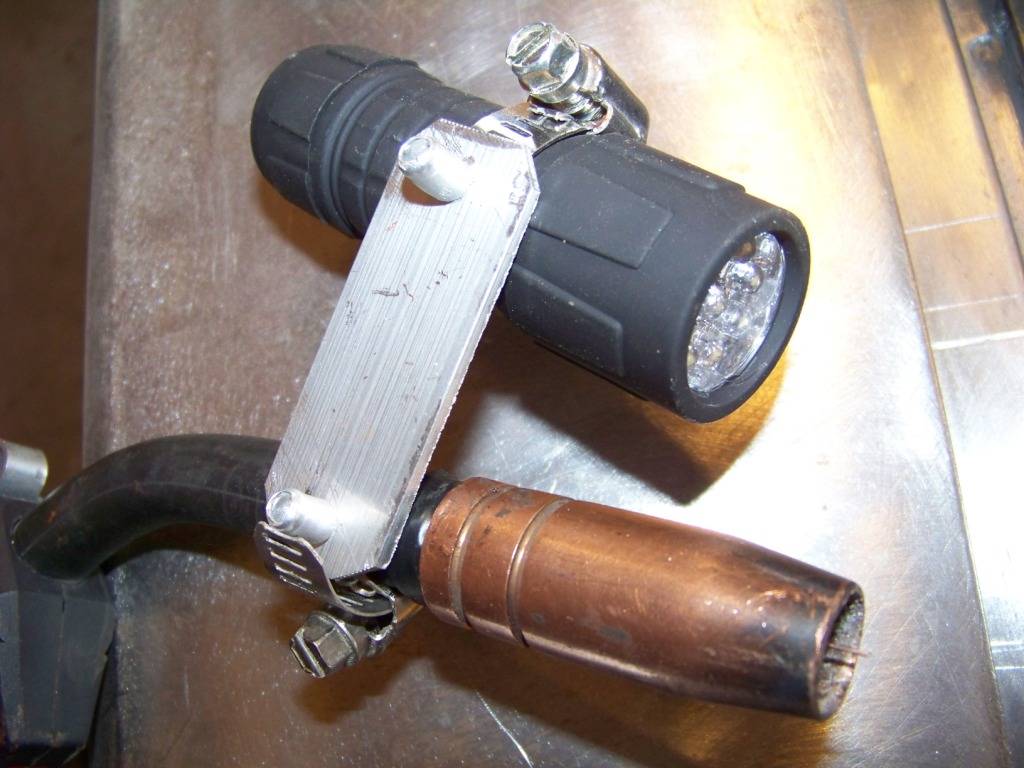
It has really helped see what I am welding which is especially helpful when welding sheet metal.
05-15-2014 #63 Registered User
- Join Date
- Apr 2009
- Location
- FRANCE
- Posts
- 683

Nice work !
Good mods on the torch,reminds me kinda thing :
Gil
05-21-2014 #64
Registered User
- Join Date
- Nov 2011
- Location
- Springfield, OH
- Posts
- 58
Trunk Lid Rework
Next task for body work was reworking the trunk lid. The one that came on the car was all rusted out along the lower edge but in good shape otherwise. The area around the key hole was also somewhat mangled. Reproduction trunk lids are available at $400 a pop but I decided to take on the challenge of reworking this one.
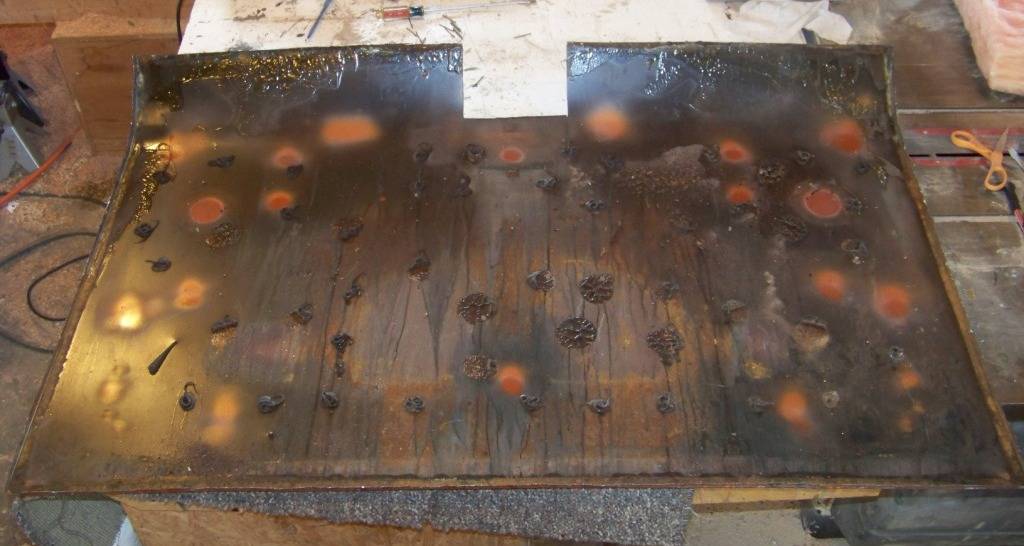
I cut off the lower inch along the bottom of the lid and separated the inner and outer skins. This picture shows the inside of the outer skin and the primer, paint, sealant and wax cavity undercoating (that didn't do any good here) that I had to remove:
The next picture shows the new metal I added to the bottom and to replace the mangled key hole area.
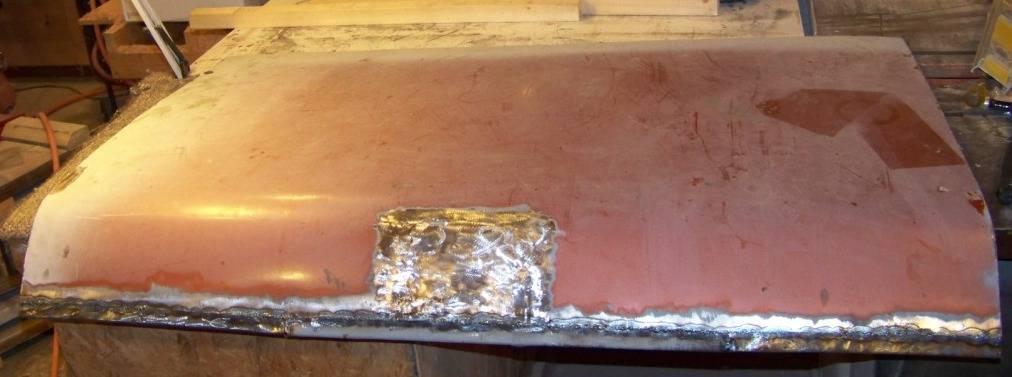
I have also modified the trunk lid to use the latch and electric actuator from the donor GTO, I will document that in a future post.
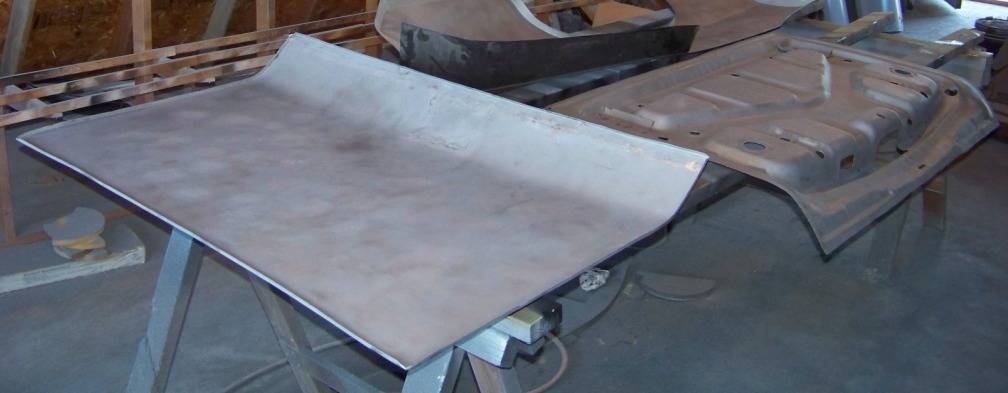
Both the inner and outer skins were sandblasted to bare metal and then the mating surfaces were given two coats of epoxy primer:
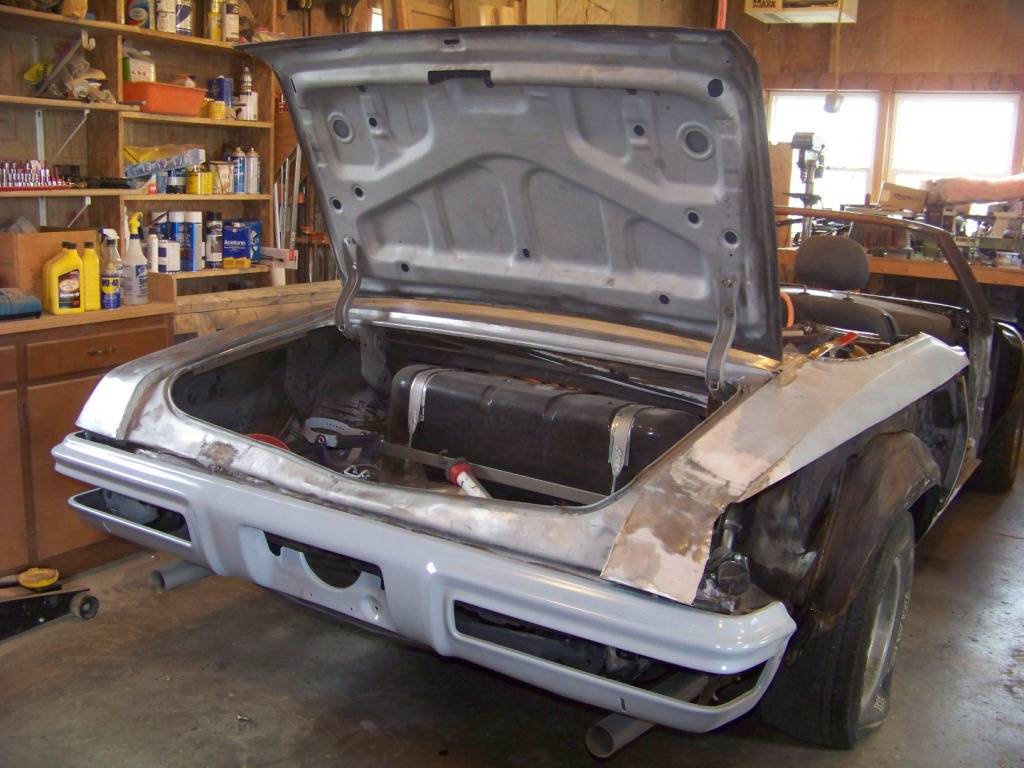
I applied seam sealer to the inside edges and then reassembled the lid and installed it to check the fit:
I have also sandblasted and primed the rear bumper, the chrome wasn't great and I wanted to paint it body color anyway to match the front bumper which were originally painted on these cars.
06-18-2014 #65
Registered User
- Join Date
- Nov 2011
- Location
- Springfield, OH
- Posts
- 58
Another milestone on my project - got some color on some parts. Next stop in the bodywork was replacing the passenger rear quarter. I wanted to have the passenger door installed to check gaps as I fussed with it. To make things more efficient I decided to paint the door jambs, inside of the doors, and the door hinge parts so I wouldn't have to pull them off again later.
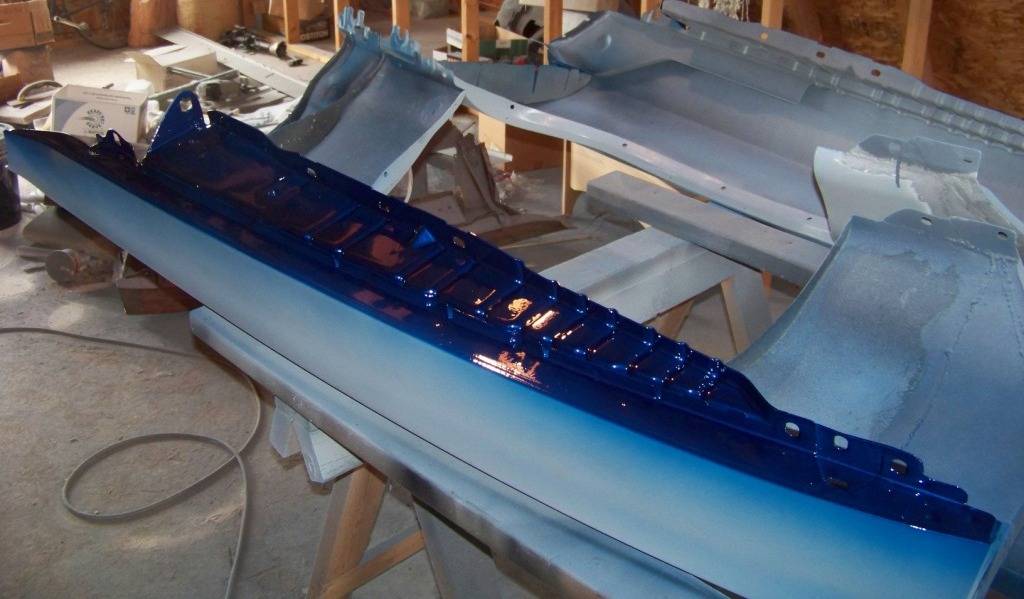
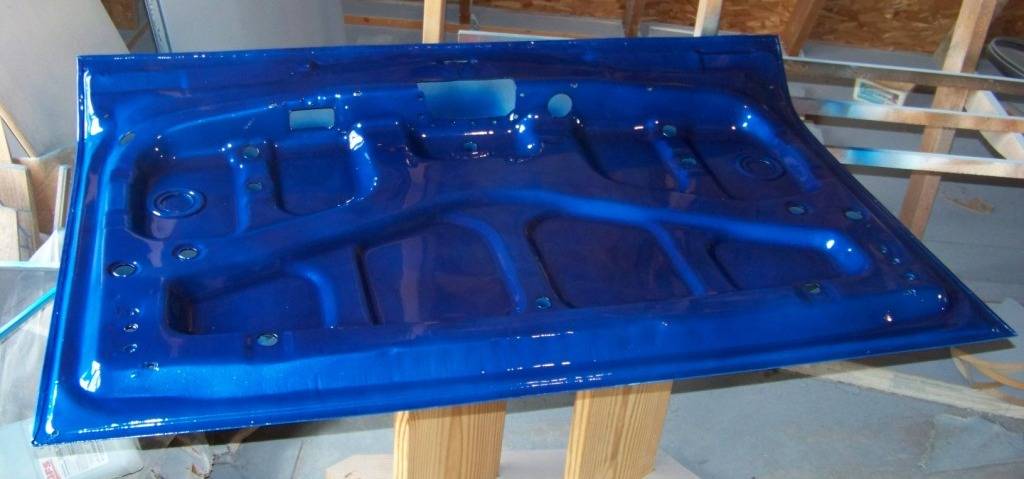
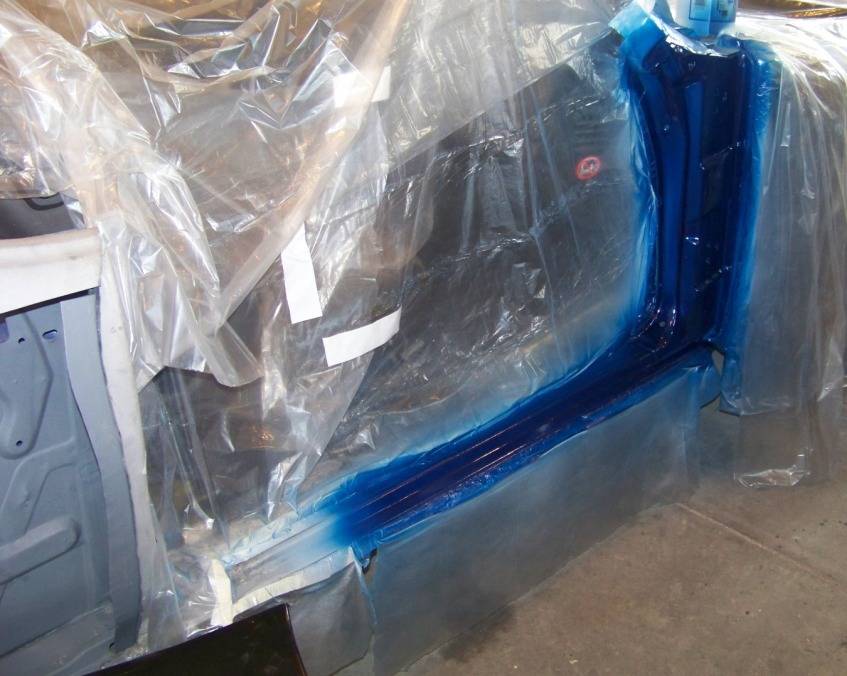
First few pictures are the painting. Never done any automotive painting before but I did quite a bit of spray finishing when I had my cabinetmaking business so I knew how to handle a spray gun. It actually went pretty well and I was pleased with the results. Color is Lemans blue as used on some recent GM products such as 2005 Corvette. I used a base coat/clear coat system. Paint is PPG, clear is SPI Universal clear.
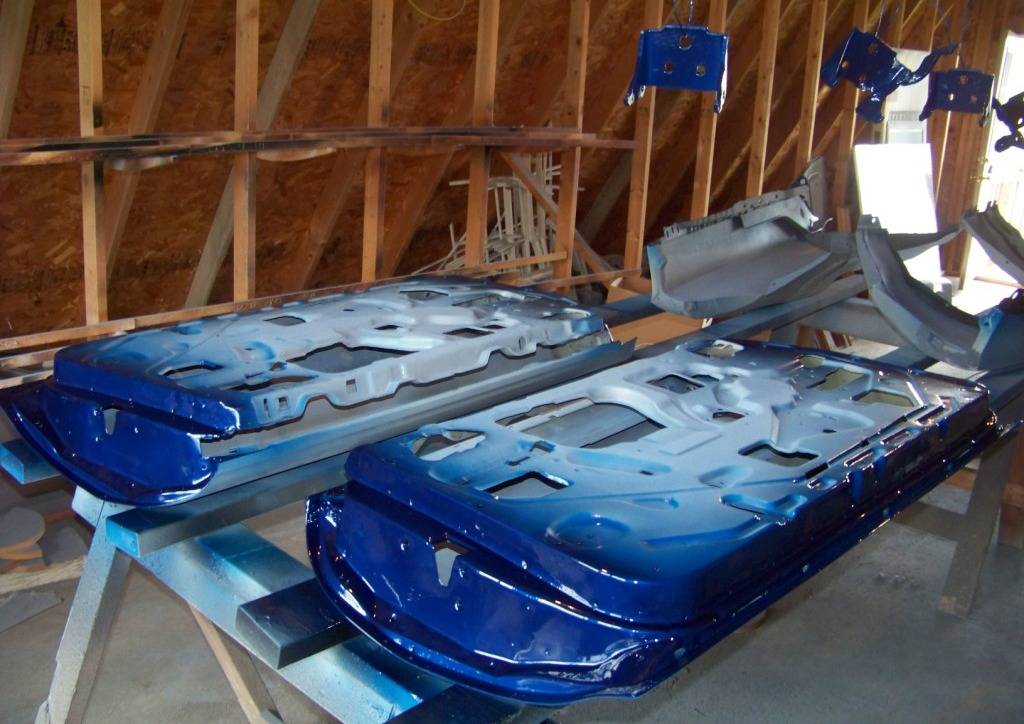
I also painted the inside edges of the front fenders so I could install those once and be done:
And the inside of the trunk lid:
Also painted the forward part of the door jamb area:
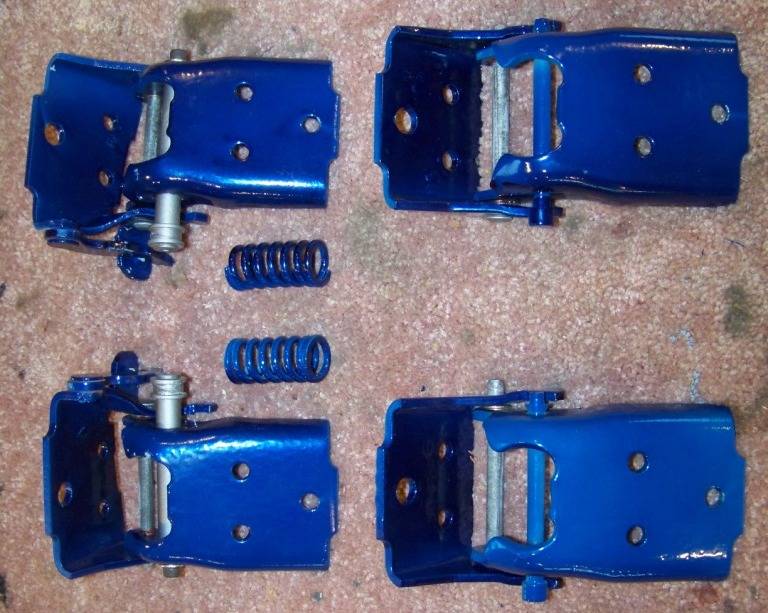
Hinges were disassembled, sand blasted, primed, painted and then reassembled with new pins and bushings:
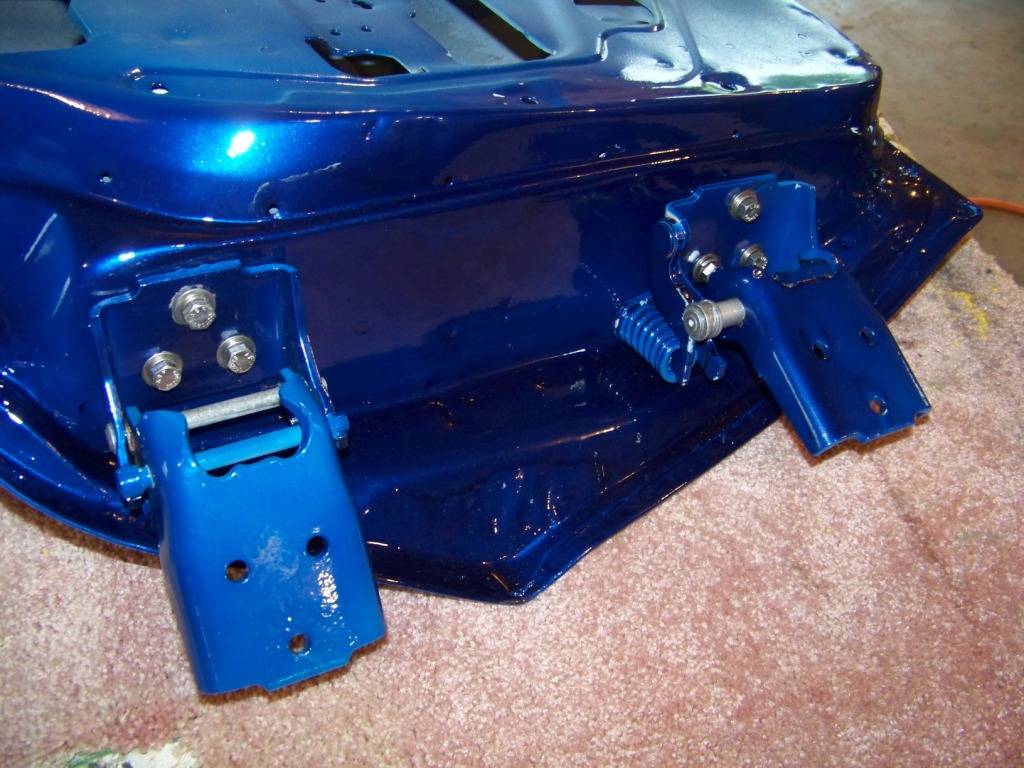
Door hinges installed onto doors (I used stainless steel bolts):
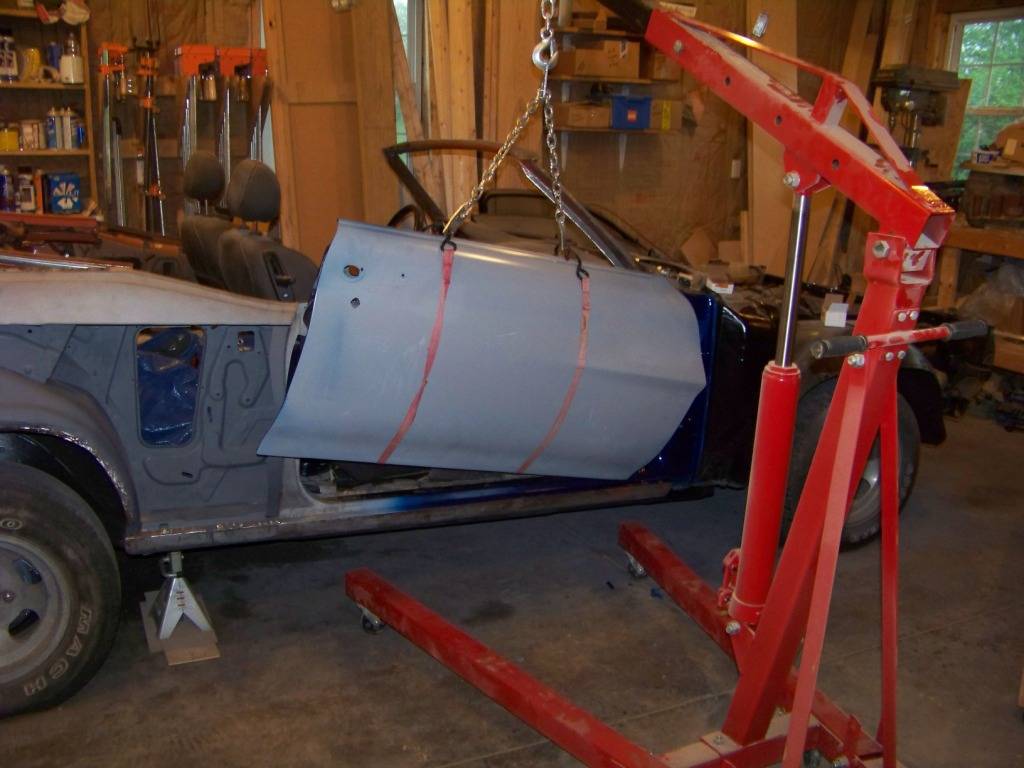
Since I work by myself I needed a way to hold the door in place easily while I started the bolts. Here is what I came up with (worked pretty well):
It's slowly starting to look like a complete car. Next up is replacing the passenger quarter panel, aligning the doors, and installing and aligning the front fenders.
06-20-2014 #66 Registered User
- Join Date
- Feb 2013
- Location
- South Carolina
- Posts
- 935
If you've got an engine load leveler lying around, aligning those doors by yourself won't be bad at all.
06-22-2014 #67
Registered User
- Join Date
- May 2011
- Posts
- 1
Similar build
I'm sorry it has taken so long to get this done. I seem to be computer illiterate. I will put some photo's up through my build which is in year six. I am having some issues with my convertible assembly. I took it completely apart and am now not sure which bolts and shims go where. If yours is still together, would you mind sending some pics. If you have any questions about what i have done let me know.
Thanks!
09-15-2014 #68
Registered User
- Join Date
- Nov 2011
- Location
- Springfield, OH
- Posts
- 58
I am like the turtle in his race with the hare, slowly but surely I am getting there . . .
Now that the passenger door is hung and roughly adjusted I could move on to the replacement of the passenger quarter panel. It had been replaced at least once before by a previous owner, but done very poorly being brazed instead of welded on. It had the usual rust around the wheel well lip and down where it used to attach to the trunk dropoffs. I removed it entirely, an easy job since it was easy to grind through the few brazed "welds". I then sandblasted and finished all the inside areas with epoxy primer.
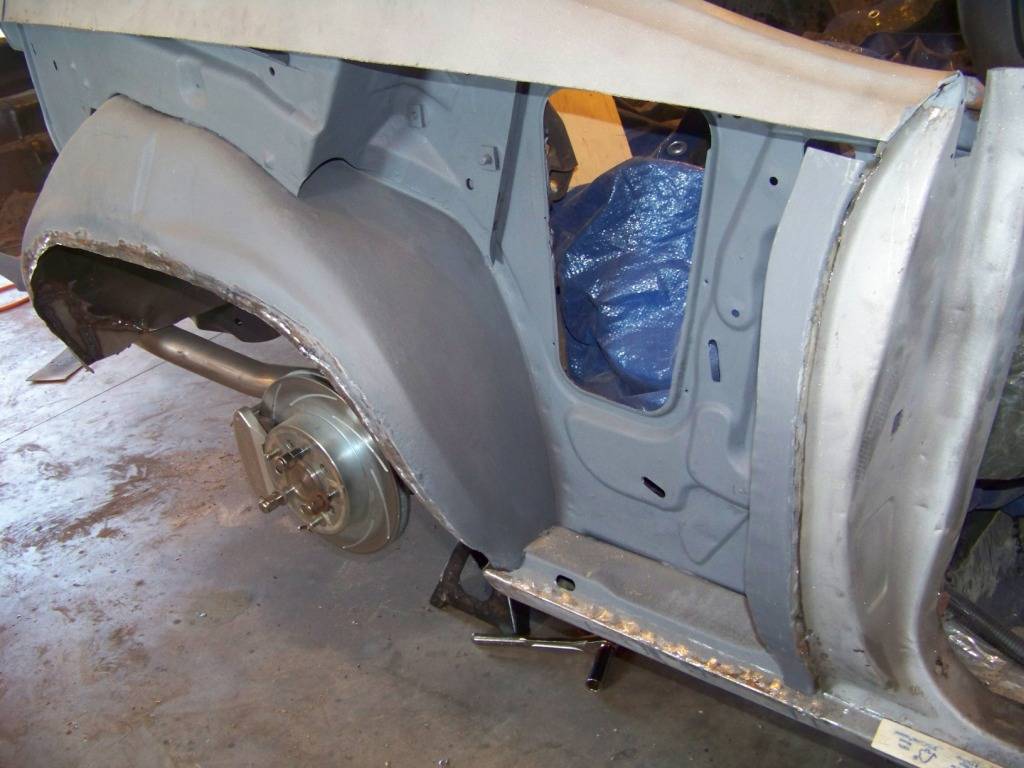
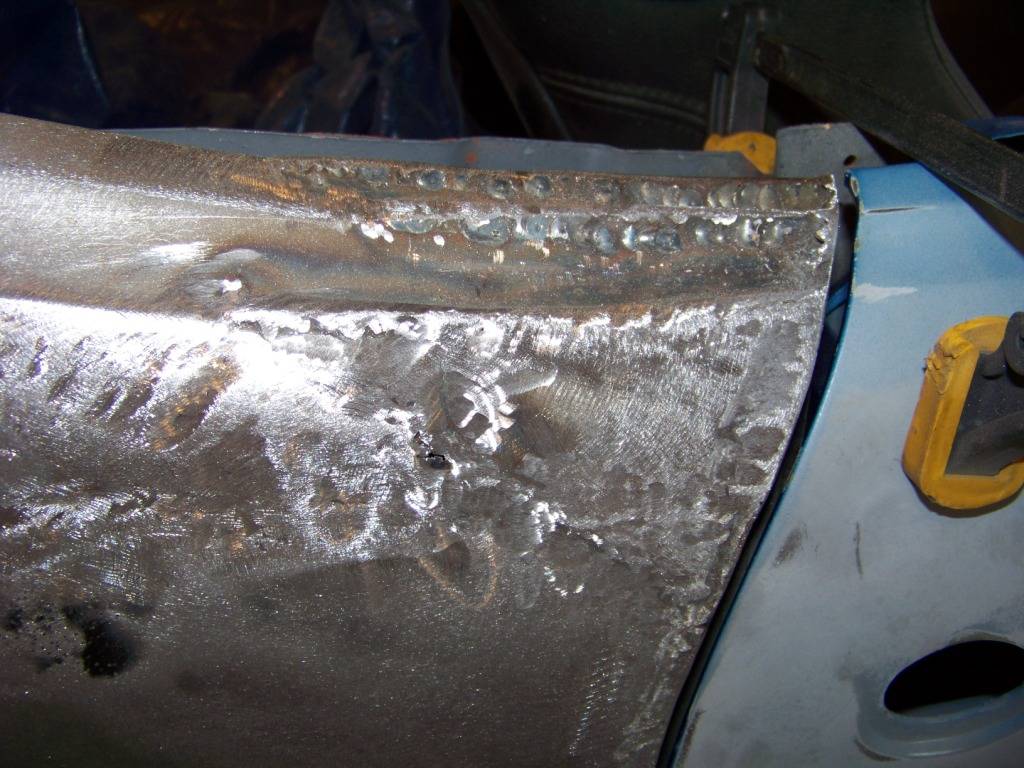
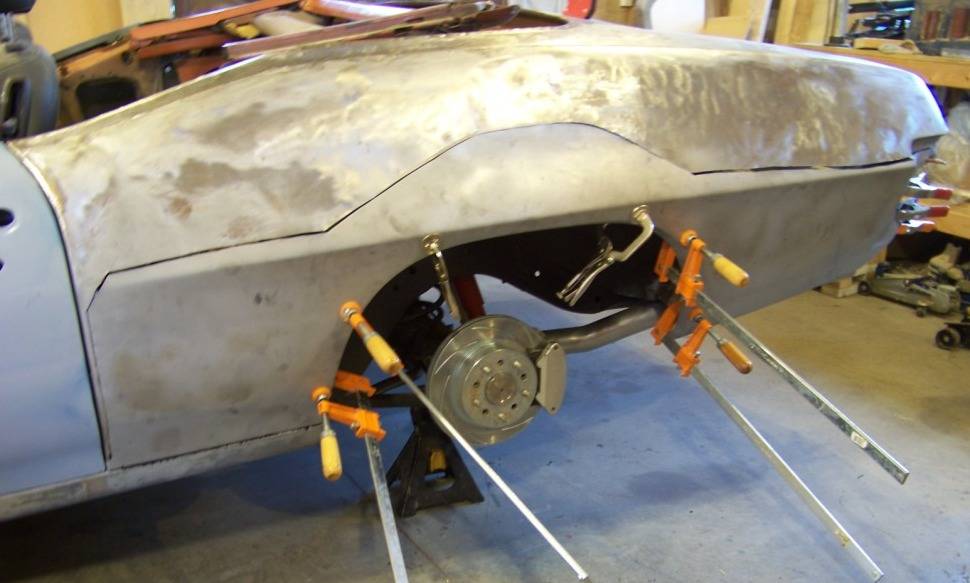
New replacement quarters are available for sedans but not convertibles. So I had to piece together what I had. Fortunately the top portion of the existing convertible quarter was in pretty good shape, so I sandblasted it inside and out and reattached it with welding. That is the bare metal part of the fender seen in the photos below, the replacement fender is black from the ecoat. This picture shows a trial fitting, one of many.
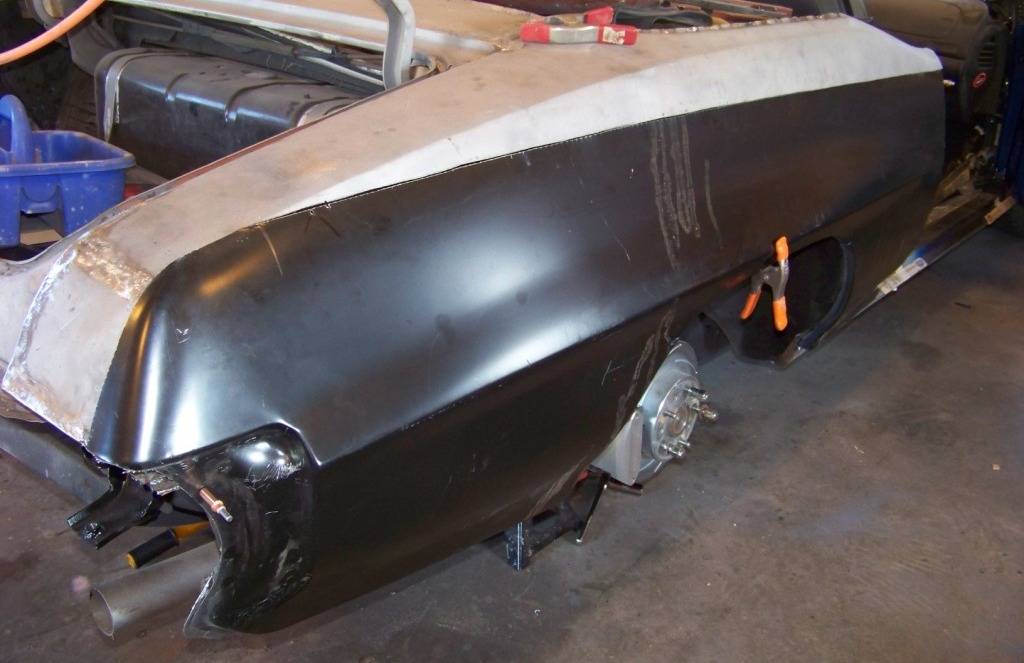
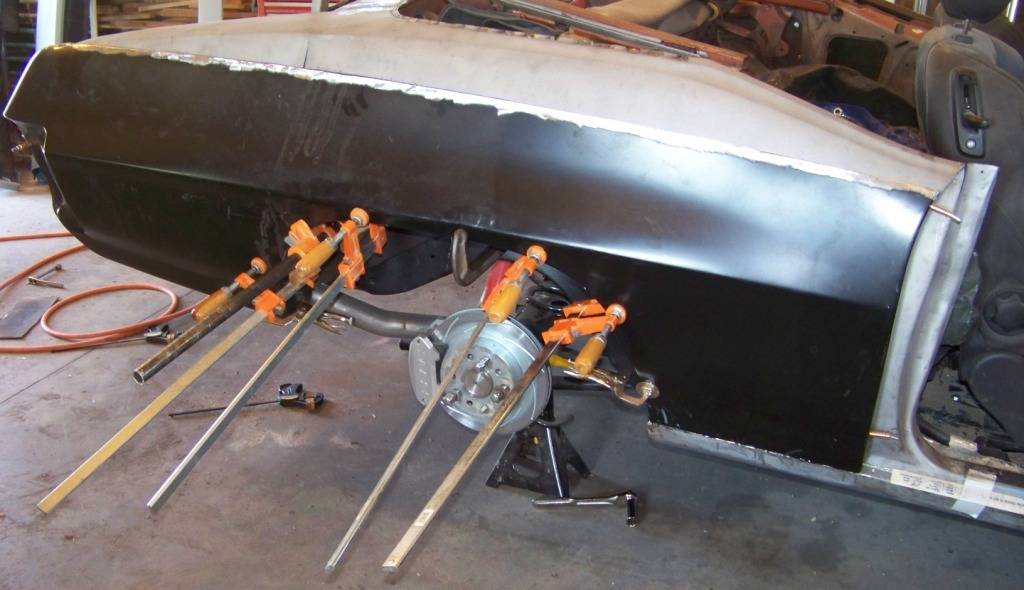
I decided to attach the new fender with a combination of glueing and welding, similar to what is done with newer cars. Structural adhesive was used along the bottom front where the fender goes on top of the rocker, between the inner and outer fender along the wheel well lip, and behind the bumper cavity. This picture shows clamps being used while the adhesive was curing.
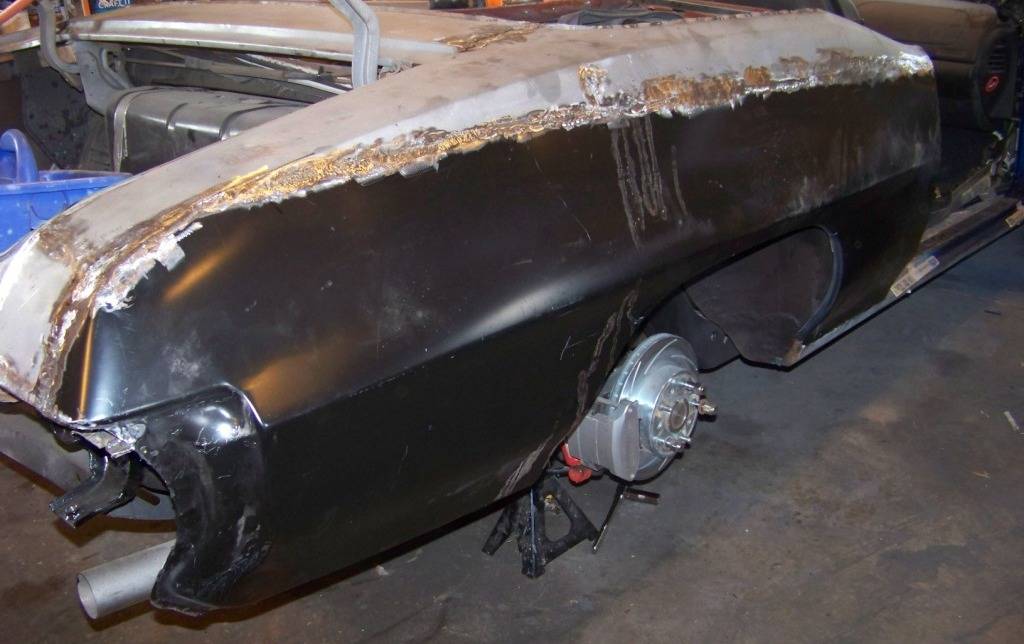
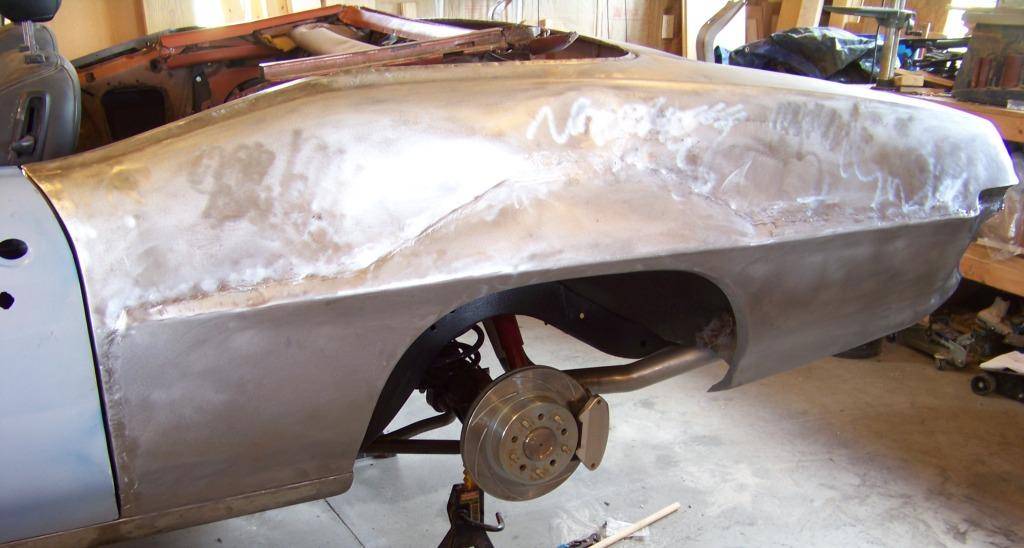
The seam between the existing fender and new fender and along the door jamb was welded and then ground smooth.
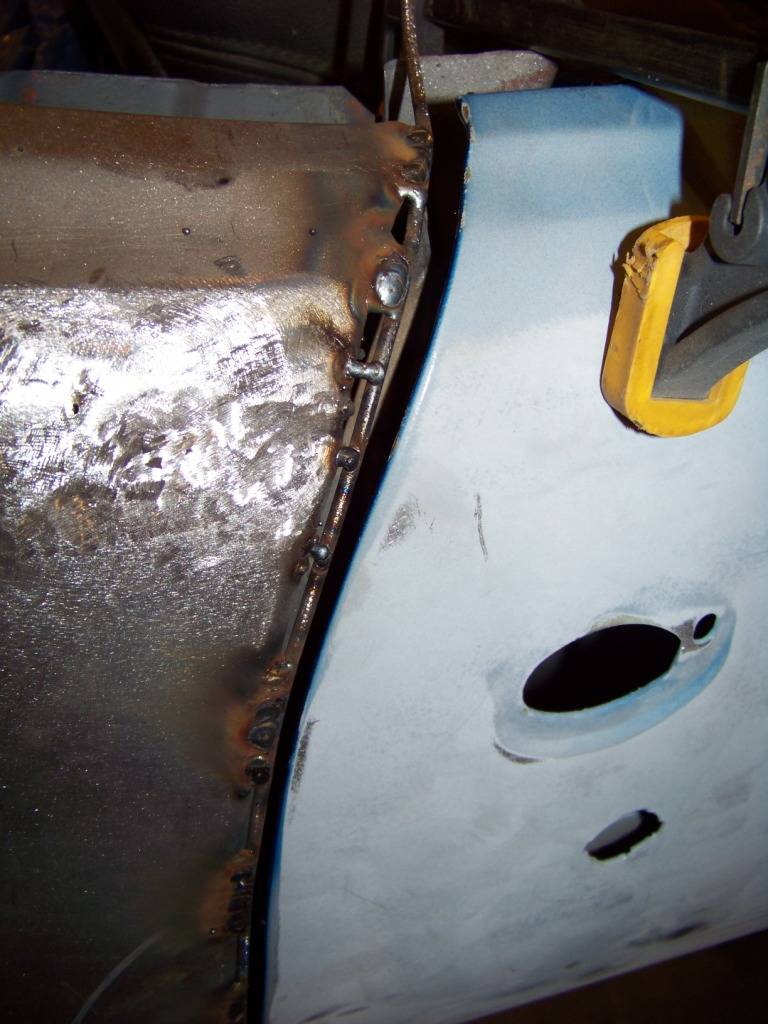
The fit along the door was pretty good except for at the top. I welded some 3/16" rod along the door jamb and on top of the fender the close gaps and get body lines to align much better.
Next, a similar effort with the driver's quarter panel.
Bad_Billy_Goat: Your car looks really impressive! I like all the custom touches. I haven't done anything with my top frame. I will need to be cleaned up and have some minor rust repair done to it. That will probably be one of the last things I do.
09-16-2014 #69 Registered User
- Join Date
- Apr 2012
- Location
- Bay Area, CA
- Posts
- 48
Looking good! very inspirational/admirable build
10-05-2014 #70
Registered User
- Join Date
- Nov 2011
- Location
- Springfield, OH
- Posts
- 58
I went ahead and replaced the driver's quarter too. It was original and wasn't as rusted as the botched passenger replacement, but I decided to do the same on both sides, that way the inside of the quarter was sandblasted and primed and I had dealt with the rust as must as possible. But before I could do that I had to install the driver's door.
I figured out a little simpler way of hanging doors than what I used for the passenger side. I took a scrap of 2x4 and screwed a hook into it as shown below.
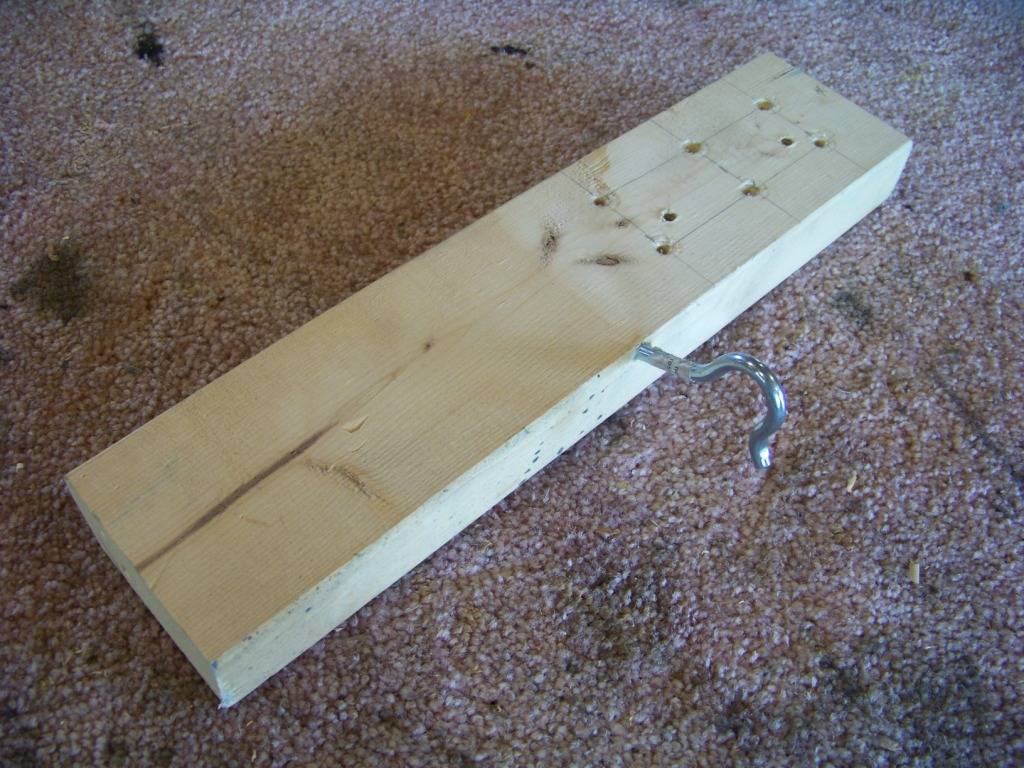
The 2x4 was inserted inside the door and then the positioned so the hook was pointing up through the window slot. The 2x4 is thicker than the window slot so it's doesn't come out. The engine hoist is then used on the hook and lifts the door easily.
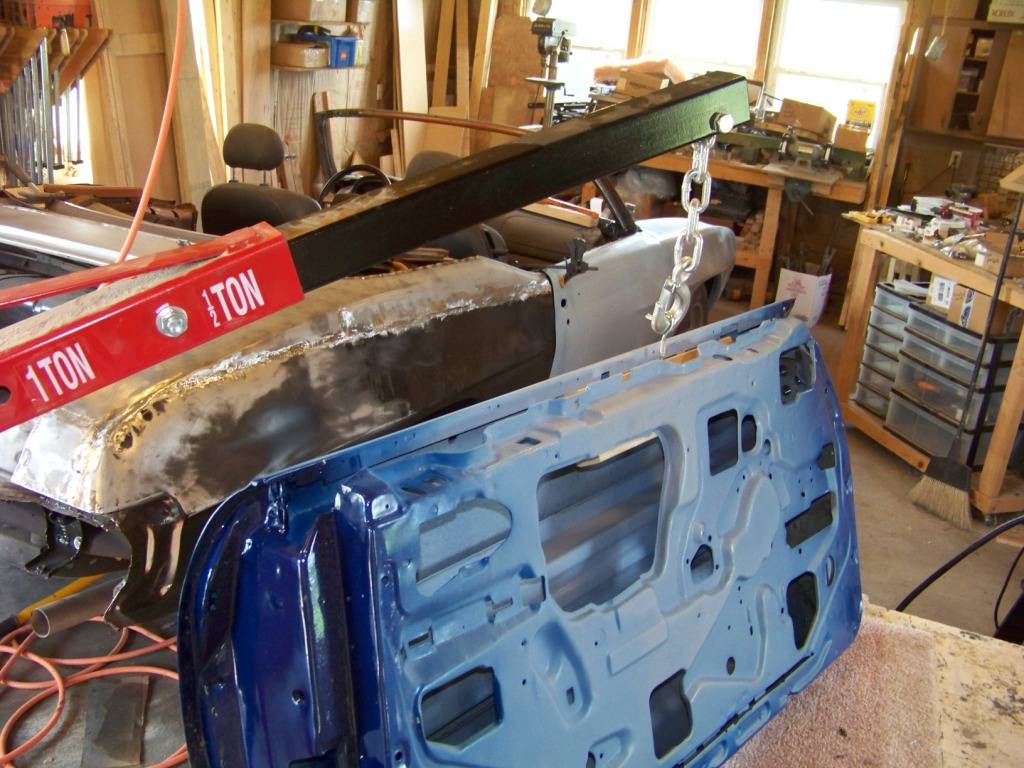
As before the engine hoist then holds the door while the bolts are started through the hinges into the body.
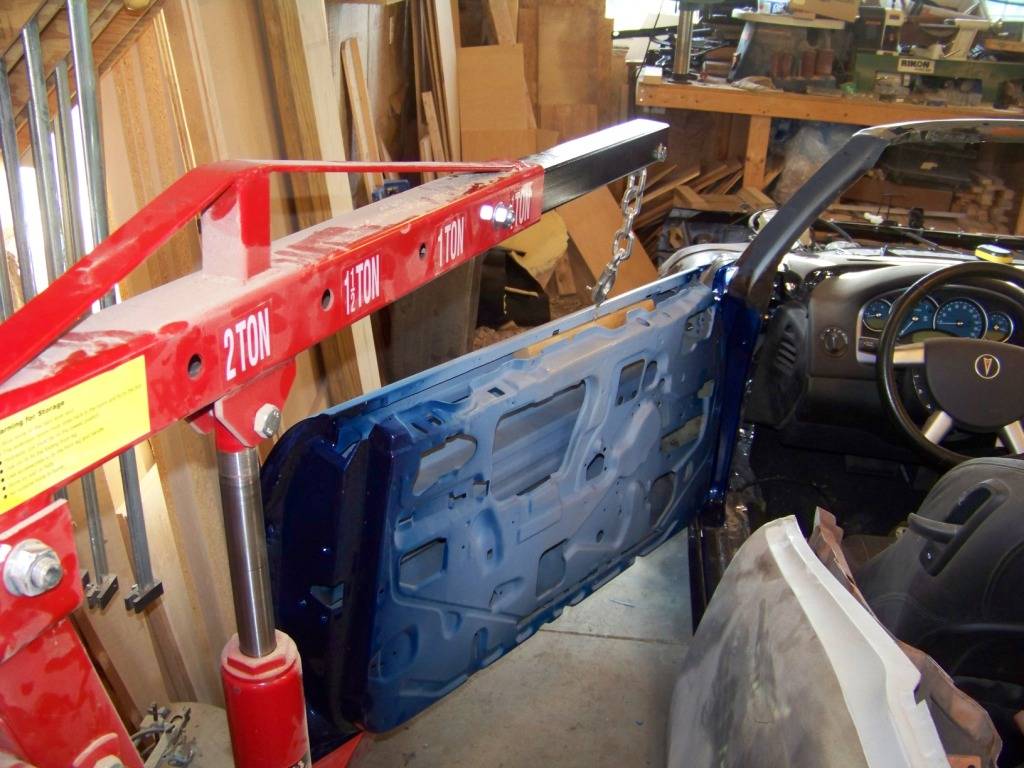
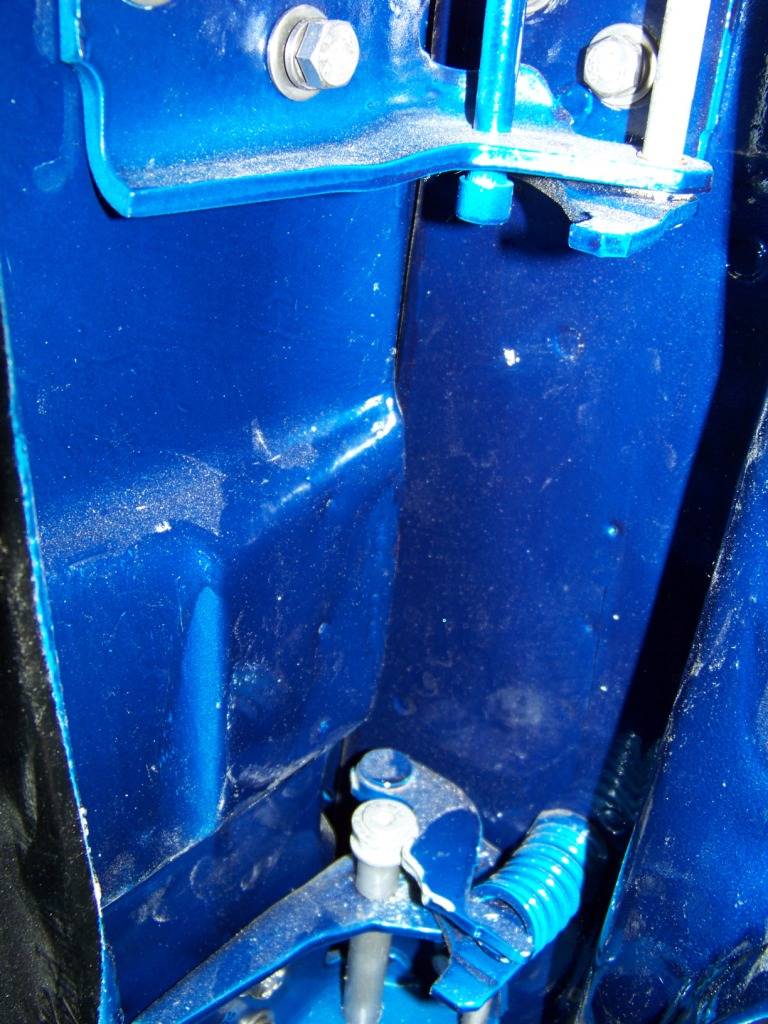
I ended up using this more than once for both doors as I realized I forgot to drill the holes for the door electrical harness to pass through the door jamb on the body into the door. So I used my lifting gadget to lift each door off the body while I drilled the new holes. This shows the area where I drilled the holes, between the hinges.
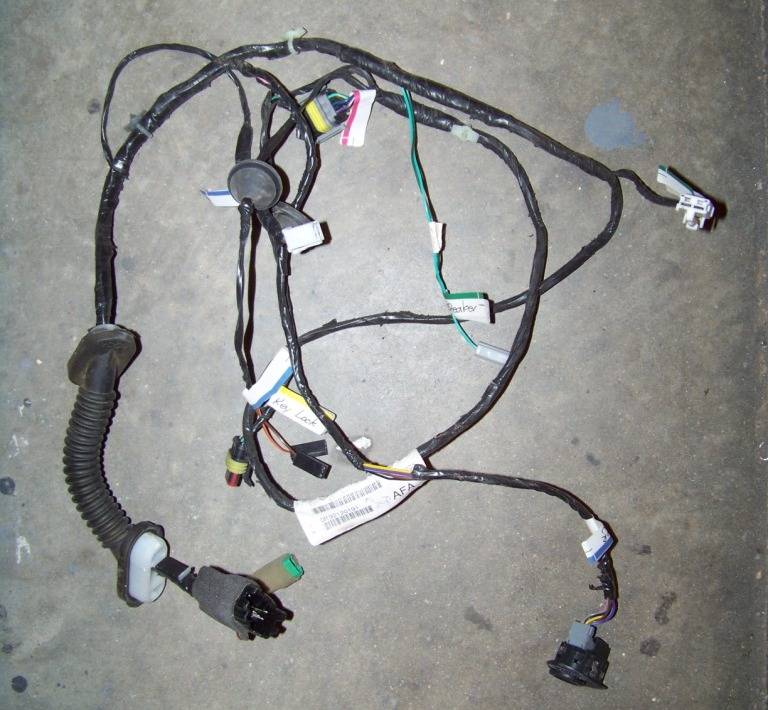
This is one of the door electrical harnesses from the GTO donor. It conveniently has a disconnect right inside the body door jamb area.
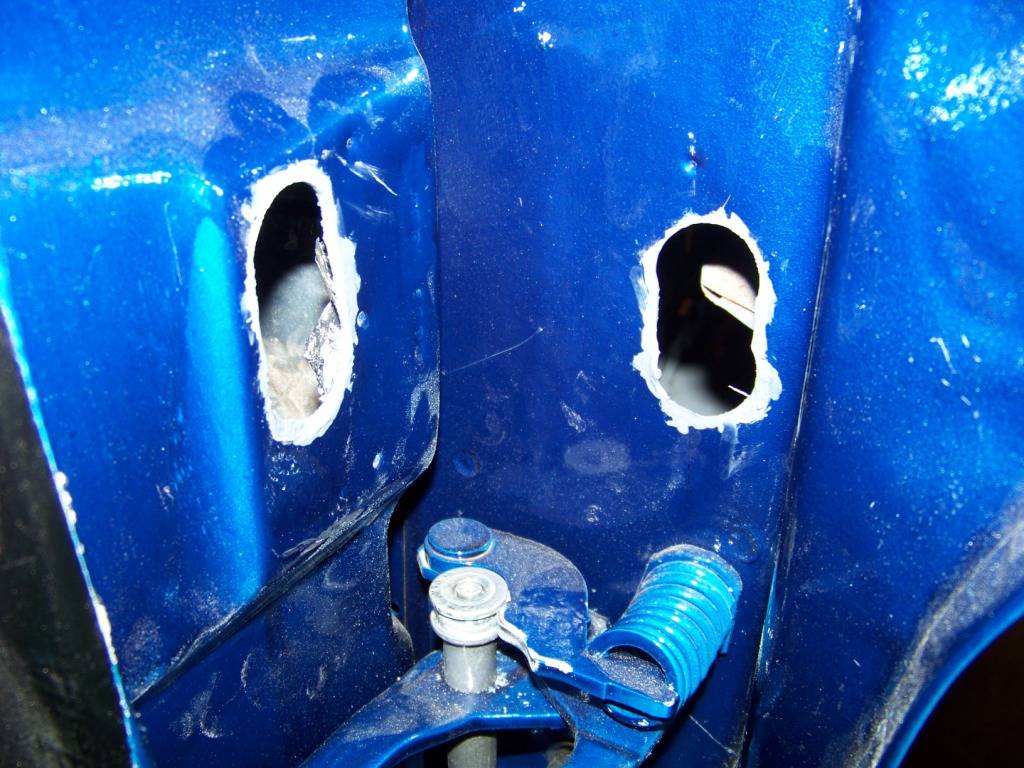
I drilled a series of large holes in the body door jamb area and on the forward part of the door, and then cut out the middle to get the required slots. I finished all cut edges with epoxy primer.
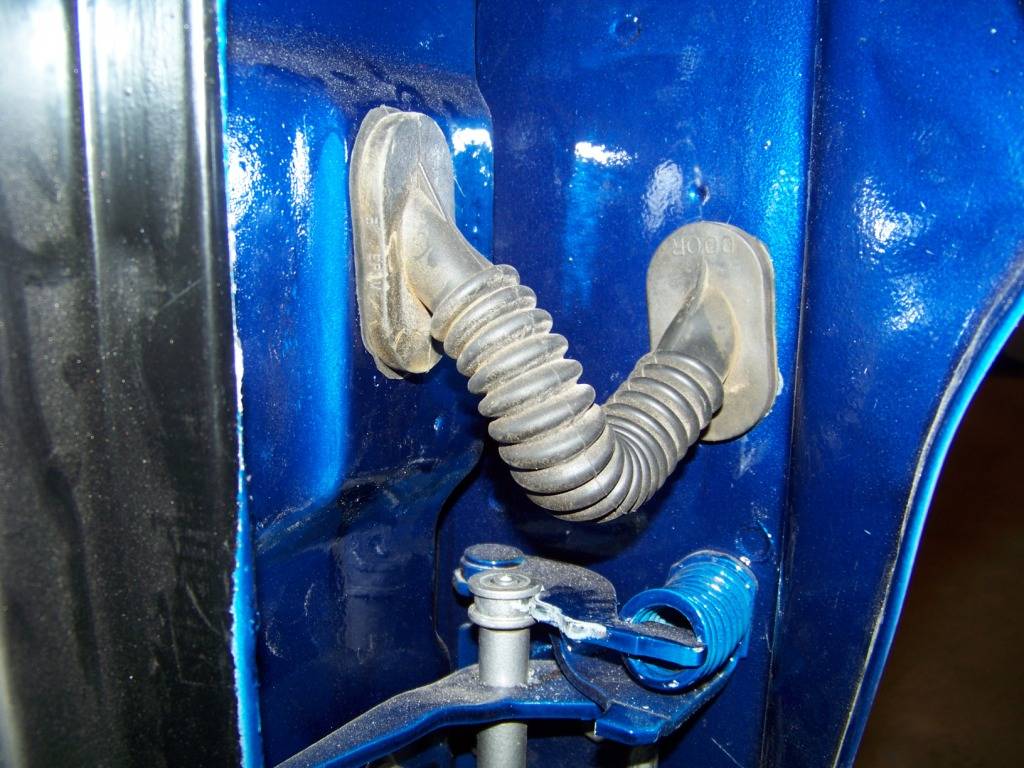
Once the epoxy cured for a day or two in inserted the harness through each slot and snapped the grommets in place. Looks and works just like OEM and I got to use even more parts from the GTO donor.
10-05-2014 #71
Registered User
- Join Date
- Nov 2011
- Location
- Springfield, OH
- Posts
- 58
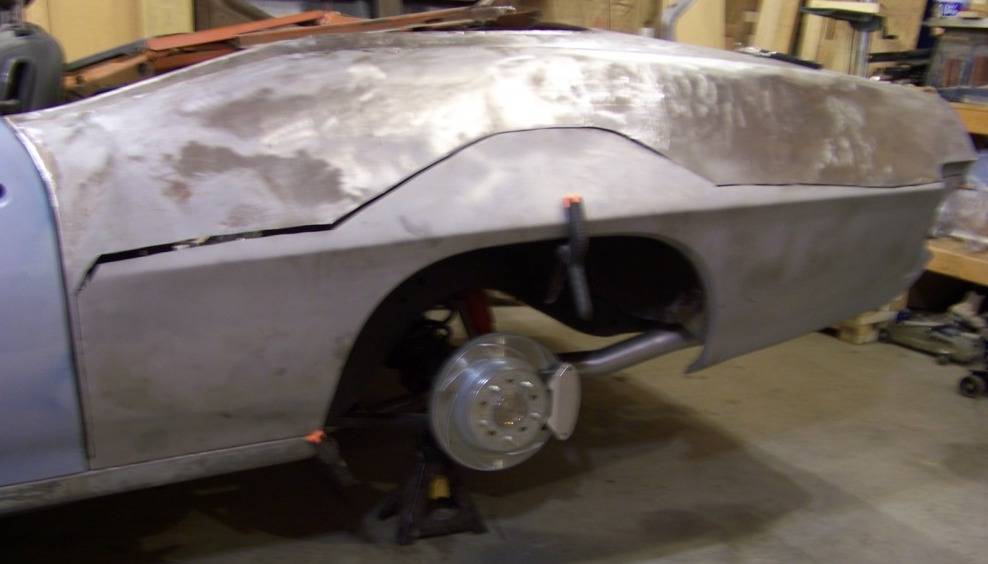
The replacement of the driver's quarter was similar to the passenger quarter except the main cut line on top was lower and I didn't remove the top part of the existing fender.
As before I cut away the existing fender as necessary to remove rust and provide access to the inside of the quarter for sandblasting.
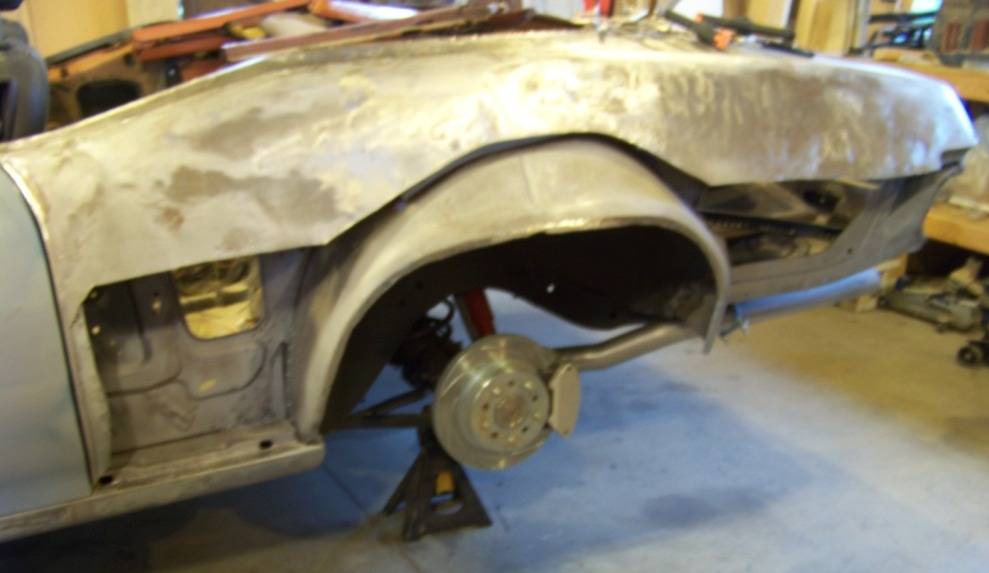
After many trial fittings I had the replacement quarter skin ready to go.
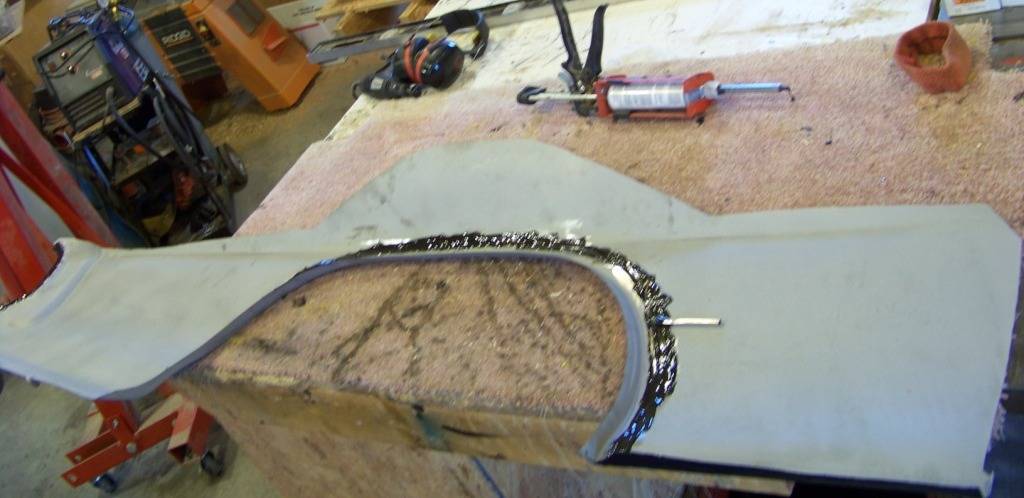
As with the passenger panel I used panel bond along the wheel well lip, along the rocker and near the rear bumper. The two pictures show spreading the panel bond adhesive to both parts.
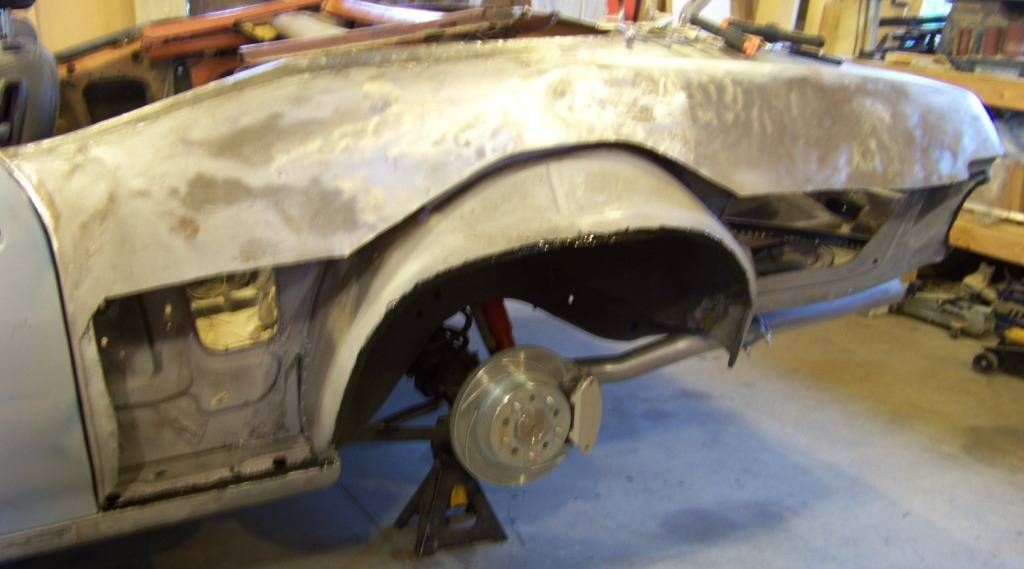
The skin was put into place for the last time, clamps were used around the wheel lip and rear bumper, pop rivets were used as clamps on top of the rocker inside the quarter cavity.
The seams along forward and top edges of the skin were then butt welded and ground smooth.
10-05-2014 #72
Registered User
- Join Date
- Feb 2014
- Posts
- 779
That's awesome. I love the 2x4, very clever.
01-13-2015 #73
Registered User
- Join Date
- Nov 2011
- Location
- Springfield, OH
- Posts
- 58
Before winter set in here in Ohio I got some bodywork done before my shop got too cold.
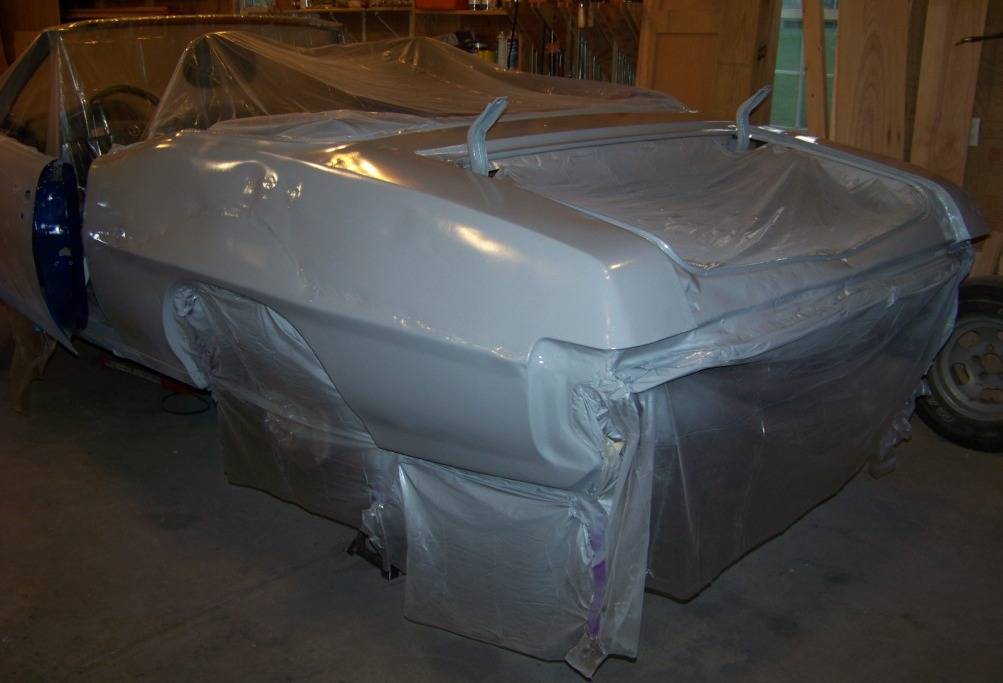
Soon after the welds on my replacement quarters were ground down I sprayed two coats of epoxy primer to seal them:
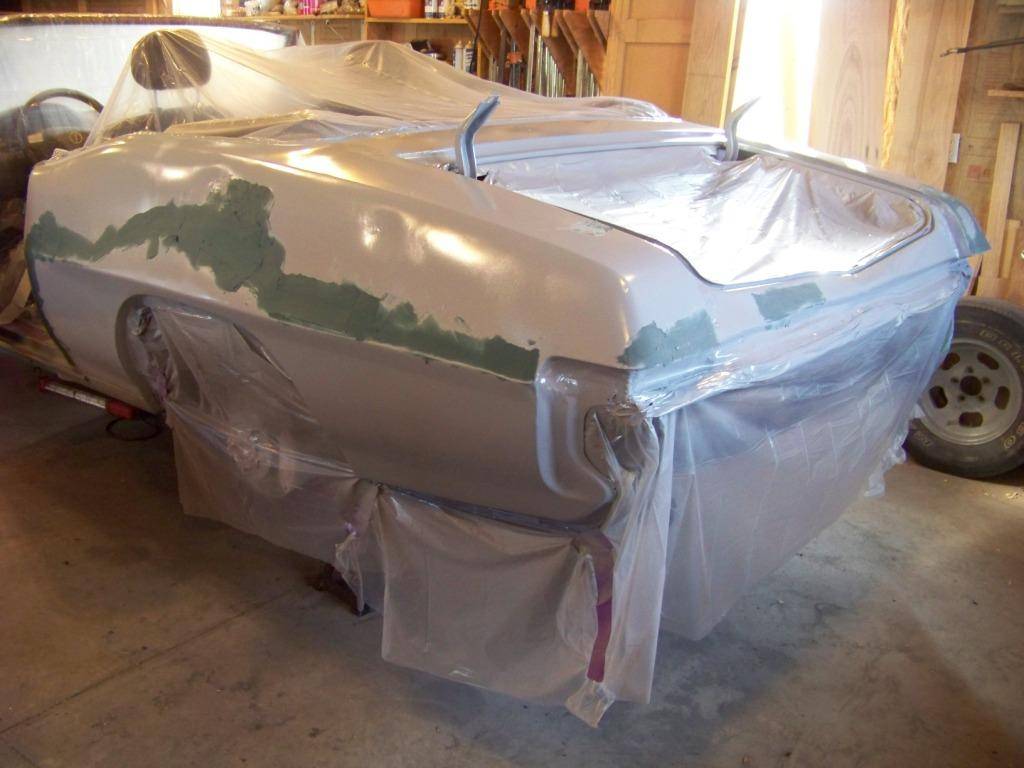
I then followed that with some Duraglass filler to reinforce the welds and fill any pinholes I may have missed:
While I was at it I primed the rear portion of the door jambs and the trunk jambs:
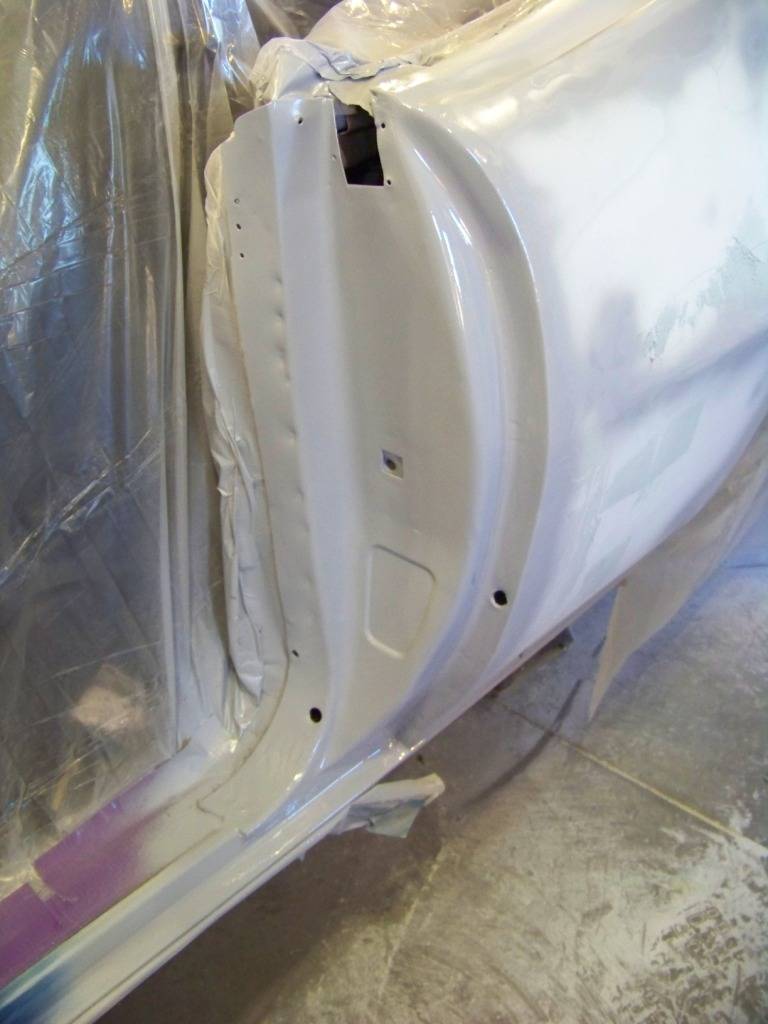
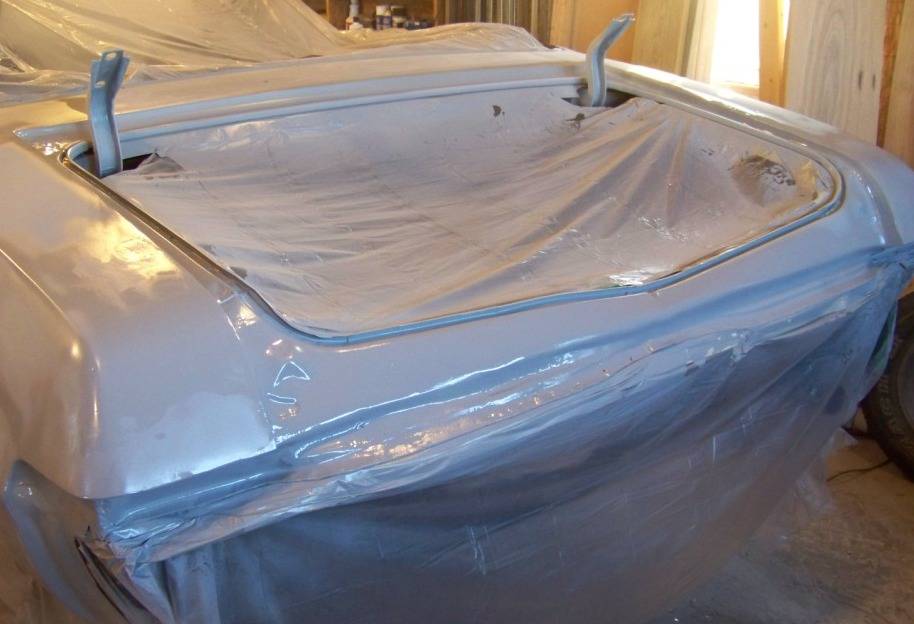
The next day I sprayed base coat and clear on the same two areas:
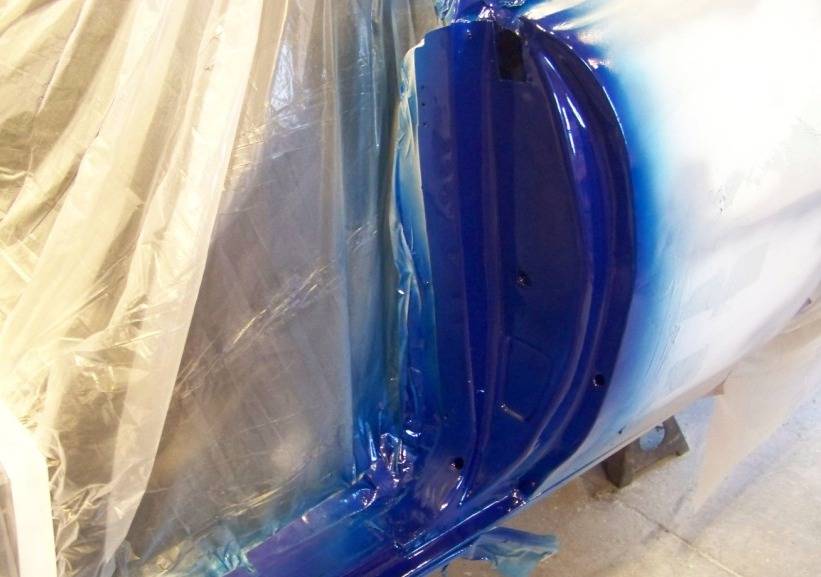
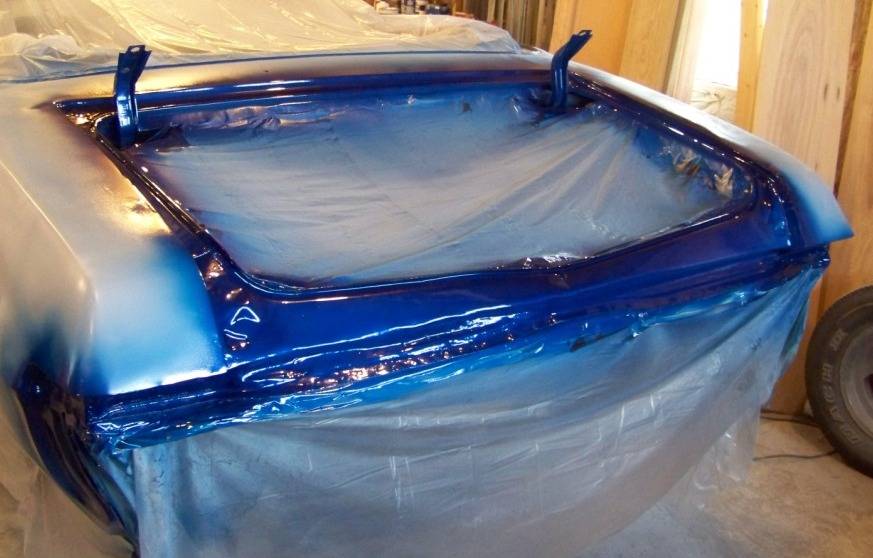
Since then I have been doing a few small and subtle body mods, I will show those in the next few posts.
01-14-2015 #74
Registered User
- Join Date
- Apr 2009
- Location
- FRANCE
- Posts
- 683
Very nice bodywork !
Thanks for showing the process with quarter panels...
Gil
04-23-2015 #75
Registered User
- Join Date
- Nov 2011
- Location
- Springfield, OH
- Posts
- 58
I just wanted to let everyone know I am selling my unfinished project. I have an ad in the Pro-Touring classifieds:
Project for sale
It breaks my heart to sell it but I am moving soon and won't have a good place to work on it anymore. Also, I just don't have the time and money to devote to it. I am hoping someone reading this will decide to take this on and finish what I have started. I need to find a new home for this in the next couple of months so any advice would be appreciated, or if you know someone that might be interested please refer them to my ad.
To those that have responded and commented over the last few years thank you for all the advice and words of encouragement, I have learned a lot and have enjoyed talking and even meeting you. Maybe if circumstances change I will get back to this some day.
01-08-2017 #76
Registered User
- Join Date
- Aug 2012
- Location
- Texas
- Posts
- 9
[QUOTE=fsdproject;914186]Deconstruction started as soon as we got it home. I took the advice of others and tagged and bagged removed parts and took pictures as much as possible.
Since it's a convertible I added bracing to the interior to keep it folding up like a taco while it was off the frame. Since my welding skills were zero at that point and steel can be a little pricey I looked for materials that might work and come upon electrical conduit which is relatively cheap and easy to work with. I attached these to the car and to each other with 5/16" bolts. I tried to triangulate the bracing as much as possible to keep the body from flexing too much, it seemed to work really well and kept it rigid for months.
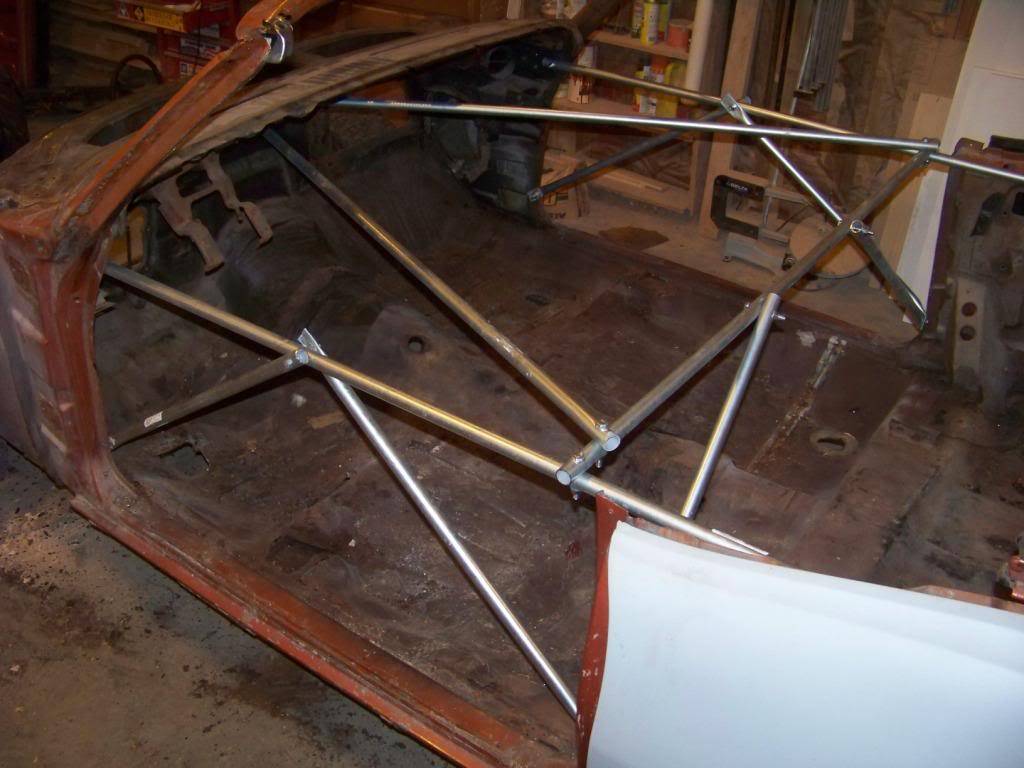
I know this is an older build, but I saw a picture of your bracing technique and thought this will be the best method for me as well. Is the conduit you used strong enough to leave the car on for 6 months or more? Also is it galvanized steel or some other metal? Love the build lots of great information.

 Reply With Quote





