


Results 41 to 60 of 168
Thread: Project Orngasm
-
07-03-2011 #41

 Registered User
- Join Date
- Nov 2008
- Location
- Templeton, CA
- Posts
- 561

Next I installed the rotor assembly along with the outer bearing.
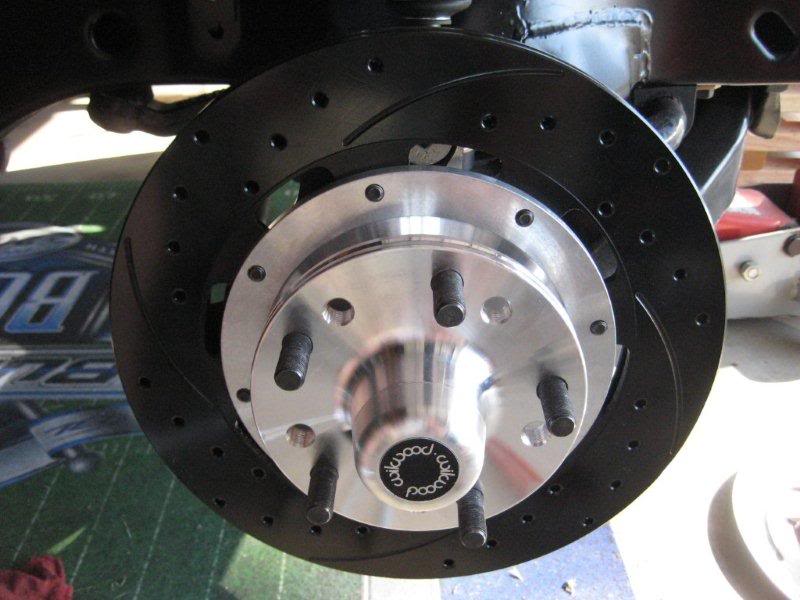
I had some issues with this. When I went to tighten the spindle nut down, it ran out of threads! I was no where near to the point I needed to be. So I decided to use the old spindle washer along with the new one. The one that was in the kit was thicker but obviously not thick enough. I will contact Wilwood on Tuesday. Do any of you see a problem with this? I was able to adjust everything to OEM specs afterwards.
Another issue was with the dust cap... awesome by the way. A lot better than trying to tap the damn thing in like on the old ones! What a PITA! Anyway the issues was with the cotter pin. It was hitting the dust cap and i could feel it when i was turning the rotor. A lil' massaging of the cotter pin and all is well.Robert
My sloooow build thread...https://www.pro-touring.com/showthre...hlight=Orngasm
"If happiness is in your destiny, you need not be in a hurry."
If I can only convince myself of this!
-
07-03-2011 #42
Registered User
- Join Date
- Nov 2008
- Location
- Templeton, CA
- Posts
- 561
The caliper was next. Pretty straight forward.
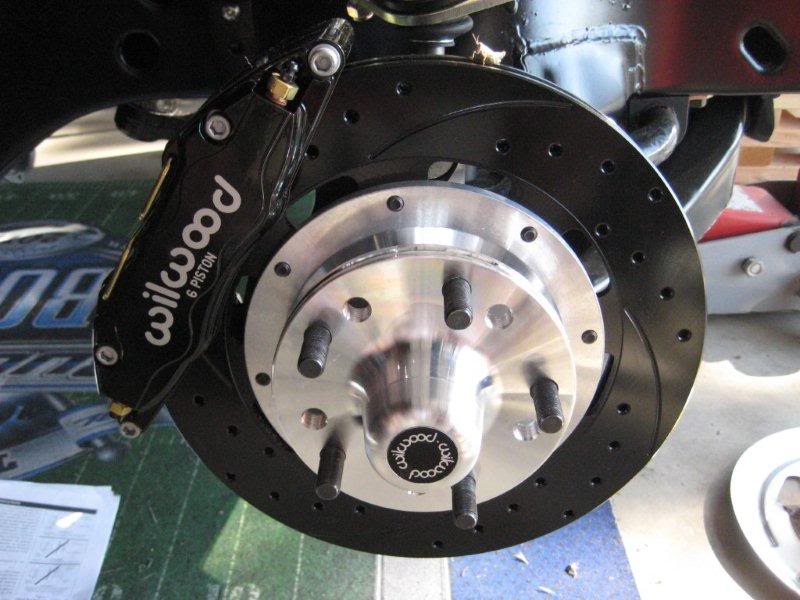
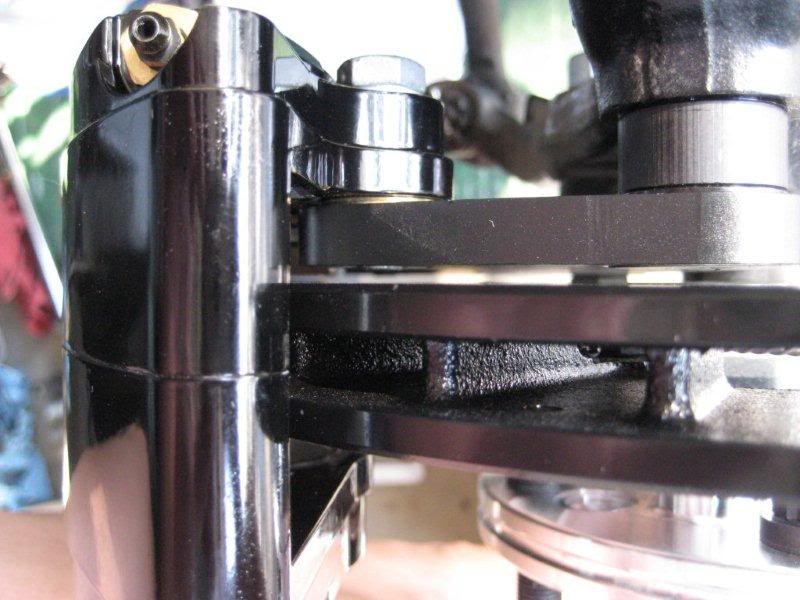
In this pic you can see the bolt at the top (pointing down). They provided you with many shims but suggested you start with two to begin with. Two shims betwen the caliper and the bracket. This was to center everything up and to make sure the bolt end was even with or just protruding from the bracket. Two shims did the trick.
 Robert
My sloooow build thread...https://www.pro-touring.com/showthre...hlight=Orngasm
"If happiness is in your destiny, you need not be in a hurry."
If I can only convince myself of this!
-
07-03-2011 #43
Registered User
- Join Date
- Nov 2008
- Location
- Templeton, CA
- Posts
- 561
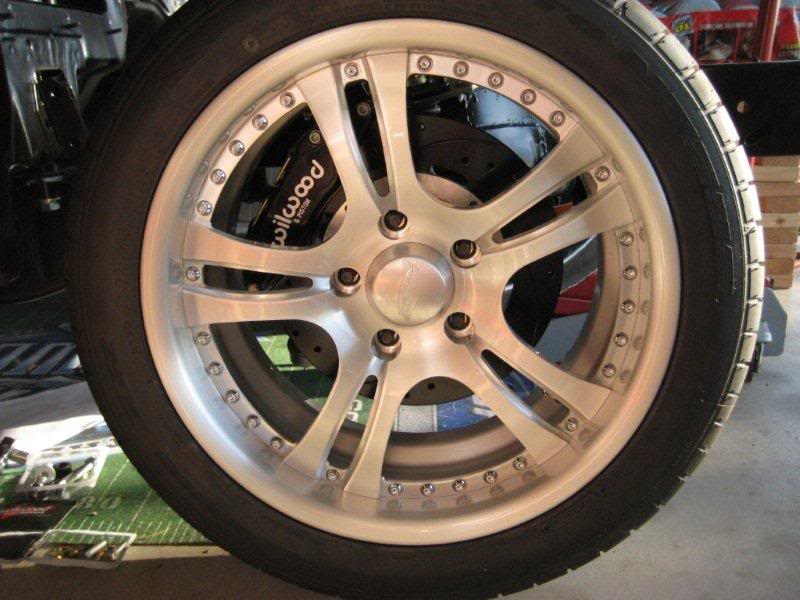
Here she is all done. I'm liking the contrast between the black caliper and the wheel. I could have gone bigger but money is tight. I'm liking it!

 Robert
My sloooow build thread...https://www.pro-touring.com/showthre...hlight=Orngasm
"If happiness is in your destiny, you need not be in a hurry."
If I can only convince myself of this!
-
07-03-2011 #44
Registered User
- Join Date
- Nov 2008
- Location
- Templeton, CA
- Posts
- 561
Are you talking about doing the inner fenders? If so, you could mask off the fender but I don't know how well the coverage would be inside on the inners. make sense? Originally Posted by rfalker1
 Robert
My sloooow build thread...https://www.pro-touring.com/showthre...hlight=Orngasm
"If happiness is in your destiny, you need not be in a hurry."
If I can only convince myself of this!
-
07-03-2011 #45
 Registered User
- Join Date
- Nov 2010
- Posts
- 1,387
true, but the question is could I just pull the fenders off with removing the metal front panels... (I cant think of what they are called at the moment "VEgas" lol)
68 Camaro RS twin turbo
https://www.pro-touring.com/threads/...d-Intent-V-2-0
1993 Toyota Supra 6768 Built Single Turbo
Slow Lifted Jeep No TURBO :(
Randal F
-
07-04-2011 #46
Registered User
- Join Date
- Nov 2008
- Location
- Templeton, CA
- Posts
- 561
Okay, yes you can just remove the entire fender. It's attached in the front to the header panel and the lower valance. Don't forget to count the shims and where they go! Originally Posted by rfalker1
Robert
My sloooow build thread...https://www.pro-touring.com/showthre...hlight=Orngasm
"If happiness is in your destiny, you need not be in a hurry."
If I can only convince myself of this!
-
07-04-2011 #47
Registered User
- Join Date
- Nov 2008
- Location
- Templeton, CA
- Posts
- 561
Happy Birthday USA!
I went out early this morning to try and beat the heat. Got the driverside done and it wasn't too bad knowing what I was in for. I only had to use one spindle nut though. I tried it with the two and I couldn't even get the spindle nut to the hole. WTF? Oh well. I'll be contacting Wilwood tomorrow and see what they have to say.
I put the caliper on and bolted it down and something wasn't right. The bolt end was about to hit the rotor! I used the same amount of shims (2). I was ready to add another shim and as I was reomving the bolt, I looked over and the box of shims and what did I see... two washers that I forgot to use with the bolts. Duh! Problem solved.
I safety wired the caliper bolts and it wasn't as bad as I expected. It was just a weee bit tight in there.
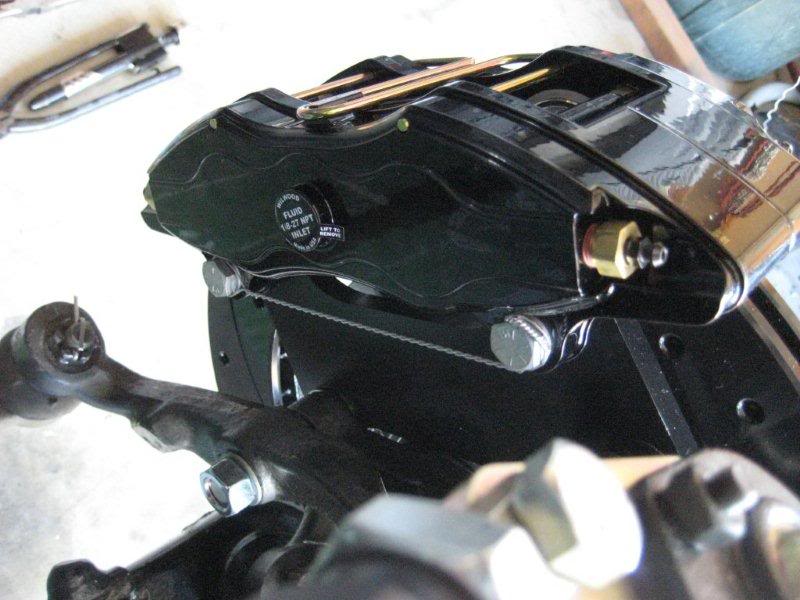
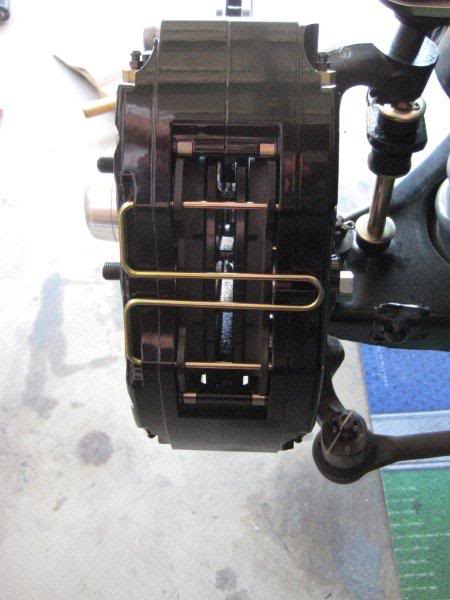
I then installed the pads. Wow talk about easy! Remove fancy pin, drop said pads in, reinstall pin, Done. I can see how nice it would be to change the pads, say for a track day. Two minutes then some bedding in time.
 Robert
My sloooow build thread...https://www.pro-touring.com/showthre...hlight=Orngasm
"If happiness is in your destiny, you need not be in a hurry."
If I can only convince myself of this!
-
07-04-2011 #48
 Registered User
- Join Date
- Jan 2009
- Location
- Lawrenceville, Ga.
- Posts
- 440
Thanks' for the info on the Wilwoods This will come in handy when I order mine.
There are 2 factors in Autocross, Tires and the loose nut behind the wheel.
Paul Grala
69 Mach 1 project (For Sale)
78 Cobra
87 GT
98 Expedition
-
07-06-2011 #49
Registered User
- Join Date
- Nov 2008
- Location
- Templeton, CA
- Posts
- 561
No problem Paul. Isn't that we are all here for... help one another with these pics and write ups? lol
I spoke with Wilwood the other day about the spindle washer issue and they seemed surprise also. They said it would NOT be a problem with two washers on. As long as it's (bearings) adjusted right.
This weekend... cutting quarter panels out and homemade mini tub? We'll see and post pics of course!Robert
My sloooow build thread...https://www.pro-touring.com/showthre...hlight=Orngasm
"If happiness is in your destiny, you need not be in a hurry."
If I can only convince myself of this!
-
07-08-2011 #50
Registered User
- Join Date
- Nov 2010
- Posts
- 1,387
cool thanks for the info!!! that will be a project for a later date!!! your brakes are sick to by the wayOkay, yes you can just remove the entire fender. It's attached in the front to the header panel and the lower valance. Don't forget to count the shims and where they go!68 Camaro RS twin turbo
https://www.pro-touring.com/threads/...d-Intent-V-2-0
1993 Toyota Supra 6768 Built Single Turbo
Slow Lifted Jeep No TURBO :(
Randal F
-
07-17-2011 #51
Registered User
- Join Date
- Nov 2008
- Location
- Templeton, CA
- Posts
- 561
No problem Randal. Thank you for the compliments on the brakes. Originally Posted by rfalker1
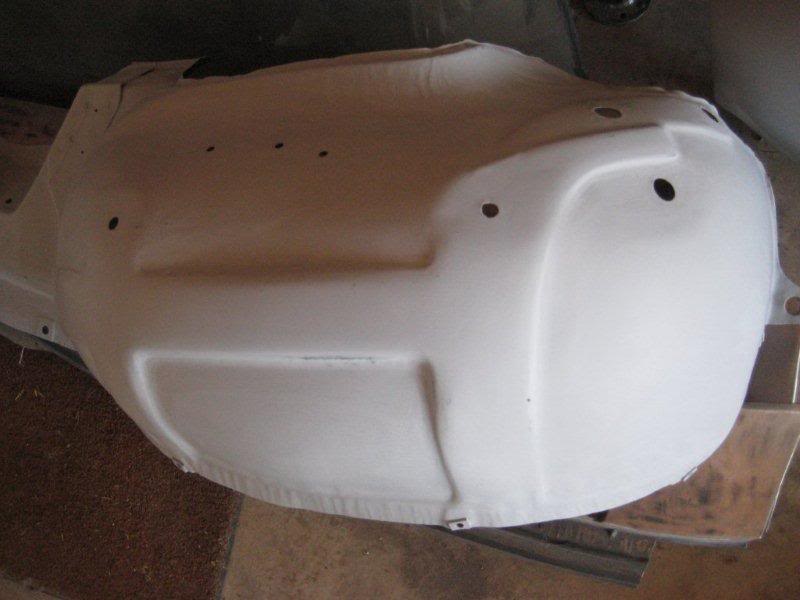
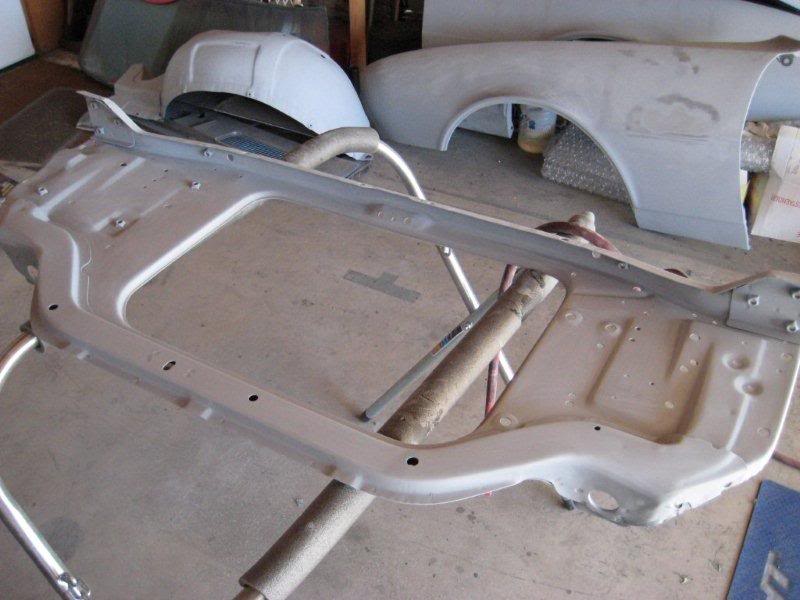
I need to get to the quarters but something always comes up. I need to make a list and start with number 1! I had some left over Valspar primer so I decided to spray the inner fenders and the radiator support.
 Robert
My sloooow build thread...https://www.pro-touring.com/showthre...hlight=Orngasm
"If happiness is in your destiny, you need not be in a hurry."
If I can only convince myself of this!
-
07-17-2011 #52
Registered User
- Join Date
- Nov 2008
- Location
- Templeton, CA
- Posts
- 561
I then took the remaining Eastwood Underhood Black and sprayed them.
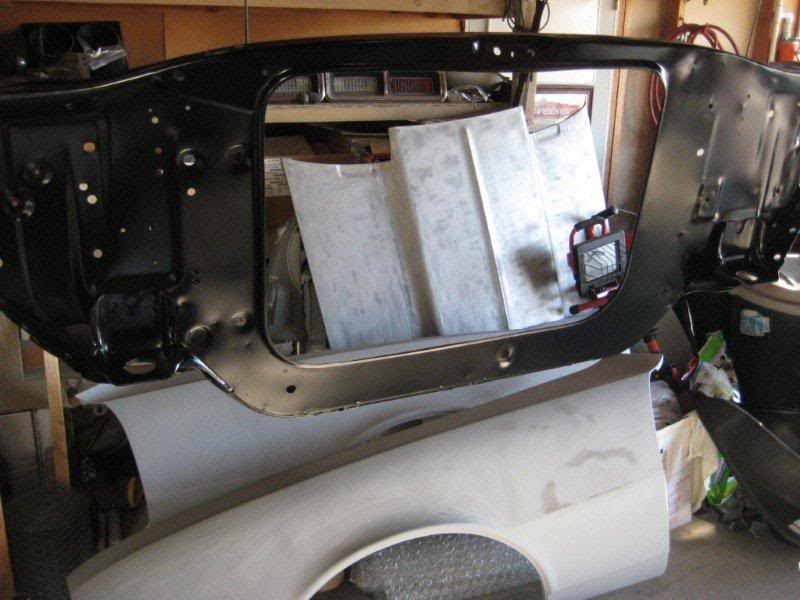
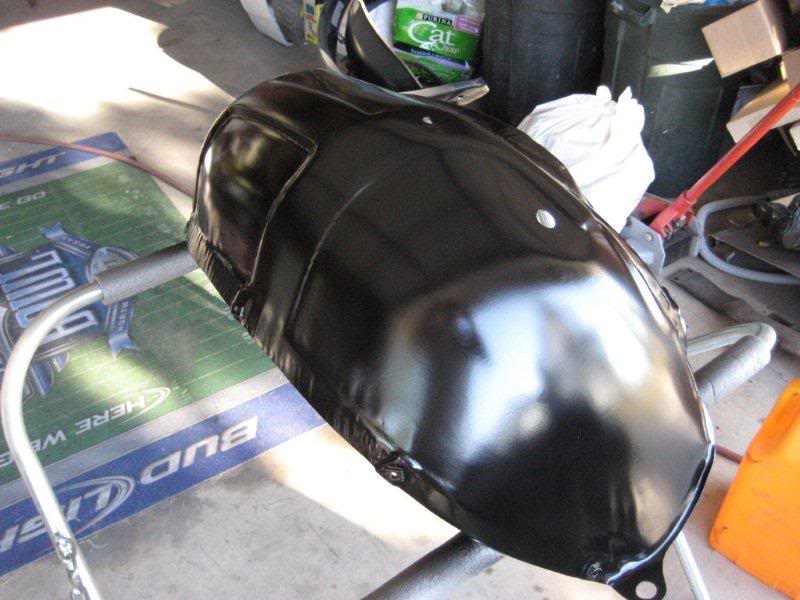 Robert
My sloooow build thread...https://www.pro-touring.com/showthre...hlight=Orngasm
"If happiness is in your destiny, you need not be in a hurry."
If I can only convince myself of this!
-
07-17-2011 #53
Registered User
- Join Date
- Nov 2008
- Location
- Templeton, CA
- Posts
- 561
I attempted to weld the cowl panel on and had nothing but problems. First the heat was too high. Kept burning holes in the new, thinner metal. Then turned the heat down, welded, beautiful weld, then 'pop' it didn't hold! I blame it on the weld thru primer! lol When I welded the inside I first removed all the primer (being inside) who cares, and I had no problems with the welds... beautiful!
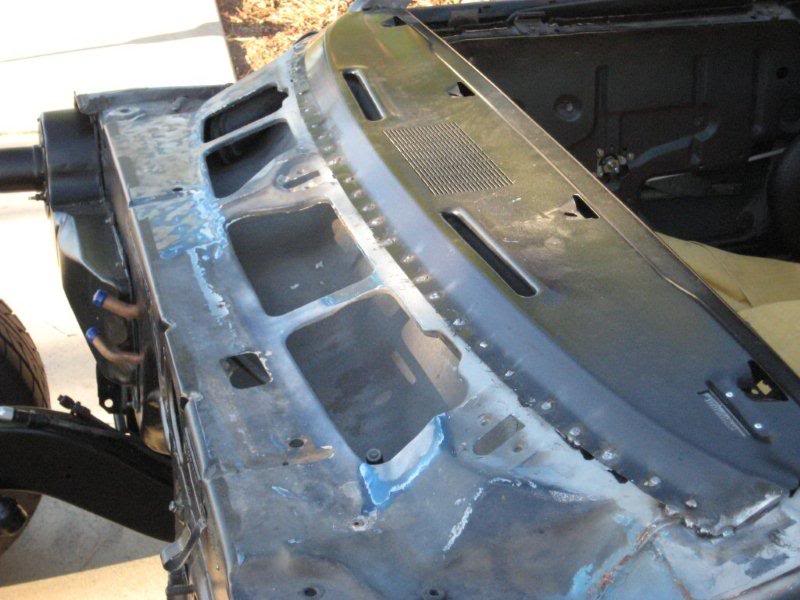 Robert
My sloooow build thread...https://www.pro-touring.com/showthre...hlight=Orngasm
"If happiness is in your destiny, you need not be in a hurry."
If I can only convince myself of this!
-
07-17-2011 #54
Registered User
- Join Date
- Nov 2008
- Location
- Templeton, CA
- Posts
- 561
Well I don't think I'll be ready for Hot August Nights yet another year!!
 So my next event to shoot for will be Buttonwillow in Sept. There will be a few PT peeps there and should be a lot of fun. I'm tired of missing all these fun events. Not this one!
 :
Robert
My sloooow build thread...https://www.pro-touring.com/showthre...hlight=Orngasm
"If happiness is in your destiny, you need not be in a hurry."
If I can only convince myself of this!
-
07-24-2011 #55
Registered User
- Join Date
- Nov 2008
- Location
- Templeton, CA
- Posts
- 561
I was cleaning the cowl area today and have a few questions for all of you.
1. What are your thoughts on painting the dash the same as the body color?
2. What type of seam sealer did they use in these areas. It's not your typical sealer as it was applied to bare metal. I thought you primered first then put down the seam sealer.
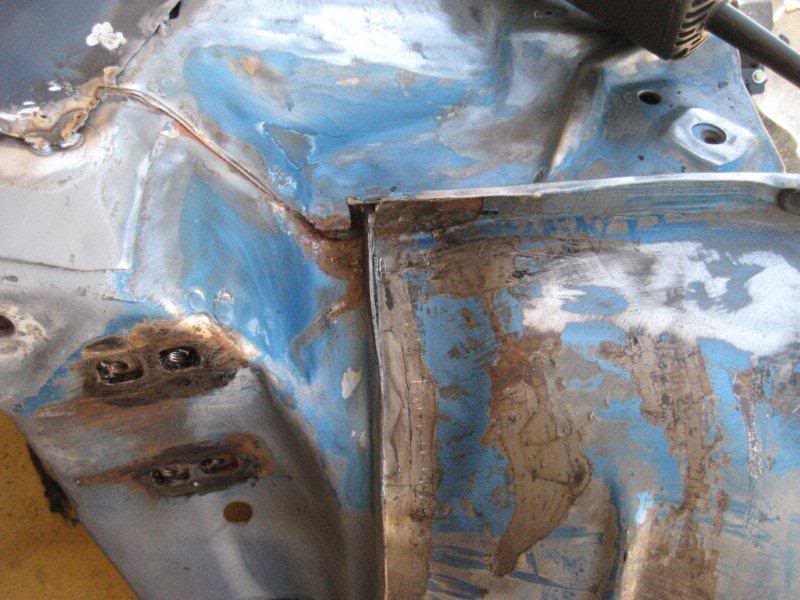
No rust issues until the very bottom of the cowl.
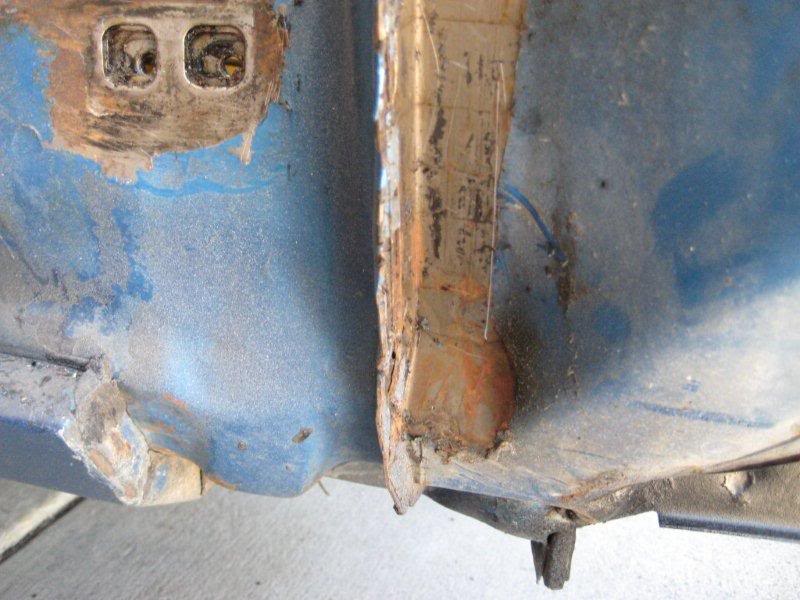
Why the clump of sealer here along with other areas?
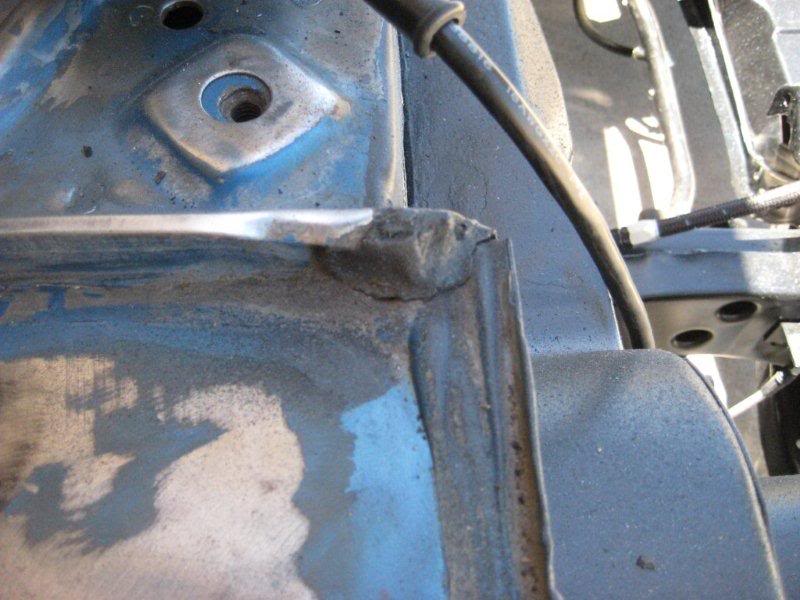
Thanks guys.Robert
My sloooow build thread...https://www.pro-touring.com/showthre...hlight=Orngasm
"If happiness is in your destiny, you need not be in a hurry."
If I can only convince myself of this!
-
07-24-2011 #56
Registered User
- Join Date
- Nov 2008
- Location
- Templeton, CA
- Posts
- 561
Some other problems I ran into. When I installed the Wilwood flex lines I turned the tire to make sure there was no binding or clearance issues. Come to find out I did have some clearance issues. It appears the 245's on 17x8 wheels are going to hit the UCA and the subframe. I was thinking these would clear with no problems. That's what I get for thinking. I'll have to investigate this. David Pozzi asked if I could move the wheels out more? Not quite to that stage yet! I guess I could throw a fender on and see what happens. but then again there is no motor in it. Would that really matter?
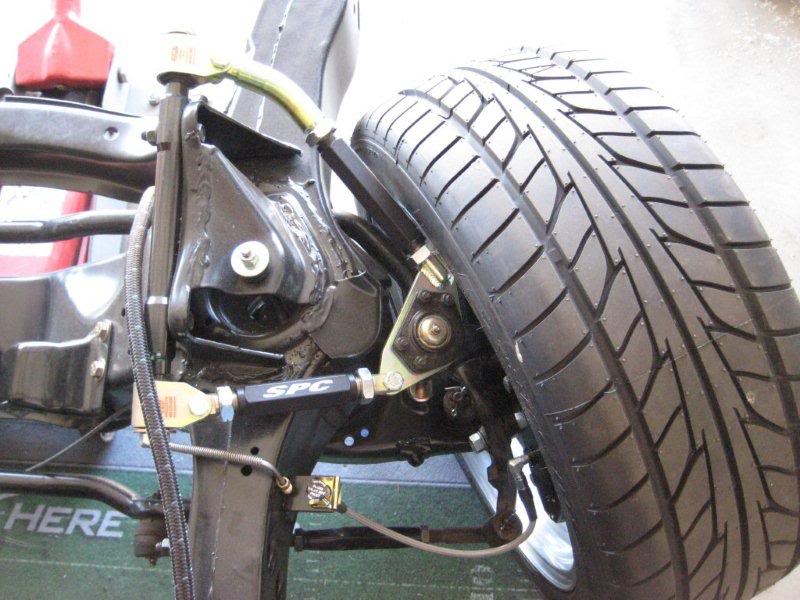
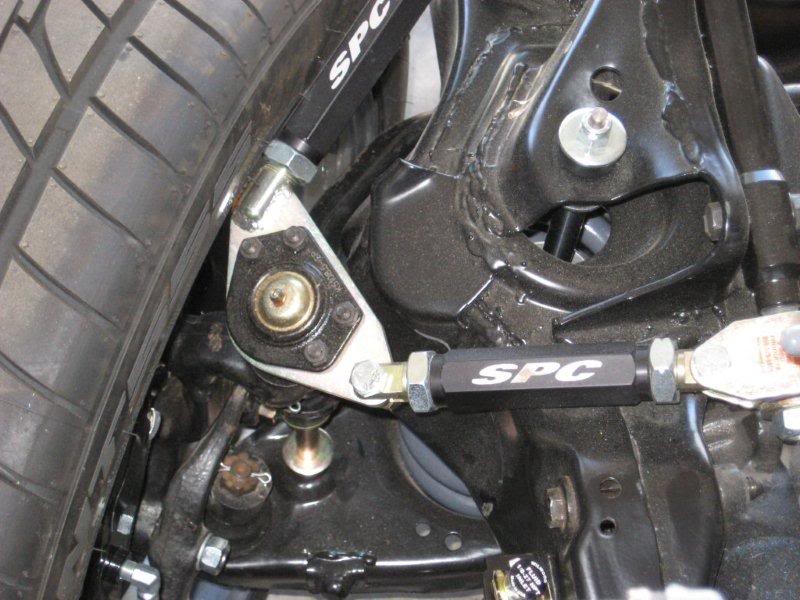 Robert
My sloooow build thread...https://www.pro-touring.com/showthre...hlight=Orngasm
"If happiness is in your destiny, you need not be in a hurry."
If I can only convince myself of this!
-
07-24-2011 #57
 Registered User
- Join Date
- May 2011
- Location
- Central FL
- Posts
- 216
What's the rim's backspacing on that 17x8?
- David
1967 Camaro - In remembrance of my friend Scott
-
07-24-2011 #58 Full Blown G-Machiner
- Join Date
- Sep 2010
- Location
- alpine ca
- Posts
- 657
IMO if your doing a black interior then do the dash black, im putting epoxy primer on cowl and firewall than the seam sealer that way the primer gets into the seams for protection im using a sealer in a tube like caulking, thats a big bummer about your wheels sorry to here it
john1972 NOVA SPEED TECH TORQUE ARM AND FRONT ARMS , RUSHFORTH NIGHT TRAINS, DRIVERZ INC
BUILD LINK
https://www.pro-touring.com/showthre...t-(GREY-MATTER)
07-24-2011 #59
Registered User
- Join Date
- Feb 2010
- Location
- Corvallis Montana
- Posts
- 597
[QUOTE=ROBS6T8;814777]The caliper was next. Pretty straight forward.
looks like you have a little someone checking out your new brakes
07-24-2011 #60
Registered User
- Join Date
- Nov 2008
- Location
- Templeton, CA
- Posts
- 561
Thanks for stopping by guys.
That's what I was thinking... black! But I wanted to get some color on there and since I was doing the cowl area, I figured I could just continue into the dash and spray some Tangelo! I don't know. The sealer thing has thrown me. The sealer I used previously was in a caulking gun also. I applied it after the primer. This stuff I removed was black in color and there was no primer under it. Just plain metal as you see in the pics. Originally Posted by johnny68
[QUOTE=robertjra;821180]I forgot about him! lol I was wondering if anyone would see him. He pretty much hung around after the assembly was installed. Too funny. Originally Posted by ROBS6T8
The back spacing is 4.875. I really didn't think I would have any problems with this. I'm not too concerned yet. I'll let the build get a lil' further. Originally Posted by MyFriendScott
Robert
My sloooow build thread...https://www.pro-touring.com/showthre...hlight=Orngasm
"If happiness is in your destiny, you need not be in a hurry."
If I can only convince myself of this!

 Reply With Quote



