Results 281 to 300 of 533
Thread: 'Streamline' 1968 camaro project
-
12-18-2018 #281

 Registered User
- Join Date
- Sep 2009
- Posts
- 2,996

Sometimes it just works out that way. Good deal with the pedals. Make sure that you install some sort of positive clutch petal stop though so you don't overthrow the clutch master cylinder.
1955 Nomad project LC9, 4L80e, C5 brakes, Vision wheels
1968 Camaro 6.2 w/ LSA, TR6060-Magnum hybrid and etc SOLD
1976 T/A LS1 6 Speed, and etc. SOLD
Follow me on Instagram: ryeguy2006a
-
12-18-2018 #282
 Registered User
- Join Date
- Aug 2015
- Location
- charlotte
- Posts
- 929
It doesn't happen near enough! Originally Posted by ryeguy2006a

-
12-18-2018 #283
Registered User
- Join Date
- Aug 2015
- Location
- charlotte
- Posts
- 929
Another big couple of days in the garage, the first of which was spent protecting everything I didn't want to receive overspray followed by scuffing every inch of the car to receive feather fill G2 high build primer.
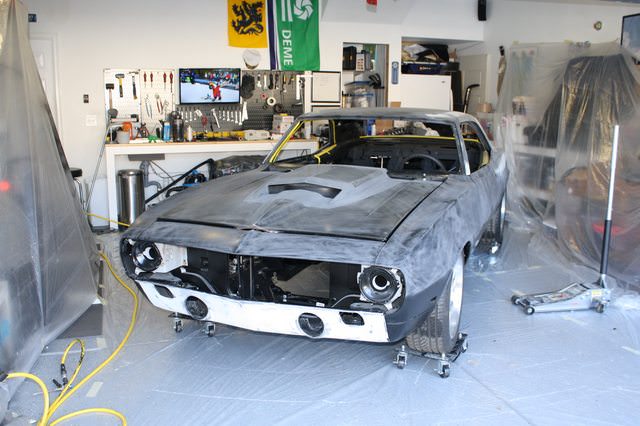
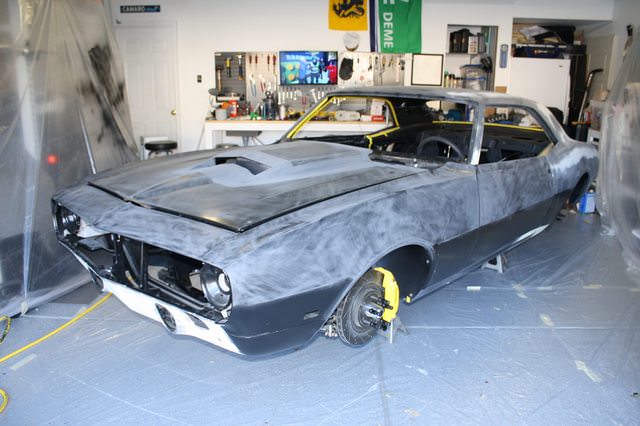
then an even longer day taping up. This was to be expected since I want as little overspray on the interior as possible.
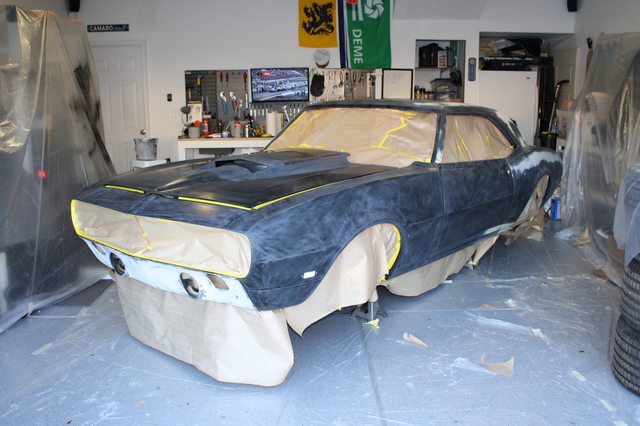
Then finally I hit it with primer. I used a 2.2mm tip and reduced it 5-10% but even then it was hard to spray. Regardless, I got the whole Gallon onto the body, and am happy enough with the result.
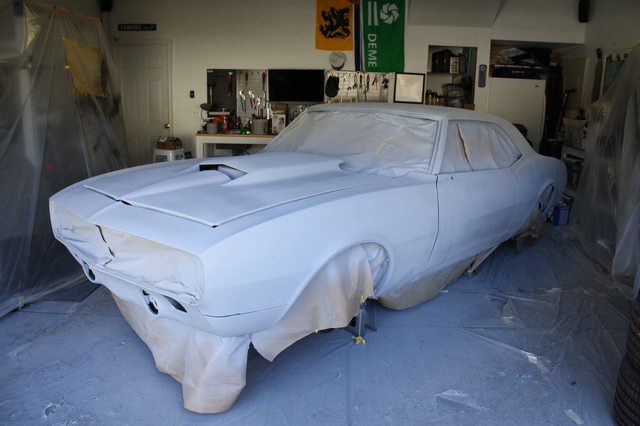
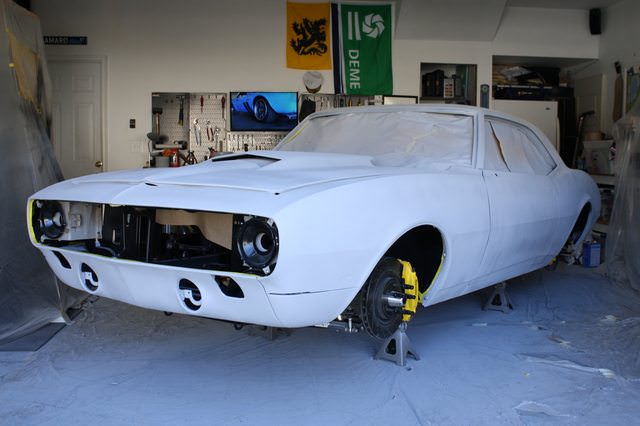
So today I had the less than fun job of reverting the garage back to its original state and then hit the car with some guide coat.
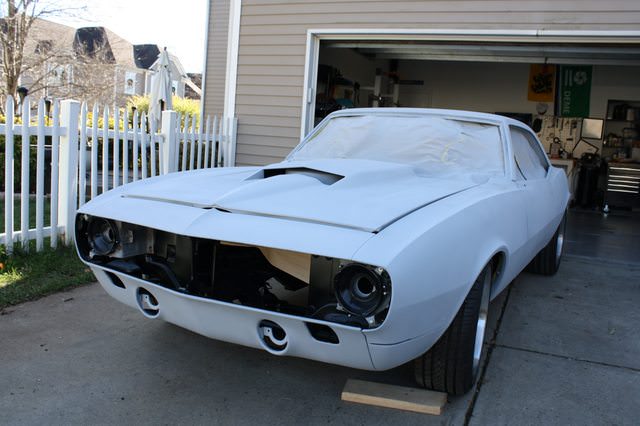
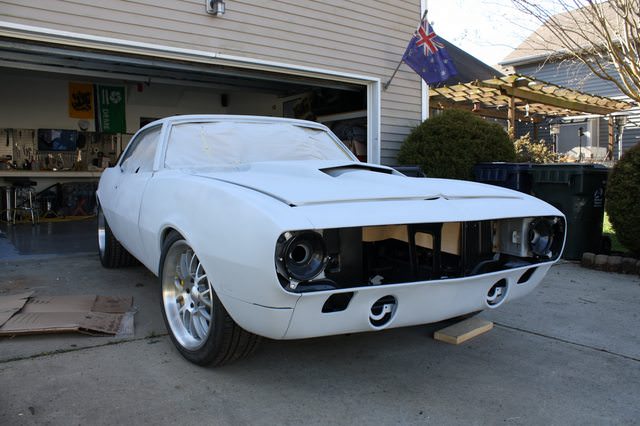
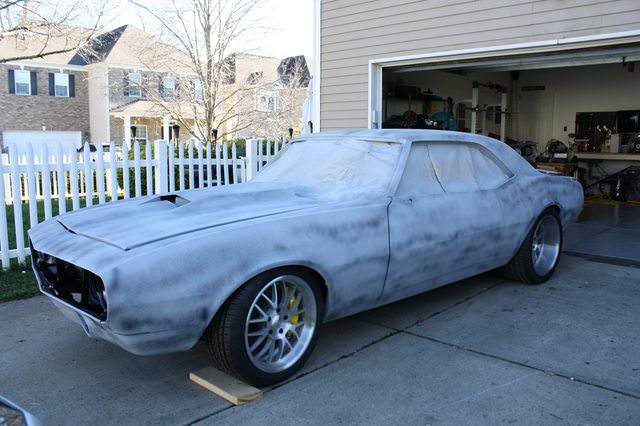
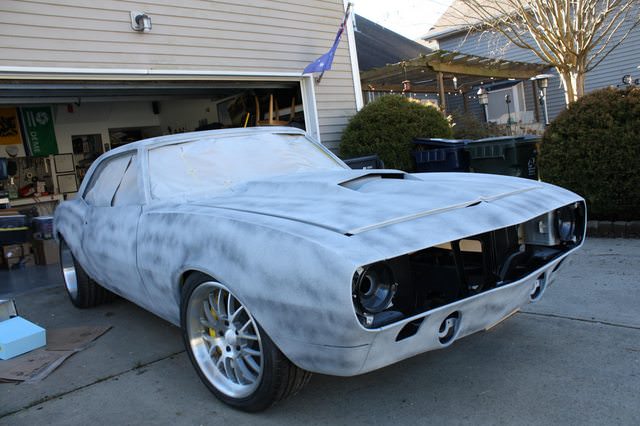
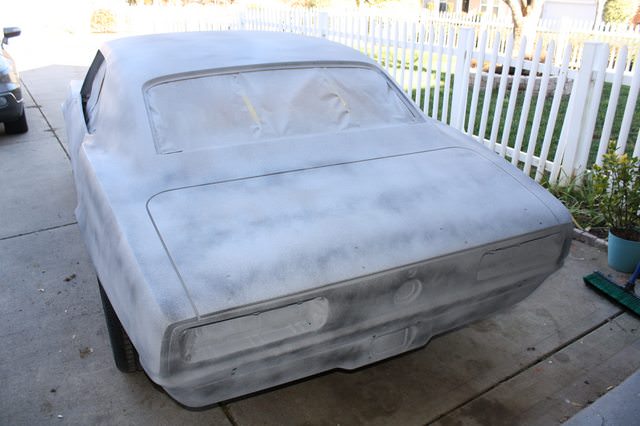
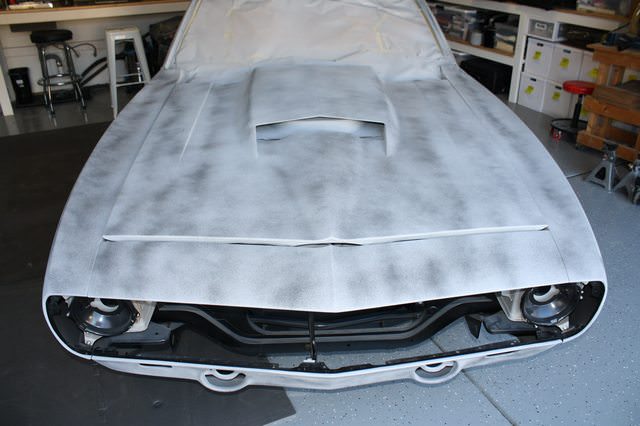
I'll most likely give the car a few more days to really harden up then get stuck into it. I'm more than happy with the current gaps on the car and can't see a huge amount of filler work left in the future.
-
12-19-2018 #284
 Registered User
- Join Date
- Dec 2005
- Location
- Maryville, TN
- Posts
- 844
Ah yes, the "tiger stripe" days... remember them well. You're getting there man!
Originally Posted by slimjim
-
12-20-2018 #285
Registered User
- Join Date
- Aug 2015
- Location
- charlotte
- Posts
- 929
Still here... still sanding
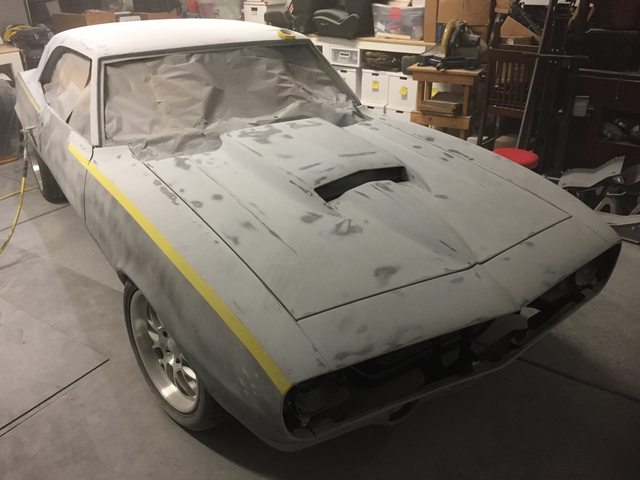
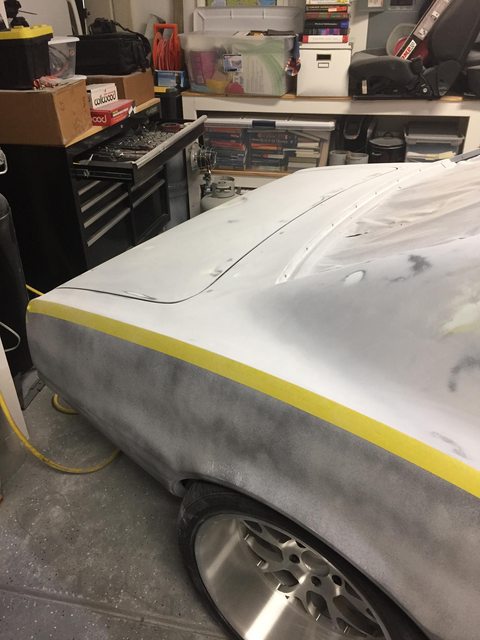
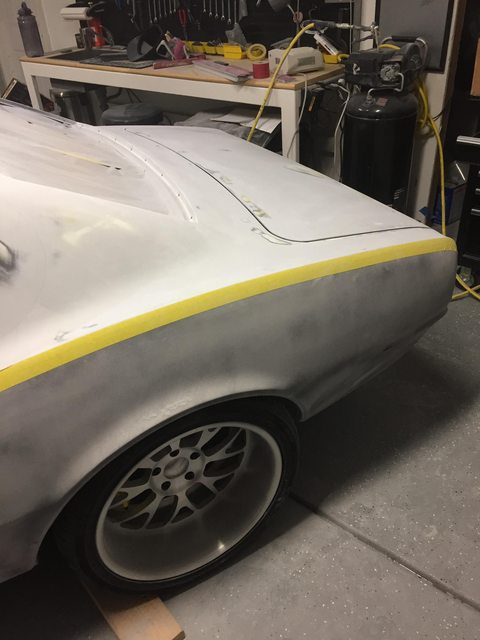
so far I'm very happy with it, not 'too many' areas needing further attention
-
12-20-2018 #286
 Registered User
- Join Date
- Nov 2006
- Location
- Ma.
- Posts
- 5,560
It looks good keep picking away at it!
Wayne
Car FINALLY home !!!!!! lol
Project FNQUIK https://www.pro-touring.com/showthre...ghlight=FNQUIK
-
12-20-2018 #287
 Registered User
- Join Date
- Aug 2007
- Location
- Vancouver, BC
- Posts
- 125
 Originally Posted by slimjim
Is the purpose of the black valvecover-mounted bent plates just to conceal the coil plug wiring? Or any other specific reason? Just curious. Looks so clean!!1972 Nova, forged LQ4 with twin 6466's, T56 Magnum, OEM subframe w/ Speedtech front, Chassisworks gLink rear, Ridetech coils & Wilwoods, with a rear floater in the works --> http://www.ls1tech.com/forums/conver...1972-nova.html
-
12-21-2018 #288
Registered User
- Join Date
- Aug 2015
- Location
- charlotte
- Posts
- 929
That is the proform coil bracket, if you look at a picture below once the engine is further assembled, the coils now sit perfectly horizontal rather than angled. For now I will run it like that, but in the future I may consider hiding the coils on the subframe. Originally Posted by frojoe
- - - Updated - - -
see here Originally Posted by slimjim
-
12-29-2018 #289
Registered User
- Join Date
- Aug 2015
- Location
- charlotte
- Posts
- 929
I have been doing bodywork for the most part of the last week, a crazy amount actually. progress is slow, but I'm very happy with it. I'll save the pictures until this stage of refining is complete, but my guess is I'll have another coat of high-build on it by this time next week.
Meanwhile, most days I start by doing something else on the car, just so my life doesn't entirely consist of being dusty.
I managed to get my clutch pedal connected, it seems 5/16-24 is a hard size to get an extension for the clevis, however it's done now.
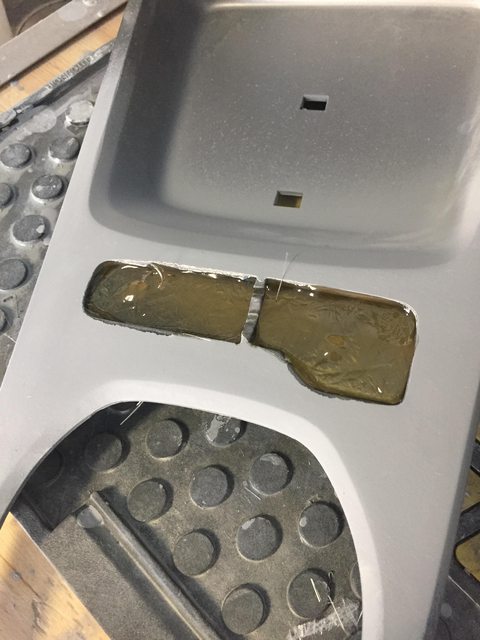
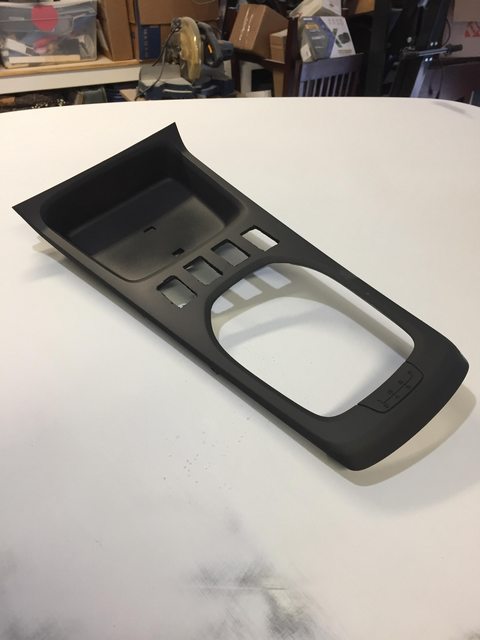
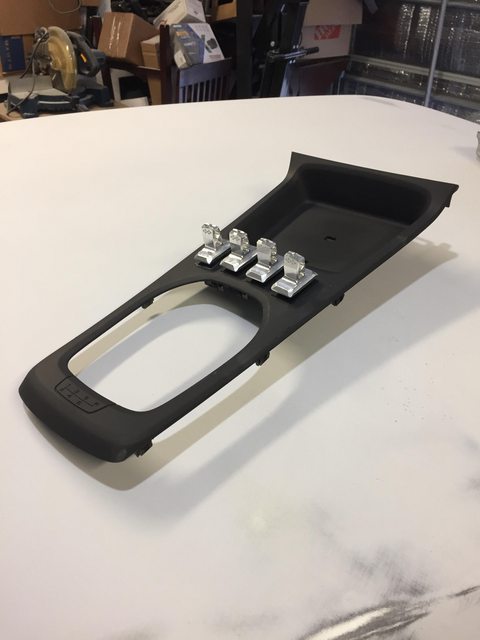
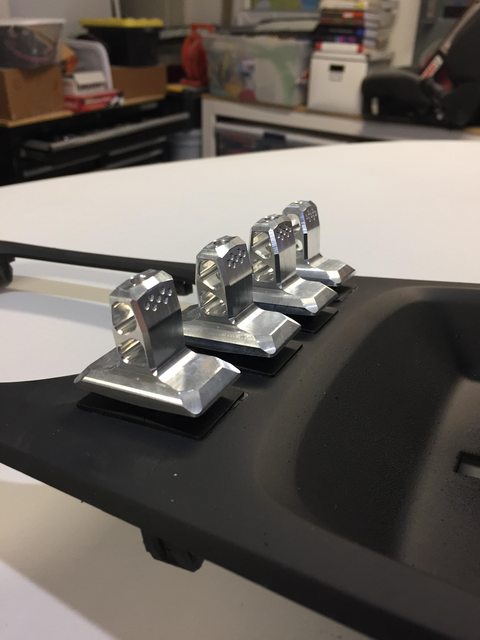
I ordered some billet window switches from ringbrothers a few months ago, then I forgot about them, but they finally arrived a week ago, and some point in the last few months I also ordered a 'gauge-less console trim' for the 5th gen console and decided to put my idea to the test. I'm very happy with the final result and the switches are a piece of art.
-
12-29-2018 #290
Registered User
- Join Date
- Nov 2006
- Location
- Ma.
- Posts
- 5,560
What a sweet idea.
Wayne
Car FINALLY home !!!!!! lol
Project FNQUIK https://www.pro-touring.com/showthre...ghlight=FNQUIK
-
01-05-2019 #291
Registered User
- Join Date
- Aug 2015
- Location
- charlotte
- Posts
- 929
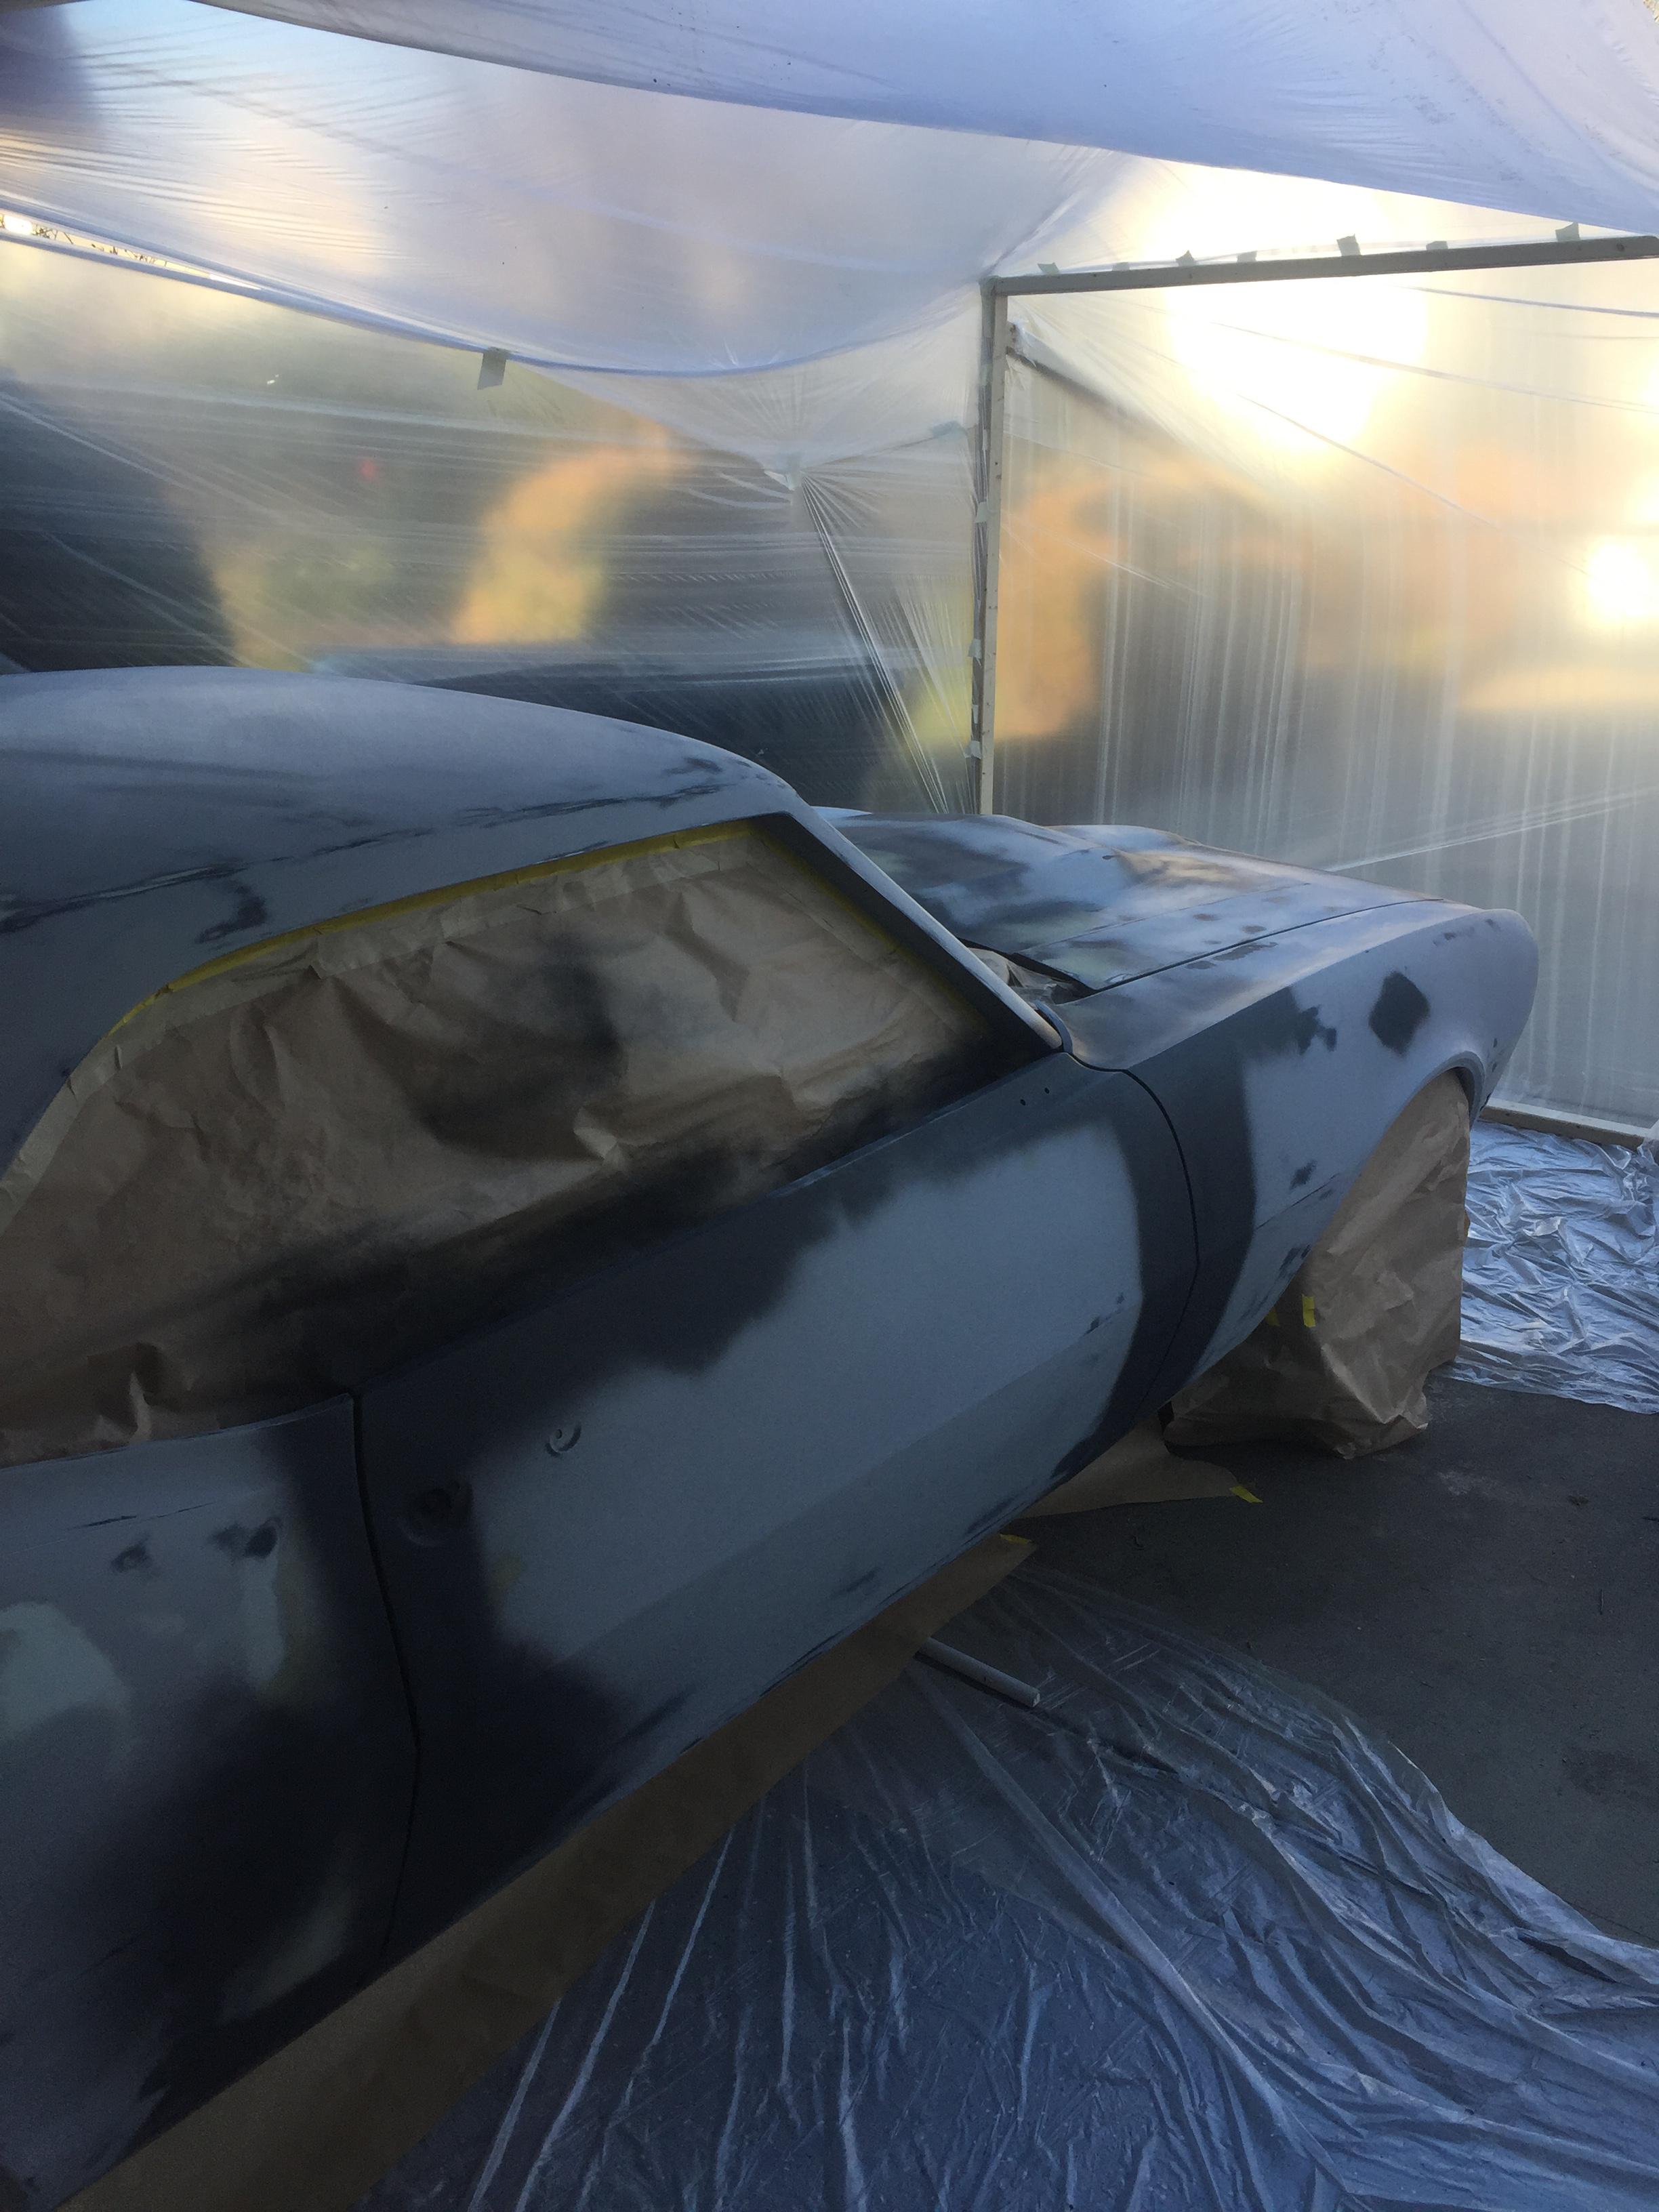
Ok I have spent numerous days(every day since my last post) on the bodywork and finally the weather window started today so I didn't waste any time.
I setup my redneck garage/driveway paint booth and hit it again with featherfill poly. I took zero pictures during the sanding process and none bar this one picture today.
But I spent a lot of time refining the gaps over the last week, hit all the burn-throughs with epoxy and today it was ready.
Tomorrow I plan to push it out, clean everything up, and take some proper photos for you all. first results are very satisfying!
-
01-06-2019 #292
Registered User
- Join Date
- Aug 2015
- Location
- charlotte
- Posts
- 929
I had some trouble on the first round of poly so I bought a new gun with a 2.5mm tip and it sprayed remarkably better.
very happy with gaps now.
The rear spoiler might be my next big project as I've decided I'm nowhere near satisfied with it's fitment.
iPhone pictures for now.

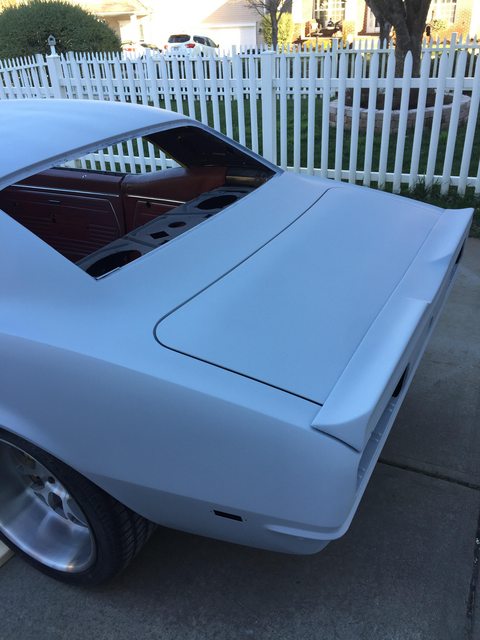
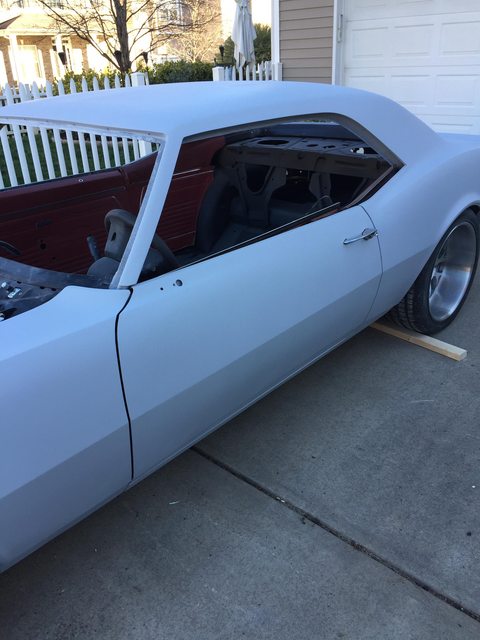
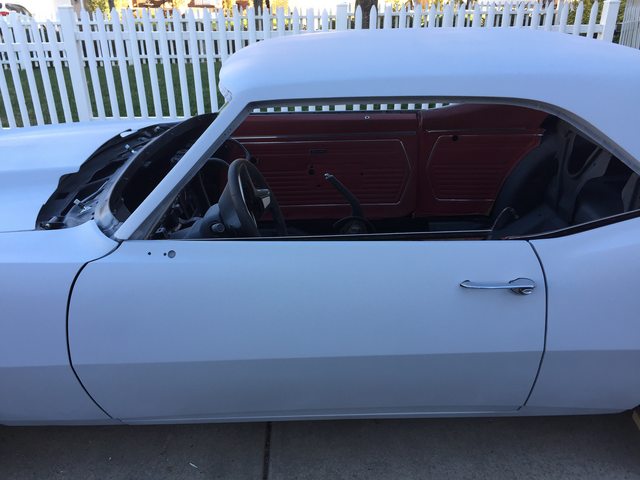
That's about the extent of my sanding and bodywork for now though.
-
01-06-2019 #293
Registered User
- Join Date
- Nov 2006
- Location
- Ma.
- Posts
- 5,560
Nice work it looks great, nice crisp lines. The body looks good all one color.
Wayne
Car FINALLY home !!!!!! lol
Project FNQUIK https://www.pro-touring.com/showthre...ghlight=FNQUIK
-
01-07-2019 #294
Registered User
- Join Date
- Sep 2009
- Posts
- 2,996
Wow, that is a great job! Body work really is satisfying. All the cussing you do while you are sanding, but when you step back after it's done to look at the finished product makes it all worth it. Dude, you just need to paint it yourself! You already have the booth set-up, just buy the paint and let it rip. If you were laying down nice consistent coats with the primer, the paint really isn't much different. The clear was definitely more tricky as it tends to run easier, but I just did light coats and took my time. YOU CAN DO IT!!
1955 Nomad project LC9, 4L80e, C5 brakes, Vision wheels
1968 Camaro 6.2 w/ LSA, TR6060-Magnum hybrid and etc SOLD
1976 T/A LS1 6 Speed, and etc. SOLD
Follow me on Instagram: ryeguy2006a
-
01-07-2019 #295
 Registered User
- Join Date
- Nov 2006
- Location
- Mountain Springs, Texas
- Posts
- 4,862
Great attention to detail in this build. Looks great.
Don1969 Camaro - LSA 6L90E AME sub/IRS
1957 Buick Estate Wagon
1959 El Camino - Ironworks frame
1956 Cameo - full C5 suspension/drivetrain
1959 Apache Fleetside
-
01-07-2019 #296
Registered User
- Join Date
- Aug 2015
- Location
- charlotte
- Posts
- 929
Thanks guys.
Ryan, It has crossed my mind, I doubt my abilities but then again, I doubted doing this stage of bodywork also. I was kind of driven to do this part as the previous body shop made no progress, moved my car to the next state over and since I brought the car home, and I was home, I got studying and tackled it myself and I'm now very happy that I did. Plus the car made significant progress when the other option was a wasted 6 months.
I would really like to continue sanding this second coat of poly, I'd hit it with 220 and continue hunting for any remaining lows...BUT.. this time next week I move back to Australia for the year...
-
01-08-2019 #297
Registered User
- Join Date
- Aug 2015
- Location
- charlotte
- Posts
- 929
So another project on my mind for a while got some attention today. Ages ago I bought the 4.5" Truck-lite driving lights which are made to match the 27270C headlights. But I couldn't figure out how to mount them and to buy a set of the fester billet mounts and re-work them would be an expensive experiment.
Well since these driving lights are most common for Harleys, I decided to get some cheap Harley pods and trim pieces from Ebay. So for about $18 I have these trim pieces that are sort of close to the 69 valance curve. They're far from perfect but I think with some nice tabs welded on the inside I should be able to get them to mount up pretty nice.
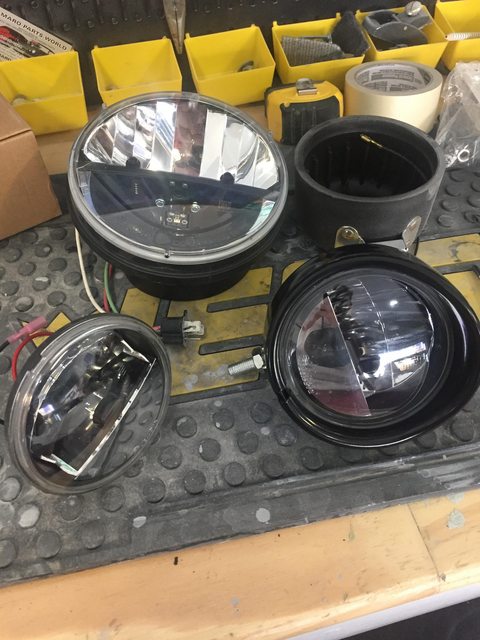
This is before I cut out the original mounting bracket
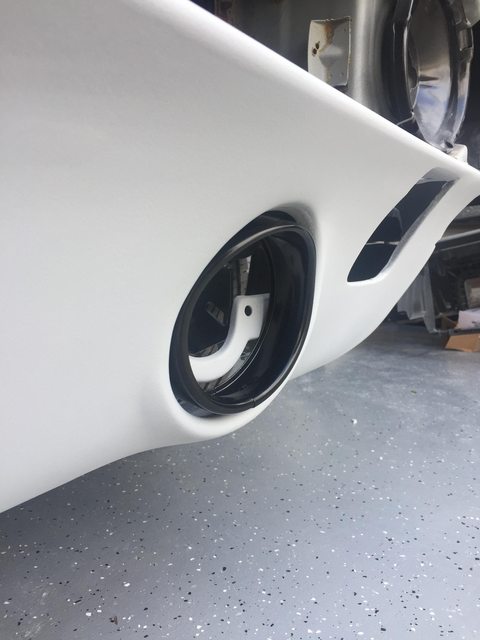
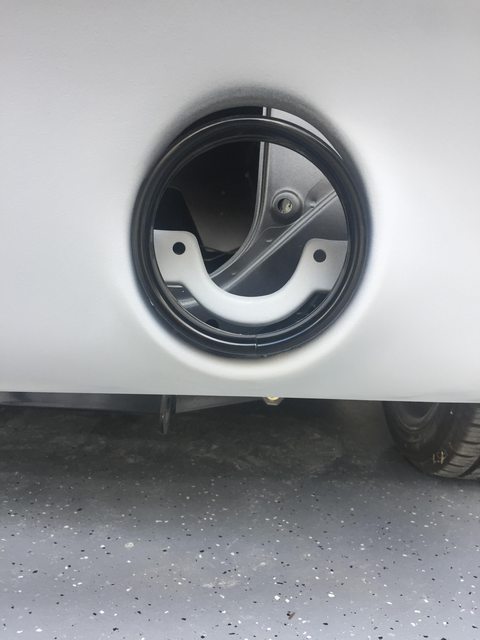
And after.
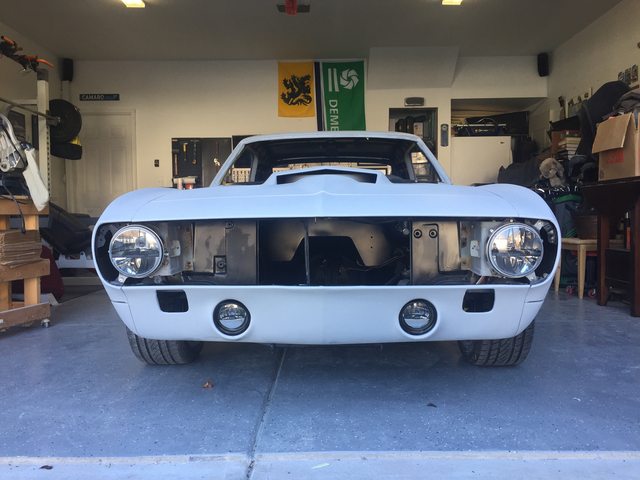
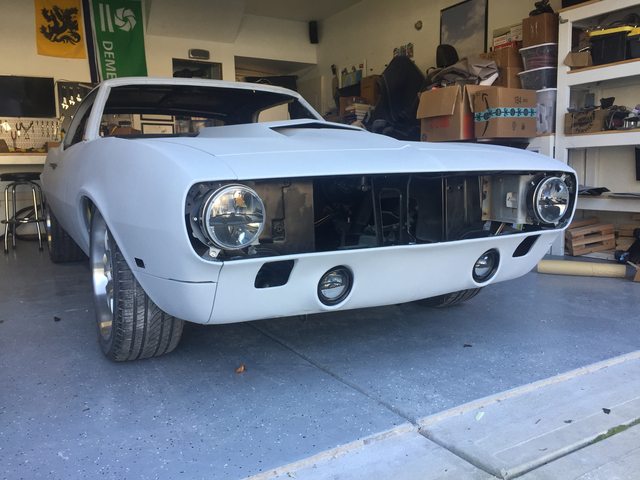
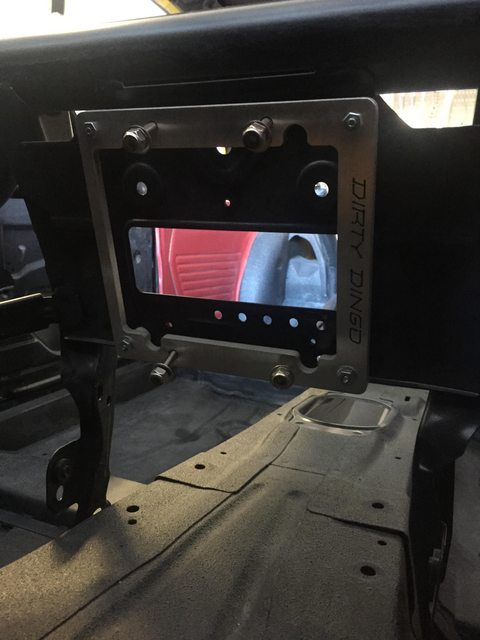
I also found what could be a very nice PCM location. This would sit directly behind my double din display, should get great ventilation and "shouldn't" intrude with the vintage air I am yet to purchase, and best of all, it is directly above the grommet where the harness goes through the trans tunnel.
I chose to use the dirty dingo E38 PCM bracket
-
01-08-2019 #298
Registered User
- Join Date
- Nov 2006
- Location
- Ma.
- Posts
- 5,560
Nice job fitting them in.
Wayne
Car FINALLY home !!!!!! lol
Project FNQUIK https://www.pro-touring.com/showthre...ghlight=FNQUIK
-
01-08-2019 #299
 Registered User
- Join Date
- Oct 2011
- Posts
- 721
Great job! Can you post s link to the Harley pods?
My Very Ambitious 69 Build
https://www.pro-touring.com/threads/...lls?highlight=
-
01-08-2019 #300
Registered User
- Join Date
- Aug 2015
- Location
- charlotte
- Posts
- 929
The pods I haven't fitted just yet, but these are the trim rings I used. Originally Posted by joeko23
https://www.ebay.com/itm/4-5-Light-V...item2cdb765dc7
And these are the pods
https://www.ebay.com/itm/4-5-LED-Fog...item3d71d3a5f7

 Reply With Quote