

Results 81 to 100 of 121
Thread: 1970 Trans Am Project
-
03-28-2014 #81

 Registered User
- Join Date
- Jul 2005
- Location
- Texas
- Posts
- 255

Heck no! I leave some things to the pros. I am great with front and rear suspension and brakes, but I leave the big jobs to my shop. It would end up costing me double to undo my flubs....LOL.
And yes, I most certainly have a TKO in the future, as I have in my 72 Chevelle.1969 Nova SS Build Thread https://www.pro-touring.com/threads/...da)-69-Nova-SS
-
03-28-2014 #82
Registered User
- Join Date
- Mar 2008
- Location
- Harrison, AR
- Posts
- 78
Let there be guitar, let there be rock, and let there be fast cars!

Love this project. Keep it going on brother!
DavidDavid G
-
03-28-2014 #83
Registered User
- Join Date
- Apr 2012
- Posts
- 385
 ha ha
ha ha
-
03-28-2014 #84
Registered User
- Join Date
- Apr 2012
- Posts
- 385
now I just discovered that my pilot bearing can slide in and out there is no interference fit it's almost like crank a hole is exactly the same size as the outside diameter of the pilot bearing. Hmmmm
-
03-29-2014 #85
 Registered User
- Join Date
- Jan 2013
- Location
- Nashville, TN
- Posts
- 90
Great build man! We are finishing up a 73 TA pro-touring build as well. Love these cars. Keep up the great work...and the videos are awesome. Nice work!

-
03-29-2014 #86
Registered User
- Join Date
- Apr 2012
- Posts
- 385
thank you I really appreciate it be sure to post a link to your build thread
-
03-30-2014 #87
Registered User
- Join Date
- Jan 2013
- Location
- Nashville, TN
- Posts
- 90
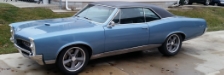
Unfortunately I don't have a build thread. Here is a pic for you. Originally Posted by jtwoods4

-
03-30-2014 #88
Registered User
- Join Date
- Jul 2005
- Location
- Texas
- Posts
- 255
Gorgeous! Originally Posted by chichirone
1969 Nova SS Build Thread https://www.pro-touring.com/threads/...da)-69-Nova-SS
-
04-08-2014 #89
Registered User
- Join Date
- Apr 2012
- Posts
- 385
Ok guys I am back. It was a long 2 weeks. I took the transmission up to American Powertrain in Tennessee and they put a new front bearing retainer on the transmission. No damage was done to the tranny thank god.
I then proceeded to align the bell housing to within .003 inches of the crank centerline. By the way, don't ever try to remove Pontiac bellhousing dowel pins while the engine is in the car, what a freakin nightmare. Slide hammers don't fit under there and I had to drill them out very slowly by stepping up the drill size. Eventually they came out with vice grips. Don't try that at home. Worst experience I have every had with a muscle car. Anyway, after installing the Lakewood .007 offset dowels the bell is now .003 within crank centerline
As I was re-assembling everything I found the problem that cracked my trans front bearing retainer: bad clutch fork geometry.
According to GM, the clutch fork needs to be sticking out of the bell housing and slightly towards the front of the car when at rest. The exact amount is between 5 and 7 degrees, this is a very slight forward angle when the clutch pedal is at rest. Well, I looked at my fork and I noticed it was leaning back -5 to -7 degrees. This causes the arc of the clutch fork/throw-out bearing to swing to far and puts a side load on the front bearing retainer by pushing the throw-out bearing side ways as the fork arc increases when the clutch is fully depressed. Hence, cracking off the front bearing retainer of the tranny.
In order to correct the clutch fork geometry I adjusted the height of my McLeod Throw-out bearing (made it taller). This moves the throw-out bearing to clutch fork attachment back towards the transmission, therefor moving the clutch ROD end of the clutch fork slightly forward, about 5 to 7 degrees. Now the arch of the throw-out bearing on the bearing retainer sleeve swings in a more forward and backward movement instead of a forward to far and to the side movement. Problem solved. You could also solve this issue by using and adjustable fork pivot ball. But I chose the adjustable throwout bearing instead.
Anyway............ onto the ride height adjustment.
After a few miles of driving the front springs have settled in and the front of the car sites to low. Speed bumps are not even an option. PTFB Comp front and rear springs. For track use it may be ok, but unusable on the street, at least with my specific car.
So tonight I measure the wheel well lip to the ground on all four corners.
Front Driver: 25 3/4 in
Front Passenger: 26 1/4 in.
Rear Driver: 28 1/8 in.
Rear Passenger: 28 in.
After doing some basic math and knowing that aluminum coil spring spacers will raise the front twice the height of the actual spacer... I came up with the following
Install .625 spacer on bottom of Drivers Side Front spring to Raise the car from 25 3/4 to 27 inches
Install .375 Space on bottom of Passenger Side front spring to Raise the car from 26 1/4 to 27 inches.
Now the front is level and I have brought the ride height up to 27 inches in front and 28 inches in back.
What do you guys think? Can anyone post your front fender lip to ground measurements?
-
06-28-2014 #90
Registered User
- Join Date
- Apr 2012
- Posts
- 385
Did another autocross event today
-
06-30-2014 #91
 Registered User
- Join Date
- Jul 2010
- Location
- East Tennessee
- Posts
- 48
Hi John,Nice talking to you at the autocross.... I have the stock '81 Turbo T/A. Sadly, you guys left before I could get back with you .... would like to get your input/advice on adding a tko to mine. My firewall is super-cluttered with all the stock stuff and was thinking I'd really have issues mounting a clutch setup.Your car looked awesome and gotta give you props for staying with the Poncho power. Looking forward to seeing more of your car.... I'm up near Knoxville, TN.Dwight
'81 Turbo Trans Am - completely stock
'72 Vega Kammback - 215 cubic inch Aluminum V8
My Rides: http://www.cardomain.com/cars?key=bugdewde&showflags=2
-
06-30-2014 #92
Registered User
- Join Date
- Apr 2012
- Posts
- 385
Hey there... it was awesome watching your car go around the course! I do have a TKO 600 in my car and the install is straight forward if you have a manual car to start with. If you have an automatic you can order a conversion kit. I already had a manual car and got my kit from American Power Train in Tennessee. It will be important to align your new bellhousing with your engine block. That will be the toughest part. The TKO has a .005 tolerance range between the Crank center line and the input shaft of the Tranny. The TKO is a very tight tolerance transmission. In order to align the bellhousing you will need a dial indicator, offset dowel pins, and you will need to also remove the stock pins from the block. This is a tough job with the engine in the car and it is not for the faint of heart. Engine out of car is no problem. Originally Posted by bugdewde
As far as your car goes the Auto trans cars are no different than the manuals. You will just need a new pedal assemble and clutch rod/zbar/flywheel/bell/fork etc. I think the auto cars even had the provision for the clutch linkage to go through the firewall. But you will need to check on that.
-
07-01-2014 #93
 Registered User
- Join Date
- Feb 2005
- Location
- Waterloo, Ia
- Posts
- 1,408
I love hearing that Pontiac mill sing on the auto-X. Cool video!
-Nick
-1967 GTO I drive and race
-Build threads:
-http://forums.maxperformanceinc.com/forums/showthread.php?t=615847&page=23
-https://www.pro-touring.com/showthre...project-thread
-
07-01-2014 #94
Registered User
- Join Date
- Apr 2012
- Posts
- 385
Thanks Nick
..... Good lookin GTO.
-
07-01-2014 #95
Registered User
- Join Date
- Jul 2010
- Location
- East Tennessee
- Posts
- 48
Thanks for the input, John. I've had a few manual trans '79s but I liked the idea of an hydraulic clutch this time.... I forgot yours had the factory "z"-bar... for some reason I thought yours was hydraulic????
I really don't plan to autocross it much at all... I'm just inbetween rides now. The manual swap idea was mostly for cruising/mileage. My 4 hour ride home at 3000 rpm wasn't exactly kind. Gotta look at the water pump/plate clearance as it didn't like the long hauls at 3k rpm. It also got hot on the track... that's the longest autocross course I've been on.... it was FUN, but the 301 really got hot.
Sadly, I didn't get to see your runs, as I must have been either running or on the cool-down run around the complex trying to get cool air in the radiator since it wanted to climb over 220 after each run..... a couple runs got to 240.
Seeing your in-car video was awesome. It sounds GREAT!!!!!'81 Turbo Trans Am - completely stock
'72 Vega Kammback - 215 cubic inch Aluminum V8
My Rides: http://www.cardomain.com/cars?key=bugdewde&showflags=2
-
07-13-2014 #96
Registered User
- Join Date
- Apr 2012
- Posts
- 385
Took the 1970 TA out to Road Atlanta Today. On lap three I was on the back straight and was about to shift from 4th gear at 6000 RPM into 5th. Right before I was about to shift the RPMs stopped at 5500 and stayed there. The pedal was to the metal and the RPMs were not climbing, speed was 110 mph. That RPM and MPH held for about 5 to 7 seconds. At that point the Crank case pressure caused oil to come out the back of the oil pan seal and get on the headers. Saw a puff of smoke in the rear view and smelled burning oil. So at that point I decided to slow down and take her back to the trailer and head home. Not sure what was causing power to halt at 5500 rpm in 4th gear.
Anyway, here is the video. Hope you enjoy.
-
07-15-2014 #97 Registered User
- Join Date
- Jun 2014
- Location
- Wisconsin
- Posts
- 61
You did really good work on that T/A. GREAT CAR!! I'm bringing a 1971 Formula back to life and if it turns out half as good as your car I'll be a happy boy. I have the same wheels sitting here in boxes, what size tires did you end up going with? I want to go with 275/40/17 all the way around if possible.
07-15-2014 #98
Registered User
- Join Date
- Apr 2012
- Posts
- 385
Thank you very much. 275 will be a tough fit on front. I went with 285/40 on rear and 255/45 on front.
07-16-2014 #99
New to Pro-Touring
- Join Date
- May 2012
- Location
- Victoria, Texas
- Posts
- 28
How is the dual master cylinder working out for you? Do you drive the car on the street some and how do they work for that? Thanks sharing your build with us.
VCT-TA (Dan)
77 TA SE
86 F250 4X4
07-16-2014 #100
Registered User
- Join Date
- Apr 2012
- Posts
- 385
It works awesome. I drive on the street all the time. manual brakes will feel and work just as good as power brakes if not better as long as you move the fulcrum point of the brake pedal up to the top hole. that in combination with the correct master cylinder bore size makes a manual brake setup feel great.

 Reply With Quote


