Results 21 to 40 of 108
-
09-14-2010 #21
 Registered User
- Join Date
- Jan 2010
- Location
- Elk River, MN
- Posts
- 676
You mean about 6 inches in the rear and 3 in the front? Yeah, yeah, it's coming Originally Posted by Samckitt


I'd have done it already but still deciding on springs.
-matt
Matt Peterson 84 Monte Carlo - Sold :( | 99 Corvette Racecar | 2001 Z06 Daily Driver
https://www.pro-touring.com/showthre...ng-Bertha-Back
http://ls1tech.com/forums/conversions-hybrids/1499192-84-monte-5-3-build.html
https://www.pro-touring.com/threads/...rvette-Racecar
-
09-14-2010 #22 Registered User
- Join Date
- Jul 2005
- Location
- Eastern Virginia
- Posts
- 3,963

LOL I figured it was coming. That would probably get it pretty low.
Scot
86 Monte SS

09-14-2010 #23 Registered User
- Join Date
- Jan 2008
- Location
- Charlotte
- Posts
- 1,295
Lookin good!
2005 LeMans Blue Corvette w/ T56 & Z51 & C6Z06 Brakes, Build Thread: https://www.pro-touring.com/showthread.php?64496
2005 GMC Sierra 2500HD LLY / Allison
2014 Chevy SS LS3 / 4 Door
01-27-2011 #24
Registered User
- Join Date
- Jan 2010
- Location
- Elk River, MN
- Posts
- 676
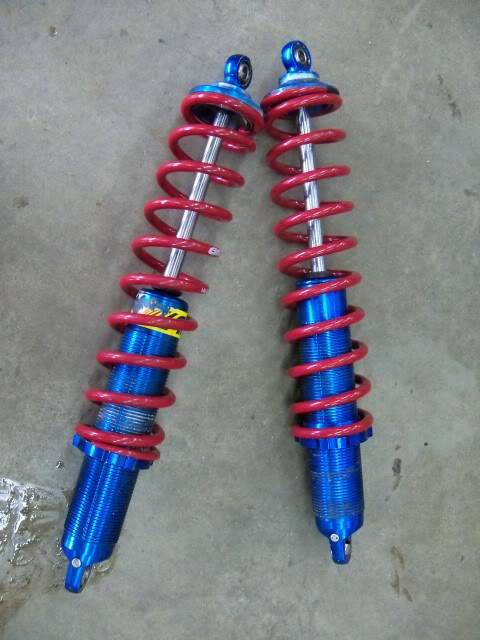
A little change in plans, I've bought a set of Afco Aluminum bodied shocks and coilover kits for the car. I got a great deal on them used, so I'll use them to mock up and get the car driving, then switch out to Penske's or Ohlins when my funds allow it. I'll post pics of the new shocks tonight, the plan is to remove the factory front spring buckets in front and rebrace with clearance for the coilovers, I'll have to build shock hoops and a crossbrace for them as well. In the rear I should be able to run the coilovers in stock shock position with some added bracing on the mounts.
Pics of the shocks tonight, more car pics this weekend.
-mattMatt Peterson 84 Monte Carlo - Sold :( | 99 Corvette Racecar | 2001 Z06 Daily Driver
https://www.pro-touring.com/showthre...ng-Bertha-Back
http://ls1tech.com/forums/conversions-hybrids/1499192-84-monte-5-3-build.html
https://www.pro-touring.com/threads/...rvette-Racecar
01-27-2011 #25
Pro-Touring Veteran
- Join Date
- Nov 2006
- Location
- Washington, MO
- Posts
- 2,363
I like it.. please don't put an SS nose on there.

01-27-2011 #26
Registered User
- Join Date
- Jan 2010
- Location
- Elk River, MN
- Posts
- 676
I promise Originally Posted by Tony_SS
 Seems like nobody leaves the SC nose on, but I like the look.
-mattMatt Peterson 84 Monte Carlo - Sold :( | 99 Corvette Racecar | 2001 Z06 Daily Driver
https://www.pro-touring.com/showthre...ng-Bertha-Back
http://ls1tech.com/forums/conversions-hybrids/1499192-84-monte-5-3-build.html
https://www.pro-touring.com/threads/...rvette-Racecar
01-28-2011 #27 Registered User
- Join Date
- Jan 2011
- Location
- CENTEX
- Posts
- 67
Nice SC. Good job so far not swapping the nose. Yes everyone swaps that nose for some reason...
J. Will.
70 Chevelle Malibu, 69 Cutlass S convertible, 71 Monte Carlo, 16 Chevy SS (yes, that one)
03-21-2011 #28
Registered User
- Join Date
- Jan 2010
- Location
- Elk River, MN
- Posts
- 676
NOTE: I've got to come back in and finish captioning these pictures when I get a minute. They're fairly self-explanatory but I need to caption them still to clarify some things.
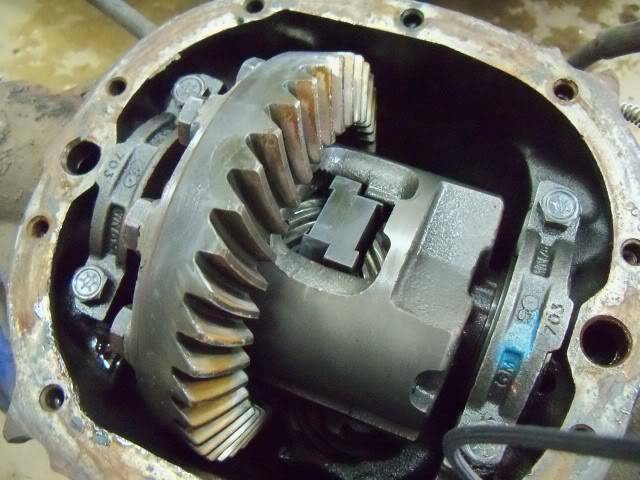
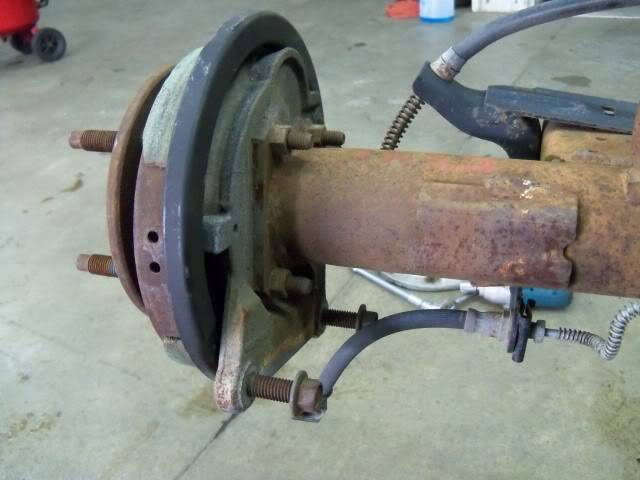
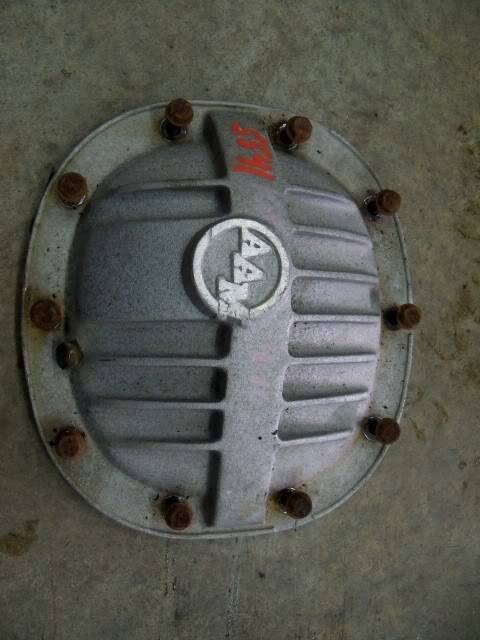
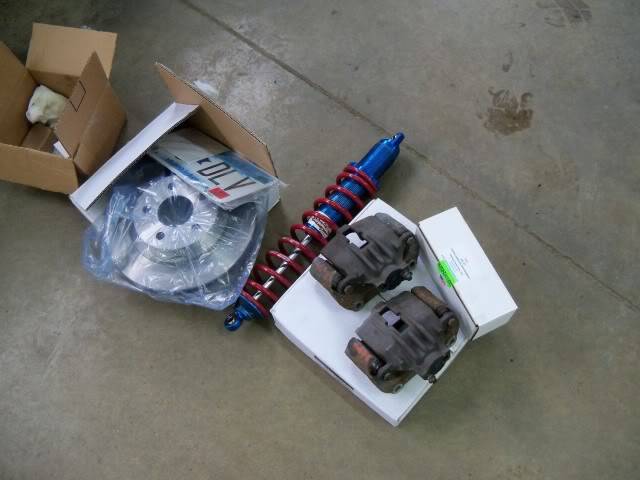
Okay, time for an update on my budget beater. Since I last posted, I decided to go with LS1 rear brakes for simplicity in incorporating the parking brake, since the Vette hub offset is really not right for use with the 10-bolt rear. The good thing is that I'm giving up nothing, the rear rotor specs are identical between the LS1 and C5 rotors, in terms of diameter and face width. I'll even be using my C5 calipers and pads on the LS1 abutments. Anywho, I picked up an entire LS1 Camaro as a donor for $400, and it happened to have an SLP 4.10 Torsen posi differential kit installed ($725 new). The following few pics show the pieces as they were when I picked it up.
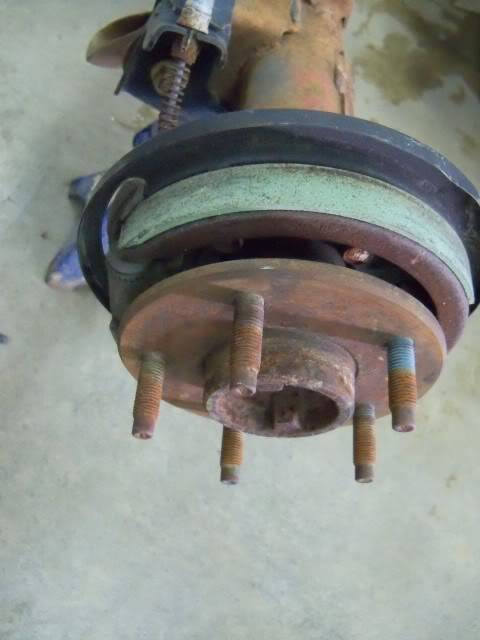
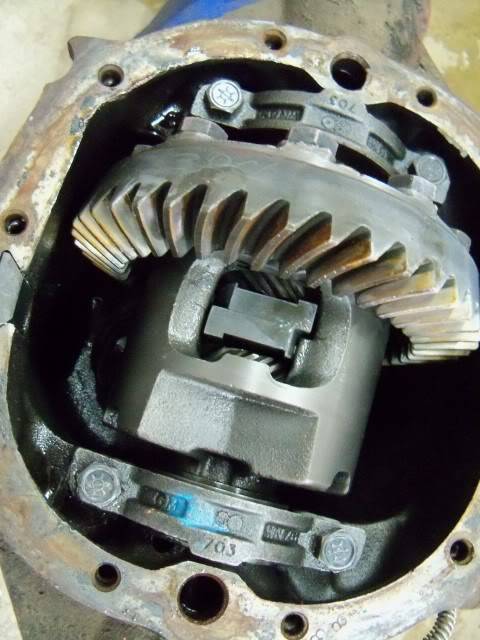
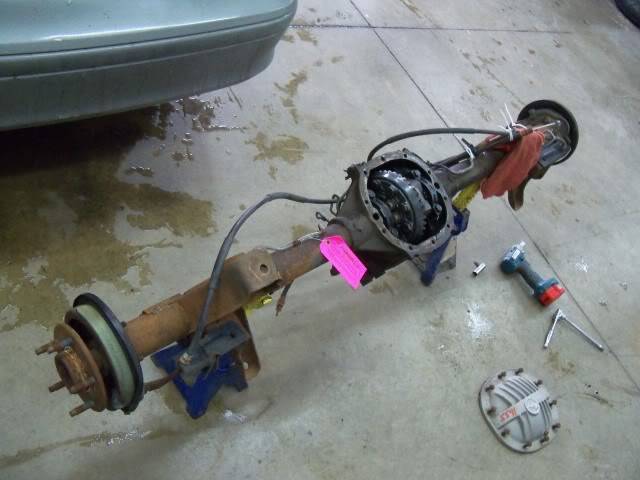
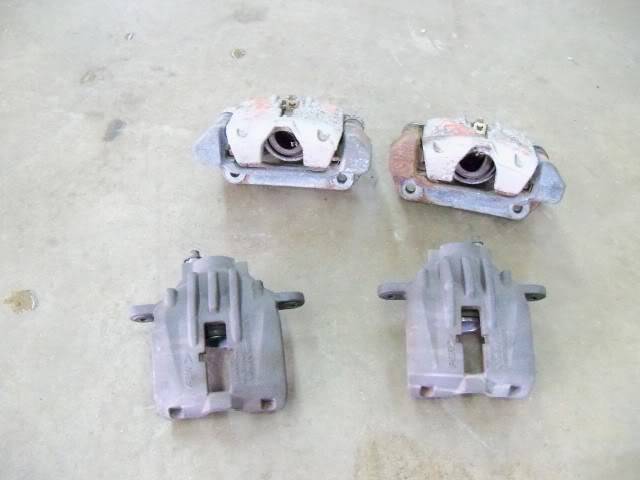
This shows the C5 calipers alongside the LS1 calipers and abutments, the calipers are virtually identical size-wise.
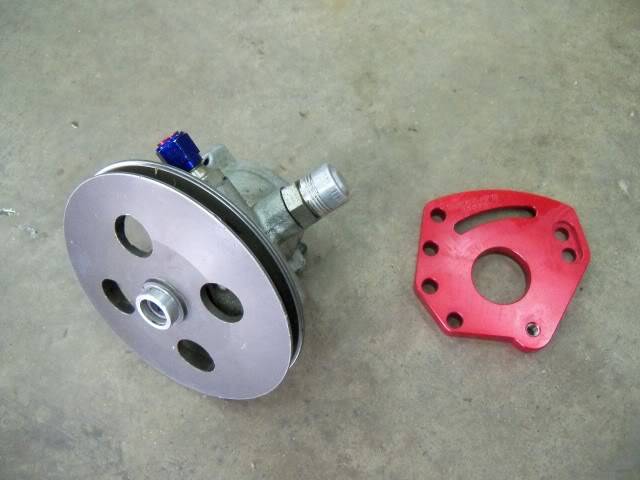
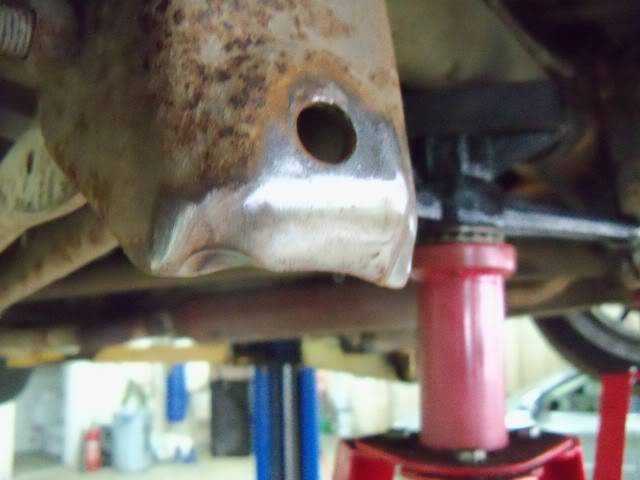
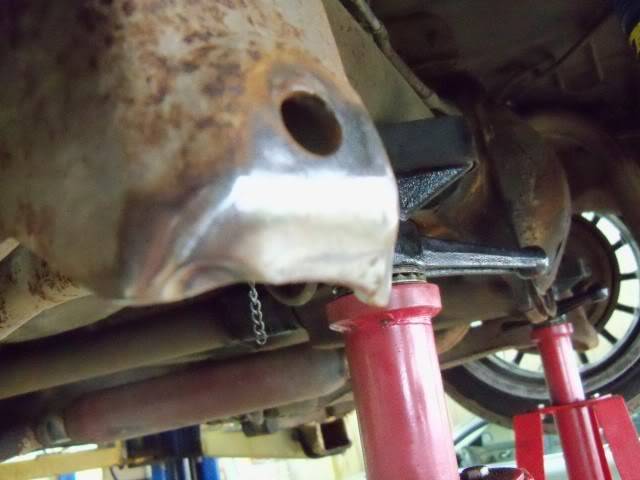
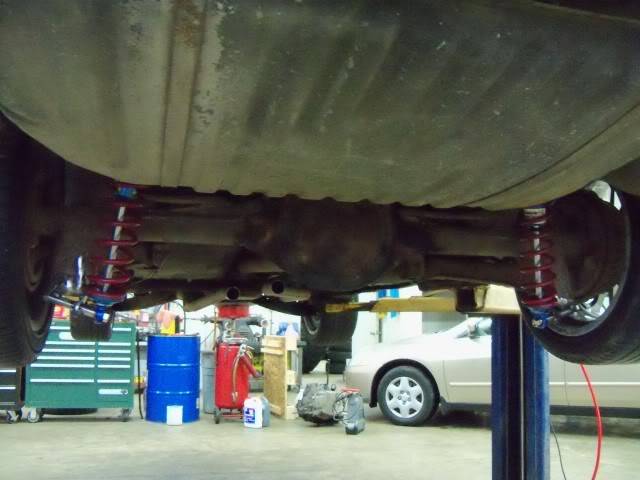
Here's the car on the hoist with the rear springs and shocks removed. I've used adjustable stands under the axle to mock up my desired rear ride height.
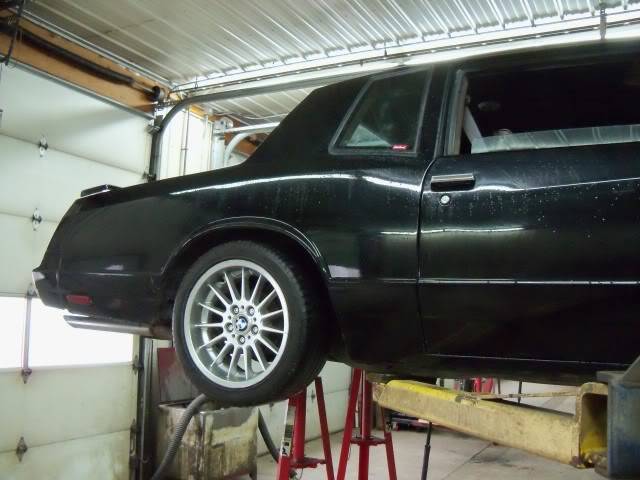
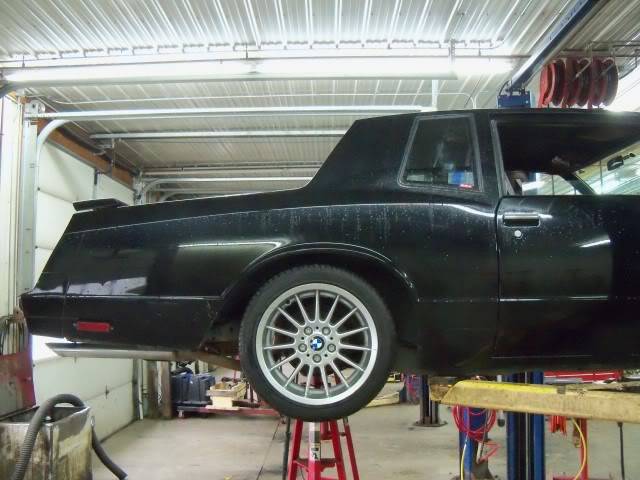
-mattMatt Peterson 84 Monte Carlo - Sold :( | 99 Corvette Racecar | 2001 Z06 Daily Driver
https://www.pro-touring.com/showthre...ng-Bertha-Back
http://ls1tech.com/forums/conversions-hybrids/1499192-84-monte-5-3-build.html
https://www.pro-touring.com/threads/...rvette-Racecar
03-21-2011 #29
Registered User
- Join Date
- Jan 2010
- Location
- Elk River, MN
- Posts
- 676

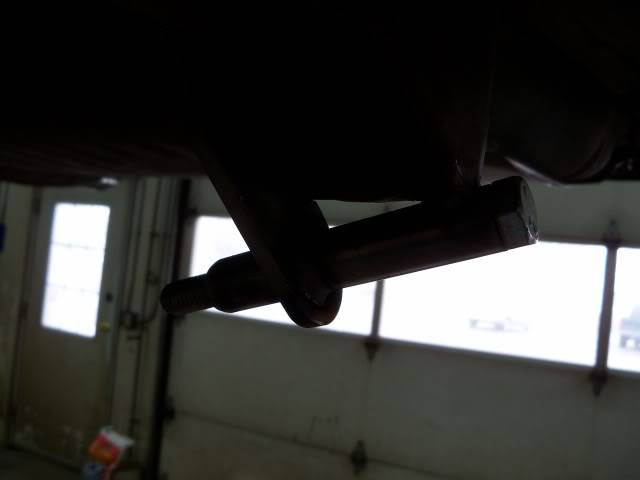
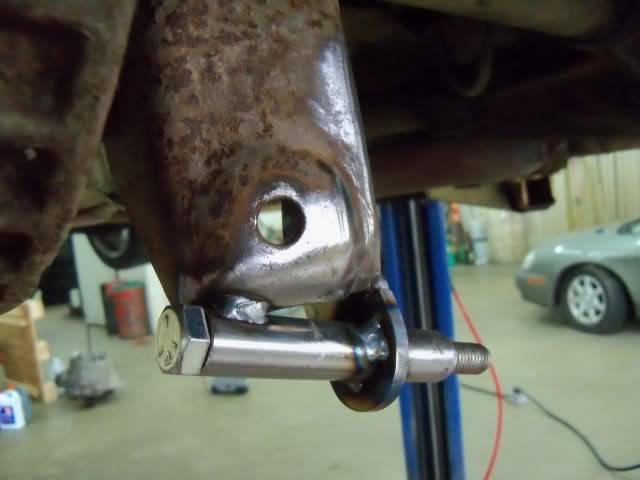
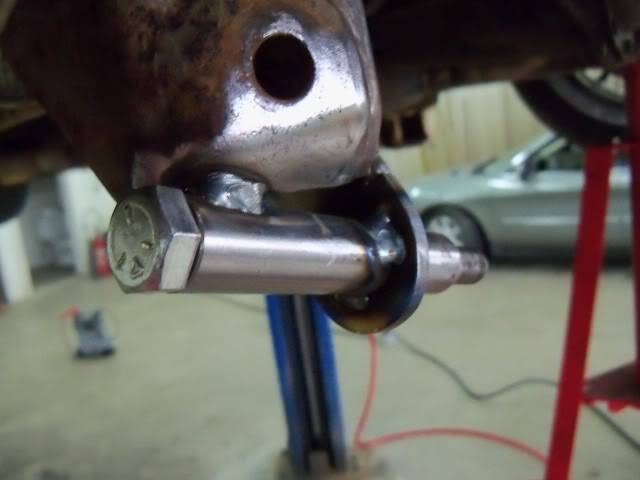
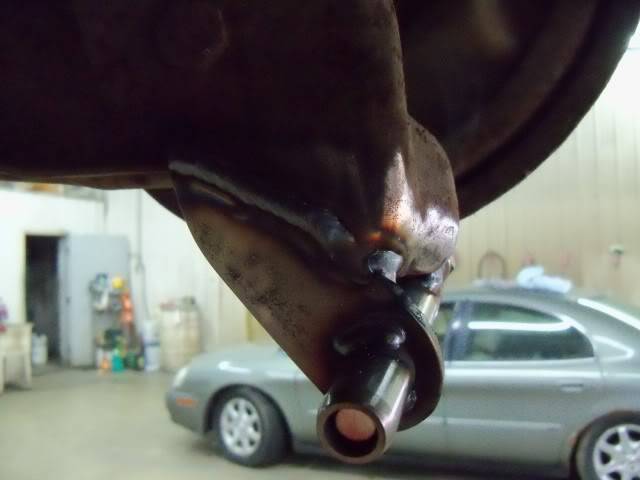
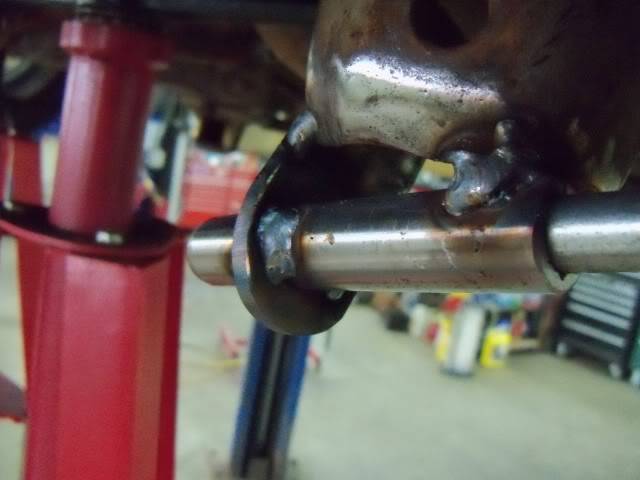
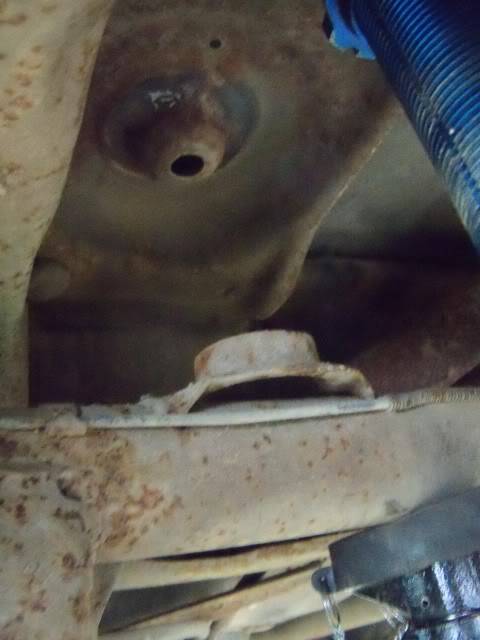
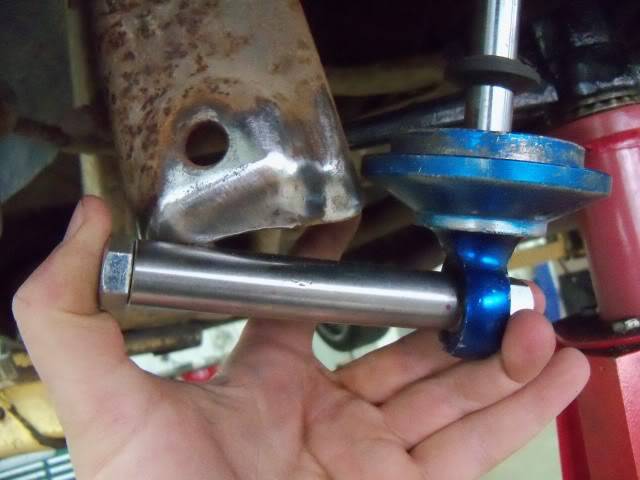
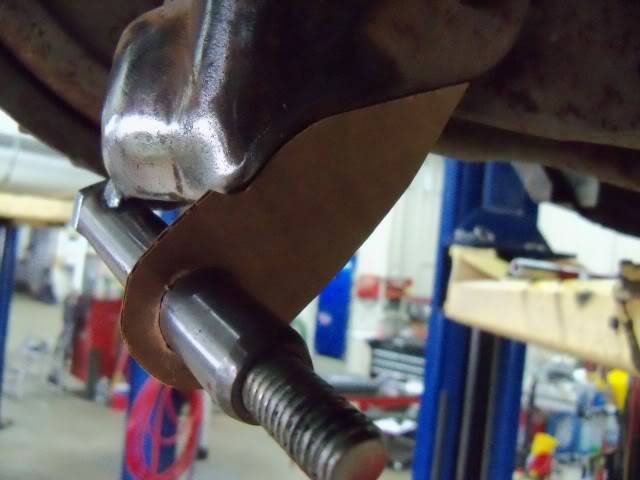
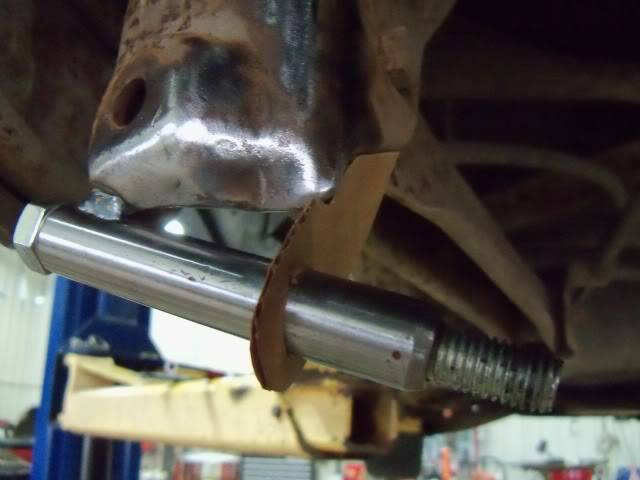
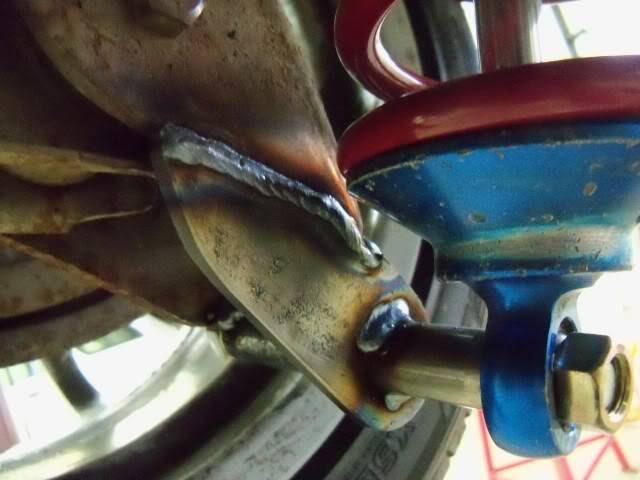
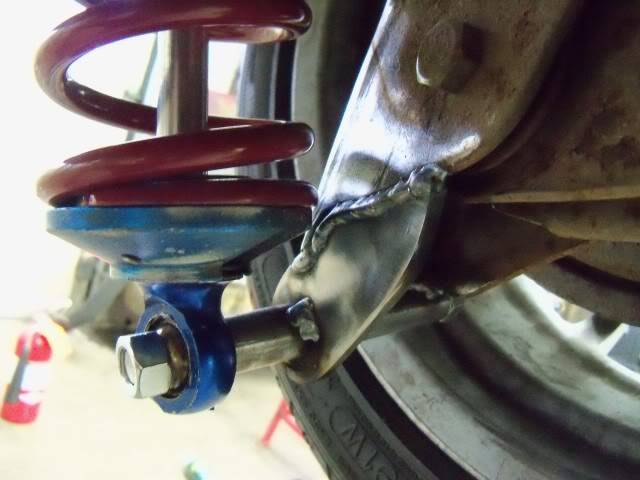
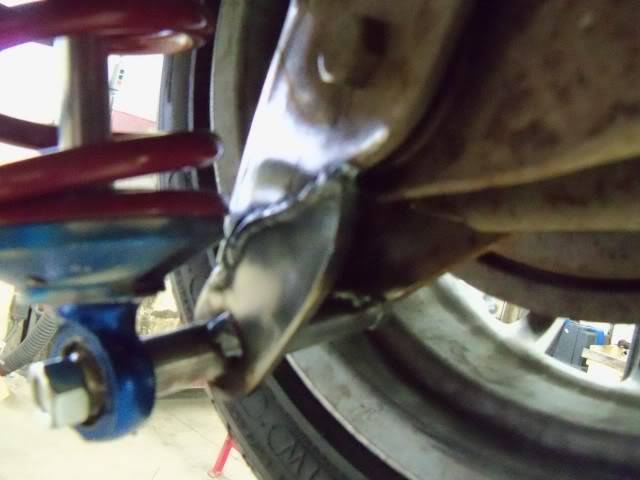
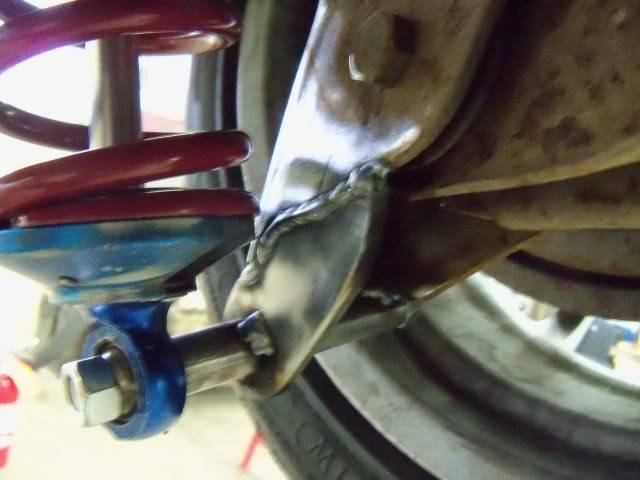
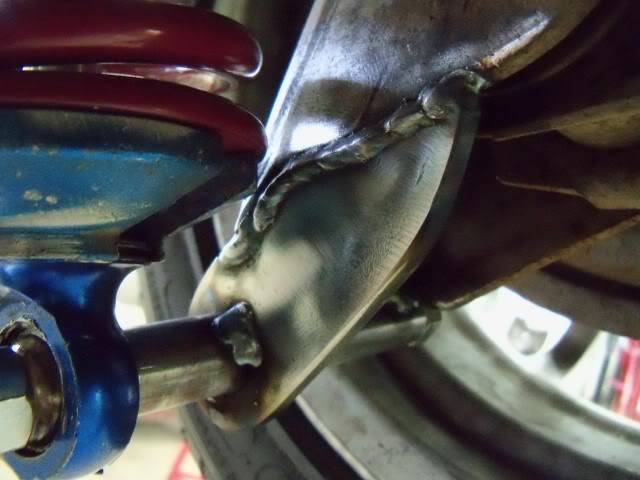
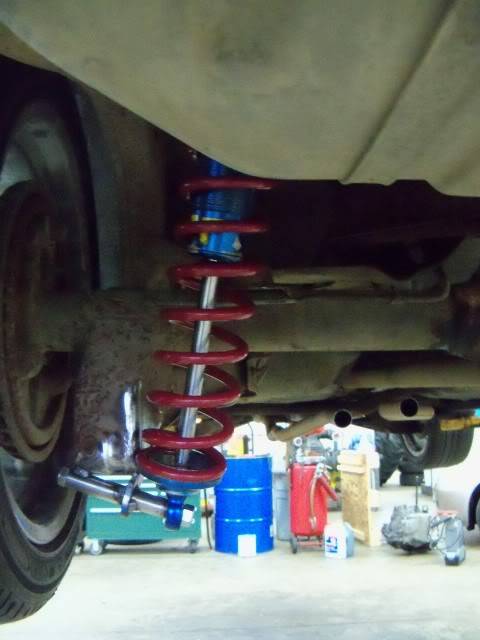
You'll notice that the nuts aren't hanging on to many threads, but the bolts are removable so I have longer bolts on order, as well as lock nuts.
-mattMatt Peterson 84 Monte Carlo - Sold :( | 99 Corvette Racecar | 2001 Z06 Daily Driver
https://www.pro-touring.com/showthre...ng-Bertha-Back
http://ls1tech.com/forums/conversions-hybrids/1499192-84-monte-5-3-build.html
https://www.pro-touring.com/threads/...rvette-Racecar
03-22-2011 #30 Registered User
- Join Date
- Mar 2005
- Location
- Woodbine, MD
- Posts
- 2,770
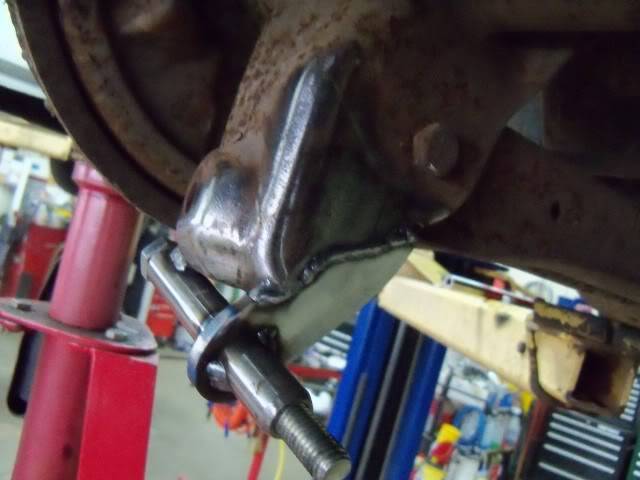
is that lower mount gonna be strong enough?
Douglas Lutes
1988 Monte Carlo SS
"Never race anything you can't afford to set on fire and push off a cliff."
03-22-2011 #31
Registered User
- Join Date
- Jan 2010
- Location
- Elk River, MN
- Posts
- 676
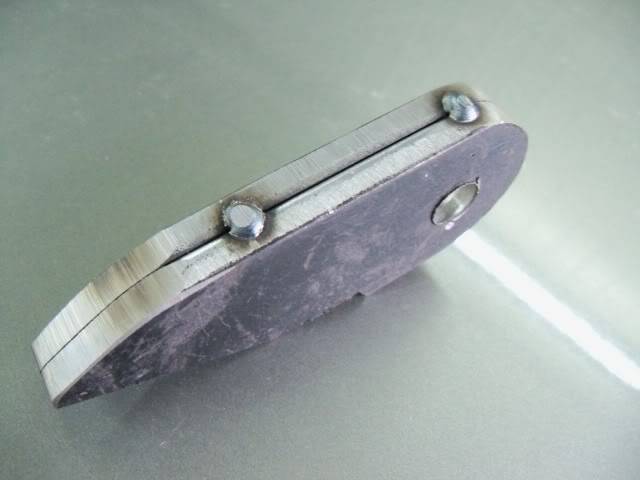
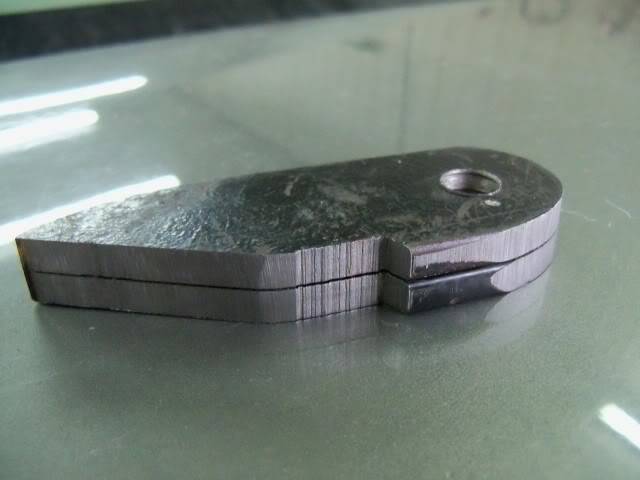
Absolutely, but I'm still adding one gusset from the bolt tube to the trailing arm mount just in case. The new bolts will be Grade 8 and the tube is chromoly that's a close clearance fit to the bolt. The welds all had excellent penetration to clean steel, and the long weld on the brackets I made will be welded on the back-side when I have the trailing arms out for replacement. The only place of any concern to me is where the bolt tube extends 1-1/4" beyond the bracket it goes through, but that will be gusseted for peace of mind.
-matt
ETA: The main reason I'm not too concerned is that we use lighter coilover mounts than this on our race car an have never seen an issue with them, even with a 500lb spring in the RR at certain tracks.Matt Peterson 84 Monte Carlo - Sold :( | 99 Corvette Racecar | 2001 Z06 Daily Driver
https://www.pro-touring.com/showthre...ng-Bertha-Back
http://ls1tech.com/forums/conversions-hybrids/1499192-84-monte-5-3-build.html
https://www.pro-touring.com/threads/...rvette-Racecar
03-22-2011 #32
Registered User
- Join Date
- Mar 2005
- Location
- Woodbine, MD
- Posts
- 2,770
where is it attached up top? CAn you put up some pics of that?
Douglas Lutes
1988 Monte Carlo SS
"Never race anything you can't afford to set on fire and push off a cliff."
03-22-2011 #33
Registered User
- Join Date
- Jan 2010
- Location
- Elk River, MN
- Posts
- 676
I just made some makeshift crossbars to get it sitting on them, my Afco tiebar kits will be here today for a better quality install. I'll probably make some 1/4" stiffener plates for the upper mounts as well, since they were only designed for shocks originally. Originally Posted by SicMonte
-matt
ETA:
This is the kit I'll be getting, the 2.625" version has slots to accommodate the mount holes on these cars.
http://www.speedwaymotors.com/AFCO-G...its,43286.htmlMatt Peterson 84 Monte Carlo - Sold :( | 99 Corvette Racecar | 2001 Z06 Daily Driver
https://www.pro-touring.com/showthre...ng-Bertha-Back
http://ls1tech.com/forums/conversions-hybrids/1499192-84-monte-5-3-build.html
https://www.pro-touring.com/threads/...rvette-Racecar
03-22-2011 #34 Registered User
- Join Date
- Jul 2008
- Location
- ohio
- Posts
- 1,135
glad to see more progress matt i think i would box in from that mount down to the bolt with some plate just for extra bracing. never can have to much.....but the car is looking great i have got a spot for g-bodys as well Originally Posted by monteboy84
keep the wheels a spinning and the Beavers a grinning (burt reynolds-smokey and the bandit)
03-22-2011 #35
Registered User
- Join Date
- Jan 2010
- Location
- Elk River, MN
- Posts
- 676
Yup, that's the plan. Thanks! Originally Posted by craigs73
-mattMatt Peterson 84 Monte Carlo - Sold :( | 99 Corvette Racecar | 2001 Z06 Daily Driver
https://www.pro-touring.com/showthre...ng-Bertha-Back
http://ls1tech.com/forums/conversions-hybrids/1499192-84-monte-5-3-build.html
https://www.pro-touring.com/threads/...rvette-Racecar
03-22-2011 #36
Registered User
- Join Date
- Jul 2008
- Location
- ohio
- Posts
- 1,135
hey thats what were here for sounds like you already had that planned before i showed up lol
keep the wheels a spinning and the Beavers a grinning(burt reynolds-smokey and the bandit)
04-01-2011 #37
Registered User
- Join Date
- Jan 2010
- Location
- Elk River, MN
- Posts
- 676
Just ordered my Stage II Plus kit from Savitske. I can't say enough about Marcus and his business, very nice guy and his knowledge of these cars and suspensions in general just blows me away.
Plans for the weekend include working on the interior a bit, I got a new windshield from Safelite so I may try to get that installed, and I got a new housing for the gauge cluster as my original one has a bunch of broken tabs and is just a mess in general. Other than that, I got my Afco tie-bar kits for my rear shocks, as well as longer bolts and lock nuts for the bottom of the rear shocks, so that will be all buttoned up when I get those in.
Thanks for looking, sorry for not having new pics yet,
-mattMatt Peterson 84 Monte Carlo - Sold :( | 99 Corvette Racecar | 2001 Z06 Daily Driver
https://www.pro-touring.com/showthre...ng-Bertha-Back
http://ls1tech.com/forums/conversions-hybrids/1499192-84-monte-5-3-build.html
https://www.pro-touring.com/threads/...rvette-Racecar
07-13-2011 #38
Pro-Touring Veteran
- Join Date
- Nov 2006
- Location
- Washington, MO
- Posts
- 2,363
any updates?
07-13-2011 #39
Registered User
- Join Date
- Jan 2010
- Location
- Elk River, MN
- Posts
- 676
Actually yeah, quite a few! I got my new windshield installed, LS1 rear disc conversion done, Savitske Stage II Plus kit installed in the front end, and a few other little things. Upholstery man called to say my drivers seat is done being repaired so I can pick that up this weekend. Originally Posted by Tony_SS
I've got pics of all of this, just haven't gotten around to uploading them so I'll do it tonight when I get home.
Thanks for asking, love your car!
-mattMatt Peterson 84 Monte Carlo - Sold :( | 99 Corvette Racecar | 2001 Z06 Daily Driver
https://www.pro-touring.com/showthre...ng-Bertha-Back
http://ls1tech.com/forums/conversions-hybrids/1499192-84-monte-5-3-build.html
https://www.pro-touring.com/threads/...rvette-Racecar
07-14-2011 #40
Registered User
- Join Date
- Apr 2006
- Location
- MD
- Posts
- 232
I don't like that cantilevered mount either, no offense. Just the moment created on the tube and the fact that the bolt is in single shear instead of double shear and a little more moment than it needs to be under. Could you chop up the shock mount and place the coilover a little more outboard? Then you could use the shock mount to extend new mounting locations down on both sides of the lower coilover strut bushing.
It could be fine for all I know, I guess if you make anything beefy enough it will work. That's just not something you want failing after you hit a pothole.
I saw that you mentioned going to electric fans. I don't know if you are using the ramchargers (which go low with one of the two wires hot and high speed with both hot). If you are using a setup like that, here is the wiring diagram that I am using on my Monte.
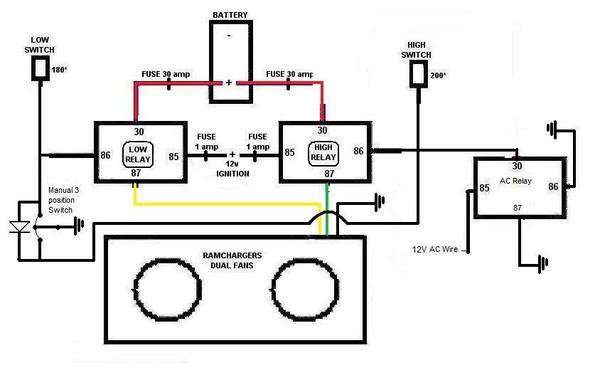
Just got the toggle switch wired up yesterday and it works great. 3 position switch allows you to toggle high, low, or off on a single switch.

 Reply With Quote