


Results 121 to 140 of 336
Thread: 1968 Firebird 400
-
02-09-2010 #121
 Registered User
- Join Date
- May 2009
- Location
- Minnesota
- Posts
- 615
 Originally Posted by E.rodz

Eric, your dead right about taking a break from the body work. I could care less right now if I ever see a welder again. LOL Now it's time to mock up new parts and make everything work together. I think it uses different brain cells because it's fun again.
-
02-09-2010 #122
Registered User
- Join Date
- Jun 2006
- Location
- Ft. Wayne, IN
- Posts
- 58
nice work, looks good to me
-
02-09-2010 #123
 Registered User
- Join Date
- Aug 2008
- Location
- Pgh, PA
- Posts
- 2,177
Body work kills brain cells - as I am fond of telling my friends who are actually good at it. Originally Posted by 68400BIRD
-
02-15-2010 #124
Registered User
- Join Date
- May 2009
- Location
- Minnesota
- Posts
- 615
Worked on the car some more. Installed the QA1's and spindles.
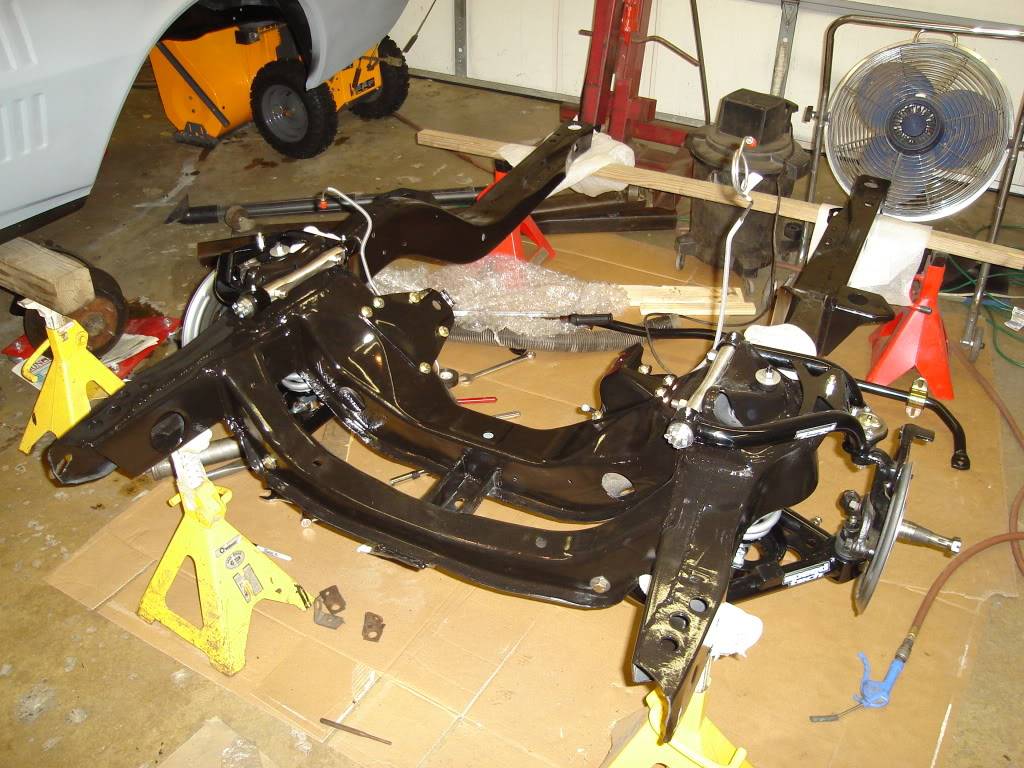
Close up shot. Need to clean everything up, it's been sitting for a long time. It's amazing how long these projects string out.LOL
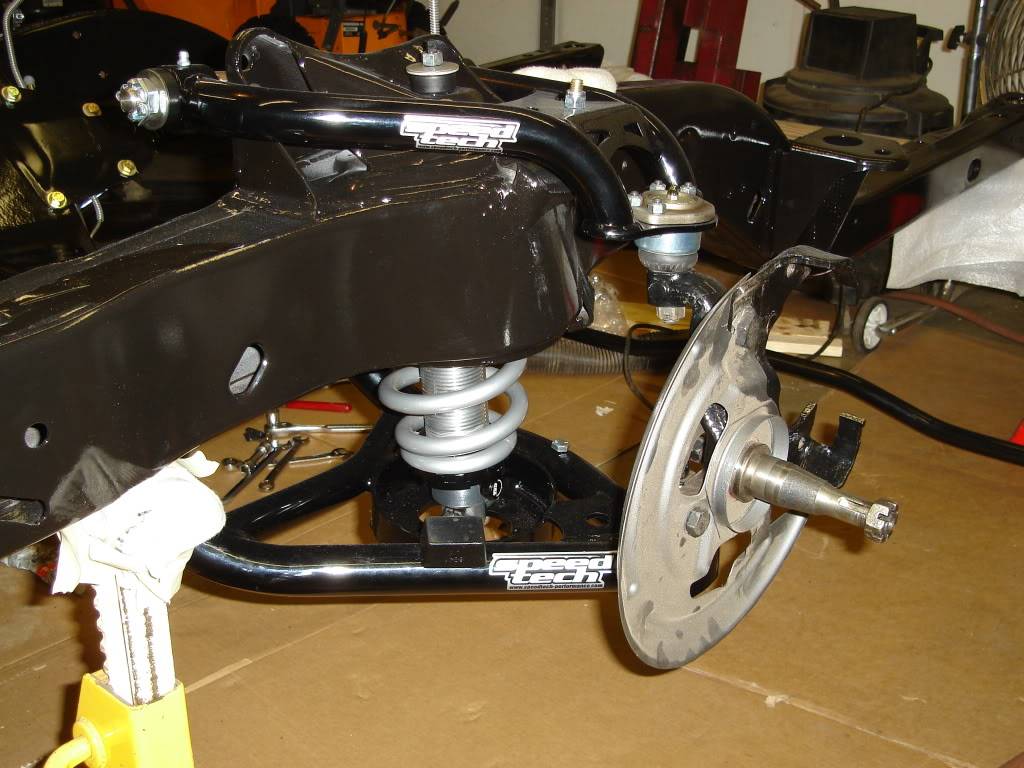
Made the plunge and installed this myself. Lots of towels and small movements.

Engine and tranny all bolted in.
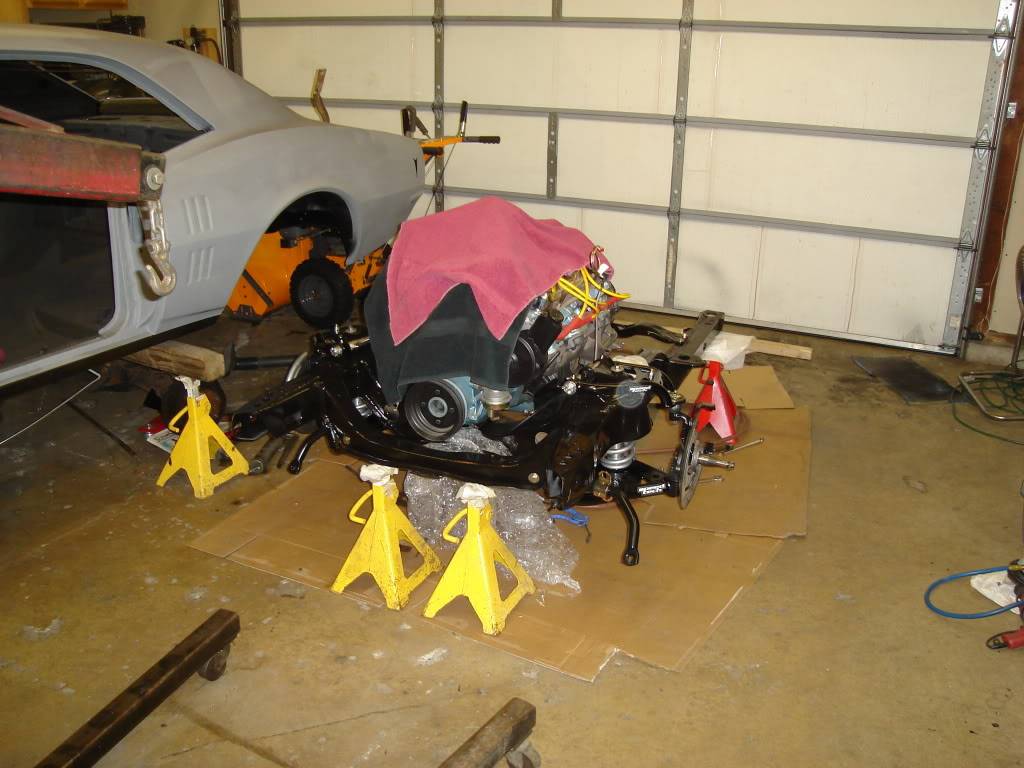
-
02-15-2010 #125
 Registered User
- Join Date
- Aug 2004
- Location
- Rustburg, Virginia
- Posts
- 3,436

You're moving right along
 1970 RS/SS350 139K on the clock:
89 TPI motor w/ 1pc rear seal coupled to a Viper T56 via Mcleod's modular bellhousing w/ hydraulic T/O bearing from the Viper, 12 bolt rear w/ 3.73 gearing, SC&C upper control arms, factory lowers with Delalums, C5 brakes at all four corners, Front Wheels 17x8's with Sumi 255/40/17 and Rear Wheels 17x9's with Sumi 275/40/17.
Brief description of the work done so far can be found here: http://www.nastyz28.com/forum/showthread.php?t=112454
-
02-15-2010 #126
Registered User
- Join Date
- May 2009
- Location
- Minnesota
- Posts
- 615
Originally Posted by John Wright
Thanks John, hows that pole shed of yours coming along?????
-
02-15-2010 #127
Registered User
- Join Date
- Aug 2004
- Location
- Rustburg, Virginia
- Posts
- 3,436
My building is still in the same configuration as it was last Fall...it's just whiter at the moment. Buried in snow.
1970 RS/SS350 139K on the clock:
89 TPI motor w/ 1pc rear seal coupled to a Viper T56 via Mcleod's modular bellhousing w/ hydraulic T/O bearing from the Viper, 12 bolt rear w/ 3.73 gearing, SC&C upper control arms, factory lowers with Delalums, C5 brakes at all four corners, Front Wheels 17x8's with Sumi 255/40/17 and Rear Wheels 17x9's with Sumi 275/40/17.
Brief description of the work done so far can be found here: http://www.nastyz28.com/forum/showthread.php?t=112454
-
02-15-2010 #128
Registered User
- Join Date
- Mar 2009
- Location
- Houston, TX
- Posts
- 1,197
Looks good Rob. I'm in the middle of rebuilding the frame and front suspension as well.
Tu Ho
Firebird V2-LS swap
-
02-16-2010 #129
Registered User
- Join Date
- May 2009
- Location
- Minnesota
- Posts
- 615
Originally Posted by rickpaw
LOL Remember to put the engine mount brackets on the frame before installing the lower control arm. Another thing I wish I had done was trial fit the control arms. I found after everything was painted that you need to go in with threaded rod and two nuts and spread out the lower braces for the control arms. Also install the front sway bar before the motor goes in. It is a little easier before hand.
-
02-16-2010 #130
Registered User
- Join Date
- Mar 2009
- Location
- Houston, TX
- Posts
- 1,197
Yup. I almost installed the arms before the mounts. I was just fitting the arms into place and noticed the arms blocking the bolt holes for the engine mounts.
Had to re-compress the spring and lower the arm on one side to install the bigger sway bar.Tu Ho
Firebird V2-LS swap
-
02-18-2010 #131
Registered User
- Join Date
- May 2009
- Location
- Minnesota
- Posts
- 615
I hope to have the car on all four wheels by the end of this month. The subframe is bolted up and I started running more of the ss gas and brake lines.
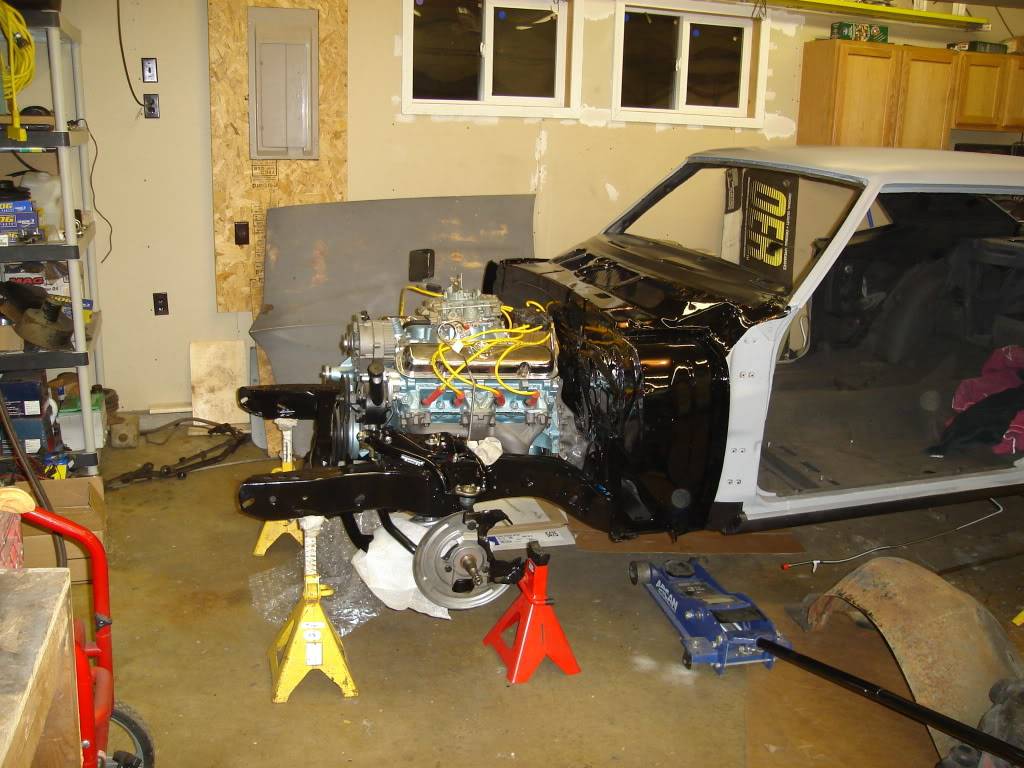
A little trial fit of some rims and tires from my last car.
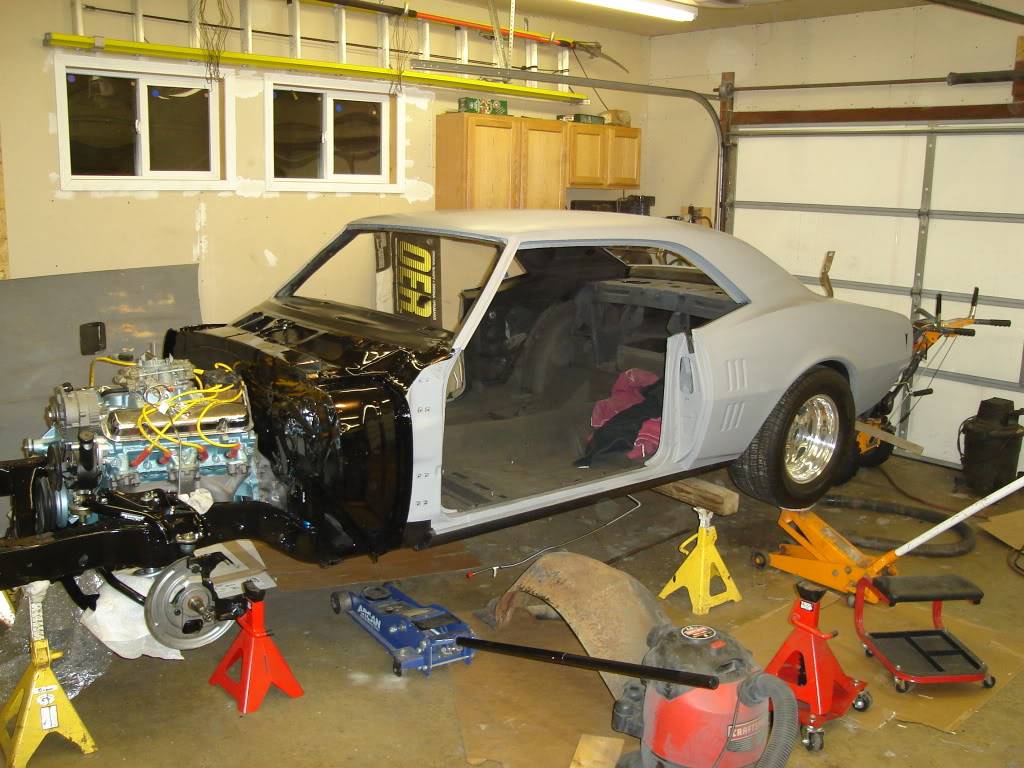
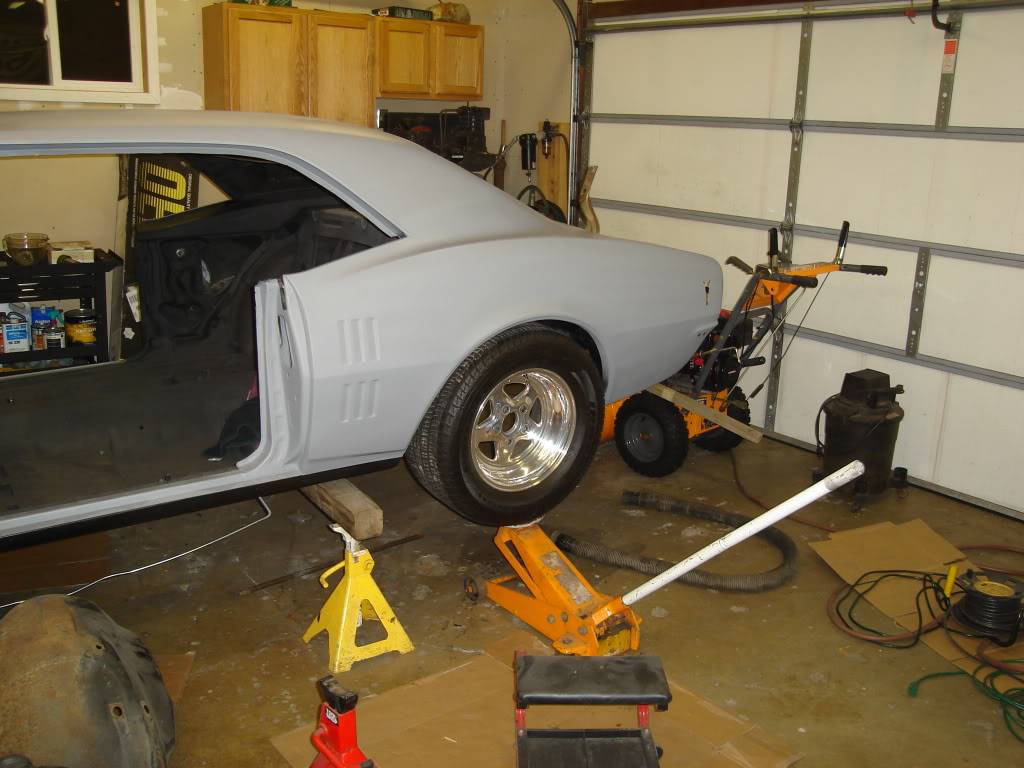
I think the back tires are going to be to wide. I can either buy different tires or go back to the Rally II's.
-
02-18-2010 #132
Registered User
- Join Date
- Aug 2008
- Location
- Pgh, PA
- Posts
- 2,177
Is that a new fuel line from Right Stuff laying under the car?
02-18-2010 #133
Registered User
- Join Date
- Aug 2004
- Location
- Rustburg, Virginia
- Posts
- 3,436
Rob, I know you're getting excited...it's looking more like a car everyday...woot!
1970 RS/SS350 139K on the clock:
89 TPI motor w/ 1pc rear seal coupled to a Viper T56 via Mcleod's modular bellhousing w/ hydraulic T/O bearing from the Viper, 12 bolt rear w/ 3.73 gearing, SC&C upper control arms, factory lowers with Delalums, C5 brakes at all four corners, Front Wheels 17x8's with Sumi 255/40/17 and Rear Wheels 17x9's with Sumi 275/40/17.
Brief description of the work done so far can be found here: http://www.nastyz28.com/forum/showthread.php?t=112454
02-18-2010 #134
Registered User
- Join Date
- May 2009
- Location
- Minnesota
- Posts
- 615
Originally Posted by wmhjr
Thats a brake line from inline tube. The gas line is on the other side and is also from inline tube. Having some problems with figuring out what clips go where. They all come in one package and they have no reference.
02-18-2010 #135
Registered User
- Join Date
- May 2009
- Location
- Minnesota
- Posts
- 615
Originally Posted by John Wright
John, Thanks, the project is getting to be more fun each day. I can't wait to get it sitting back down on all fours.
02-18-2010 #136
Registered User
- Join Date
- Aug 2008
- Location
- Pgh, PA
- Posts
- 2,177
Gotcha. I've used both of them. Inline tube made my fuel lines for me, and I used a couple pieces of brake line from Right Stuff. Both good quality - though Inline tube screwed up my order. I clearly stated 1/2" supply line with an 8AN front connection and no AN on the rear. 4AN on the front of the return but not on the back. My order form and invoice clearly specified it - including the copy that came back with the lines (supply and return). Both came with ANs on both ends. Problem is that there's no friggin way to get an 8AN fitting through the boxed frame around the front. Had to cut the supply line and put a compression fitting on it. Not terrible since I'm running a RobbMC mechanical pump up front instead of an electric in the back - otherwise I'd have made them pick it up, fix it and return it. I think it'll handle what I'm doing, but probably I wouldn't be comfortable if I were pressurizing that supply line from the tank. Originally Posted by 68400BIRD
Have fun working with that stuff! It's loads of fun (not).
02-18-2010 #137
Registered User
- Join Date
- May 2009
- Location
- Minnesota
- Posts
- 615
Yea, I'm having fun just trying to figure out the clip kits that I bought. It seems that my order was also goofed up. They sent me a bag of return line clips when I told them that I need a kit to install the fuel line that I ordered. I ordered a single 3/8 fuel line. Now I'm being told that they do not have a fuel line clip set and that I will have to search there clips and order them singly. They joys of rebuilding a 40 year old car. LOL
02-18-2010 #138
Registered User
- Join Date
- Aug 2008
- Location
- Pgh, PA
- Posts
- 2,177
The quality of the stuff at Inline Tube is great. It's just the details that make it frustrating sometimes.
You'll get it. I had an advantage. My car has a full frame so the plumbing could mainly be done before the body was on. That creates other challenges, but at least running lines was a little easier from that perspective.
02-18-2010 #139 Registered User
- Join Date
- Dec 2006
- Location
- summerville,sc
- Posts
- 160
looking killer what the plan for paint color?

02-18-2010 #140
Registered User
- Join Date
- May 2009
- Location
- Minnesota
- Posts
- 615
Originally Posted by GM_muscle
2003 Corvette electron blue or 2004 corvette lemans blue. The color might be common for other years also.

 Reply With Quote



