


Results 101 to 120 of 336
Thread: 1968 Firebird 400
Hybrid View


-
01-03-2010 #1
 Registered User
- Join Date
- May 2009
- Location
- Minnesota
- Posts
- 615
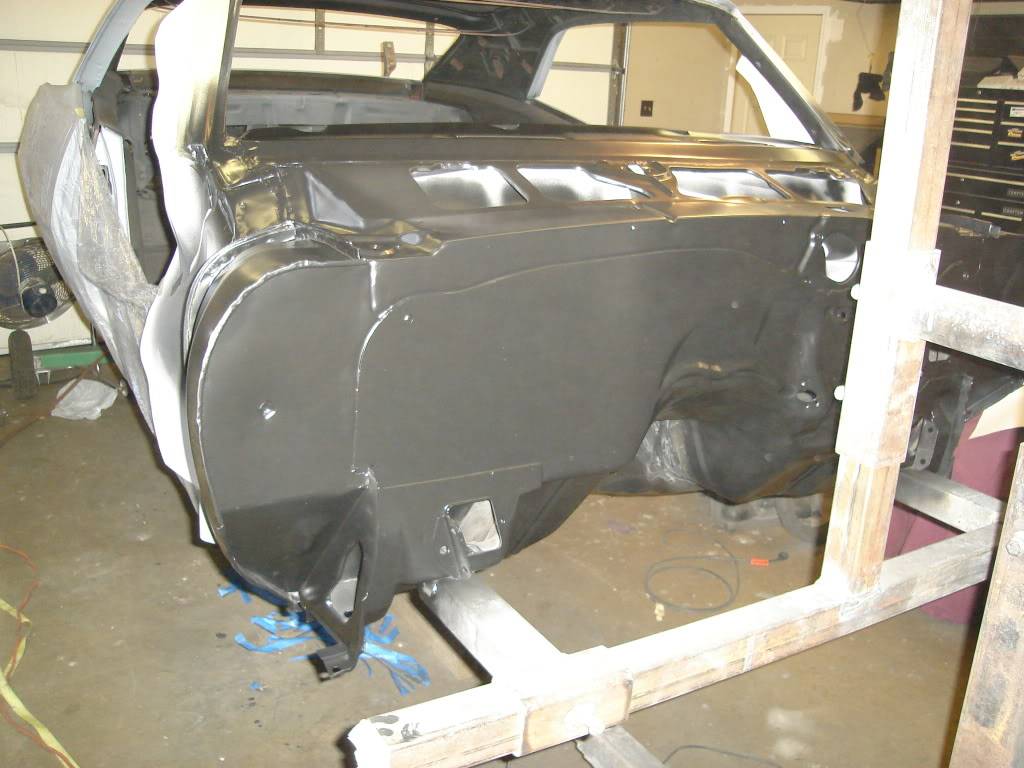
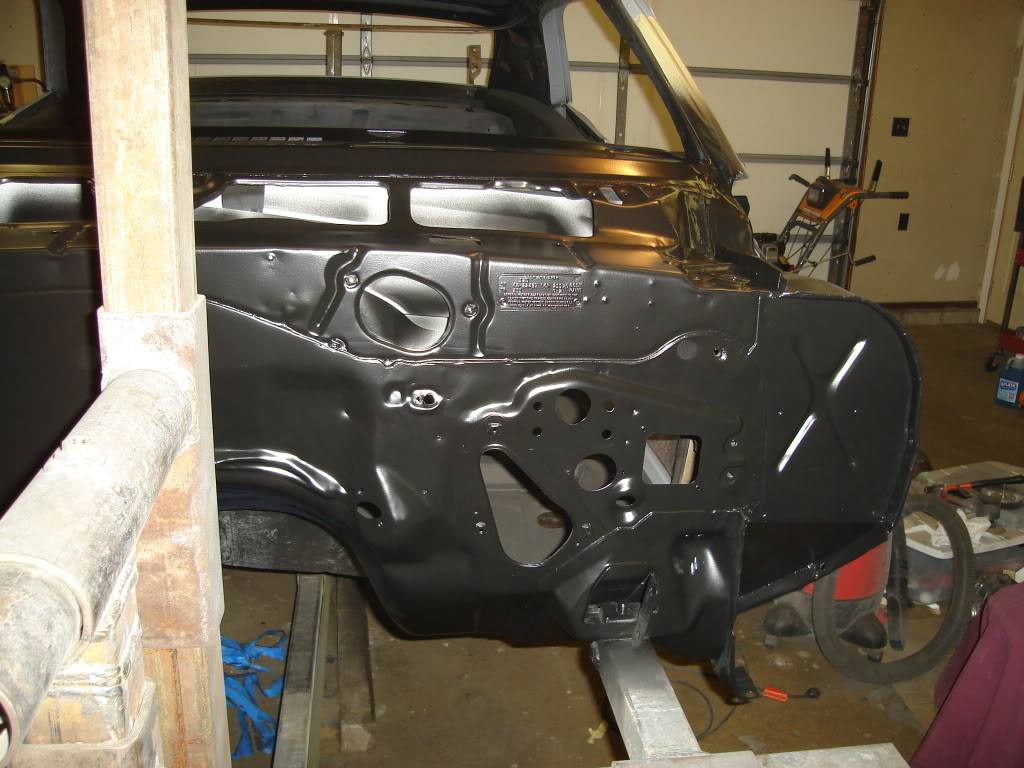
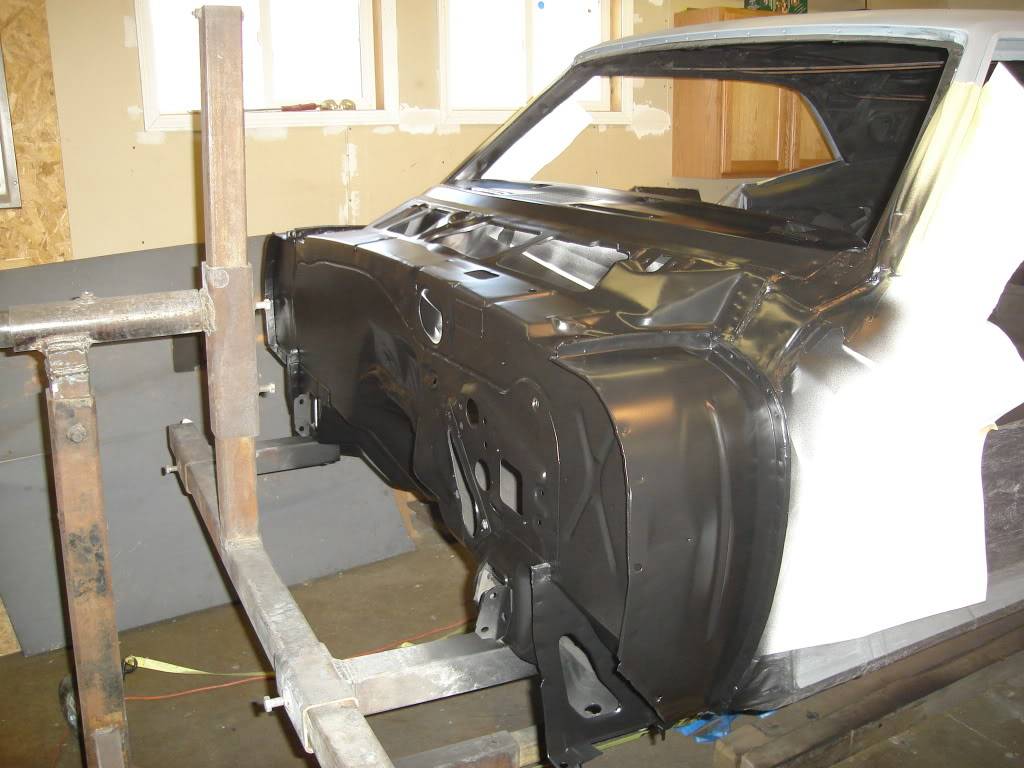
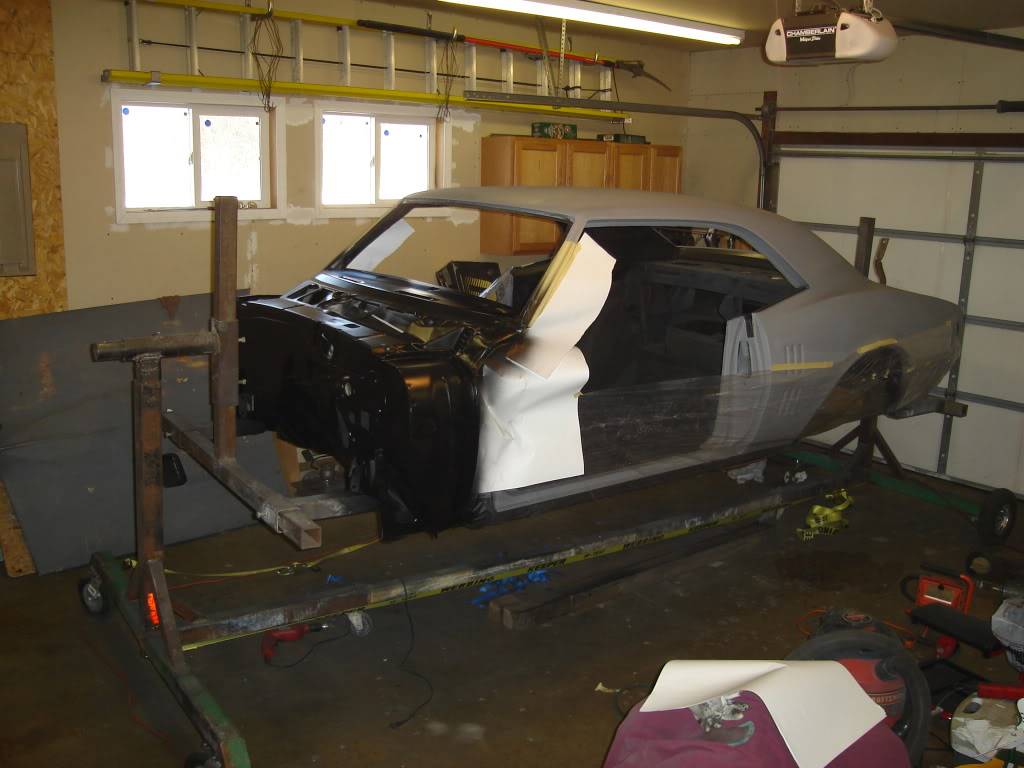
Still stinks in the garage but I snapped a few pics.
-
01-03-2010 #2 Registered User
- Join Date
- Mar 2009
- Location
- overseas
- Posts
- 3,434

nice man looking good
 Kevin S. (overseas in Germany)
1963 Chevrolet Impala 2d ht Coupe
www.CruznArt.com
CRUZN - Automotive Artworks
01-03-2010 #3 Registered User
- Join Date
- Dec 2008
- Location
- Columbus, IN
- Posts
- 131
Subscribing. Thanks for sharing and nice work. I am getting close to starting a build thread on my Bird.
'66 Mustang
'67 FireBird https://www.pro-touring.com/forum/sh...light=firebird
'68 Barracuda
'69 Mustang Mach 1
'97 Mustang Cobra
'04 Mustang Cobra
01-03-2010 #4
Registered User
- Join Date
- Nov 2007
- Location
- near Orlando
- Posts
- 231
Great do-it-yourself project. Better than many "professional" shops. Can't wait to see the roller with paint.
RagRat
Chris Costa
01-03-2010 #5 Registered User
- Join Date
- Nov 2006
- Location
- Ma.
- Posts
- 5,560
It looks great, nice work.
Wayne
Car FINALLY home !!!!!! lol
Project FNQUIK https://www.pro-touring.com/showthre...ghlight=FNQUIK
01-07-2010 #6
Registered User
- Join Date
- May 2009
- Location
- Minnesota
- Posts
- 615
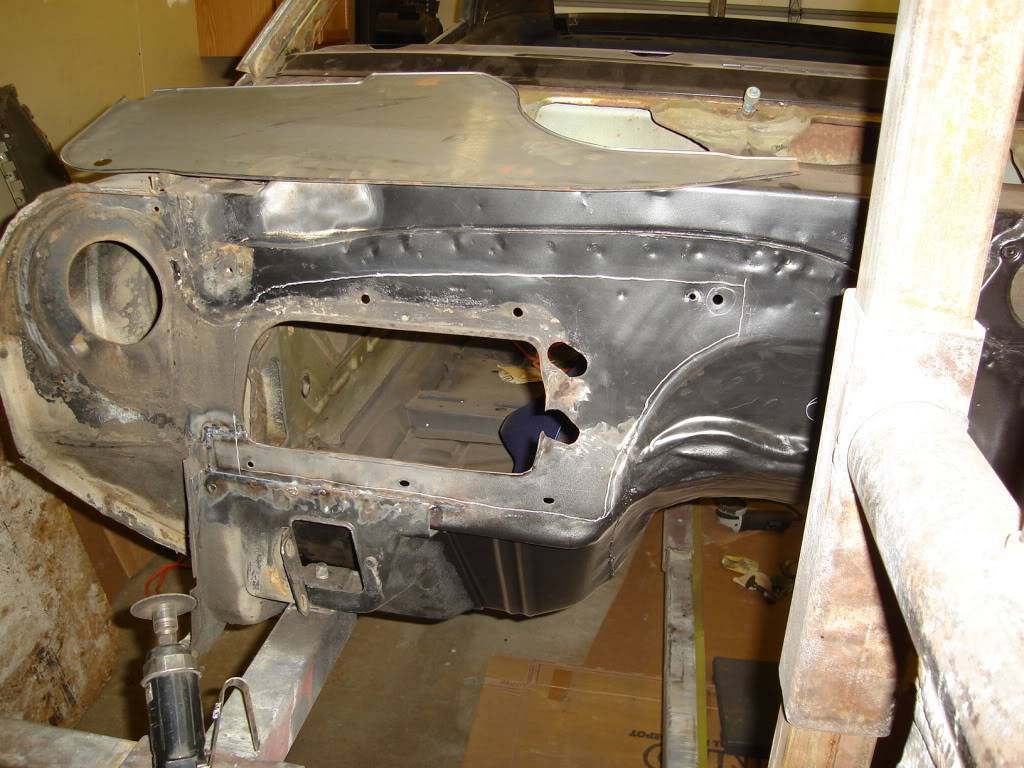
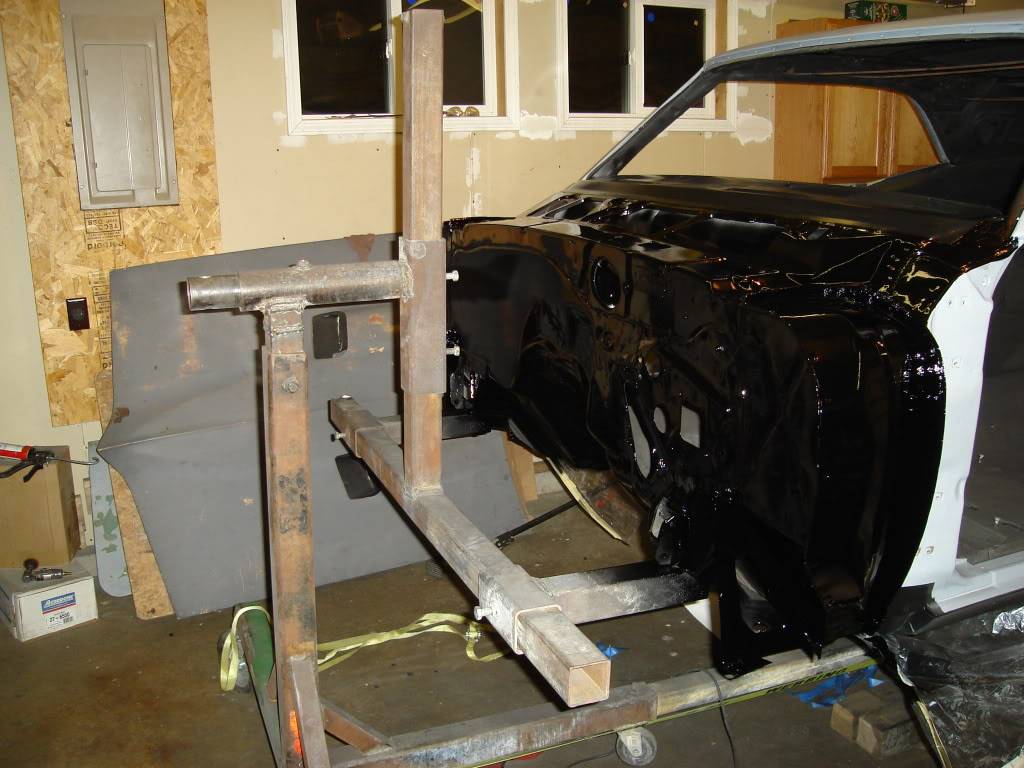
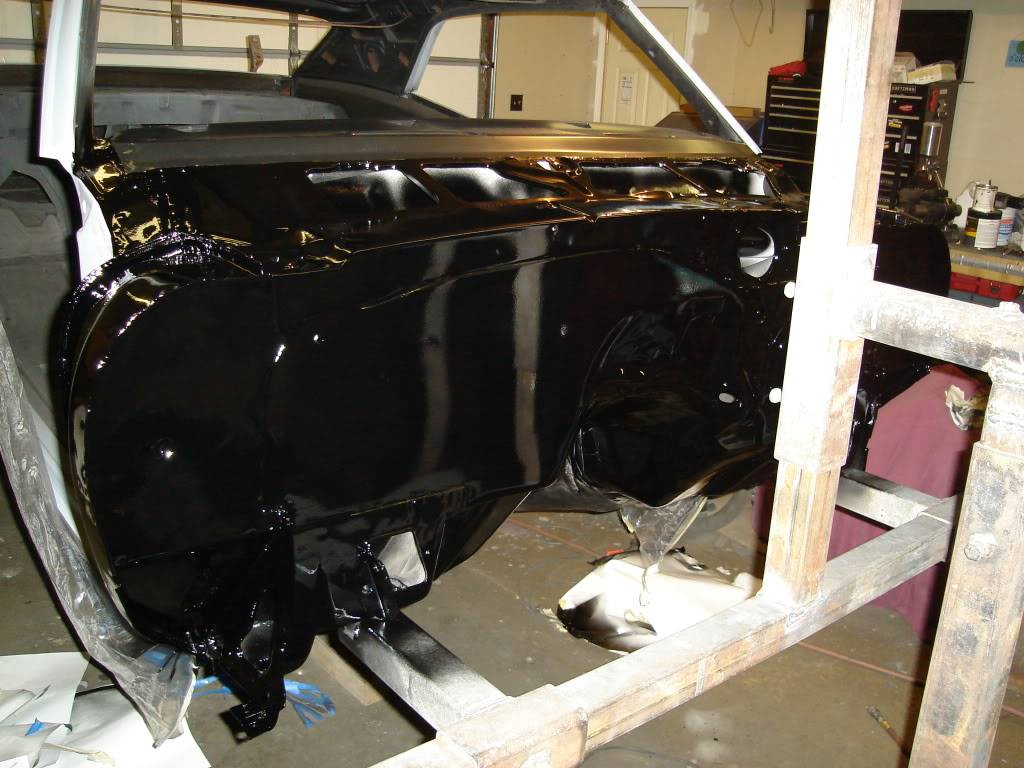
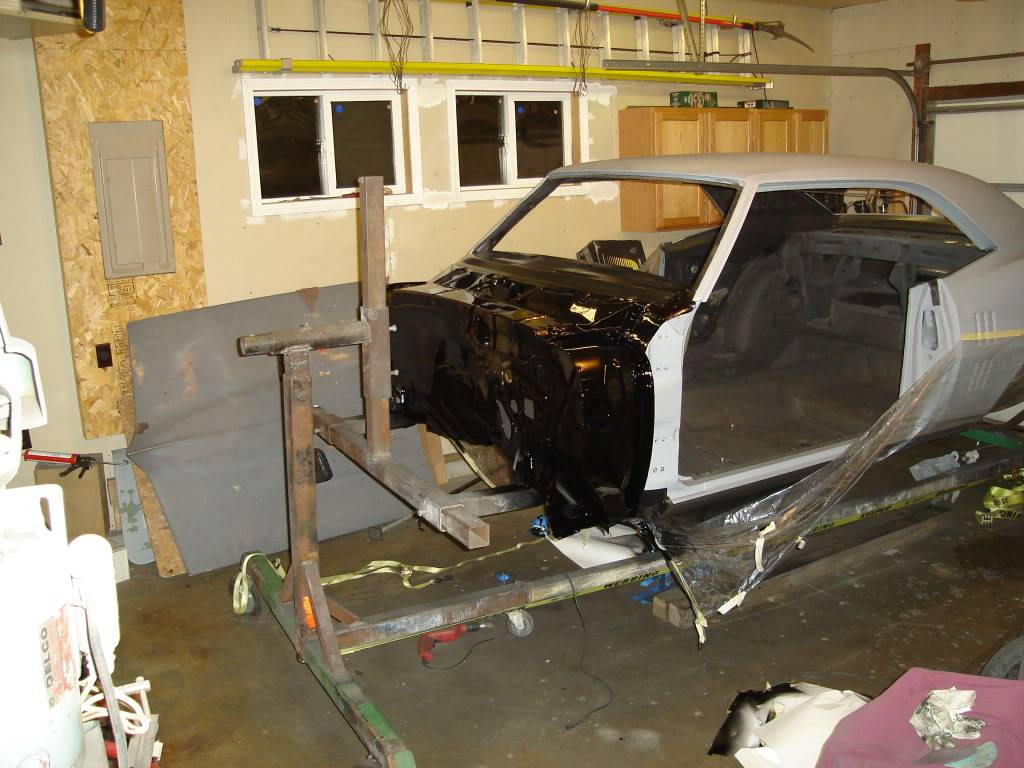
I spayed some PPG DCC gloss black paint on the firewall last night.
Here is one before pic first.
01-07-2010 #7
Registered User
- Join Date
- Oct 2009
- Location
- Reno, NV.
- Posts
- 482
I ..................like it!
01-08-2010 #8 Registered User
- Join Date
- Feb 2005
- Location
- Sydney, Australia
- Posts
- 1,797

Hey, that looks great...really clean.
Regards,
Leigh
Sydney, Australia
1971 Firebird 455
https://www.pro-touring.com/showthre...Project/page27
01-08-2010 #9 Registered User
- Join Date
- Aug 2004
- Location
- Rustburg, Virginia
- Posts
- 3,436
good job!...looking great
1970 RS/SS350 139K on the clock:
89 TPI motor w/ 1pc rear seal coupled to a Viper T56 via Mcleod's modular bellhousing w/ hydraulic T/O bearing from the Viper, 12 bolt rear w/ 3.73 gearing, SC&C upper control arms, factory lowers with Delalums, C5 brakes at all four corners, Front Wheels 17x8's with Sumi 255/40/17 and Rear Wheels 17x9's with Sumi 275/40/17.
Brief description of the work done so far can be found here: http://www.nastyz28.com/forum/showthread.php?t=112454
01-08-2010 #10
Registered User
- Join Date
- Mar 2009
- Location
- overseas
- Posts
- 3,434
yeah very nice
Kevin S. (overseas in Germany)
1963 Chevrolet Impala 2d ht Coupe
www.CruznArt.com
CRUZN - Automotive Artworks
01-08-2010 #11
Registered User
- Join Date
- Mar 2009
- Location
- Houston, TX
- Posts
- 1,197
Looking good Rob. What did you use on the firewall before spraying the last coat?
I need to get back on my 67. Sigh.
TuTu Ho
Firebird V2-LS swap
01-08-2010 #12
Registered User
- Join Date
- May 2009
- Location
- Minnesota
- Posts
- 615
 Originally Posted by rickpaw

I started with sanding the whole thing down to bare metal.
Cleaned with wax and grease remover
Acid etched all bare metal
Wiped down with tack cloth
Applied body filler numerous times
Sealed with primer sealer PPG DP90 (two coats)
You can top coat up to seven days but I'm not that fast
Applied seam sealer, let dry for at least one week
Scuffed down all primer
Applied heavy fill primer
Block sanded out filler primer
Wiped down with wax and grease remover,tack cloth
Sprayed primer sealer again
Waited to long and had to scuff down primer again LOL
Wax and grease remover,tack cloth
Sprayed primer sealer again DP90
Top coated with three coats of PPG DCC gloss black paint
I'll wait a few weeks and cut and buff the upper cowl and the area that I smoothed.
01-08-2010 #13 Registered User
- Join Date
- Mar 2005
- Location
- Miamisburg, Oh
- Posts
- 2,396
looks fantastic man!
keep up the great work.
02-09-2010 #14
Registered User
- Join Date
- May 2009
- Location
- Minnesota
- Posts
- 615
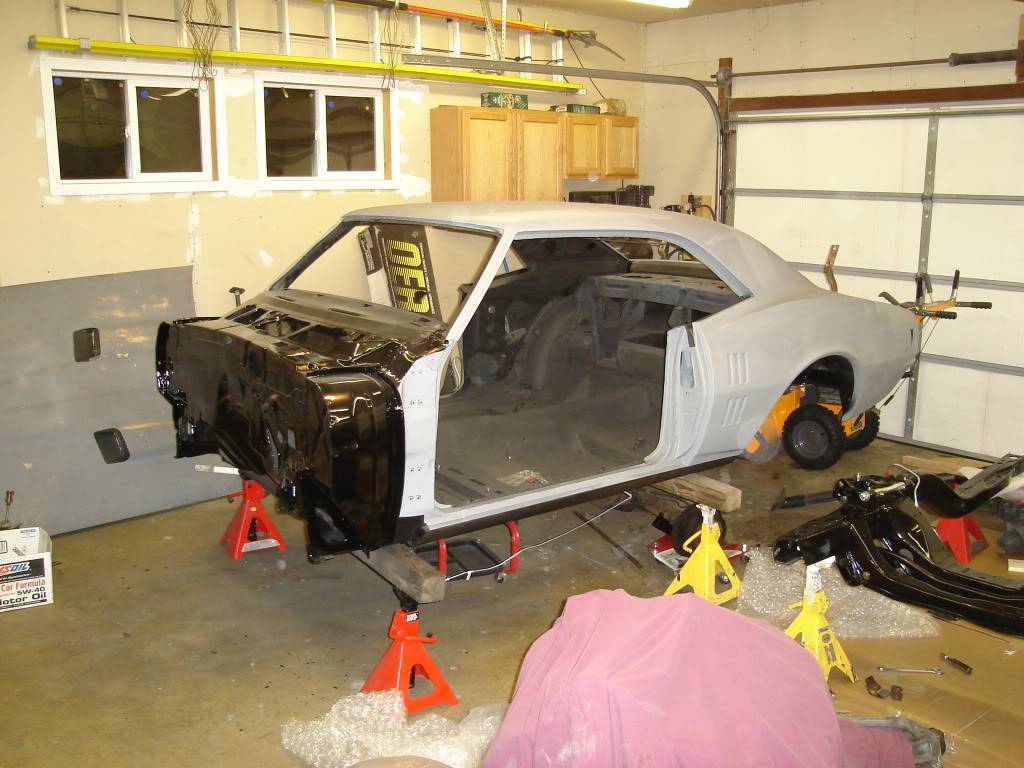
The big day finally came LOL the car is finally off of the rottisserie. Placed it on jack stands for now intill I get the subframe all put back together.
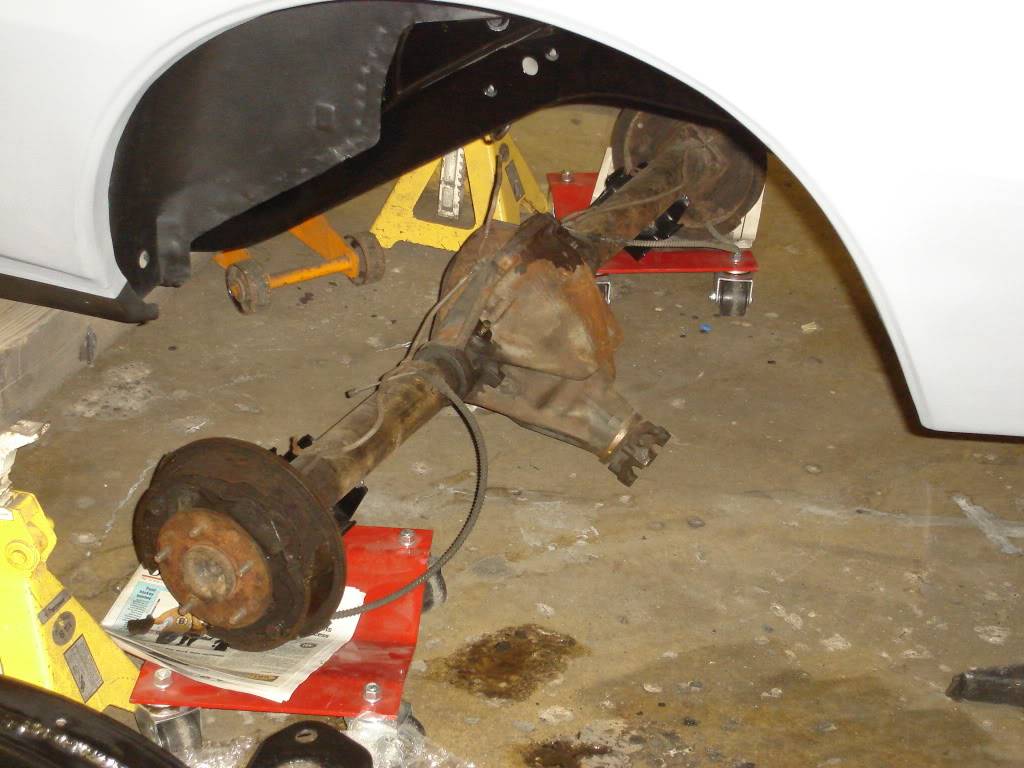
I tack welded the perches onto my 12 bolt. I will install it with the rest of the suspension and if the pinion angle is correct I will weld it solid and clean it up for paint.
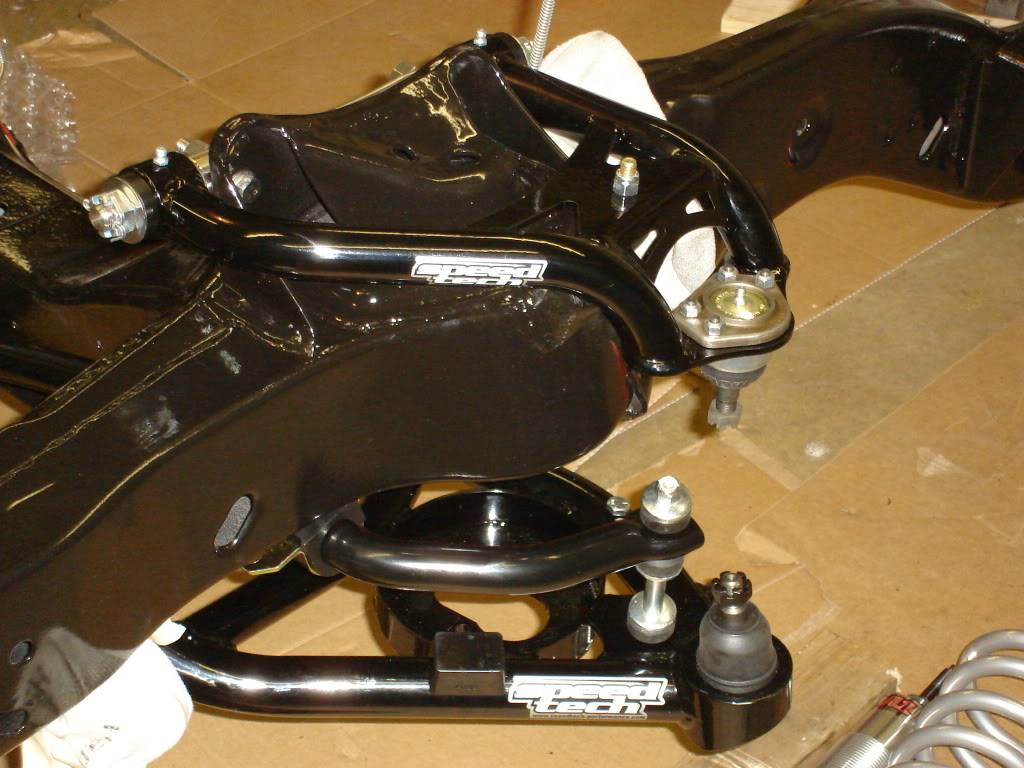
I started putting on new parts. Lower and upper control arms, and sway bar. I will have to do a few mods to the sway bar to make it fit correctly. The bar is more than twice the size of the old one. So I will need to drill new holes in the frame and make some threaded plates for inside of the frame to bolt it to.
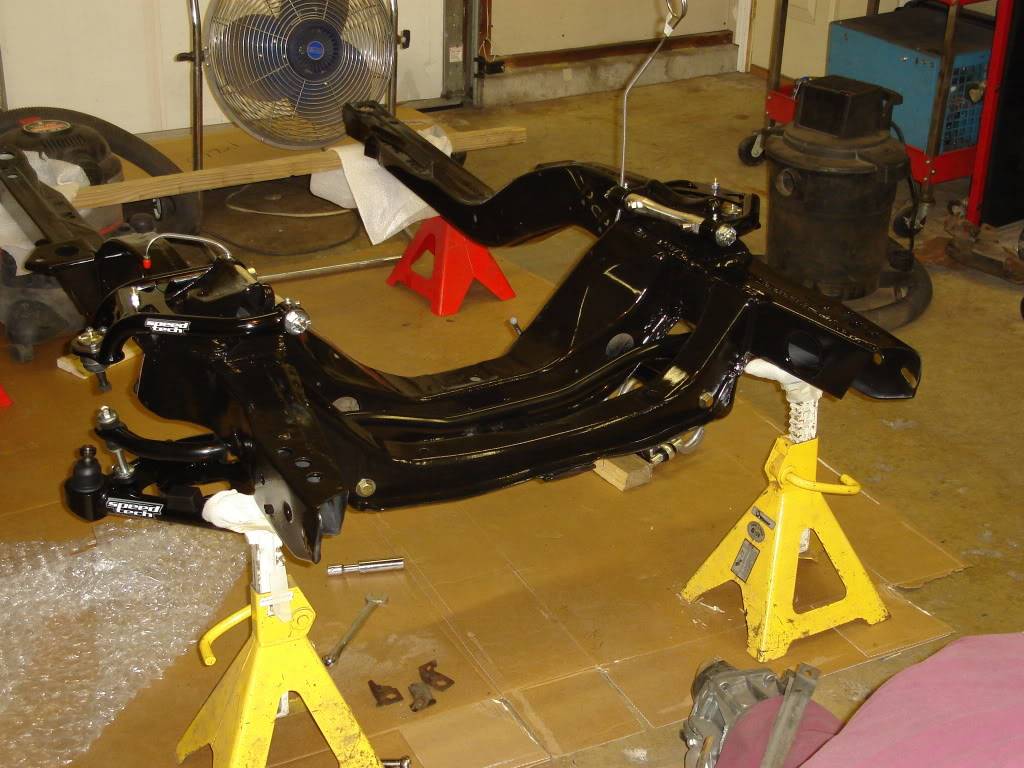
Worked on installing the rear brake lines and fuel lines. They have to go in before the engine is installed.

02-09-2010 #15 Registered User
- Join Date
- Aug 2008
- Location
- Pgh, PA
- Posts
- 2,177
Again - nice job! I'm enjoying those pics!
02-09-2010 #16
Registered User
- Join Date
- May 2009
- Location
- Minnesota
- Posts
- 615
Originally Posted by wmhjr
Thanks, I'm hoping to have a lot of pics over the next week or two. This is what I have been waiting for. Time to bolt on the new parts that I bought last summer. LOL I guess my time frame was off a little. I thought I would be driving it last summer in primer.
02-09-2010 #17
Registered User
- Join Date
- Aug 2008
- Location
- Pgh, PA
- Posts
- 2,177
Don't feel bad - my project was supposed to be on the road and done by July. For various reasons it was delayed and I'm now waiting until spring. It's been at a show, but I won't drive it until everything is clear and all salt has had a chance to be washed away.
02-09-2010 #18 Registered User
- Join Date
- Nov 2008
- Location
- st. paul mn.
- Posts
- 438
great job rob looks like your making foward progress.now your to the fun part of doing some assembling.you need to take a break between spurts of body work or you will go nuts and rush through and regret it later. keep taking your time and don't rush it you will thank yourself later.
Follow Us on Facebook!
http://www.Facebook.com/ErodzCustoms
Visit Our Website!
http://www.ErodzCustoms.com
Follow our Crazy Shop Mod's!
http://www.garagejournal.com/forum/s...ad.php?t=48204
02-15-2010 #19
Registered User
- Join Date
- May 2009
- Location
- Minnesota
- Posts
- 615
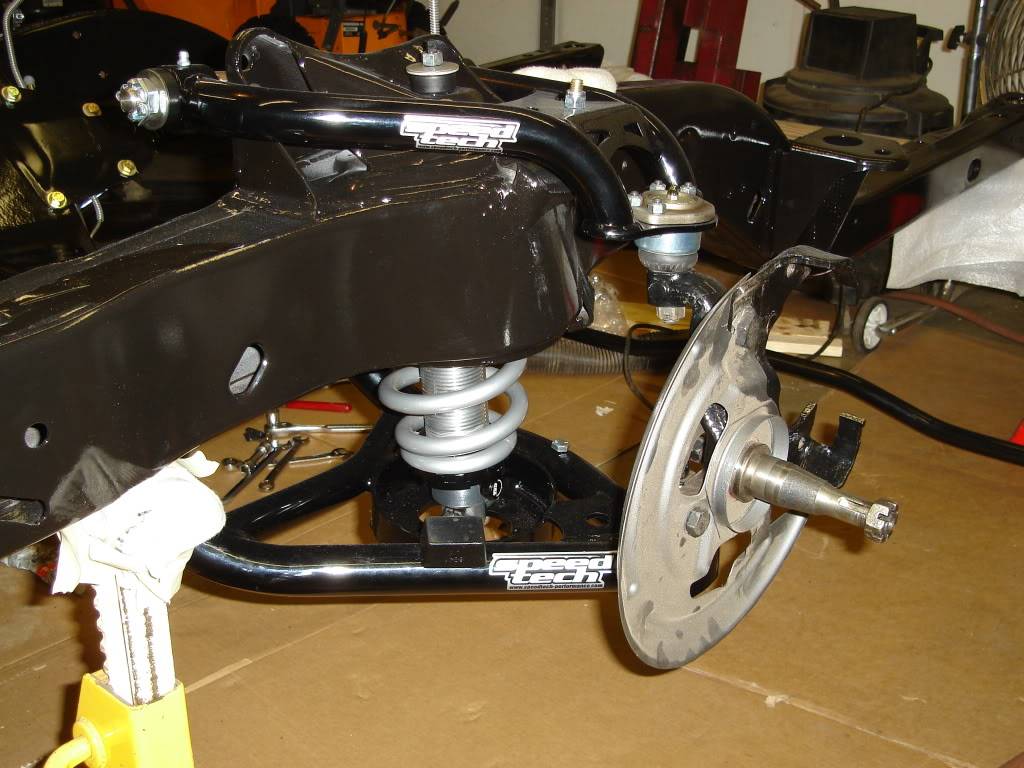
Worked on the car some more. Installed the QA1's and spindles.
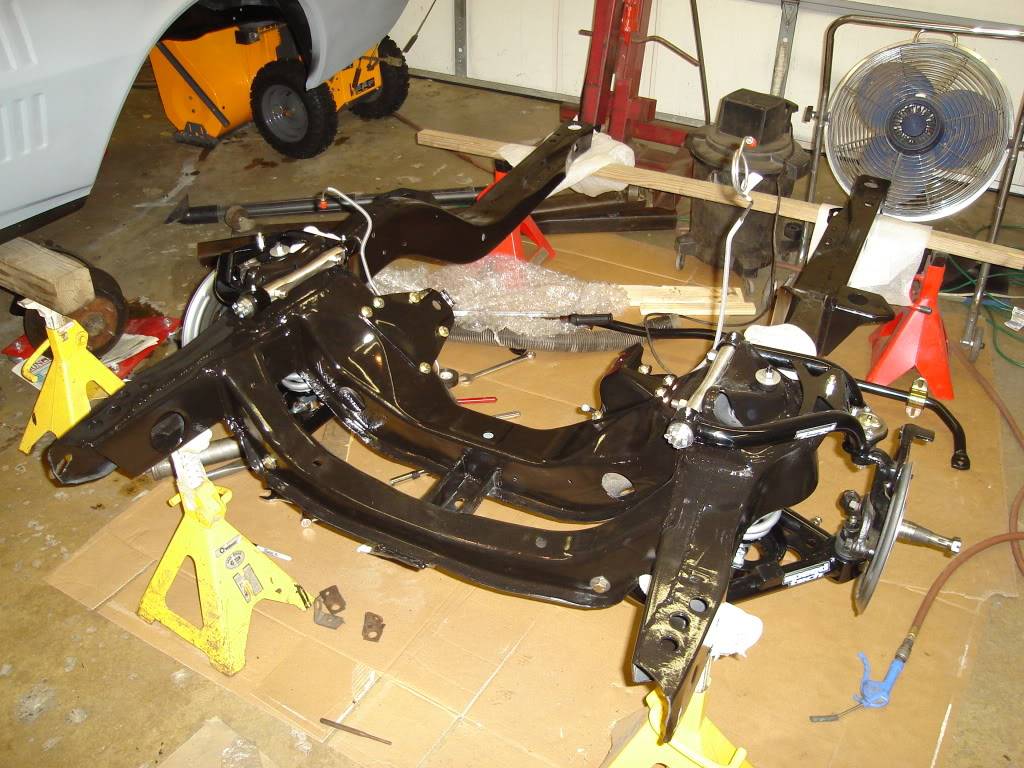
Close up shot. Need to clean everything up, it's been sitting for a long time. It's amazing how long these projects string out.LOL
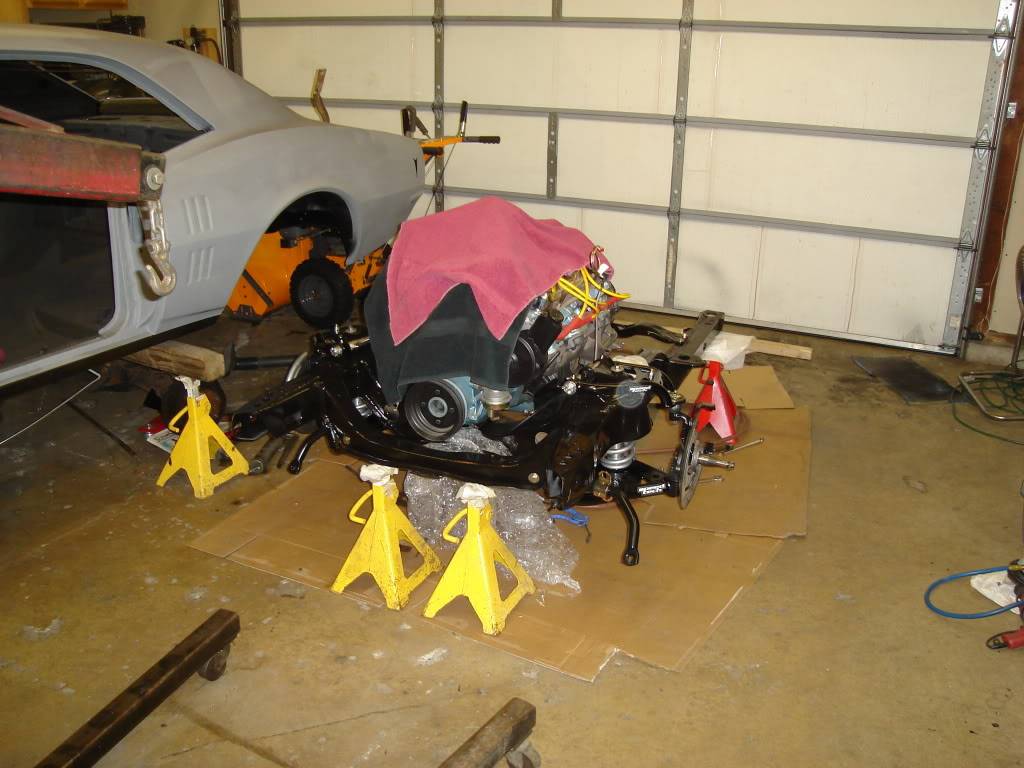
Made the plunge and installed this myself. Lots of towels and small movements.

Engine and tranny all bolted in.
02-15-2010 #20
Registered User
- Join Date
- Aug 2004
- Location
- Rustburg, Virginia
- Posts
- 3,436
You're moving right along
 1970 RS/SS350 139K on the clock:
89 TPI motor w/ 1pc rear seal coupled to a Viper T56 via Mcleod's modular bellhousing w/ hydraulic T/O bearing from the Viper, 12 bolt rear w/ 3.73 gearing, SC&C upper control arms, factory lowers with Delalums, C5 brakes at all four corners, Front Wheels 17x8's with Sumi 255/40/17 and Rear Wheels 17x9's with Sumi 275/40/17.
Brief description of the work done so far can be found here: http://www.nastyz28.com/forum/showthread.php?t=112454

 Reply With Quote



