


Results 741 to 760 of 859
Thread: 1970 GTO Version 3.0
-
05-03-2023 #741
 Registered User
- Join Date
- Sep 2013
- Location
- sw Kansas
- Posts
- 1,662

That's too bad you had to cut the tank. Extra work is just that.

-
05-05-2023 #742
 -Moderator/Sponsor-
- Join Date
- Apr 2001
- Location
- The City of Fountains
- Posts
- 16,128
The exhaust and the gas tank are done. Here are the final pictures:
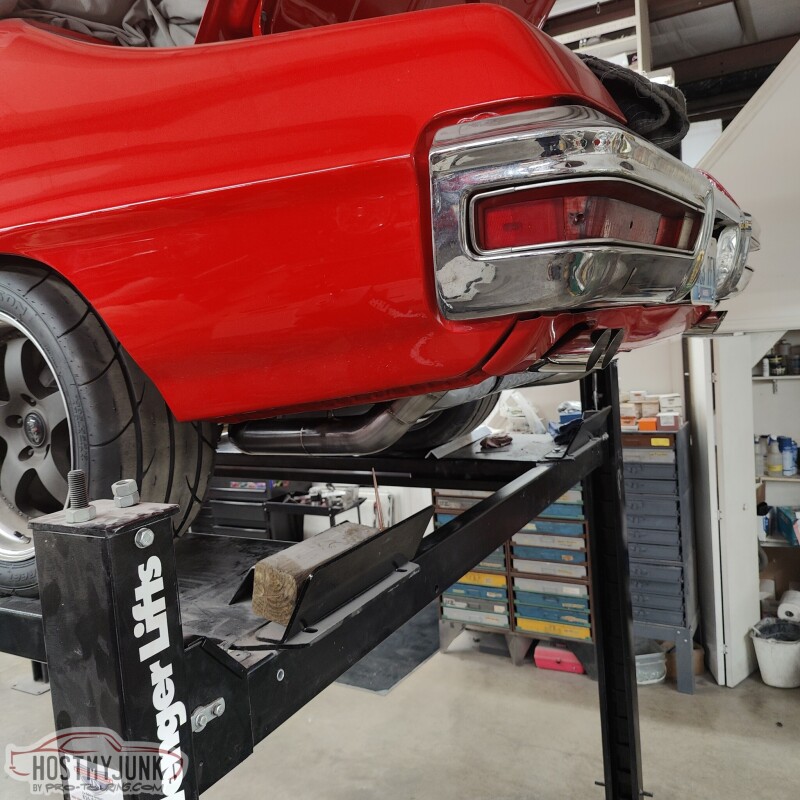
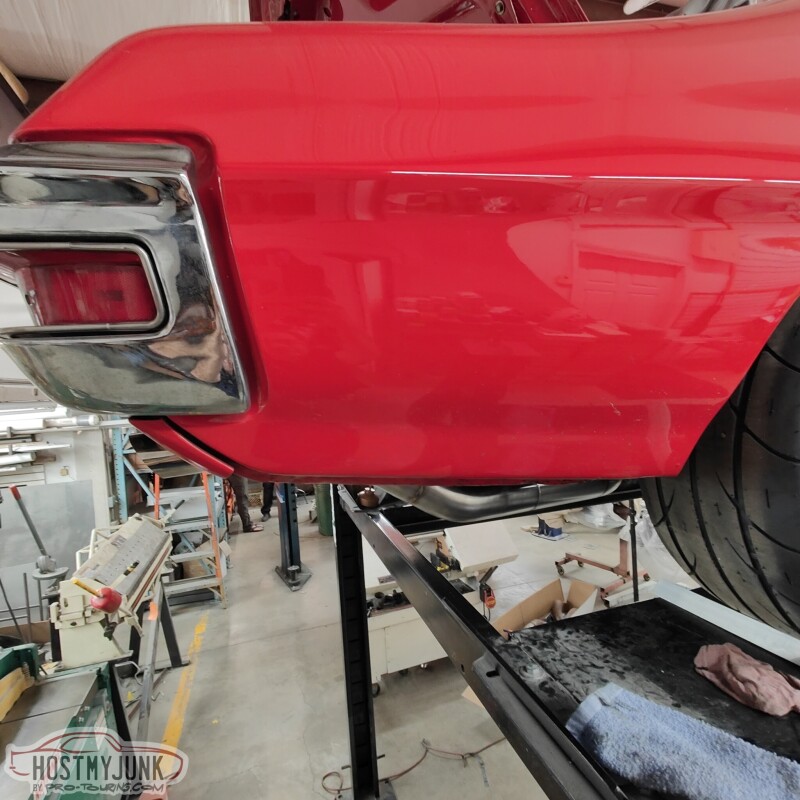
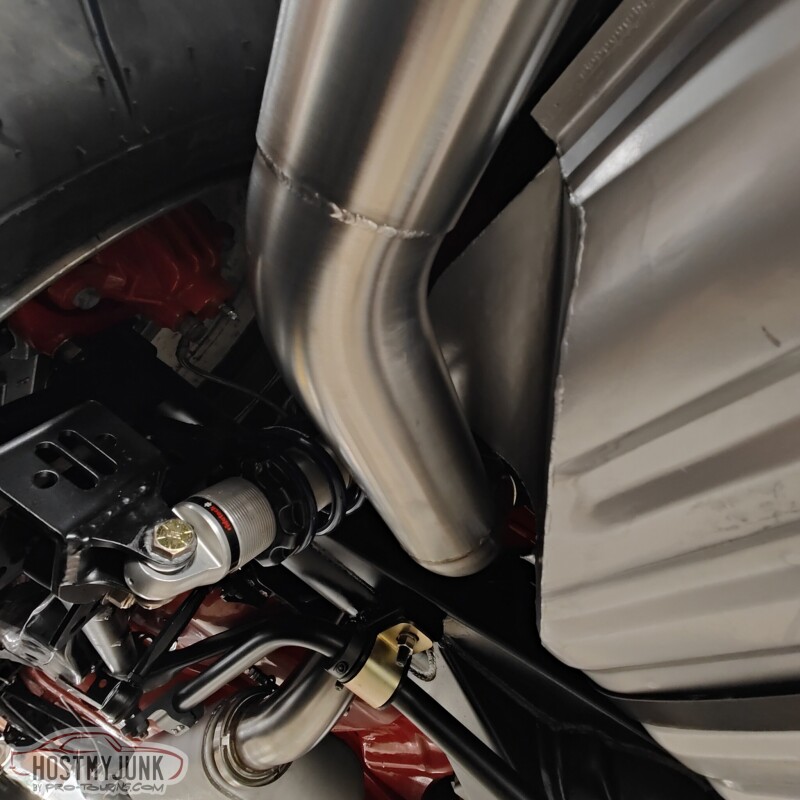
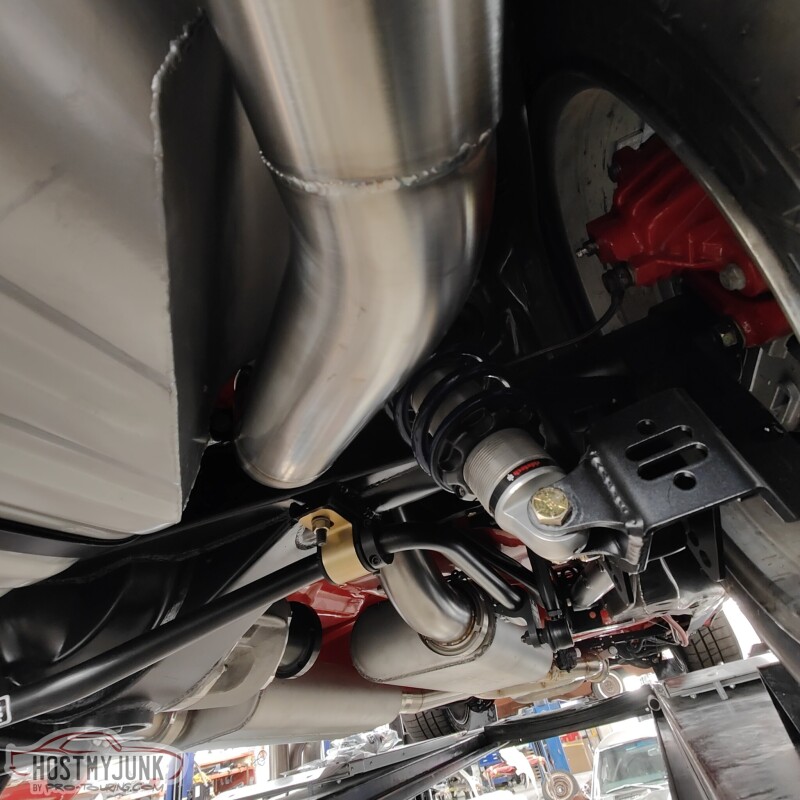
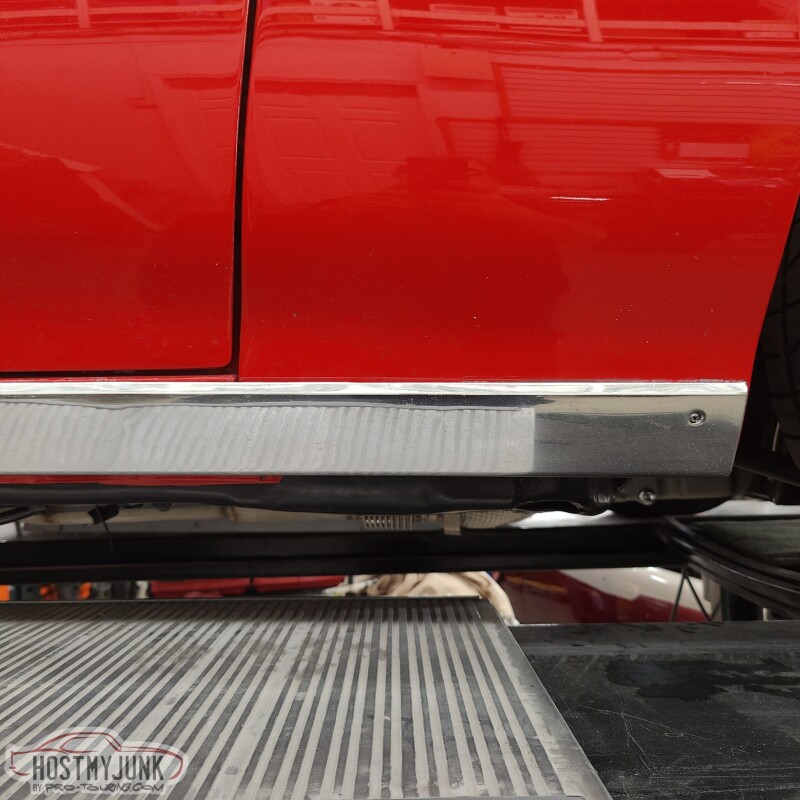
Rick from Hotrod Express also delivered the car to me this morning. Big thanks to my friend Tom, who came out to visit me. He helped to clean up and organize the garage so that I have a fighting chance of having the car drivable to LS Fest in September.
Andrew1970 GTO Version 3.0
1967 Cougar build
GM High-Tech Performance feature
My YouTube Channel Please Subscribe!
Instagram @dr__efi
I deliver what EFI promises.
Remote Holley EFI tuning.
Please get in touch if I can be of service.
"You were the gun, your voice was the trigger, your bravery was the barrel, your eyes were the bullets." ~ Her
-
05-07-2023 #743
-Moderator/Sponsor-
- Join Date
- Apr 2001
- Location
- The City of Fountains
- Posts
- 16,128
Now that the car is back, I felt the need to go out there and do something, even if it is something small. Keeping in mind that I will be doing a lot of wiring under the dash, a removable steering wheel hub seemed like a good idea. My friend Tom had a NRG steering wheel hub on his 70 GTO and I really liked it.
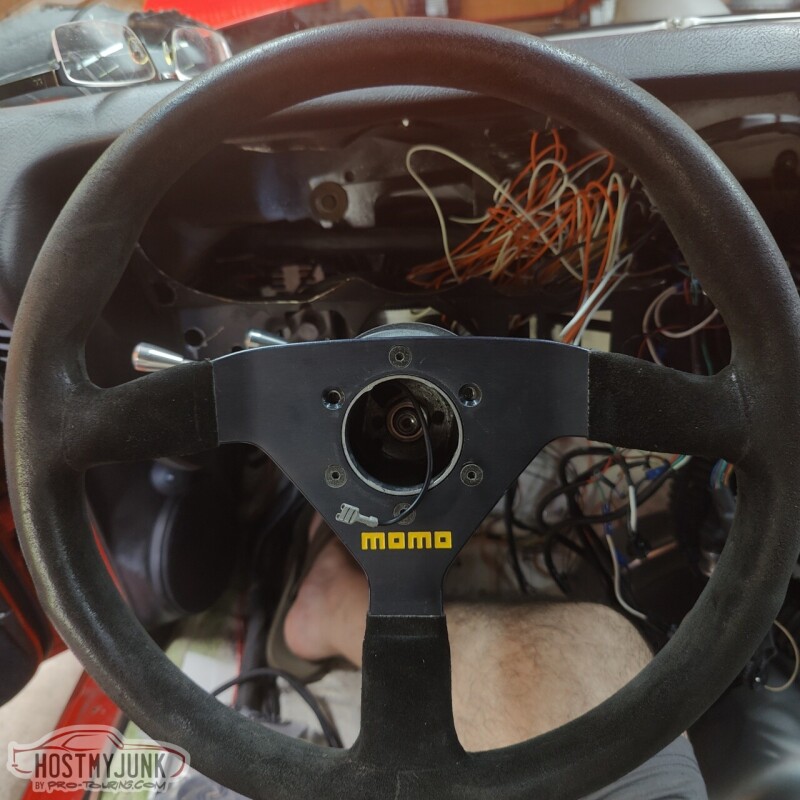
I started by removing the horn button and removing the Momo steering wheel from the Momo hub.
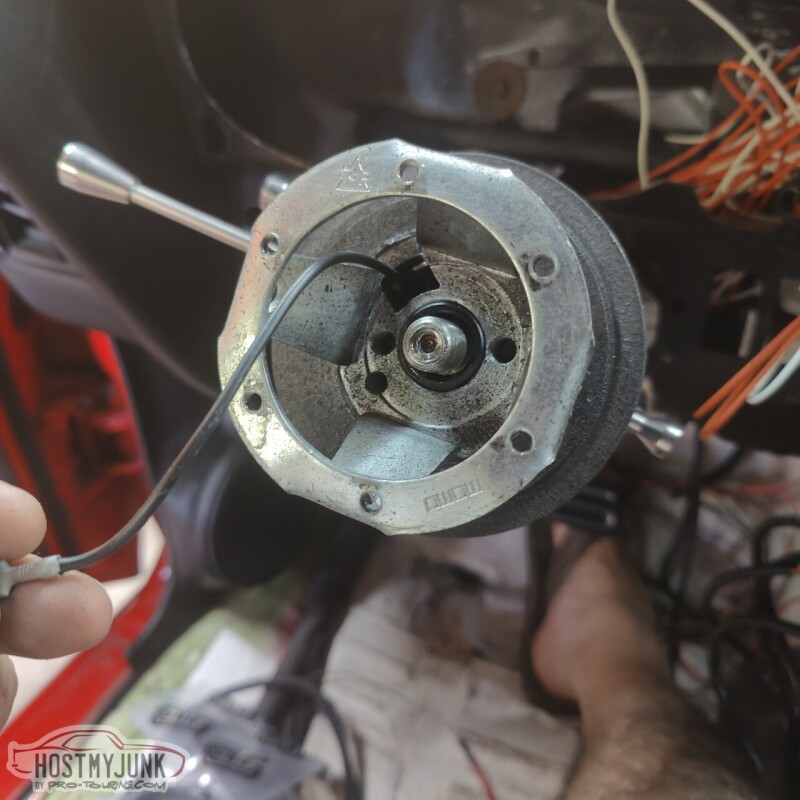
Then I removed the nut that was holding the hub in place.
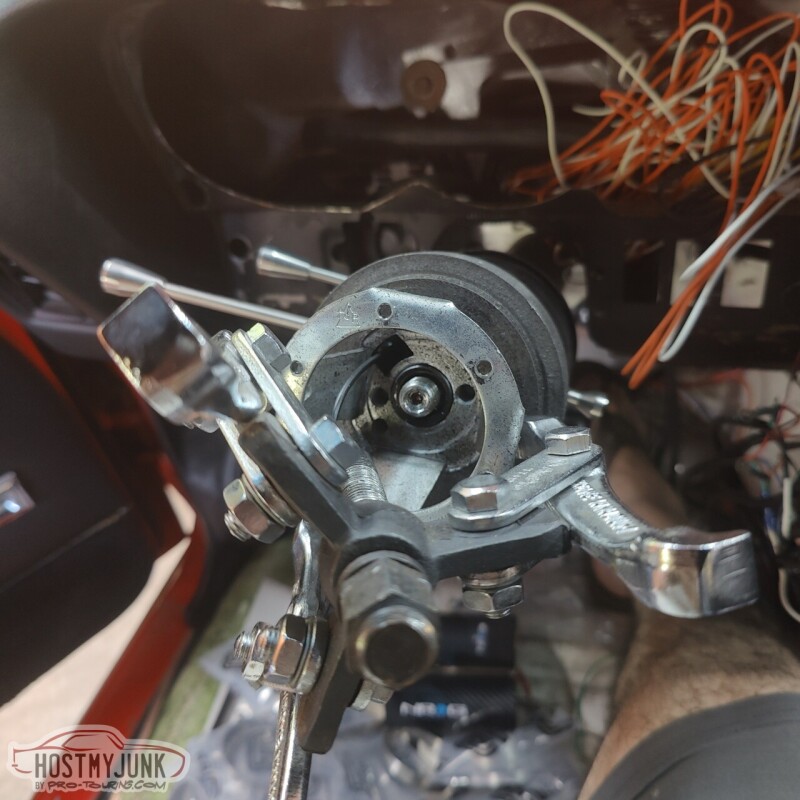
I had to use a 3 jaw puller to get the hub off the steering shaft.
This is the Momo adapter hub for a GM steering column. If anyone needs it, PM me.
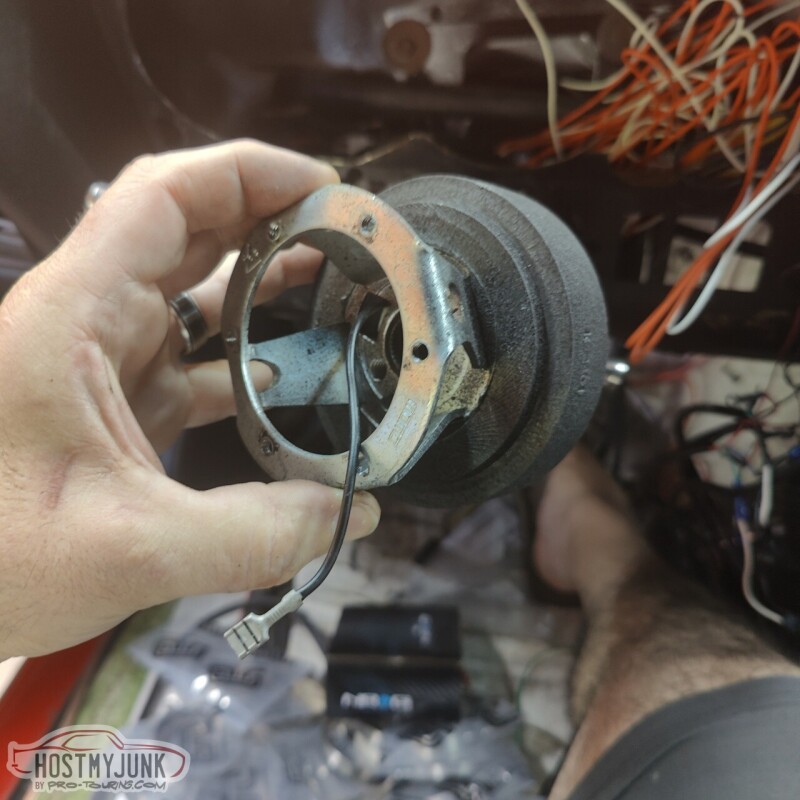
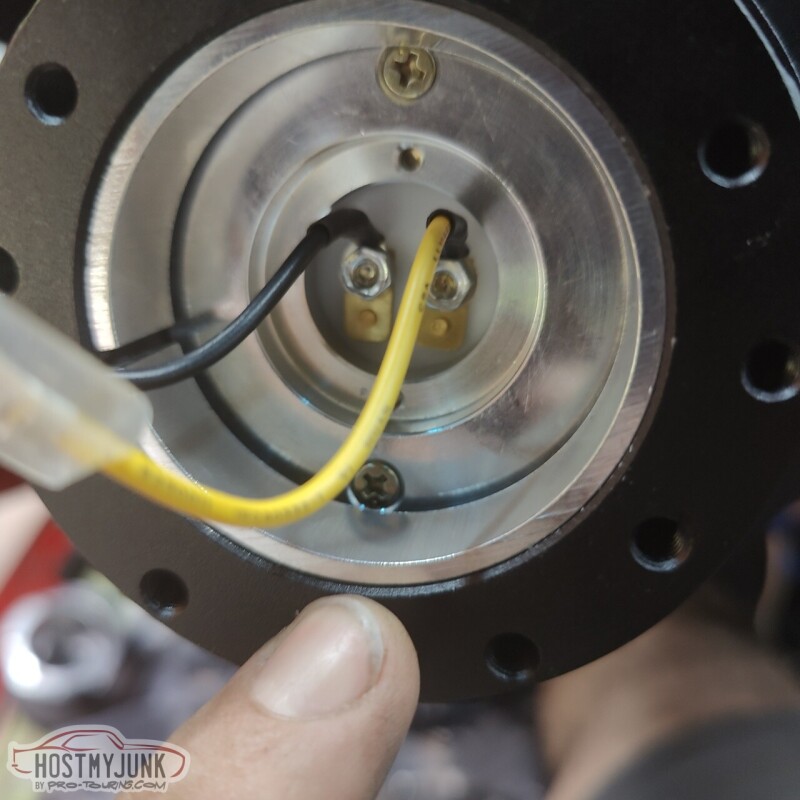
This is the new NRG hub. None of these parts came with any instructions. I am not exactly sure why the hub has a ground wire on it...
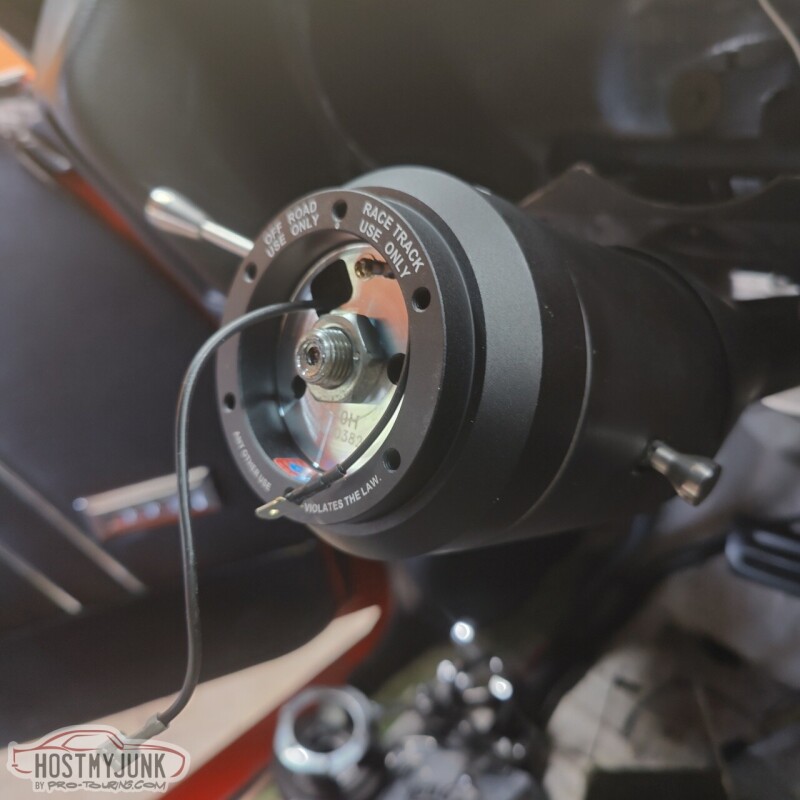
This is the hub that bolts to the steering wheel and snaps on the receiver that is bolted to the steering shaft.
This is the finishd column with the receiver hub bolted to it.
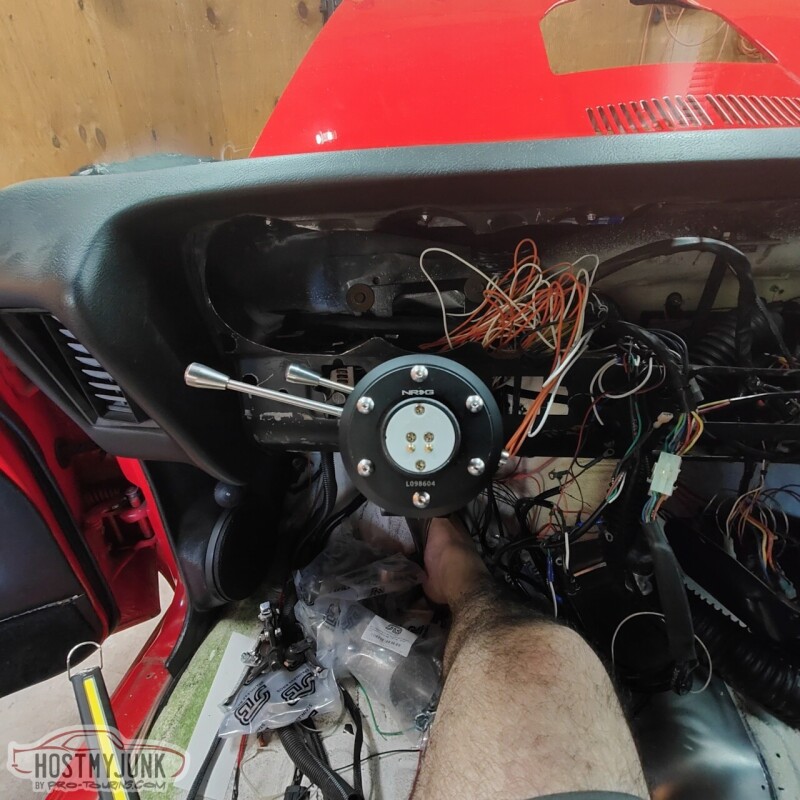
To release the steering wheel from the column, the ring under the steering wheel is pulled back...
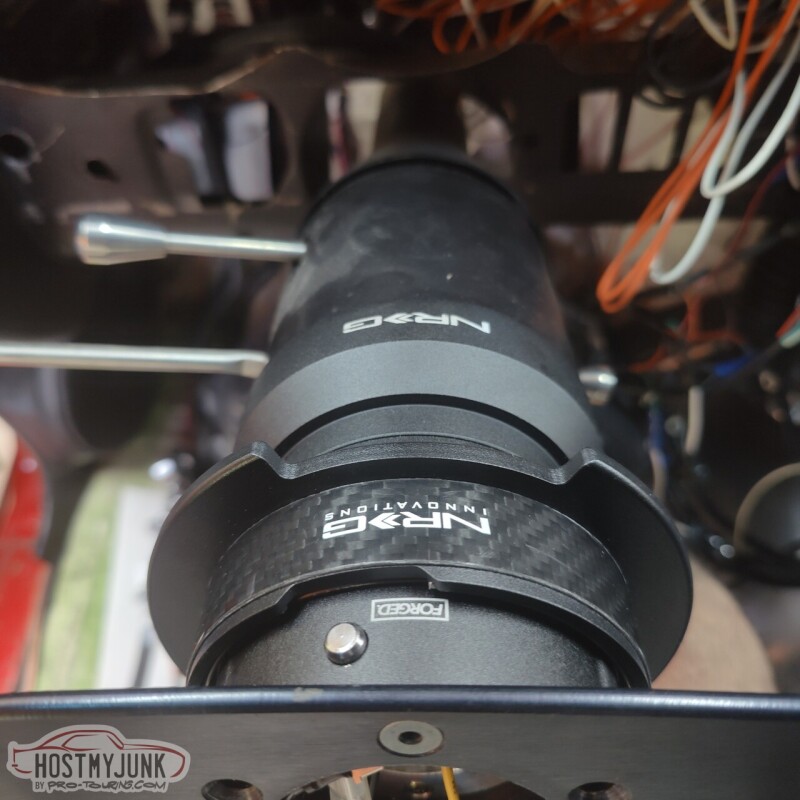
and the steering wheel comes off, along with the hub.
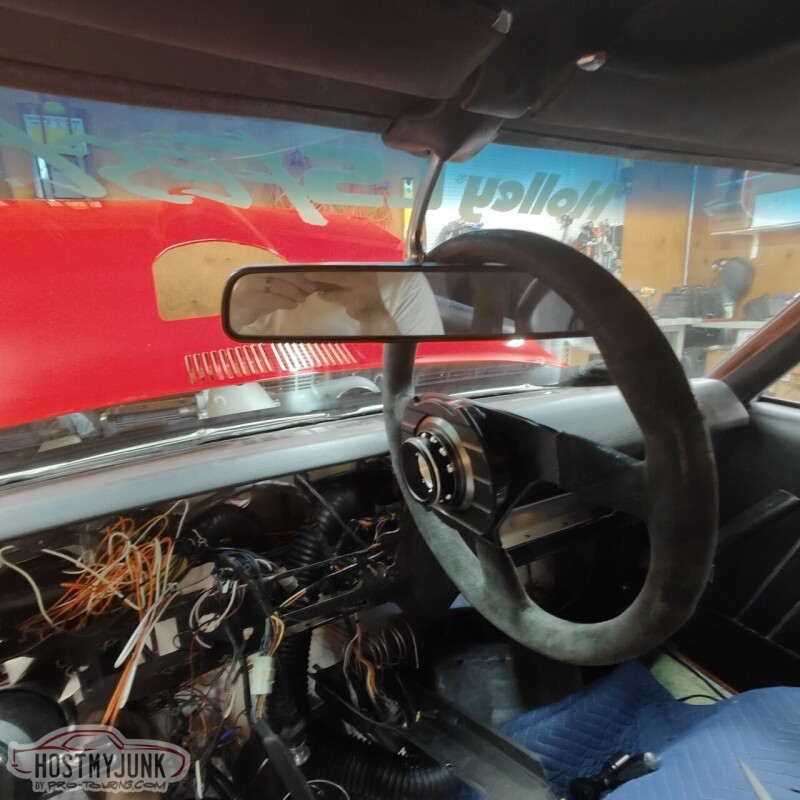
It will be a lot easier to work under the dash without the steering wheel in the way and it adds a small level of theft protection to the whole car.
Andrew1970 GTO Version 3.0
1967 Cougar build
GM High-Tech Performance feature
My YouTube Channel Please Subscribe!
Instagram @dr__efi
I deliver what EFI promises.
Remote Holley EFI tuning.
Please get in touch if I can be of service.
"You were the gun, your voice was the trigger, your bravery was the barrel, your eyes were the bullets." ~ Her
-
05-07-2023 #744
 Administrator
- Join Date
- Jan 2000
- Location
- Thousand Oaks California
- Posts
- 10,221
Very nice. I have one of those in my Camaro. Have you considered the locking cover?
Larry Callahan
Founder/Administrator of Pro-Touring.com, G-Machines.com and HostMyJunk.com
To advertise on Pro-Touring.com click here
-
05-08-2023 #745
 Registered User
- Join Date
- Sep 2009
- Posts
- 2,997
Must be a great feeling to have the car back home again! So much work has been done while it was away.
1955 Nomad project LC9, 4L80e, C5 brakes, Vision wheels
1968 Camaro 6.2 w/ LSA, TR6060-Magnum hybrid and etc SOLD
1976 T/A LS1 6 Speed, and etc. SOLD
Follow me on Instagram: ryeguy2006a
-
05-08-2023 #746
 Registered User
- Join Date
- Sep 2010
- Location
- Beach Park IL
- Posts
- 3,048
Make sure the hub isn't dragging on the column bell, they usually do.
I also remove the safety pin in the quick release.Donny
Support your local hot rod shop!
-
05-08-2023 #747
-Moderator/Sponsor-
- Join Date
- Apr 2001
- Location
- The City of Fountains
- Posts
- 16,128
Great tip Larry! Thanks. Originally Posted by Larry Callahan

It is exciting yet still daunting, because there is so much left to do before it starts. Originally Posted by ryeguy2006a
I was careful not to over tighten the hub, so there is no dragging against the column. Great tip! Originally Posted by dontlifttoshift
Andrew1970 GTO Version 3.0
1967 Cougar build
GM High-Tech Performance feature
My YouTube Channel Please Subscribe!
Instagram @dr__efi
I deliver what EFI promises.
Remote Holley EFI tuning.
Please get in touch if I can be of service.
"You were the gun, your voice was the trigger, your bravery was the barrel, your eyes were the bullets." ~ Her
-
05-08-2023 #748
Registered User
- Join Date
- Sep 2010
- Location
- Beach Park IL
- Posts
- 3,048
Leaving the hub loosish is an option, eventually it will just be loose. I typically take .060-.080 off the hub with the lathe. This isn't an NRG problem, it is an every aftermarket hub problem.
Donny
Support your local hot rod shop!
-
05-10-2023 #749
Registered User
- Join Date
- Jul 2015
- Location
- KY
- Posts
- 120
Yup. Love mine. Works great and moved the wheel closer and fit me better.
Last edited by andrewb70; 05-14-2023 at 05:44 AM.
-
05-12-2023 #750
-Moderator/Sponsor-
- Join Date
- Apr 2001
- Location
- The City of Fountains
- Posts
- 16,128
With the car now in my home garage I am able to spend a hour or two here and there and knock out little projects. Just like the old saying about how one might eat an elephant...
This picture is at a little bit of an odd angle, but it shows the finished turbo drain. While the car was at Hotrod Express, I asked Josh to put a bead in the 5/8" stainless tube that we used to extend the drain pipe. There is also a little section of 5/8" oil safe rubber hose that goes from the tube to the oil drain on the side of the oil pan. I used Gates heat shrink clamps on the hose. The stainless tube also has a silicone/fiberglass fire shield over it.
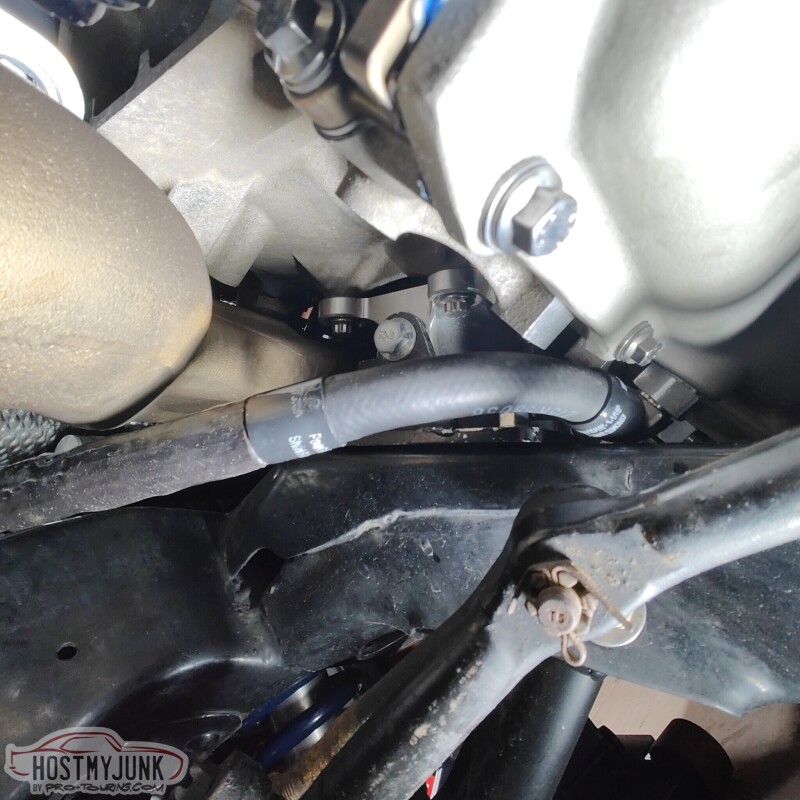
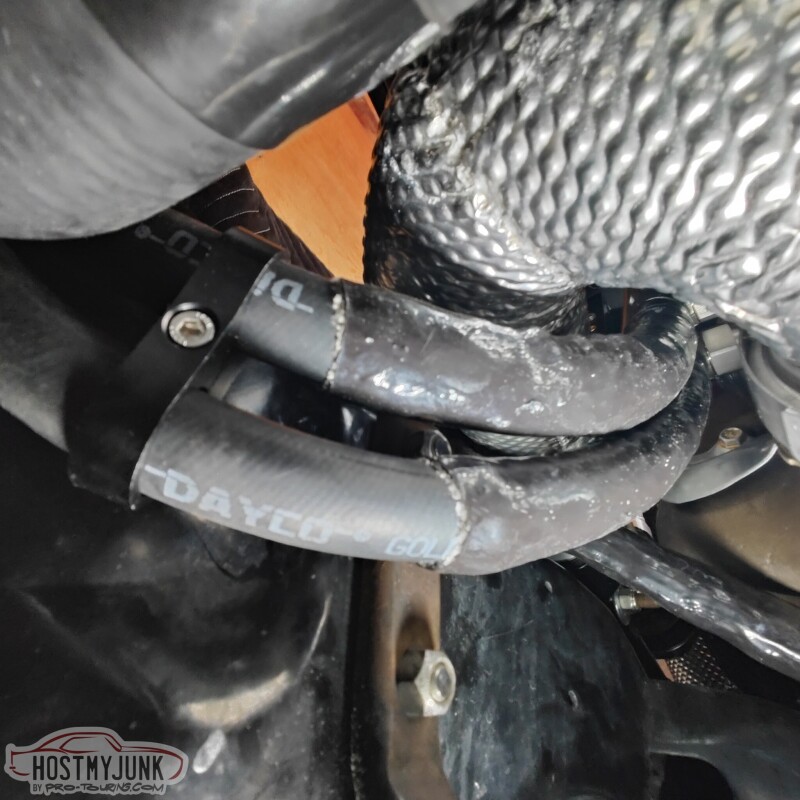
This picture is also at a bit of an odd angle, but it shows how the heater hoses come down from the water pump and under the up-pipe. There is fire sleeving over the top of the hose where it passes closest to the up-pipe.
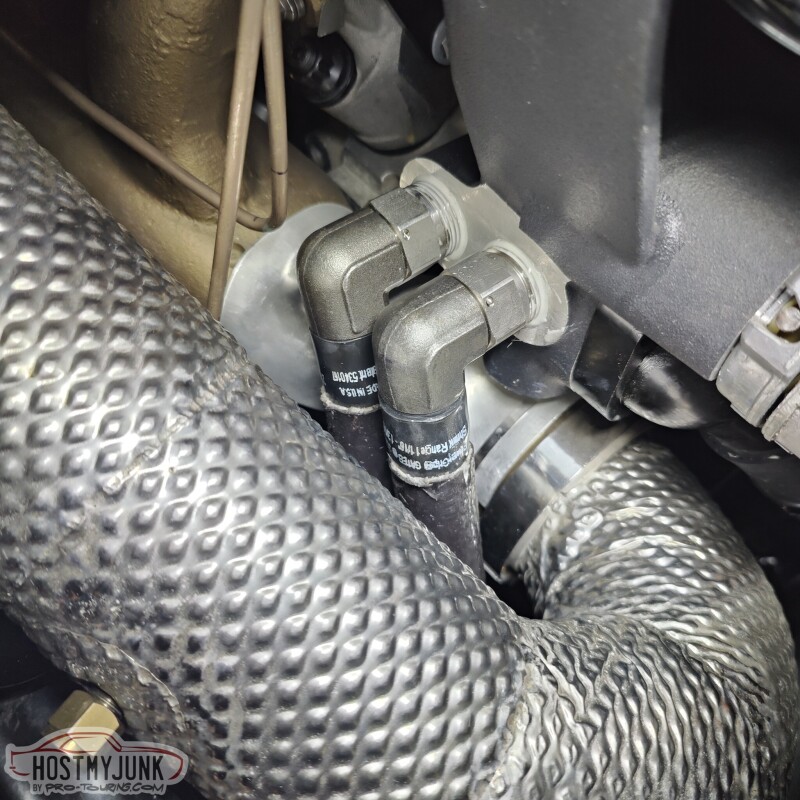
Here is the view from the top. Everything fits very closely together, but there is just enough room to turn fasteners and fittings. I also used the Gates heat shrink clamps on the heater hoses.
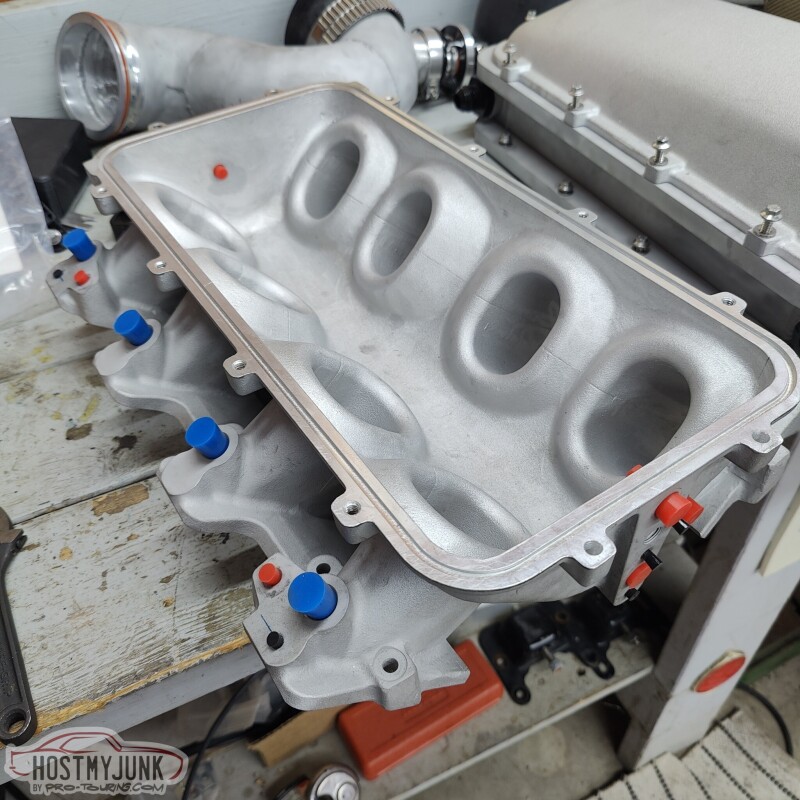
I took the intake off again so that I can clean everything and get it ready for Cerakote. Here I am mocking up the little silicone plugs that I will use to seal off machined and tapped holes.
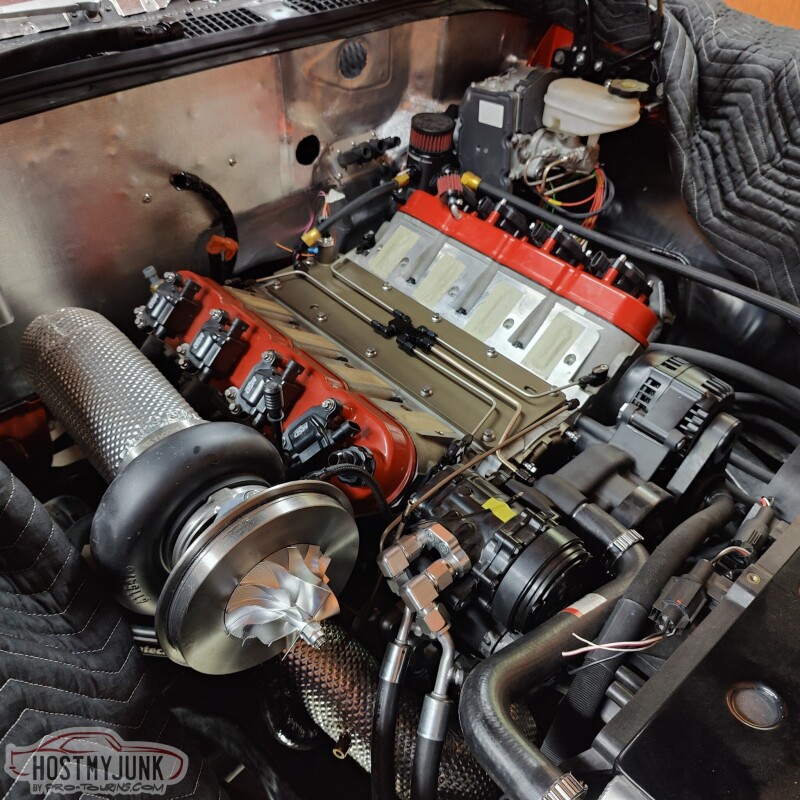
She is looking more apart than before, but progress is being made.
Andrew1970 GTO Version 3.0
1967 Cougar build
GM High-Tech Performance feature
My YouTube Channel Please Subscribe!
Instagram @dr__efi
I deliver what EFI promises.
Remote Holley EFI tuning.
Please get in touch if I can be of service.
"You were the gun, your voice was the trigger, your bravery was the barrel, your eyes were the bullets." ~ Her
-
05-13-2023 #751
-Moderator/Sponsor-
- Join Date
- Apr 2001
- Location
- The City of Fountains
- Posts
- 16,128
I have been watching the weather forecast, looking for a partly sunny day, with low wind and no rain. Well, today was that perfect day. I got started in the morning and started my Cerakote shop.
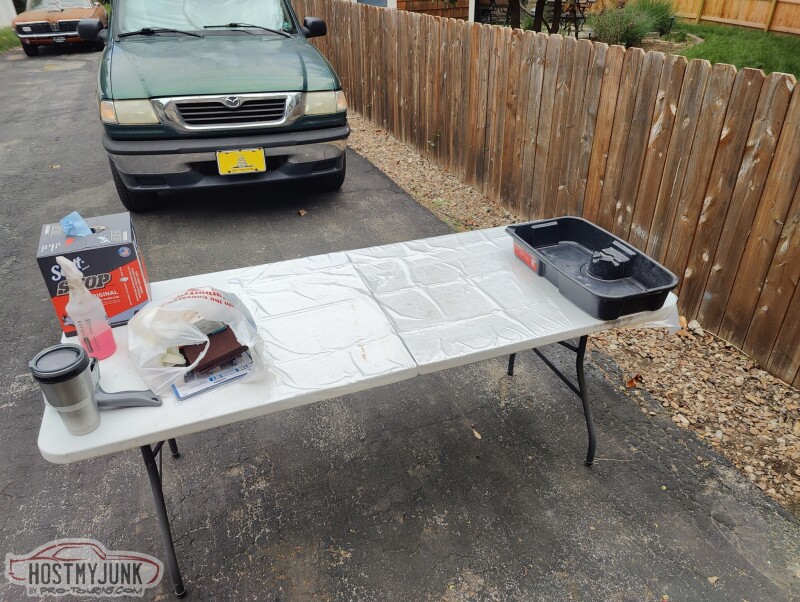
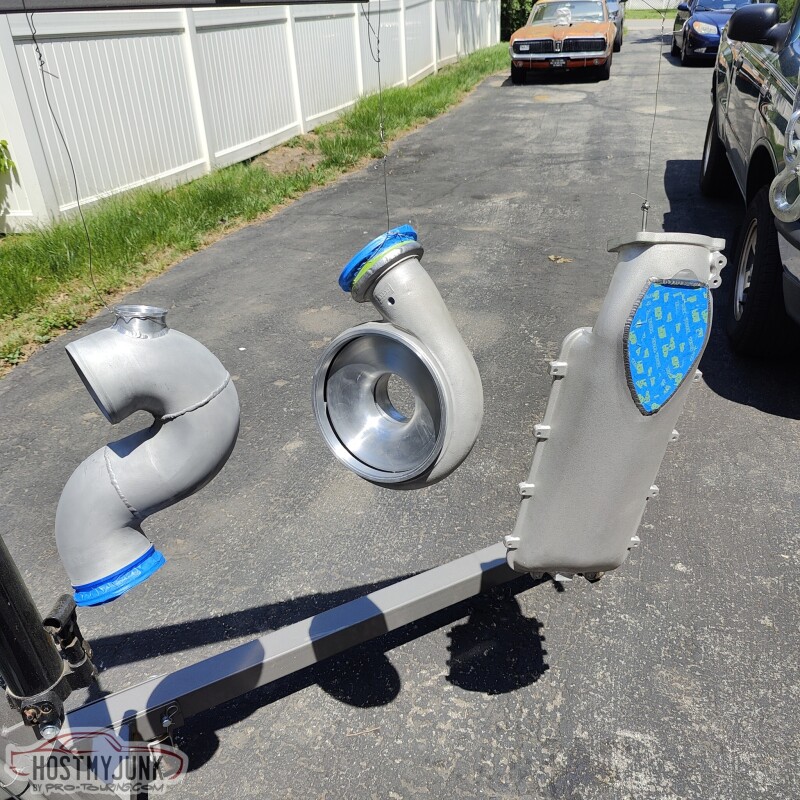
I had 4 parts to coat: compressor housing, charge pipe, intake lid and intake base (not pictured).
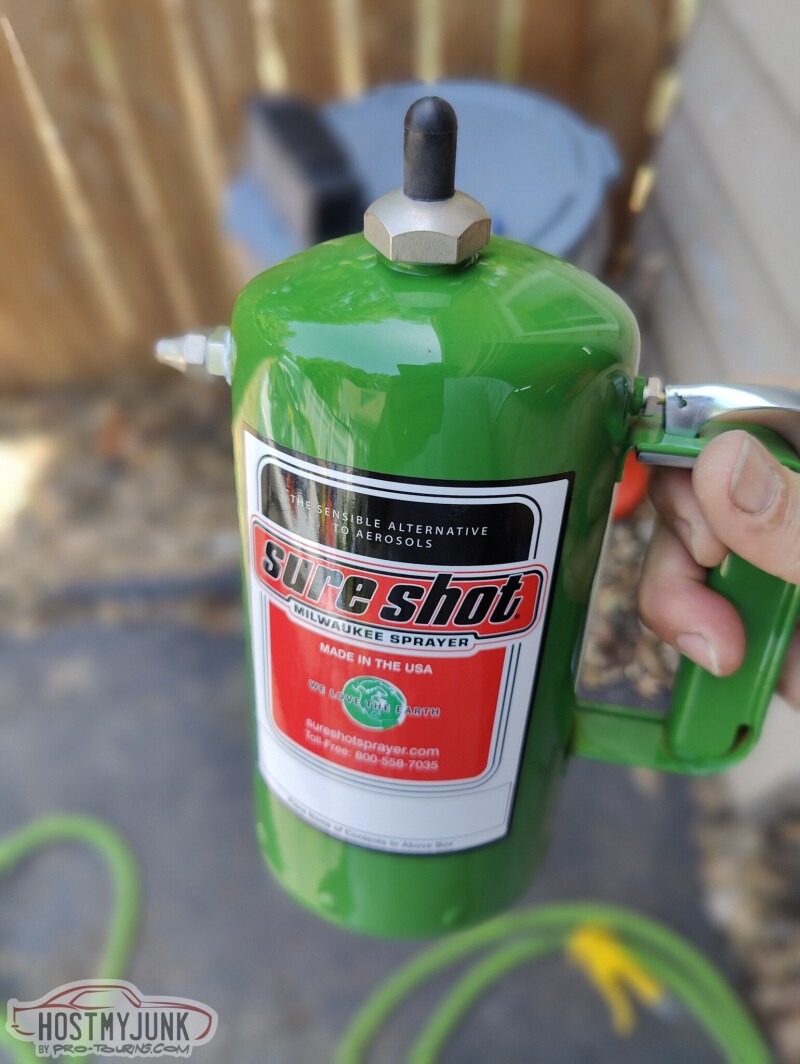
This guy was super helpful for cleaning. I filled it up with acetone, pressurized the can, and it sprayed a beautiful, fine mist that cleaned the parts well. Everything was already bead blasted before hand. I just sprayed everything down, used a red 3M pad to clean, and sprayed again. Then I used a MAP gas torch to heat the parts and evaporate all of the acetone.
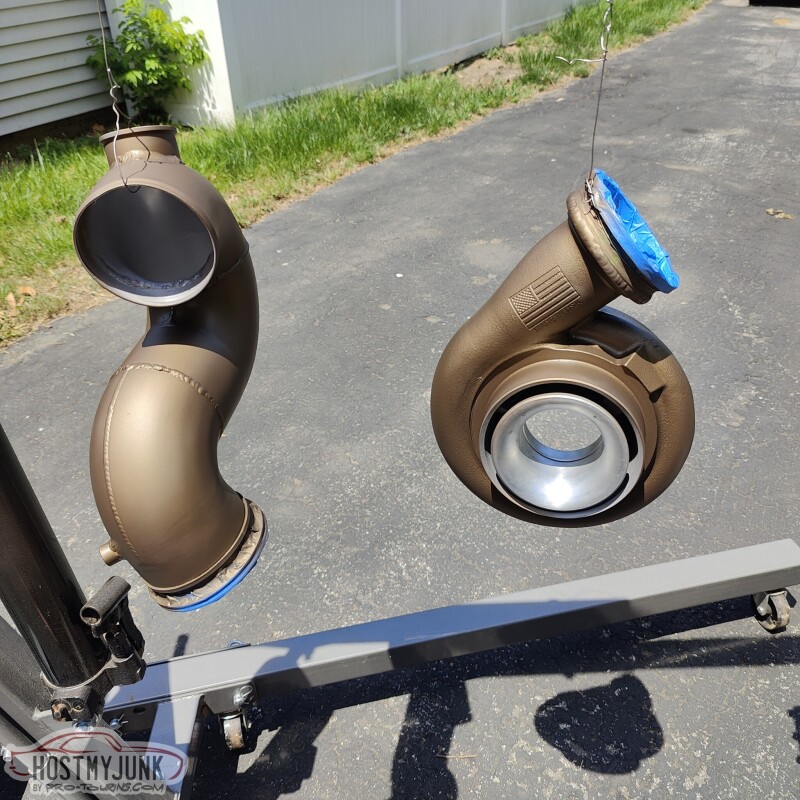
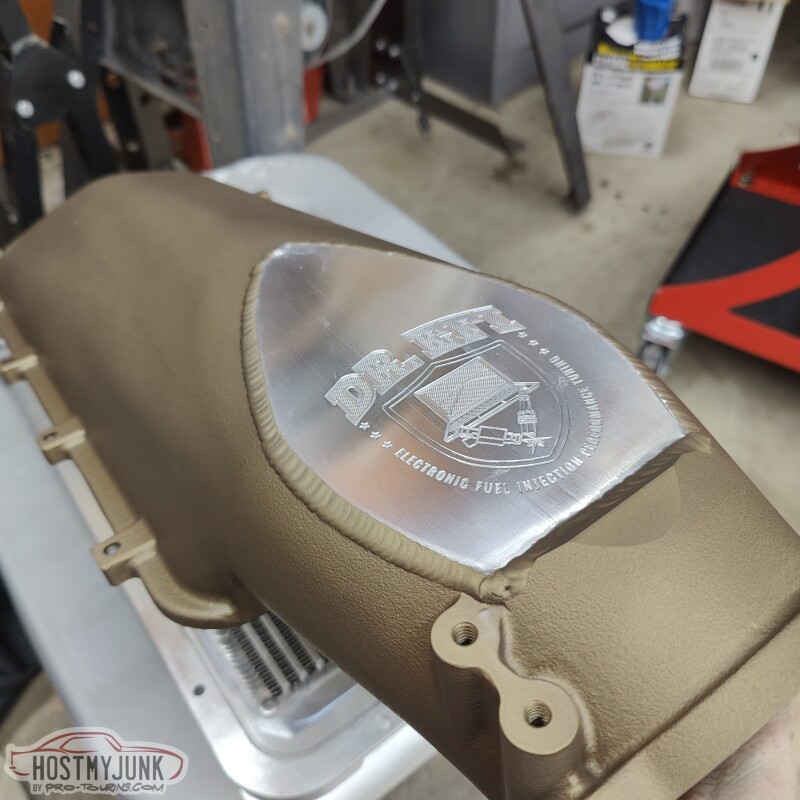
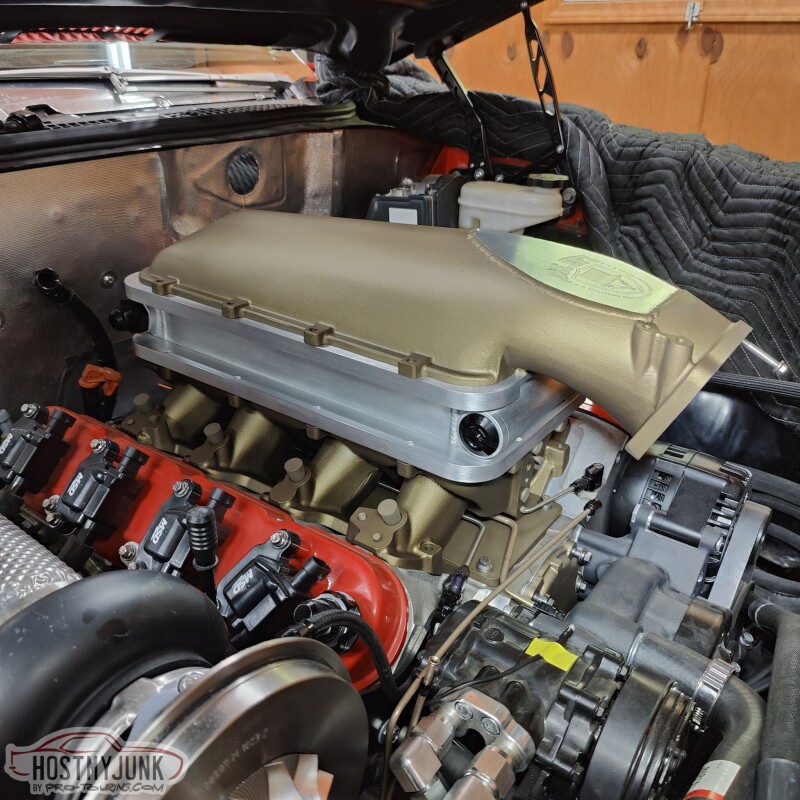
I am using the Cerakite C coating, in the same burnt bronze color that I used on the valley cover and the front cover. You put down a light coat and immediately go over it with a heavier coat. It looks amazing in the sun, because the burnt bronze has a ton of gold and copper flakes in it.
I decided to leave the intercooler in raw aluminum, but I went over all of the surfaces with the red 3M pad to give it a brushed look.
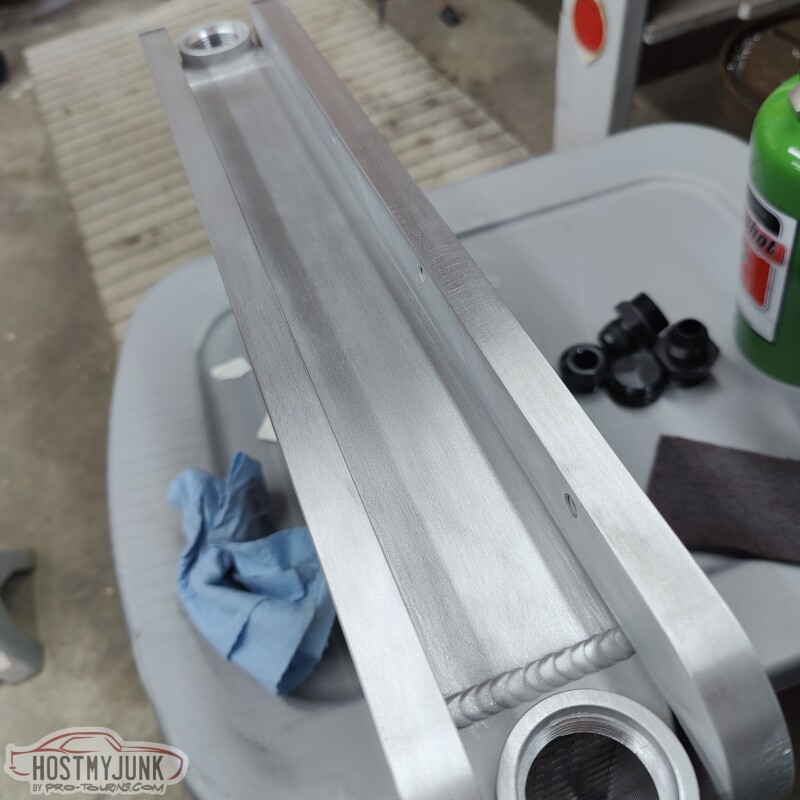
I taped off the plate with my business logo, so it would stay natural. The engraving would lose all the detail if I was to paint it.
I set everything back on the engine so that the Cerakote can fully cure.
Different angle...
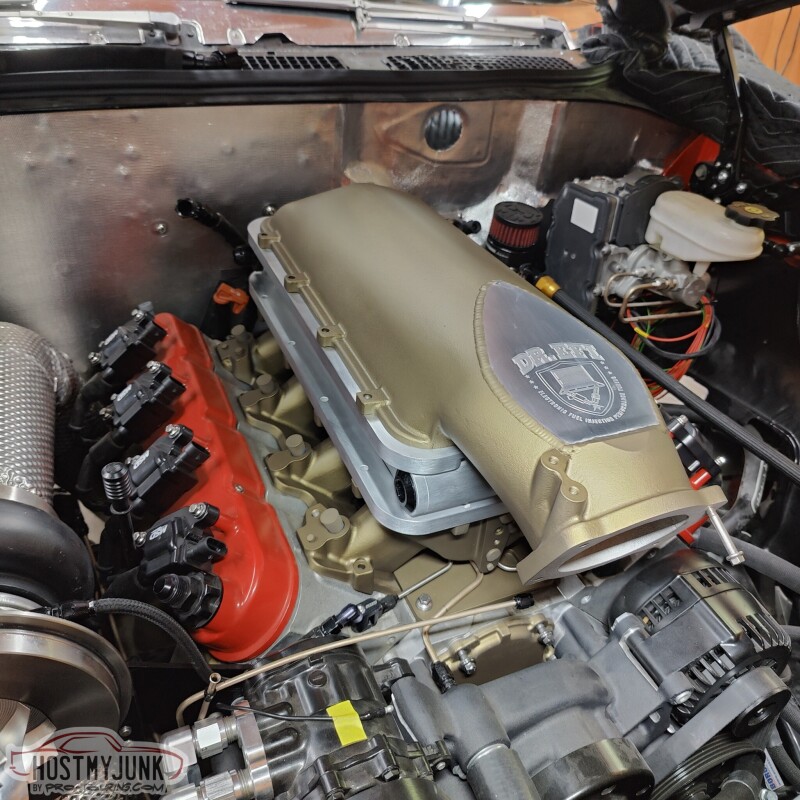
Here is a shot showing the compressor housing.
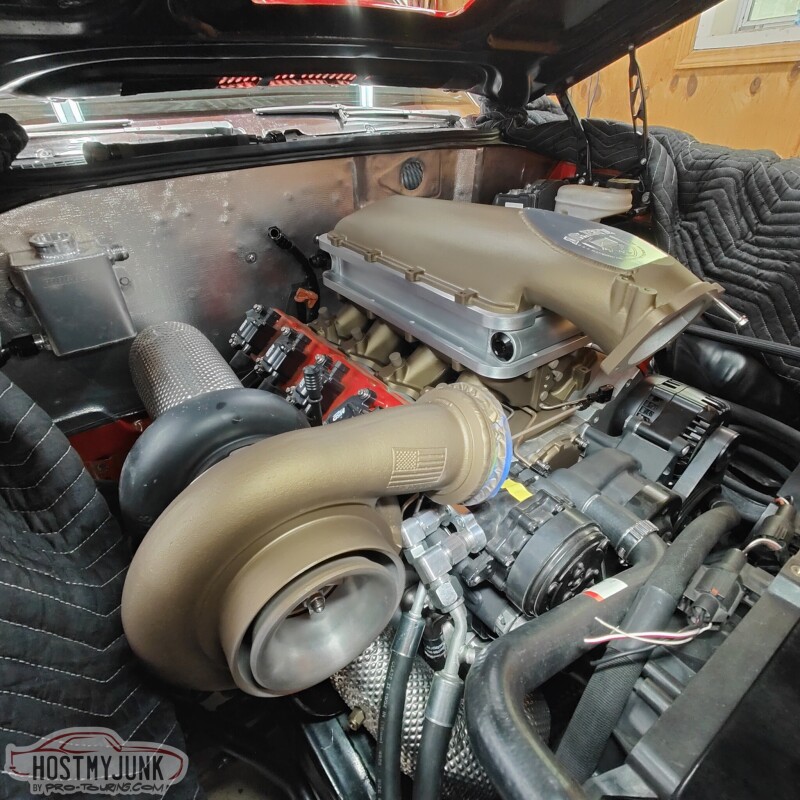
I did not mess around with the charge pipe because I want it to fully cure. Now, if I can only find all of the o-rings that I need to finally assemble everything....
Andrew1970 GTO Version 3.0
1967 Cougar build
GM High-Tech Performance feature
My YouTube Channel Please Subscribe!
Instagram @dr__efi
I deliver what EFI promises.
Remote Holley EFI tuning.
Please get in touch if I can be of service.
"You were the gun, your voice was the trigger, your bravery was the barrel, your eyes were the bullets." ~ Her
-
05-13-2023 #752
Registered User
- Join Date
- Oct 2017
- Posts
- 56
That looks really good. I here it is sometimes a challenge to get it to look really nice. I think you made a mistake by showing your work here. Now you will have many many people asking you to do their parts for them.
-
05-14-2023 #753
-Moderator/Sponsor-
- Join Date
- Apr 2001
- Location
- The City of Fountains
- Posts
- 16,128
I don't think people will want to pay what I would want to charge. It is all about the prep work. The actual application only took about 5 minutes for all of the parts. I just followed the instructions that were provided by Cerakote and used their middle of the road gun that they sell and a cheap Harbor Freight compressor with a disposable moisture trap. My set-up is not fancy. Originally Posted by GTO Jack
Andrew1970 GTO Version 3.0
1967 Cougar build
GM High-Tech Performance feature
My YouTube Channel Please Subscribe!
Instagram @dr__efi
I deliver what EFI promises.
Remote Holley EFI tuning.
Please get in touch if I can be of service.
"You were the gun, your voice was the trigger, your bravery was the barrel, your eyes were the bullets." ~ Her
05-14-2023 #754
Registered User
- Join Date
- Jun 2012
- Location
- Chicago burbs
- Posts
- 247
I think it looks soo good having the brushed intercooler sandwiched with cerakote top and bottom, you have a really good eye for aesthetics. It's ben really fun watching the latest transformation and seeing how build quality gets more and more professional. I'm currently redoing a lot of the stuff I originally did when I as just trying to slap it together to get it working--looking to maybe get build quality up to the quality of your first iteration. You're a huge inspiration Andrew, keep it up man.
1969 442 6.0L LQ9 T56
Fab9 w/ custom 3 Link conversion
FAYS2 Watts link
Thanks to Mark at SC&C for his honesty and passion for the sport, and Ron Sutton for the wealth of knowledge that has helped shape so many of the cars on this site.
05-18-2023 #755 Registered User
- Join Date
- Feb 2019
- Posts
- 284
Everything is looking beautiful Andrew! Tons of work done!
1968 Cougar - 408, FiTech, AOD, TCI, Currie, RideTech, Wilwood
1968 Skylark - 462, TKO 600, RideTech, CPP
1988 Mustang - Vortech V3, Boss 327, Magnum, MaximumMotorsports, StopTech
05-20-2023 #756
-Moderator/Sponsor-
- Join Date
- Apr 2001
- Location
- The City of Fountains
- Posts
- 16,128
Originally Posted by jetmech442
Thank you for the kind words, gentlemen!!! I really appreciate it. I just got back from the Buick Nationals and I should make more progress next week. Originally Posted by STREETFIGHTER50
Andrew1970 GTO Version 3.0
1967 Cougar build
GM High-Tech Performance feature
My YouTube Channel Please Subscribe!
Instagram @dr__efi
I deliver what EFI promises.
Remote Holley EFI tuning.
Please get in touch if I can be of service.
"You were the gun, your voice was the trigger, your bravery was the barrel, your eyes were the bullets." ~ Her
05-24-2023 #757
-Moderator/Sponsor-
- Join Date
- Apr 2001
- Location
- The City of Fountains
- Posts
- 16,128
I have ben working with The DriveShaft Shop for about 15 years on various projects. They were the ones that made the custom axles for my RX7 when installed a Ford Cobra Mustang rear diff in it. They were also the ones that made the single CV driveshaft for my GTO back in 2013 and also the dual CV driveshaft in the Cougar.
This time around they will be building a dual CV driveshaft for the GTO, but with a twist. They have some new, super strong CVs that they want to use on this project. The front slip yoke is already configured for it, but the rear needs an adapter, because the CV pinion yoke was made for the smaller CV. That said, they designed an adapter for me and sent me a 3D printed prototype for test fitting.
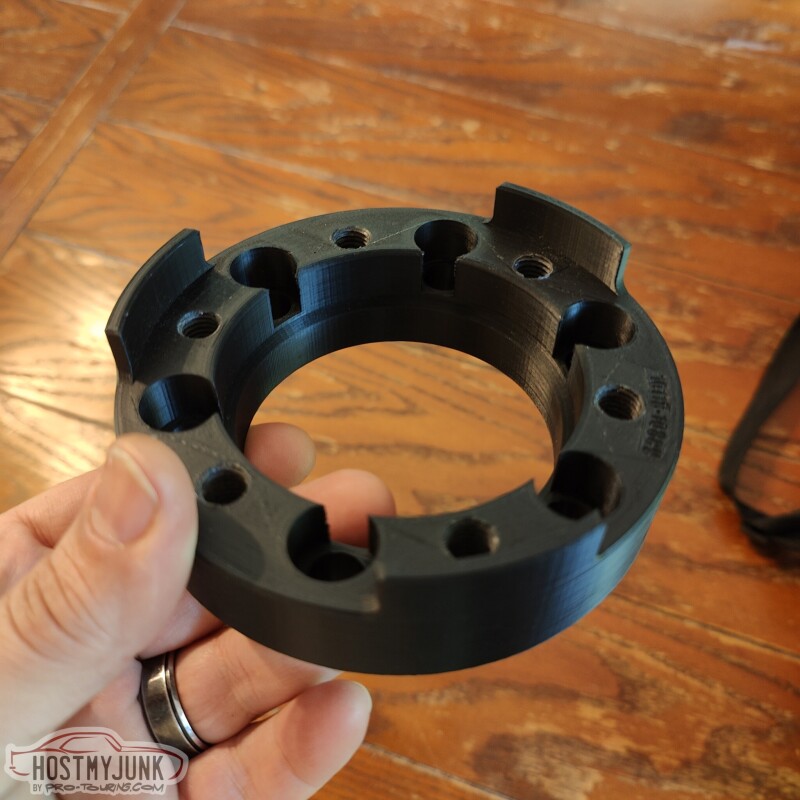
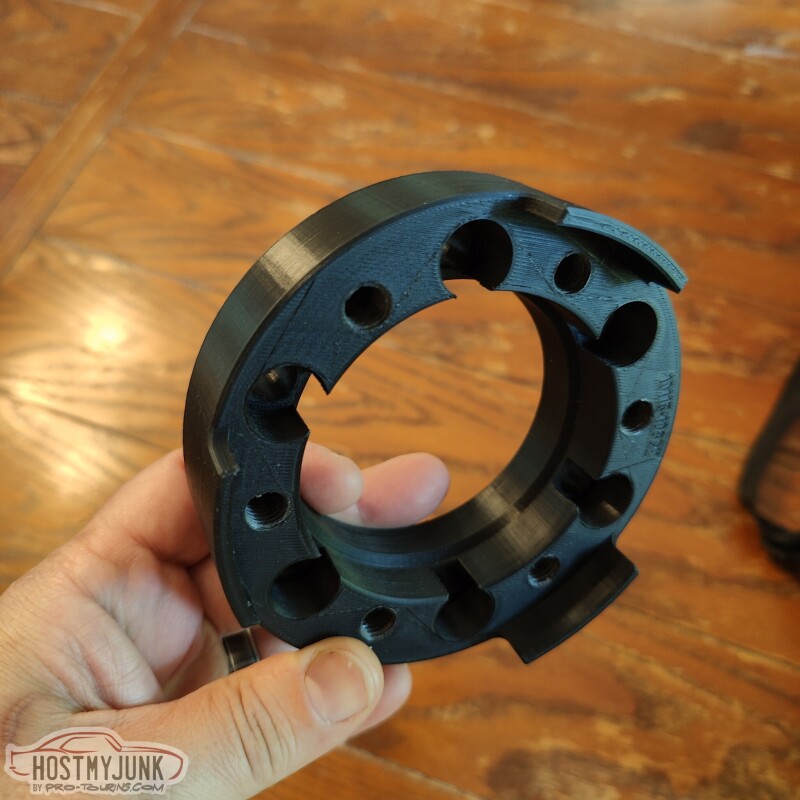
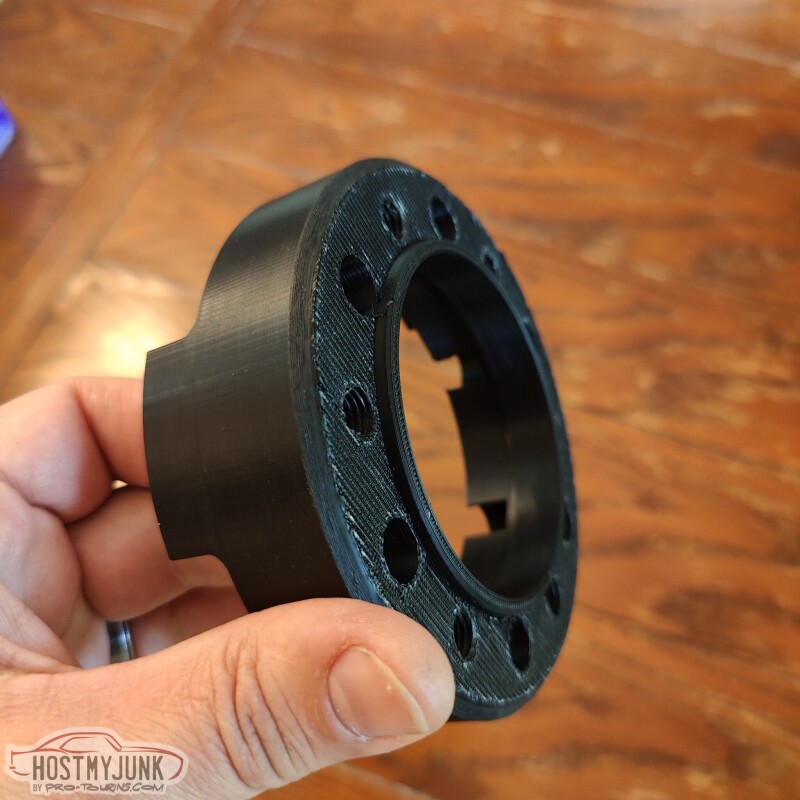
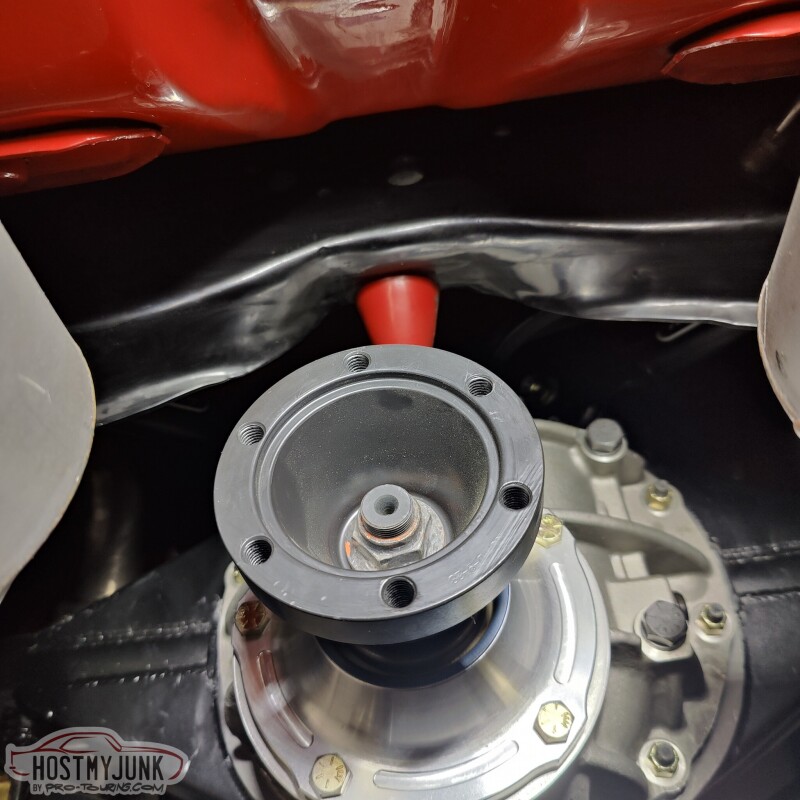
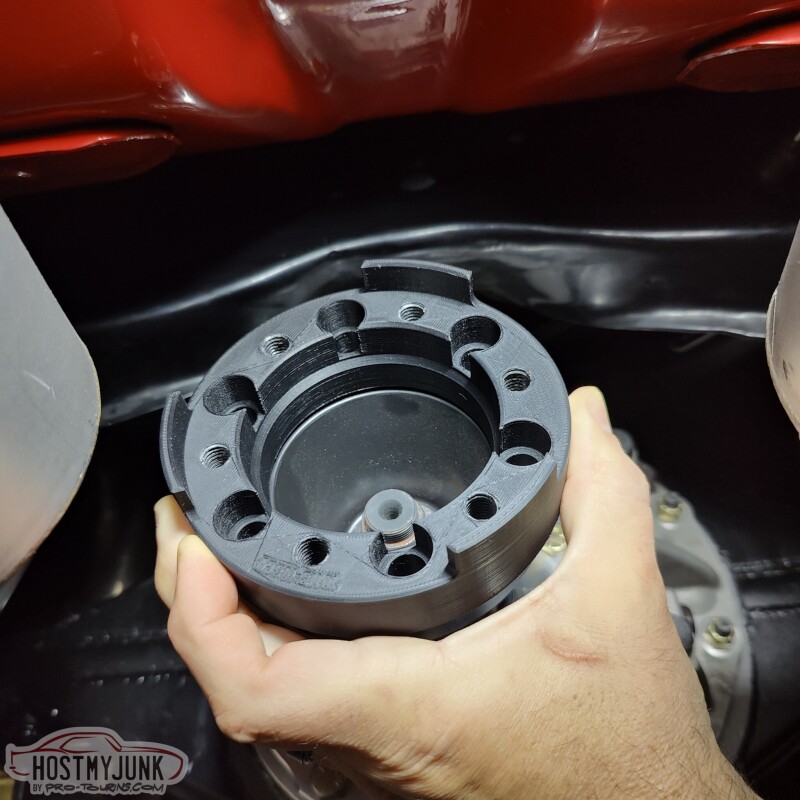
We live in truly amazing times. As Vic likes to say "That's some Buck Rogers S**t!"
Andrew1970 GTO Version 3.0
1967 Cougar build
GM High-Tech Performance feature
My YouTube Channel Please Subscribe!
Instagram @dr__efi
I deliver what EFI promises.
Remote Holley EFI tuning.
Please get in touch if I can be of service.
"You were the gun, your voice was the trigger, your bravery was the barrel, your eyes were the bullets." ~ Her
05-24-2023 #758
Registered User
- Join Date
- Jul 2015
- Location
- KY
- Posts
- 120
Awesome. It’s is truly amazing that ppl can print up mock-ups and send them out. Saves so much time and materials.
06-03-2023 #759
-Moderator/Sponsor-
- Join Date
- Apr 2001
- Location
- The City of Fountains
- Posts
- 16,128
Today I had the opportunity to go work i the garage. I decided to tackle the intake manifold assembly and final installation.
The first step was to install the o-ring that seals the base with the intercooler. It is a single viton string that gets inserted into the machined groove, the ends are butted together, trimmed flush, and the a drop of super glue is used to hold it together.
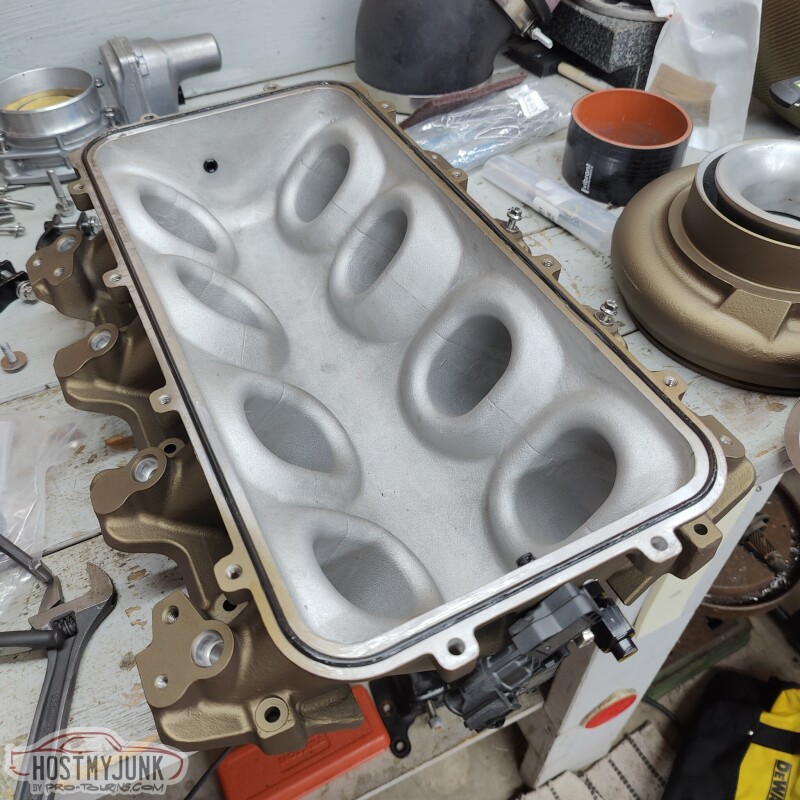
The intercooler is bolted into place.
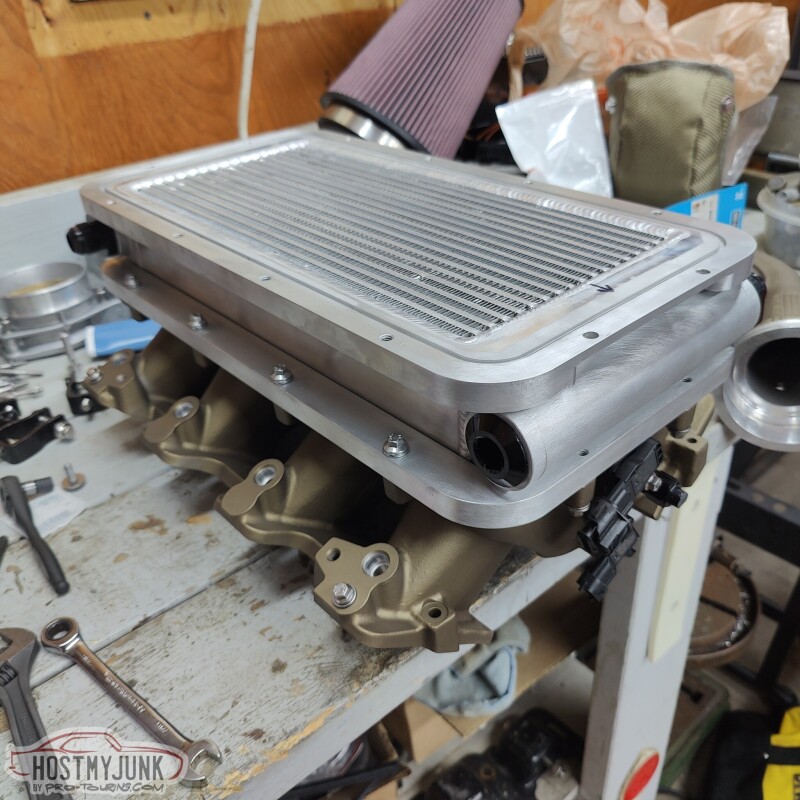
Followed by the lid.
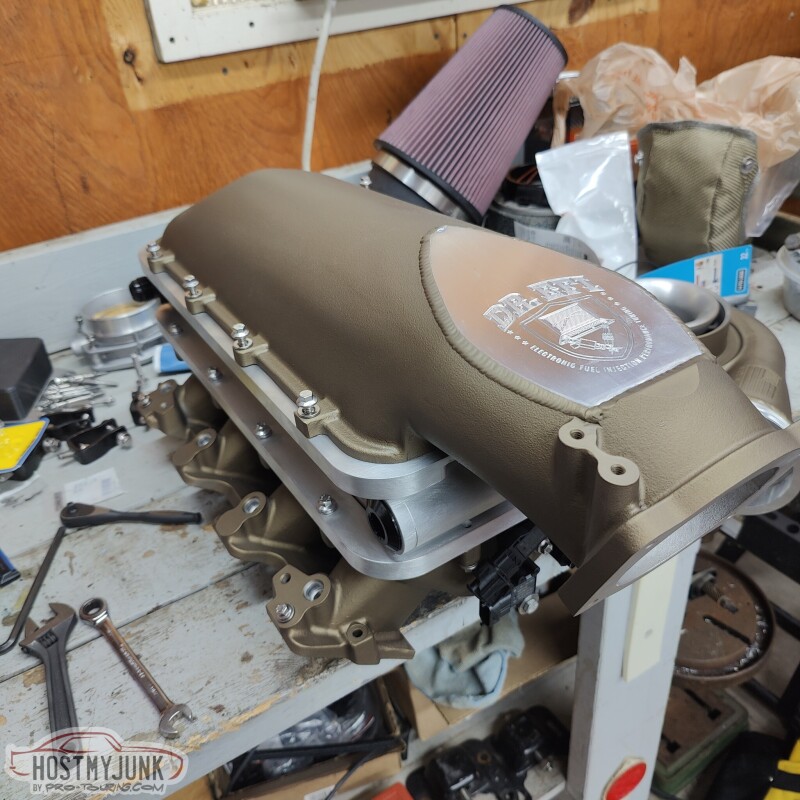
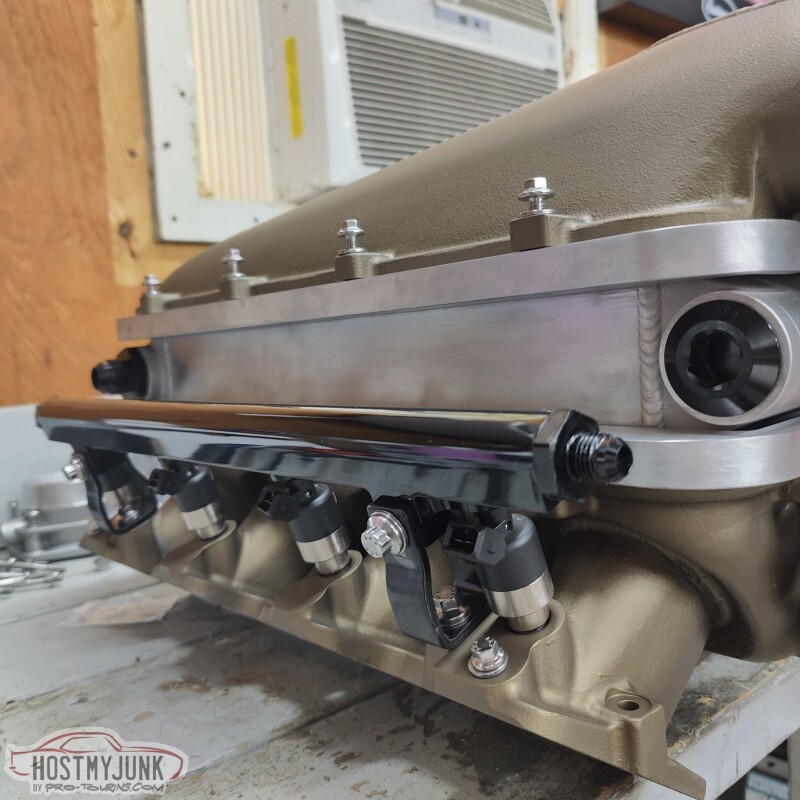
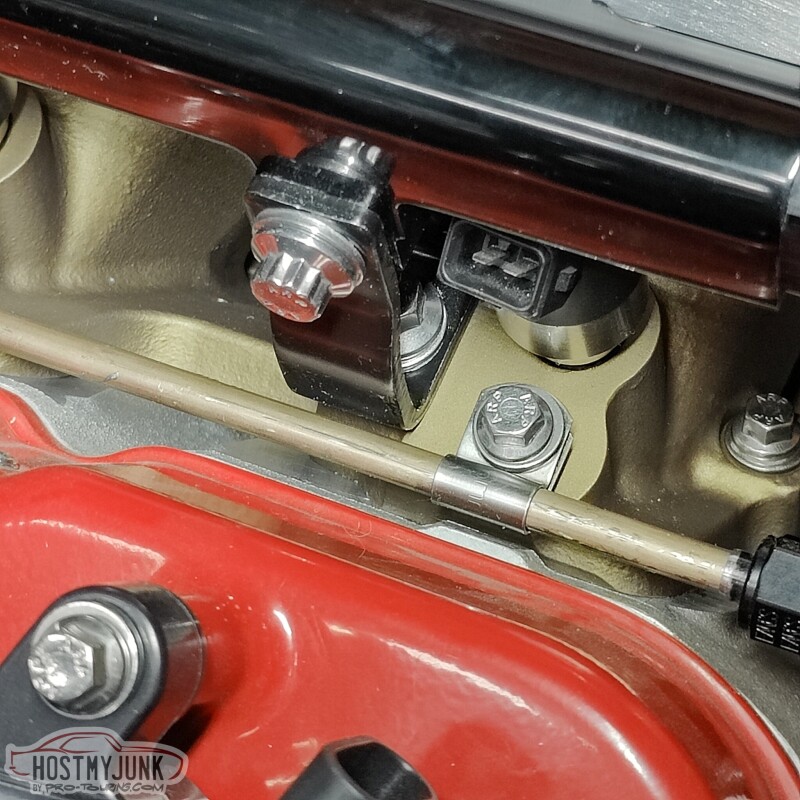
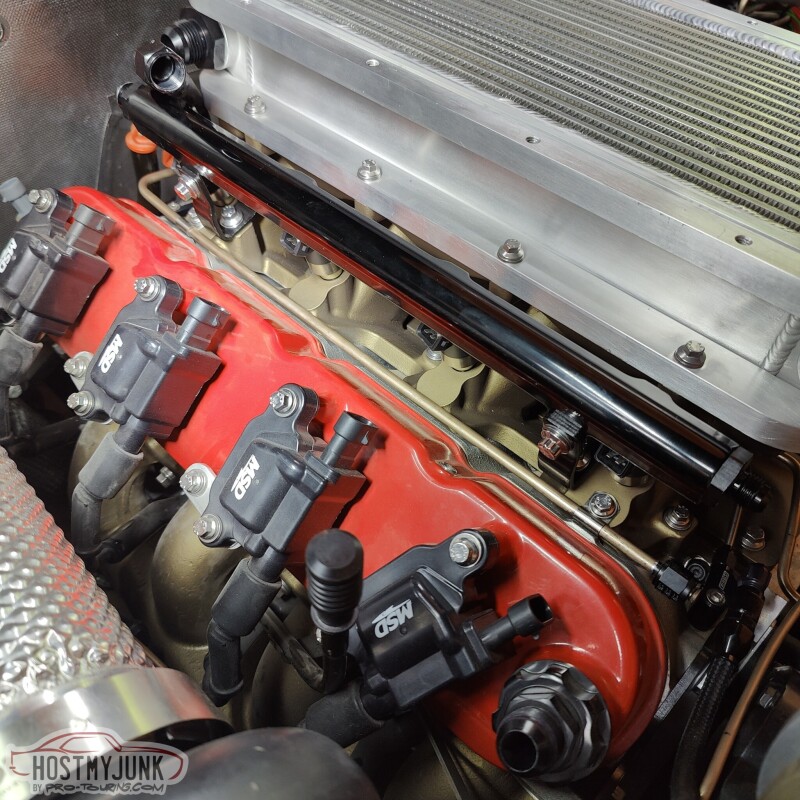
I also installed the all of the fuel injectors and rails. I used the rail brackets that came with the intake manifold, but I replaced all the hardware with ARP stainless fasters. I really like this combination of black and silver against the bronze intake manifold.
I took the masking take off the heads and cleaned everything with acetone.
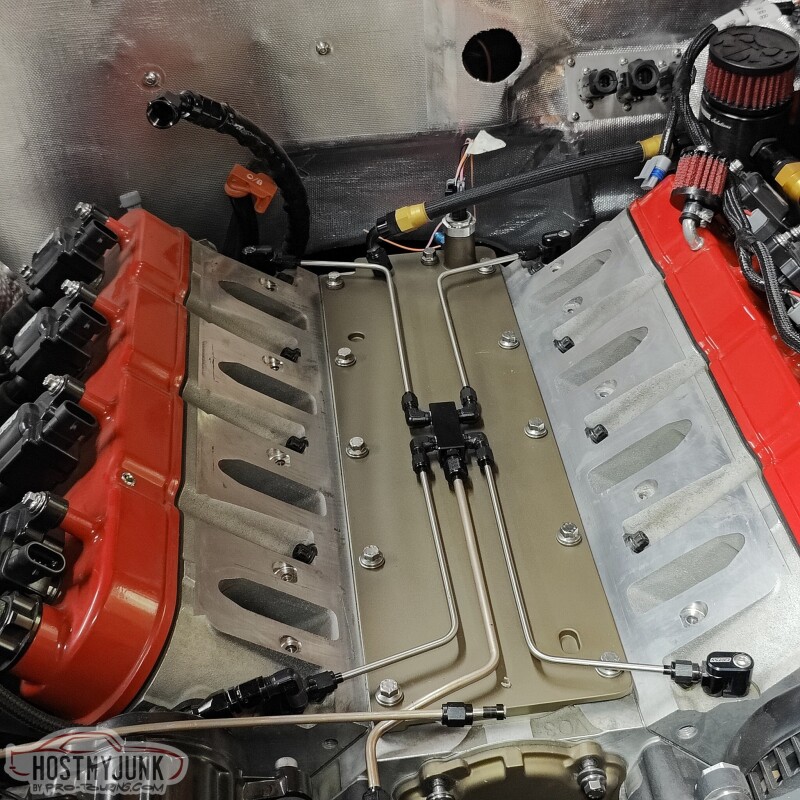
Then I installed the intake manifold assembly on the engine. The intake manifold has o-rings that seal it against the heads. I also lubricated the mating surface so the intake can easily slide around and find a happy spot as it is being torqued down.
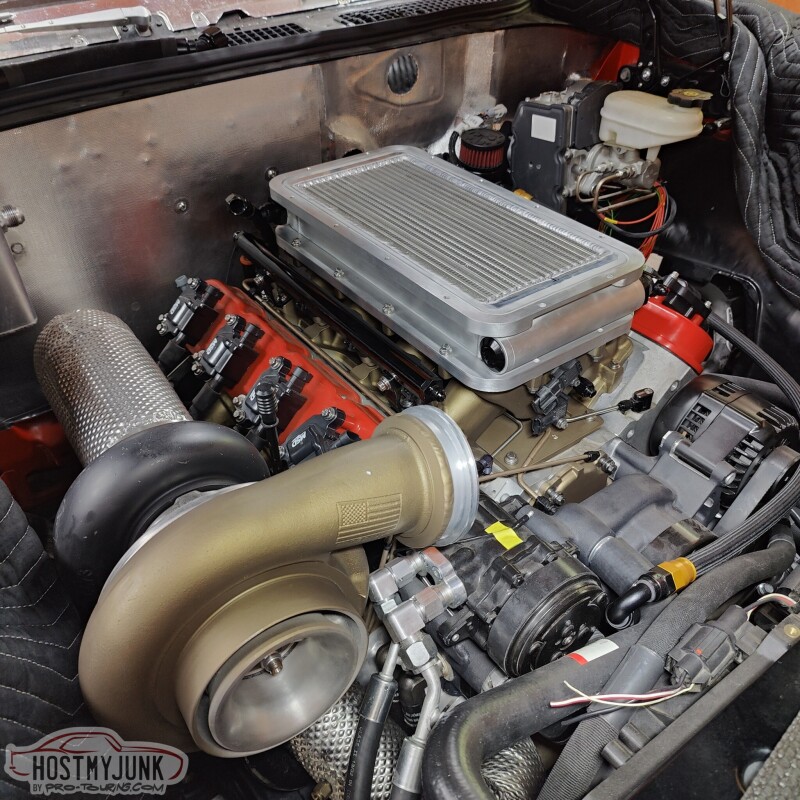
I used these stainless p-clamps for the oil feed line, again with the ARP bolts. Vic added these holes to the intake manifold months ago.
Here is a broader view that shows all the details of the stainless hardware, with black, against the bronze intake, with a pop of red on the valve covers to keep it interesting.
Slowly, but surely...
AndrewLast edited by andrewb70; 06-03-2023 at 06:48 PM.
1970 GTO Version 3.0
1967 Cougar build
GM High-Tech Performance feature
My YouTube Channel Please Subscribe!
Instagram @dr__efi
I deliver what EFI promises.
Remote Holley EFI tuning.
Please get in touch if I can be of service.
"You were the gun, your voice was the trigger, your bravery was the barrel, your eyes were the bullets." ~ Her
06-03-2023 #760
Registered User
- Join Date
- Feb 2019
- Posts
- 284
Lookin awesome!
1968 Cougar - 408, FiTech, AOD, TCI, Currie, RideTech, Wilwood
1968 Skylark - 462, TKO 600, RideTech, CPP
1988 Mustang - Vortech V3, Boss 327, Magnum, MaximumMotorsports, StopTech

 Reply With Quote


