Results 561 to 580 of 861
Thread: 1970 GTO Version 3.0
-
12-30-2022 #561
 Registered User
- Join Date
- Oct 2015
- Posts
- 64
 Very nice!
 Originally Posted by andrewb70

-
12-30-2022 #562
 -Moderator/Sponsor-
- Join Date
- Apr 2001
- Location
- The City of Fountains
- Posts
- 16,129
Thanks Tom! Originally Posted by 968ls1
Before we finalized the intake, we thought it would be good to install the new Ring Brothers hinges. These are very well made and have plenty of adjustment to get the hood lined up well.
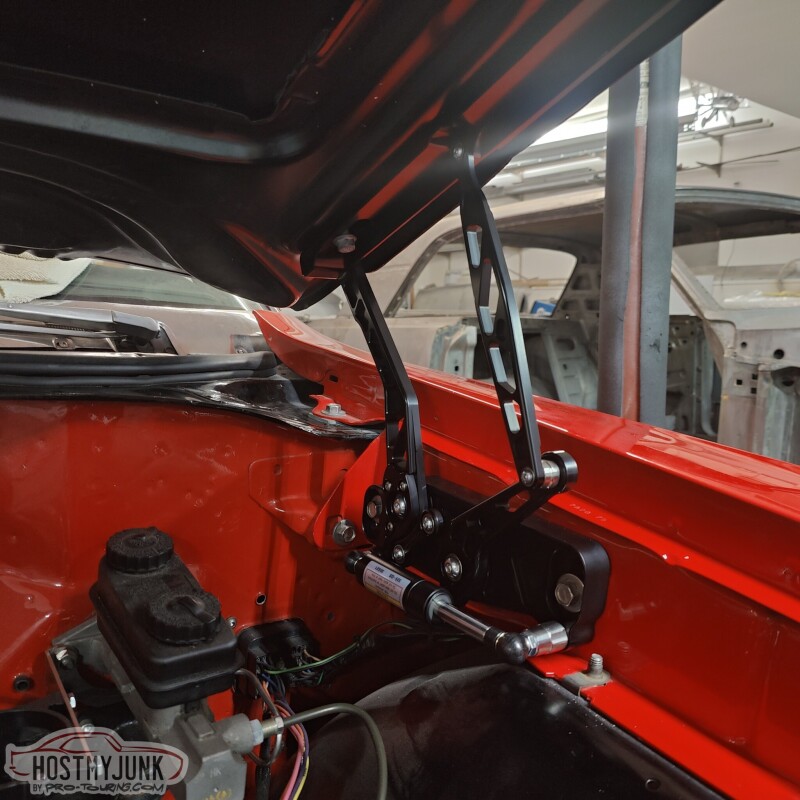
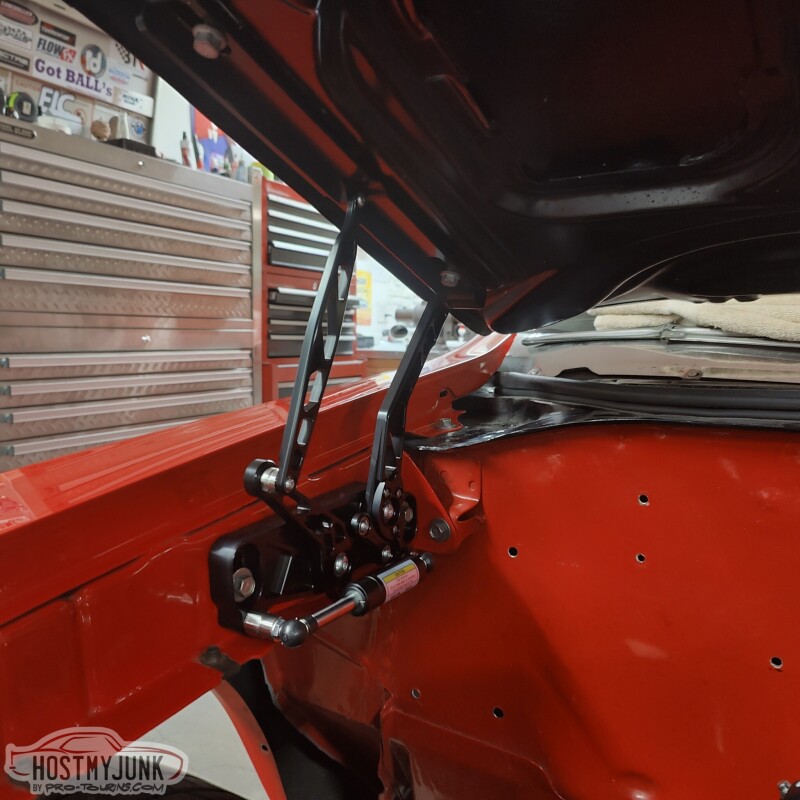
Installing them was a simple remove and replace operation and after a bit of fiddling with the adjustment, the hood was closing better than it ever has before. We did notice that these hinges don't allow the hood to open as much as the stock hinges. I guess this was mentioned on the Ring Brothers website, but I somehow missed it. I really don't think it will cause any issues...
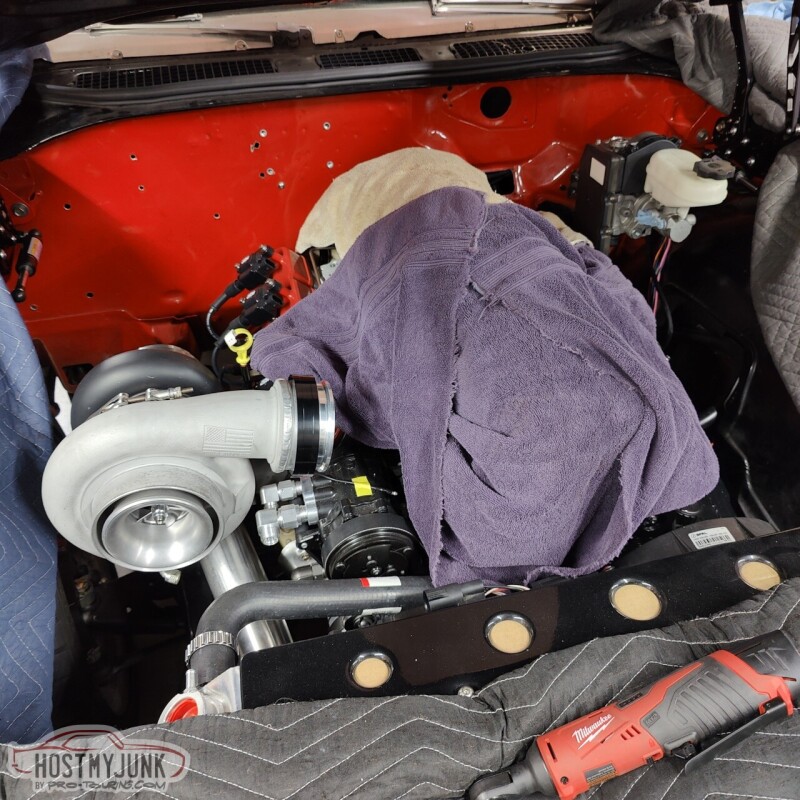
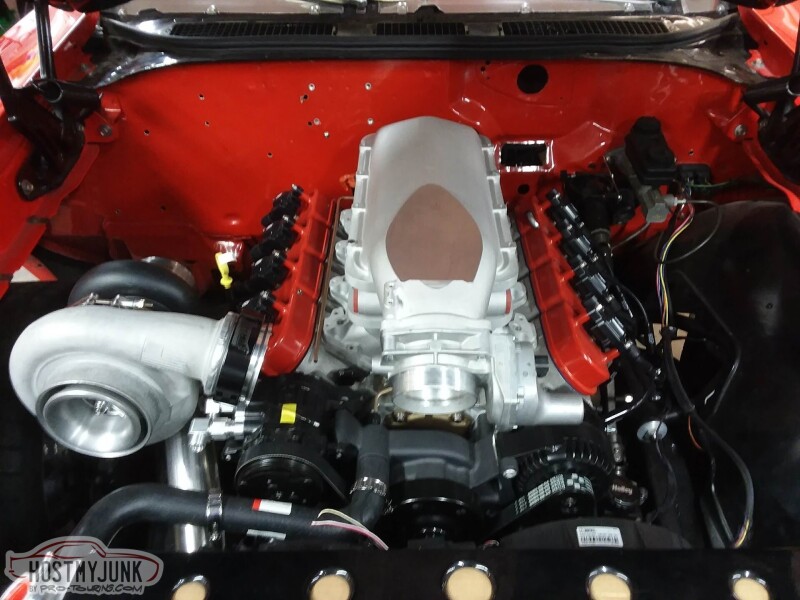
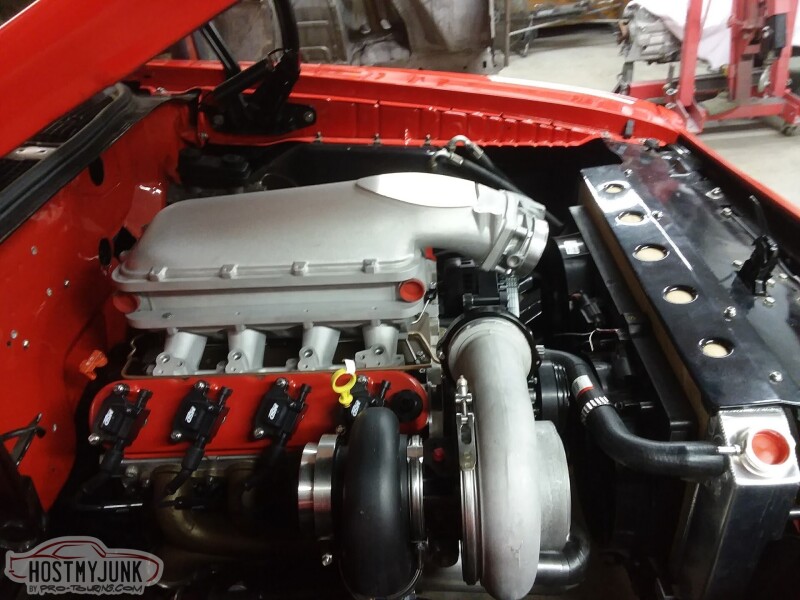
Now that the intake was finalized it was time to keep working on the charge pipe from the compressor outlet to the throttle body.
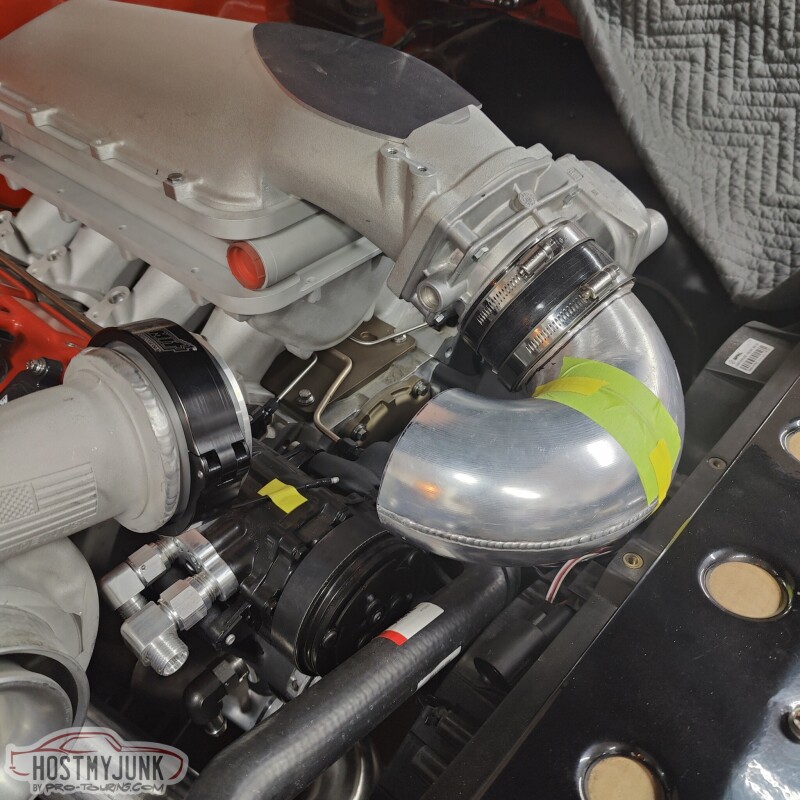
We ended up cutting the 180 degree bend that we had made previously so that half of it could be clocked independently.
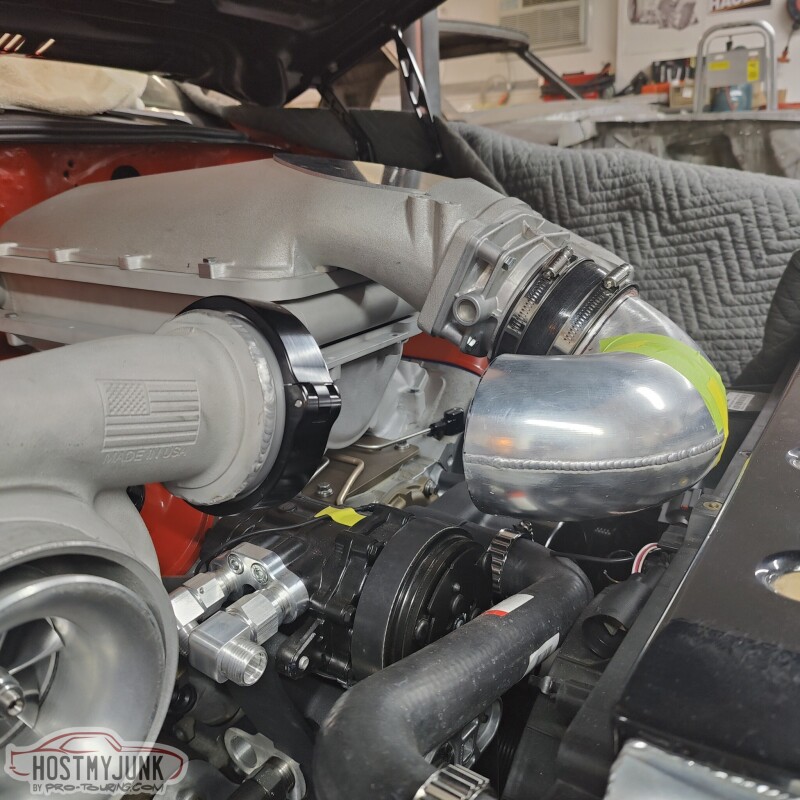
This gave us a more clear path to the compressor, so all that is left is to add another 90 and a couple of small straight cuts to make it all fit.
It is a bit of a tortured path, but this is why we chose to stay with 4" piping to keep the pressure drop to a minimum. It is really no more elaborate than if there was an A2A intercooler in the front and we had to make all the associated pieces to work with that. I think this looks super clean too.
Happy New Year to Everyone and thanks for following along.
Andrew1970 GTO Version 3.0
1967 Cougar build
GM High-Tech Performance feature
My YouTube Channel Please Subscribe!
Instagram @dr__efi
I deliver what EFI promises.
Remote Holley EFI tuning.
Please get in touch if I can be of service.
"You were the gun, your voice was the trigger, your bravery was the barrel, your eyes were the bullets." ~ Her
-
12-31-2022 #563
 Registered User
- Join Date
- Aug 2013
- Location
- Shelton WA
- Posts
- 152
The piece you have to close up your intake would be a great place to have some custom engraving done.
-
12-31-2022 #564
-Moderator/Sponsor-
- Join Date
- Apr 2001
- Location
- The City of Fountains
- Posts
- 16,129
It sure does ::wink:: Originally Posted by SPLATT71MC
Andrew1970 GTO Version 3.0
1967 Cougar build
GM High-Tech Performance feature
My YouTube Channel Please Subscribe!
Instagram @dr__efi
I deliver what EFI promises.
Remote Holley EFI tuning.
Please get in touch if I can be of service.
"You were the gun, your voice was the trigger, your bravery was the barrel, your eyes were the bullets." ~ Her
-
01-01-2023 #565
Registered User
- Join Date
- Apr 2013
- Location
- Crestview, Florida
- Posts
- 61
Could you elaborate on how you deleted the TPS and IAC wires and moved the fuel pressure? I want to do the same. As I look through the Terminator wire schematic it looks like the TPS and Fuel shares 2 wires in common with other connectors (Sensor +5V Ref Out and ground). Which wires did you re-purpose for the alternator L & S wires and did you remove them from the ECU connector? Originally Posted by andrewb70
And lastly, the Tesa harness tape you use, does it leave sticky glue residue? What’s the part number? Is it fuzzy that will collect dirt?
I love the work you’re doing and thanks for sharing all your details!Brian
'67 Camaro SS/RS, Blueprint Engines LS376, Bowler T56 Magnum
Front suspension: Ridetech, Speedtech, DSE
Rear suspension: Speedtech Torque Arm
-
01-01-2023 #566
-Moderator/Sponsor-
- Join Date
- Apr 2001
- Location
- The City of Fountains
- Posts
- 16,129
Hi Brian, Originally Posted by b17brian
Shoot me an email and I can go over the details with you. Email: projectgattago at gmail dot com
Andrew1970 GTO Version 3.0
1967 Cougar build
GM High-Tech Performance feature
My YouTube Channel Please Subscribe!
Instagram @dr__efi
I deliver what EFI promises.
Remote Holley EFI tuning.
Please get in touch if I can be of service.
"You were the gun, your voice was the trigger, your bravery was the barrel, your eyes were the bullets." ~ Her
-
01-01-2023 #567
-Moderator/Sponsor-
- Join Date
- Apr 2001
- Location
- The City of Fountains
- Posts
- 16,129
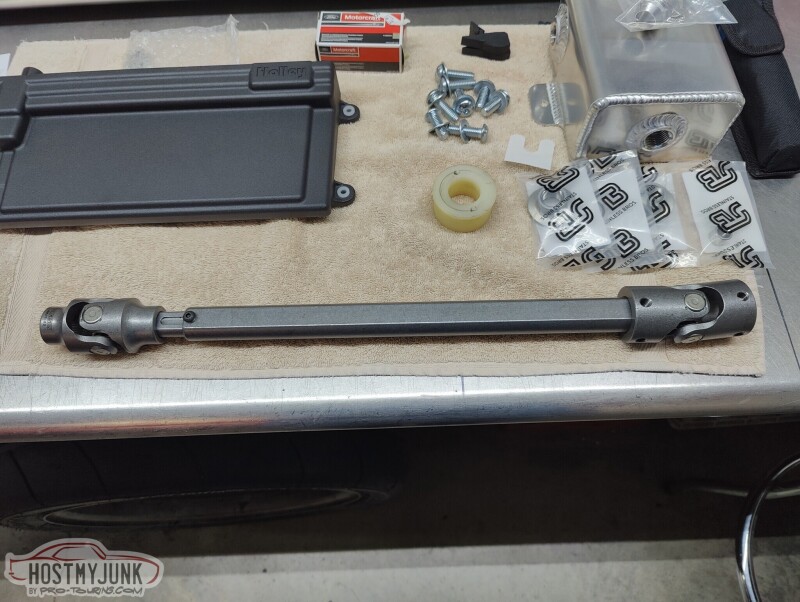
One of the items to replace for this update was the steering shaft. There was nothing wrong with it, but I never liked that it was a solid shaft.
This is a collapsable shaft and new u-joints from Borgeson. I will also be replacing my 20 year old AGR steering box with one from Borgeson.
In this picture the shaft is is already trimmed to fit.
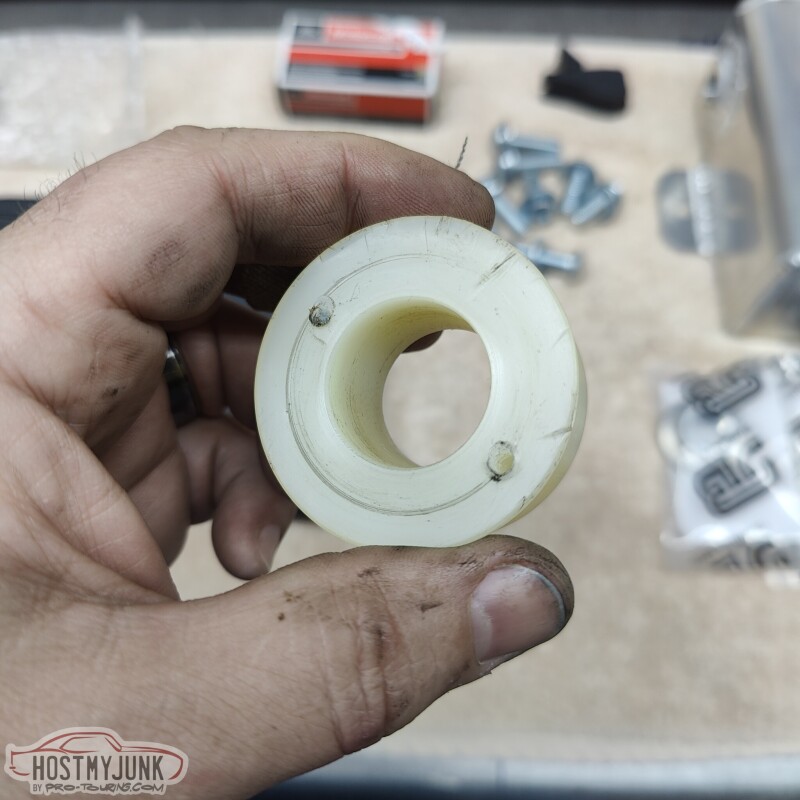
This is the bushing that supports the steering shaft inside the column. Whenever I would drive the car on a hot summer day, I would notice that the steering would get a little sticky. I suspect that this nylon bushing swell up from the heat and causes the steering to bind a little. The holes are from the screws that I installed to pull the bushing with a slide hammer.
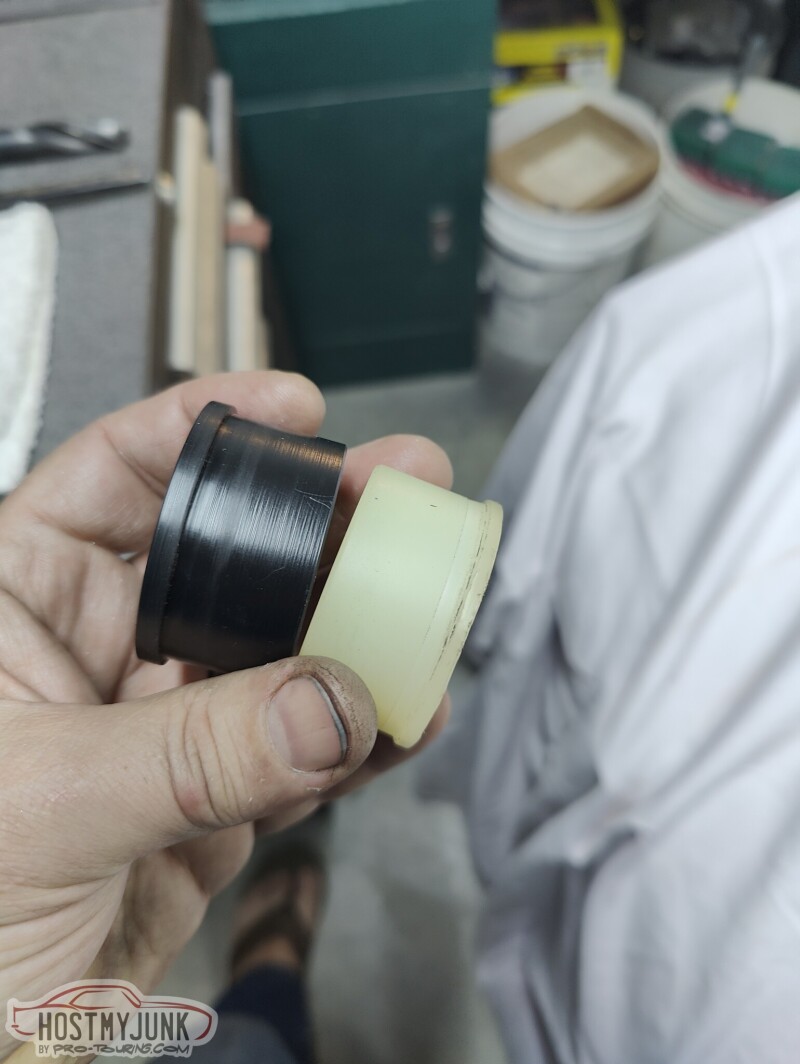
The bushing on the left is one that Vic made on his lathe. It is made out of Delrin, which I hope will be more stable with temperature changes.
Here it is tapped into the steering column.
Andrew1970 GTO Version 3.0
1967 Cougar build
GM High-Tech Performance feature
My YouTube Channel Please Subscribe!
Instagram @dr__efi
I deliver what EFI promises.
Remote Holley EFI tuning.
Please get in touch if I can be of service.
"You were the gun, your voice was the trigger, your bravery was the barrel, your eyes were the bullets." ~ Her
-
01-02-2023 #568
-Moderator/Sponsor-
- Join Date
- Apr 2001
- Location
- The City of Fountains
- Posts
- 16,129
Today we decided to take a little break from turbo stuff and figure out how to upgrade the brakes. Over the last year or so I have been seeing electronically assisted brakes on various cars and on a couple of YouTube channels that I watch. The technology seems really cool and by all accounts they work great.
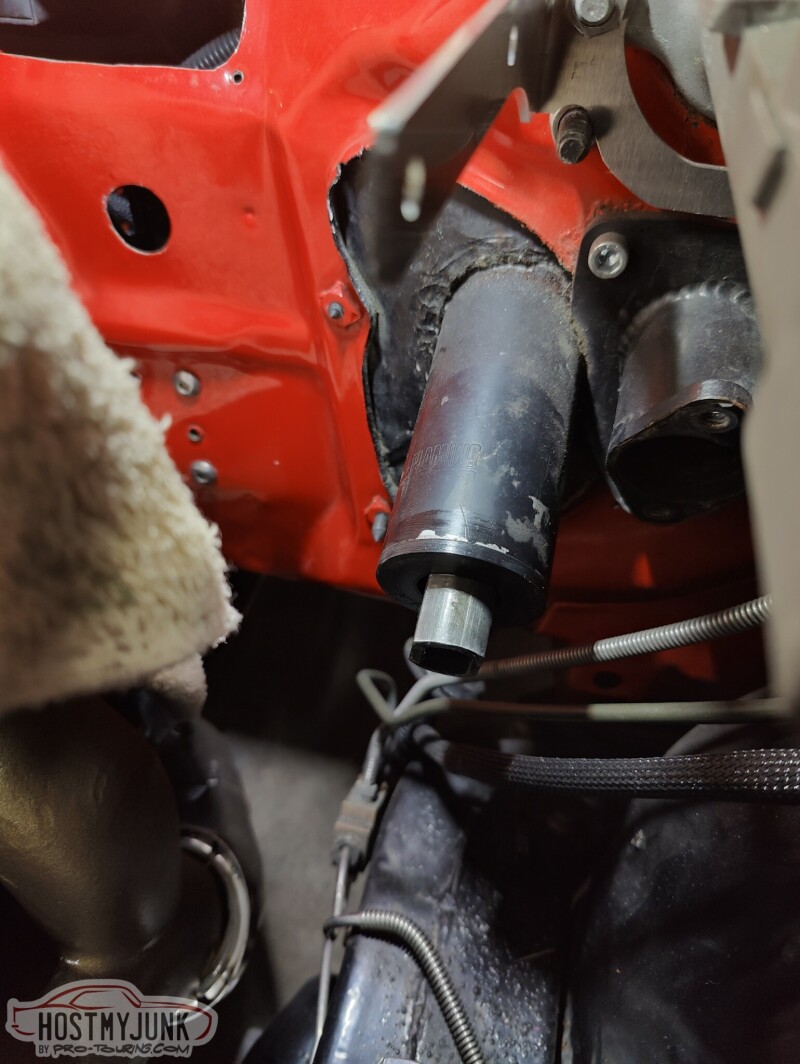
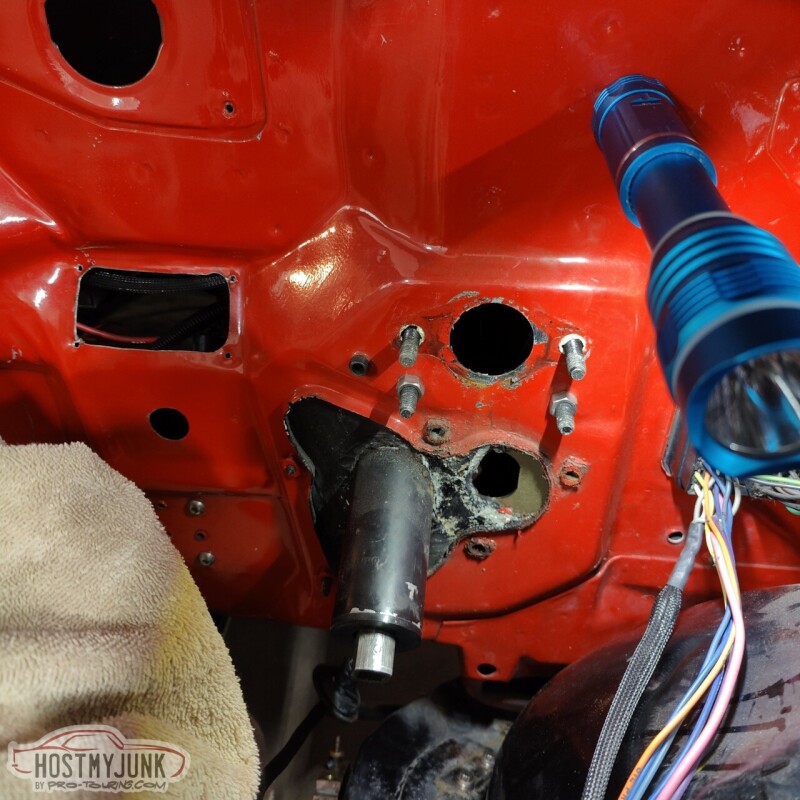
I started by removing the manual MC and the old mount for the clutch MC. There is a little rust here and there, but remember, this car was "done" 20 years ago. That area will definitely get cleaned up.
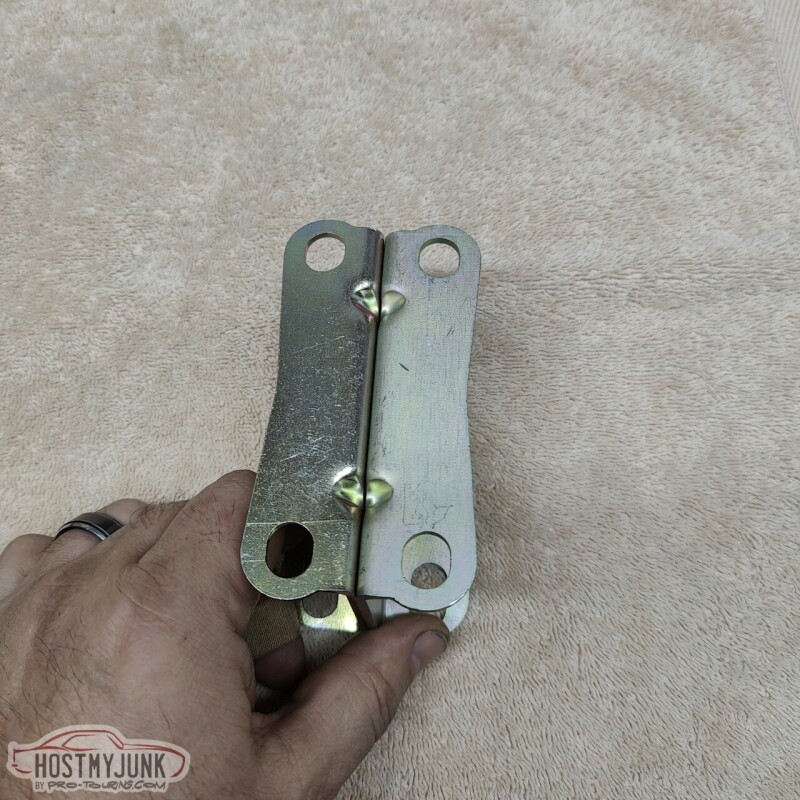
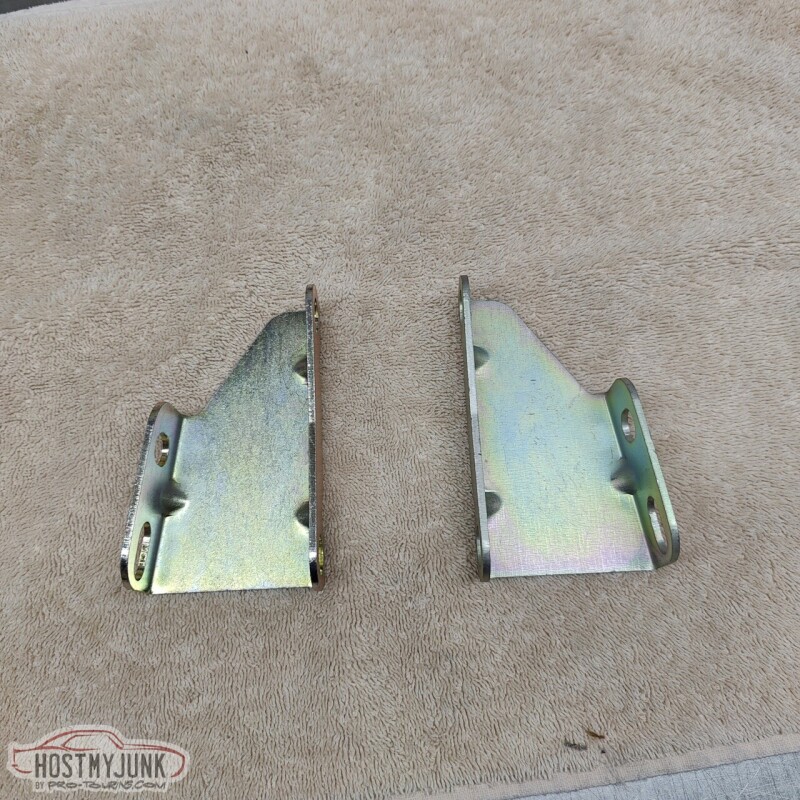
I figured a good place to start to be these brackets that I got them I was planning on doing vacuum power brakes. These are from DSE and it is their reduced angle bracket.
The is the Gen 1 Bosch iBooster unit that I got. It is from a 2010ish Tesla Model S with the adaptive cruise control. Bosch has a Gen 2 model of the iBooster available, but I don't like the looks of them and I am sure that none of the features of the new unit are even applicable to what we are doing here.
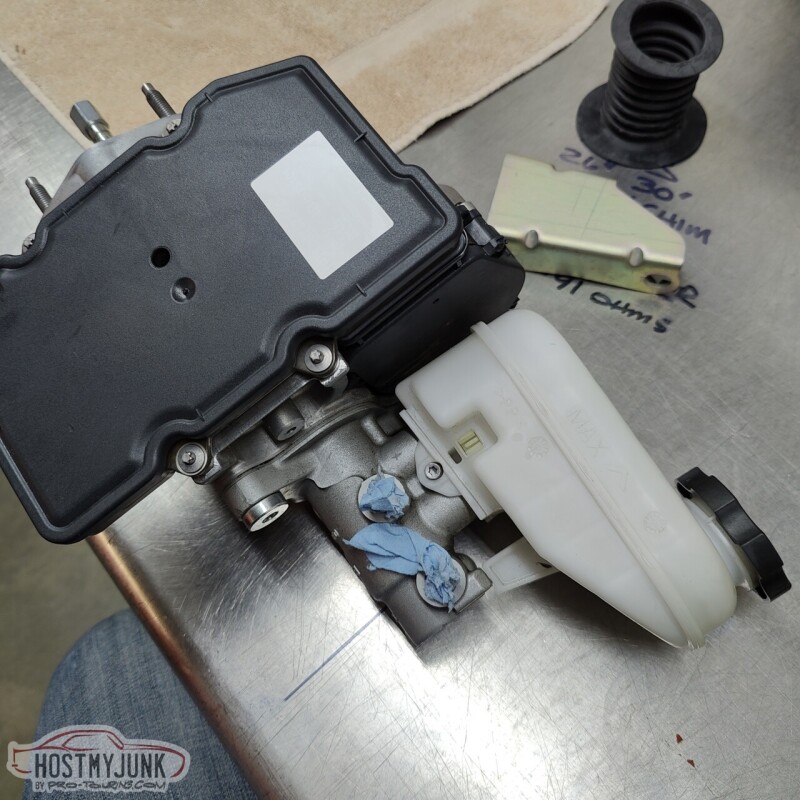
After a little welding, milling and hole sawing, we had the bracket modified to fit the iBooster.
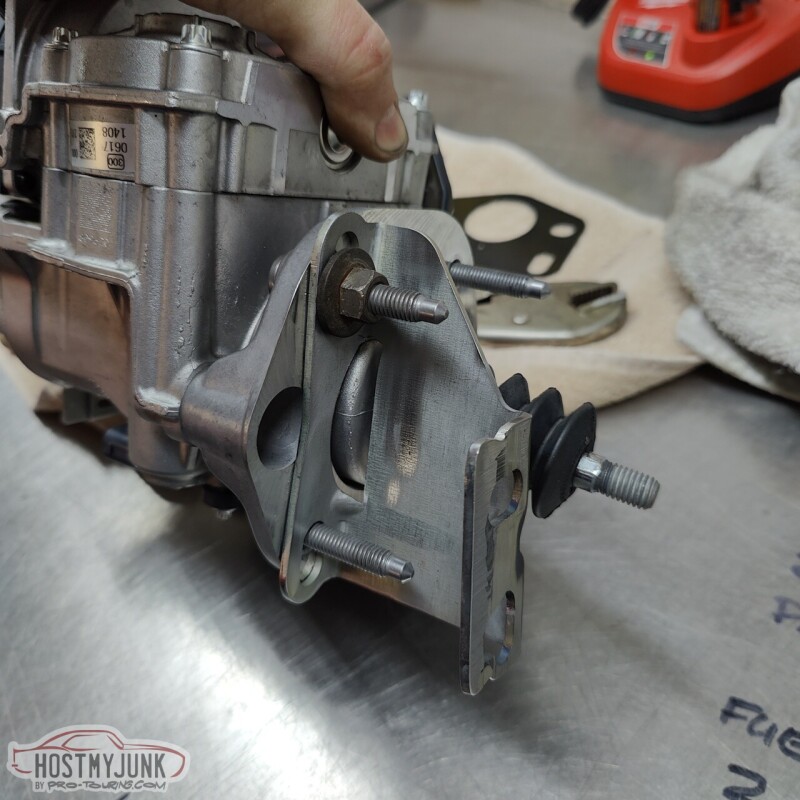
It is bolted to the firewall here, but there is still a lot to sort out.
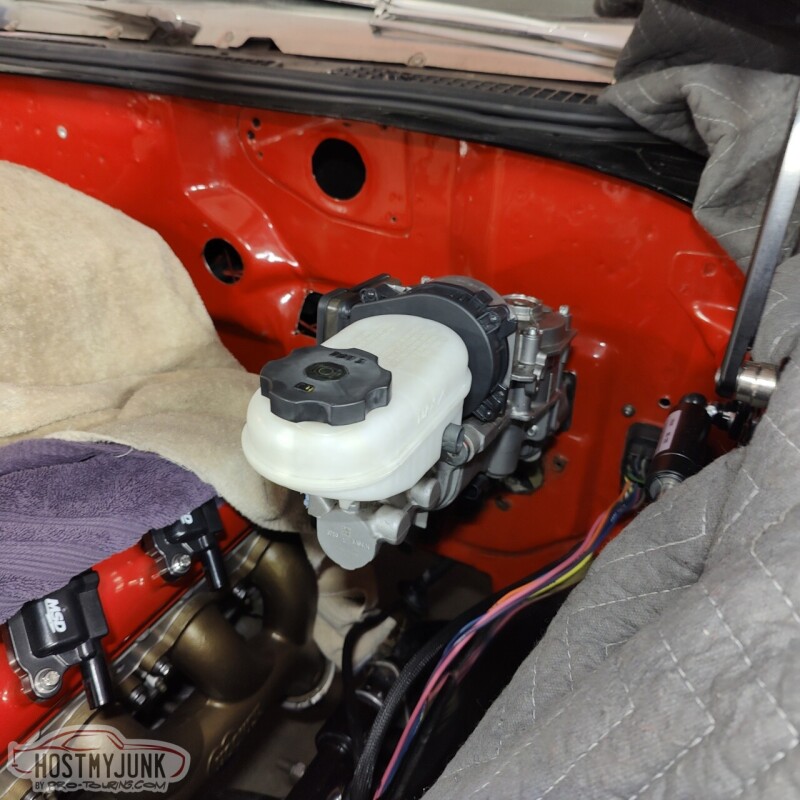
I am not really happy with how the pushrod alignment is looking at the moment. The unit might actually need to be tilted up at the front a little more, but I am already concerned about hood clearance. We will sort out the details the next time.
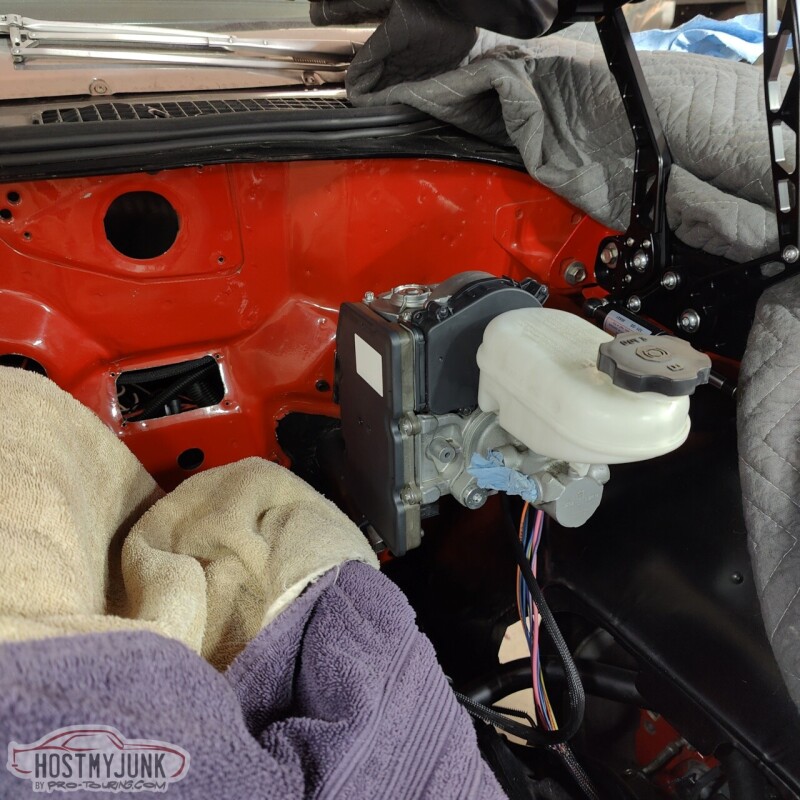
I really like the way these look. They add a little high-tech touch to the engine compartment.
Andrew1970 GTO Version 3.0
1967 Cougar build
GM High-Tech Performance feature
My YouTube Channel Please Subscribe!
Instagram @dr__efi
I deliver what EFI promises.
Remote Holley EFI tuning.
Please get in touch if I can be of service.
"You were the gun, your voice was the trigger, your bravery was the barrel, your eyes were the bullets." ~ Her
-
01-02-2023 #569
 Registered User
- Join Date
- Feb 2019
- Posts
- 284
Wow lotsa nice work Andrew! Looking awesome!
1968 Cougar - 408, FiTech, AOD, TCI, Currie, RideTech, Wilwood
1968 Skylark - 462, TKO 600, RideTech, CPP
1988 Mustang - Vortech V3, Boss 327, Magnum, MaximumMotorsports, StopTech
-
01-03-2023 #570
 Registered User
- Join Date
- Sep 2009
- Posts
- 2,998
Great work on the intake Andrew! That solves a lot of problems for you and it looks amazing! I love that brake booster. Very interested to know more about that.

1955 Nomad project LC9, 4L80e, C5 brakes, Vision wheels
1968 Camaro 6.2 w/ LSA, TR6060-Magnum hybrid and etc SOLD
1976 T/A LS1 6 Speed, and etc. SOLD
Follow me on Instagram: ryeguy2006a
-
01-03-2023 #571
 Registered User
- Join Date
- Sep 2010
- Location
- Beach Park IL
- Posts
- 3,050
What is the pedal ratio in a Tesla?......what is the bore size on that master cylinder? *** 26mm ***
***lots of info here https://www.evcreate.nl/installing-the-ibooster/ ***Donny
Support your local hot rod shop!
-
01-03-2023 #572
-Moderator/Sponsor-
- Join Date
- Apr 2001
- Location
- The City of Fountains
- Posts
- 16,129
Donny, Originally Posted by dontlifttoshift
That's a great link and where I got a lot of my information. I also found a source for a pretty nice wring harness here:
https://tulayswirewerks.com/product/...-wire-harness/
Andrew1970 GTO Version 3.0
1967 Cougar build
GM High-Tech Performance feature
My YouTube Channel Please Subscribe!
Instagram @dr__efi
I deliver what EFI promises.
Remote Holley EFI tuning.
Please get in touch if I can be of service.
"You were the gun, your voice was the trigger, your bravery was the barrel, your eyes were the bullets." ~ Her
01-03-2023 #573 Registered User
- Join Date
- Feb 2019
- Location
- Kankakee IL
- Posts
- 362
These guys sell a booster mount as well as a master cylinder adapter.
https://www.bbtfabrications.com/fab-...!/c/0/offset=9Tracey
01-03-2023 #574
-Moderator/Sponsor-
- Join Date
- Apr 2001
- Location
- The City of Fountains
- Posts
- 16,129
Using this adapter plate would make the iBooster practically a bolt in deal. Originally Posted by Tsaints1115
Andrew1970 GTO Version 3.0
1967 Cougar build
GM High-Tech Performance feature
My YouTube Channel Please Subscribe!
Instagram @dr__efi
I deliver what EFI promises.
Remote Holley EFI tuning.
Please get in touch if I can be of service.
"You were the gun, your voice was the trigger, your bravery was the barrel, your eyes were the bullets." ~ Her
01-03-2023 #575
-Moderator/Sponsor-
- Join Date
- Apr 2001
- Location
- The City of Fountains
- Posts
- 16,129
This seems like a pretty straightforward part to make, but it's quite intricate. There is very little space and we had to use a donut to get the radii tight enough to connect the dots.
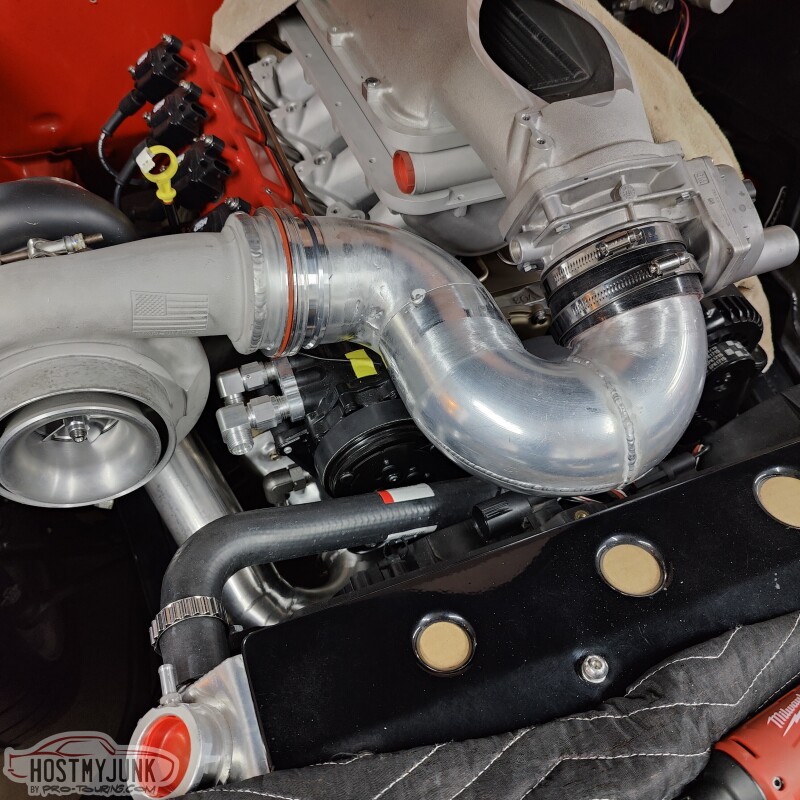
There is a slight gap where the pipe meets the compressor discharge. This was done to accommodate any movement due to heat, etc...The Summit Racing clamp is made to account for this movement. All that is left is to finish a couple of welds, add the blow-off valve, which will go on the outside bend just before the throttle body, and smooth out whichever welds we can.
Andrew1970 GTO Version 3.0
1967 Cougar build
GM High-Tech Performance feature
My YouTube Channel Please Subscribe!
Instagram @dr__efi
I deliver what EFI promises.
Remote Holley EFI tuning.
Please get in touch if I can be of service.
"You were the gun, your voice was the trigger, your bravery was the barrel, your eyes were the bullets." ~ Her
01-04-2023 #576
Registered User
- Join Date
- Sep 2013
- Location
- sw Kansas
- Posts
- 1,662
Interesting to watch.
 Now, I'm going to go read all of the ibooster links.
01-04-2023 #577
-Moderator/Sponsor-
- Join Date
- Apr 2001
- Location
- The City of Fountains
- Posts
- 16,129
Here is a fun YouTube video that talks about the iBooster and brakes in general. Originally Posted by wfo guy
Andrew1970 GTO Version 3.0
1967 Cougar build
GM High-Tech Performance feature
My YouTube Channel Please Subscribe!
Instagram @dr__efi
I deliver what EFI promises.
Remote Holley EFI tuning.
Please get in touch if I can be of service.
"You were the gun, your voice was the trigger, your bravery was the barrel, your eyes were the bullets." ~ Her
01-04-2023 #578
-Moderator/Sponsor-
- Join Date
- Apr 2001
- Location
- The City of Fountains
- Posts
- 16,129
Today I had a few hours to spare, so I drove to Vic's house to make a little close-out panel that would go under the brake booster. In one of the previous pictures you can see the hole that was left after I removed the clutch MC mount. That hole needed to be covered up and I also needed to clean up some of the peeling paint and surface rust that was there.
I scraped the loose paint off and then scrubbed the surface with an abrasive pad. Then I sprayed some primer into a small cup and used a small brush to apply it and then did the same with some black paint. The point wasn't to make it look pretty, but to seal the exposed metal.
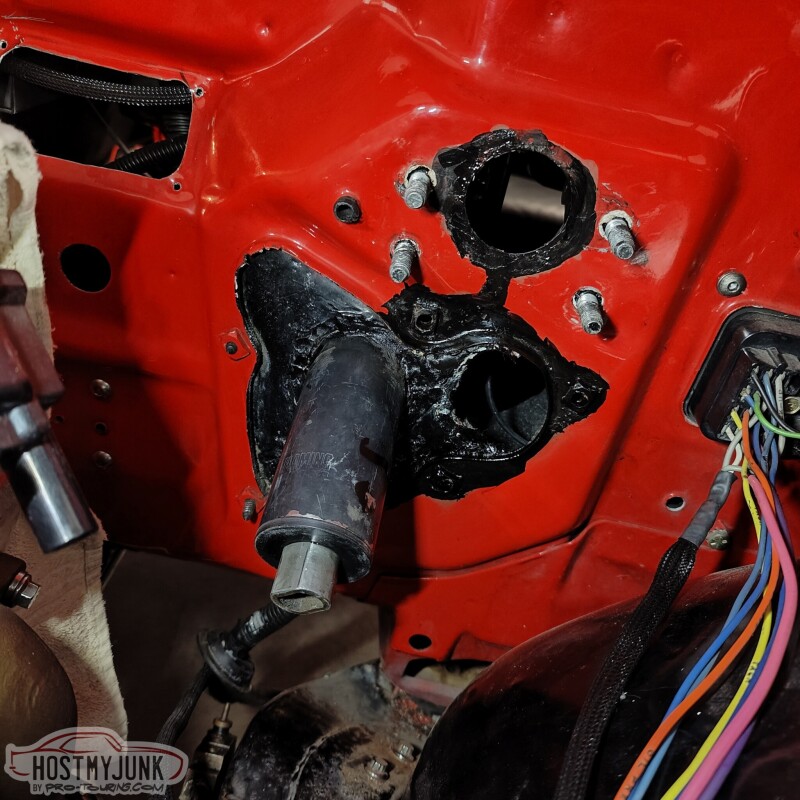
I then started to layer 2" masking tape over the whole area.
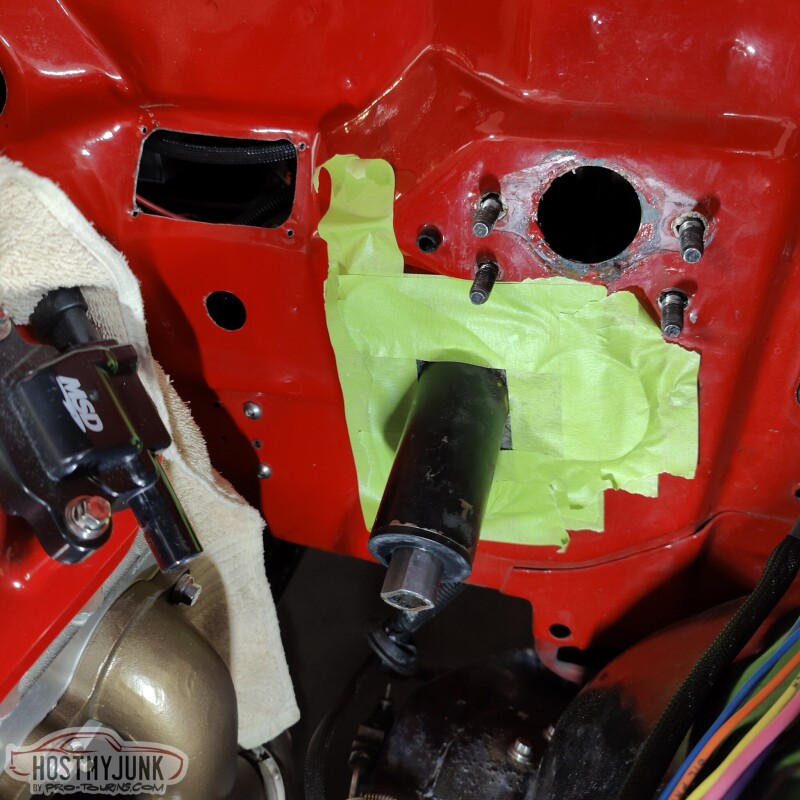
I used a pencil to trace out the outline of the patch that I wanted to cover and also marked out the 3 mounting holes.
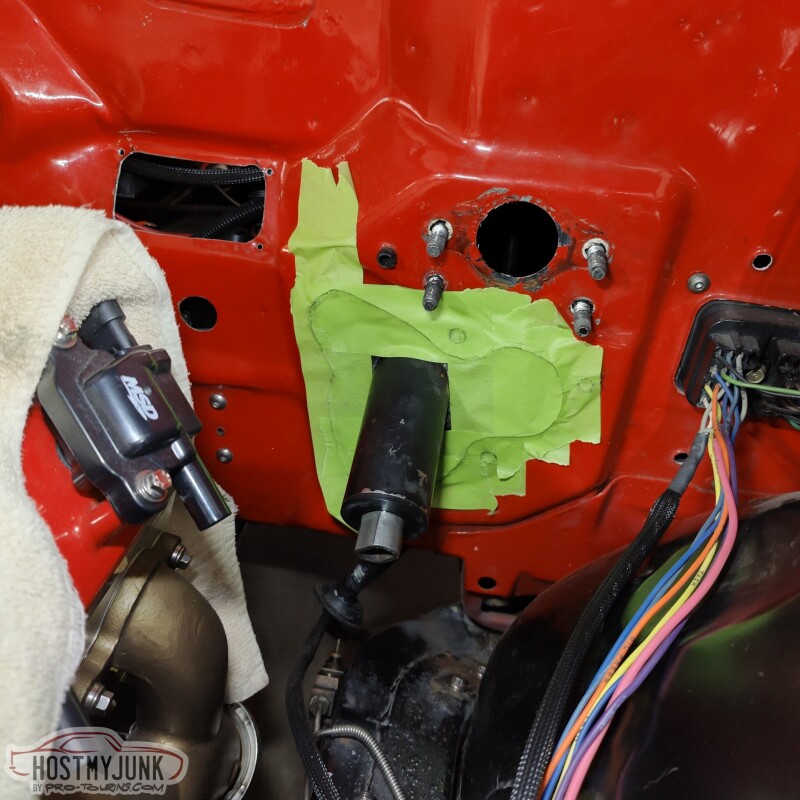
I then transferred the masking tape template to some thin cardboard and used a sharpie to draw out the shape that would capture the mounting bolts and that would overlap the opening that I wanted to cover.
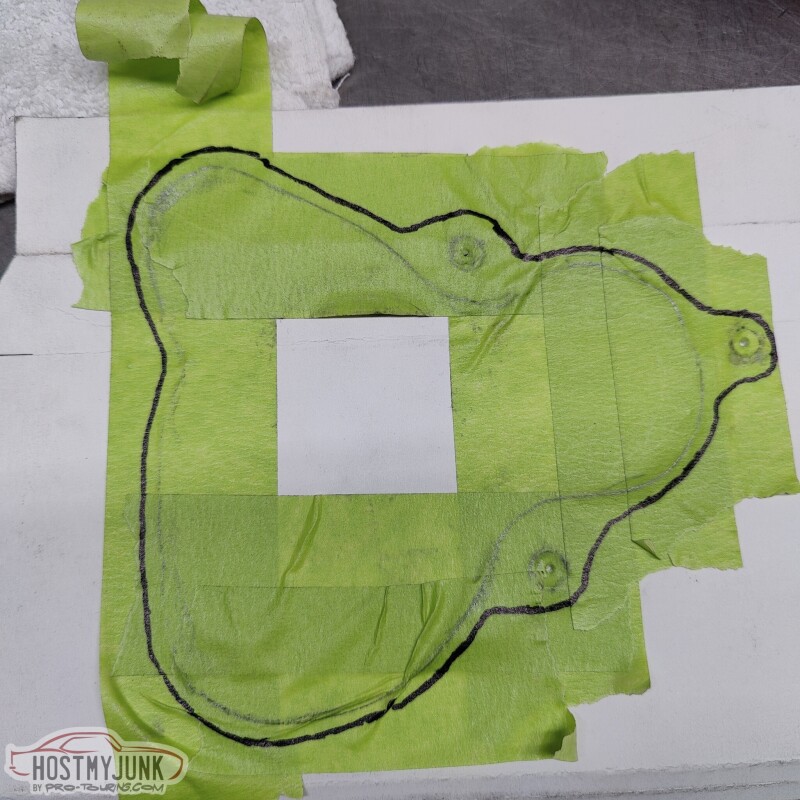
I cut the cardboard with some scissors and did a trial fit. Everything was looking pretty good.
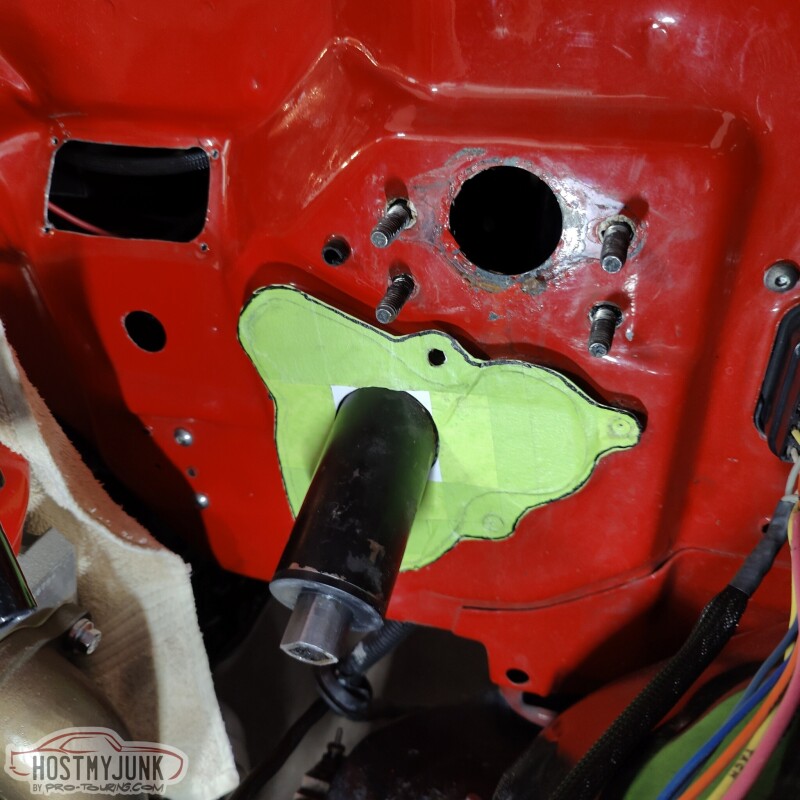
I used the cardboard template to transfer the shape and the holes to a piece of 1/8" aluminum plate.
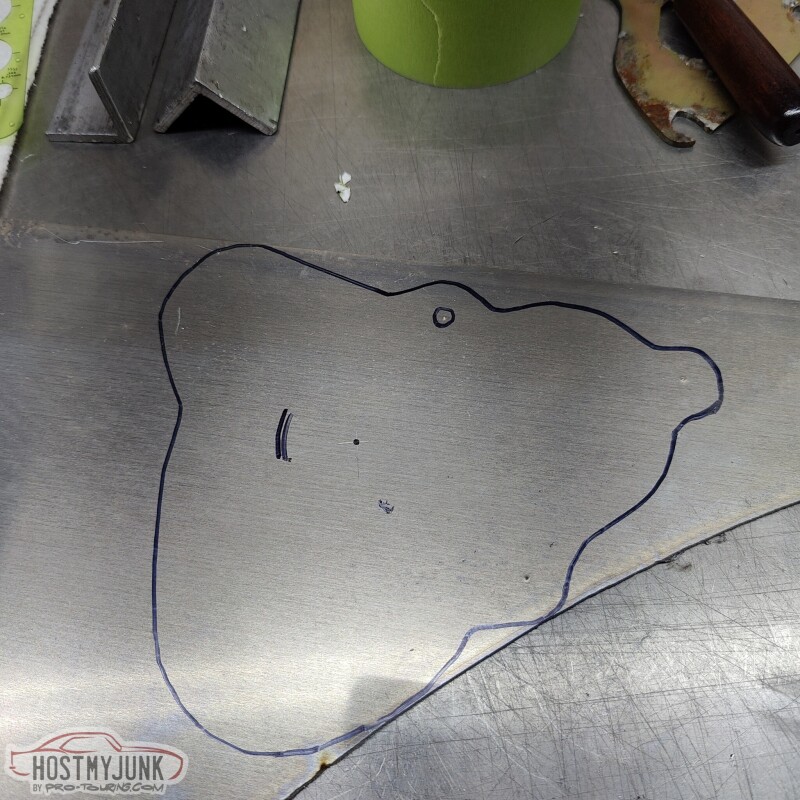
I cut the couch shape on a bandsaw and then used a belt sander the arrive at the final shape. I also used a 2" hole saw to make the hole.
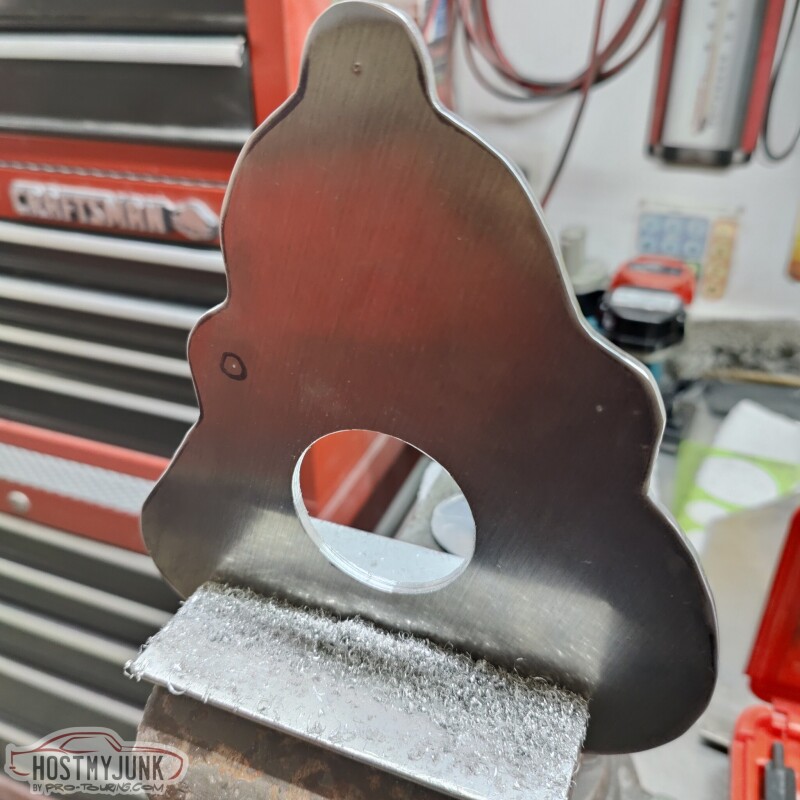
Since the column pokes through the plate at an angle, the opening had to be oval, not round, so I used a file to contour the opening until the panel fit flush against the firewall.
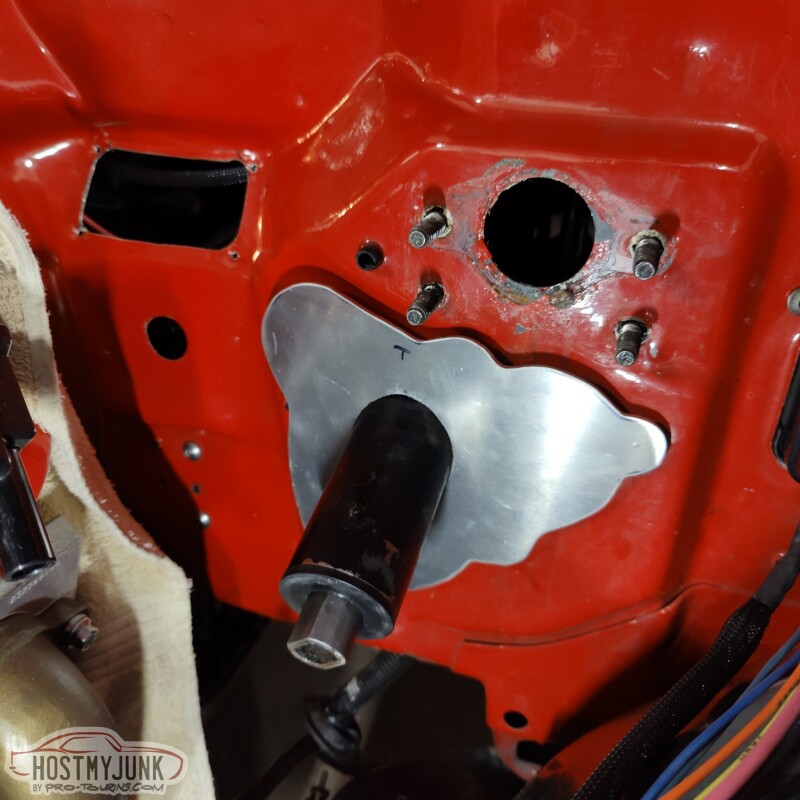
Then I drilled out the 3 mounting holes.
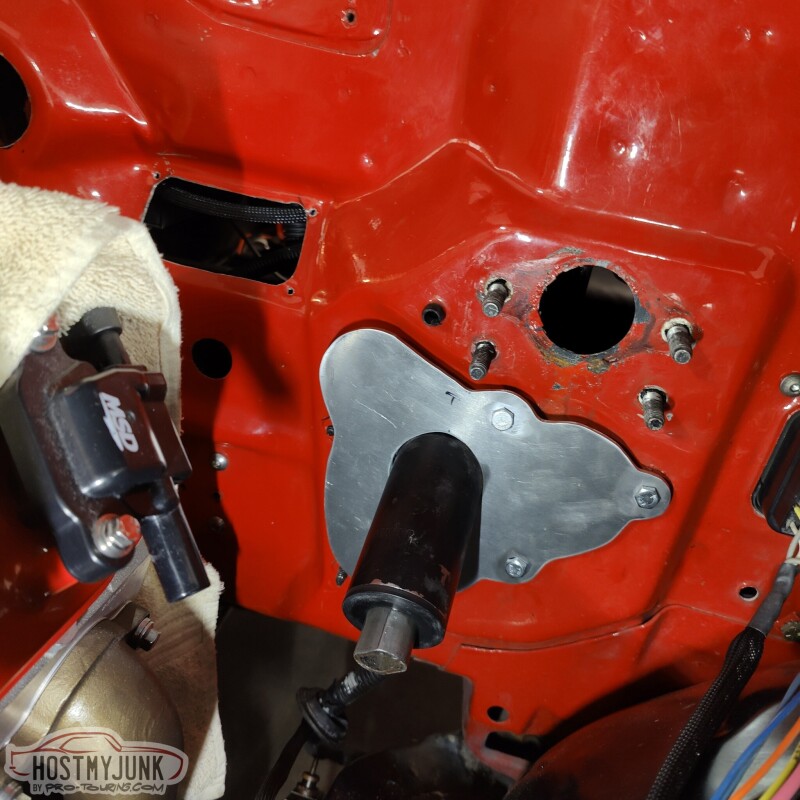
The panel fits really well. It will get painted black and I will use some window mount urethane to seal the plate against the firewall. This will keep water from collecting and keep that area clean and dry. Once the booster is installed, the panel won't really be visible, but I think it adds a finished touch to an area that looks a little raggedy before.
Andrew1970 GTO Version 3.0
1967 Cougar build
GM High-Tech Performance feature
My YouTube Channel Please Subscribe!
Instagram @dr__efi
I deliver what EFI promises.
Remote Holley EFI tuning.
Please get in touch if I can be of service.
"You were the gun, your voice was the trigger, your bravery was the barrel, your eyes were the bullets." ~ Her
01-05-2023 #579
-Moderator/Sponsor-
- Join Date
- Apr 2001
- Location
- The City of Fountains
- Posts
- 16,129
Today wasn't terribly productive. I managed to install the new Borgeson steering box. Overall it looked pretty similar to my ancient AGR steering box, with the exception of having 4 mounting ears instead of 3. My frame only has 3 mounts, so the 4th is just, there...
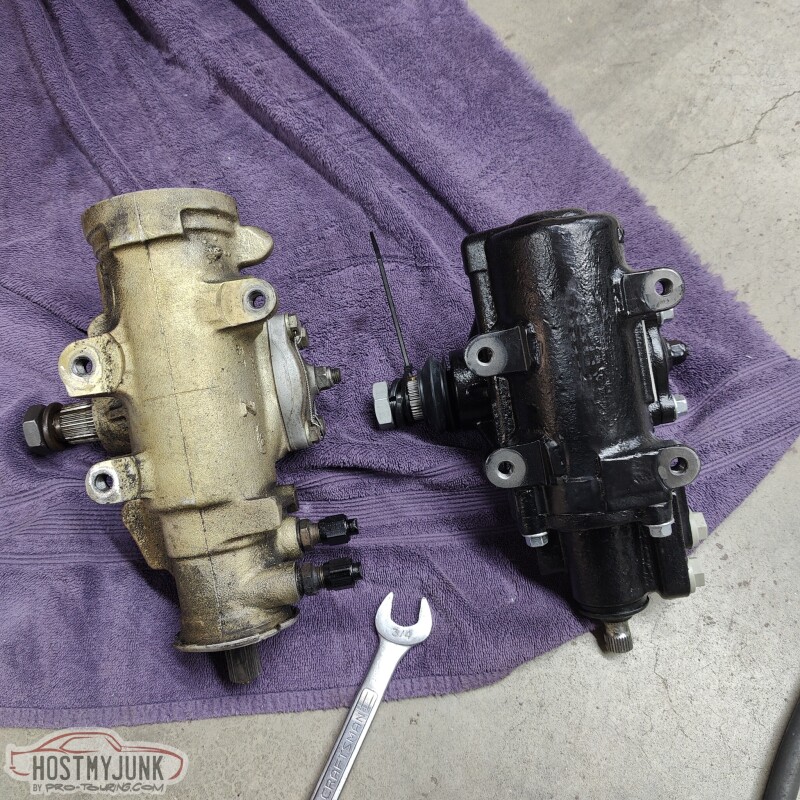
I was able to reuse the fittings from the old box on the new box. The Borgeson box uses metric fittings with o-rings, which were the same size as my old AGR box.
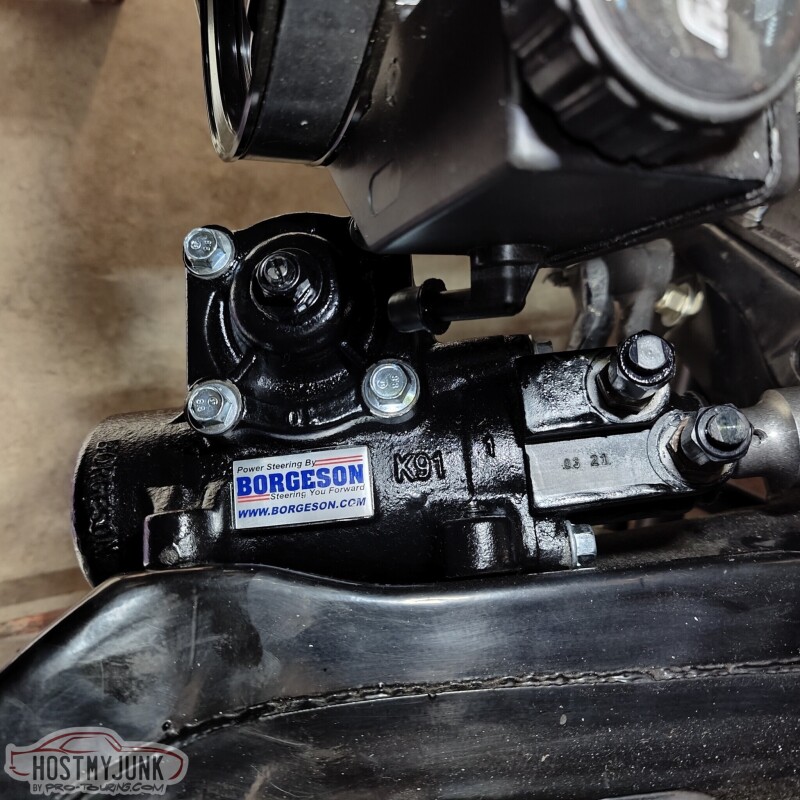
The Borgeson box also uses a slightly smaller input shaft.
Andrew1970 GTO Version 3.0
1967 Cougar build
GM High-Tech Performance feature
My YouTube Channel Please Subscribe!
Instagram @dr__efi
I deliver what EFI promises.
Remote Holley EFI tuning.
Please get in touch if I can be of service.
"You were the gun, your voice was the trigger, your bravery was the barrel, your eyes were the bullets." ~ Her
01-06-2023 #580 Registered User
- Join Date
- Sep 2004
- Location
- Orlando, FL
- Posts
- 1,086
Advantage of the Borgeson over the AGR?
SMSgt Ty Ingle, USAF
"CF71" - Freedom BirdHoodpins.com, Inland Empire Driveline, Billet Accessories Direct, Modo Innovations, AutoRad Radiators, Morris Classic Concepts, Marquez Design, Anvil Auto, Fesler Billet, US Collision (DOOM), AGR Performance, Pro-touringF-body.com, Phoenix Transmission Products, Shiftworks, ACC Carpet, Hedman Hedders, BMR Fabrication, American Autowire, MityMounts, TIN INDIAN Performance, Kauffman Racing Equipment, Pypes, RobbMc Performance, WMC, Holley, NOS, PST

 Reply With Quote