

Results 1 to 20 of 38
Thread: '63 Grand Prix Project
-
11-27-2015 #1
 Registered User
- Join Date
- Nov 2015
- Location
- Saint Louis MO
- Posts
- 36

'63 Grand Prix Project
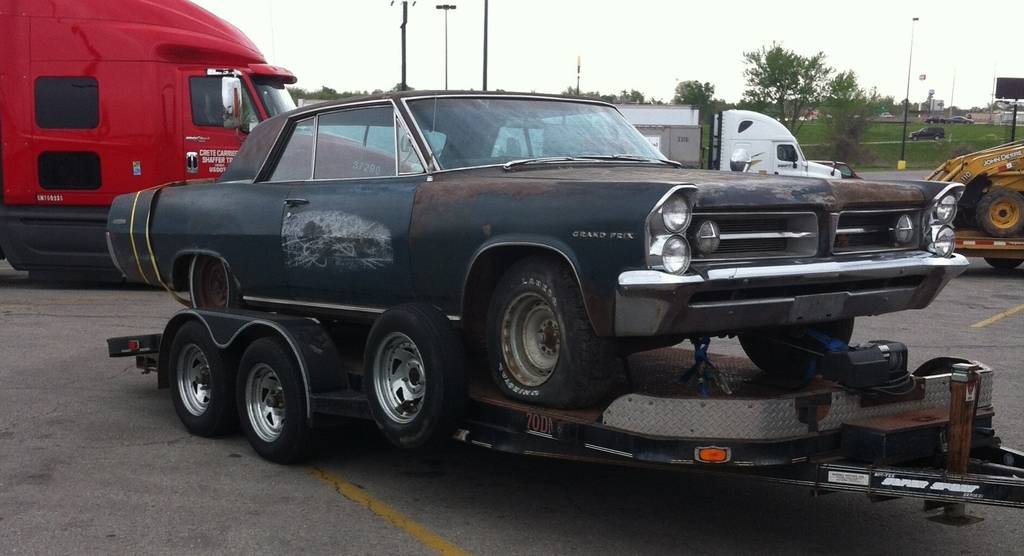
Well here is my build thread. Looks like I'm gonna be the first Pontiac B-body in the house.
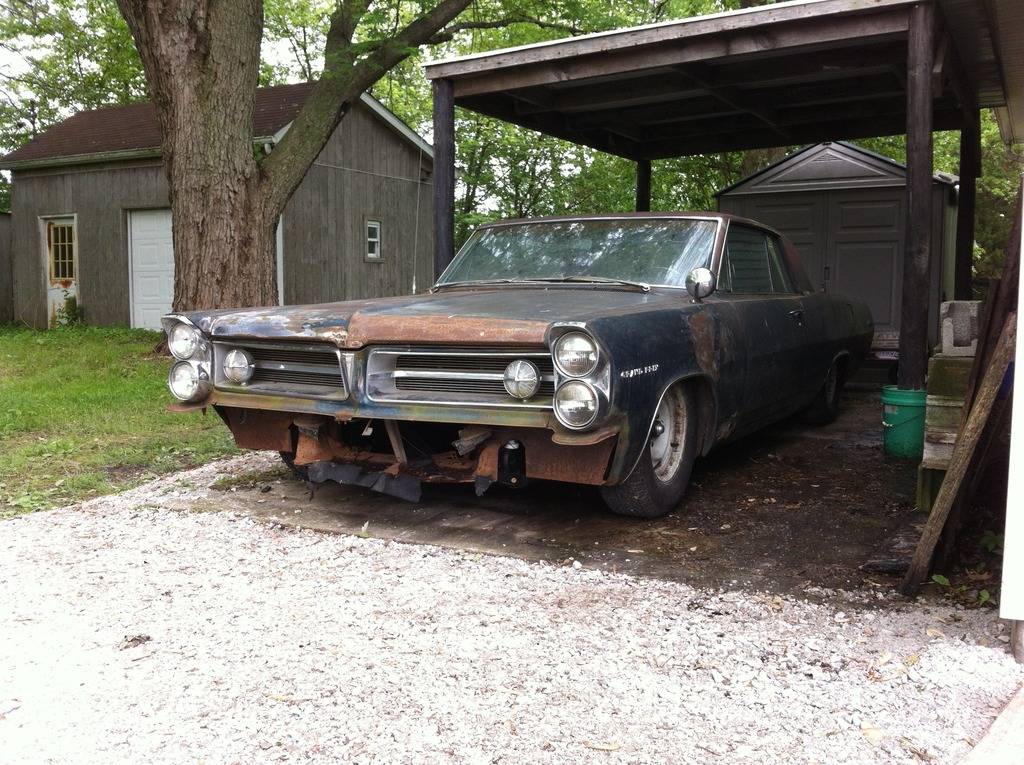
I guess I'll start with day one when I drug the ol boat home. Picked it up off craigslist, was back and forth about getting it, but I eventually convinced myself it would be a neat project.
First order was to get the frame out from under the car and see what kinda mess I was in for.


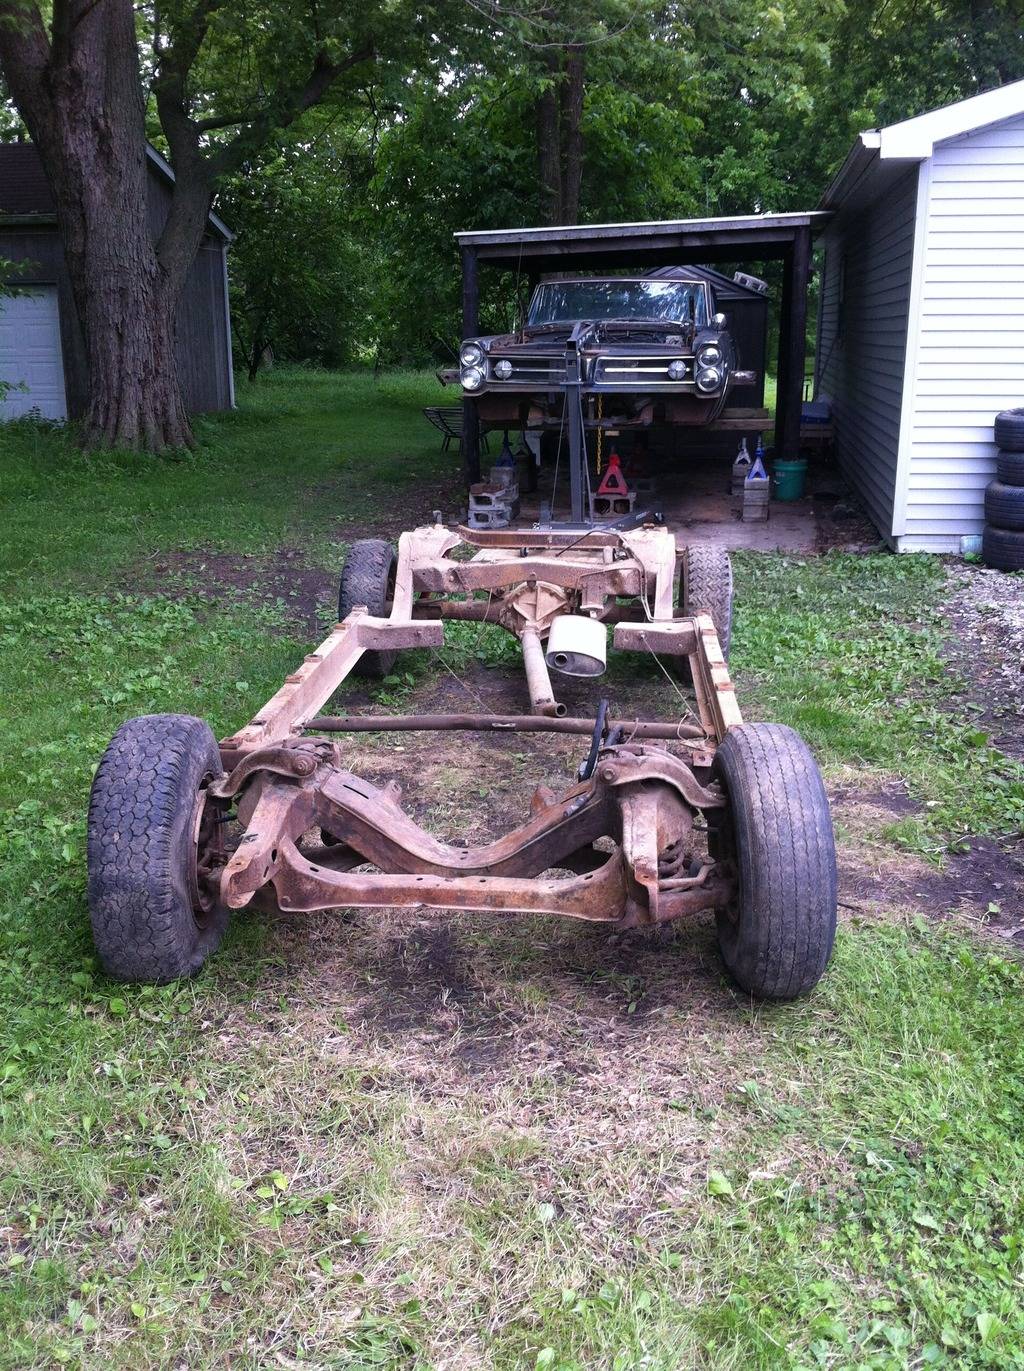
After I got the frame in the garage I yanked all the coil springs out to see how the frame would lay out.


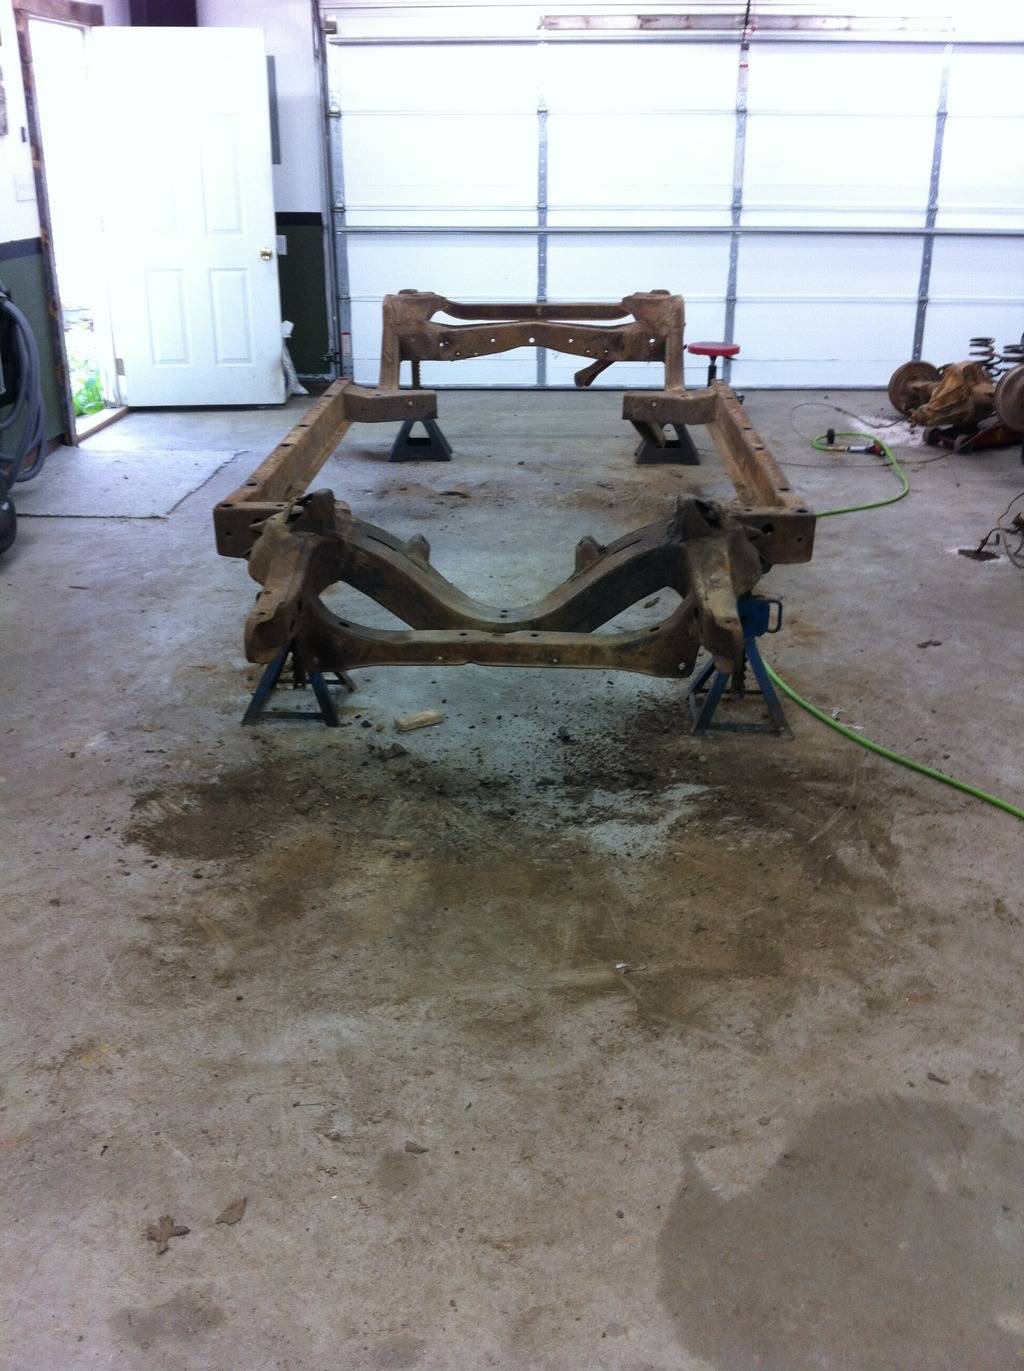
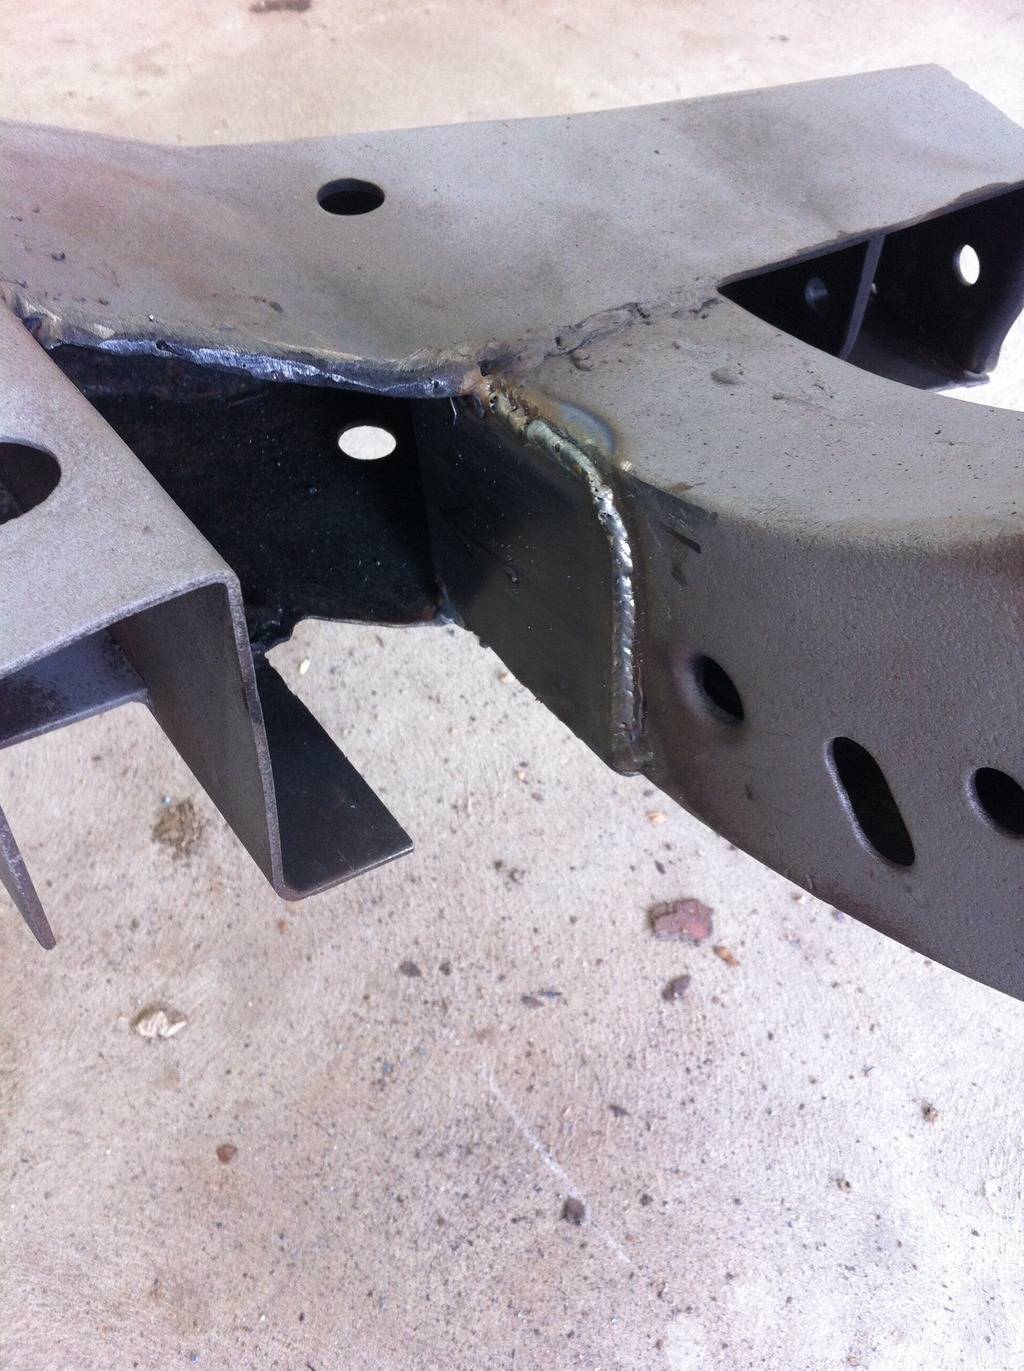
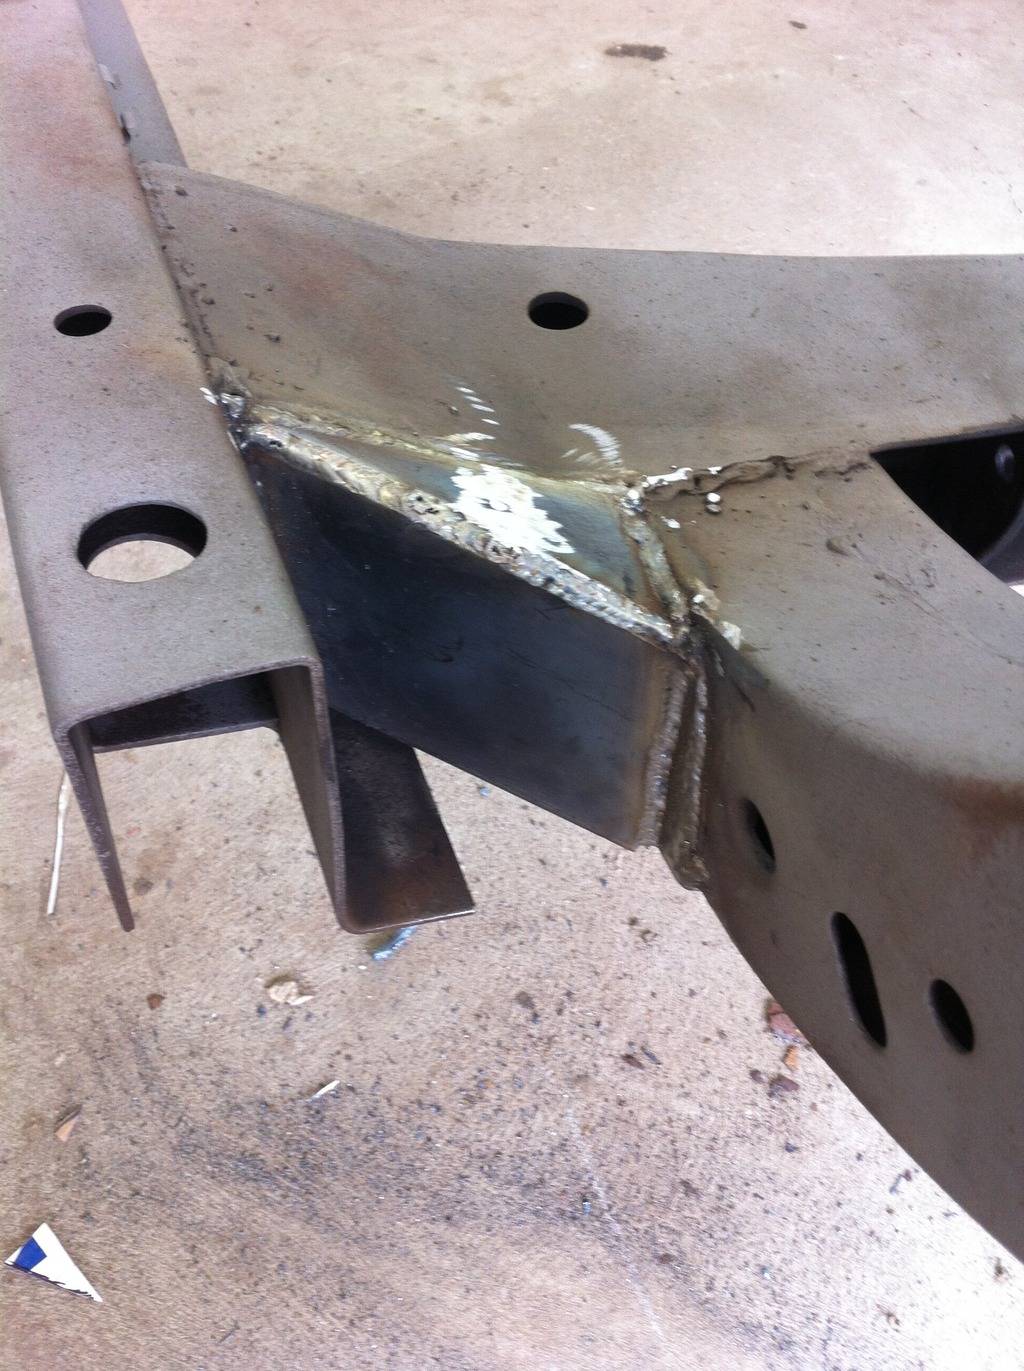
Now time go get started. Stripped the frame and sent it and the rear end housing out for sandblasting.
Now that the 50+ year old dirt is off the frame I could inspect it for any bad spots. It had a few in the rear where the frame starts to go up over the rear axle. After cutting the old section out I discovered the frame seemed to be a home for a mud dobber colony at some point in time.
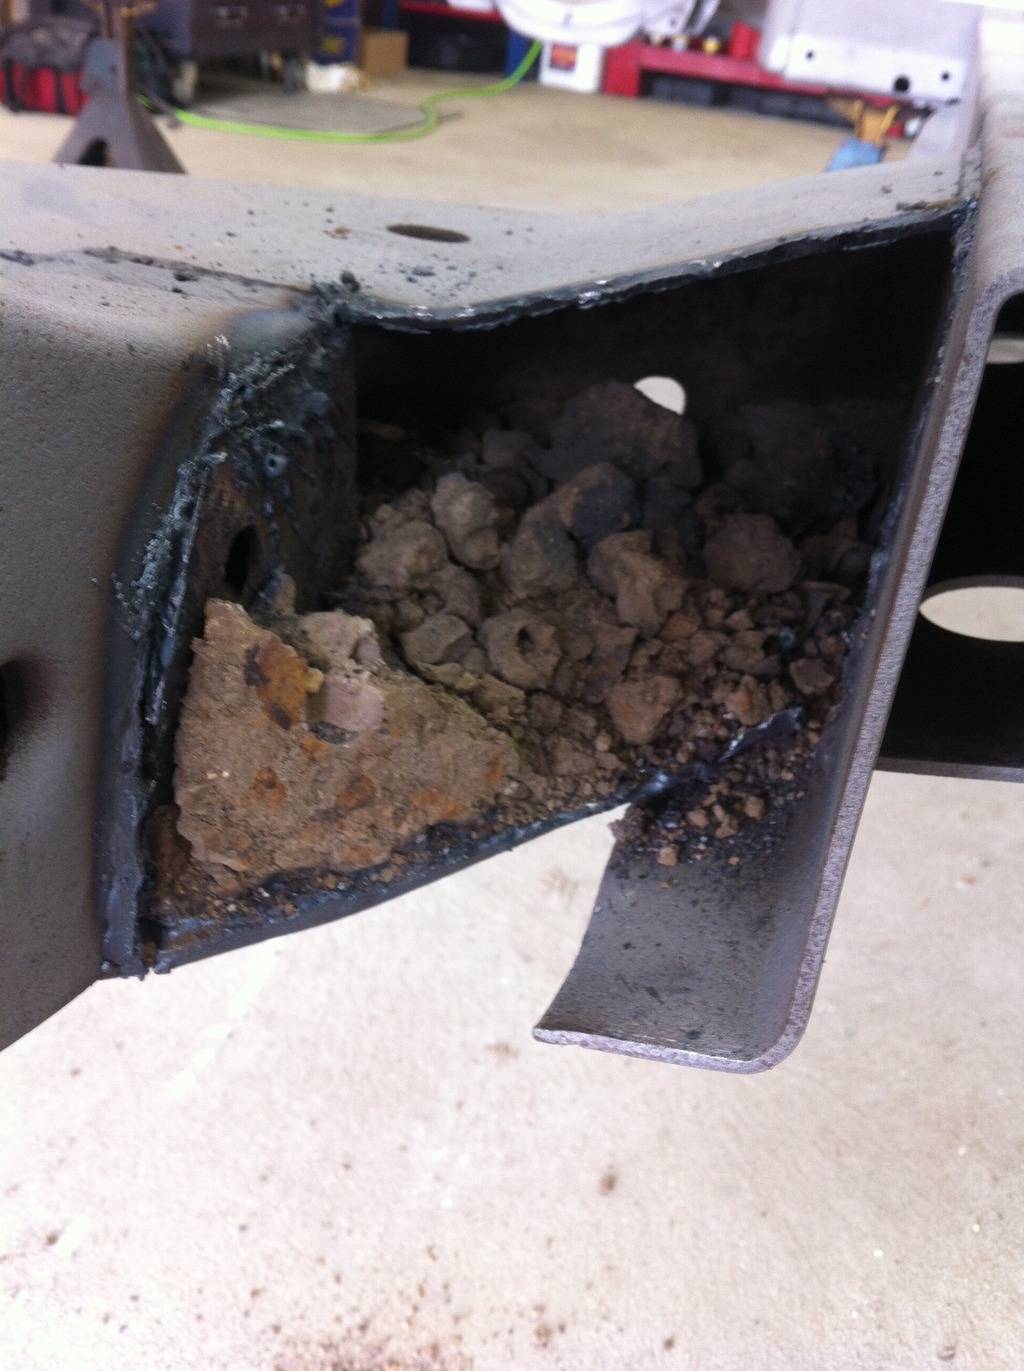
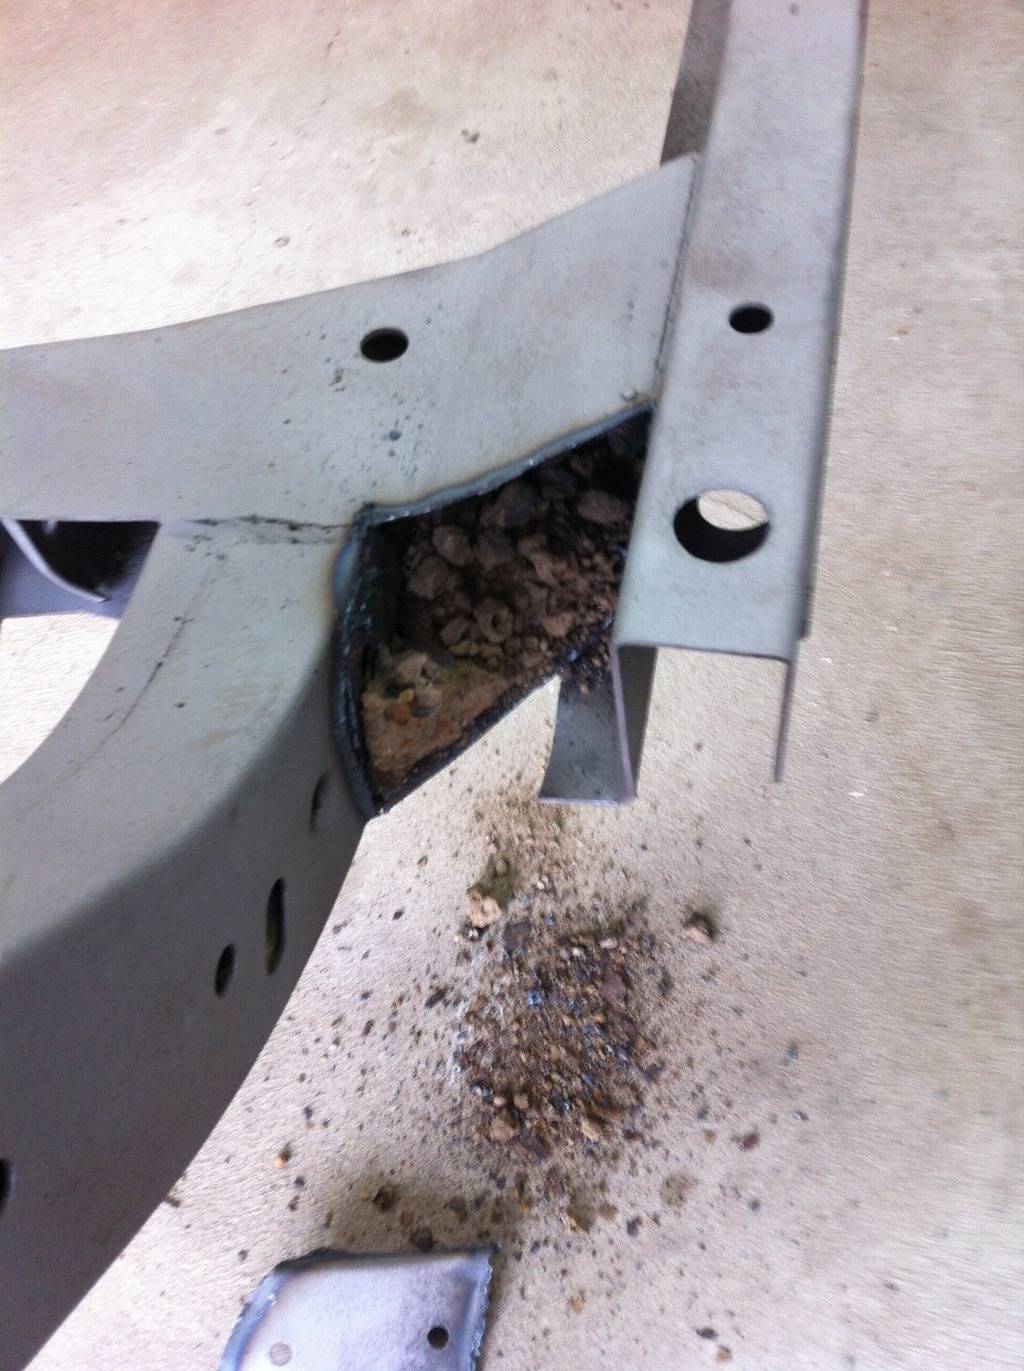
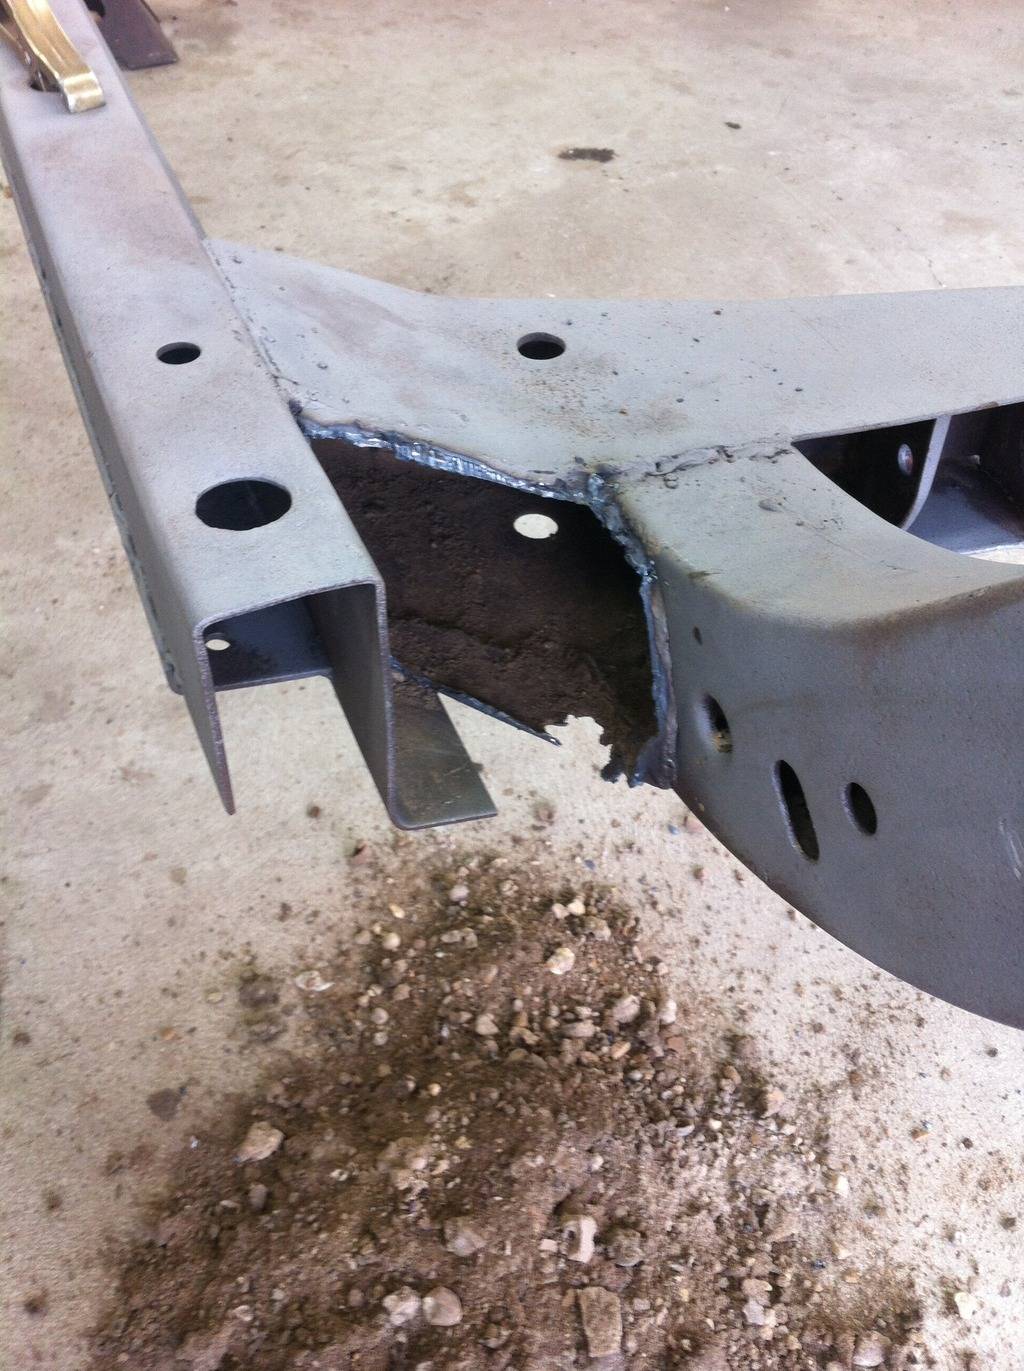
Cleaned out the dirt and patched up both side of the frame. The rest was in pretty good shape.
-
11-28-2015 #2
Registered User
- Join Date
- May 2011
- Location
- Brisbane, Australia
- Posts
- 453

Cool. Love the stacked headlights. What's the basic plan?
1967 Mustang Fastback - widebody https://www.pro-touring.com/threads/...stang-Fastback
1966 Plymouth Fury III
1961 Oldsmobile 88 "bubbletop" = next project
-
11-28-2015 #3
Registered User
- Join Date
- Nov 2015
- Location
- Saint Louis MO
- Posts
- 36
Yeah the stacked headlights and front end is what I fell in love with. The plan is to have a nice Grand touring car to travel around the country in with my family.
-
11-28-2015 #4
Registered User
- Join Date
- Nov 2015
- Location
- Saint Louis MO
- Posts
- 36
Suspension
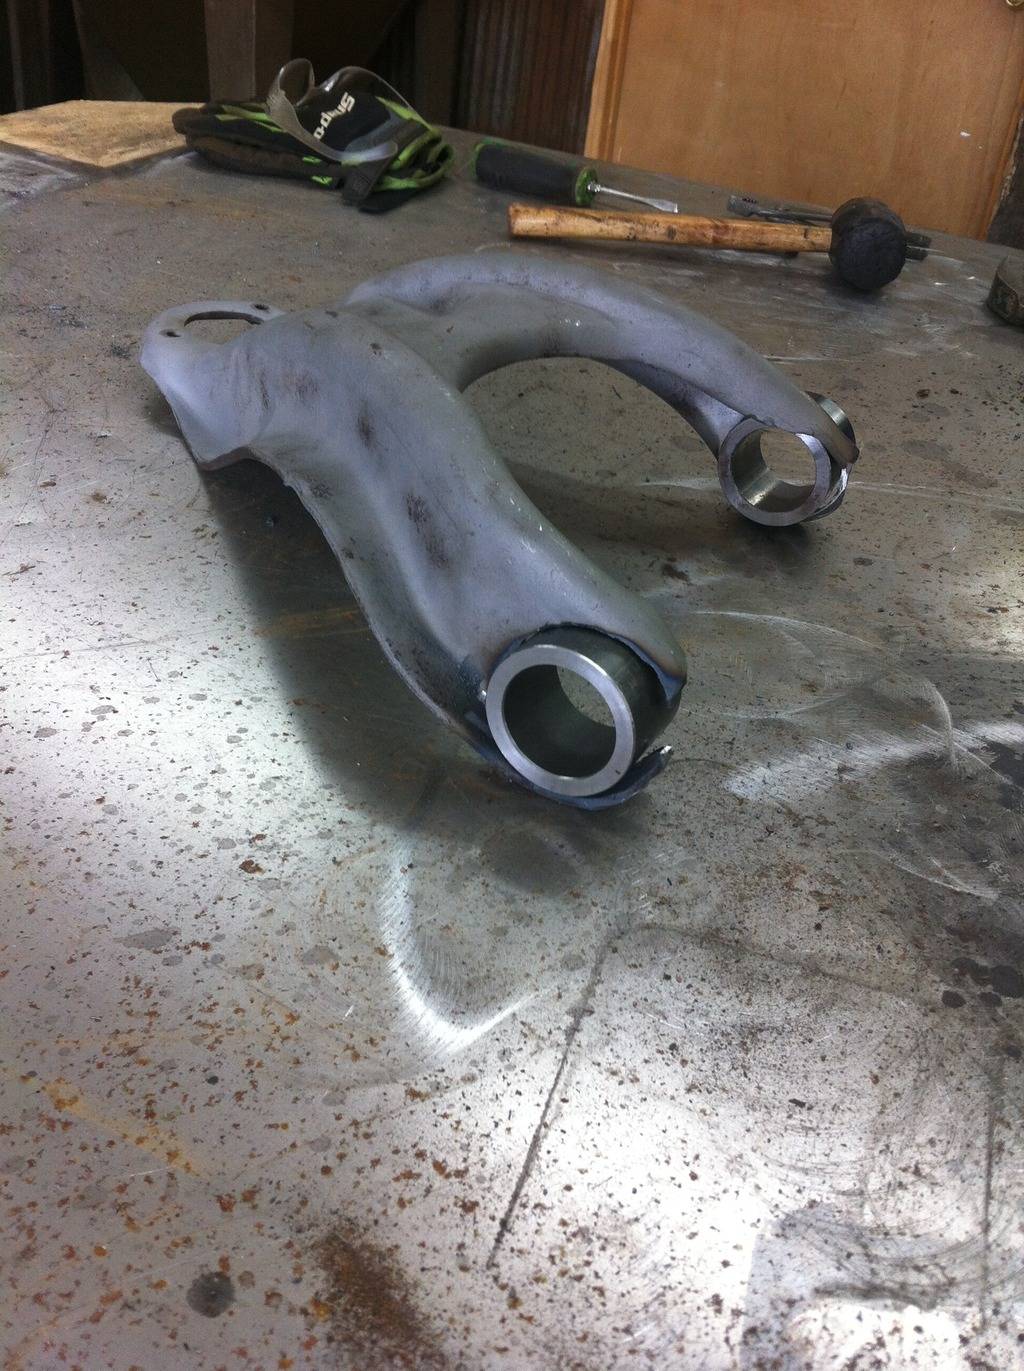
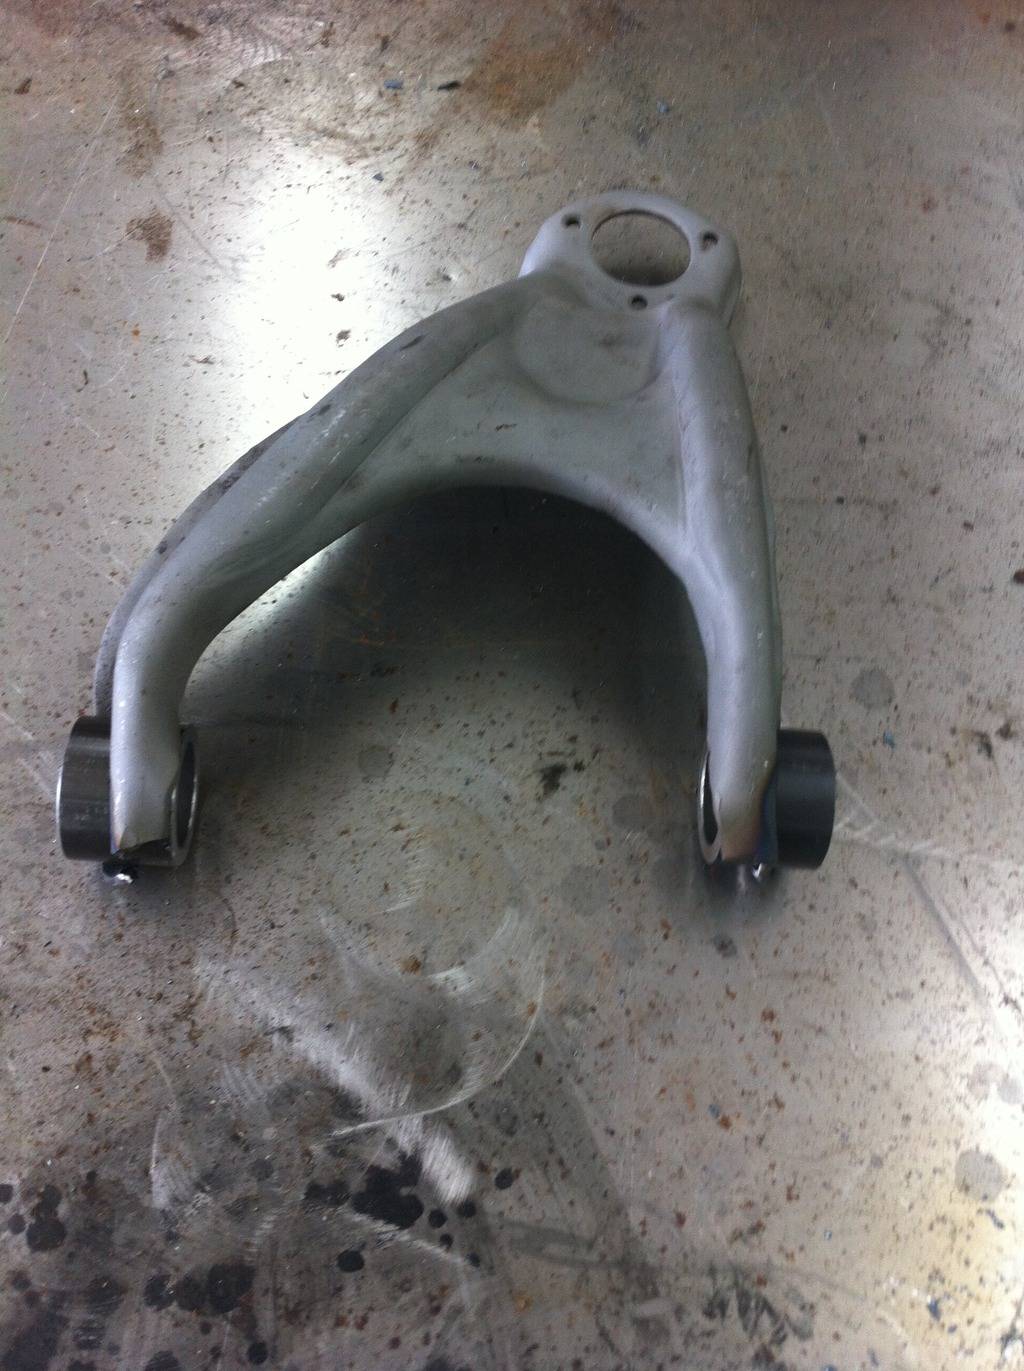
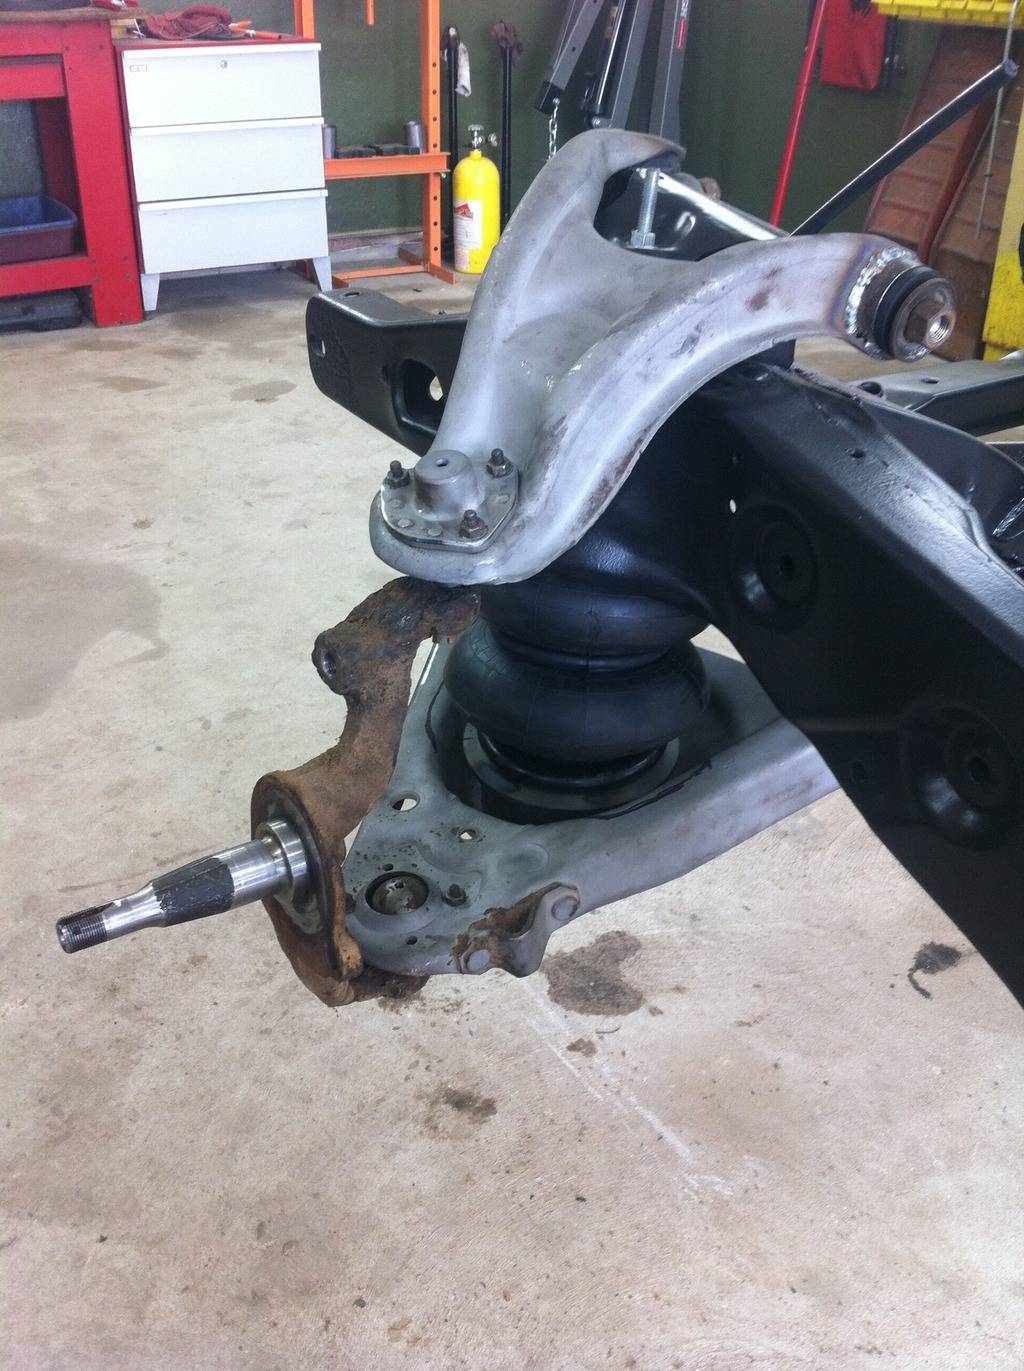
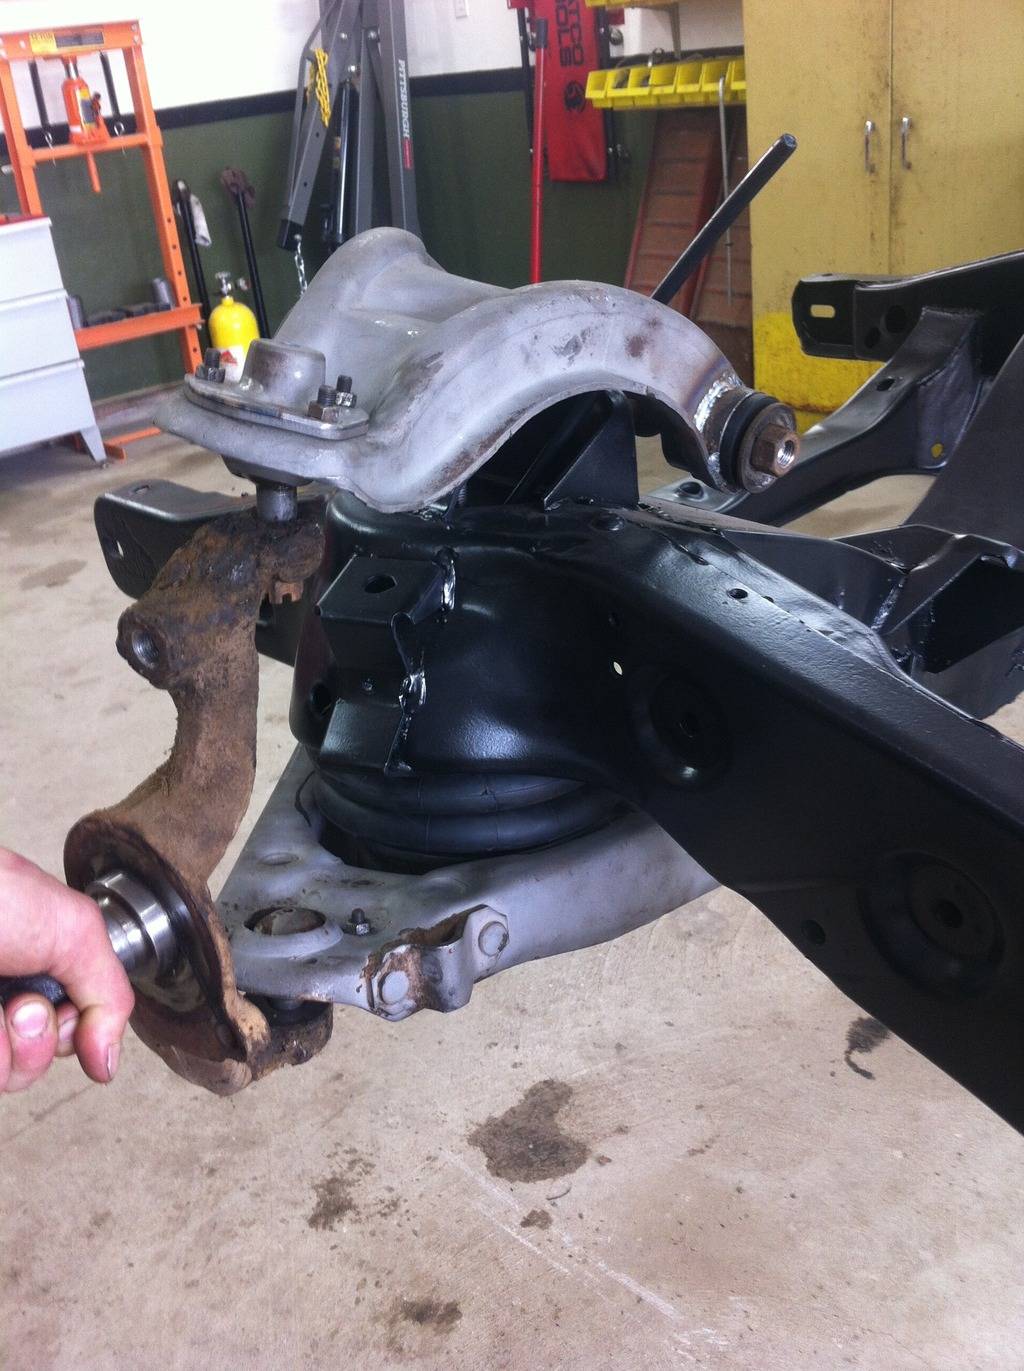
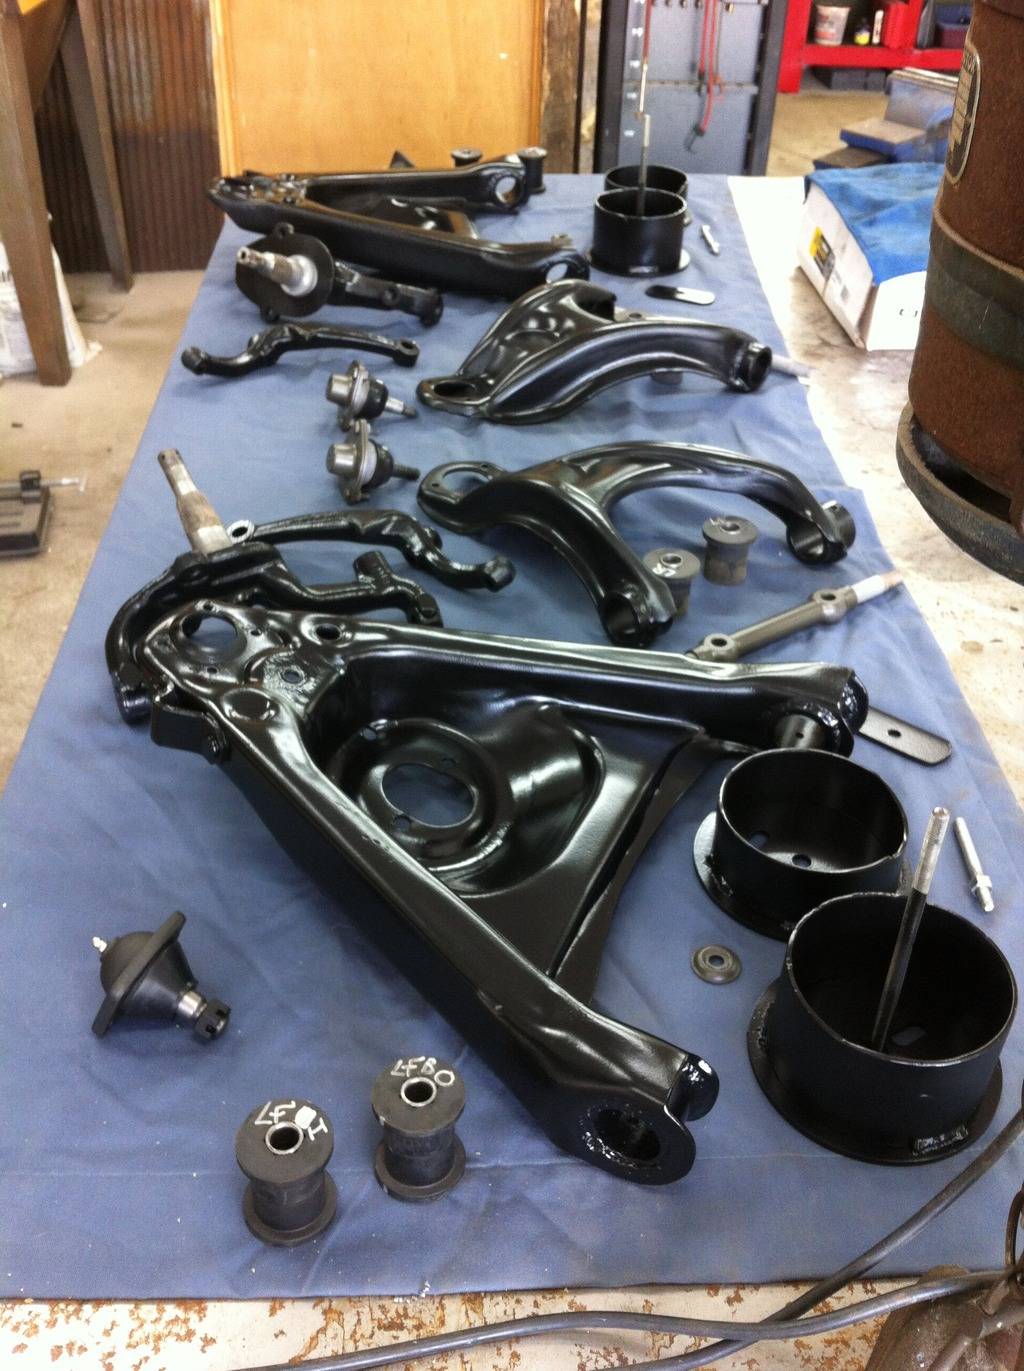
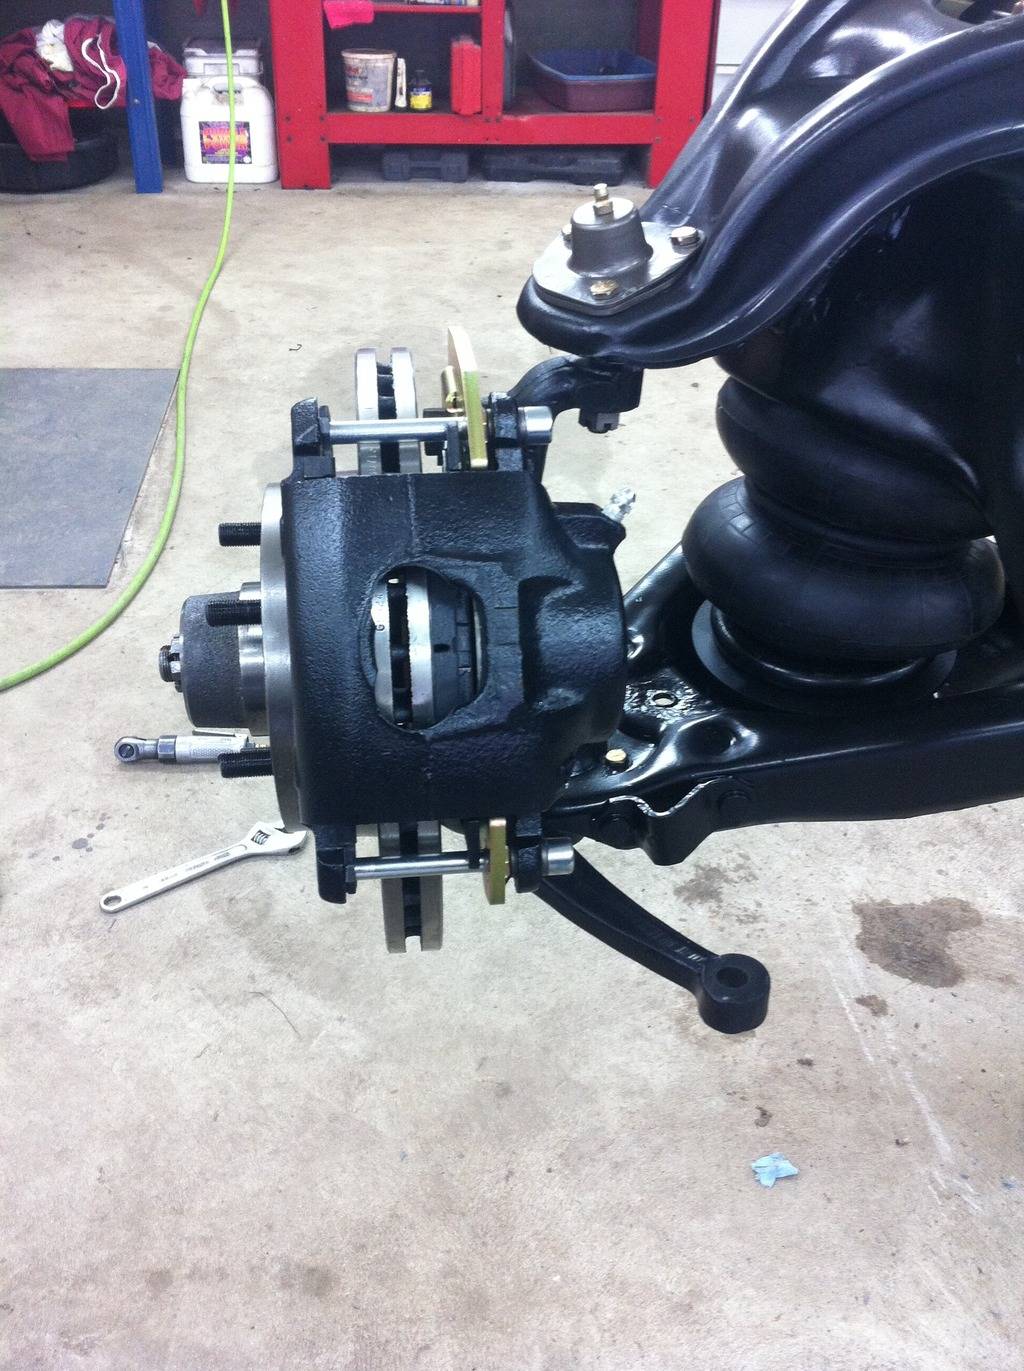
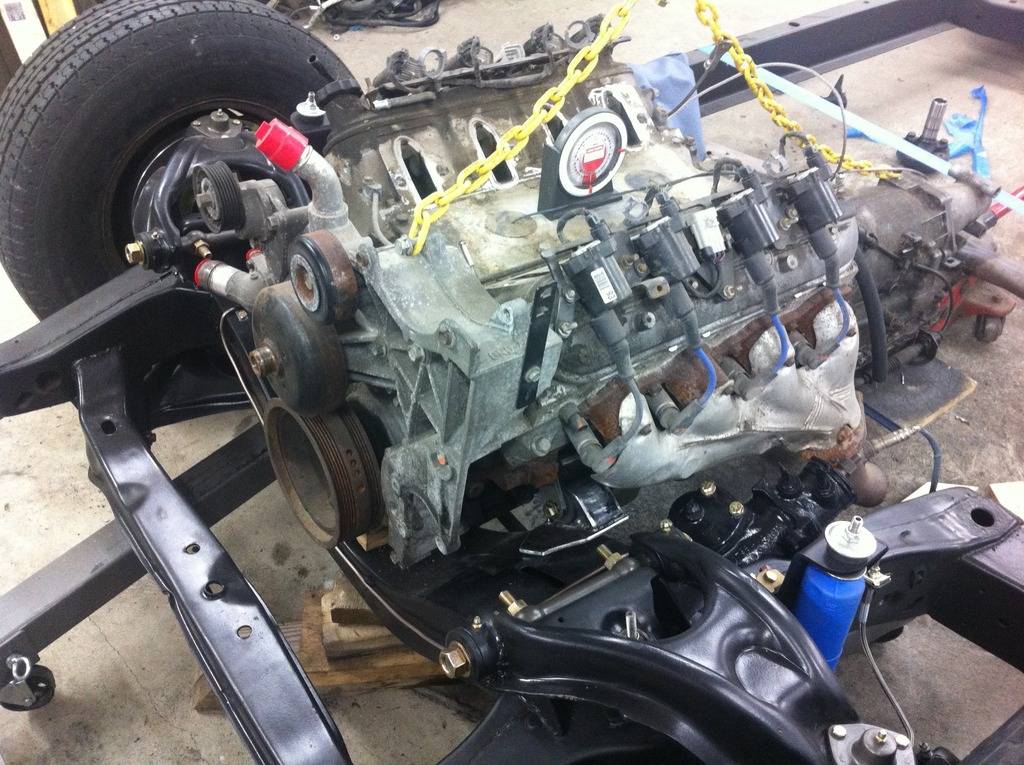
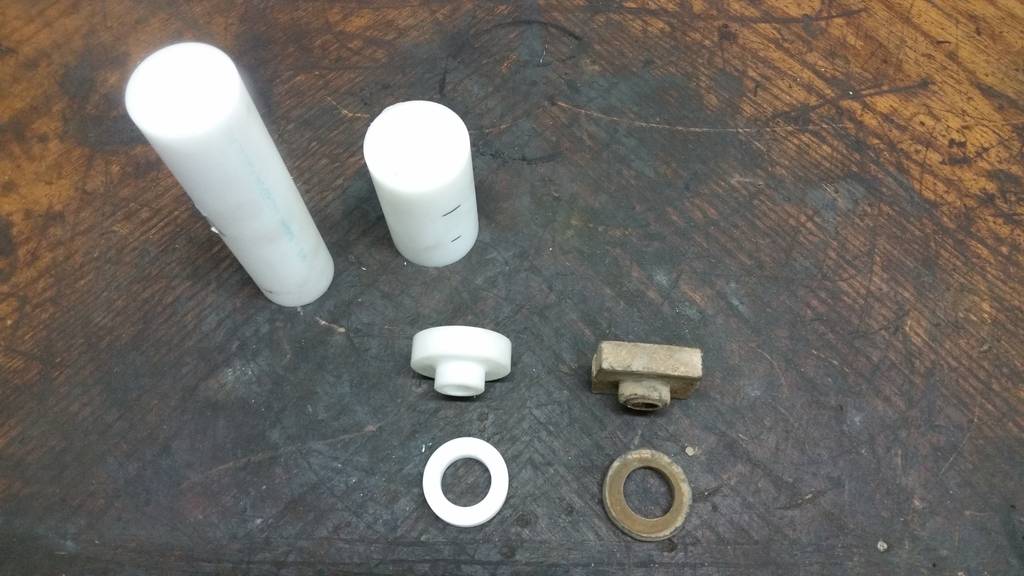
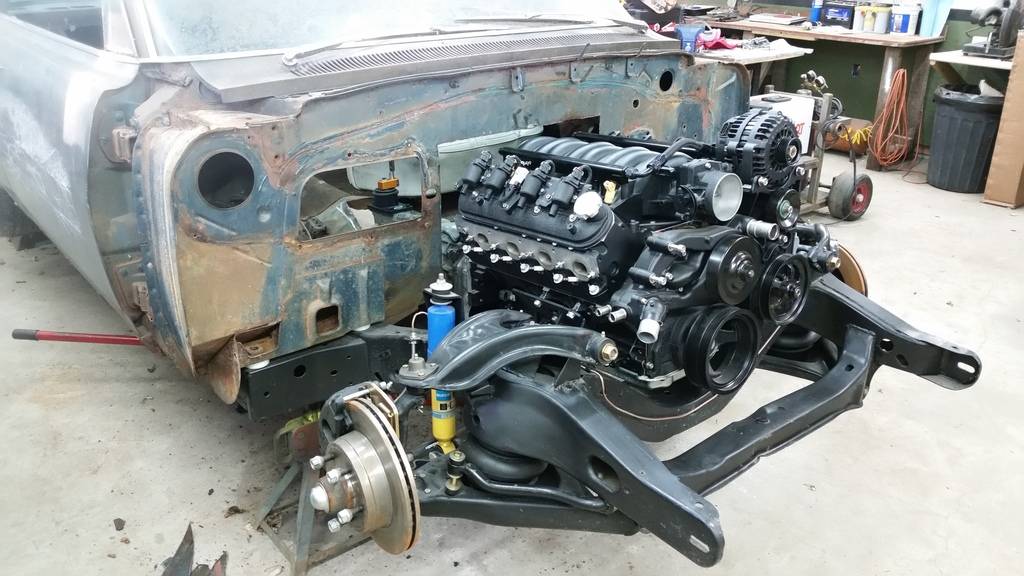
After the frame was repaired, it was time to start on the suspension. Since the car is not gonna be a track car I felt that the need for tubular front control arms was a bit much, also no companies advertise performance front ends parts for a 63 grand prix that I could find. Along with the control arms I couldn't even find any urethane bushings to replace the stock rubber ones. So I reverted back to my 4x4 days and modified both the front upper and lower control arms to accept a 2.375 wide sleeve and urethane bushing. I also added grease zirks in them to keep em quite.
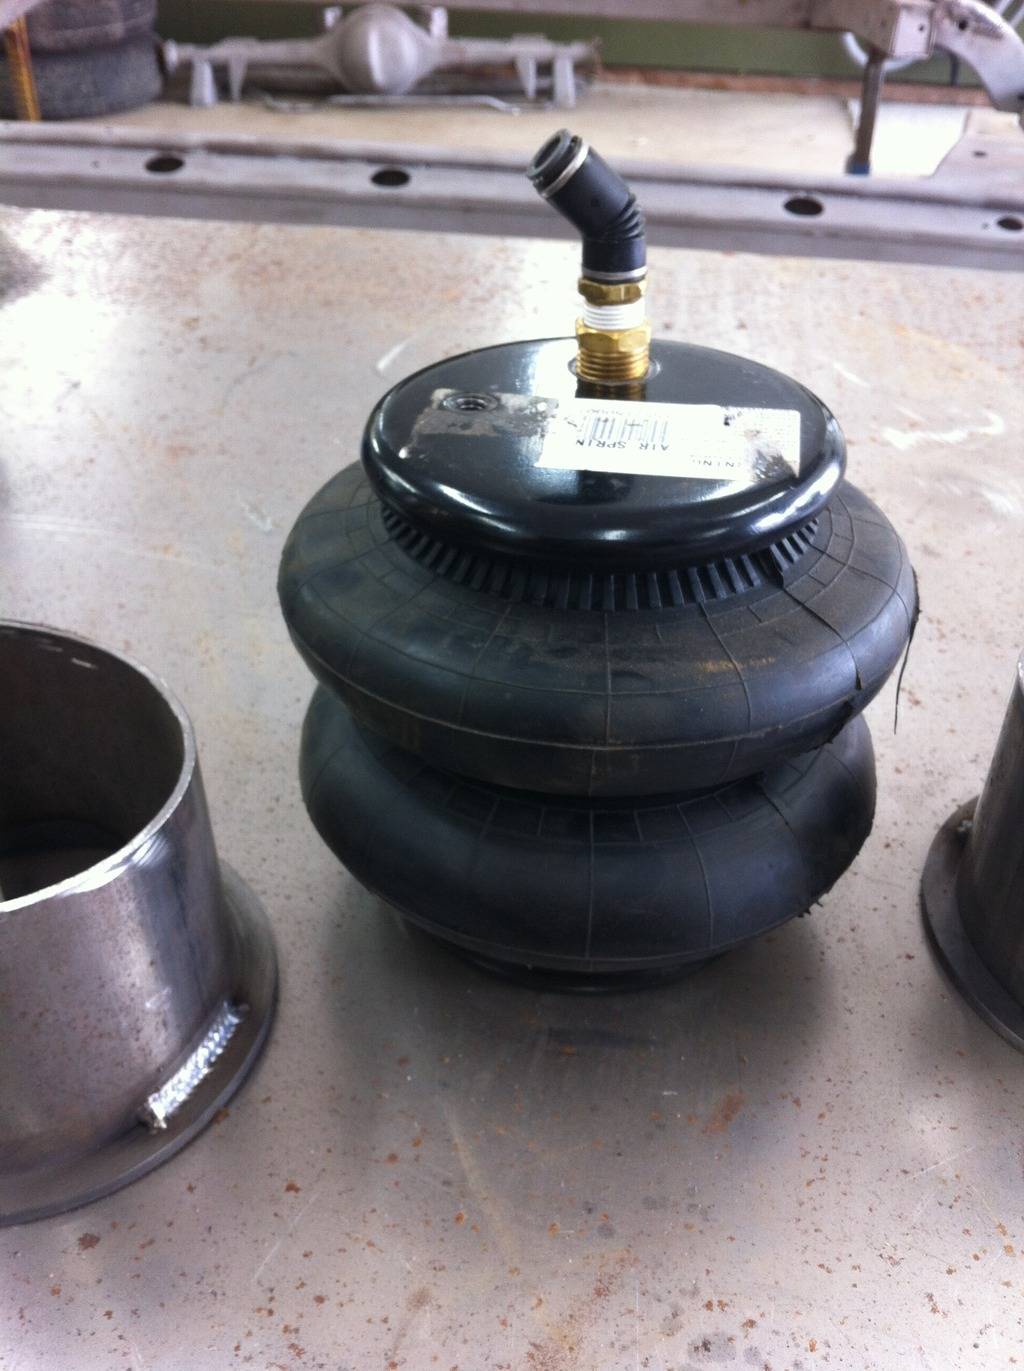
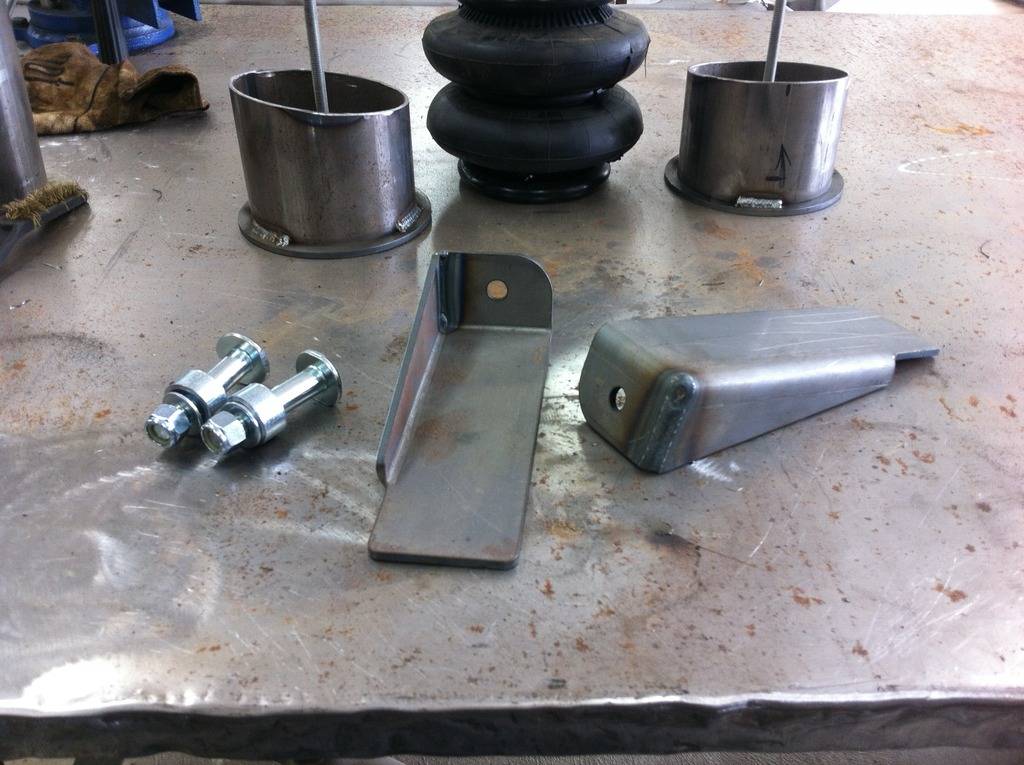
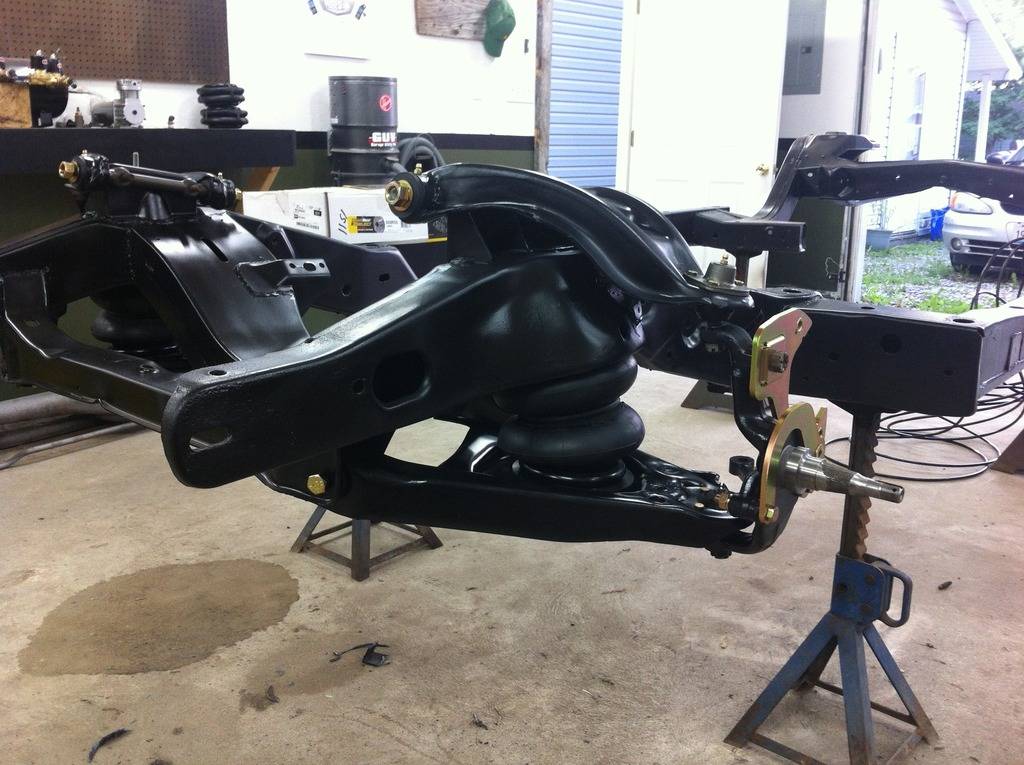
After I got the front Control arms lined out, I mad some mounts for the air bags to replace the coil springs.

Also picked up some shock relocation brackets.
Mocked up the front end to check clearance of the bag around the front spring pocket.
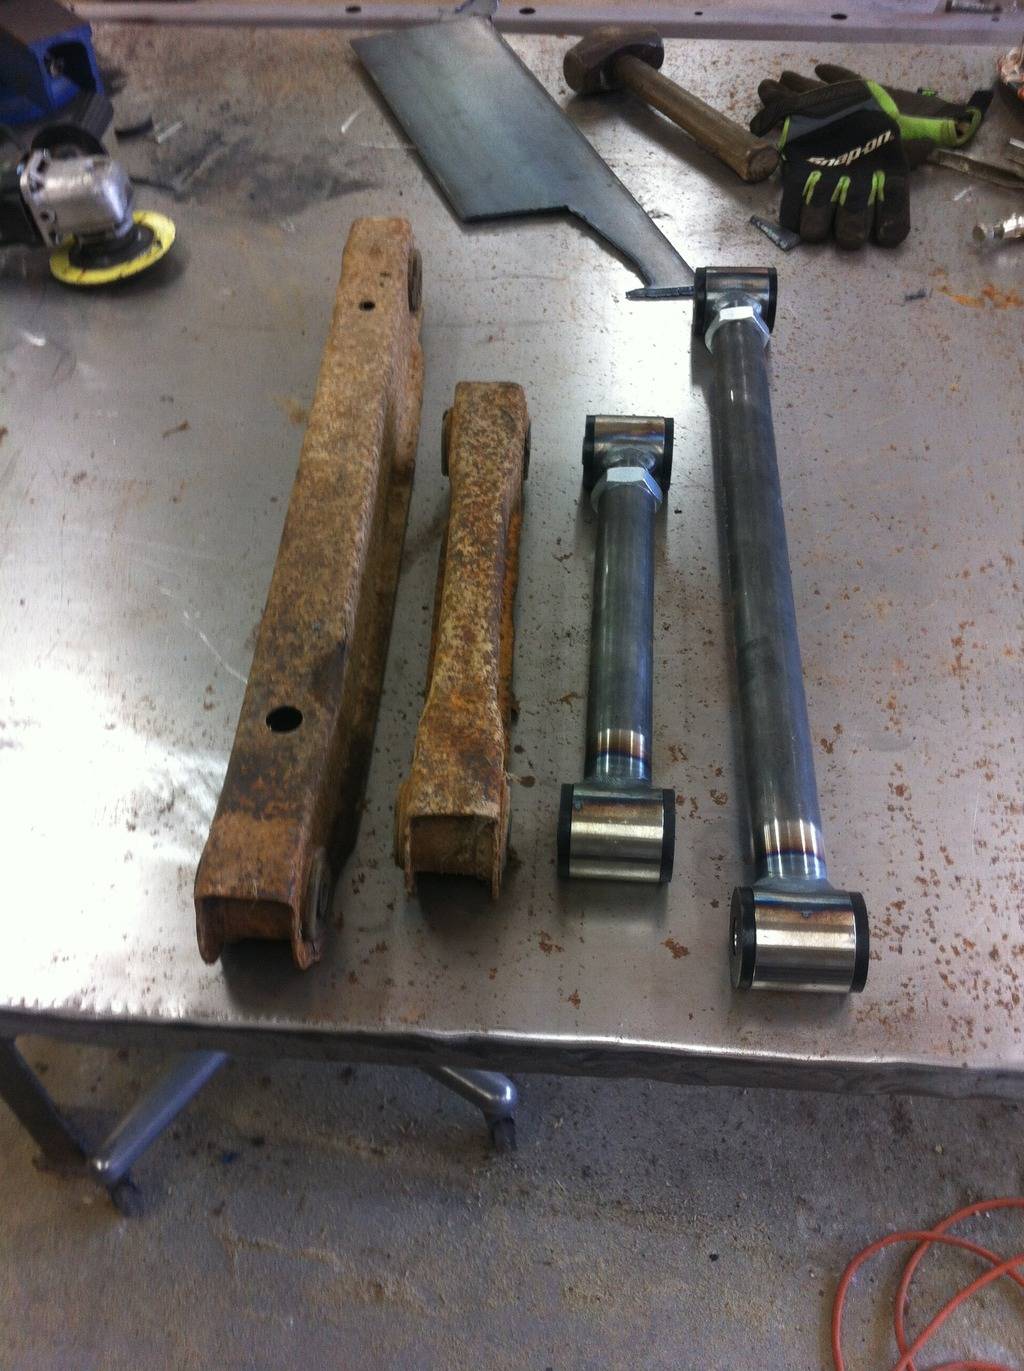
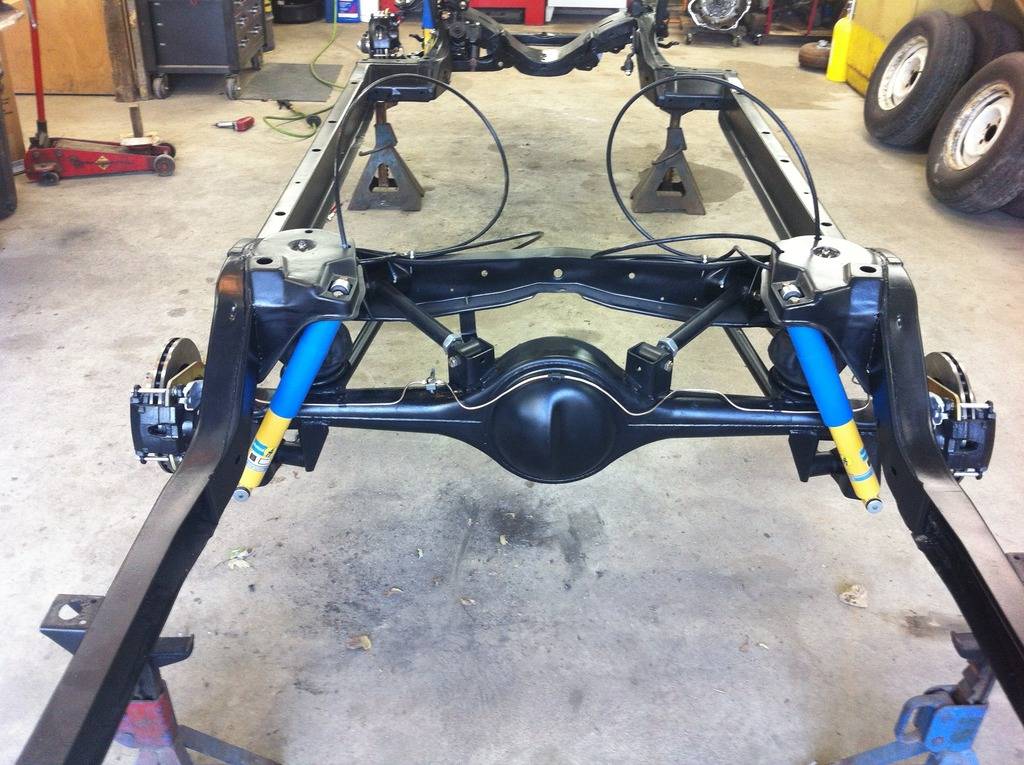
Since the front was pretty much figured out I needed to work on the rear. The original plan was to modify the rear trailing arms like the front control arms with the sleeve and bushings and just box them in, but I found an air ride company that could make custom adjustable link bars cheaper than I could buy the material to modify the stock trailing arms.
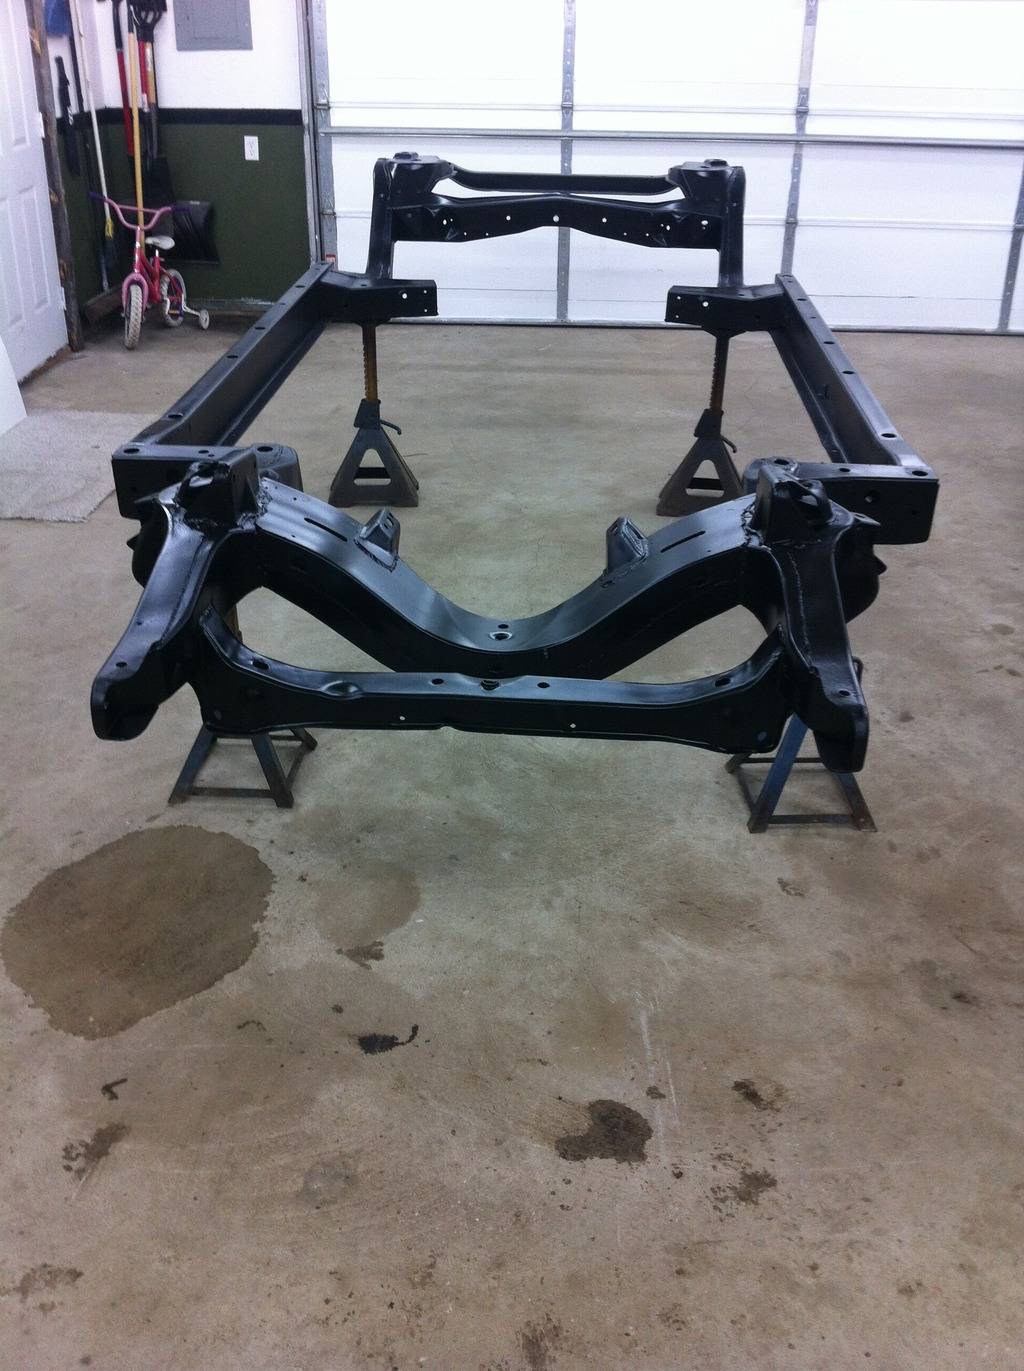
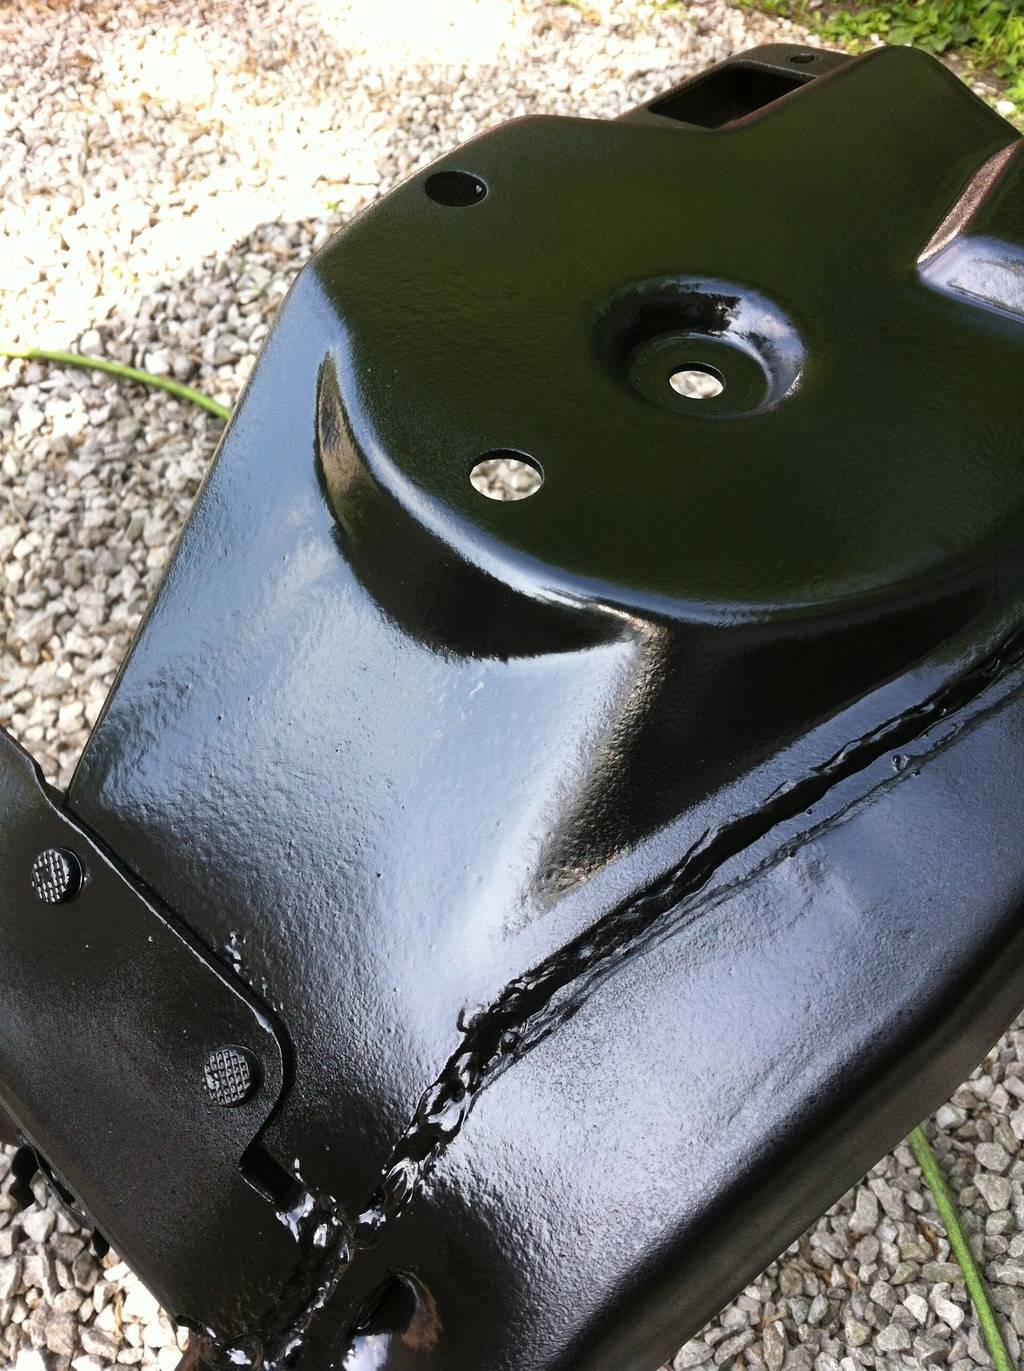
Once the suspension was all mocked up I went ahead and painted the frame and suspension parts.
-
11-28-2015 #5
Registered User
- Join Date
- Jan 2014
- Location
- Austin, TX
- Posts
- 664
very cool.....in for the build!
-
11-28-2015 #6
 -Moderator/Sponsor-
- Join Date
- Apr 2001
- Location
- The City of Fountains
- Posts
- 16,117
Awesome build. In for updates.
Andrew1970 GTO Version 3.0
1967 Cougar build
GM High-Tech Performance feature
My YouTube Channel Please Subscribe!
Instagram @dr__efi
I deliver what EFI promises.
Remote Holley EFI tuning.
Please get in touch if I can be of service.
"You were the gun, your voice was the trigger, your bravery was the barrel, your eyes were the bullets." ~ Her
-
11-28-2015 #7
Registered User
- Join Date
- Nov 2015
- Location
- Oregon
- Posts
- 36
Looking forward to updates.... Best friend from high school has a 63 GP also.... Cool cars...
Brian
-
11-28-2015 #8
Registered User
- Join Date
- Nov 2015
- Location
- Saint Louis MO
- Posts
- 36
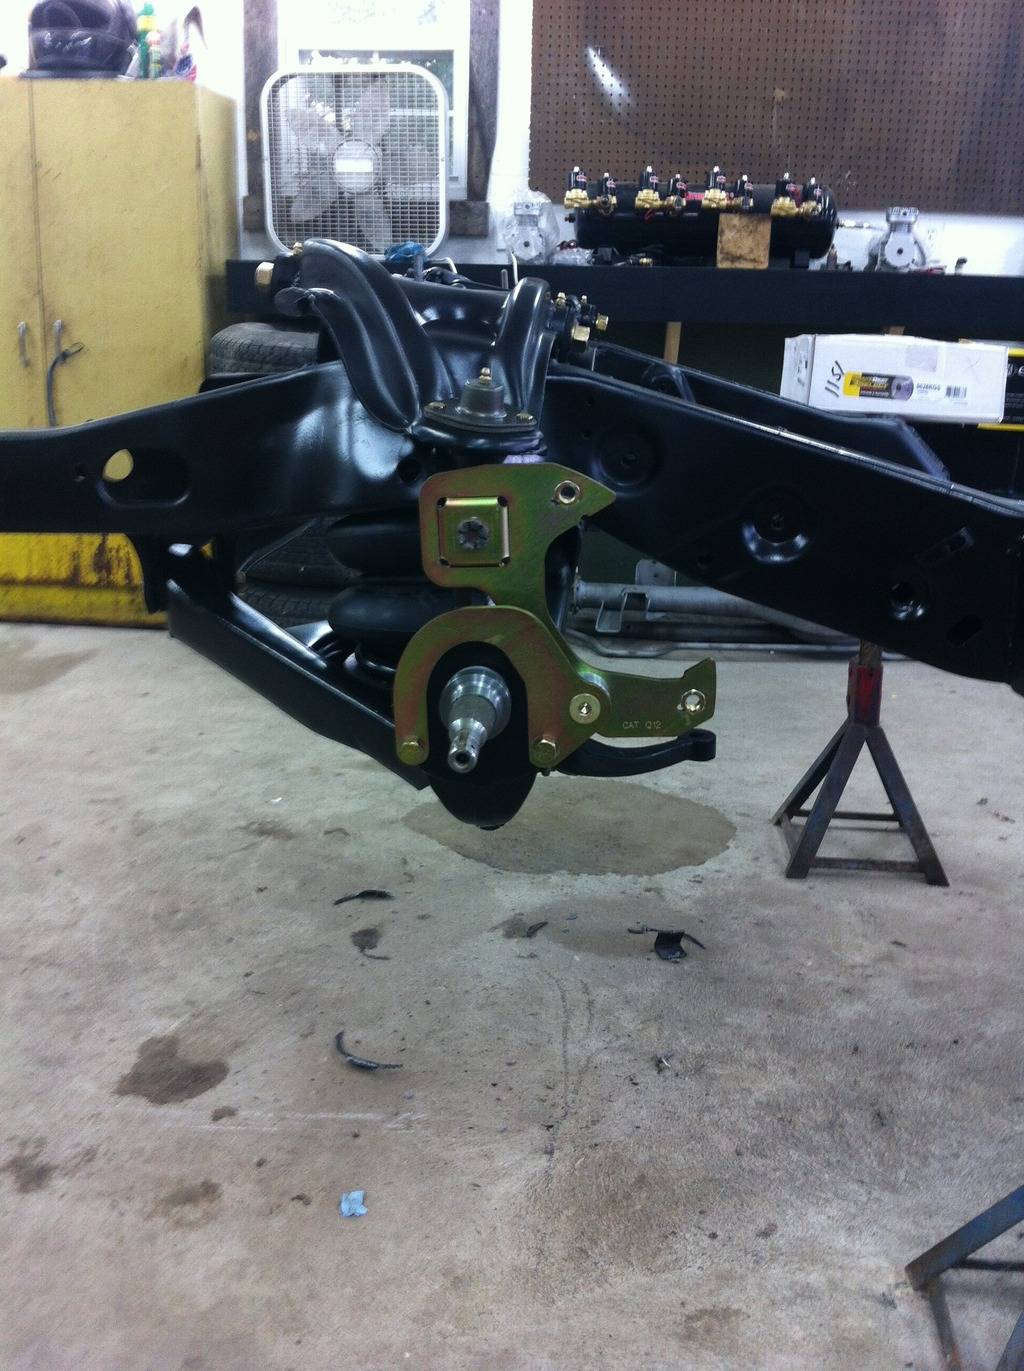
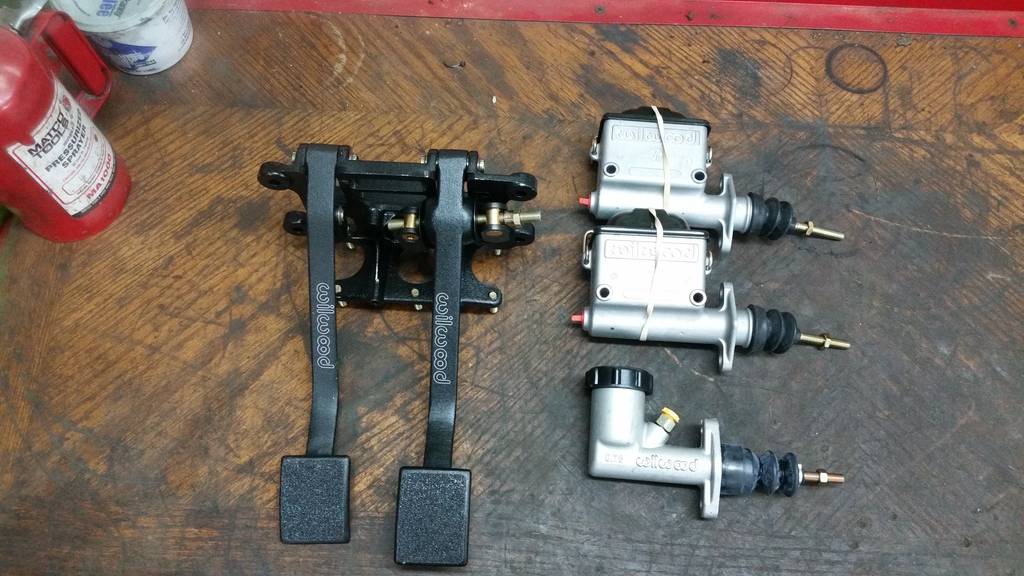
Brakes
Now time for Brakes. As you probably know, the car was originally a four wheel power drum brake car. That was not gonna satisfy my braking needs, so I decided to put together a budget four wheel brake setup. The front brakes consist of Scarebird disc brake brackets that utilizes the good ol D52 front calipers along with 11.875 rotors, stainless steel brake hoses, and some cheap ceramic pads for now, until the car is drive able to play with pad compounds.

The rear brakes also use Scarebird caliper brackets with the common Eldorado rear calipers with integrated parking brake, 11" rotors, stainless steel brake hoses and ceramic pads.


For the Hydraulics I decided to go with a manual dual master cylinder setup from wilwood, 7/8" master for the front and 1" master for the rears, along with their pedal setup.
-
11-28-2015 #9
 Registered User
- Join Date
- Dec 2006
- Location
- Out of the Burbs of Detroit to SoCal, then onto my ancestral homeland, the woods of Cascadia
- Posts
- 1,753
This is a cool build. I'm in for spectating until you're through
That said, please address the way the body is supported. The way you are using cinder blocks, they can collapse and the car can tumble off the stands. Please at least rotate them so the thru holes are vertical and drop a chunk of wood on them to support the jackstands.Greg Fast
(yes, the last name is spelled correctly)
1970 Camaro RS Clone
1984 el Camino
1973 MGB vintage E/Prod race car
(Soon to be an SCCA H/Prod limited prep)
-
11-28-2015 #10
Registered User
- Join Date
- Aug 2015
- Location
- Madrid Iowa
- Posts
- 116
Sweet, you're off to a damn good start man.
-
11-28-2015 #11
Registered User
- Join Date
- Nov 2015
- Location
- Saint Louis MO
- Posts
- 36
Engine
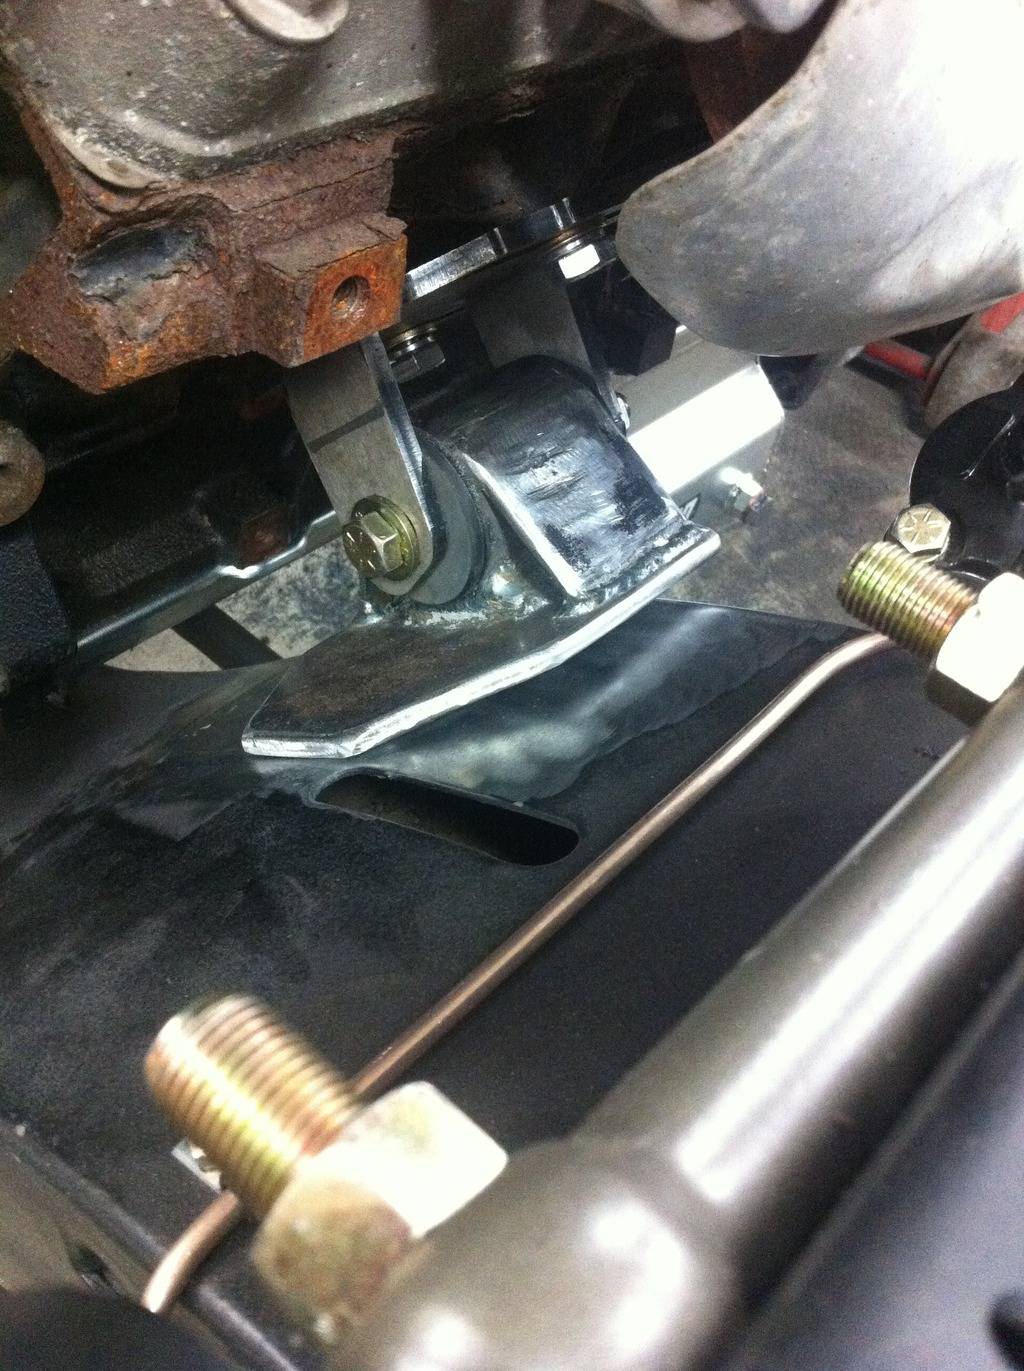
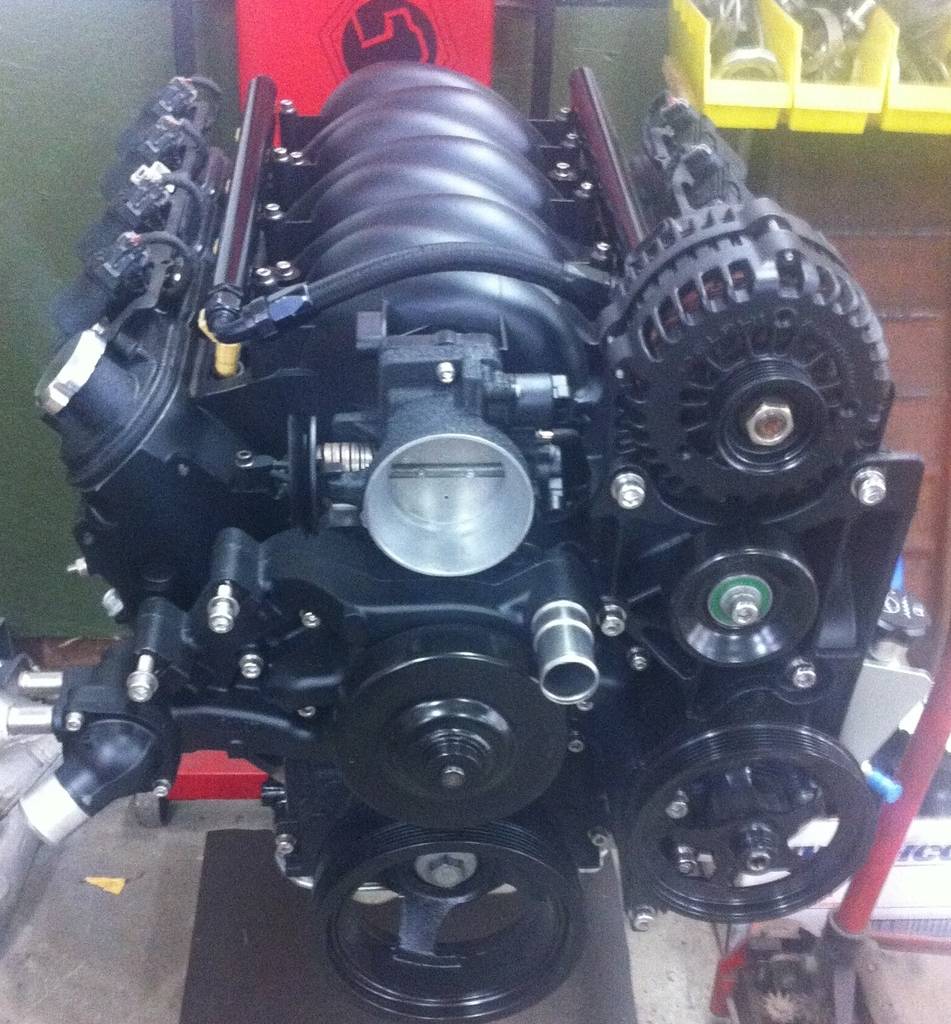
Since the Grand Prix didn't have an engine or trans in the car I was on the hunt for a power plant. The plan for the car was always LS powered, So I picked up a complete take out LQ4 from a 2500 Express van from a friend, he also had an F-body 4L60e he threw in. I used the 4l60e for mock up, but sold it and purchased a T56 out of a 05 GTO. Upon my search for LS swap mounts, I yet again did not find any one that made specific mounts for a 63 grand prix. I ended up just buying some muscle car engine brackets from Dirty Dingo and made my own frame mounts with sleeves and urethane bushings that I welded to the cross member.
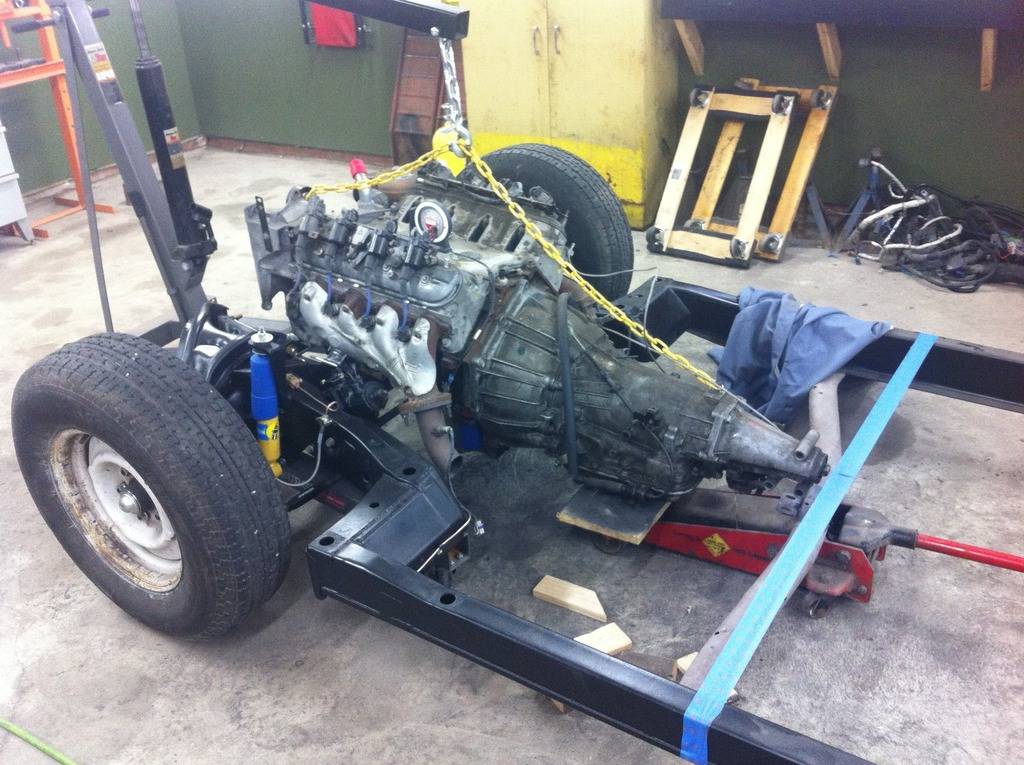
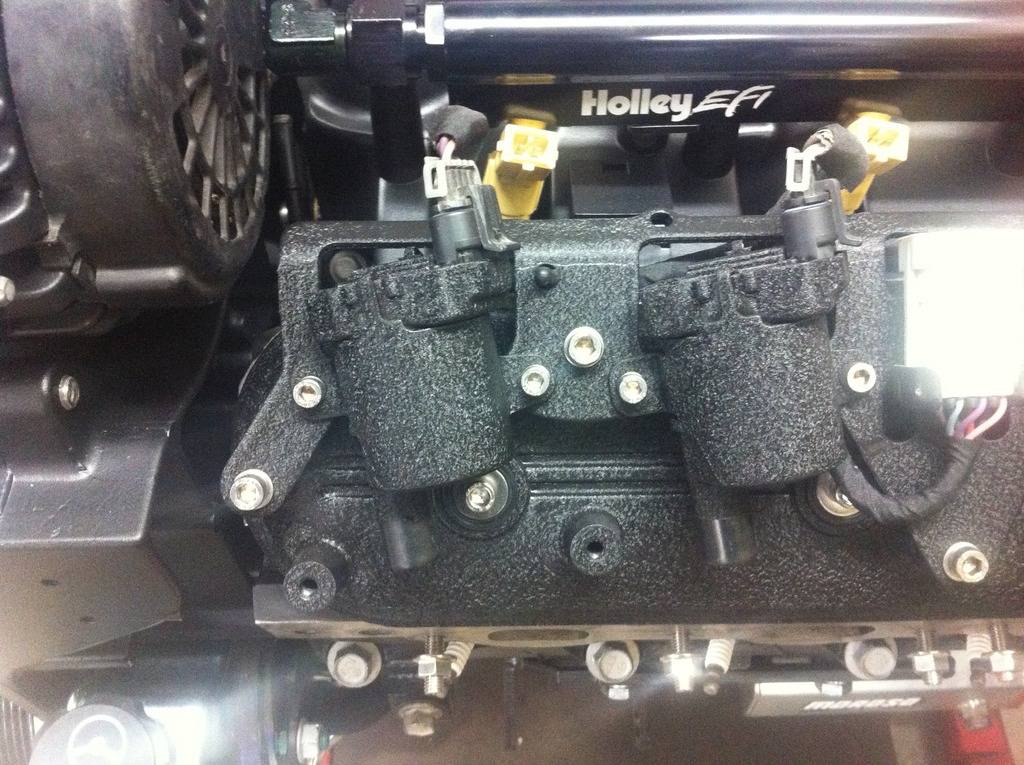
Once the engine was mocked up it was time to put a little more pep in her step. I sold off the high combustion chamber 317 heads, and got a set of lower cc 243 heads to bump the compression up a little. While the heads were getting freshened up at the machine shop I had him take .020" off the deck surface and install some ls6 valve springs along with new guide seals. Other upgrades to the engine include a ported oil pump, LS2 timing chain, GM performance ASA cam, and some chromoly push rods. Finished it off with an LS1 intake and the Holley EFi fuel rails with 33lb injectors and a little paint.

-
11-28-2015 #12
Registered User
- Join Date
- Nov 2015
- Location
- Saint Louis MO
- Posts
- 36
Thanks for the encouragement guys!
Greg, Thanks for the advise about the blocks, The car is no longer on the jackstands. I'm just getting everyone caught up to current with the car. Luckily the car sit on the blocks like that for 11 1/2 months without issue. Originally Posted by Twentyover

-
11-28-2015 #13
 Registered User
- Join Date
- Nov 2010
- Location
- Ma.
- Posts
- 583
Love how you cleaned up the engine, looks great...
-
11-28-2015 #14
Registered User
- Join Date
- Nov 2015
- Location
- Saint Louis MO
- Posts
- 36
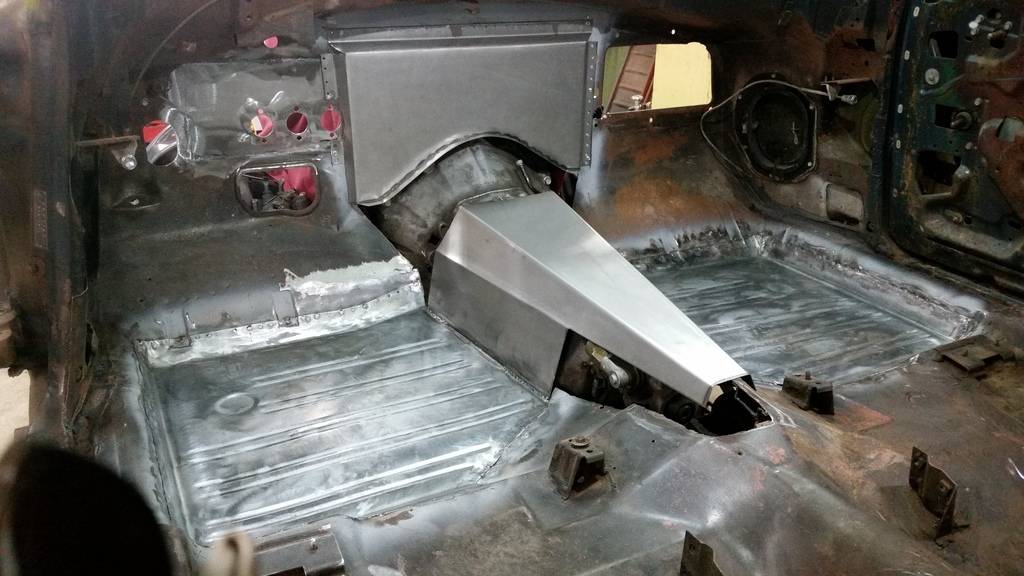
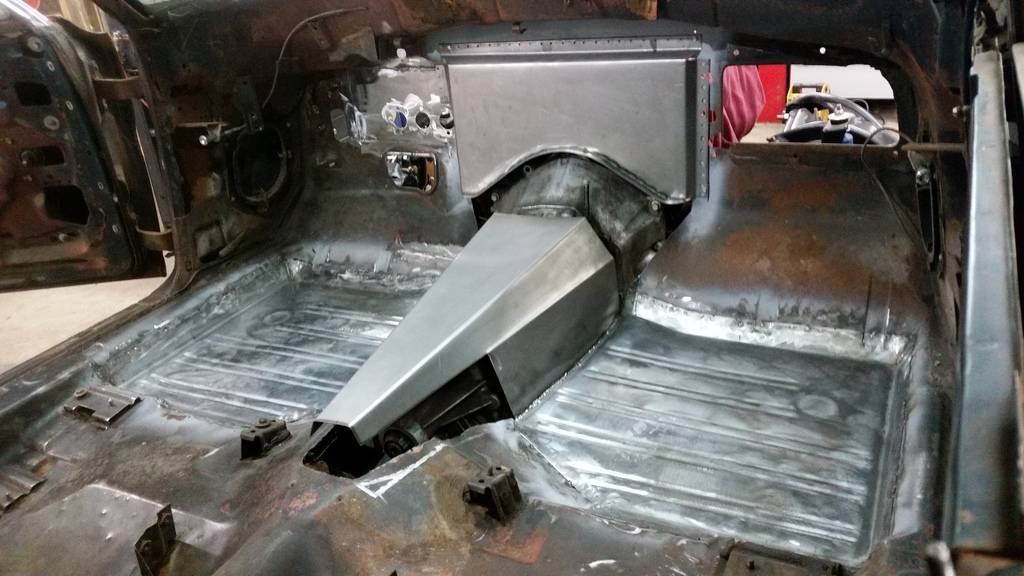
Body
This should be the last update to the current status of the car.
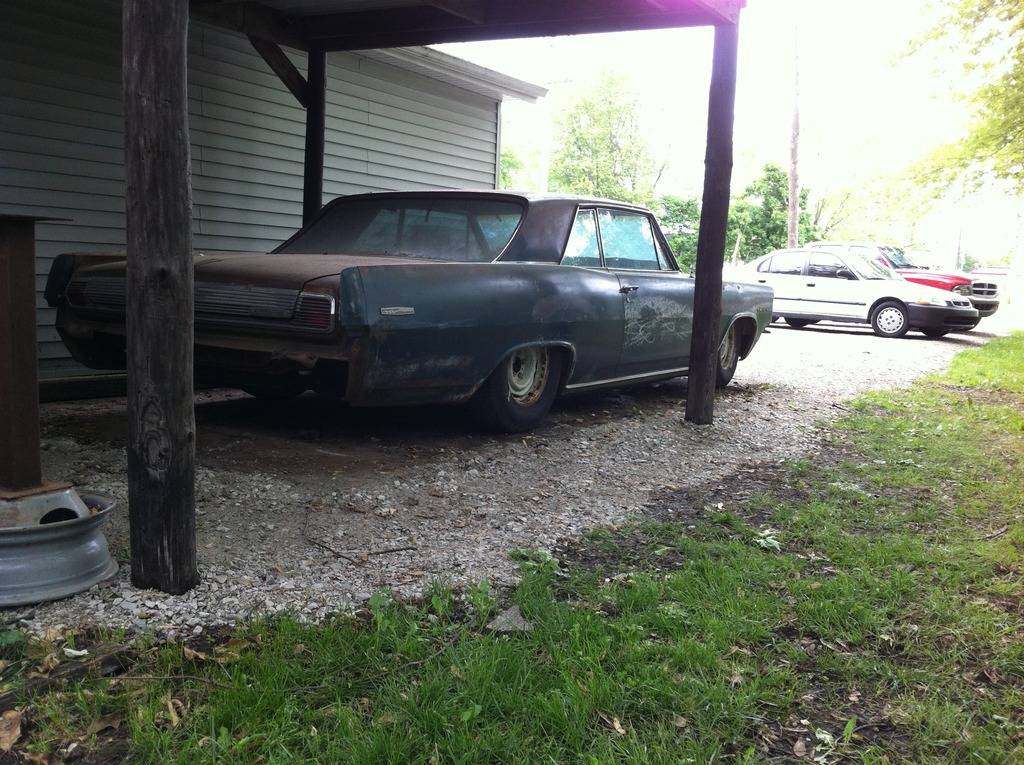
I will start with the body mounts. The stock body mounts are made of rubber and are 52 years old, they have seen better days. Instead of just replacing them with new rubber I felt that I should use something a little more rigid. After searching, I could not find anything of course. Then I remembered that I had bought a body lift for a Toyota truck years ago and the mounts I got were made of a hard plastic type material called Delrin. Come to find out it is kinda popular in the machinist world. So I took some measurements of the original body mounts and drew up some plans to have my machinist buddy make. Ordered the solid Delrin stock in the size I needed, and let him go to town.
Now that I had body mounts I could lower the body back down on the frame to get the car in the garage.
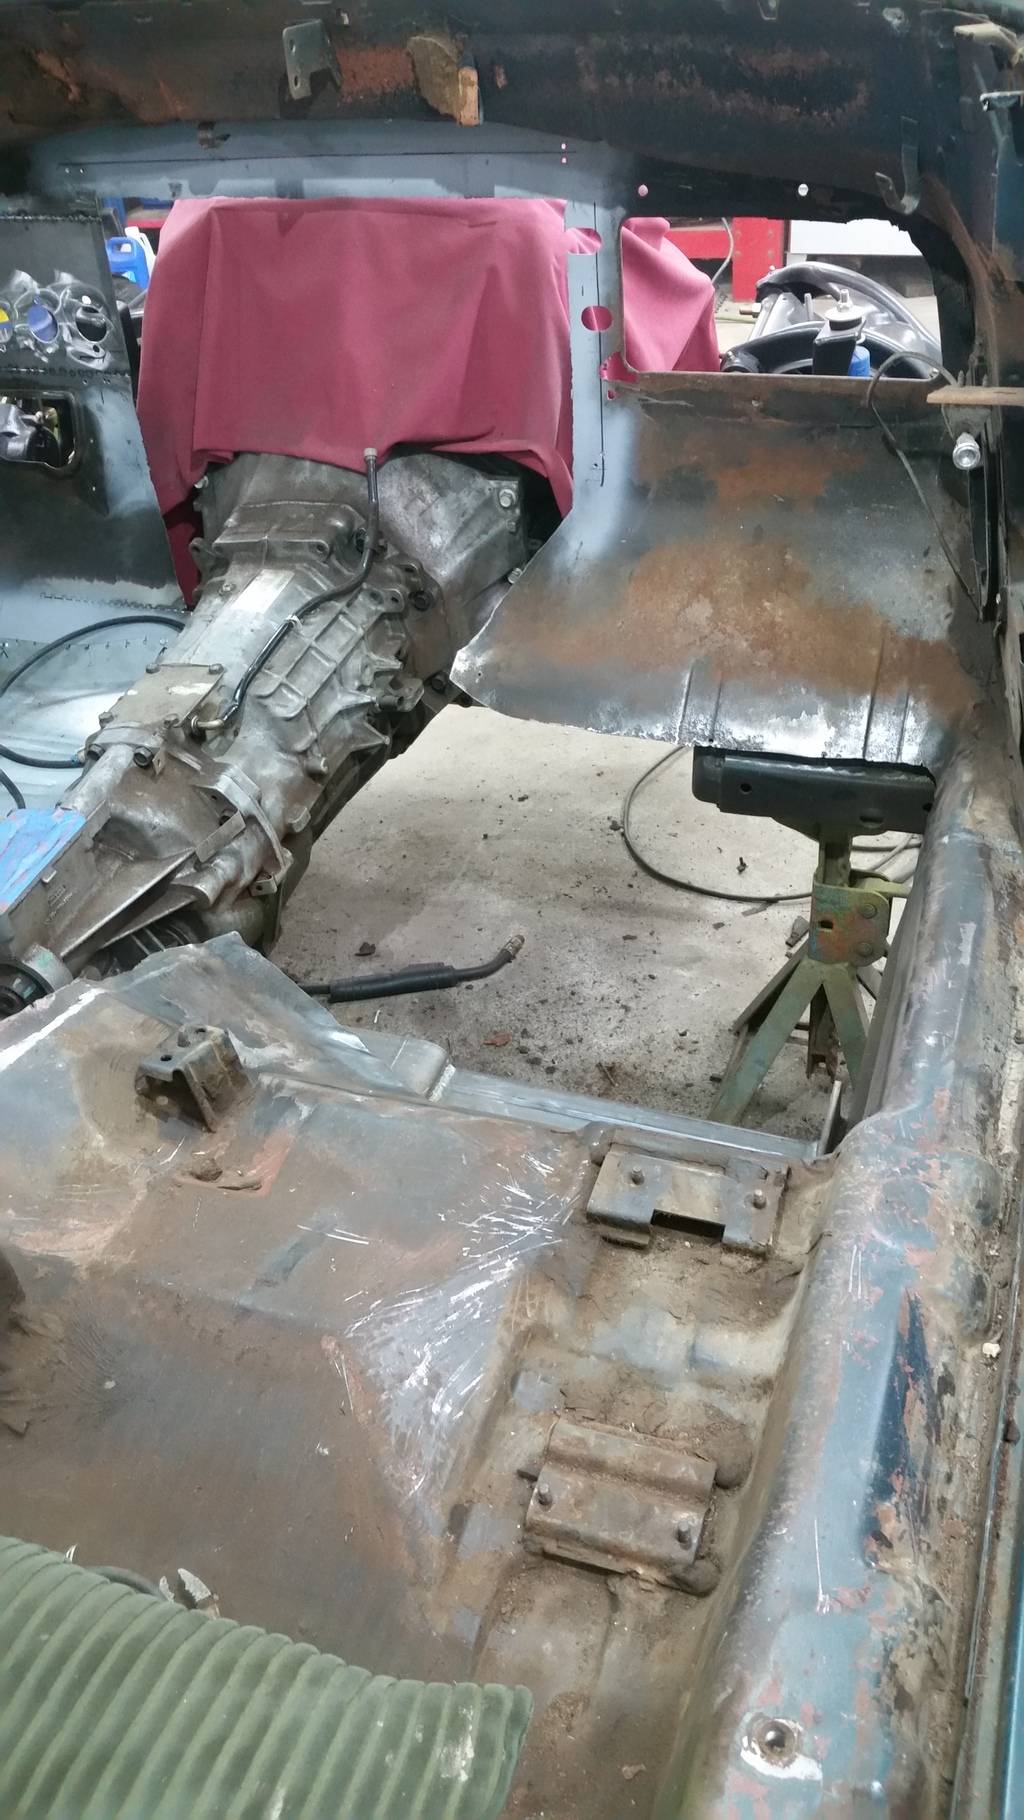
After the car was in the garage I removed the front clip in order to install the engine and transmission to see what kind of firewall/trans tunnel clearance was needed. I ended up cutting out the entire trans tunnel and a big section of the fire wall.
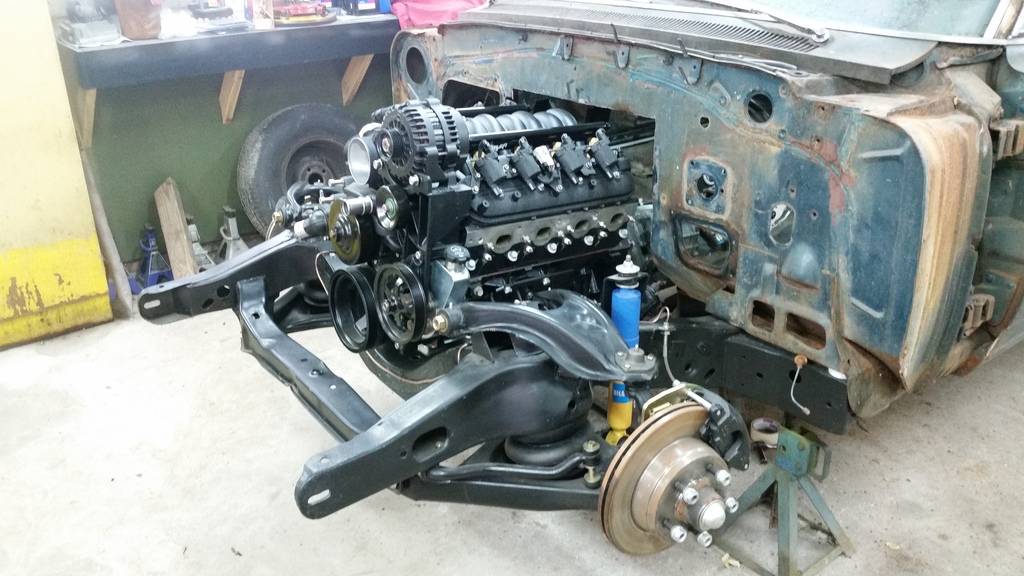
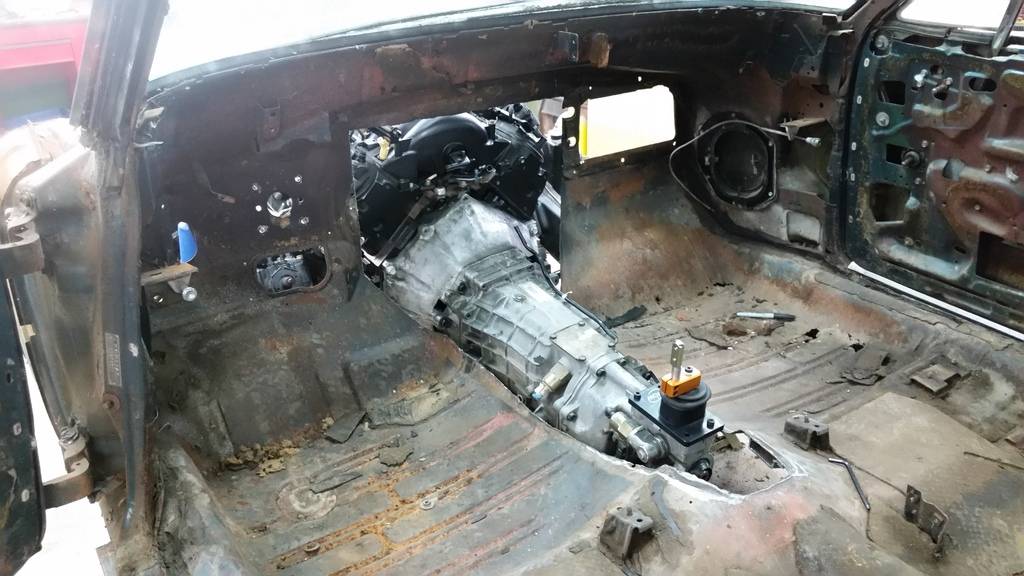
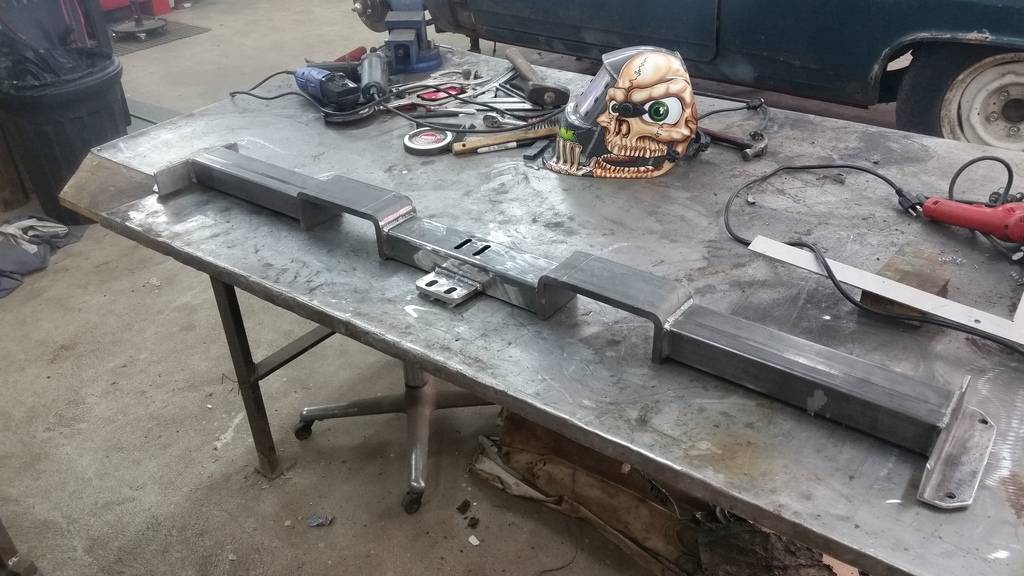
Now that there was plenty of room for the engine/trans, It was time to build a transmission cross-member to get the drive line angel nailed down before the sheet metal.

Once the transmission was in place I went ahead with cutting out both front floor pans.

Got both floor pans fitted, also made a panel for the wilwood pedals and made a recess panel for the fire wall.

Welded in the floor pans, made lip on the fire wall panel, and started making the trans tunnel.
-
11-28-2015 #15
Registered User
- Join Date
- Jun 2010
- Posts
- 17
This is going to be a nice looking car when it's done, it's looking good already…
-
11-29-2015 #16
Registered User
- Join Date
- May 2011
- Location
- Brisbane, Australia
- Posts
- 453
Will be a great ride. Not familiar with this model but as well as the front end with stacked lights the rear is really cool too. Great rear section of the roof and rear window and also really like the tail panel and small fins. Also love the original rear view mirror! I'd be keeping that if I were you.
Excellent job so far. The trans cross member looks awesome.1967 Mustang Fastback - widebody https://www.pro-touring.com/threads/...stang-Fastback
1966 Plymouth Fury III
1961 Oldsmobile 88 "bubbletop" = next project
-
11-29-2015 #17
 Registered User
- Join Date
- Jul 2006
- Location
- Pensacola, FL
- Posts
- 1,264
Very impressed with your work. I wish my skills on welding & fab were up to that level. I have always liked pontiacs, very nice build.
Scott
-
11-29-2015 #18 Registered User
- Join Date
- Feb 2005
- Location
- Waterloo, Ia
- Posts
- 1,408
Love the old Pontiacs. Cool build. Looking forward to updates
-Nick
-1967 GTO I drive and race
-Build threads:
-http://forums.maxperformanceinc.com/forums/showthread.php?t=615847&page=23
-https://www.pro-touring.com/showthre...project-thread
11-29-2015 #19
Registered User
- Join Date
- Nov 2015
- Location
- Saint Louis MO
- Posts
- 36
Godbolt, yes the Grand Prix has some nice classic lines, the concave rear glass was new for the 63 models as well, the fender mounted mirror is definitely staying. Not sure if you noticed but the two headlights on the drivers side both have covers over the top of them. I'm guessing they were there to keep the lights out of the eyes of on coming traffic, little piece of 1963 courtesy. The cross-member is just a weld up universal one from summit, thanks. Originally Posted by Godbolt
I really love your mustang. The widebody is pretty sweet, couldn't imagine taking on a task of that magnitude, little alone make it look factory. I've always loved the lines of a mustang. My wife's family own a Mustang restoration business called Mustang Corral. So I'm sure I will own one eventually.
Thanks Z06, Your skills will improve with practice, the whole point of this build for me is practice. I've never done sheet metal work before. Originally Posted by Z06vet
11-29-2015 #20 Registered User
- Join Date
- Oct 2009
- Location
- Palm Beach County
- Posts
- 195
Corlas
68 Firebird https://www.pro-touring.com/threads/...chine-GO-GO-GO


 Reply With Quote


