

Results 21 to 38 of 38
Thread: '63 Grand Prix Project
-
11-29-2015 #21
 Registered User
- Join Date
- Nov 2015
- Location
- Oregon
- Posts
- 36

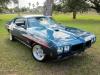
Found a picture of my friends 63...
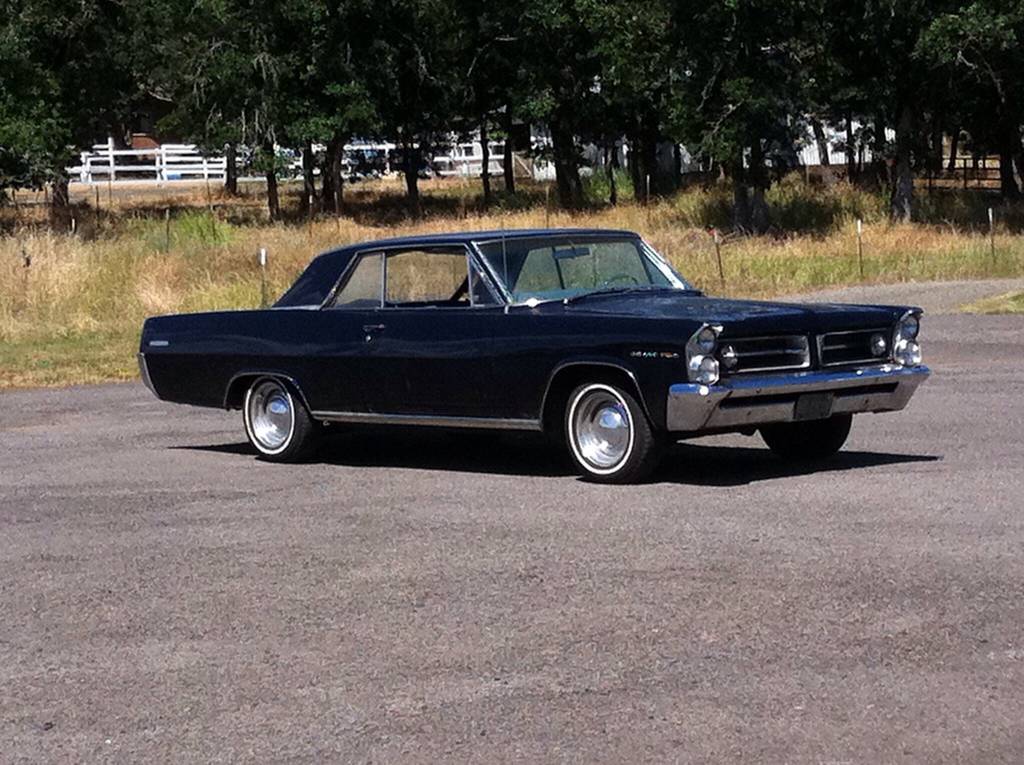
This was a couple years back when he stopped by my shop with his now ex-wife for a quick visit... Interior still needed to be done at this point.... Rest of the car is stock..
Interesting that your car has the headlight half covers on one side... Of all the half covers I have seen they have always been on both sides of the car... My buddies car does not have any on it..
Brian
-
11-29-2015 #22
Registered User
- Join Date
- Nov 2015
- Location
- Saint Louis MO
- Posts
- 36
That's a good looking car! I'm guessing it's an Auto 389 car? Since they only made 5000 or so 4 speed manual cars. Does it have the fuel economy vacuum gauge on the center console? I noticed it doesn't have the fender mount rear view mirror.
Maybe someone switched the head light half covers around at some point. I will more than likely put one on the other side, not sure which light yet though.
12-06-2015 #23
Registered User
- Join Date
- Nov 2015
- Location
- Saint Louis MO
- Posts
- 36
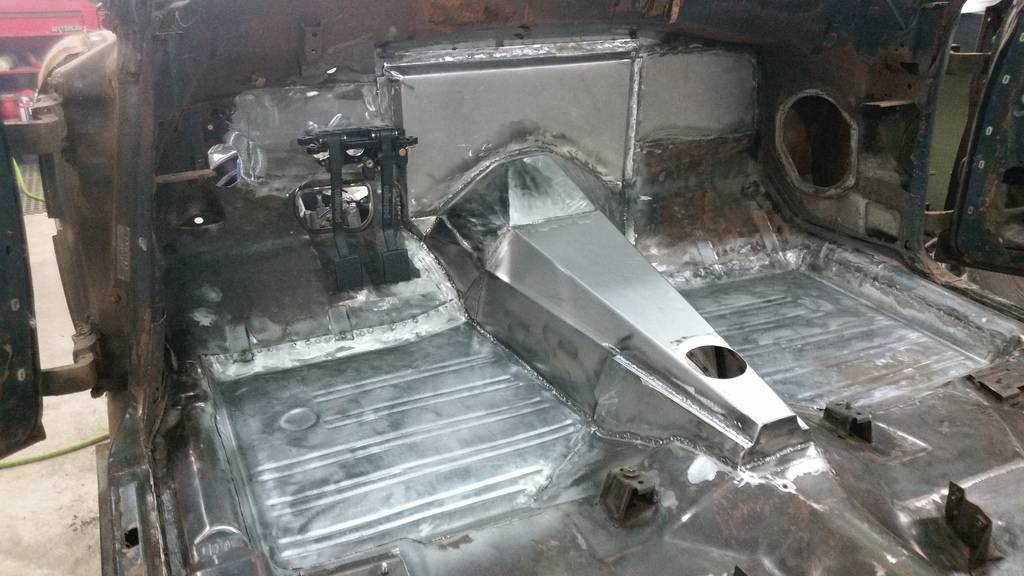
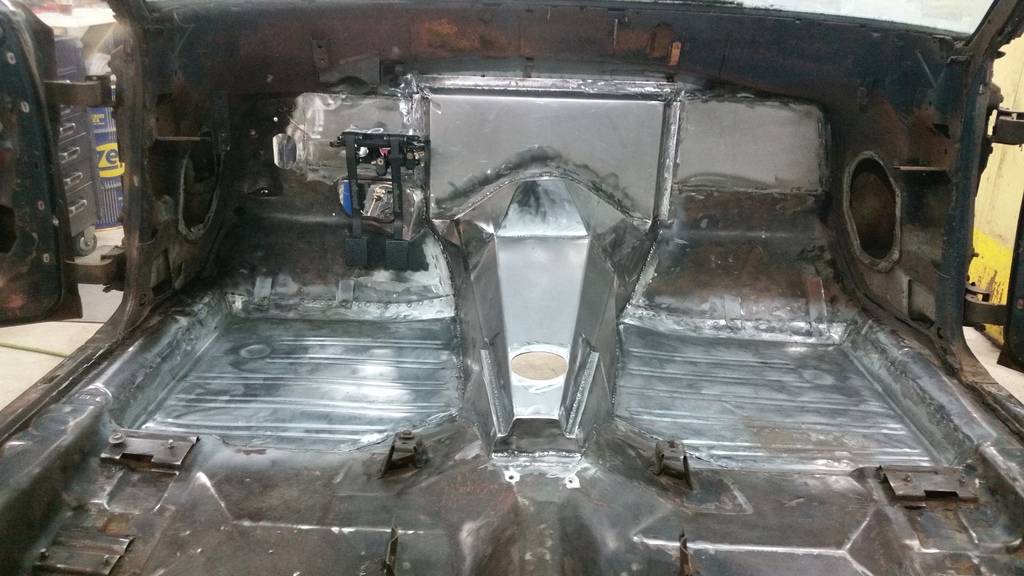
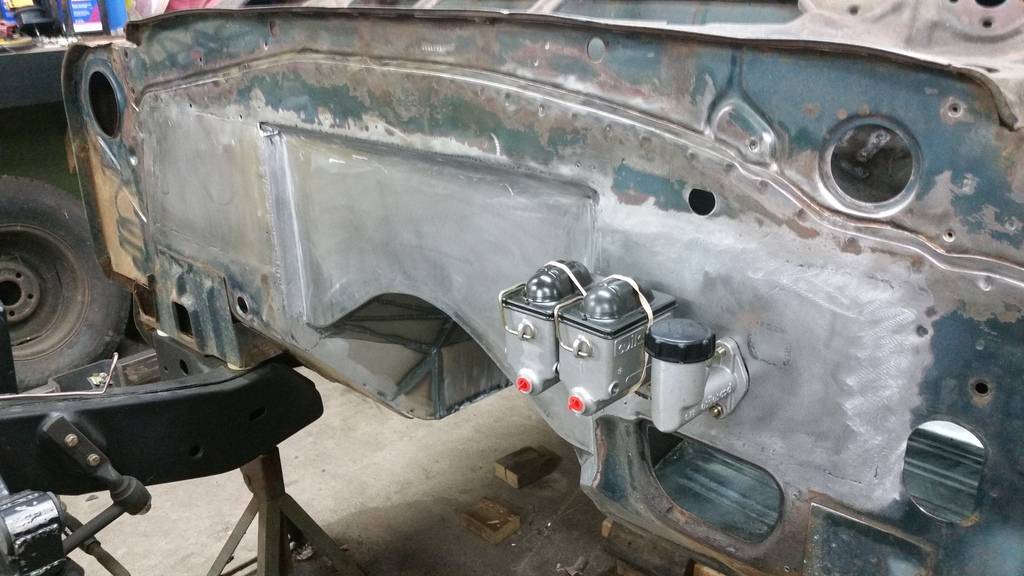
Made a HVAC delete plate, welded the recess panel on the firewall, and connected the transmission tunnel gaps. Also cut a hole out for the shifter, and bolted up the Wilwood pedals so I can build a frame support off the original pedal mount.

 '63 Pontiac Grand Prix
https://www.pro-touring.com/threads/...d-Prix-Project
12-06-2015 #24 Registered User
- Join Date
- Oct 2015
- Posts
- 122

Looking real good Mr. White. Quality fabrication.
12-06-2015 #25
Registered User
- Join Date
- Nov 2015
- Location
- Oregon
- Posts
- 36
Gig
As far as I know it has the 389 with auto... Originally Posted by Mr. White

The car has been in storage for a few years now... My buddy got into a nasty divorce and wound up moving to Alaska... He is just about recovered financially and can start getting his cars back going again... He also has a 1964 LeMans convertible that he wants to do a GTO clone with..
Brian
12-08-2015 #26 Registered User
- Join Date
- Mar 2005
- Location
- Portland, OR
- Posts
- 90
Such a cool build! Looks so good at full drop, ought to be an all day cruiser.
Ben C. - Sometimes Complete > Perfection - I just want to drive my car...
1969 Nova 408/T56 | 2003 XJ8 Sport LS2/T56
12-08-2015 #27
Registered User
- Join Date
- Mar 2015
- Posts
- 30
I love this build. Keep after it
12-09-2015 #28
Registered User
- Join Date
- Sep 2015
- Location
- SW KS
- Posts
- 162
Great looking ride and nice fabrication work. I look forward to seeing more!
Chris
12-09-2015 #29
Registered User
- Join Date
- Nov 2015
- Location
- Saint Louis MO
- Posts
- 36
Thanks guys!!
Christmas came a little early for the car! Just got my Vintage Air Gen IV kit today thanks to Matt @ MCB. Also got a smokin deal on a FAST 102. It's over kill for my setup but I couldn't pass it up.
 '63 Pontiac Grand Prix
https://www.pro-touring.com/threads/...d-Prix-Project
02-02-2016 #30
Registered User
- Join Date
- Nov 2015
- Location
- Saint Louis MO
- Posts
- 36
Body
Time for an update!
Installed the new FAST intake on the engine. Decided to just run the 3 bolt 75mm throttle body for now vs getting a 102mm. Also switch the factory LQ4 valley cover over to a PCV style LS6 one.

Made some little brackets to mount the vintage air unit and defrost ducts. Just sport welded them to the cowl, Forgot to snap a picture of the mock up.

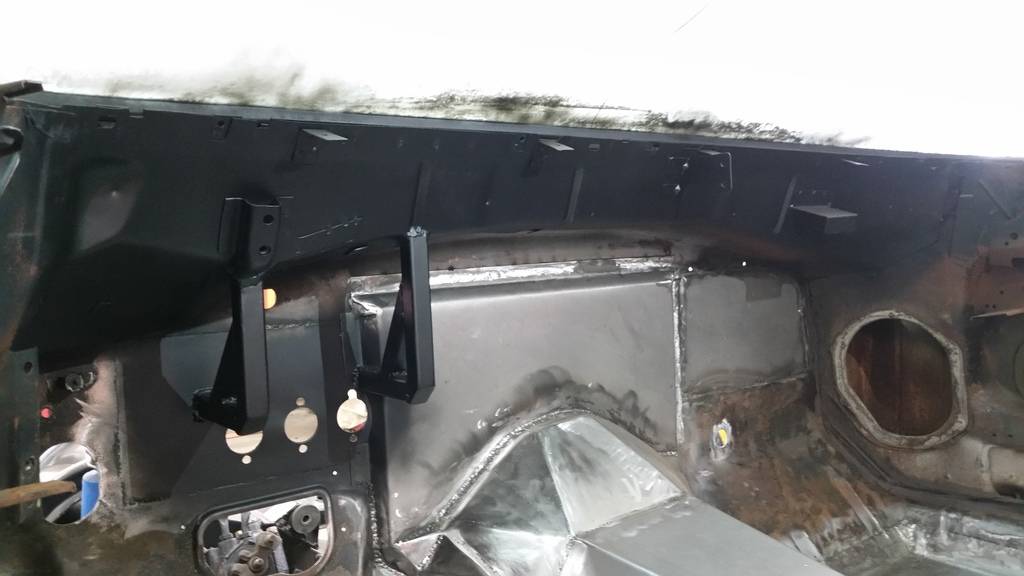
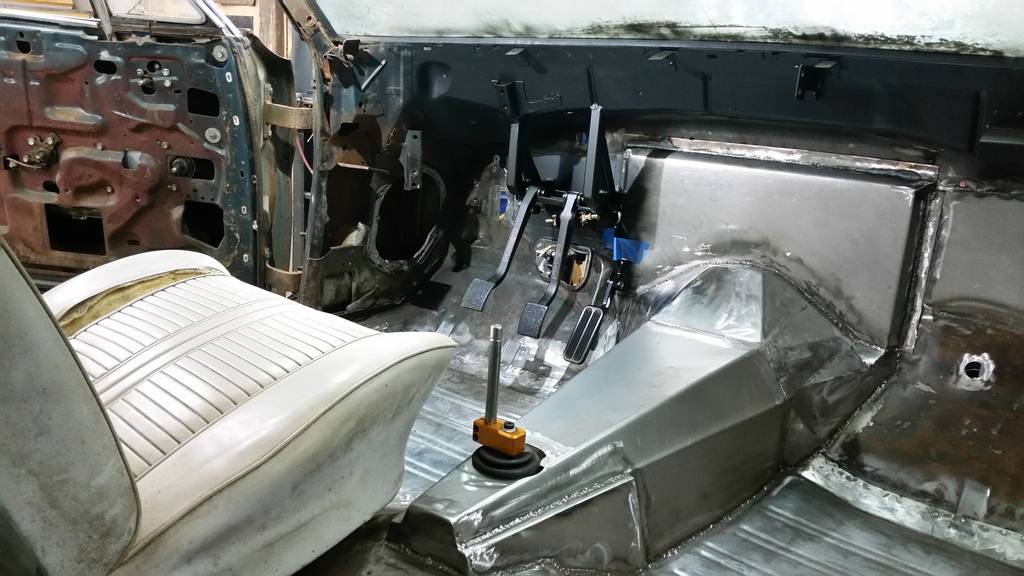
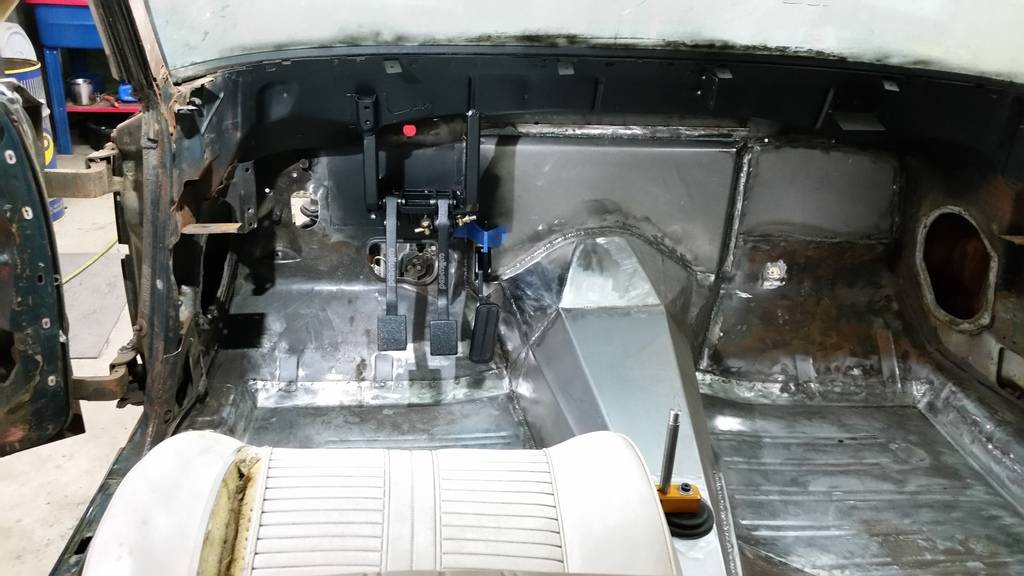
Built a mount for the brake and clutch pedals as well. Then hit the cowl with some black.
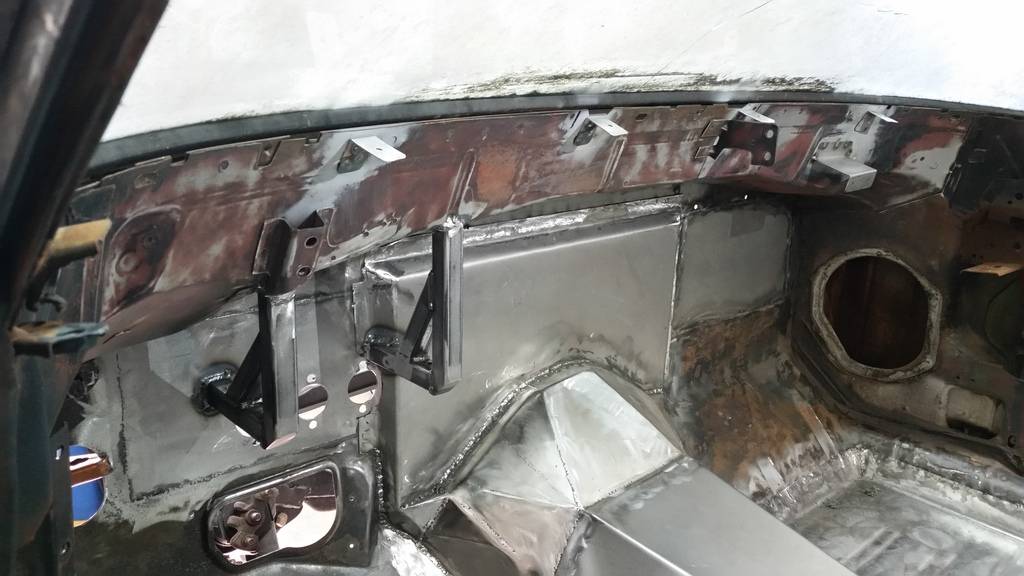
Found a good spot for the accelerator pedal and got it mocked up. Once the pedals were installed, I had to put the seat in to get a better perspective. I plan on ordering the LOKAR brake and clutch pedal pads to match the accelerator.
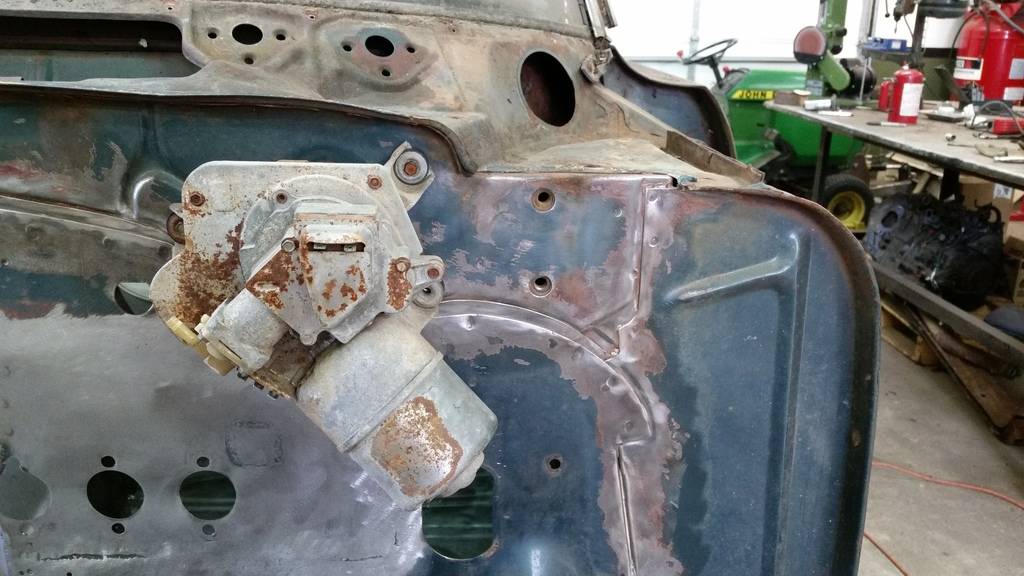
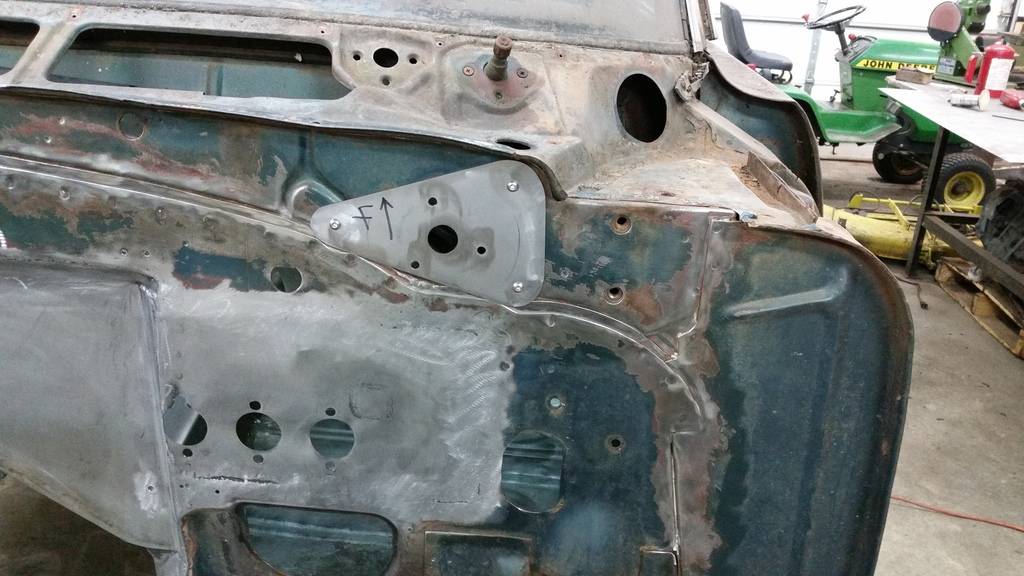
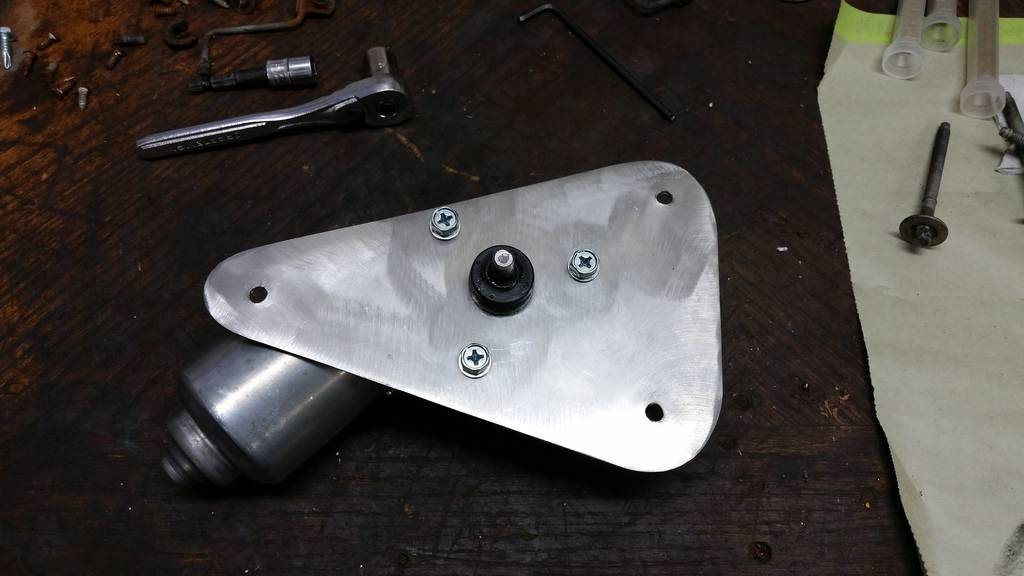
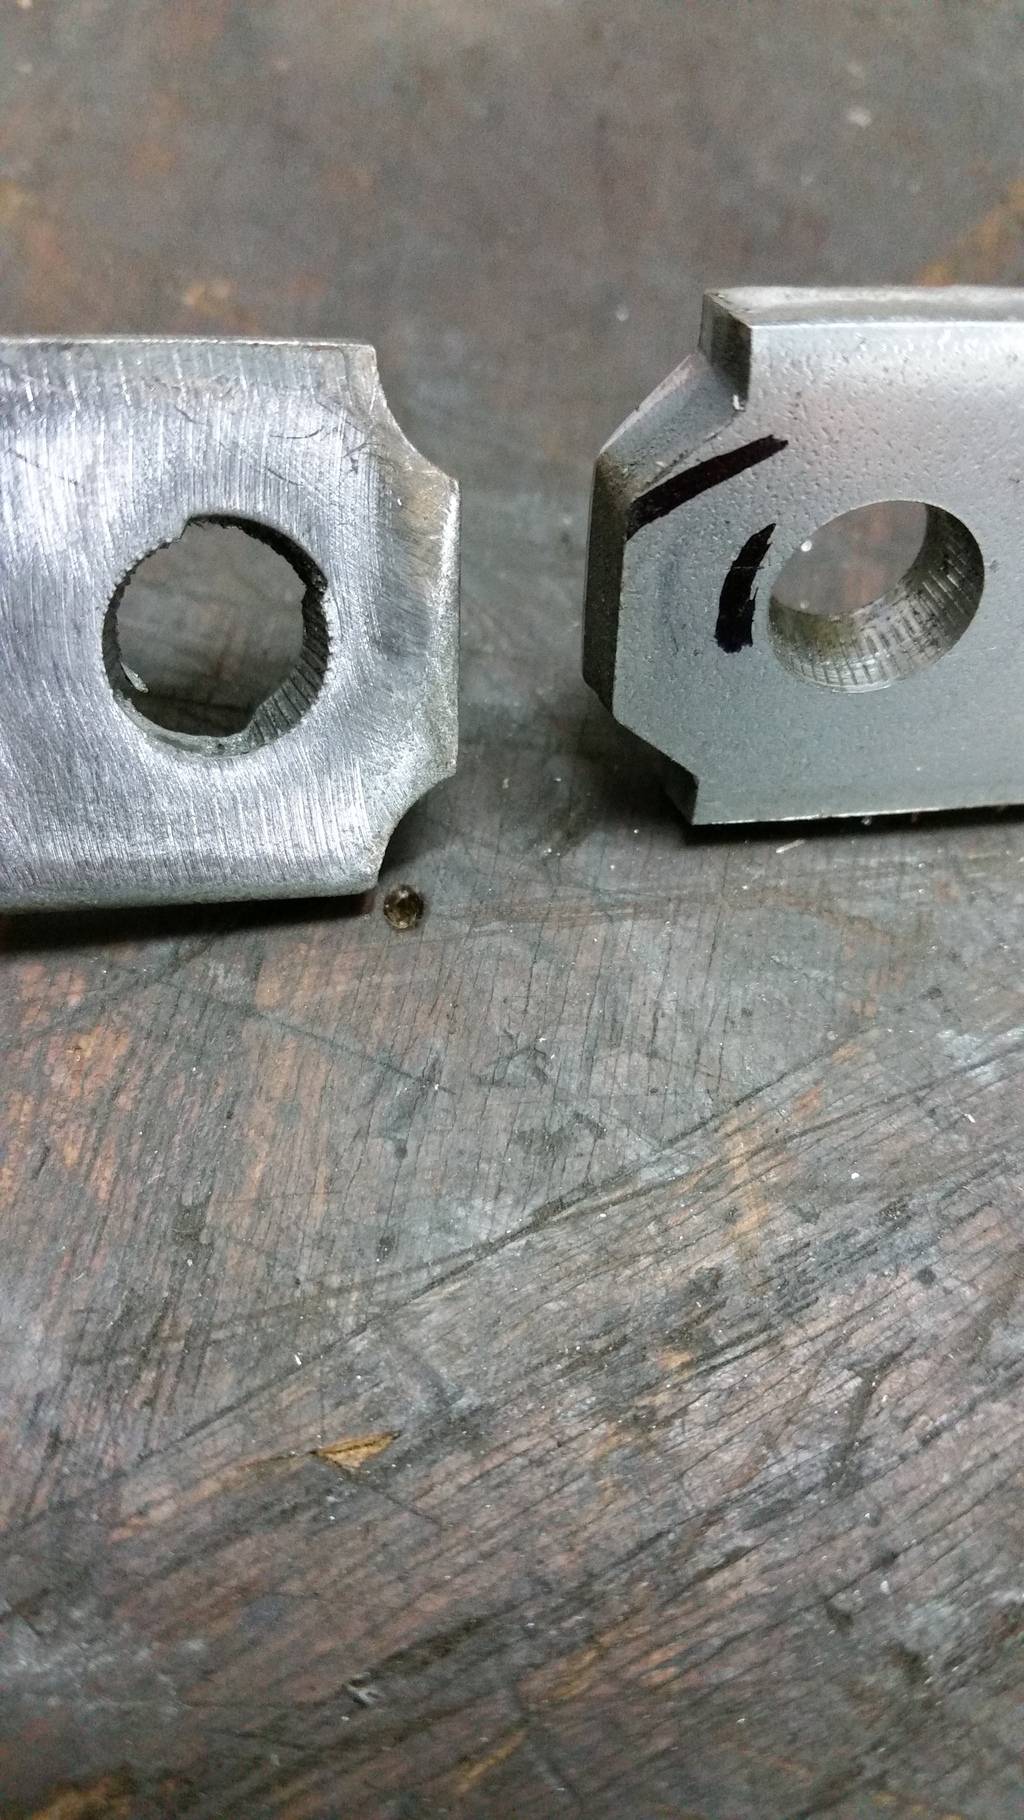
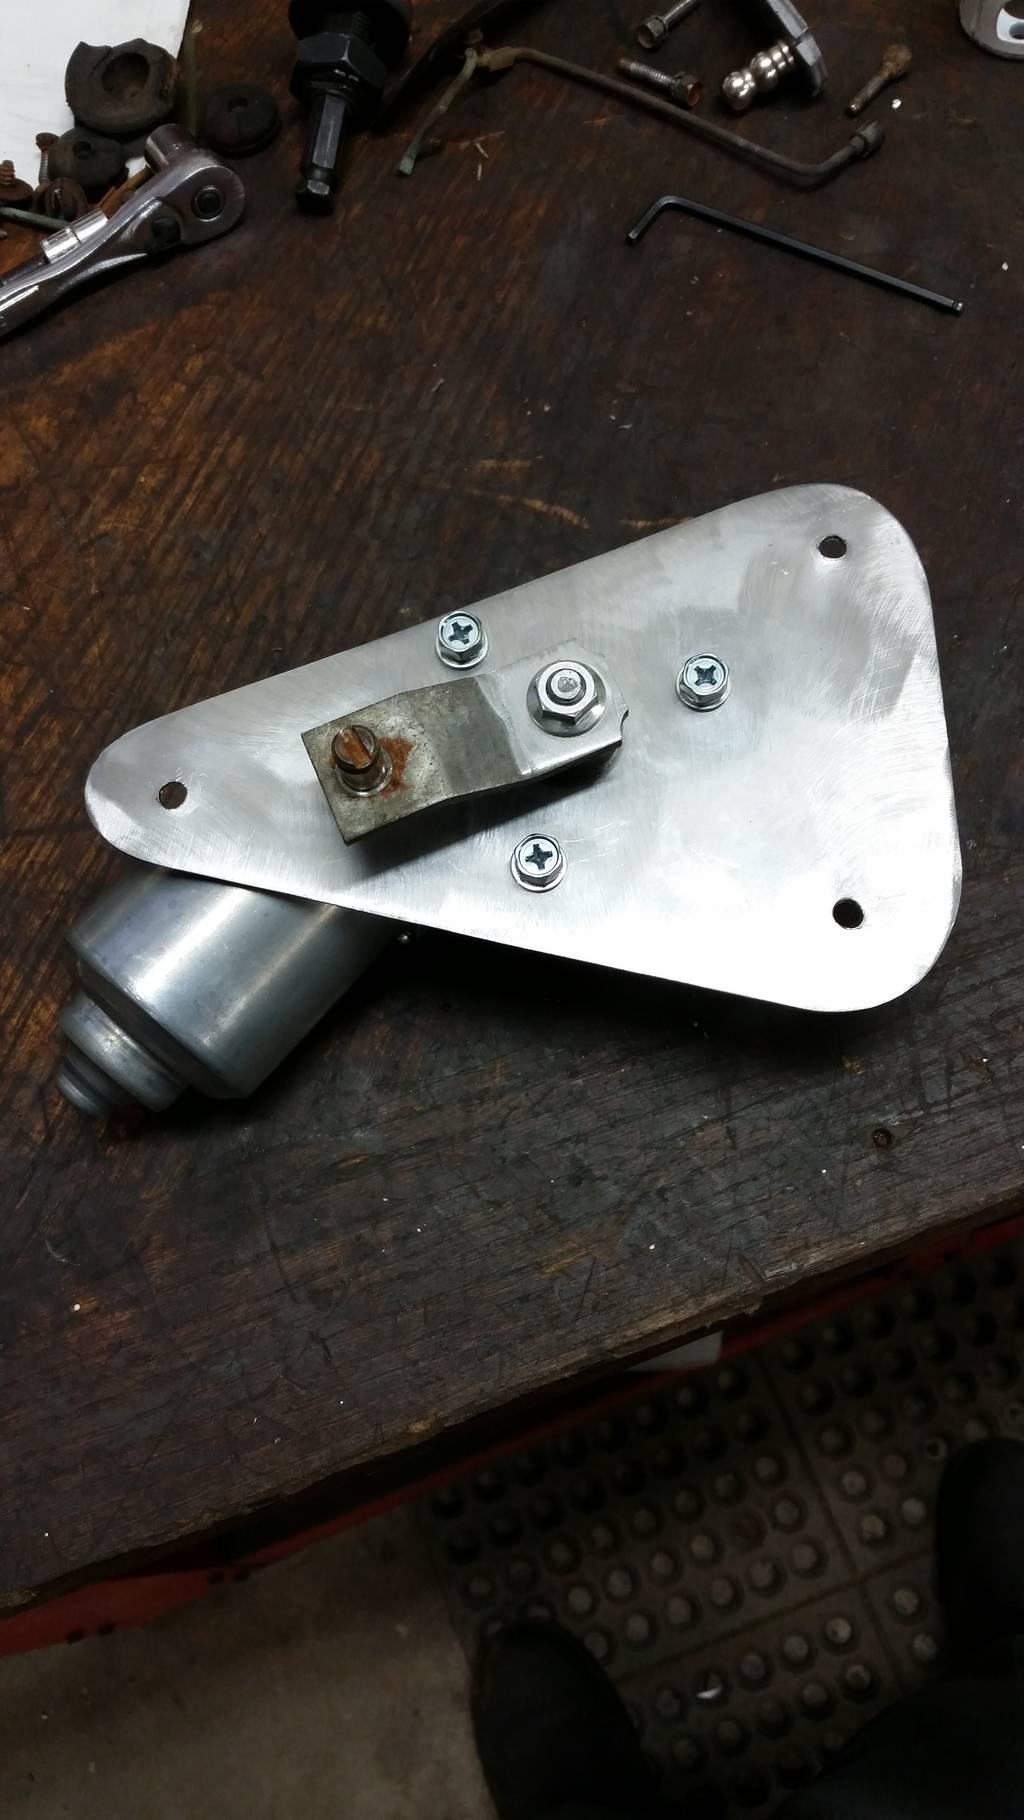
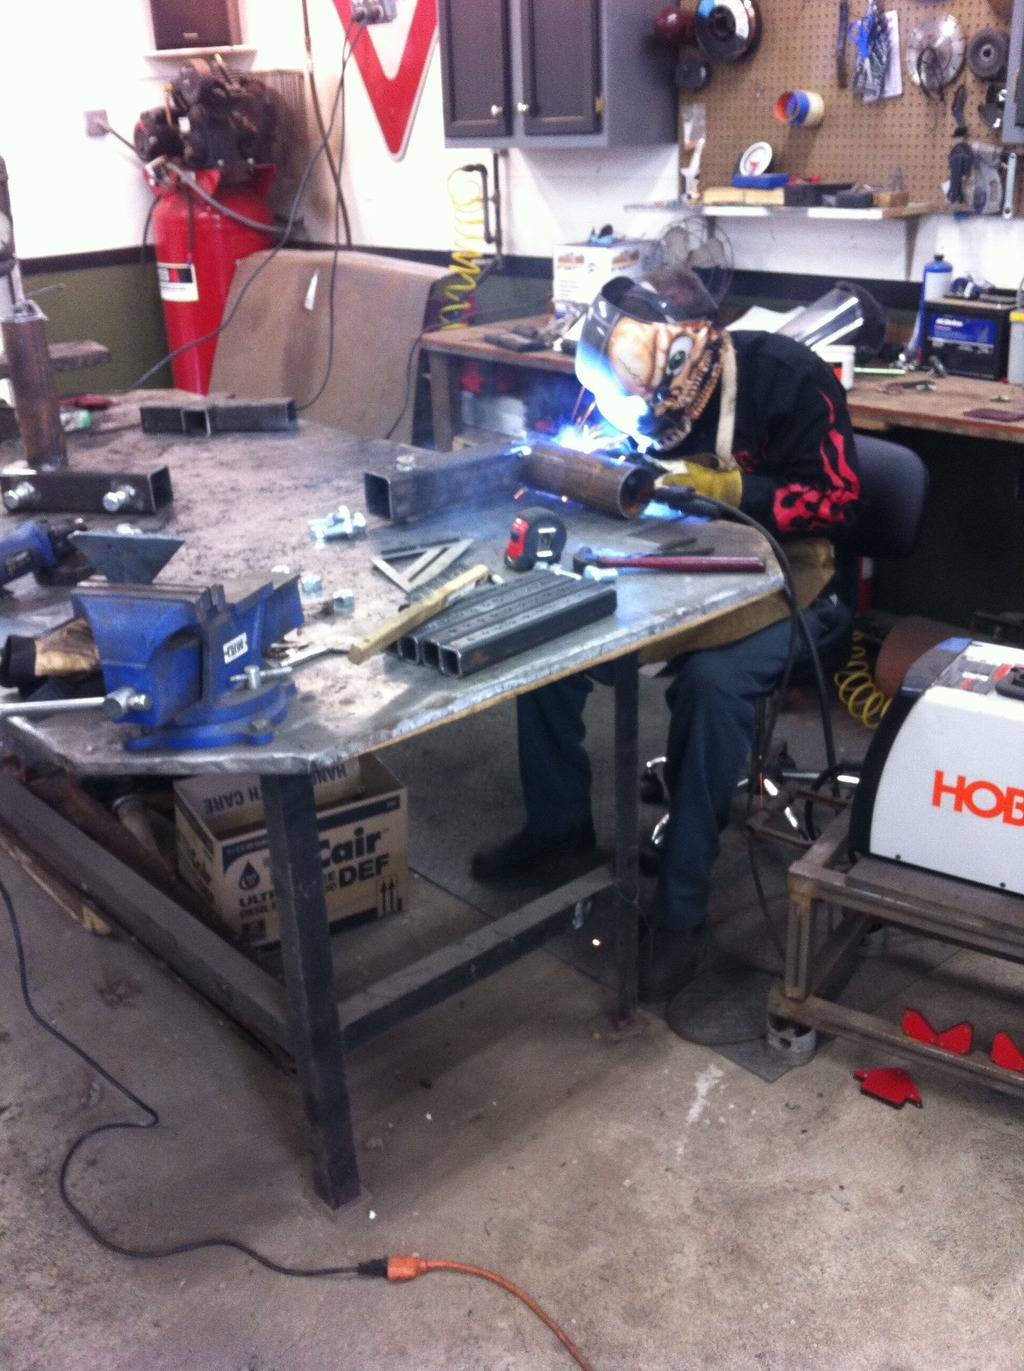
Next I moved on to the windshield wipers. The original wiper motor to the car was locked up, so I was in need of a new one. Since I didn't care to much for the big bulky original one, I decided to come up with something different. After some research I found a very nice well put together universal kit that DSE sells, BUT I was not going to spend that kind of coin on wipers. So I picked up a new CTS wiper motor, made my own plate and modified the original wiper motor arm to bolt to the CTS motor.


I know that DSE sells a wiper control module with their kit in order to utilize the park and control delay. I plan to just build my own module with some relay's and a 555 timer.
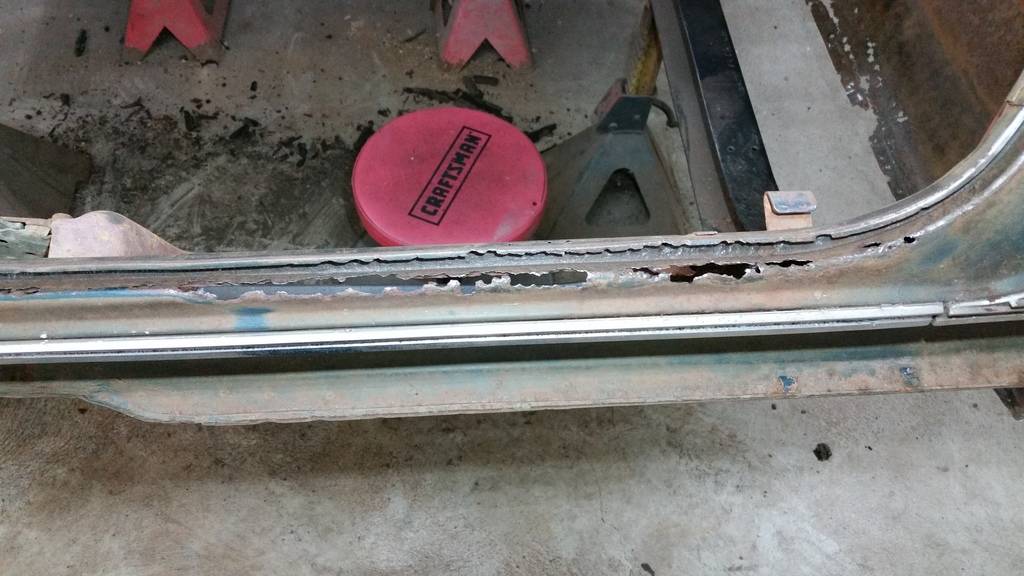
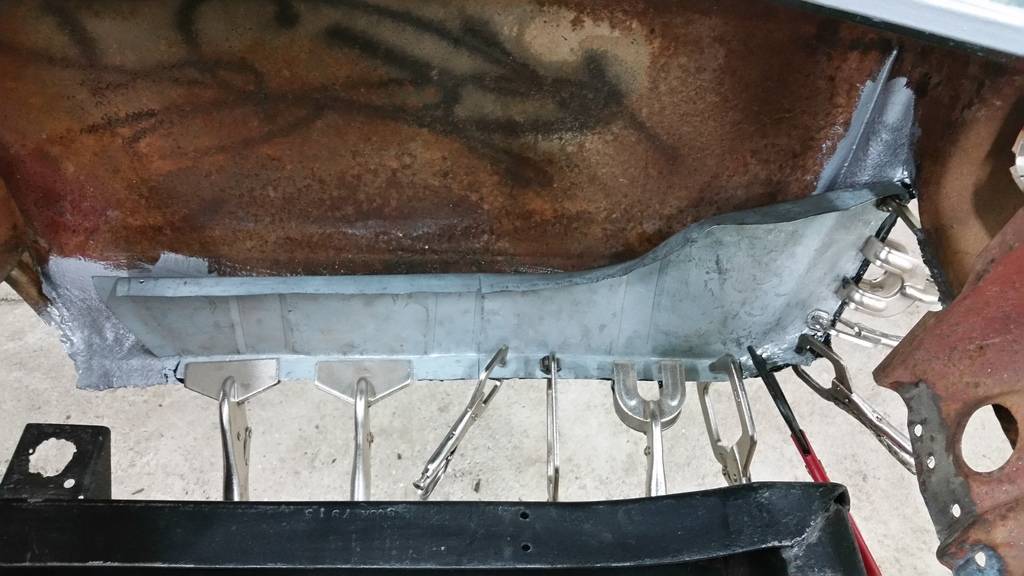
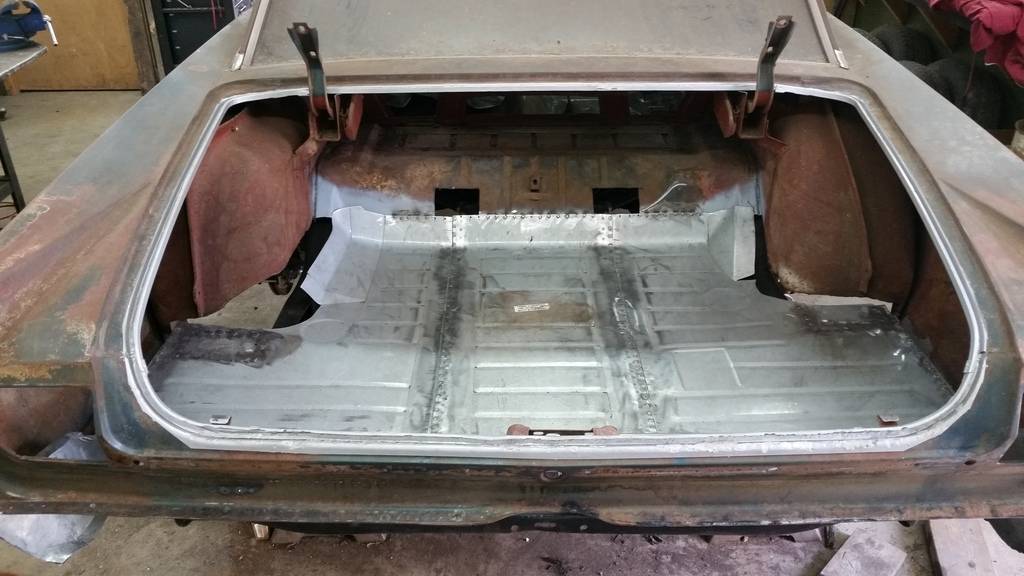
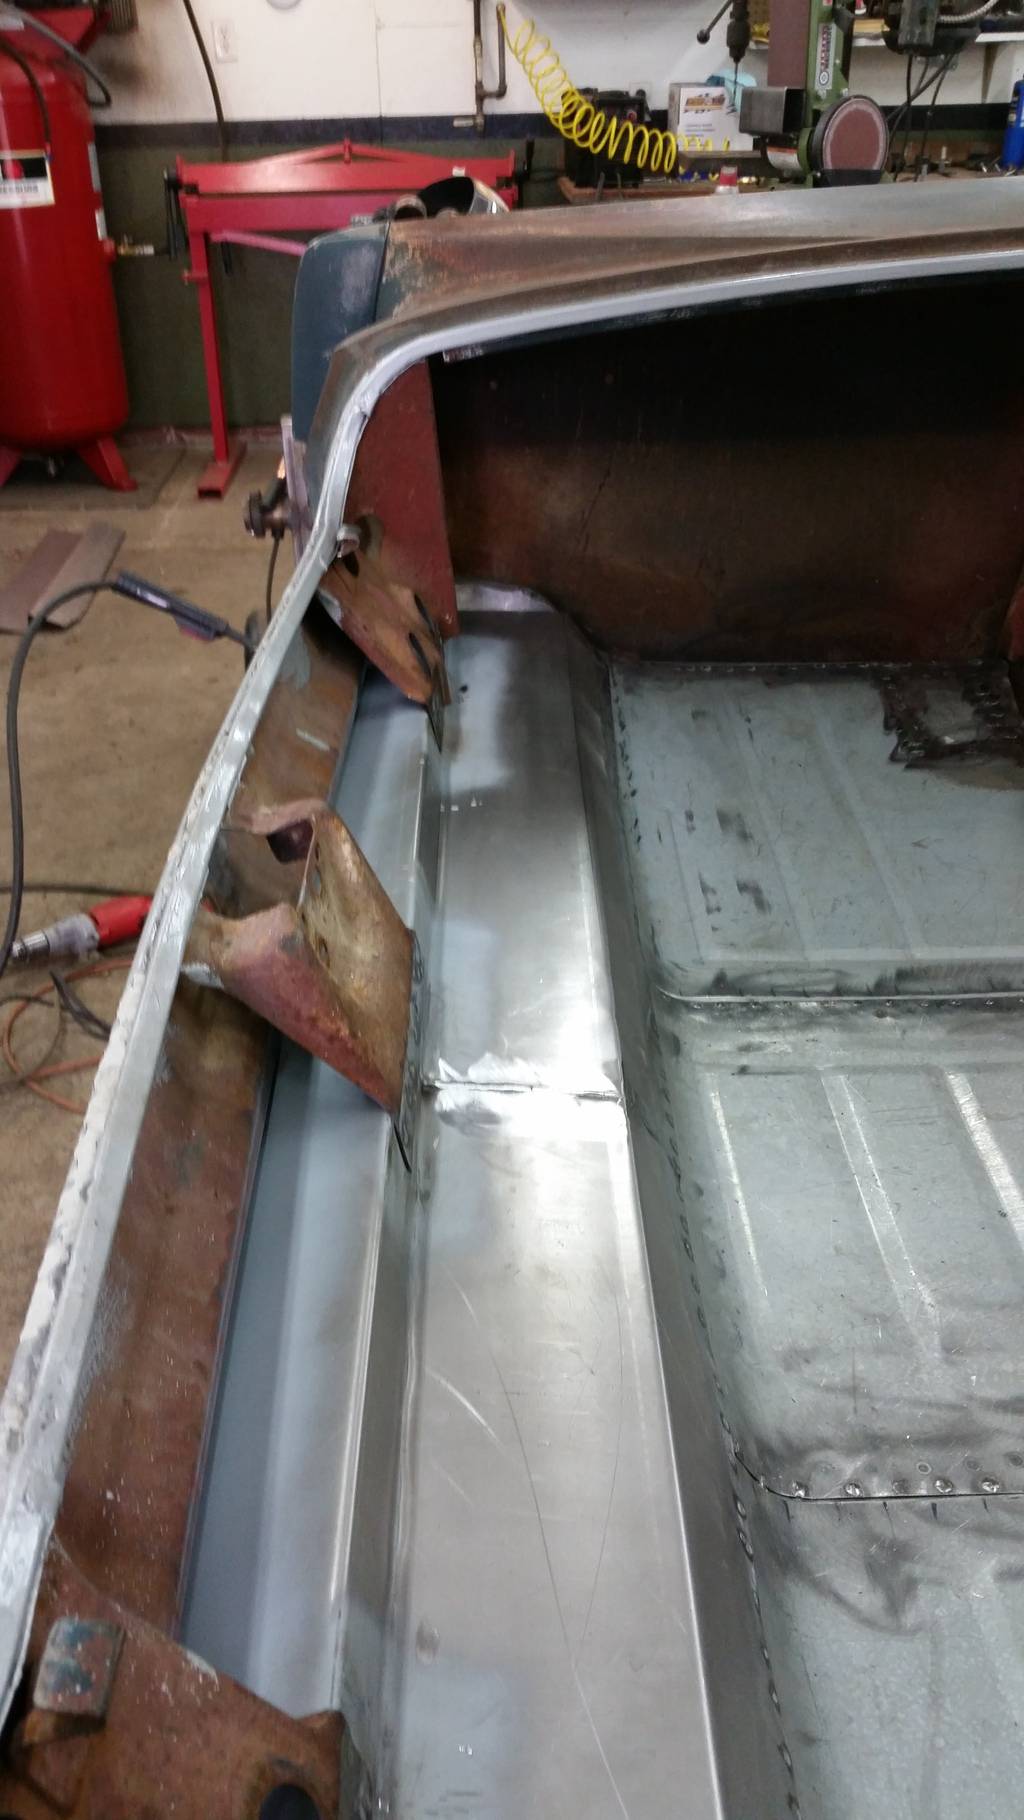
Now on to the dreaded trunk, the worse of the rust. The entire floor was rotten, along with both trunk extensions which connect the floor to the lower rear quarter panels, all the floor braces, the mounts, and the lip that holds the trunk lid weather strip.
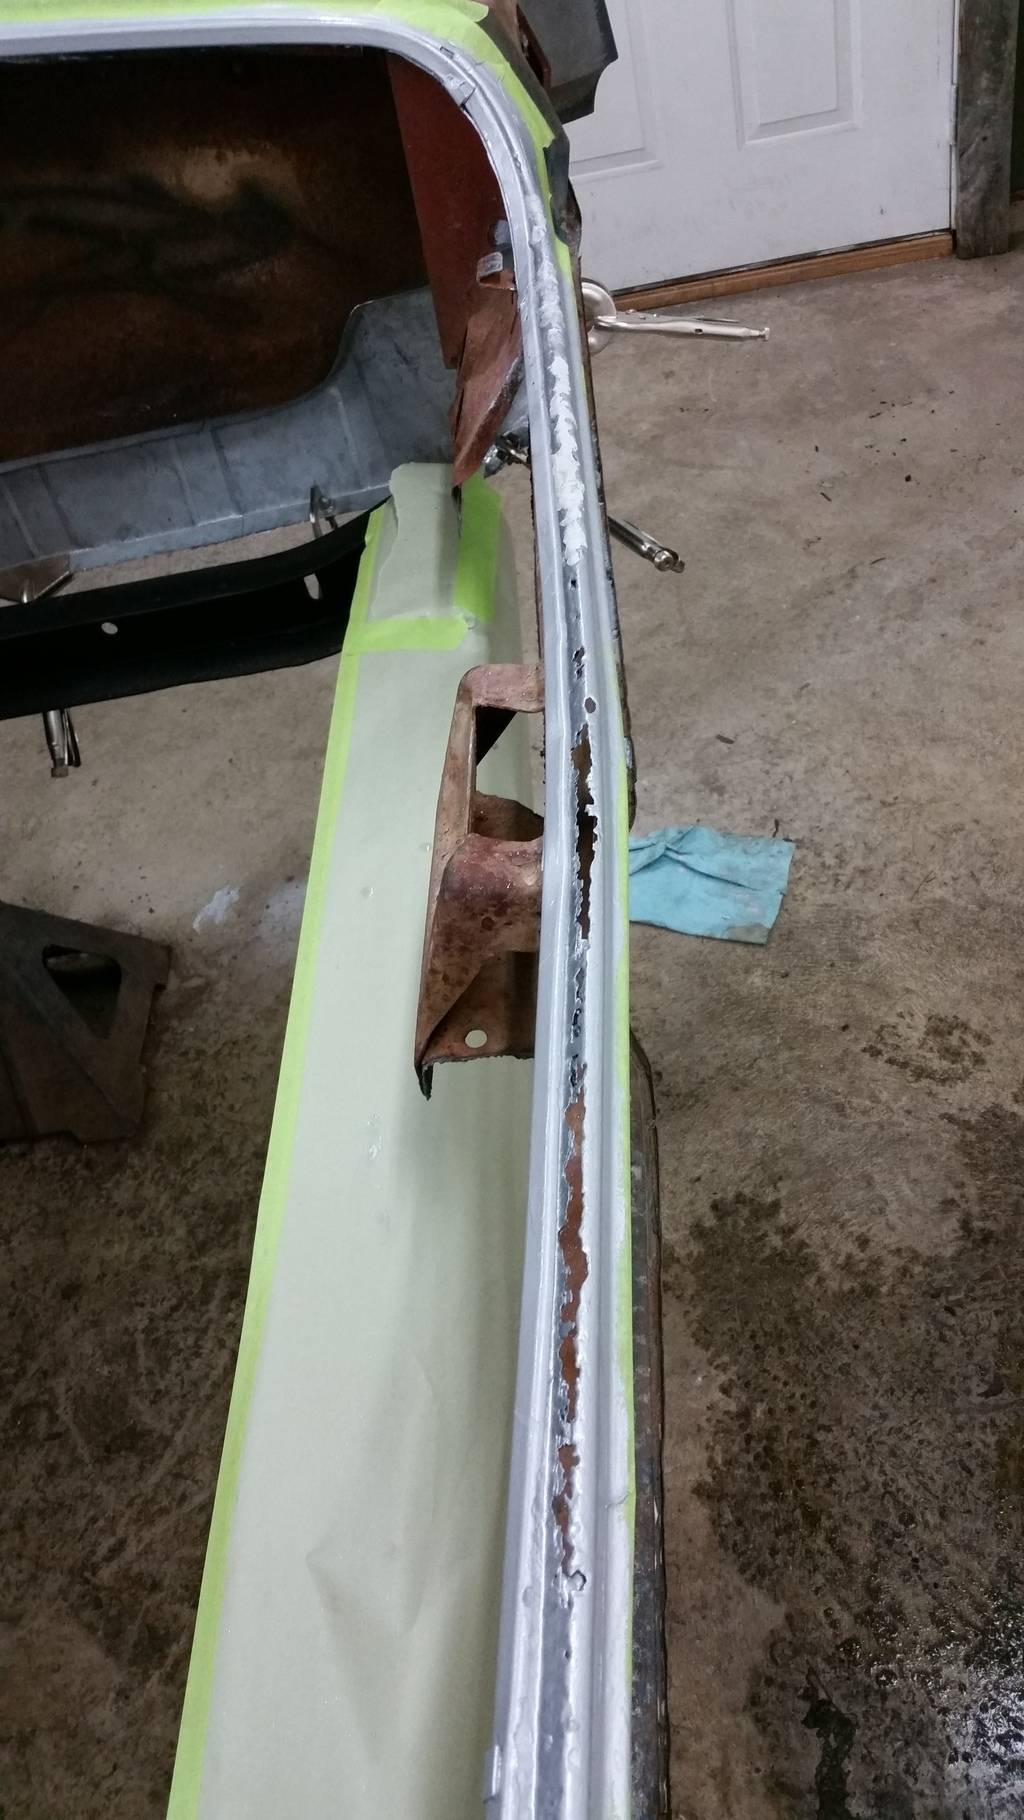
First was the trunk weather strip lip. After weeks of contemplating how I wanted to attack the issue, I decided to give POR15 a shot to see how good of a product they claim to have. So I picked up their trunk and floor pan resto kit, followed their direction to a T and when to town.
Here is what I had to start with.
Put two coats on the entire weather strip lip and let it setup.
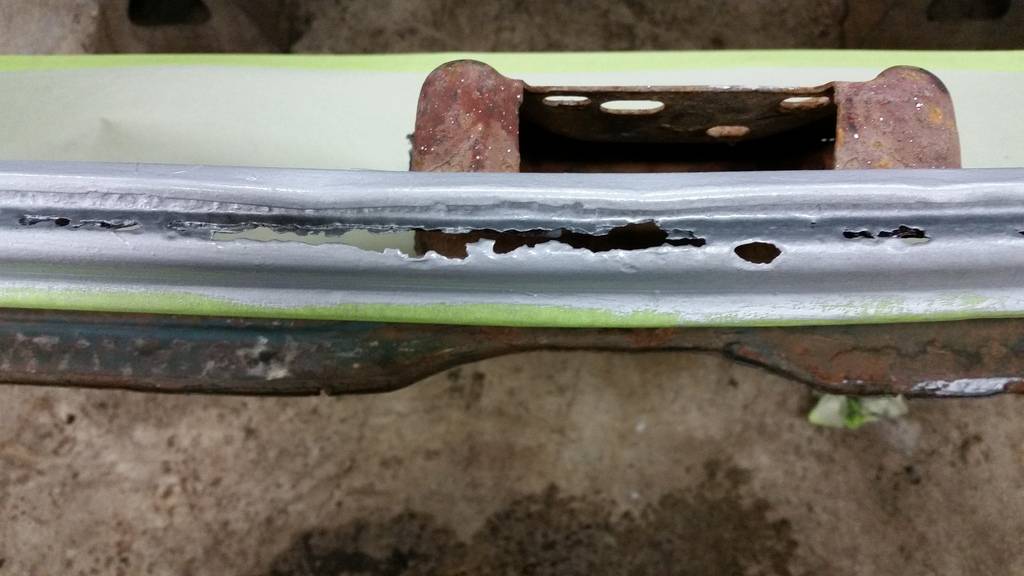
Then cut off some of the epoxy putty, mixed it up and started pushing it into the holes.

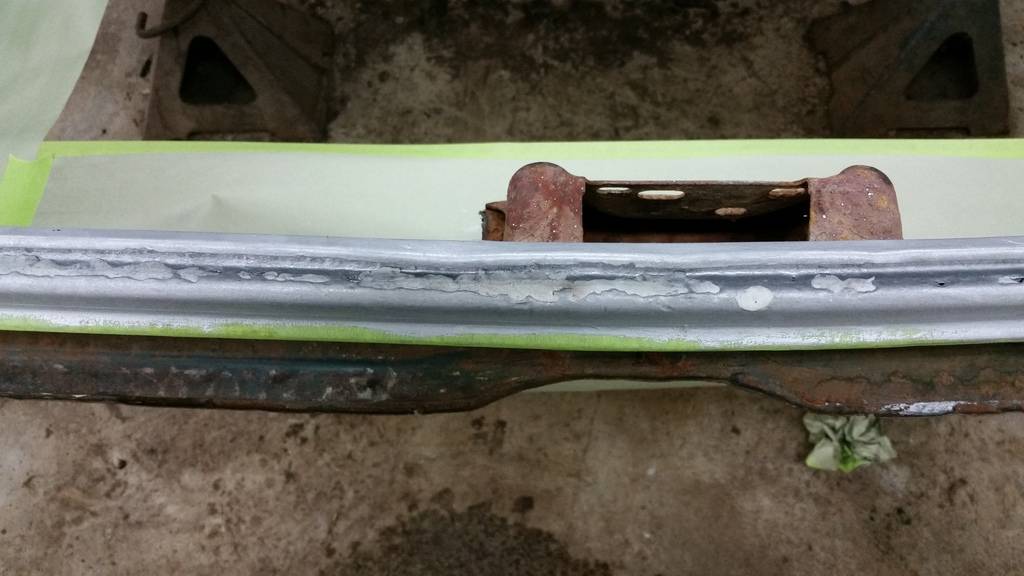
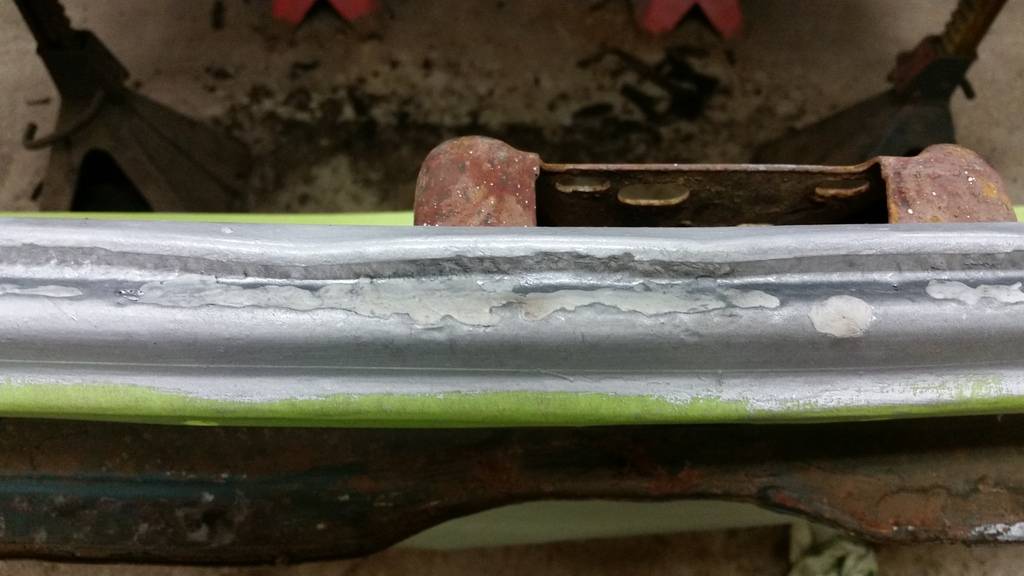
In all reality I am pleased with the way it turned out so far. The epoxy putty took care of the holes and also reinforced the whole rear section of the lip. It dries extremely hard and in sand able.'63 Pontiac Grand Prix
https://www.pro-touring.com/threads/...d-Prix-Project
02-02-2016 #31
Registered User
- Join Date
- Nov 2015
- Location
- Saint Louis MO
- Posts
- 36
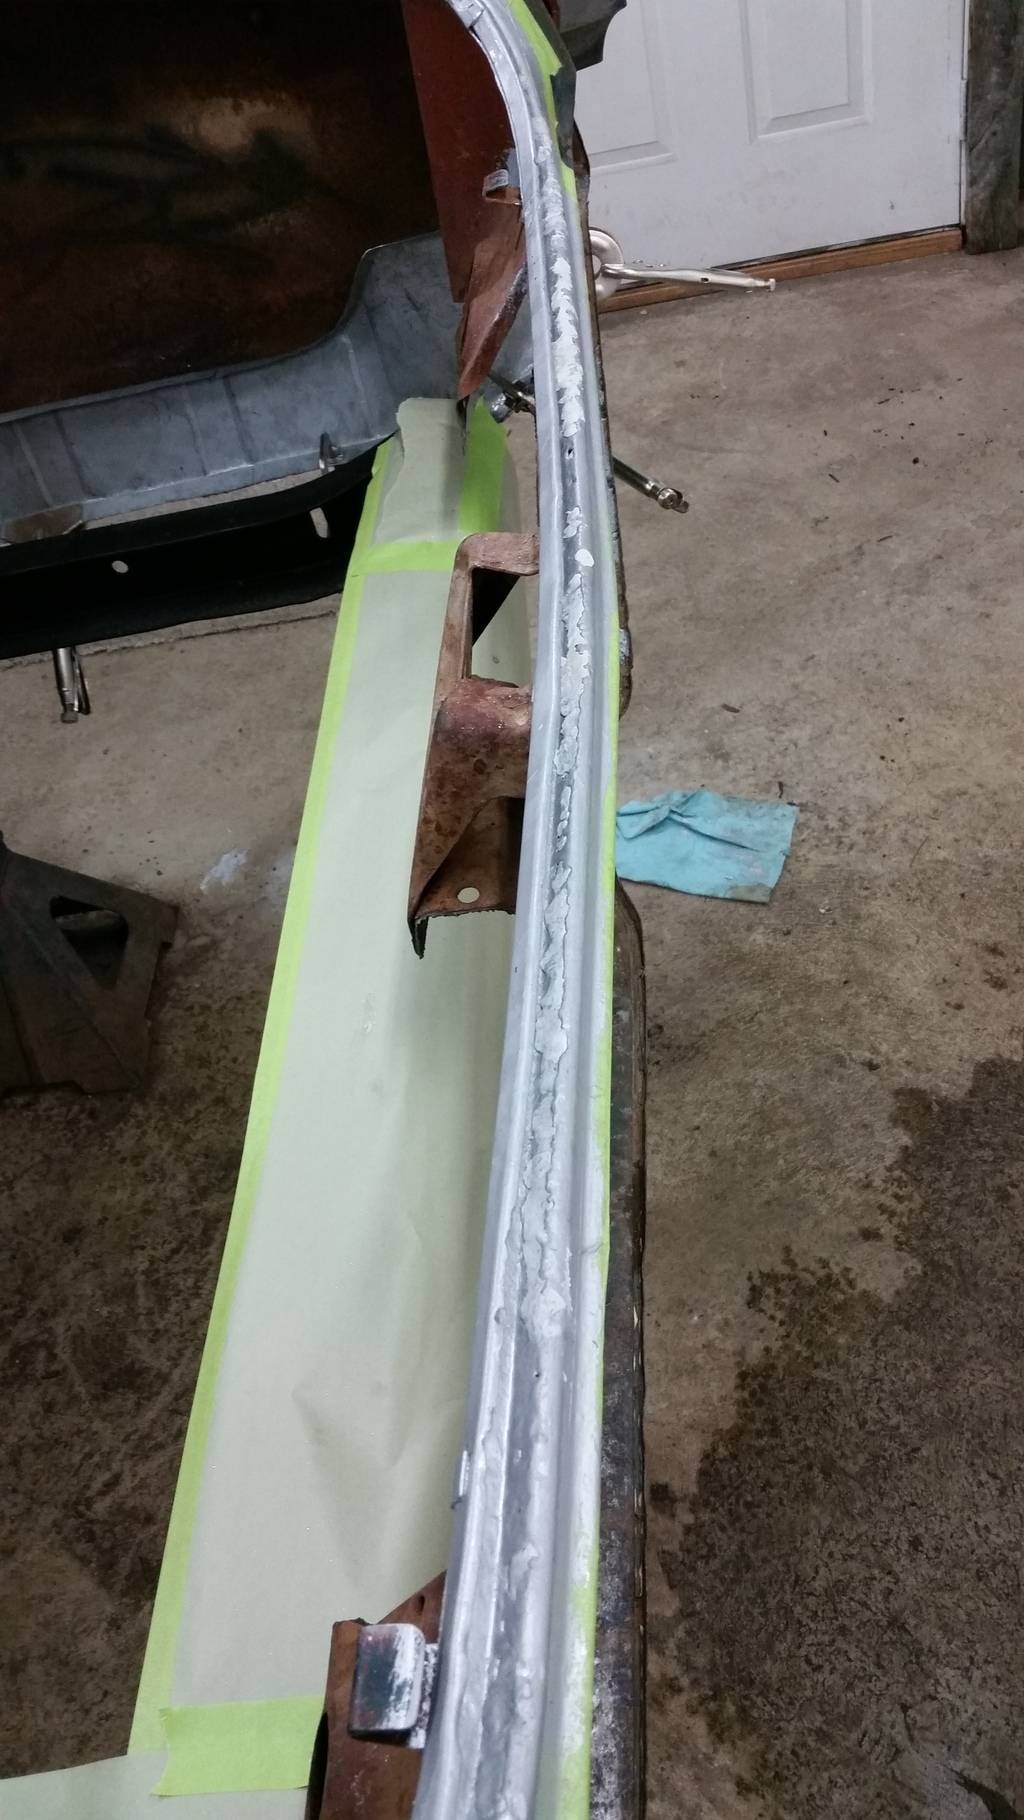
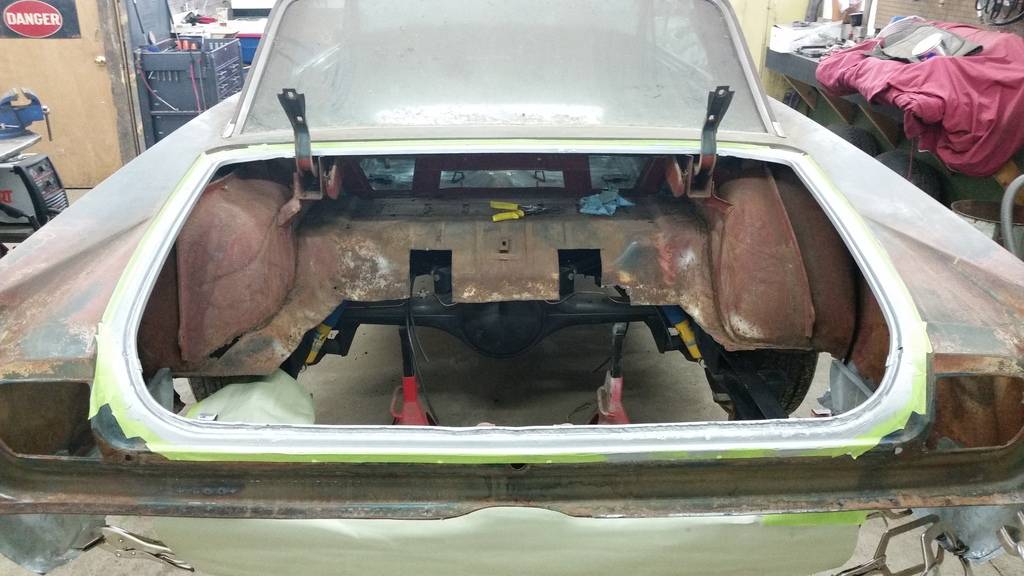
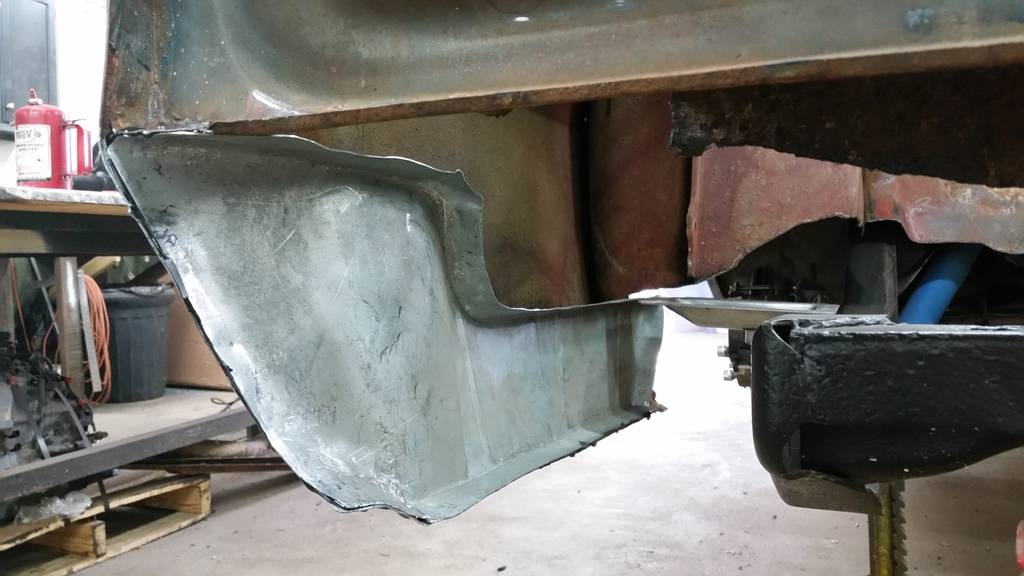
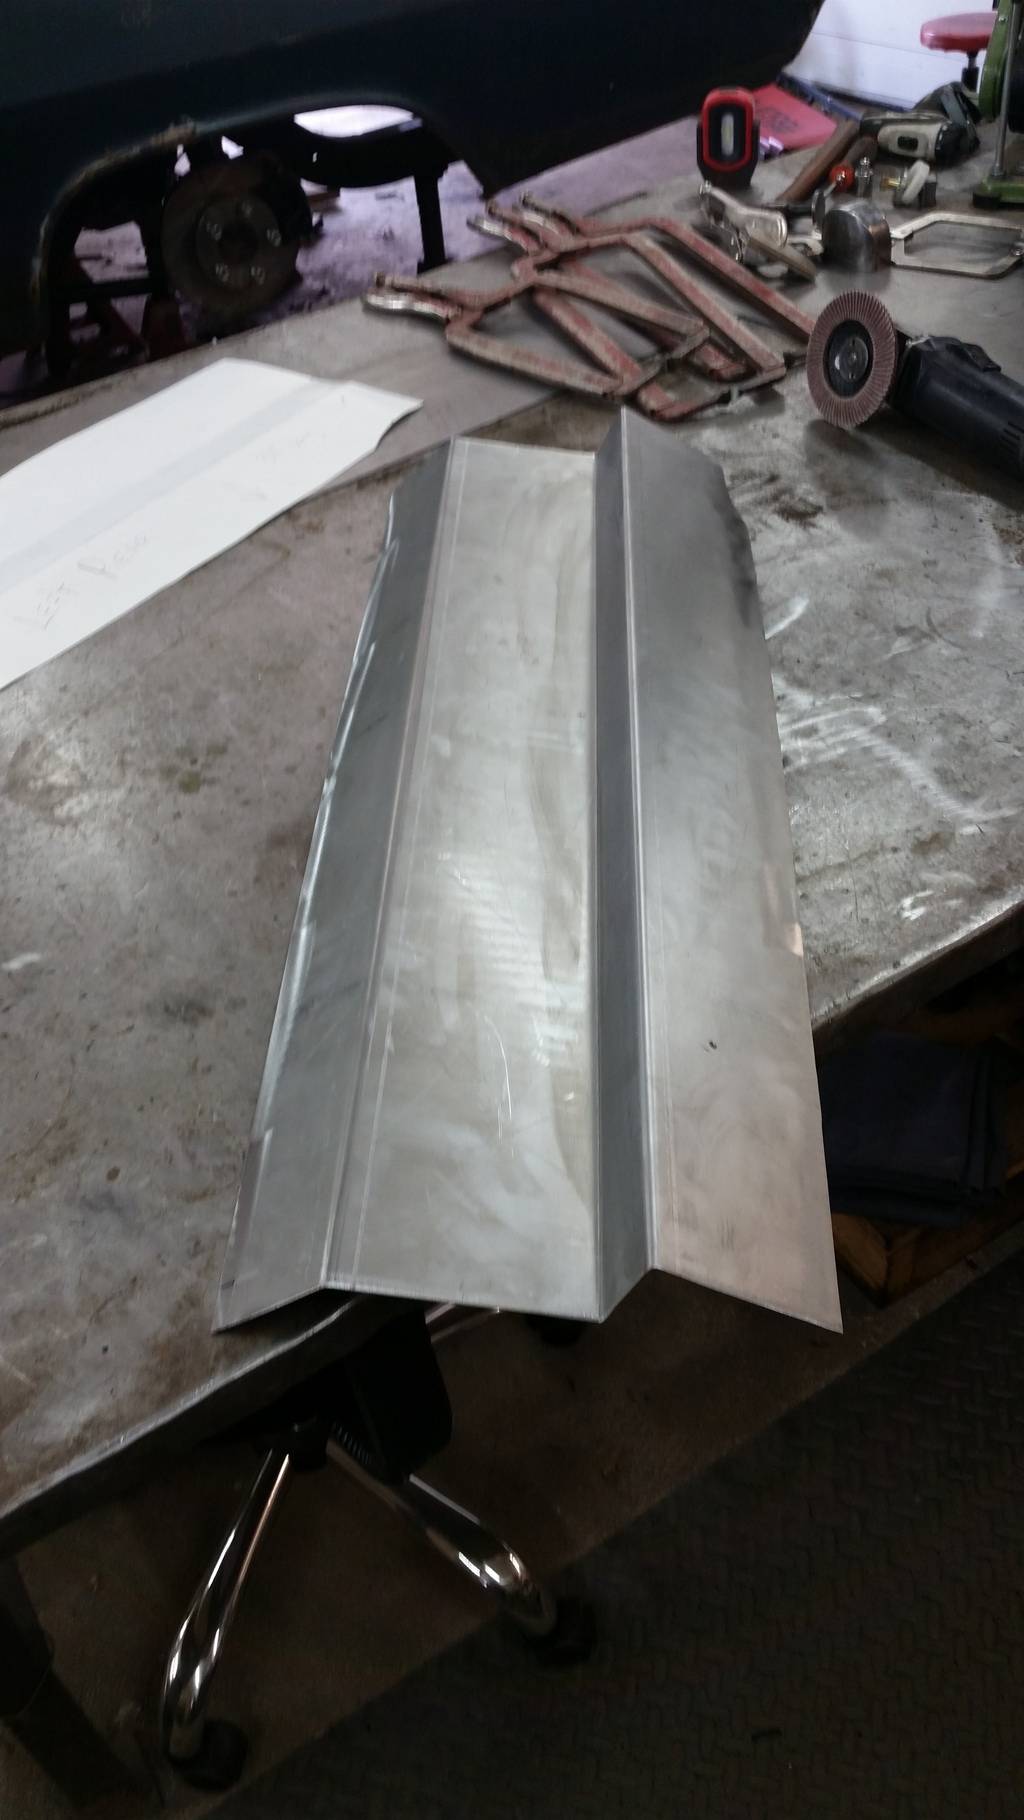
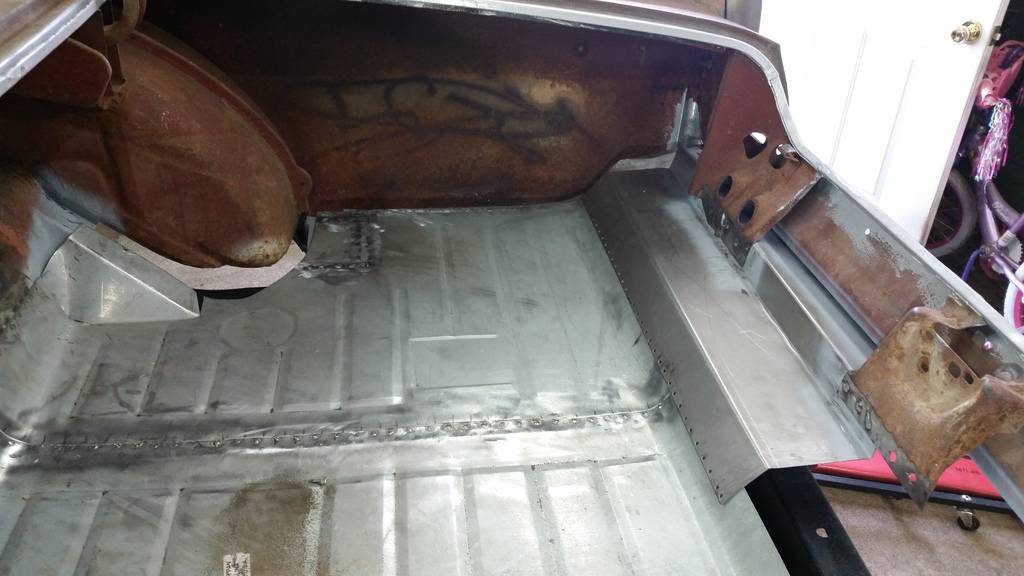
Next was the trunk extensions. Since I was going to preserve the original out side patina of the car for now, I didn't want to weld the new trunk extensions to the lower quarters. So I coated the inside of the quarters with POR15 and glued the new extension panels on with 3M panel bond. I know you are supposed to glue metal on metal with panel bond, but we shall see how this holds up for know.
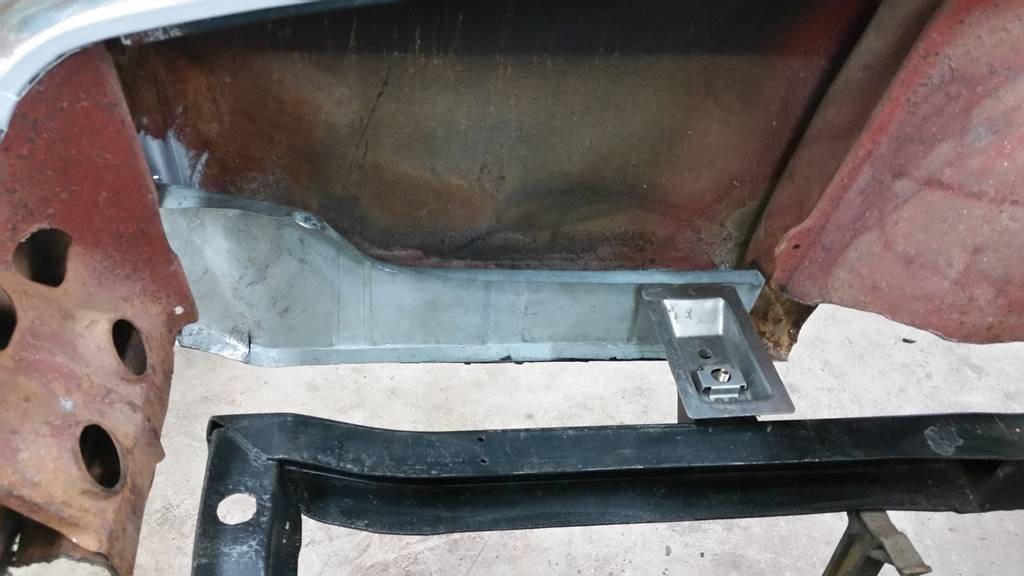
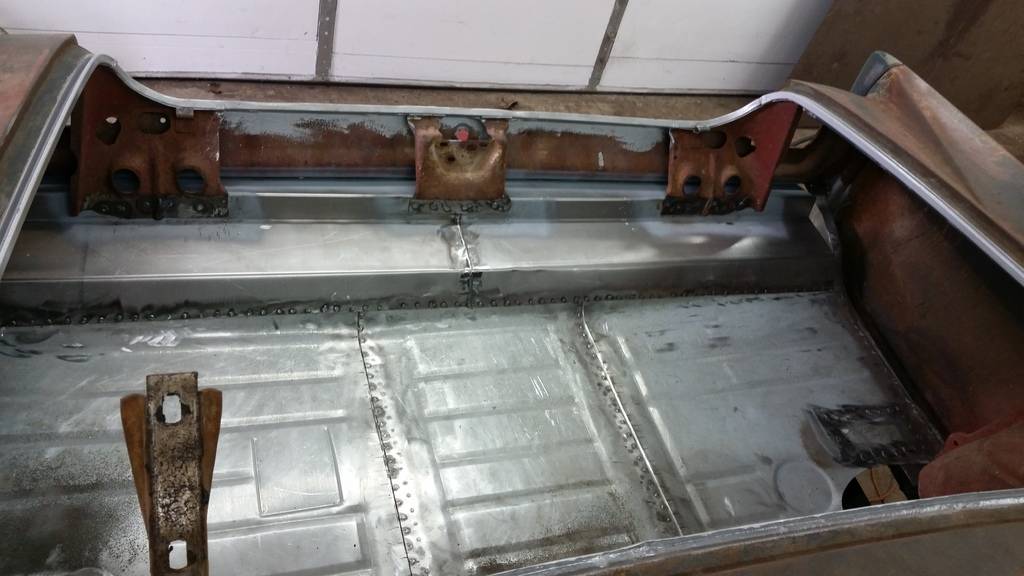
After the trunk extensions were glued in and setup. I welded the 3 piece trunk floor together and got it welded in. Then I stared to make the filler panels to connect the new floor pan to the rear tail light panel.
The plan for this weekend is to build a rotisserie, get the body mounted on it, So I can finish out the sheet metal and get the whole under side of the car in bed liner.'63 Pontiac Grand Prix
https://www.pro-touring.com/threads/...d-Prix-Project
02-02-2016 #32 Registered User
- Join Date
- Oct 2013
- Location
- H-Town, TX
- Posts
- 356
Project is really coming along- looks great
02-07-2016 #33
Registered User
- Join Date
- Nov 2015
- Location
- Saint Louis MO
- Posts
- 36
Thanks 65GP!
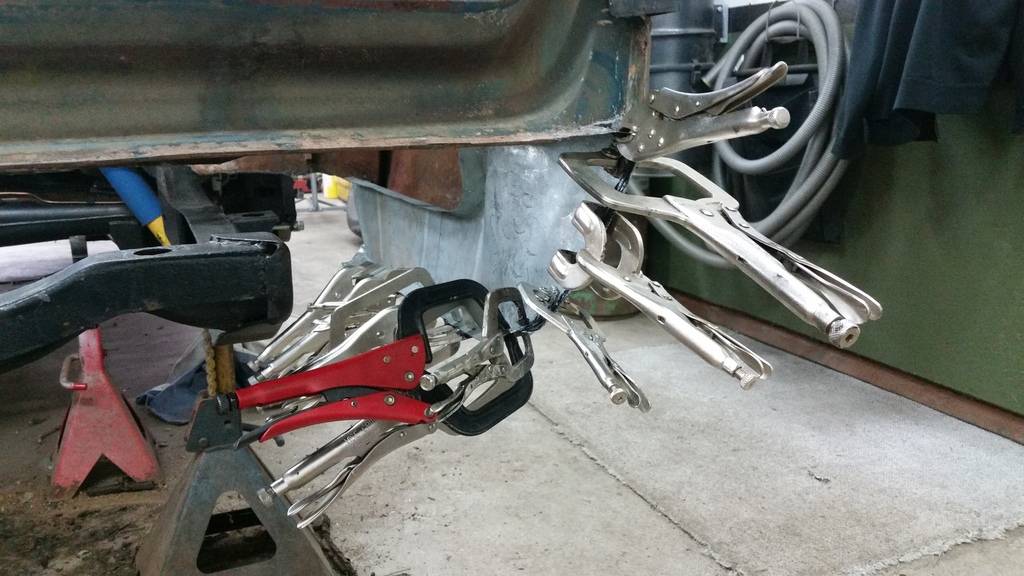
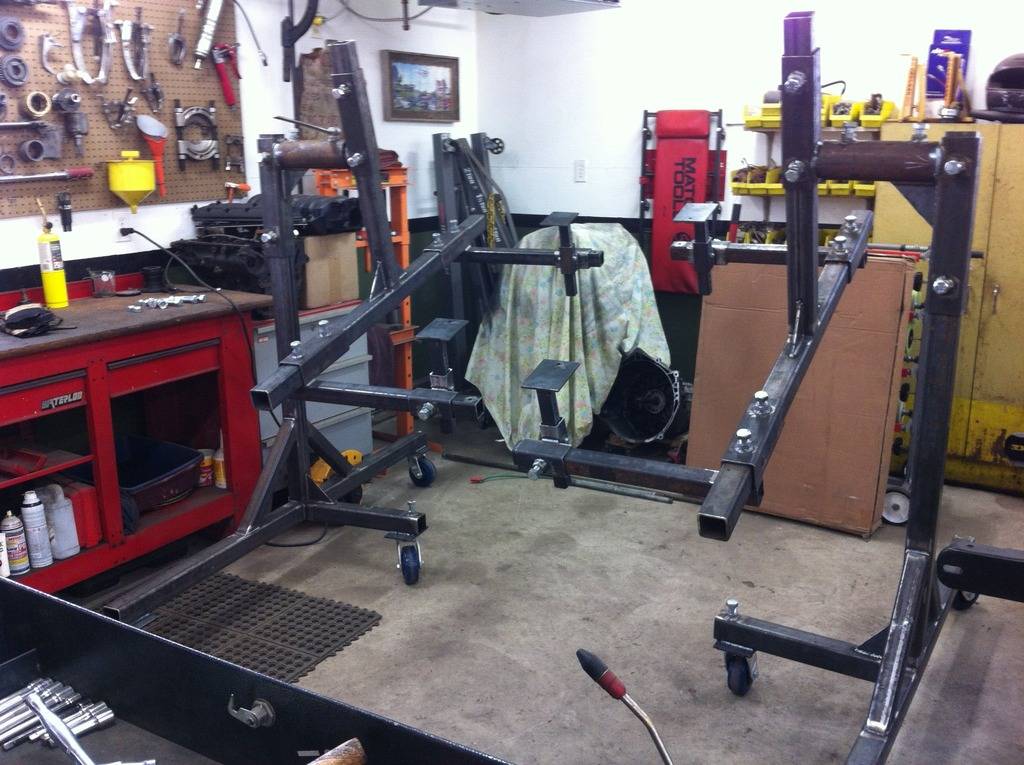
Had a productive weekend, built a rotisserie for the car and got the body mounted to it. I'm pretty happy with how it turned out, it was pretty nerve racking getting the car trued up and balanced, but its done now and will make my life that much easier finishing out the bottom of the car. Here are some pics of the build. Sorry for the out of focus pics, my dad isn't the best at working a camera phone.

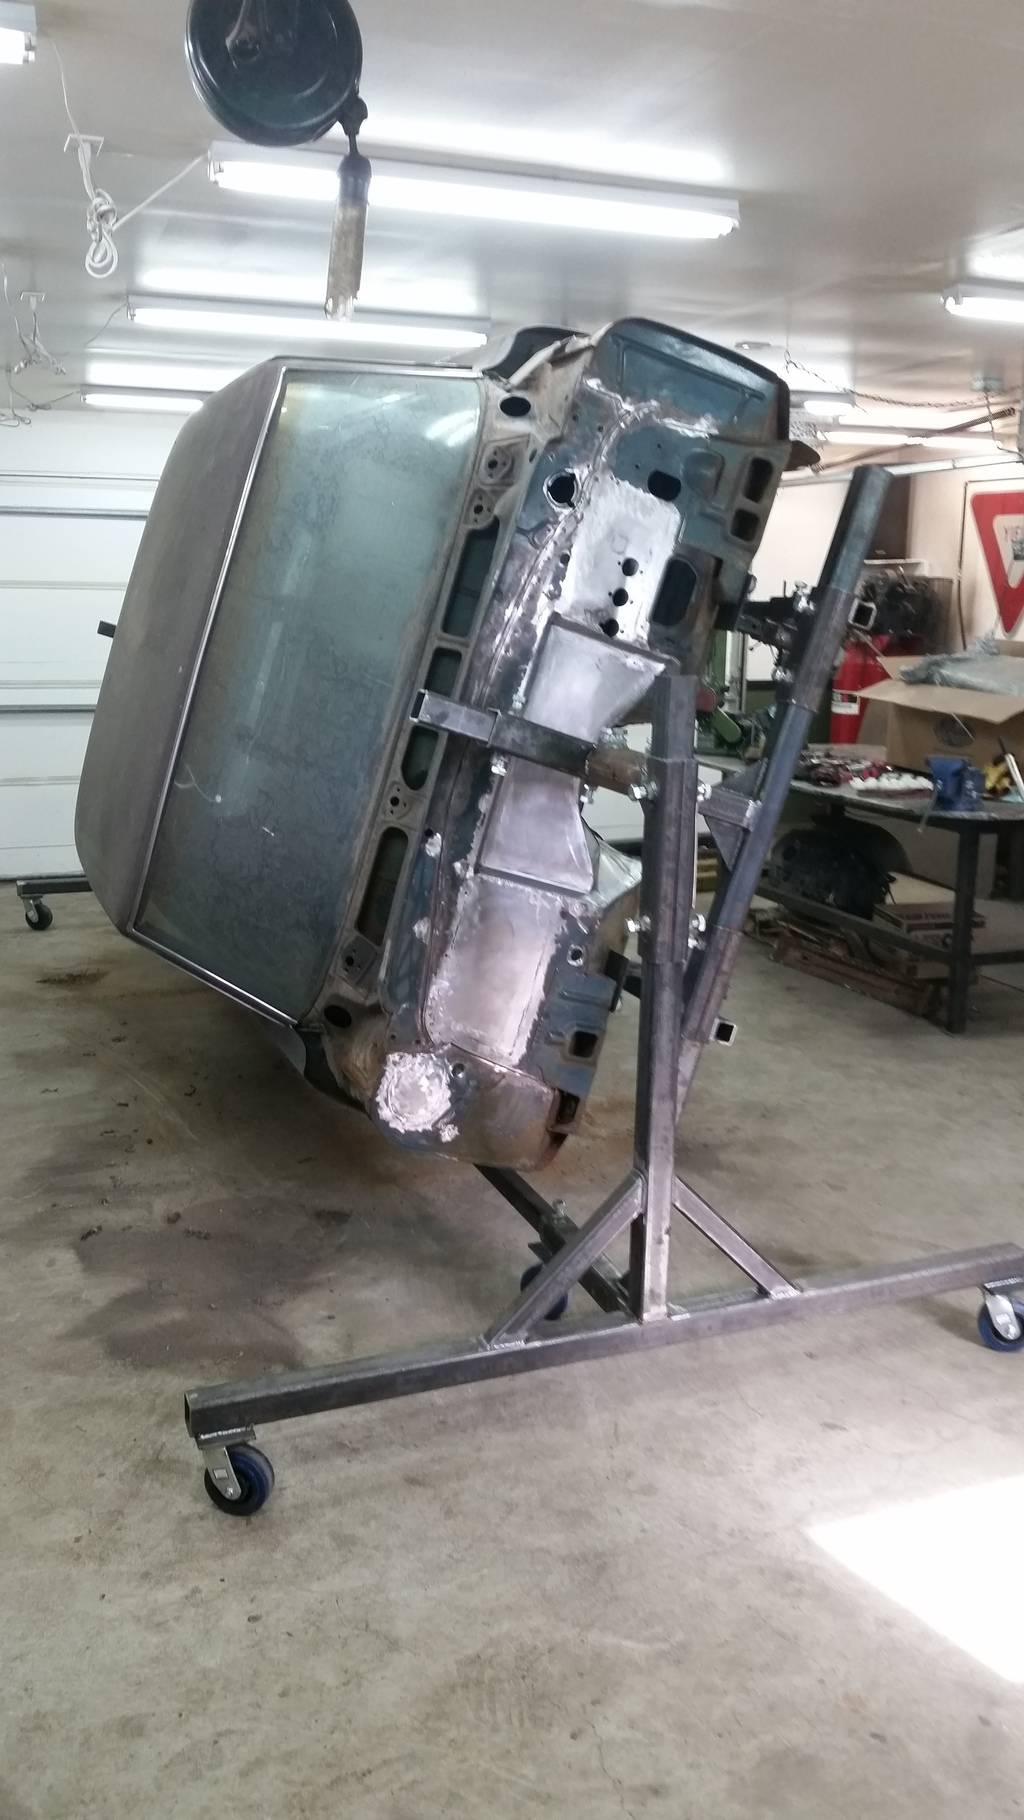
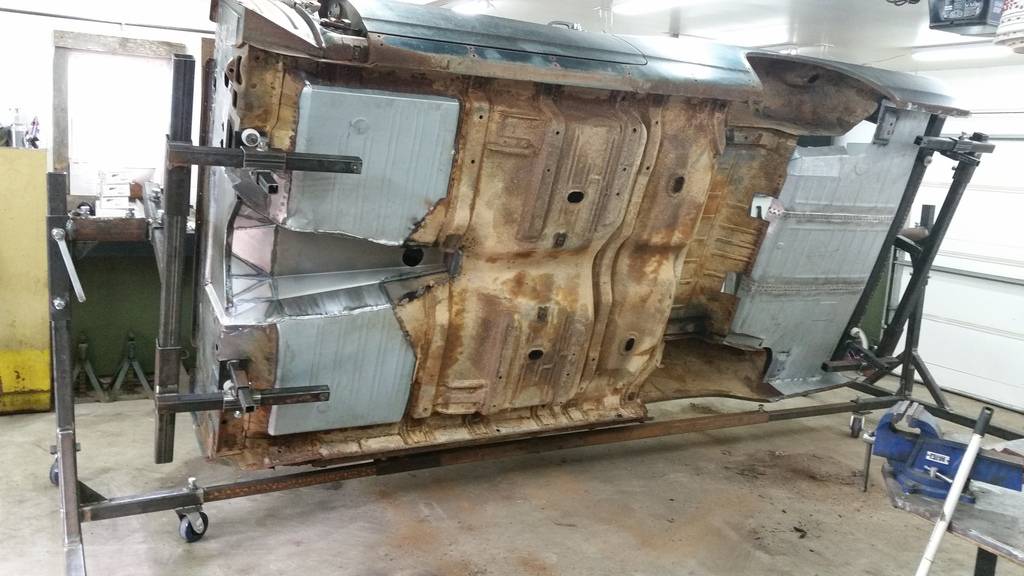 '63 Pontiac Grand Prix
https://www.pro-touring.com/threads/...d-Prix-Project
06-12-2016 #34
Registered User
- Join Date
- Nov 2015
- Location
- Saint Louis MO
- Posts
- 36
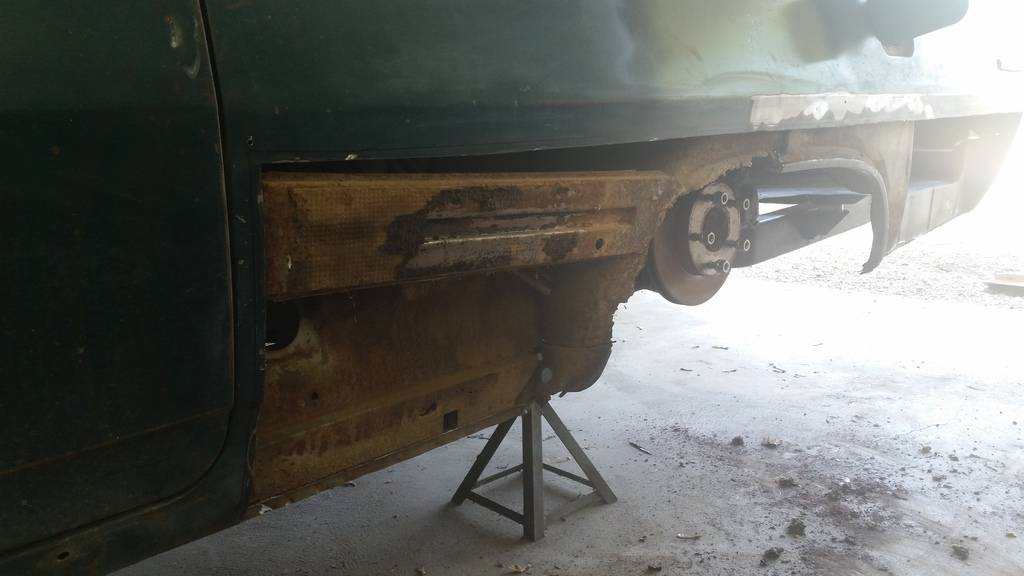
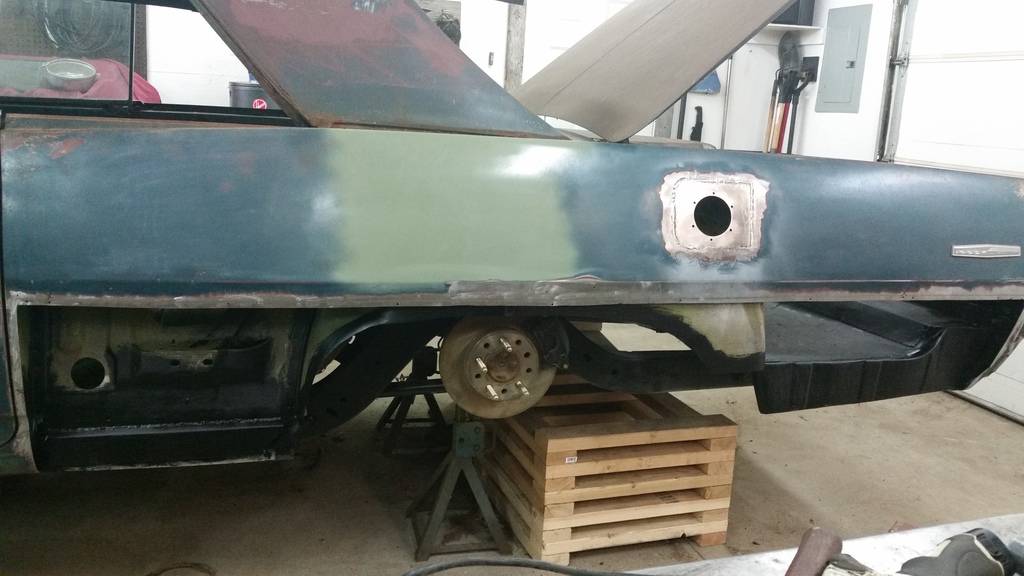
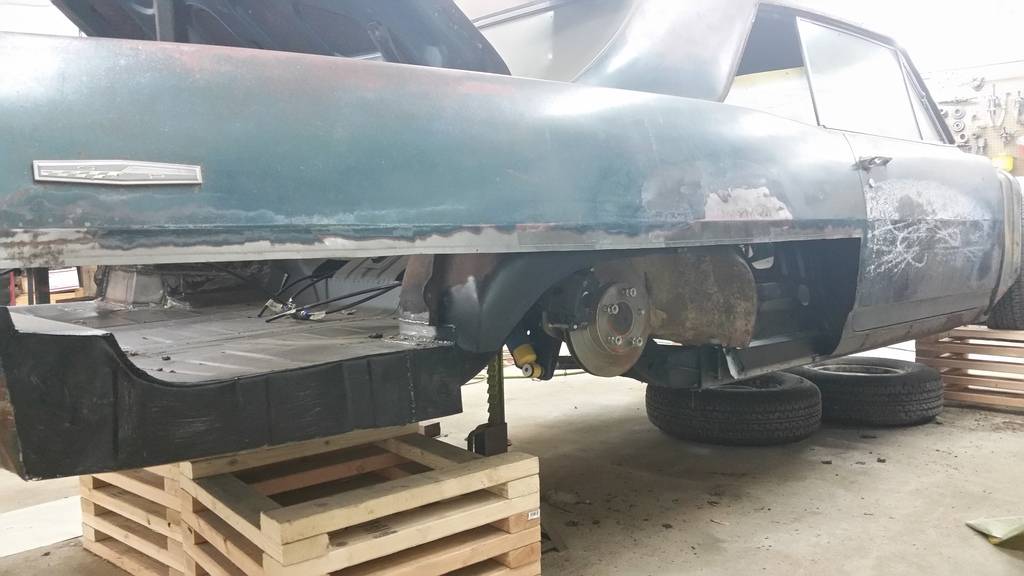
Looks like its been a while since the last update. Once I had the car on the rotisserie and got a good look of the entire body, I felt the car had a little more rust in the quarters and wheel houses than I was comfortable with. So I made the decision to replace the quarters, cut out all the rust and paint the car.
I stared with replacing the drivers quarter panel.

After I cut the quarter off this is what is found beneath.

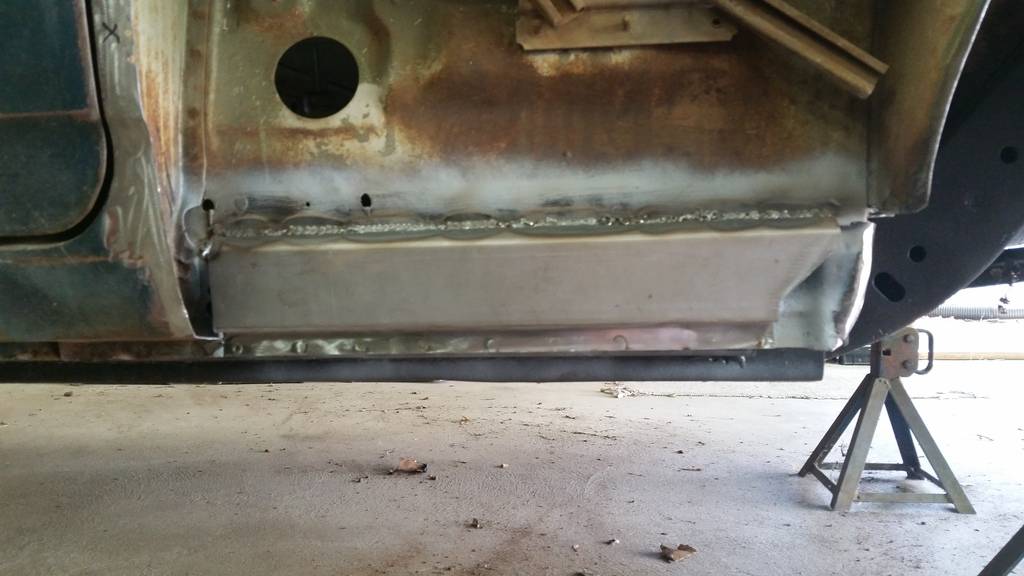
Made a new panel and replaced the lower section of the inner structure and cover with some epoxy.

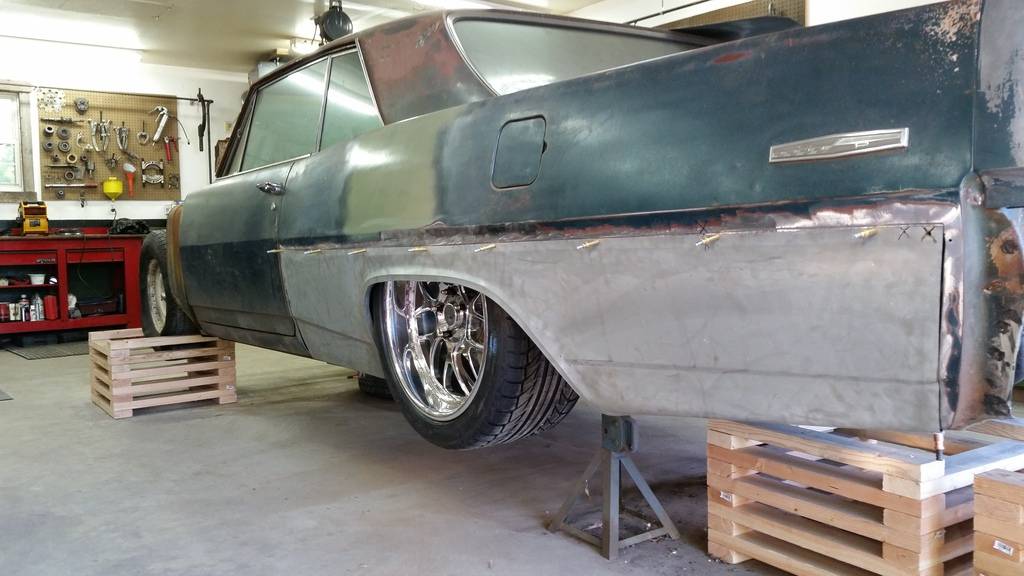
Got the quarter panel cut down and fit to the car.


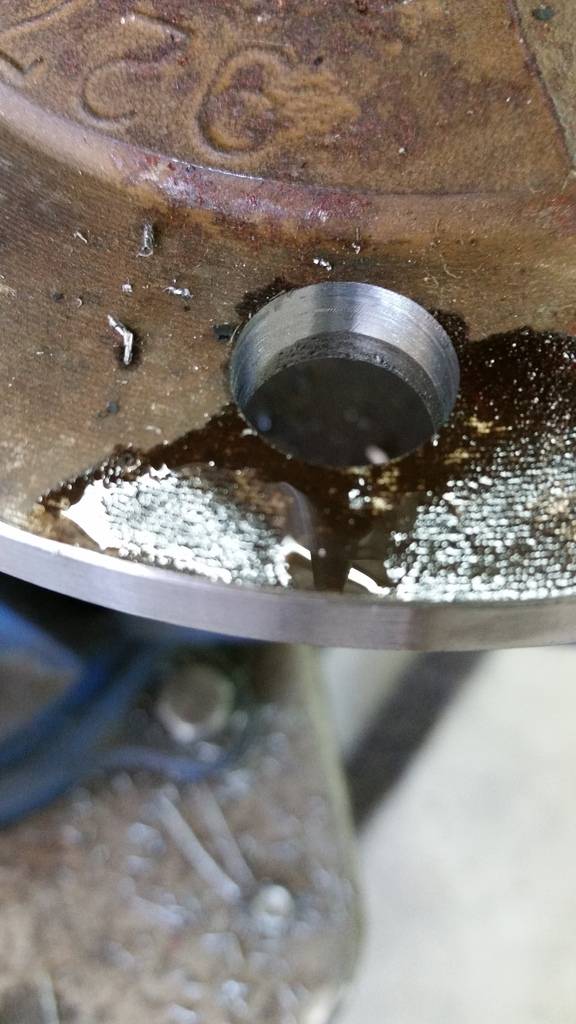
Once the quarter was fitted, I decided to go a head and blot up a wheel just to make sure everything had plenty of clearance before I weld up the panel. Before I could do that, I had to change the bolt pattern of the rear axle to 5 x 4.750 since billet specialties could not make the wheels I wanted in a 5 x 5 pattern. In order to do that, I pickup a nice jig to make life easier.
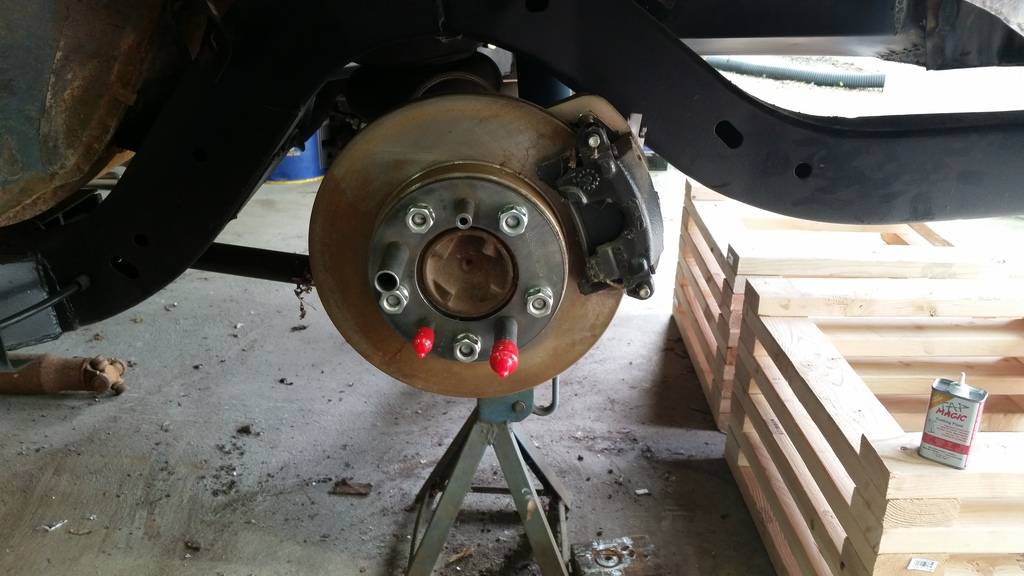
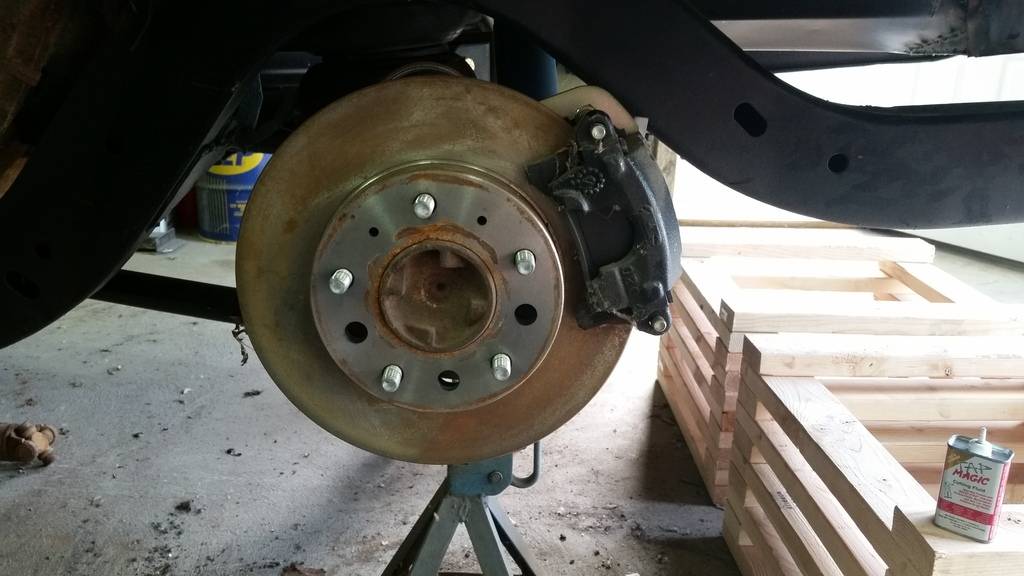
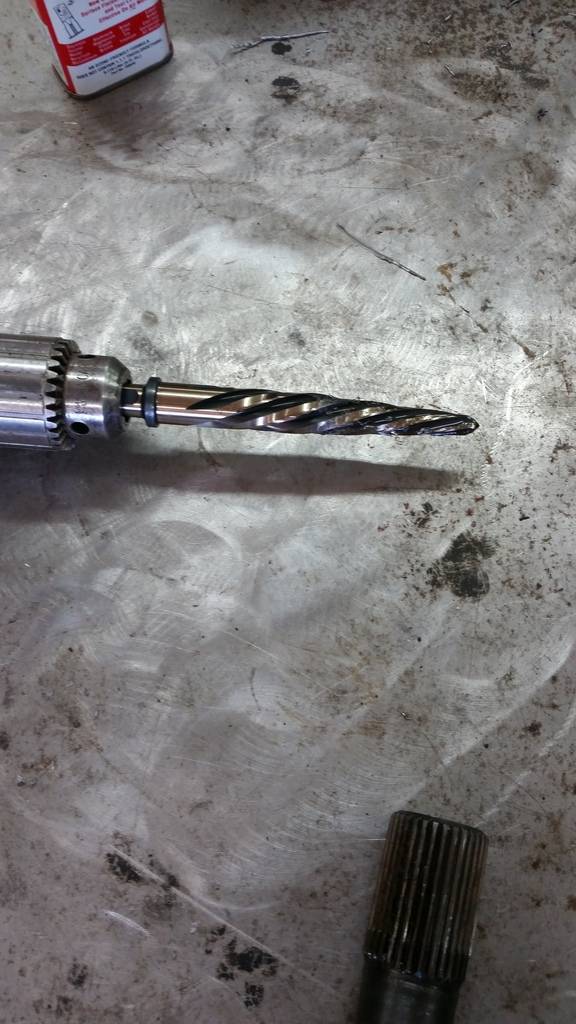
After the bolt pattern was drilled, I had to ream the holes out just a little to install the new ARP studs.

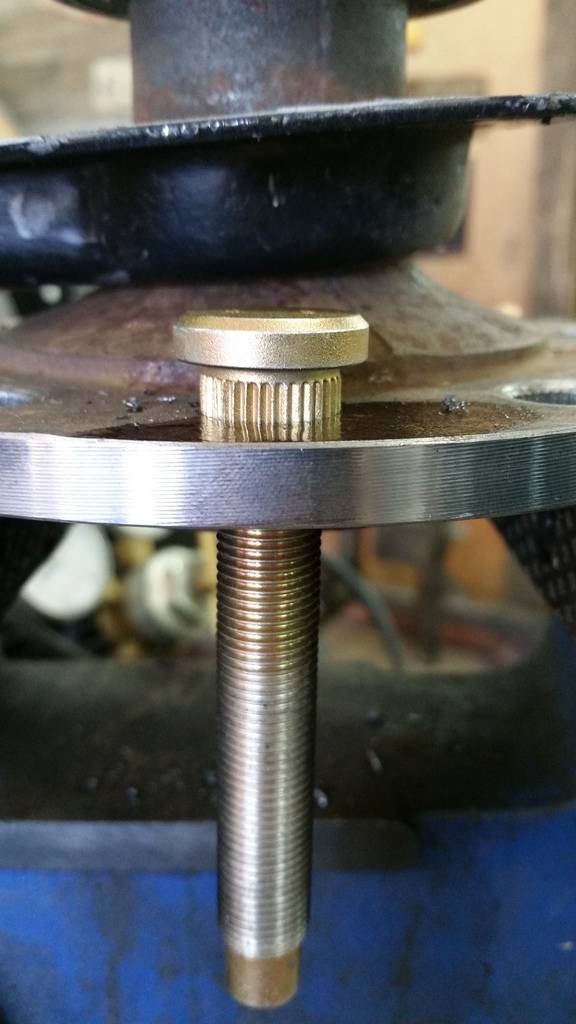
Pressed the studs in and Finally bolted up a wheel.

and laid out.


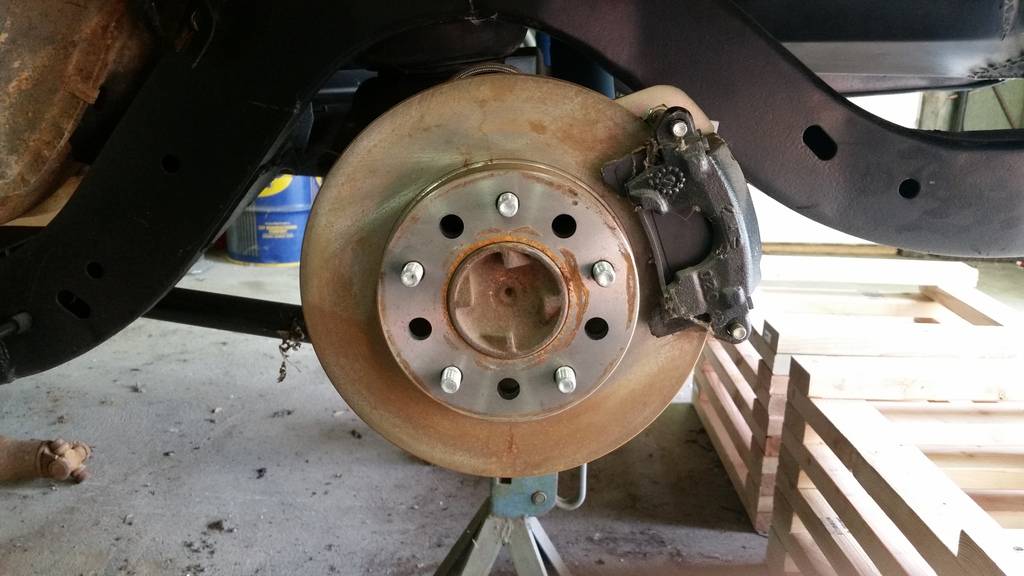
Got the passenger side prepped like the drivers and and ready to fit the quarter and drill the axle.
 '63 Pontiac Grand Prix
https://www.pro-touring.com/threads/...d-Prix-Project
06-12-2016 #35
Registered User
- Join Date
- Nov 2015
- Location
- Saint Louis MO
- Posts
- 36
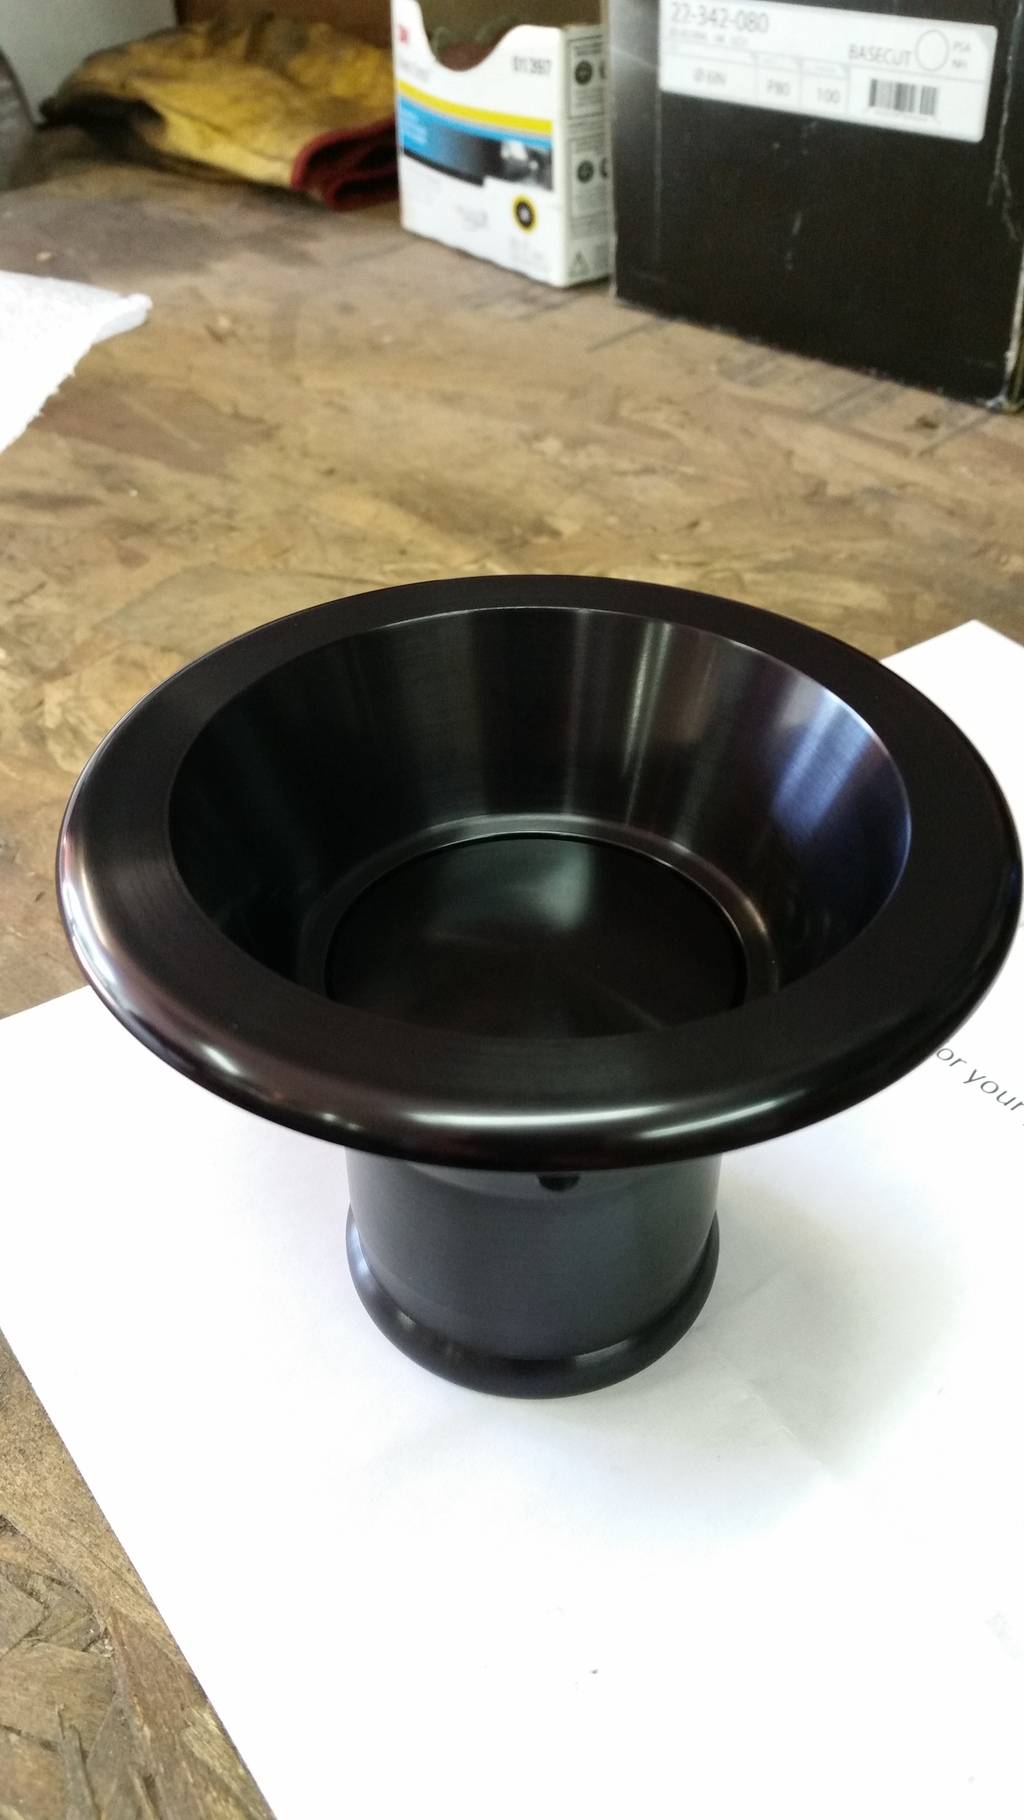
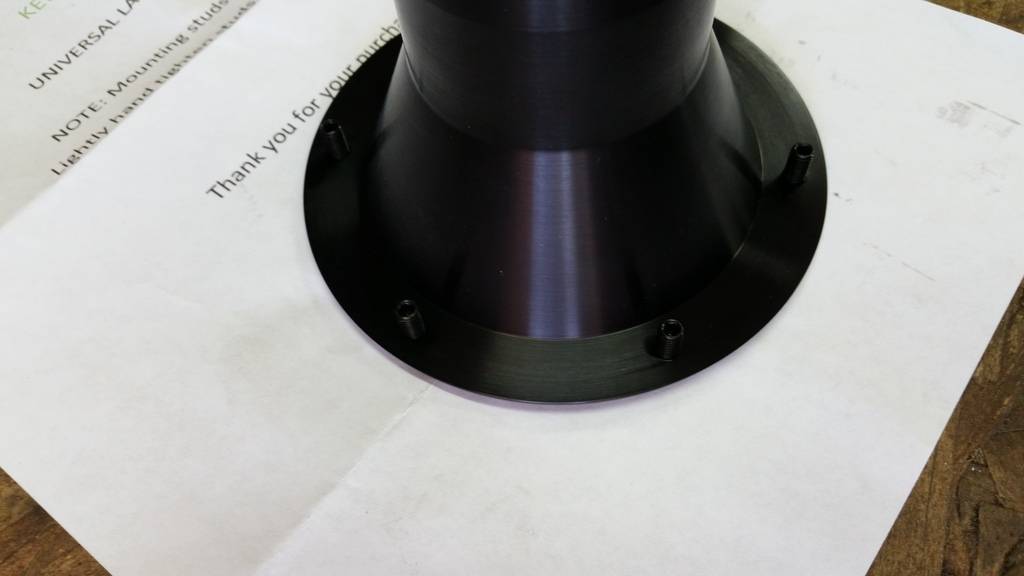
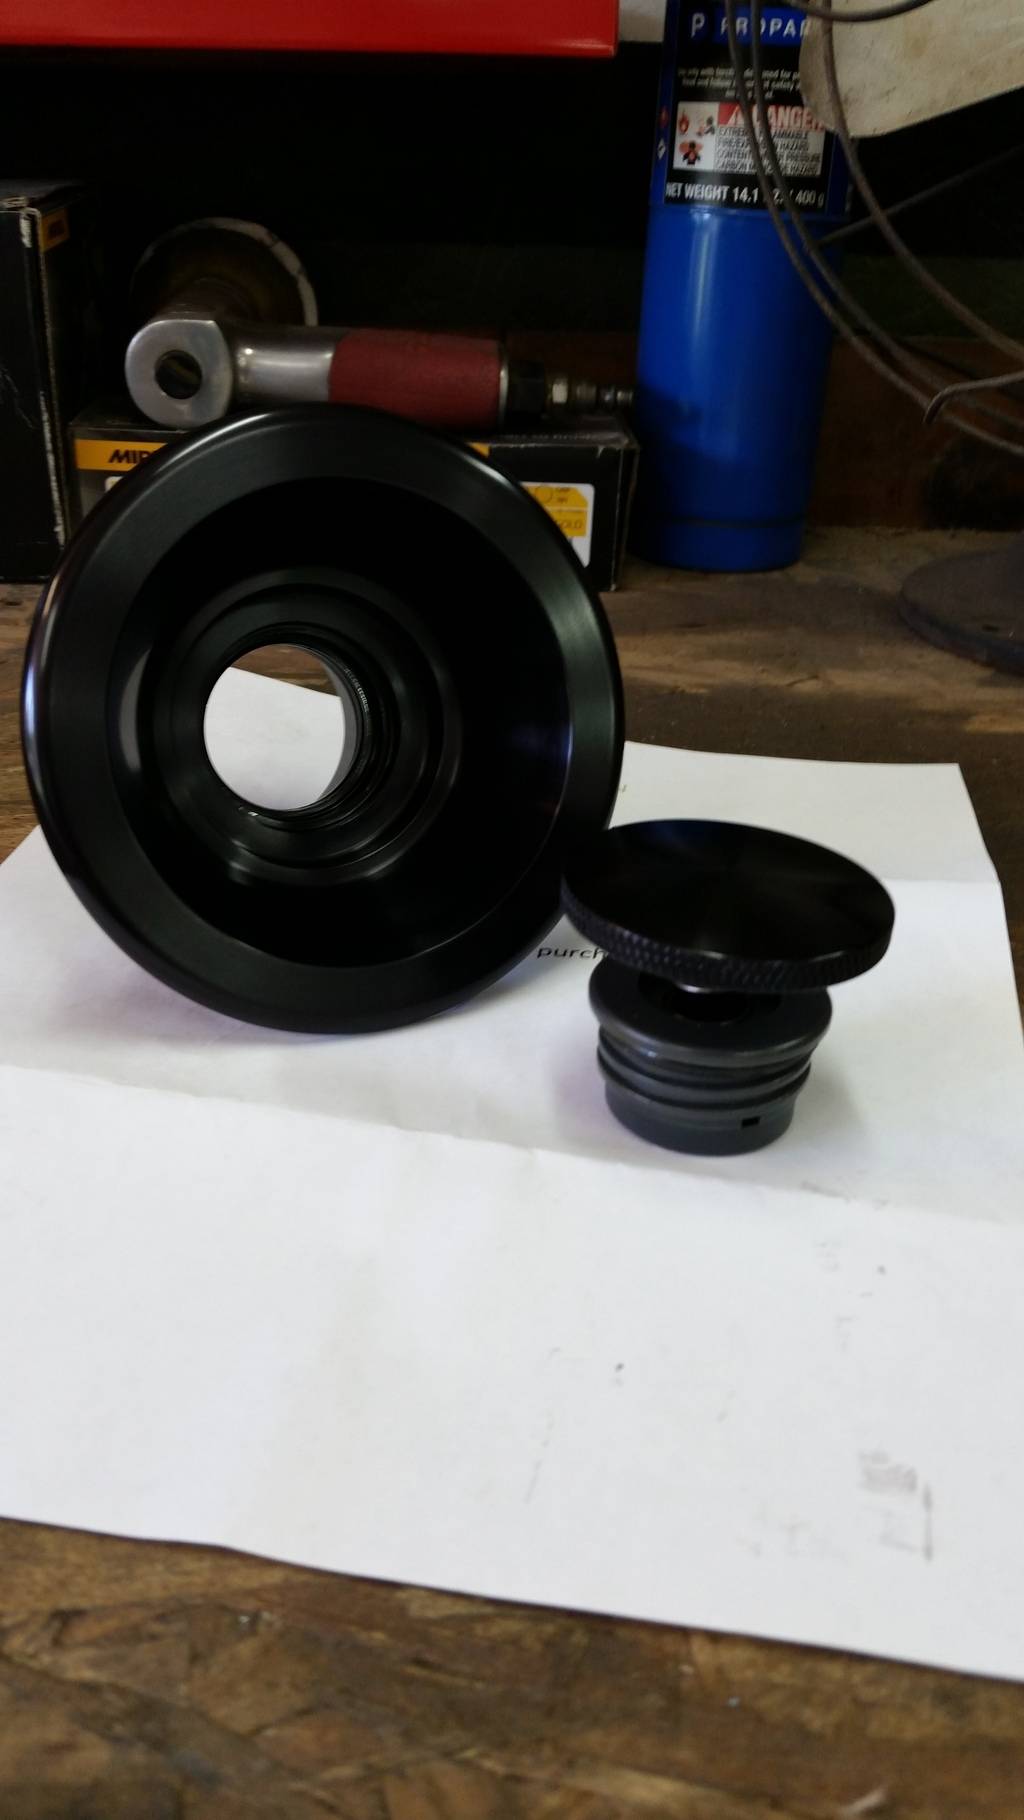
In the mean time I pulled the trigger on a Keefer Design Universal Billet fuel Filler, Made a panel for it and replaced the old gas door.

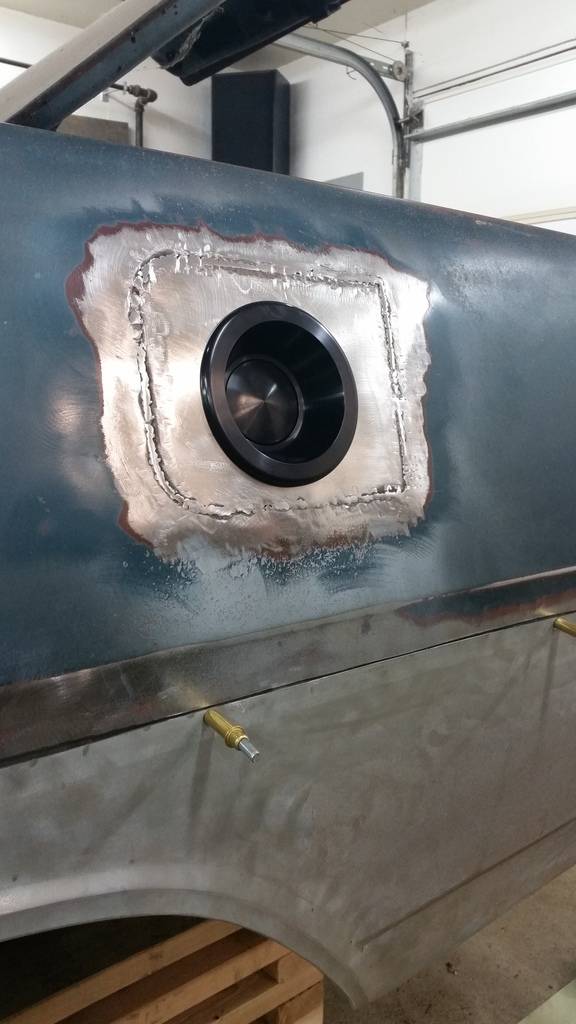 '63 Pontiac Grand Prix
https://www.pro-touring.com/threads/...d-Prix-Project
06-12-2016 #36 -Moderator/Sponsor-
- Join Date
- Apr 2001
- Location
- The City of Fountains
- Posts
- 16,117
Excellent work!
Andrew1970 GTO Version 3.0
1967 Cougar build
GM High-Tech Performance feature
My YouTube Channel Please Subscribe!
Instagram @dr__efi
I deliver what EFI promises.
Remote Holley EFI tuning.
Please get in touch if I can be of service.
"You were the gun, your voice was the trigger, your bravery was the barrel, your eyes were the bullets." ~ Her
06-13-2016 #37
Registered User
- Join Date
- May 2011
- Location
- Brisbane, Australia
- Posts
- 453

Yep, excellent work alright and great write up. Wheel looks fantastic on there.
1967 Mustang Fastback - widebody https://www.pro-touring.com/threads/...stang-Fastback
1966 Plymouth Fury III
1961 Oldsmobile 88 "bubbletop" = next project
09-30-2016 #38
Registered User
- Join Date
- Sep 2016
- Posts
- 1
So glad I stumbled across your build! I'm preparing to start on my 63 GP...and have the same plans right down to the bags and LQ4....I will probably run a 4l65e though to try and keep the GP center console, but I would prefer a manual. Here is some inspiration from back in day! Did you know Watson's first lace paint job was a 63 GP.

 Reply With Quote


