


Results 1 to 20 of 108
-
05-23-2010 #1

 Registered User
- Join Date
- May 2010
- Location
- Chattanooga, TN
- Posts
- 137

My 64 Corvette Pro Tour build, Long view of how car eveolved into what it is today.
I would like to share my 64 Corvette Coupe build with members here. Hope you bear with me while I go over how build. I have waited until car was painted before posting about it's details and how it has evolved via Project Scope Creep. I wanted to make sure it could be finished and not draged out of a couple more years.
My story is not short. It will require a few post to try an explain it.
Purcased car in Dec 2007. Started gathering parts for it in Jan 2008. By June of 2008 I had all the major parts in hand to start build. Car was a barn find that had gone through 2 other owners prior to my buying it. It was a perfect car to turn into a Pro Tour.
Frame had rusted completely through in about 4 places. There was also rust in the windshield frame, sill plates and door lock pillars that need to be repaired. Only fiberglass body parts that were usable were the doors and top panel due to car having been raced prior to be stored in barn.
First thing I bought was aftermarket frame/chassis with C4/C5 Corvette Suspension from Street Shop Inc. in Athens, Alabama. Frame rail are rectangular hydro formed tubing rather than welded round tube type used by some who are doing Corvette Restomod builds. Had chassis equipped with Bare Brakes rotors and calipers rather than stock Vette ones. Rear end is Dana 44 with 3.54 gearing. Sort of in between gearing compromise for touring aspect of car.
I wanted to use a latest GM LS design engine and decided on LS3 480 HP crate engine. Would have been nice to have gone with LS7 but felt the extra dollars good be put to better use elsewhere. Original plan was to use a 4L65 A4 trans built to handle 600 HP and upgraded with ISS to support LS3 ECM rather than a manual, as both my knees need replacing. Even the new clutches with hydraulics that take lot less effort didn't help when caught in traffic.
Two weeks ago I made the decision to not to go with a 4L65 but go with a 4L80E based transmission instead. Two main reasons for that. 1. While 4L80E adds more weight to car, it is by far stronger. Not only should it take track use better, it will allow me to upgrade my HP & TQ later on should I decide too. 2. Better gear splits modifications for competion use offered. There is a third reason for it also, but can't talked about it at this time. That reason may make the car competive with a manual car when auto crossed or on a road track. Time will tell on that.
Torque converter, like the 4L80E based trans is overkill for amount of HP engine puts out. It's a multi disc unit design made by Circle D Specializes that is designed for 1000-1100 HP 4L80E based drag cars. Major difference is it only stalled to flash to 2400-2500 RPM, so it's purpose is to limit slippage to same are lees than a manual trans clutch when up shifting and take pounding when down shifting and getting in and out of throttle. It's not designed to give awesome 60 ft times. All the converter people I talked with understand what works for drag racing, but none were sure what it would happen if you beat on converter up shifting and downshifting for say 1 hour on a road course. All they agreed on was keep the trans fluid as cool as possible and if possible less than 180 degrees. Time will tell if I made the right decision.
Next I had to find a shop to assemble and do the bodywork car needed. Shop I had planned to use had problems getting customer's car delivered. Found a shop that agreed to take on job, B Rod or Custom located in Knoxville, TN. They believed in having a plan to work too. They also had their vision for Project which didn't match my vision. I was looking at just using aftermarket 1.0" stretched rear quarter panels so I could run a wider tire on rear.
They, being creative had a vision of making the car distinctive by putting wheels on back with minimum of 4.0 inches of exposed wheel hoop. Problem with their vision is Vettes suspension is designed with positive offset. Using current aftermarket stretched quarters panels allow for using the wider tire size they wanted car to have, but not more wheel hoop than stock wheels.
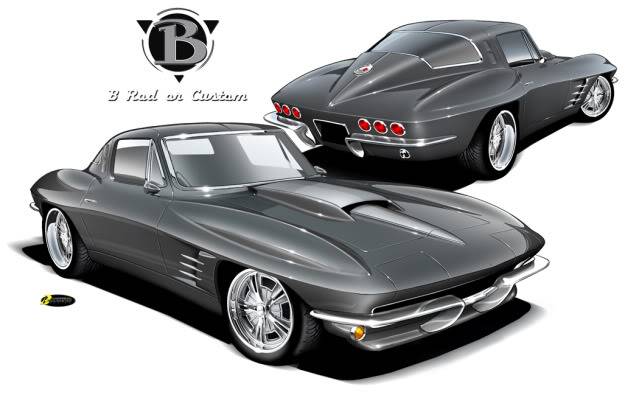
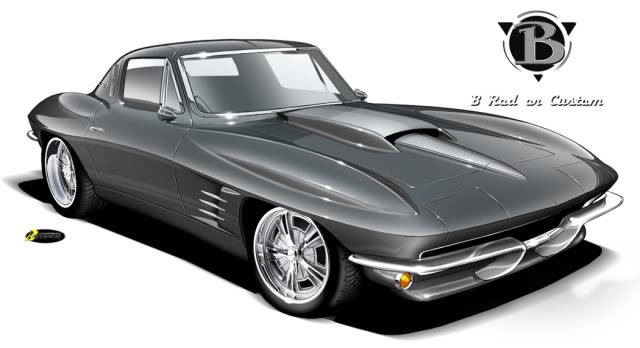
Here is 1st rendering of what they thought would work that included one of the two requirements for build, adding a third taillight on each side and improving the look of lower front fender dummy vents bland looks.
Shop thought they could just move the frame rails in and shorten the suspension. You can do that, but you ruin the rear suspension geometry if you shorten it. You can more the rails in and tub the body so you can use wider tires and rims, but that want get you more exposed wheel hoop. Just still means using late model C6 style positive wheels is required.
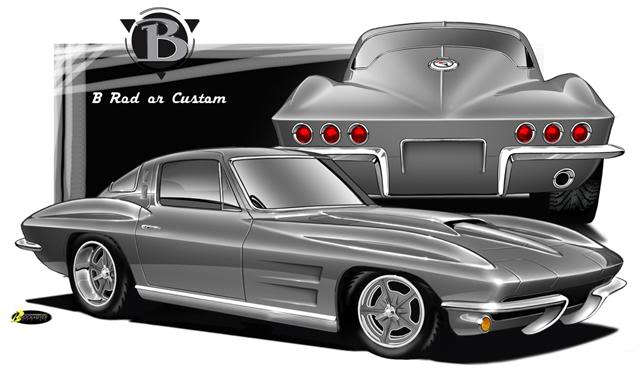
There also was a problem with wheel design. Shop like old school style wheels, while I had no problem with the late model Corvette style wheels. When I saw the rendering I said no to those wheels and they said no to my choice. They asked me to see if I couldn't find a wheel that was maybe an updated old school wheel style that was acceptable to us both. They still wanted a wheel that looked good with minimum of 4.0 inches of exposed wheel hoop.
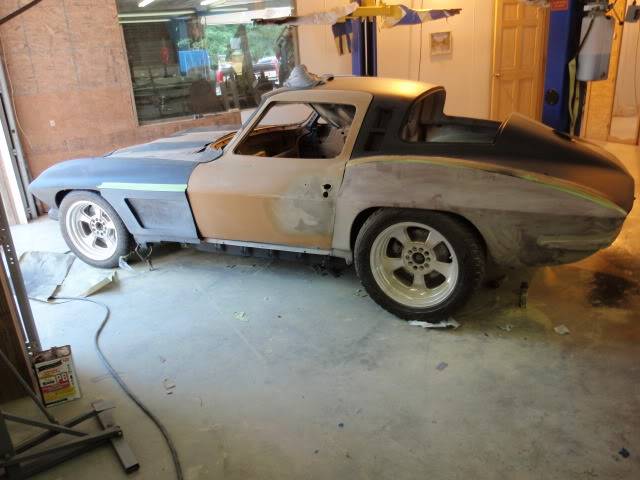
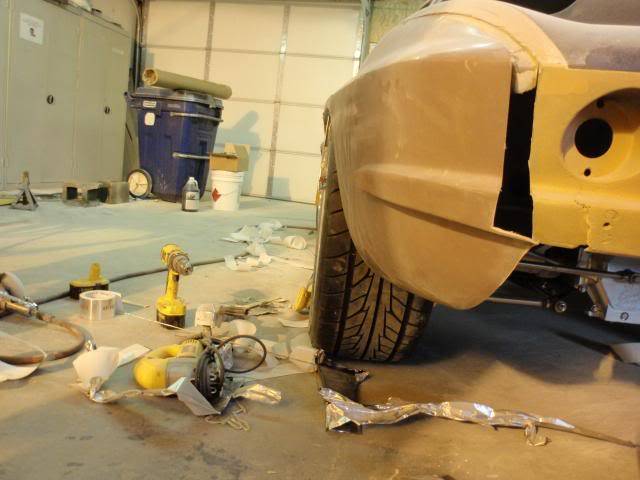
To try and get me to buy into their vision they installed a set of wheels off a Camaro that had the tire size they wanted to use and had 4.0" of wheel hoop. They had came in on a customers, and available to use even if they did look like crap. They were install under 1.0 aftermarket quarter panels I had already purchased for build. You can see that in order to get them to fit inside the quarters, shop had to adjust the suspension to tilt them in toward frame. Standing up straight they stuck out about 3/4 of and inch and were 2.0 inches away from frame rails. In the second picture you can see we had been trying to work on improving the front lower fender dummy vent look and make it functional.

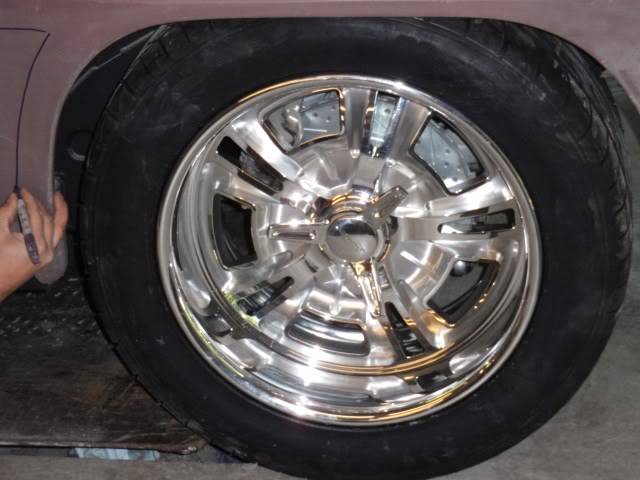
In the meantime, I started searching for a wheel that was acceptable to both me and them. It's unreal how many wheel companies there are. I just happen to run across a company name Schott Wheels. They have a very distinctive cover loc wheel style, and one of their models intrigued me. It was their Modsport K.O. wheel with spinner. Found it was based of both the old Halibrand Kidney Bean style of mid 40s to late 50s and their Sprint style introduced in the early 60's. Shop loved the look for car. What happen next changed the entire direction of build. It's what made me decide car had become a Pro Tour one.

Shop said they would order the wheels with correct back spacing for car. I assumed that meant wheels and tires would fit under the 1.0" aftermarket stretched quarter panels I had already purached. Wrong, shop order the wheels with backsacing that got them their 4.0" of exposed wheel hoop for their vision of car. Doing that meant the front fenders would have to stretched at least 1.5 inches to maintain any kind of front to rear body proportions. This post is getting a little too long so I'll end it for now. Then I'll so you what problems that caused and how using High Tech Redneck Engineering shop overcame them.
There 4.0" of exposed wheel hoop. Not what I was expecting. I was expecting 2.0" at most.
-
05-23-2010 #2
Registered User
- Join Date
- Dec 2006
- Location
- Kansas City, MO
- Posts
- 173
Post more!
-
05-23-2010 #3
 Registered User
- Join Date
- Sep 2006
- Location
- Southern Indiana
- Posts
- 4,709
OK so who is writing the the check? And you didnt want 4 in of outside hoop?
Hmm sounds like that shop needs less work if they wont listen to customer.
Lee Abel
AFTERMARKET PERFORMANCE
1977 Chevy Monza 2+2:Project "Cheap Trick"
1978 C10 Long bed , On air and trailer puller
2006 Buell Blast ,Just a bike to ride and for mileage
1966 Caprice 4dr Sports Roof fact.327/now 350/SOON 454???? Project "II Old,,,ZERO BUDGET OR LESS CAPRICE!"
-
05-23-2010 #4
Registered User
- Join Date
- May 2010
- Location
- Chattanooga, TN
- Posts
- 137
I'm the one writing the check. It wasn't that I didn't like the 4 inches of outside hoop, I was aware of what problems trying to do it entailed. What I didn't want was how it changed body line on most cars I'd seen it tried on. Originally Posted by MonzaRacer

Other problem was a stock midyear corvette with stock tires has a lot of exposed tire on rear as it is. Moving wheel out wards makes it even worst and causes you to have the same problem on front side of wheel well.
I showed them pictures of problems it caused and how some had tried to deal with it.
Most people just leave it as is on front and rear. Just allows for a lot of trash to be slung on side of car from the tires.
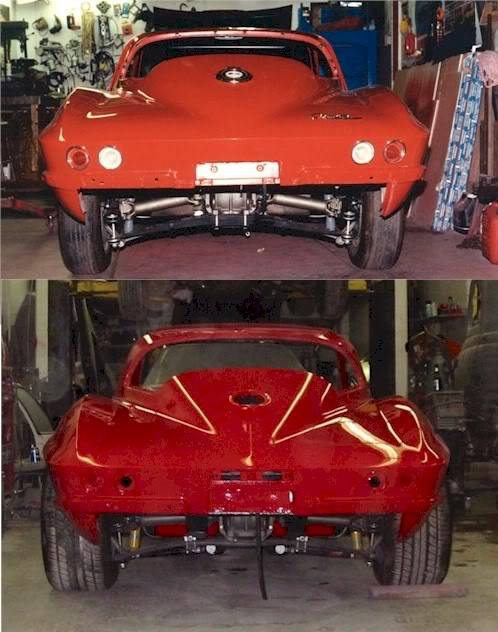
Some have copied approach. Rear isn't too bad but does bubble the back end of car. What they did on front does not add to look of car at all.
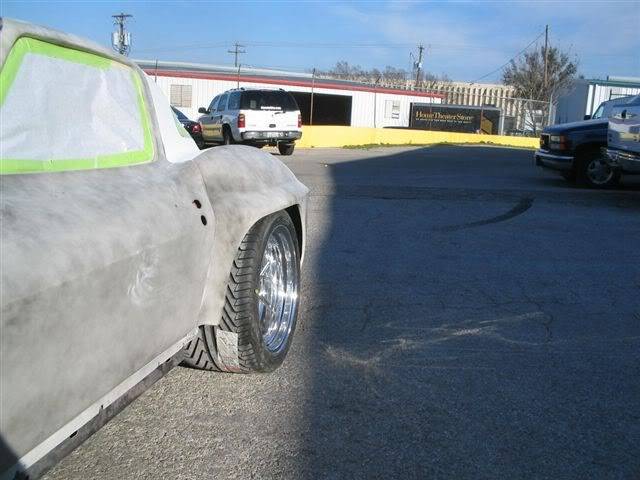
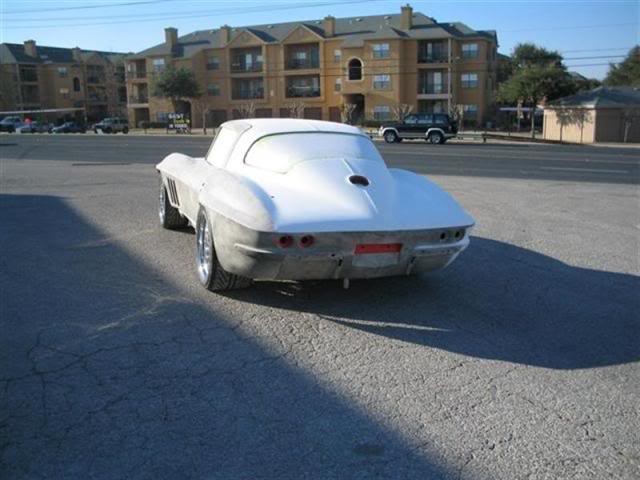
Shop's owner said he had a plan that that would provide more coverage on rear than what stock body has, and on front side he would at least match the coverage.
Problem was, nothing like their plan had been tried and it meant having to stretch the front fenders to keep body lines in proportion.
In the mean time we had done a little more research on a functional front vent to replace the stock lower front fender dummy vent. They did a rendering of what they thought they had the expertise to do. Part of that included trying to duplicate the look of a 2008 C06 front vent on lower front fenders. You can't make a mold that will fit in space we had to work with off C6 fendeer, plus midyear inner fenders are not spaced the same from side to side.
Here is third rendering they did of project.

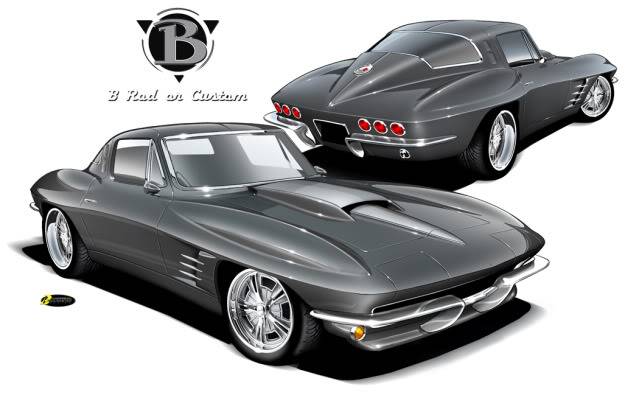
Below is the 4th and final rendering of his vision of car of what he thought shop could make the 64 into. This time you can see we decided the vent styling off a 2008 Z06 would make for a better look and it would provide more coverage of the amount of exposed tire that was going to be caused by moving the front wheels out wards too, in order to maintain front to rear fender balance.
Ambitious! I knew they might be able to do pull the back of quarters out to cover more of the exposed tire, but could they do it without making the width of the rear end grow.
The front side of quarter I had no hope for.
The vents would require a talented body man that could take the drawing and reproduce the vent on both sides of car. Each hand made.
You can see the rendering still didn't improve the amount of exposed tire on rear side of it.
4th and final rendering the car was to be built to.
05-23-2010 #5
Registered User
- Join Date
- Sep 2009
- Location
- tampa fl
- Posts
- 184
looks great. i like the wheels
05-23-2010 #6 Registered User
- Join Date
- Nov 2008
- Location
- TN
- Posts
- 959
Looks Great!
I Do say that I am not really impressed with the shops attitude. I don't think that they should force their ideas on you when they are supposed to be working for you.
Post more soon!
Also those scoops don't look too hard to make.. What do you want them to do? Just vent air? I could probably make you a set.. I assume you would want them out of Fiberglass so they could be molded in? PM me if you are interested.Benjamin
Twin Dusters
'72 Plymouth Duster "Aero Duster" project
'72 Plymouth Duster "Daily Duster" project
https://www.pro-touring.com/showthre...RO-DUSTER-quot
05-23-2010 #7
Registered User
- Join Date
- Dec 2006
- Location
- Kansas City, MO
- Posts
- 173
I'm confused. The car is out of paint?
Go ahead and put it out there. No need to draw it out for drama's sake.
05-23-2010 #8
Registered User
- Join Date
- May 2010
- Location
- Chattanooga, TN
- Posts
- 137
Benjamin, Originally Posted by Bjkadron
Owner and Son are creative builders. I had a hint of this when we first spoke. Most of their customers that bring a car to them to build want a build that is a little unique. Like me they have ideas, some for the better some for the worst. Part of any builder job is to keep the customer from making mistakes and help them build something that just different enough to make the owner proud.
I'm not saying what shop did was right. I do understand why they did it. What they saw me doing was just doing a repeat of same old, same old build others across the country had already done. For a little more money they wanted to build me a one off Vette that would be the next evolution in looks by making car have a more modern look while till trying to maintain look of original body lines from a distance.
In other words, make you average non Corvette purist look at car, no something has been changed, yet wonder what. There are three dead give aways that car does not have a stock body when viewed from a distance. The rocker panels and lower front fender vents from a side view, and the third tail light from rear view. That is only if your familiar with midyear Corvettes.
My problem is most people don't even notice the real changes done to improve just use of wider tires on these cars.
Here are a couple of picture of what GM did just to try and make these car completive on track back in 1963. My car has a wider tract than GM's racer. That is the major handling change that at least to me makes my car a Pro Touring candidate.
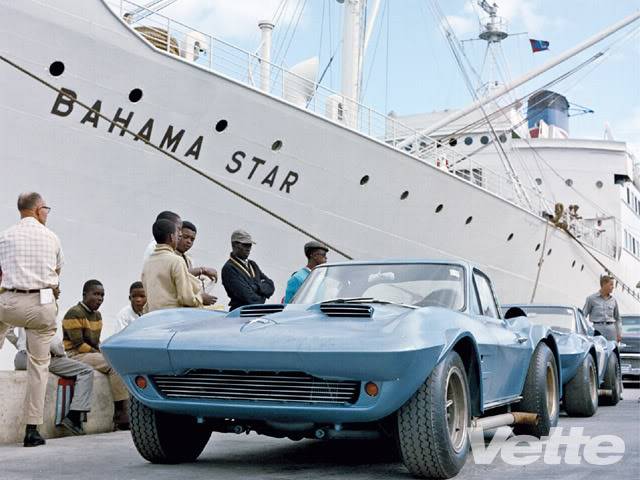
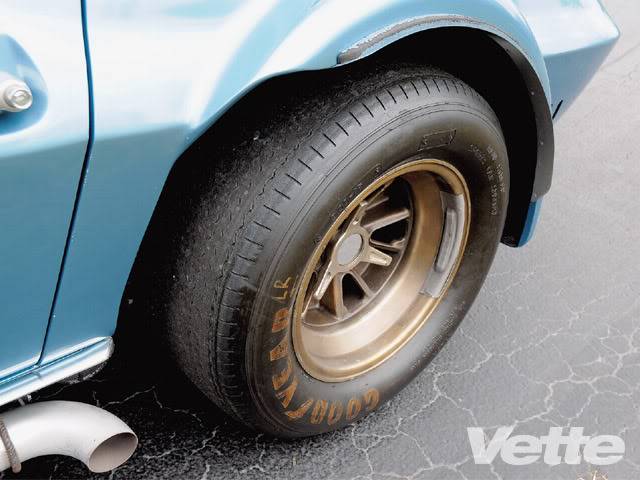
I do appreciate you offer to make vents, but the vents have already been finished. In my opening statement I stated I had waited until car had been painted before posting about it and why I did so.
05-23-2010 #9
Registered User
- Join Date
- May 2010
- Location
- Chattanooga, TN
- Posts
- 137
Car is out of paint as stated in my first post. Originally Posted by SimplyKC
I'm not doing this for drama's sake.
You saw the rendering of what car is suppose to look like. Just in case someone wants to try and do a similar build, are take my build to the next level, show you and others what went into doing it, and how it was done using Redneck Low Tech means.
05-23-2010 #10 Registered User
- Join Date
- Oct 2004
- Location
- Orlando, Fl
- Posts
- 1,229
So are you going to post updated pics?
Nick DiPrenda
05-24-2010 #11
Registered User
- Join Date
- May 2010
- Location
- Chattanooga, TN
- Posts
- 137
Yes! Originally Posted by dipren443
Just takes time to try in get things in order. Time frame from start till car in primer awaitng paintings is 11/15/09 to 03/21/10. I have no plans to show car painted. I prefer to wait until car is finished for that. I've already discovered paint is hard to shoot. It will take someone who knows lighting with better equipment than me to try and get good shots of it.
Week one.
Final go look had been nailed down.
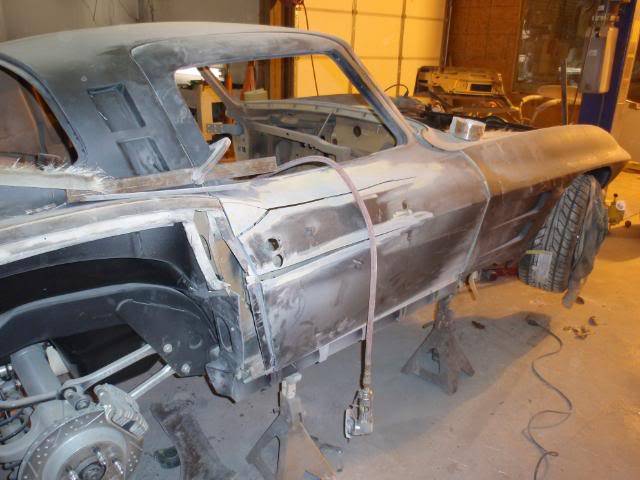
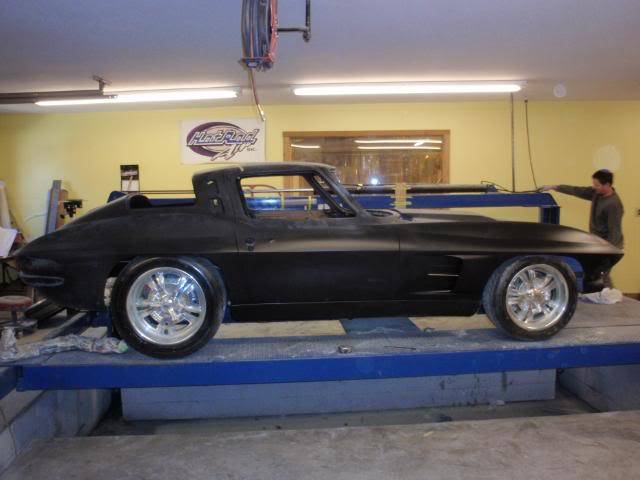
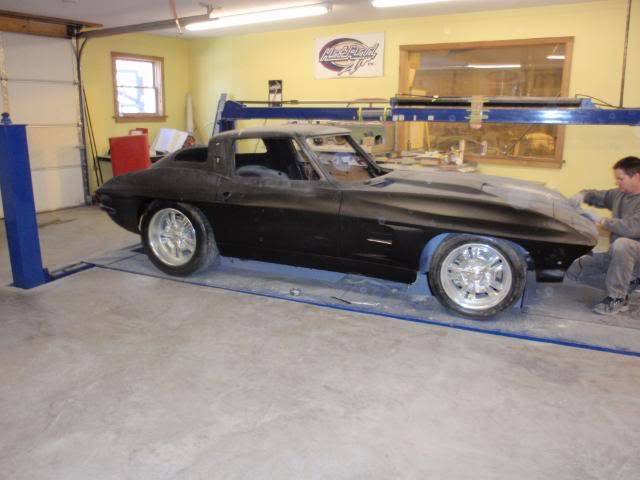
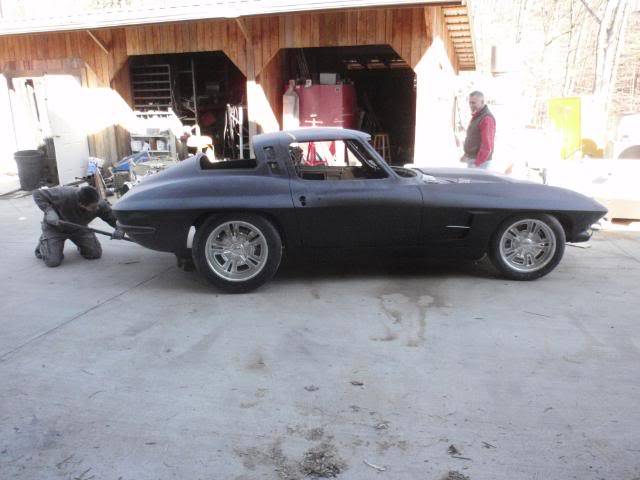
Next comes the Sawsall, and ues of High Tech Redneck wooded paint stirrers, masking tape, screws, and a piece of a 4"X4" wood post under rear of qtr panel bonding strip to push out rear of qtr panel. Goal is to get about same amount of tire exposed, as that exposed on a stock body and tire car, yet maintain the stock qtr's look on rear. The rear of qtr has not had any cuts made to allow it to curve back in and mate up with rear valance panel.
As you see in from pictures, shop started a Coke bottle curve look shown in the rendering, but with change that make the transition between the rear qtr panel and door even less dramatic and more flowing than that in rendering by extending point out to middle of door's conture to match it back up with that of stock body. In rendering it matched up just in front of door handle.
You should be able to see how much that change reduced the amount of exposed tire and dramatic drop of body line in pictures below. Odds are when he gets through contouring fender to fit tire, even less of tire will show.
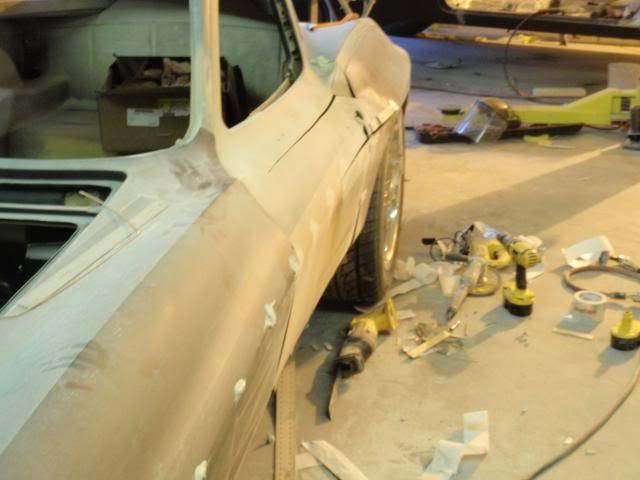
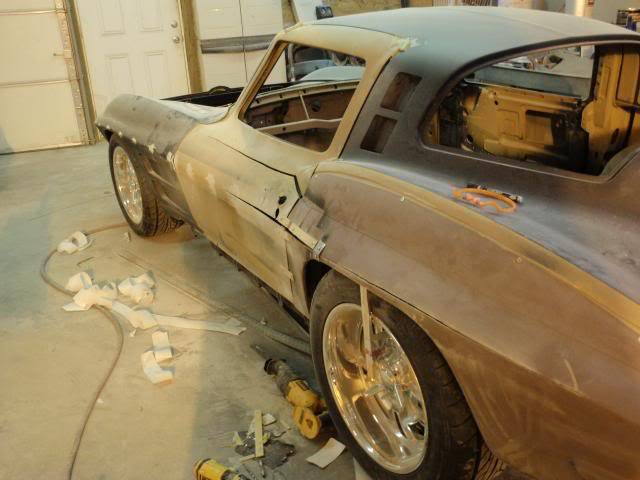
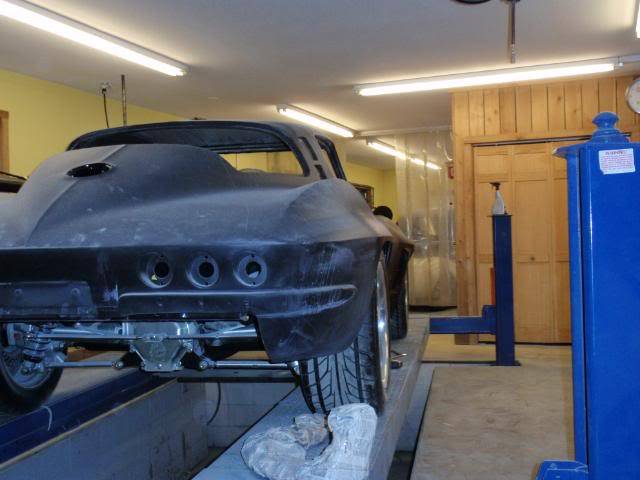
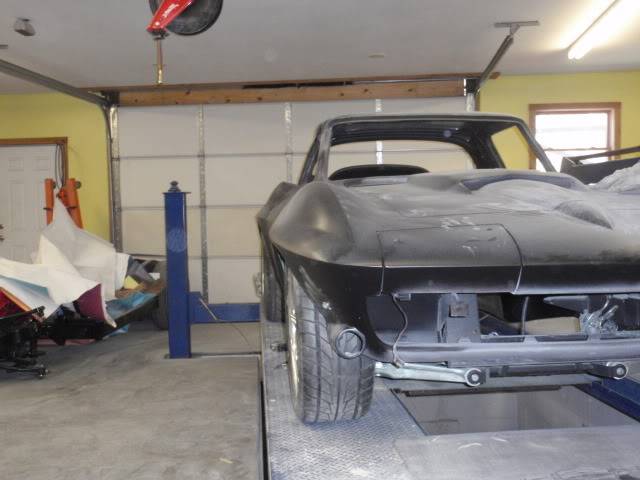
Picture of rear showing amount of tire exposed and showing how much of exposed tire we were able to cover yet still maintain look of stock body qtr panel. Since there are no cuts made yet to allow the rear of qrt panel to curve back in to rear vaalance/tailight panel. Once he starts contouring rear qtr, he hopes to be able to get a little more of exposed tire covered up to match look of stock tire and qtr panel car. He is trying hard not to have it take on a wide rearend bubble look.
Rear bumpers will have to be cut and sectioned an are pie cut to fit.
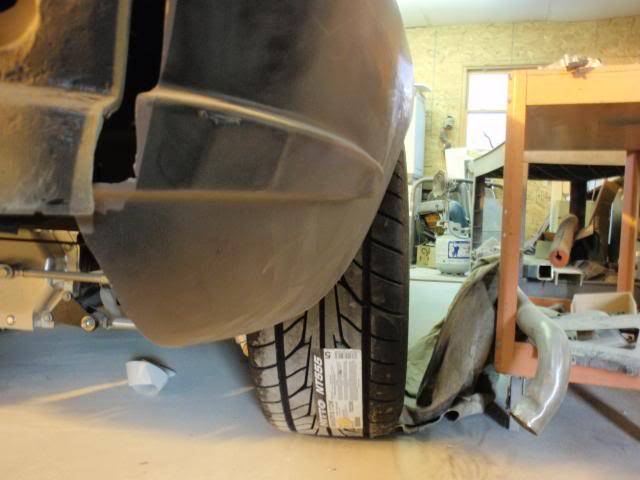
As you can see the rear tire and wheel are still canted in wards. Shop will adjust suspension to stand tire straight up and stretch the outer lip of wheel well out wards. The paint stir stick used in increments of 1, 2 or 3 will make the quarter's lip curve. Then cuts will be made in the quarter to let lower part that attches to lip be stretched out and mated up with it.
05-24-2010 #12
Registered User
- Join Date
- May 2010
- Location
- Chattanooga, TN
- Posts
- 137
Here shop start to play with vent trim/bling by using ones made from styrofoam.
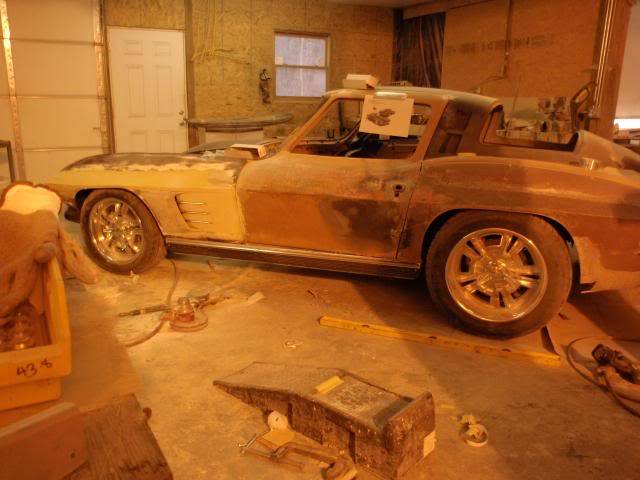
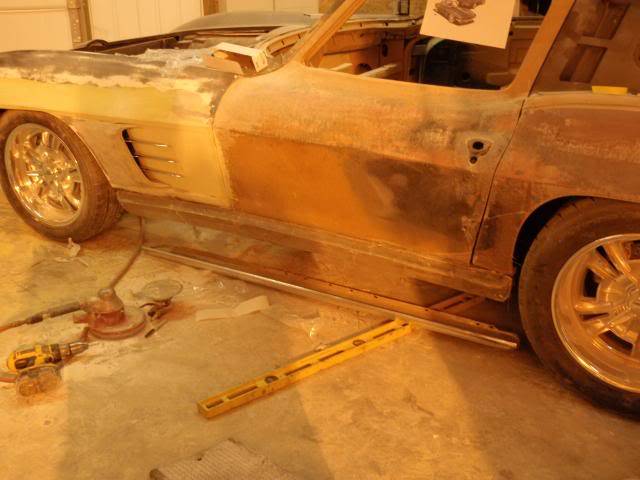
How the rear of the quarter panel's wheel well opening was pulled out to give more exposed tire coverage. Had to cut out the bumper closure to get it to stretch out at front of quarter and bend back into it stock location at rear taillight panel so rear end would not take on a bubble look.
There of pictures of one of the body men was working on door jam that needed to be changed due to moving the door skin outward along with the rear qtr panel to get tire coverage on forward end of qtr panel.
Door Jam.
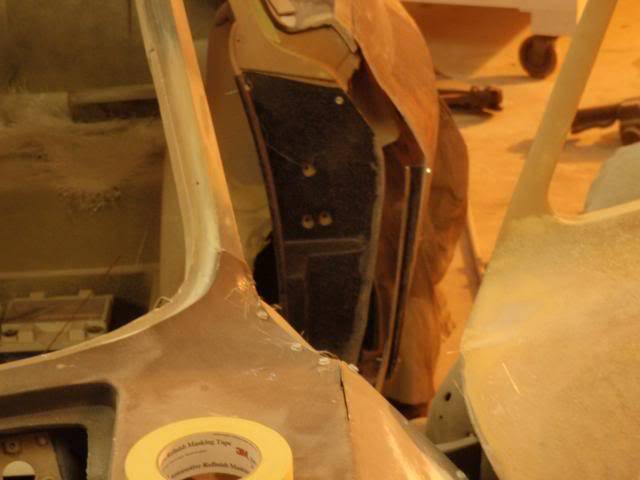
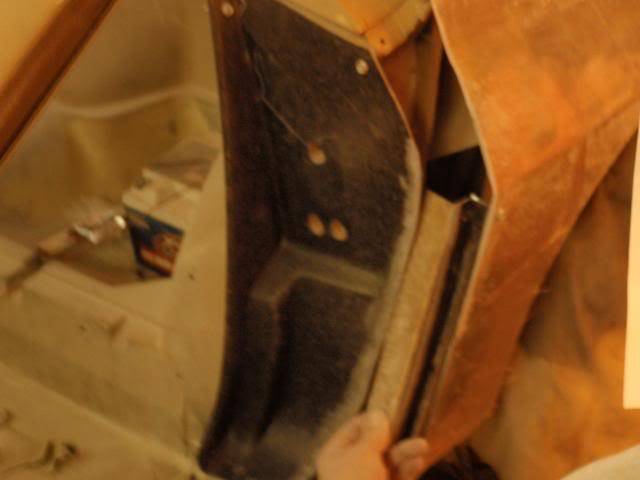
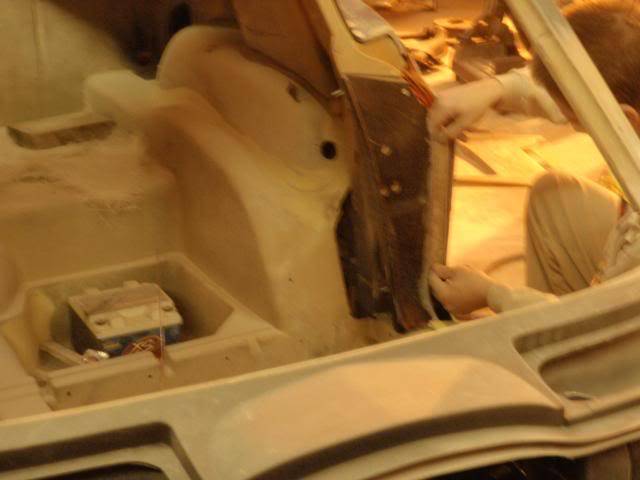
Now the big if on project has been, can we stretch the rear quarter panel to provide better tire coverage on side, without causing a bubble effect to look of rear end. I hope we have achieved that goal.
It took about 30 mins to do what you see, with a little coaching of panel and body man to get the darn thing where I wanted it. In fact we got the front and rear of wheel well opening within 1/8 of each other so we have the same tire coverage on front and rear of wheel well opening. Oddly enough that extra 1/8 of and inch outwards is on the rear side.
View of Right Rear quarter panel from rear. Note that Tire & Wheel are canted inwards to get tire inside the 1.0" GTS stretched 1/4, so there would be even more tire exposed without that. Note also were the end point of 1/4 is at on rear tire.
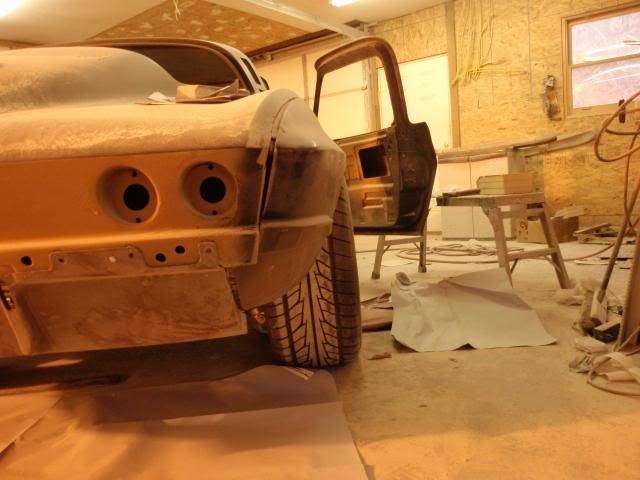
Pre-stretched try by using 3" x 4 " block of wood.
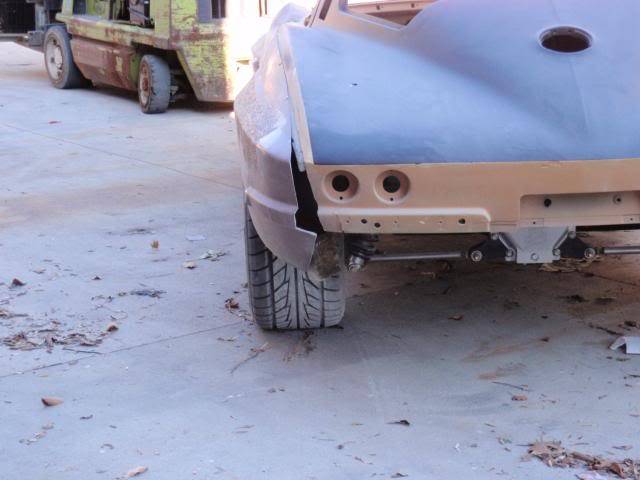
As you can see we were able to stretch the 1/4 to get same tire coverage on front and rear of wheel well opening.
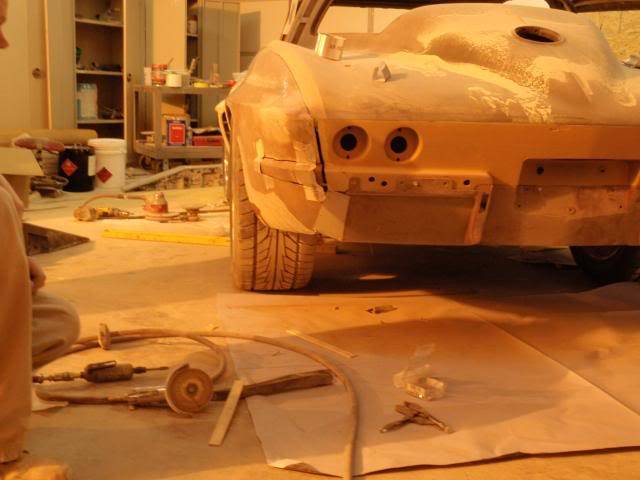
Front side of wheel well to compare tire exposure.
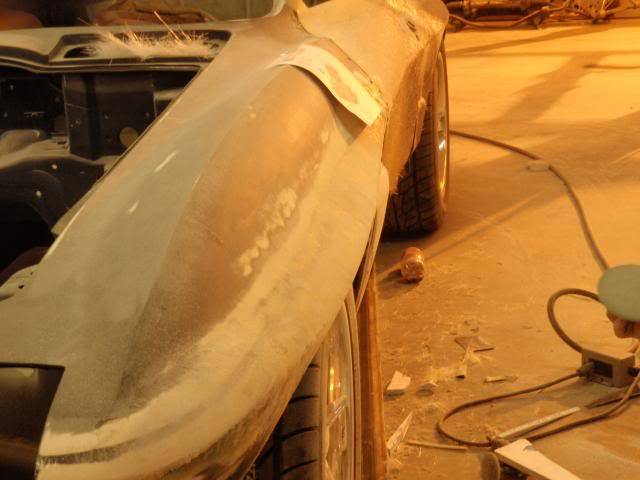
How we got there.
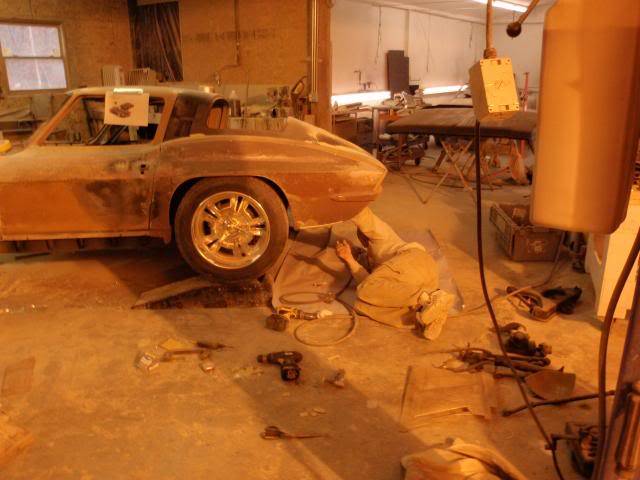
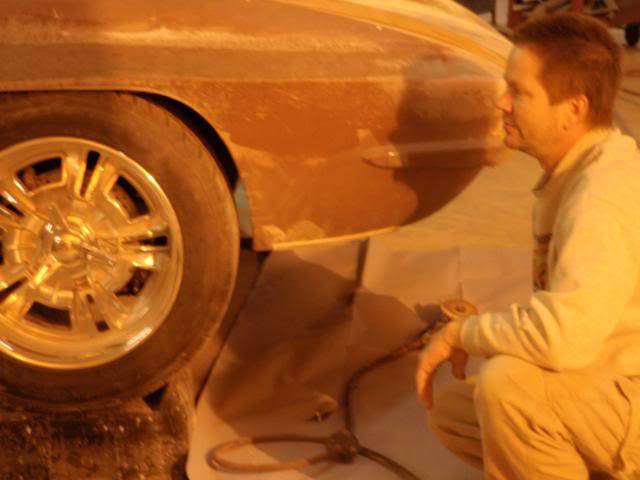
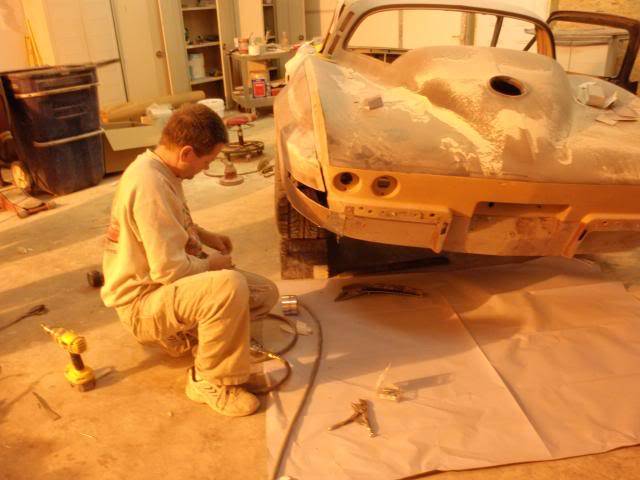
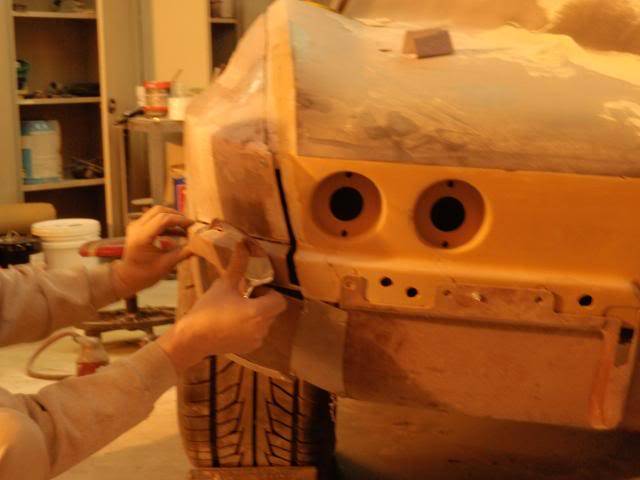
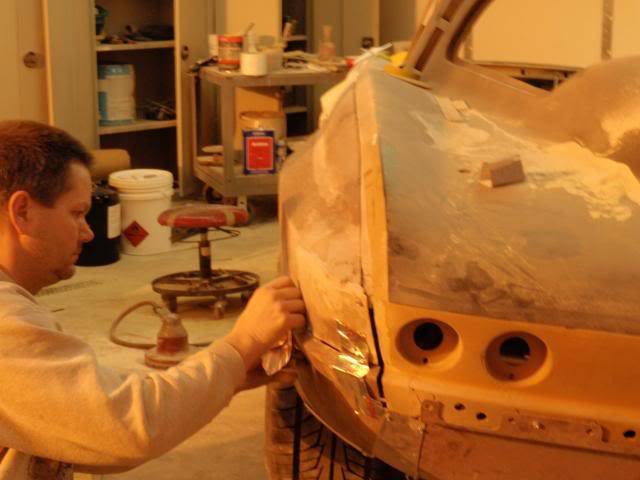
Vent will be using C1 Spears for bling and has been reshaped to remove some of it's bludge.
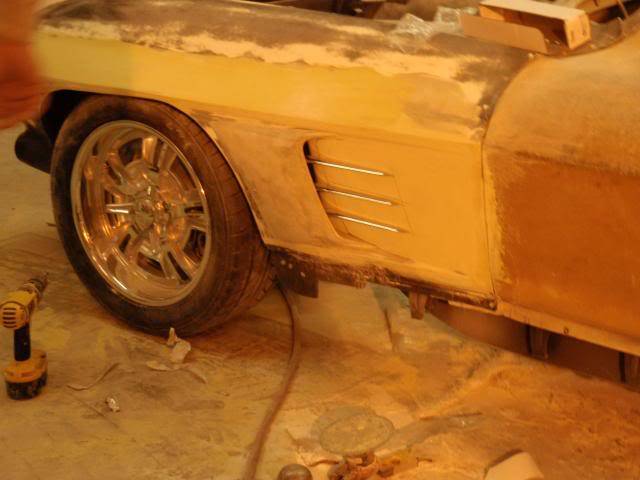
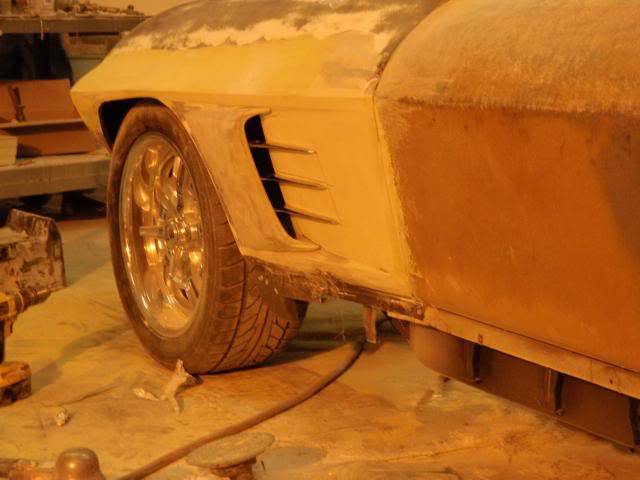
05-24-2010 #13
Registered User
- Join Date
- May 2010
- Location
- Chattanooga, TN
- Posts
- 137
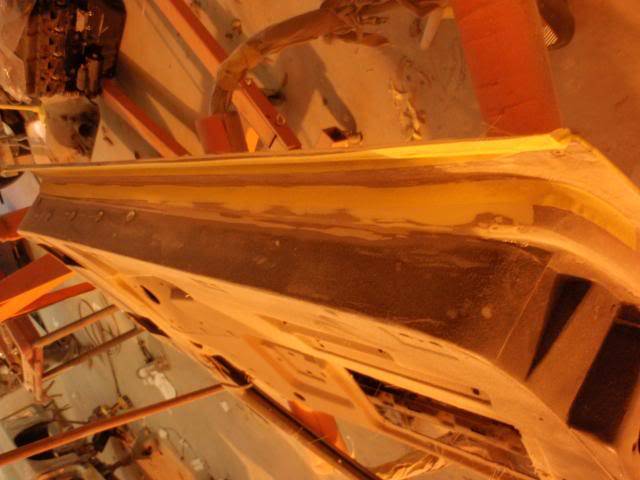
Here are some pictures of door and start of work on other side.
The Left hand door has been glassed back up inside and out and ready for finish work.
Inside of door
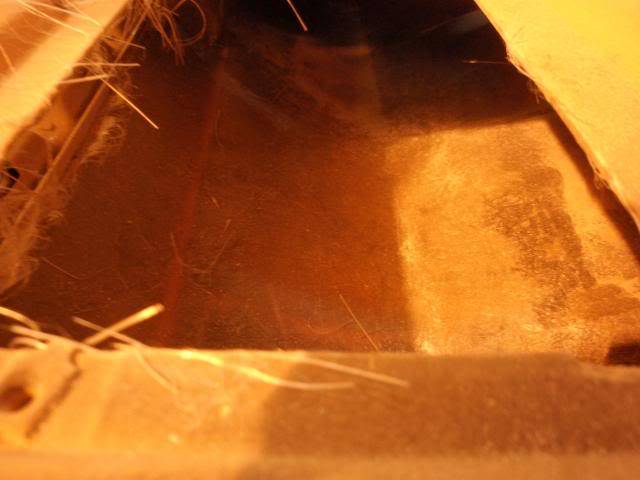
Rear view of door. You may be able to see how much lower portion of door skin was moved outwards.
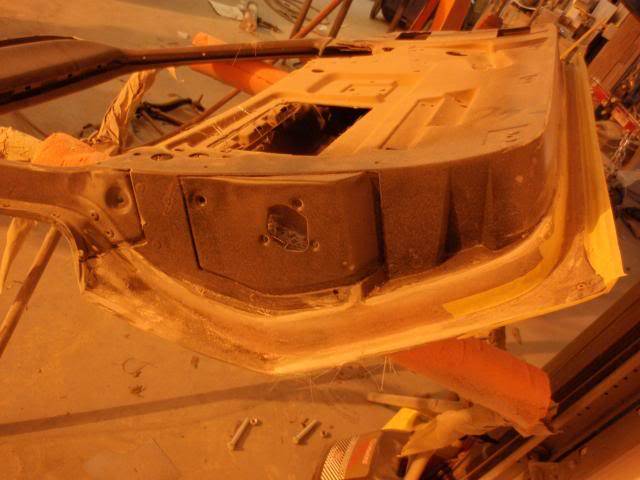
Lower view of door.
Door lock pillar/sill has been glassed back in and ready to be finished.
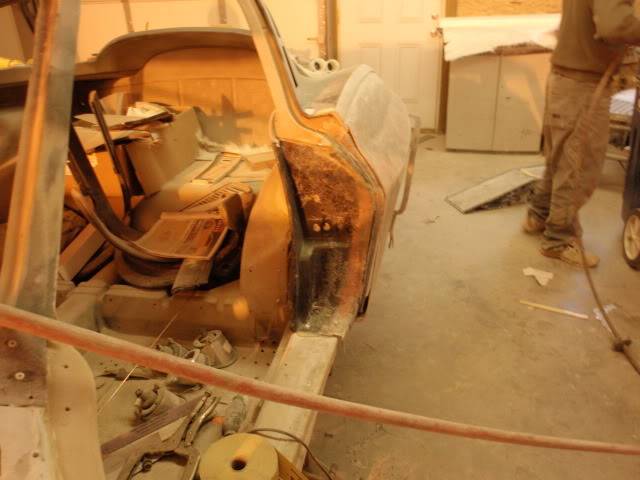
View of door lock pillar looking forwards.
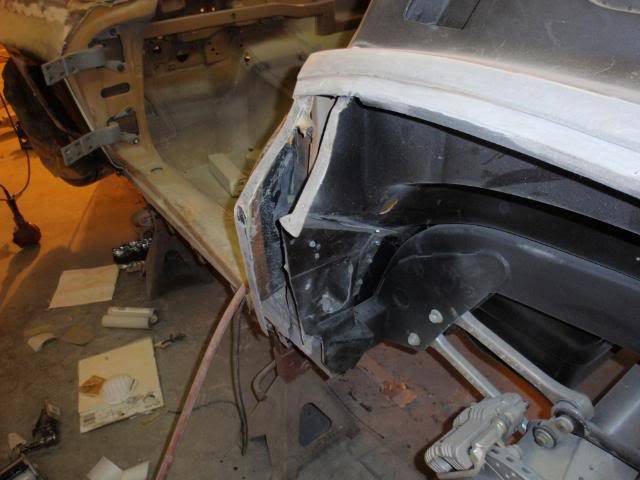
This picture of stretched rear 1/4 panel bonding panel may give you an idea of how much the back of the rear 1/4 panel was stretched outwards.
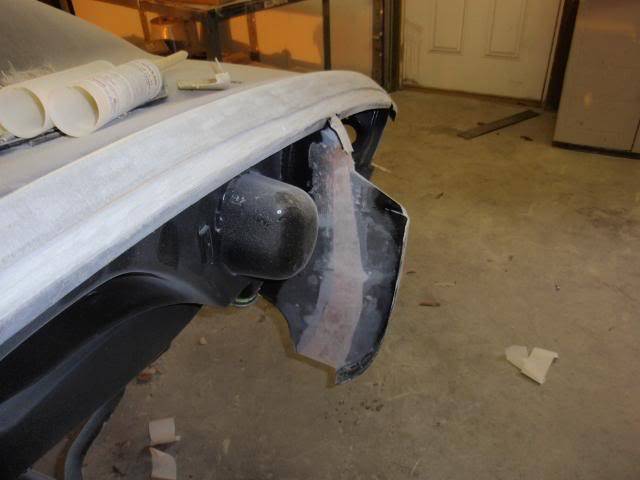
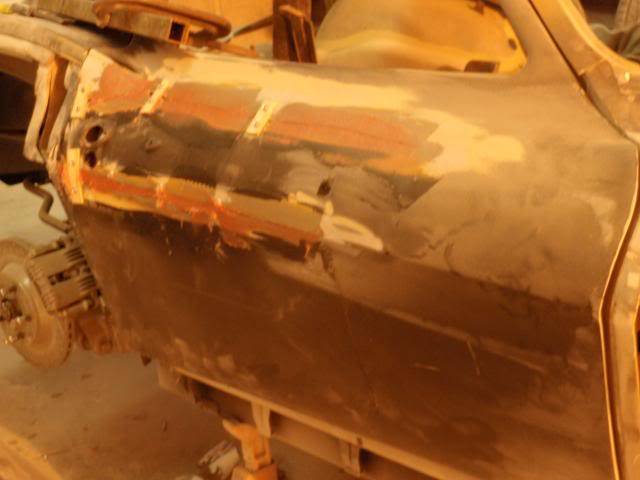
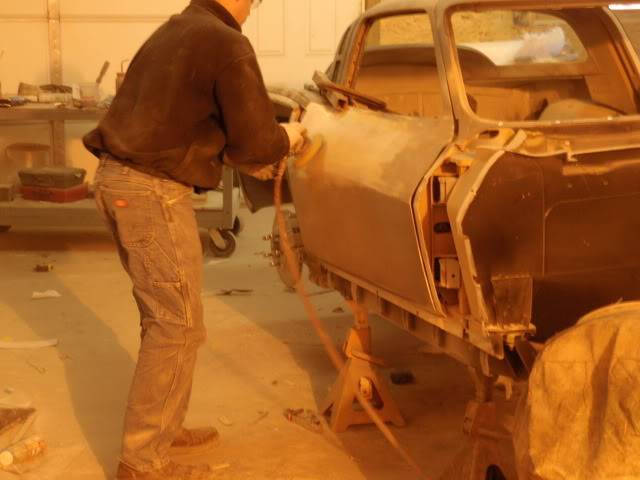
While I was there, Allstate (nickname) made cuts on right had door to stretch it. Not pretty looking.
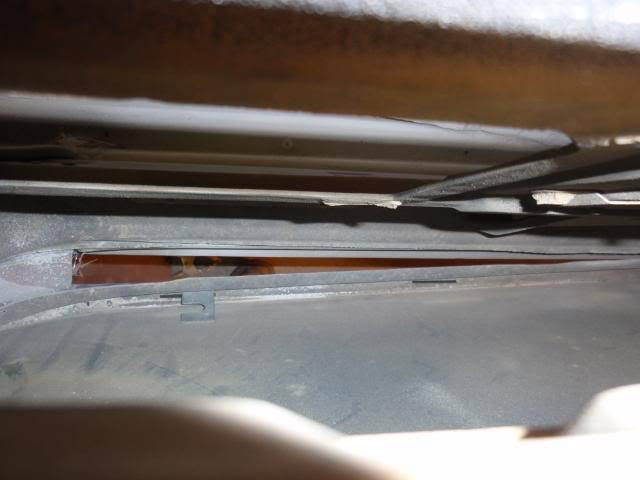
Picture looking down into inside of door after cutting to give you and idea how far out door skin is being moved.
Cuts filled in so door skin can be glassed over, Allstate grinding filler down in preparation for glassing outer skin.
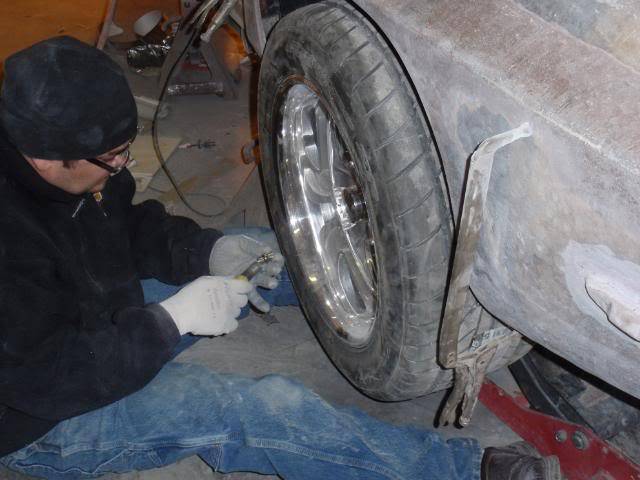
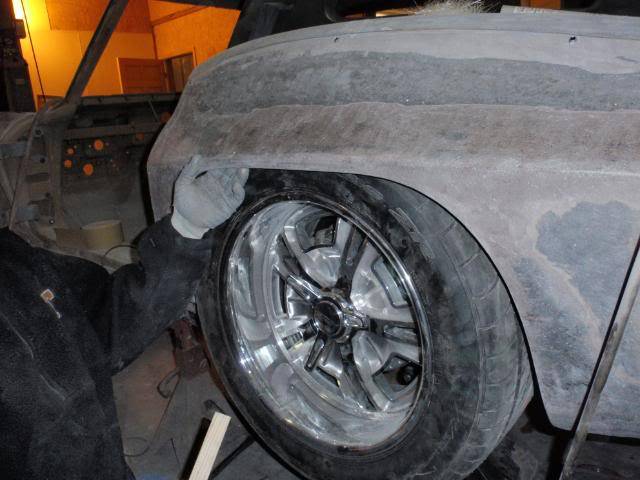
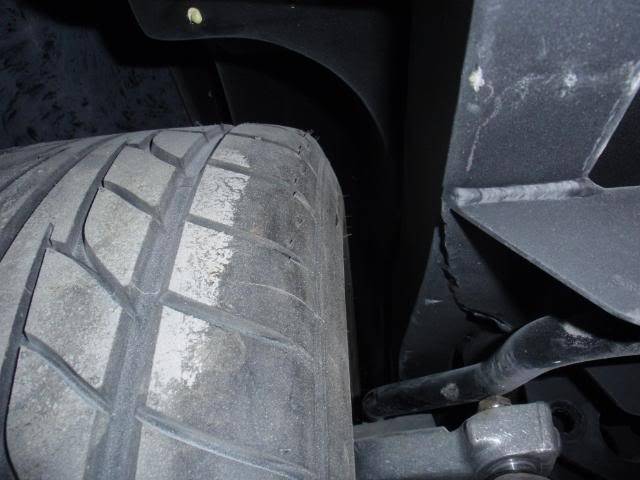
Had them do one last test clearance test of wheel and tire to make sure it would not hit under full compression. As you can see from pictures, no worries there as coil over has been removed to get and idea of max possible wheel travel and we still have 1.5" of clearance between tire and Frame/Body and 1/2" between 1/4 panel. No problem going to 11.0" rims and 315 tire...LOL
Max Down travel.
Max up outside.
Max up inside. You can see control arm is hitting swaybar.
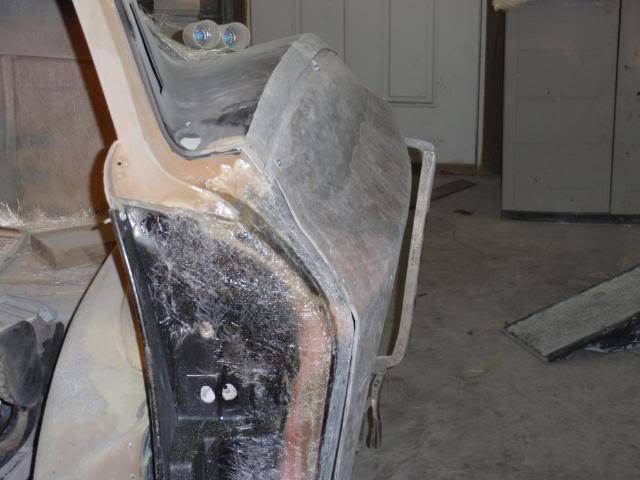
By the way, if you go back and look at my prior post showing stretching rear 1/4, you will see the body line is flat between front and rear of wheel well opening. Rendering shows this area to have same curvature as front fender in this area. Allstate didn't let me down.
The front and rear have same contour now achieving the Coke bottle look, or as cars designer says, Sophia Loren look. Being a real Southern Redneck, I told him it was Dolly Parton look as Dolly had here bust enlarged like car's fenders, while Sophia's was aw natural.:laughing:
05-24-2010 #14
Registered User
- Join Date
- May 2010
- Location
- Chattanooga, TN
- Posts
- 137
Left rear qtr panel bonded on, right door completed, right qtr panel stretched and ready to bond on, rear tail light panel modified for adding third taillight to each side, and right front fender's vent duct made, front fender stretched and cut out to install it.[/B]
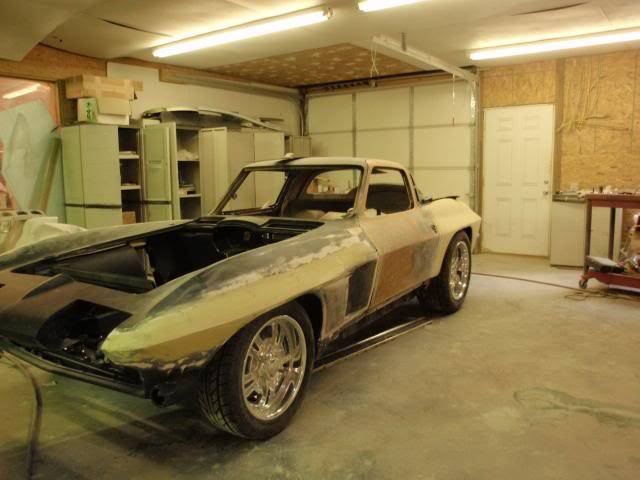
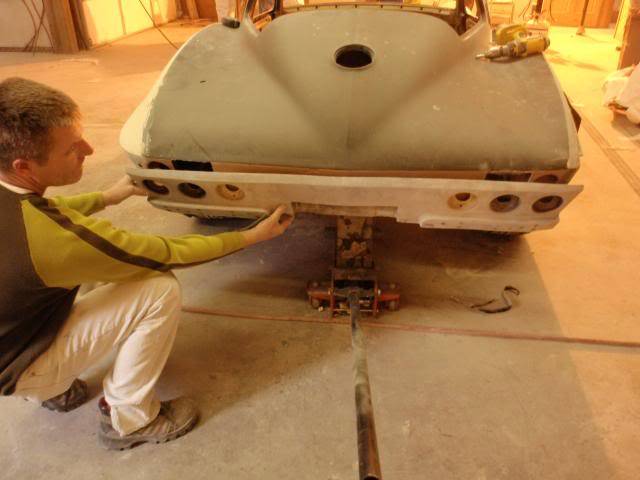
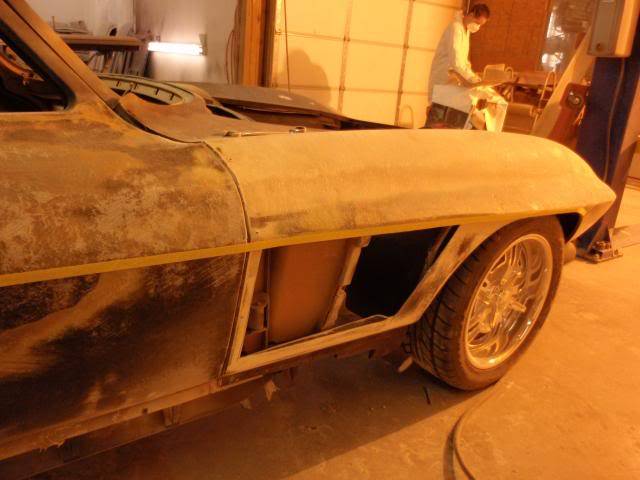
Verified Body line on left & right side with laser level. First time with frame leveled wheels off the ground and below shot with car back on wheels and level a Bubble off like car's owner....because he forgot to have lights turned off when car was on jack stands....
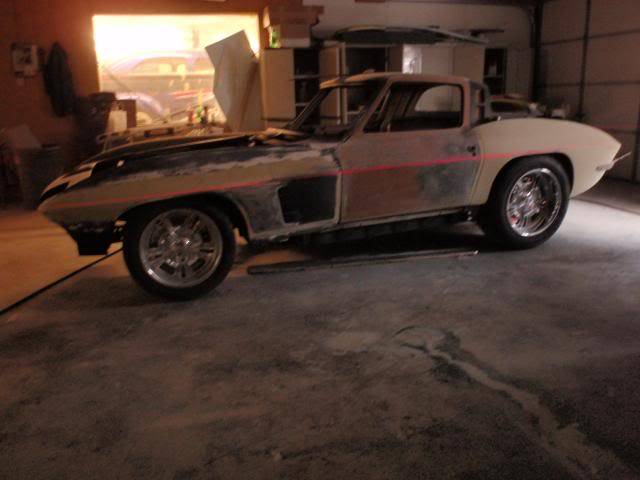
Misc shots of work.
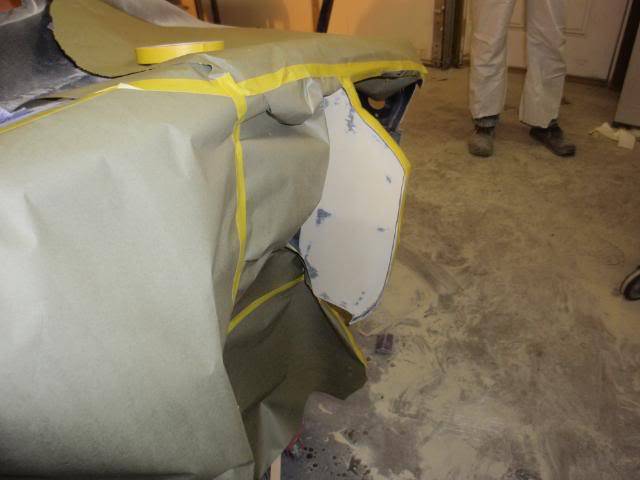
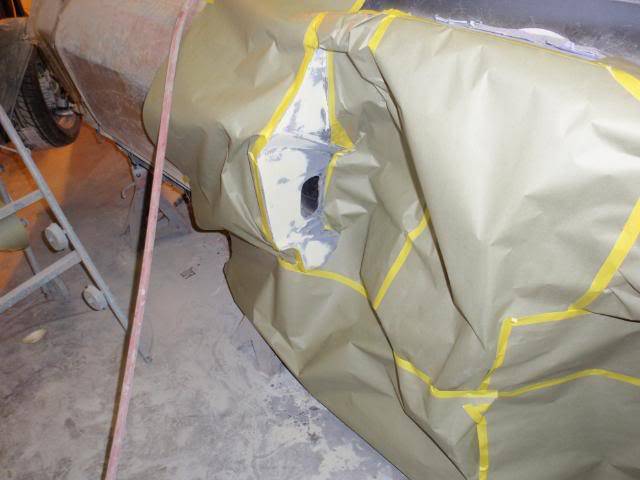
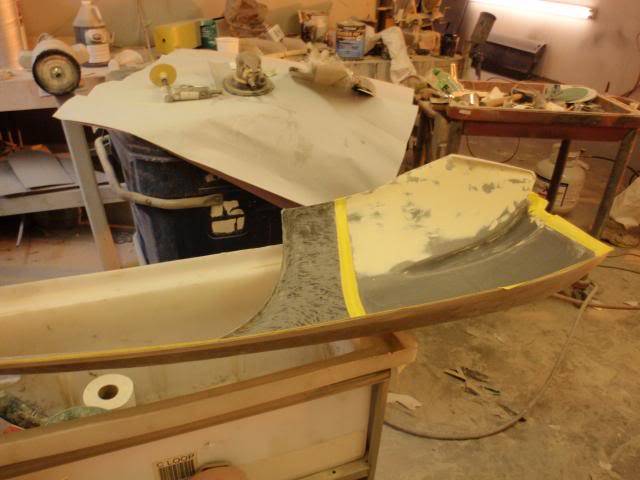
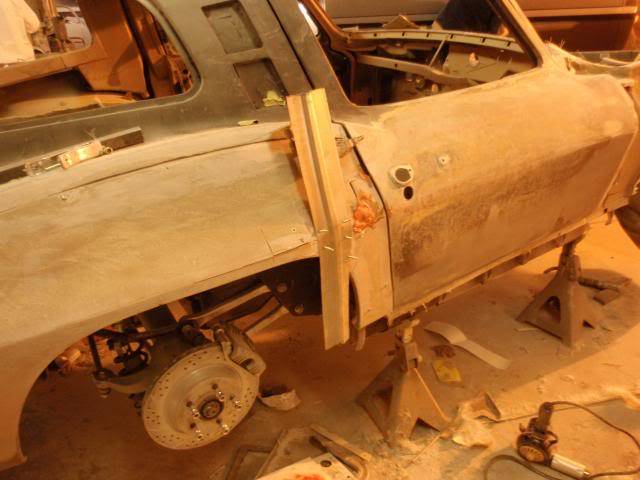
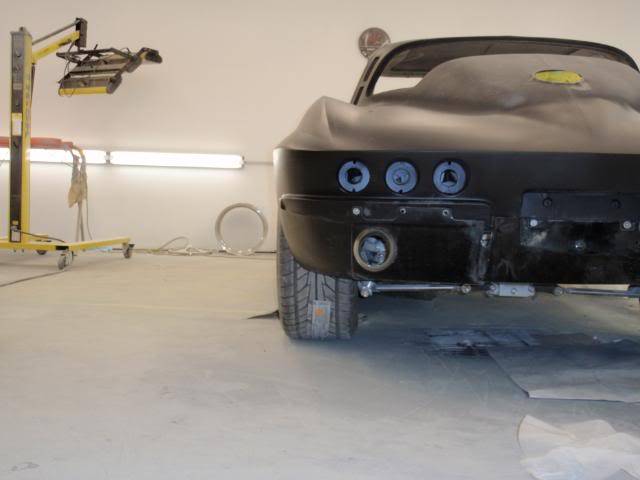
How to handle Rocker Molding was decided. Will try and make it look like the rocker panel in Rendering. Making the Rocker Panel is a not a big deal, but we will have to modify the bottom of Rear Qtrs, Doors and Front Fender to smooth the transition between them and Rocker Panels. It's a Restomod so might as well update that area to look more modern. Makes it easy to cover with Clearstatic too.
05-24-2010 #15
Registered User
- Join Date
- May 2010
- Location
- Chattanooga, TN
- Posts
- 137
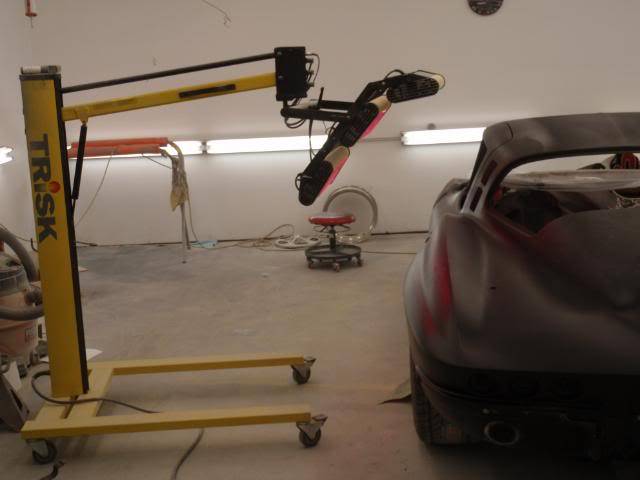
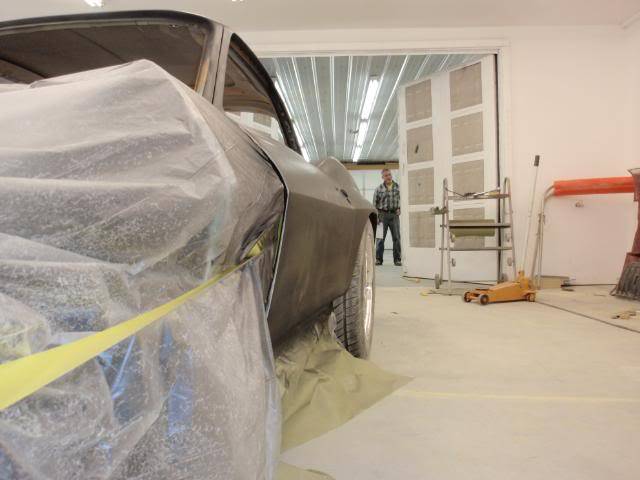
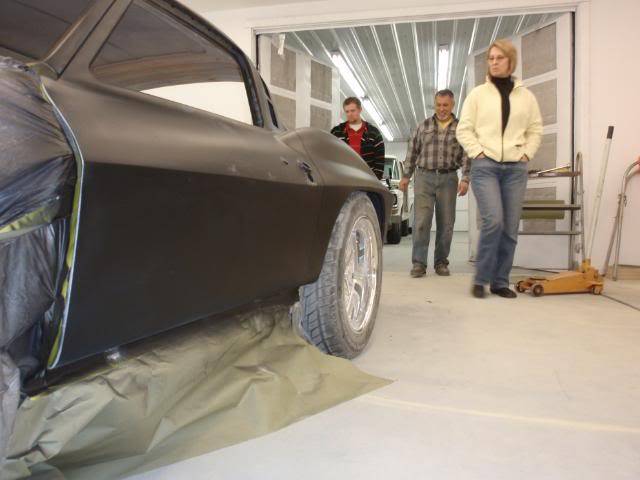
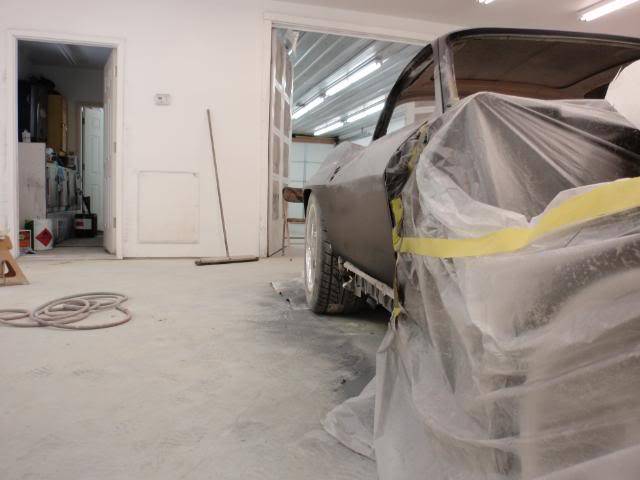
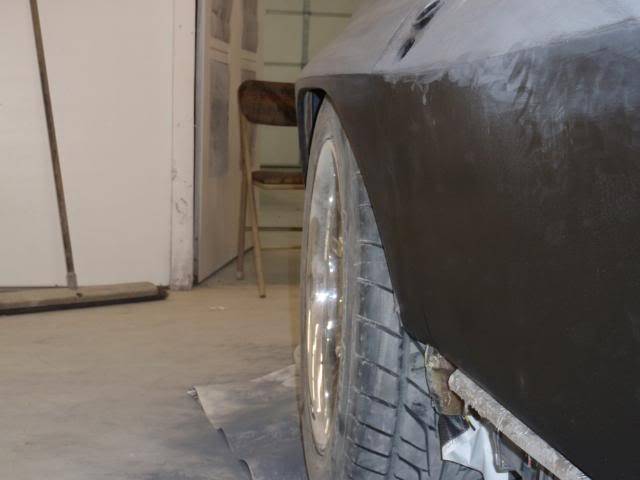
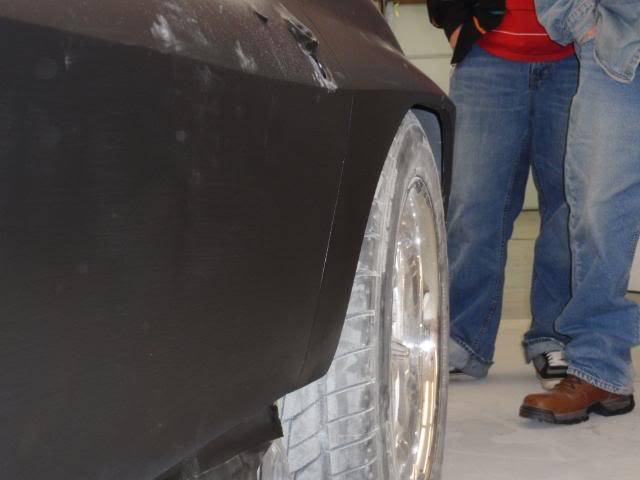
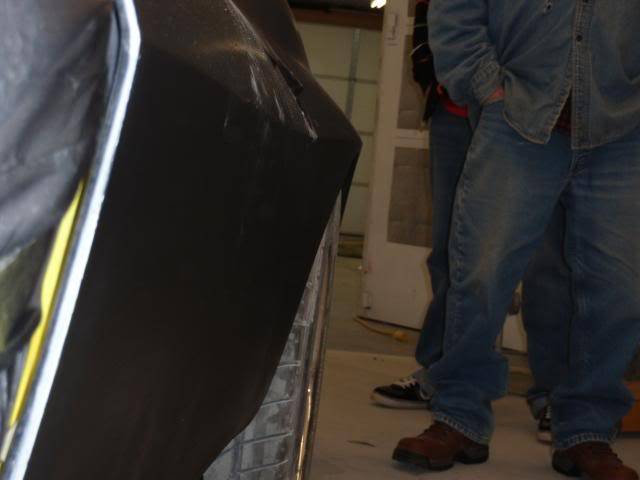
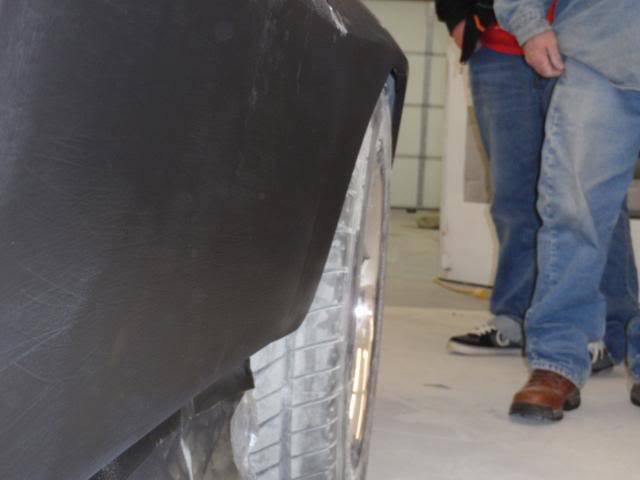
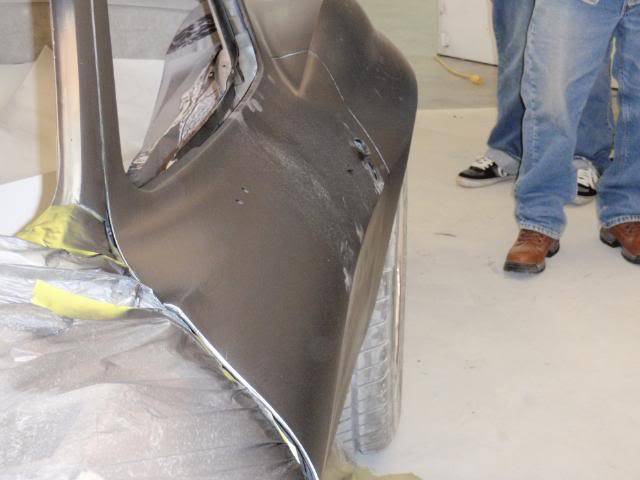
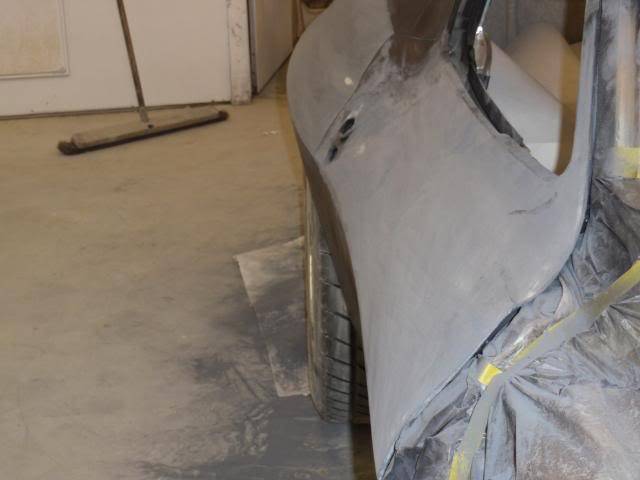
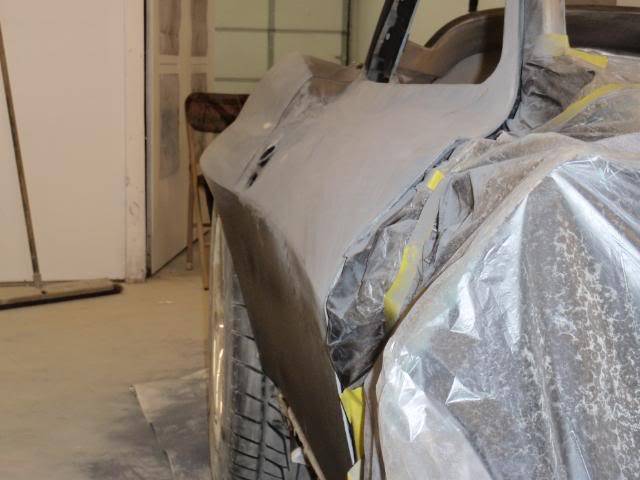
Getting a little closer. Has to be TUFF too, as it has to be able to take the heat as you can see from first picture.
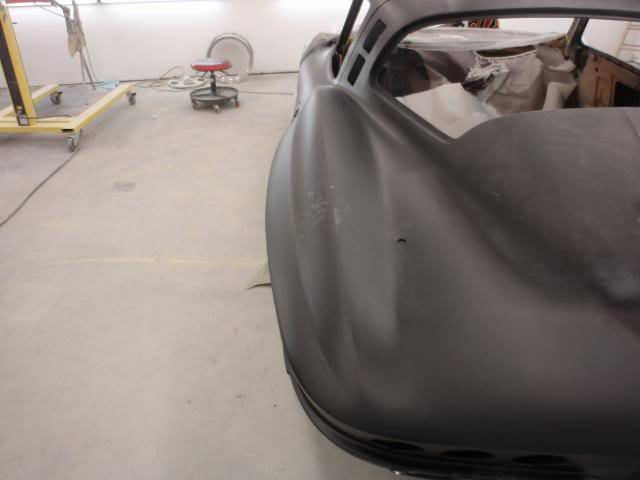
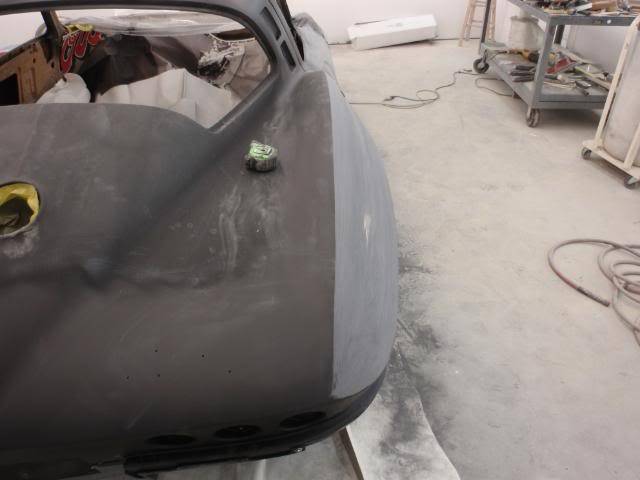
You will be able to see what curing does to the glass and primer in some of the pictures, since as it cures it moves . By curing all the fresh glassed areas, it could just keep paint from moving first time car is exposed to sun's heat on a nice hot day.
The body from doors back is ready to be blocked and sanded and any inconsistencies in body work from side to side corrected.
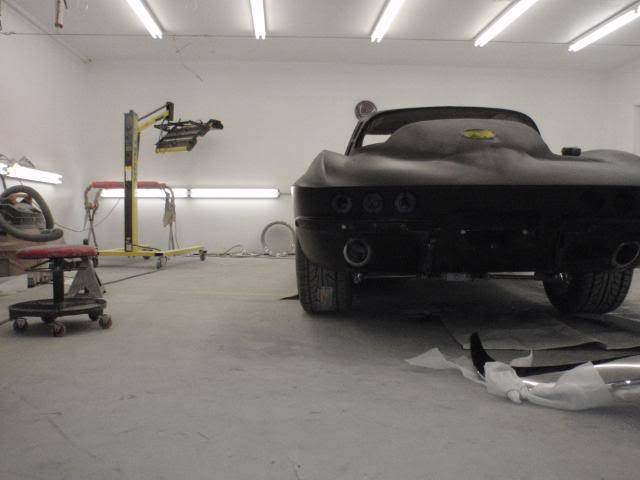
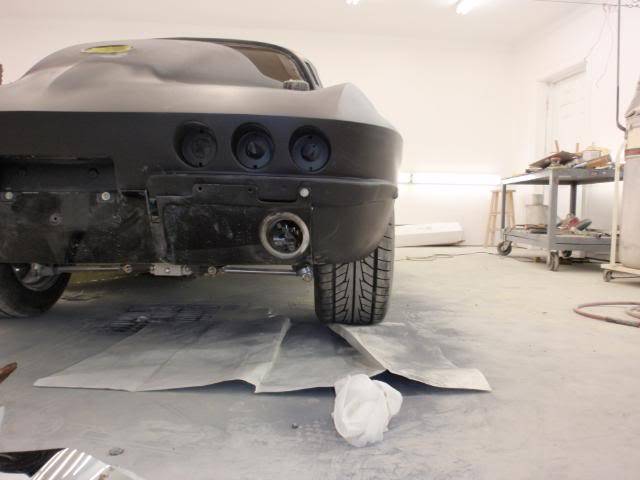
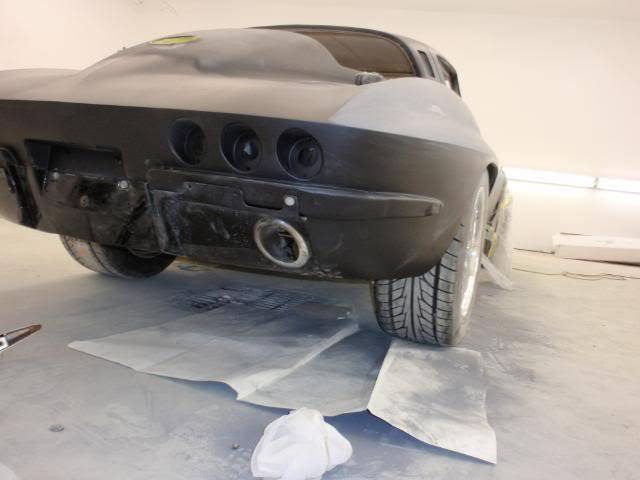
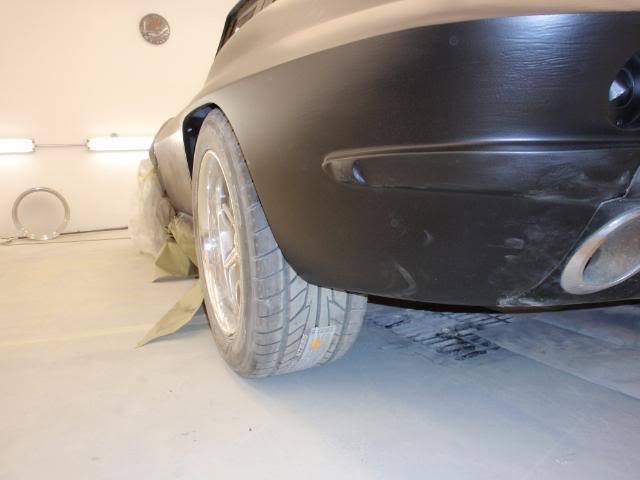
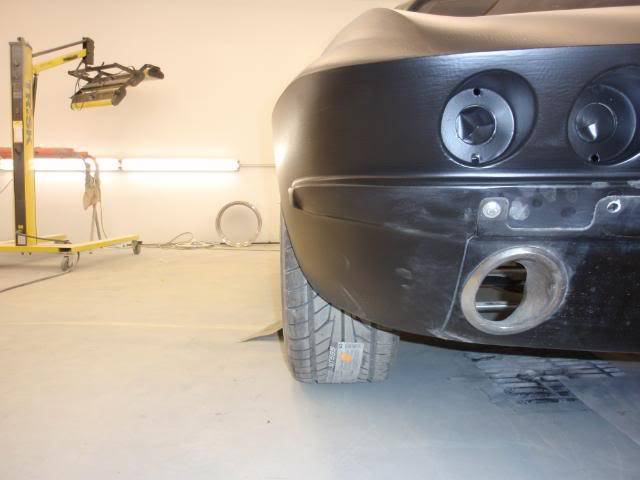
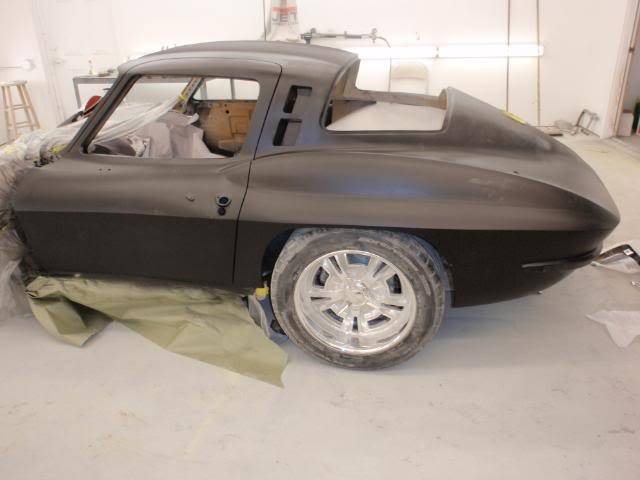
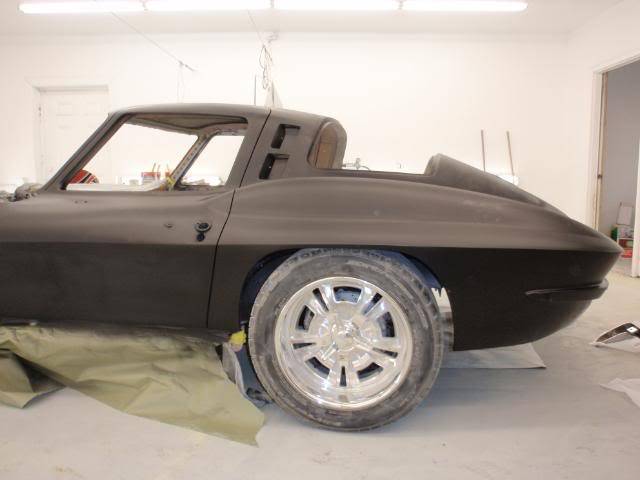
Hope the below pictures show what shop has accomplished on what we hope is better front and rear wheel well coverage of wide tires not seen using current aftermarket rear quarter panels.
This was the primary goal of trying to reinvent them with a REV 2 revision of wide tire rear quarter panel, along with trying to maintain basic flow of stock C2 body between door and quarter panel too.
05-24-2010 #16
Registered User
- Join Date
- May 2010
- Location
- Chattanooga, TN
- Posts
- 137
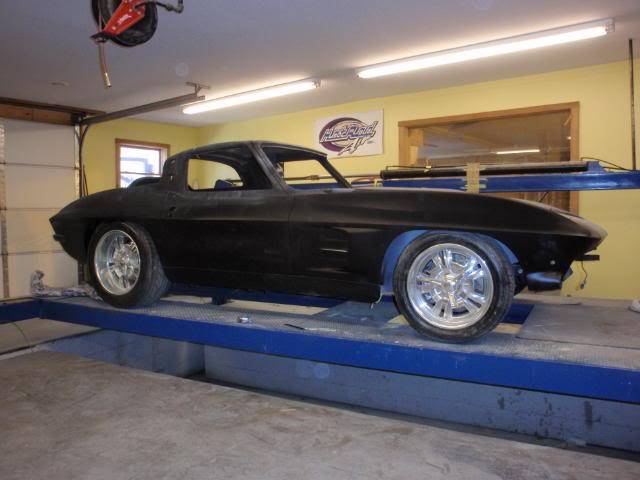
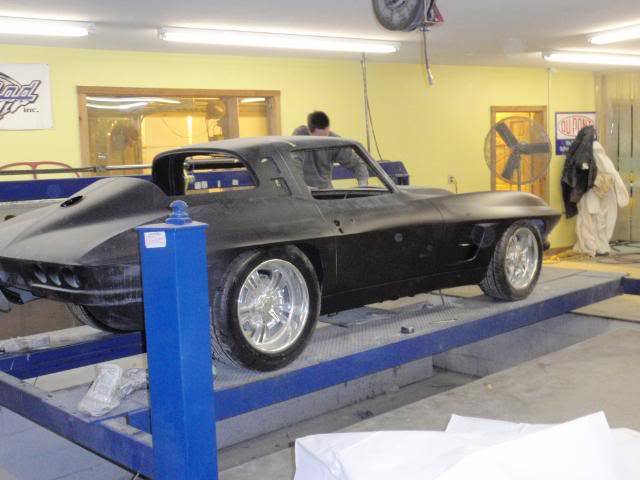
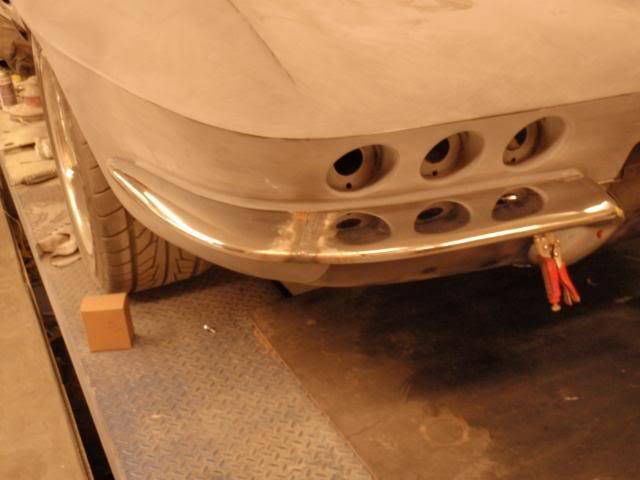
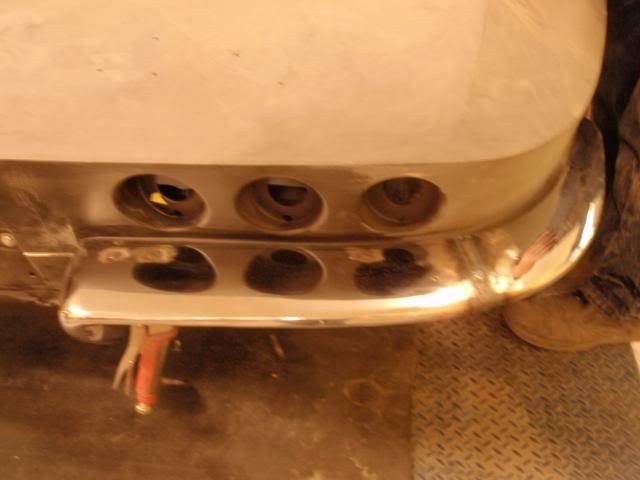
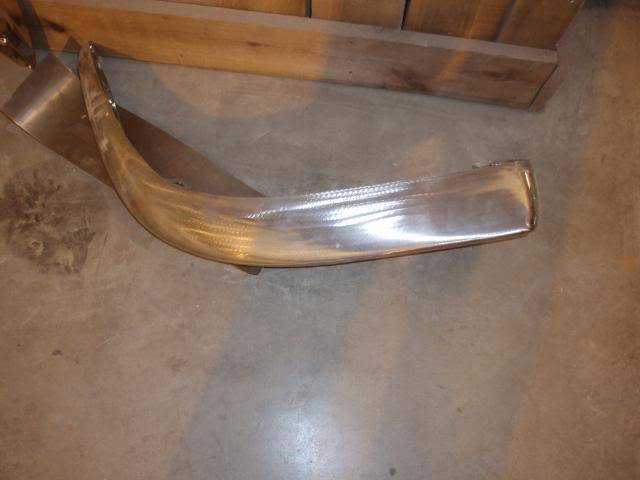
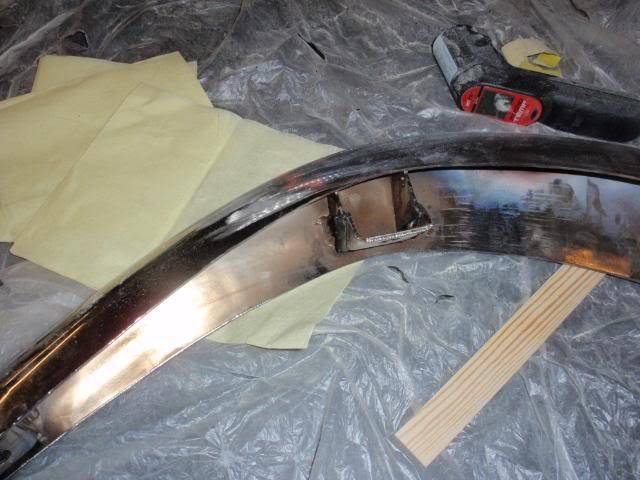
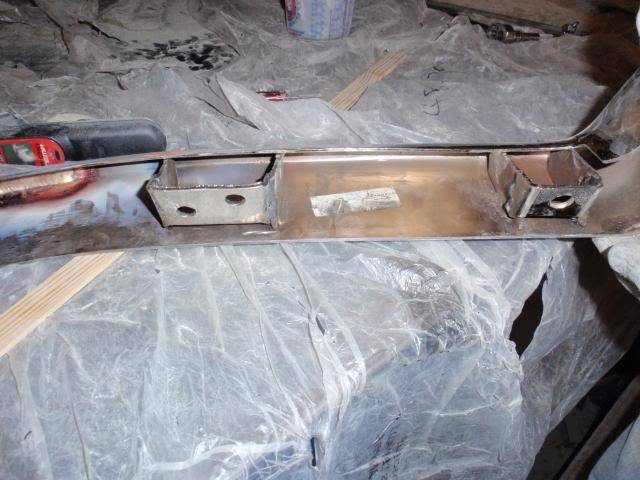
Here are some pictures of Bumpers prior to plating. Have to say GM seemed to have used +/-1/4" tolerance on bumper's mounting brackets. I had access to 2 sets of stock rears, and one set of GM licensed repos. No two mounting brackets were in same mounting plane. There would be two or more 1/8" in or out of where mounting surface should be. Problem is trying to deal with ones that were out past the top edge of bumper. You can shim the ones that are in too far, but you either have to live with bumper standing off body to far, are cut them and weld them back in so bumpers fits body correctly.
Probably not a problem with NCRS restorations, but for me they made car look bad, so we used the repo ones and cut the brackets and welded them so bumpers mounted to body as designed, without the +/- 1/4" tolerance swings. Bumpers had to be re-chromed anyway, because we had to make pie cuts in them fit.
05-24-2010 #17
Registered User
- Join Date
- May 2010
- Location
- Chattanooga, TN
- Posts
- 137
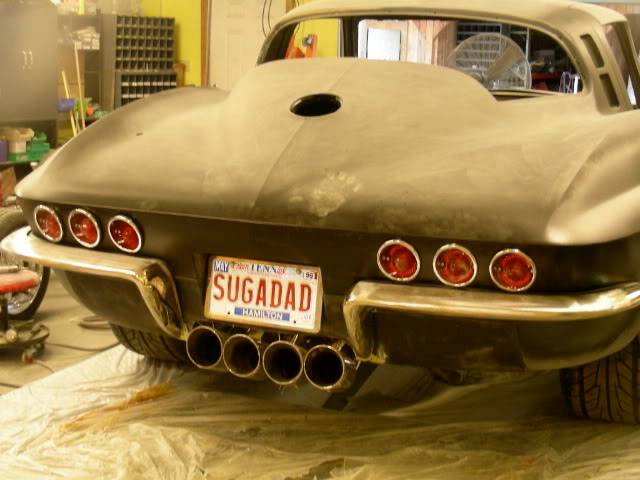
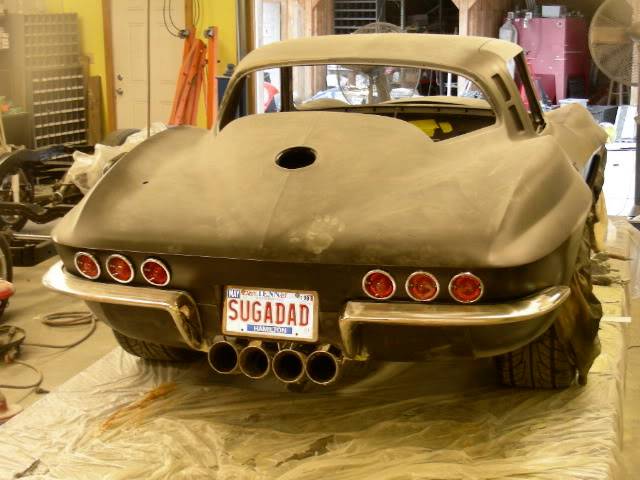
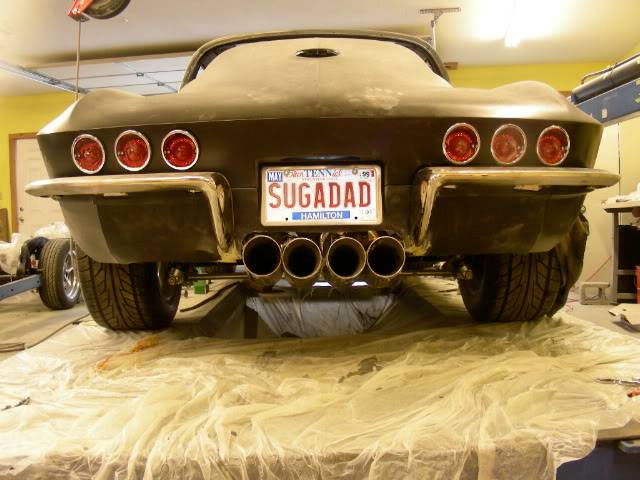
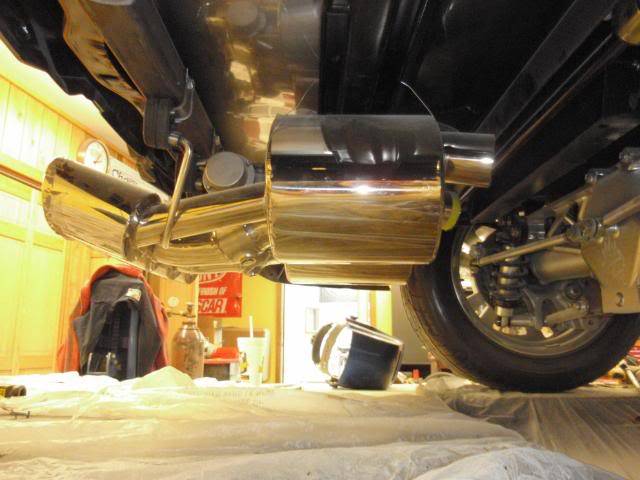
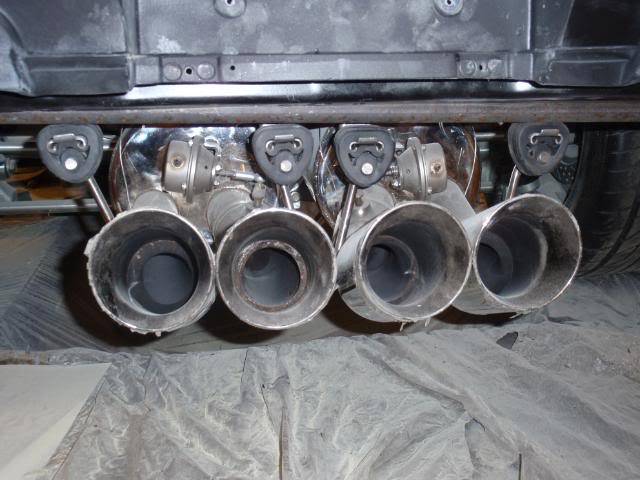
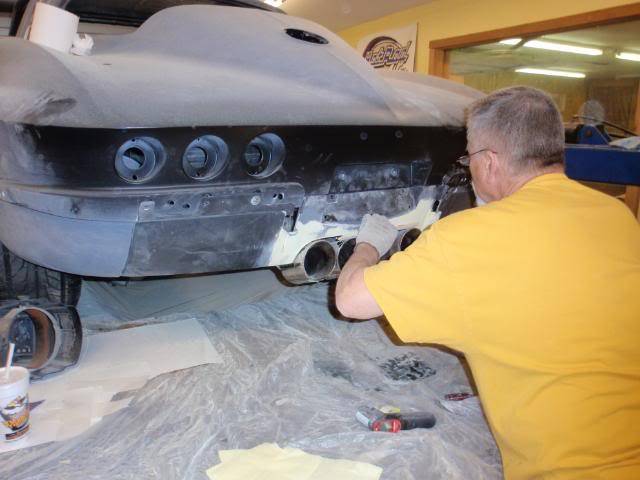
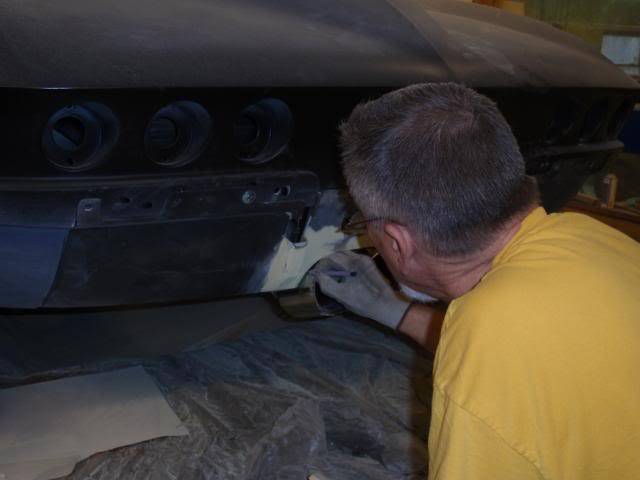
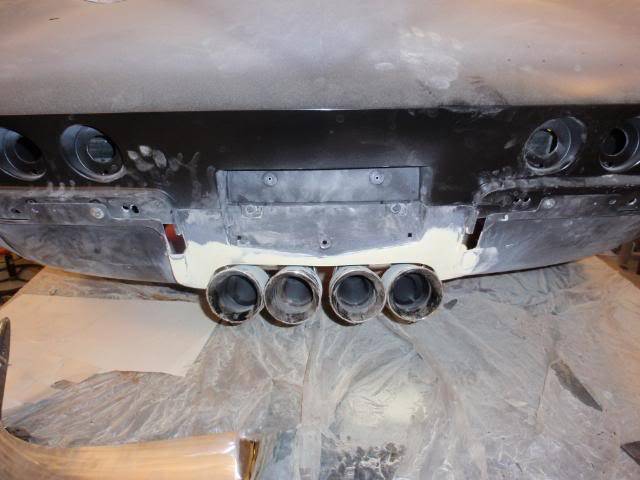
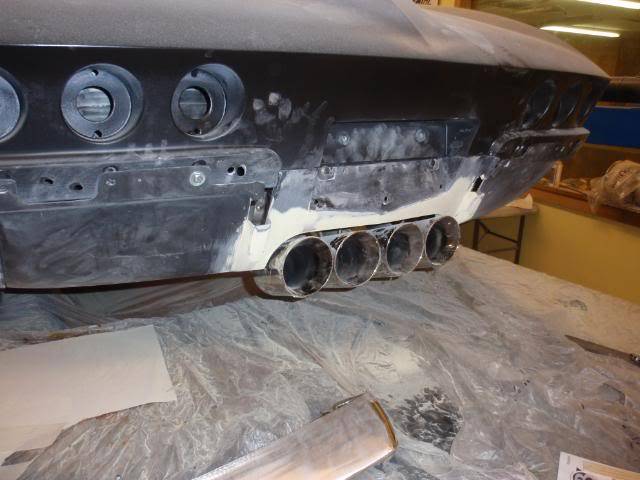
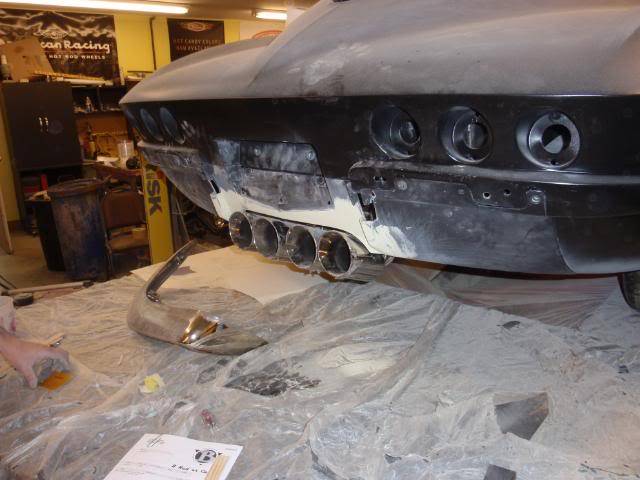
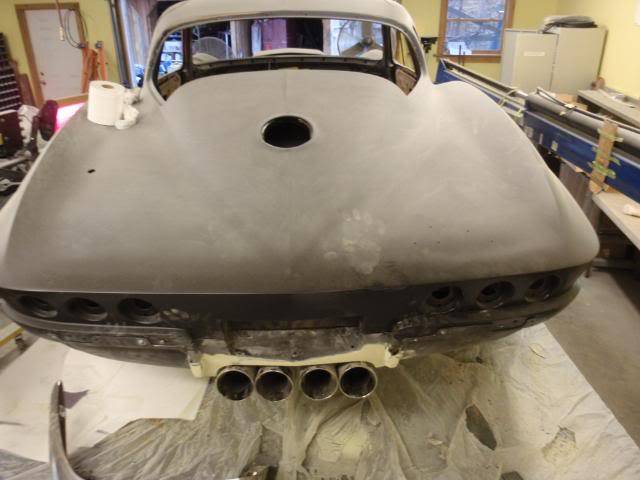
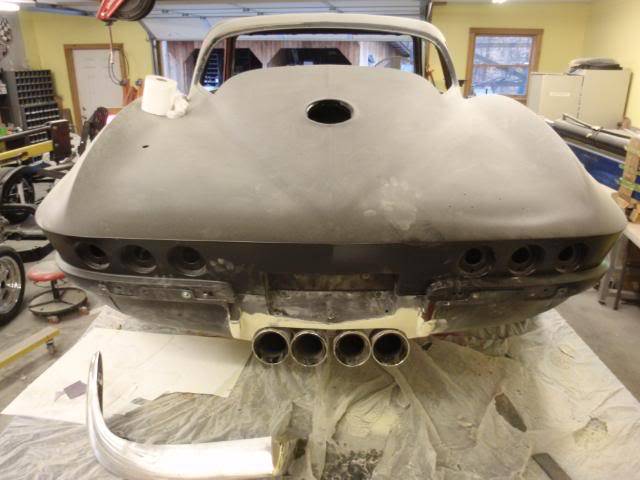
I got lucky, are maybe not lucky and was able to pick up a set of C6 Z06 3.0" Billy Boat Fusion NPP mufflers.
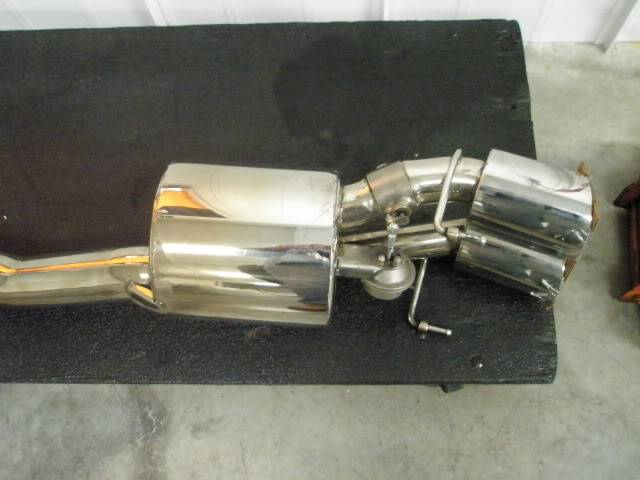
Using mechanic's wire, they were hung in place to see if they would fit between bumpers and in space where spare tire tub used to reside.
Only tag I had laying around to use to make sure it would clear.
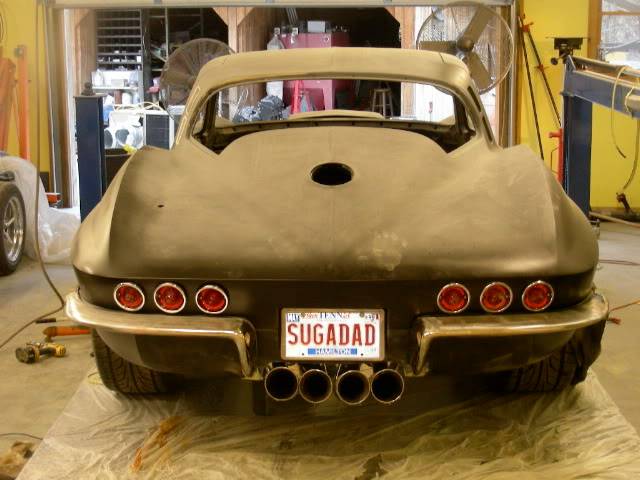
05-24-2010 #18
Registered User
- Join Date
- May 2010
- Location
- Chattanooga, TN
- Posts
- 137
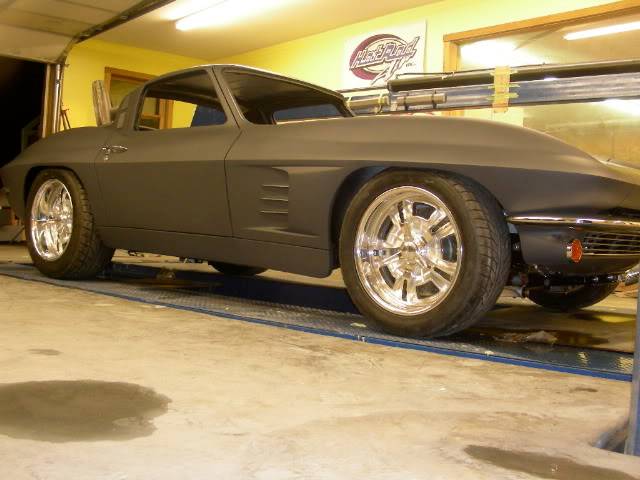
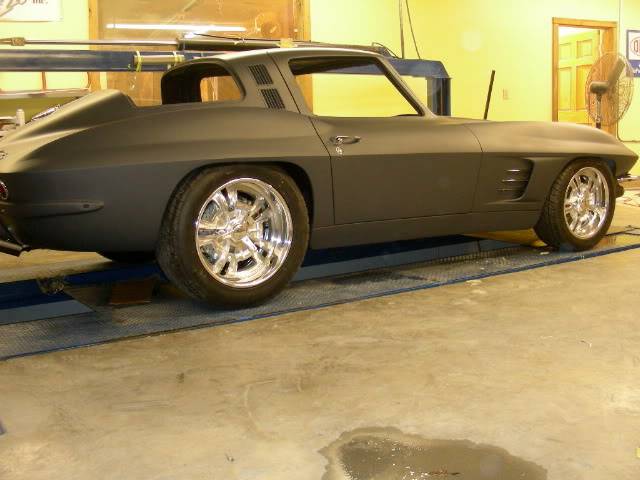
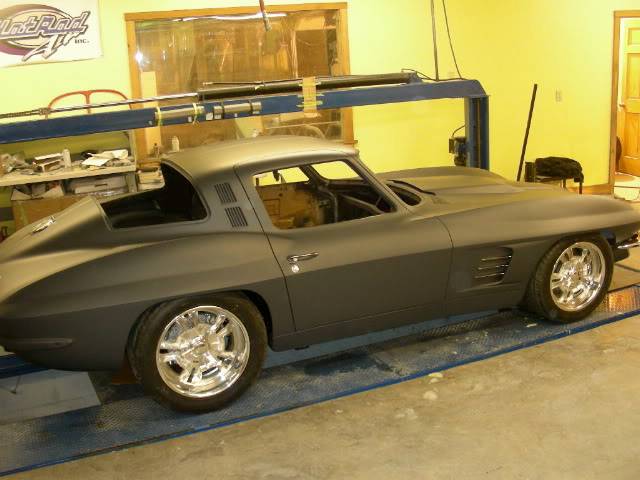
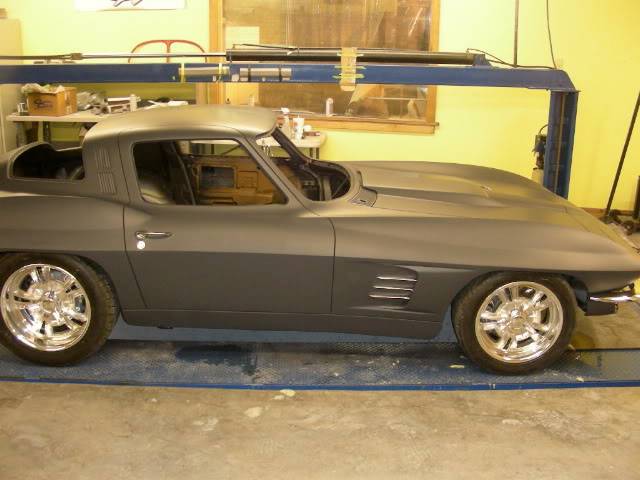
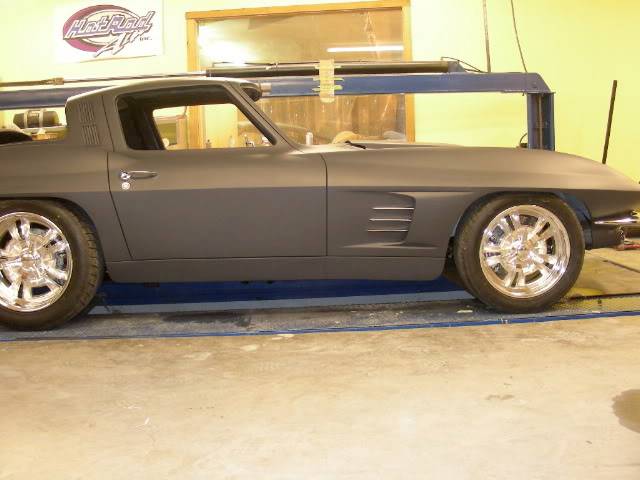
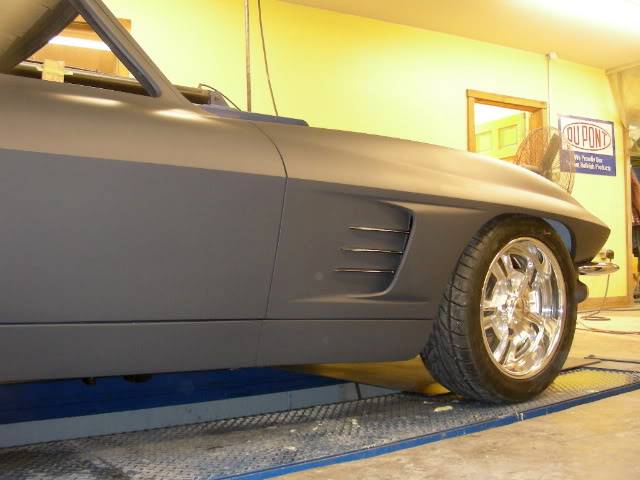
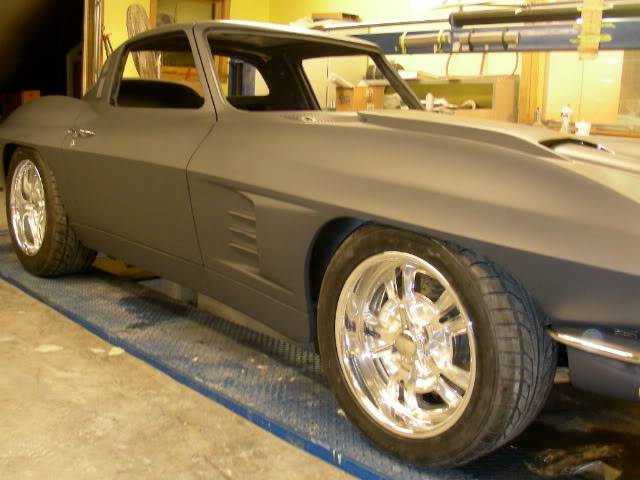
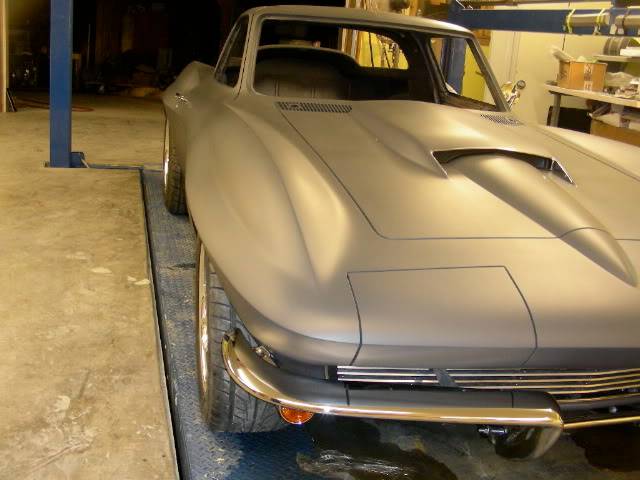
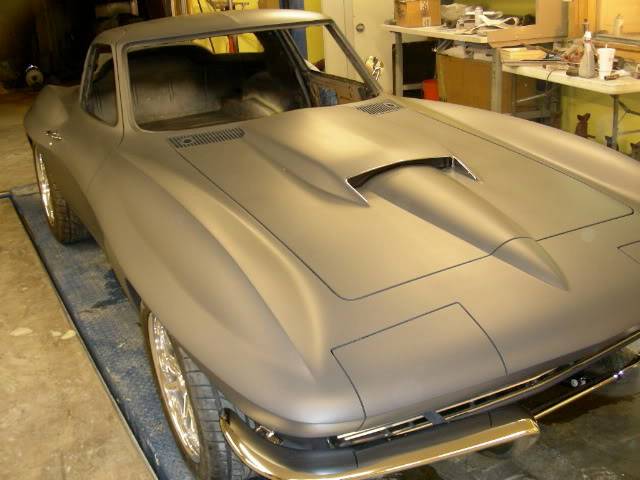
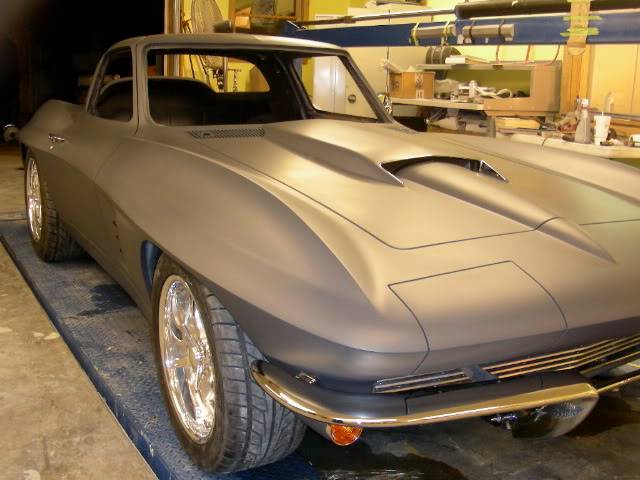
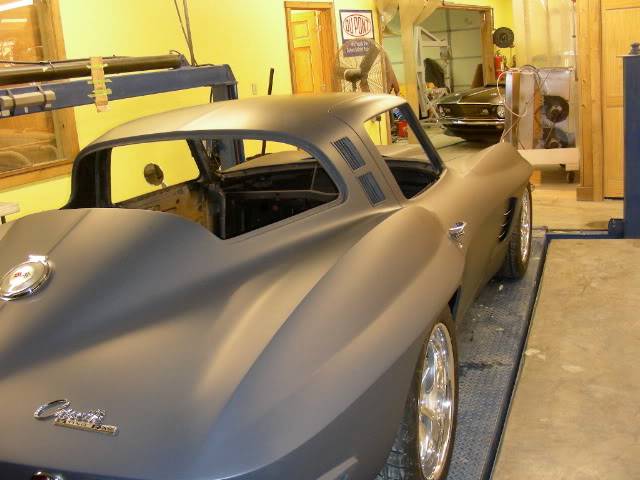
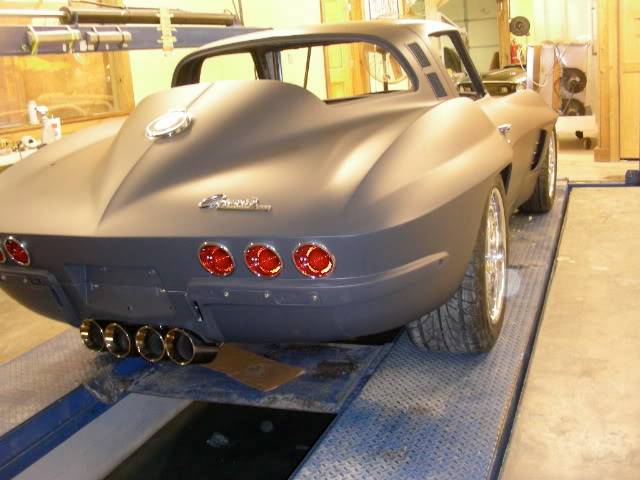
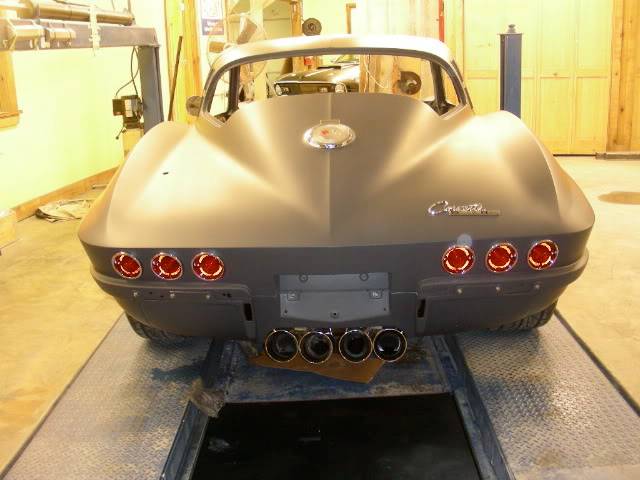
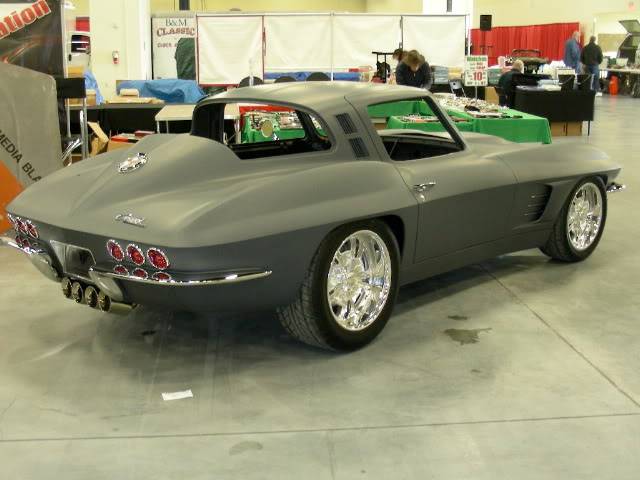
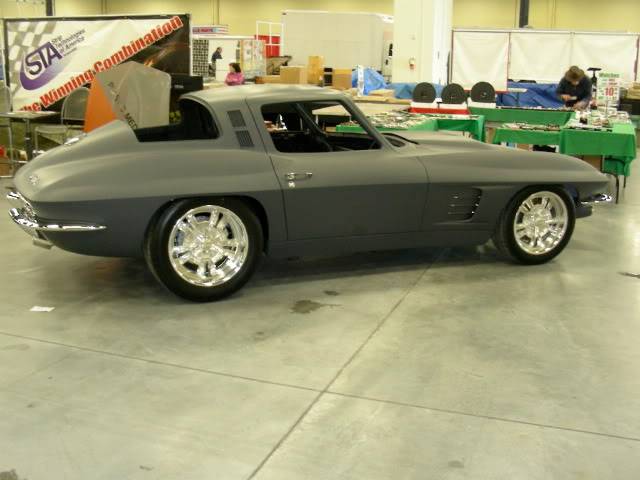
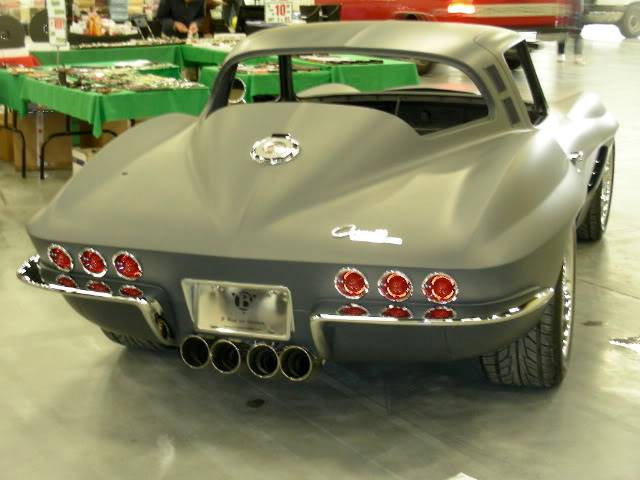
These are the last pictures you'll have to look at. These were taken just prior to car being taken to show as display of shops work.
Last 3 were taken at show as bumpers didn't make it back from chromer's until next morning of show.
I think car looks better than the rendering it was built to.
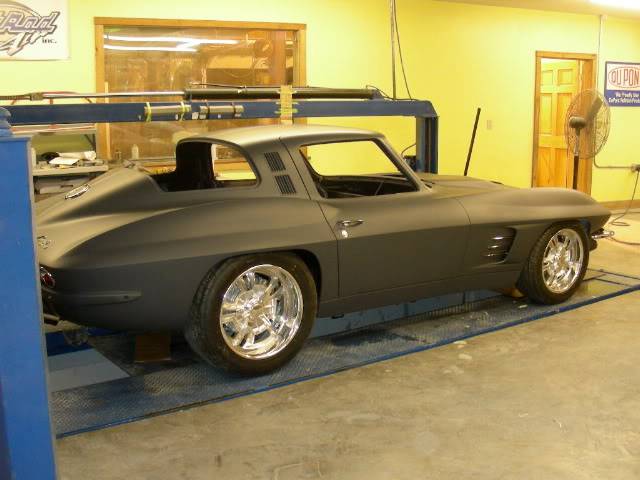
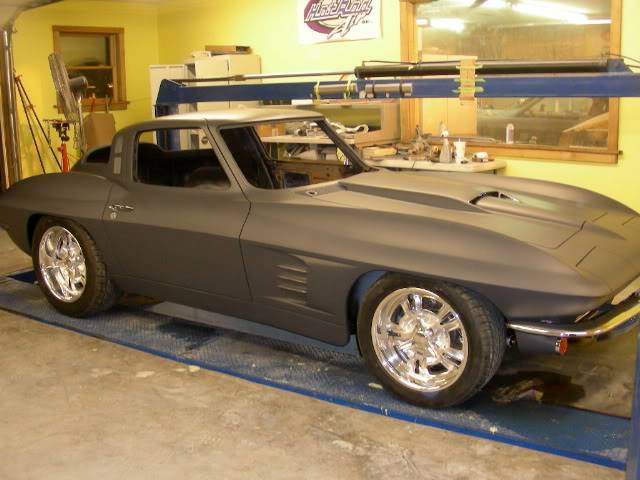
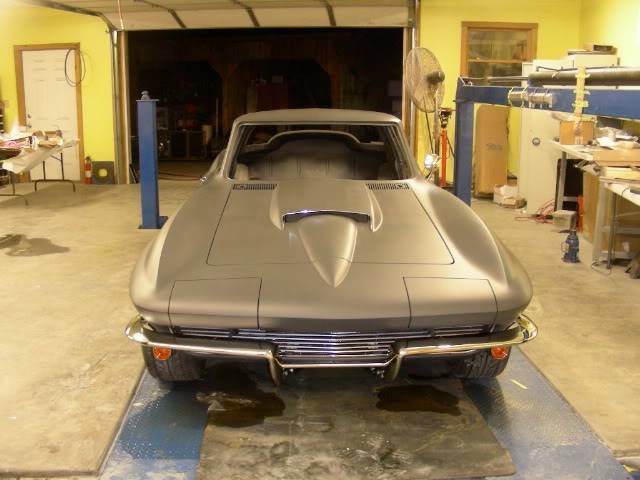
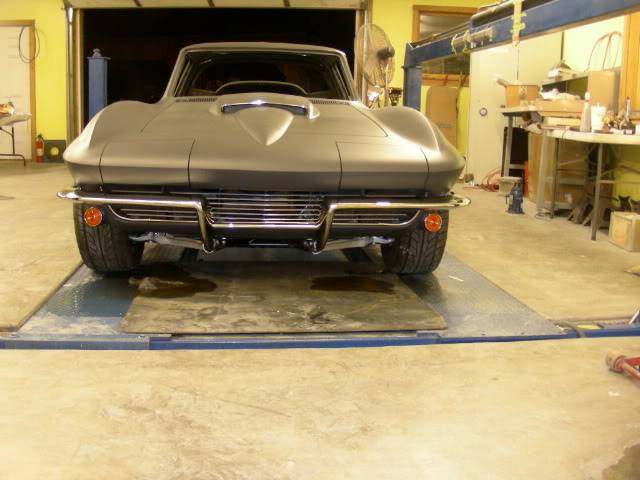
05-24-2010 #19 Registered User
- Join Date
- Jan 2008
- Location
- Charlotte
- Posts
- 1,295
I swear I saw the chassis/engine build on Ls1tech...
your SN looks familiar... LS7/6l80e & a G8 GT shifter??2005 LeMans Blue Corvette w/ T56 & Z51 & C6Z06 Brakes, Build Thread: https://www.pro-touring.com/showthread.php?64496
2005 GMC Sierra 2500HD LLY / Allison
2014 Chevy SS LS3 / 4 Door
05-24-2010 #20
Registered User
- Join Date
- Nov 2008
- Location
- TN
- Posts
- 959
I understand WHY they did it. I just don't agree with HOW they did. Originally Posted by Poorhousenext
Yes, I forgot you said that when I offered.
Build looks great! They do nice work! I didn't know there was anyone around here. Well except Bobby Alloway.Benjamin
Twin Dusters
'72 Plymouth Duster "Aero Duster" project
'72 Plymouth Duster "Daily Duster" project
https://www.pro-touring.com/showthre...RO-DUSTER-quot

 Reply With Quote


