


Results 61 to 80 of 336
Thread: 1968 Firebird 400
-
09-14-2009 #61

 Registered User
- Join Date
- Nov 2006
- Location
- Ma.
- Posts
- 5,560

The bottom looks good your doing a nice job..
Wayne
Car FINALLY home !!!!!! lol
Project FNQUIK https://www.pro-touring.com/showthre...ghlight=FNQUIK
-
09-15-2009 #62
Registered User
- Join Date
- May 2009
- Location
- Minnesota
- Posts
- 615
Thanks Wayne, I'm looking forward to projects that are a little more fun.
-
09-15-2009 #63 Registered User
- Join Date
- Aug 2004
- Location
- Rustburg, Virginia
- Posts
- 3,436
It might not be fun Rob, but it is important to get all of that done. Great job...now come down here and do mine for me...LOL Originally Posted by 68400BIRD
 1970 RS/SS350 139K on the clock:
89 TPI motor w/ 1pc rear seal coupled to a Viper T56 via Mcleod's modular bellhousing w/ hydraulic T/O bearing from the Viper, 12 bolt rear w/ 3.73 gearing, SC&C upper control arms, factory lowers with Delalums, C5 brakes at all four corners, Front Wheels 17x8's with Sumi 255/40/17 and Rear Wheels 17x9's with Sumi 275/40/17.
Brief description of the work done so far can be found here: http://www.nastyz28.com/forum/showthread.php?t=112454
10-03-2009 #64
Registered User
- Join Date
- May 2009
- Location
- Minnesota
- Posts
- 615
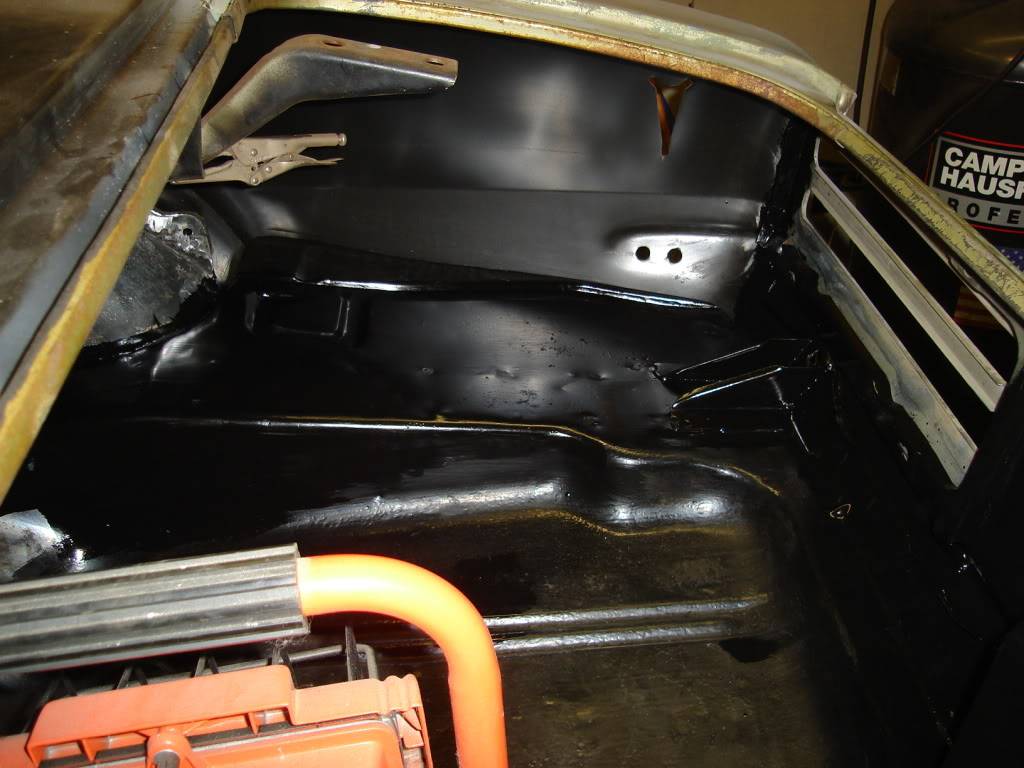
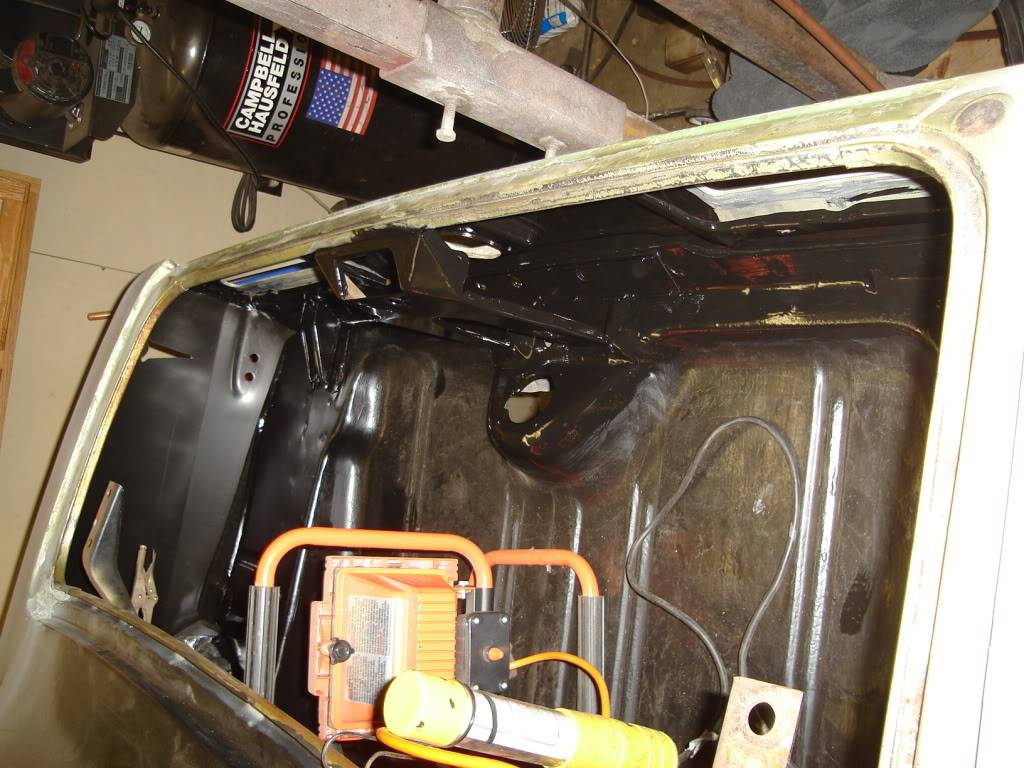
Started working on the inside of the trunk again. I have around 15 hours into grinding down welds,sandblasting,acid etching, and general clean up of panels and old seam sealer. I have one patch welded in and a couple of pin holes that I welded close. I acid etched the inside of the trunk and put down two coats of POR15. I'm going to sand it all down with 400 and put two coats of Lizard skin down.
10-03-2009 #65 Registered User
- Join Date
- May 2007
- Location
- Houston, Tx
- Posts
- 2,200
looks good!
Colin Russ
10-13-2009 #66
Registered User
- Join Date
- May 2009
- Location
- Minnesota
- Posts
- 615
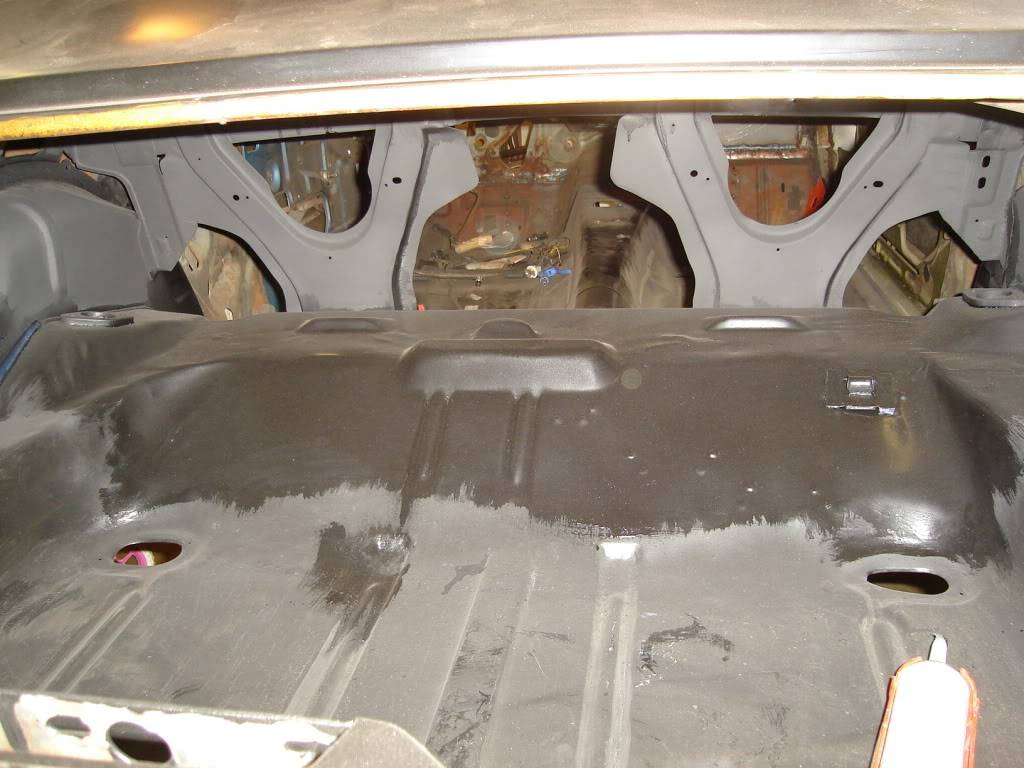
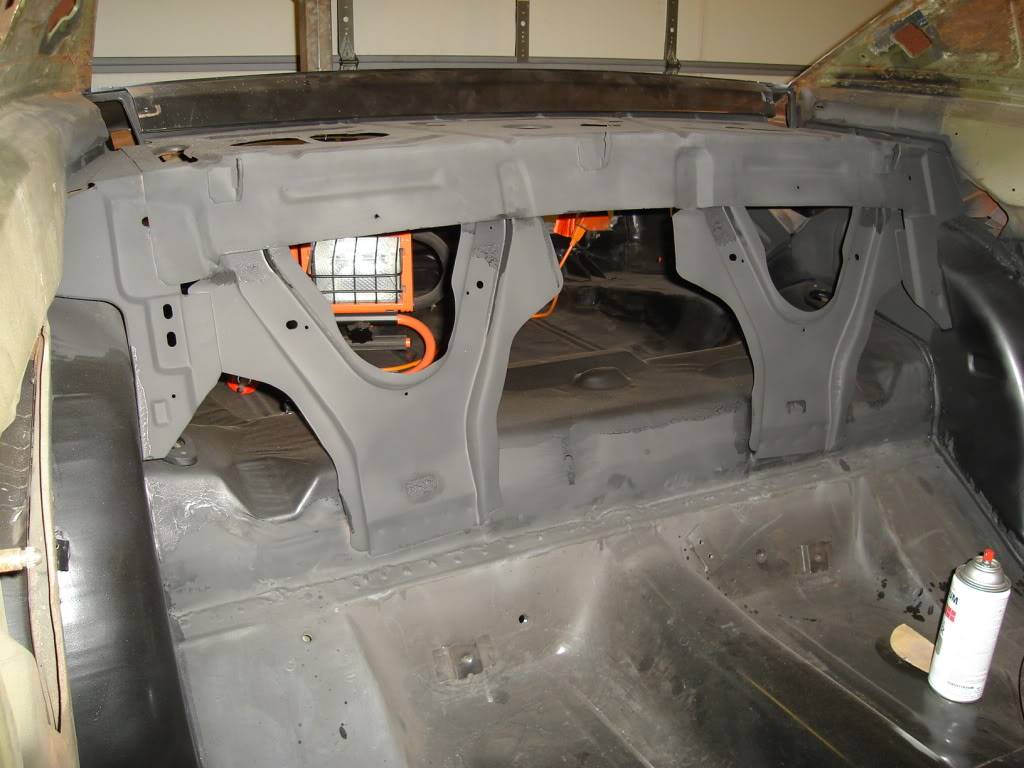
I did some work in the trunk. The paint looks funny because I used two different POR15 products. One was satin and one was gloss. I sandblasted the whole trunk,acid etched, and either sprayed DP90 or used POR15 depanding on the location. This will all get scuffed down and then will get 2-3 coats of Lizardskin and then spatter paint.
10-13-2009 #67
Registered User
- Join Date
- Aug 2004
- Location
- Rustburg, Virginia
- Posts
- 3,436
Nice.....wish the trunk in my camaro was that clean....
1970 RS/SS350 139K on the clock:
89 TPI motor w/ 1pc rear seal coupled to a Viper T56 via Mcleod's modular bellhousing w/ hydraulic T/O bearing from the Viper, 12 bolt rear w/ 3.73 gearing, SC&C upper control arms, factory lowers with Delalums, C5 brakes at all four corners, Front Wheels 17x8's with Sumi 255/40/17 and Rear Wheels 17x9's with Sumi 275/40/17.
Brief description of the work done so far can be found here: http://www.nastyz28.com/forum/showthread.php?t=112454
10-13-2009 #68
Registered User
- Join Date
- May 2009
- Location
- Minnesota
- Posts
- 615
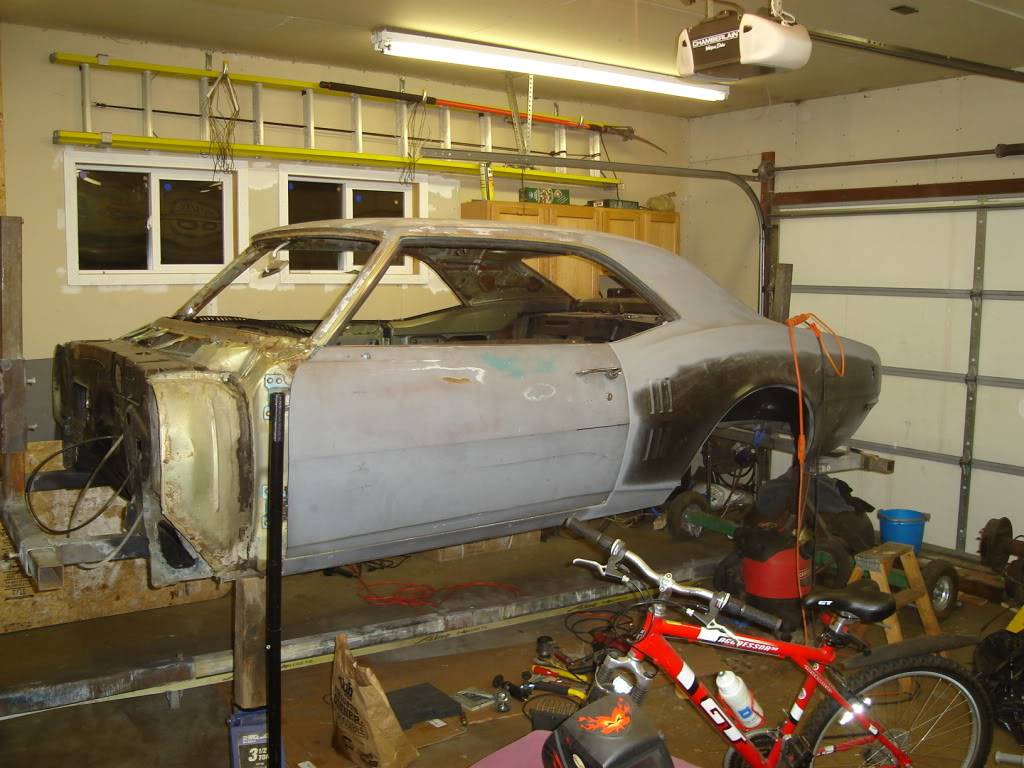
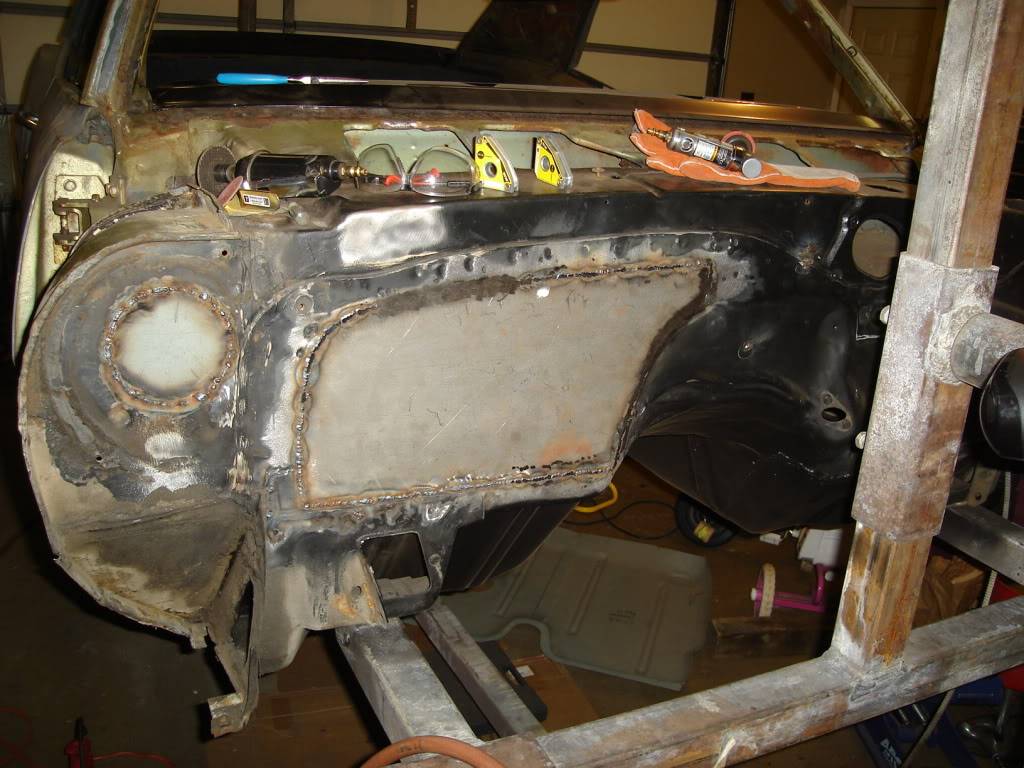
I had a friend stop by and help this last Sunday and we decided to tackle the firewall.
Here is what it looked like when we started.
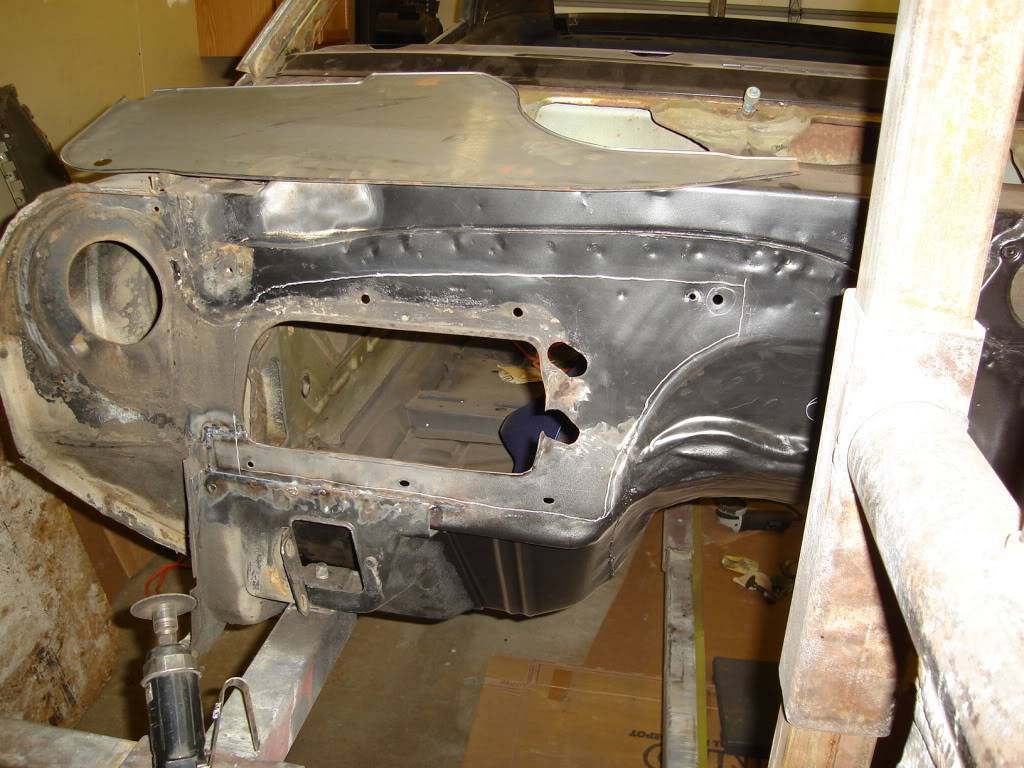
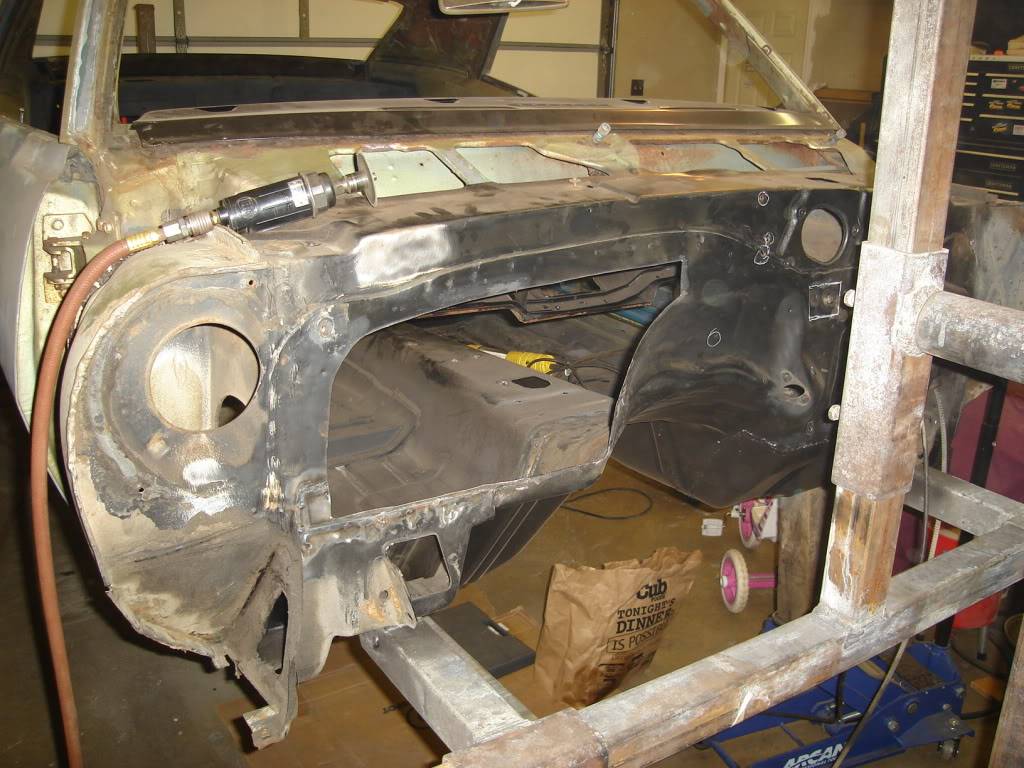
A couple of patches welded in.
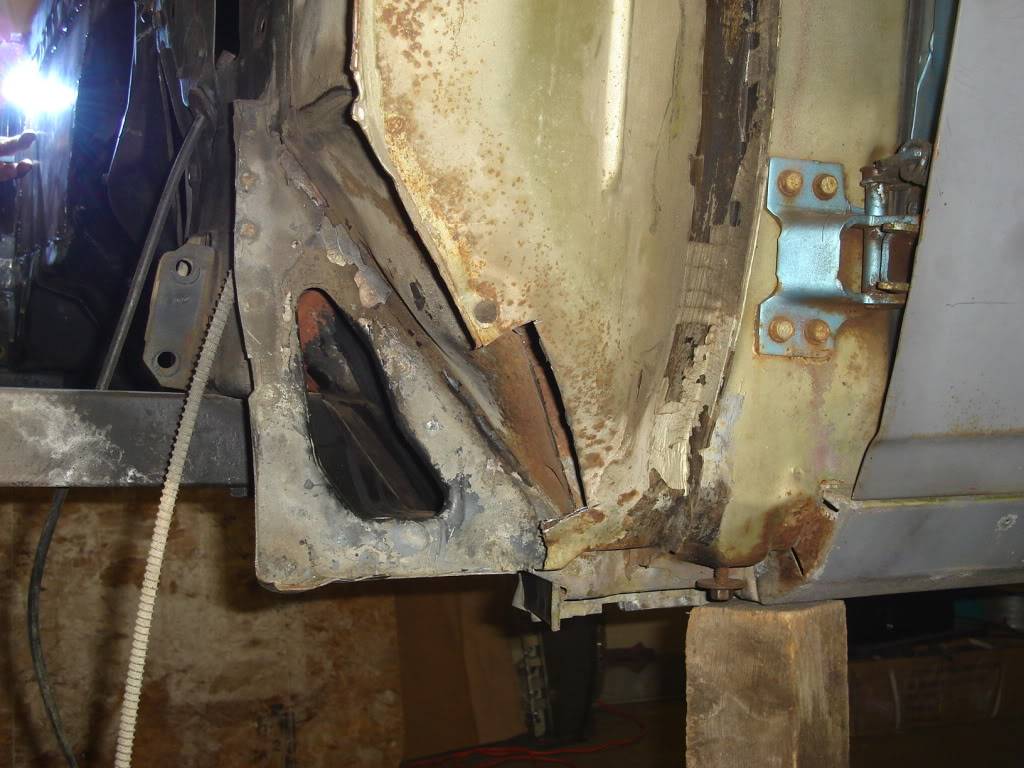
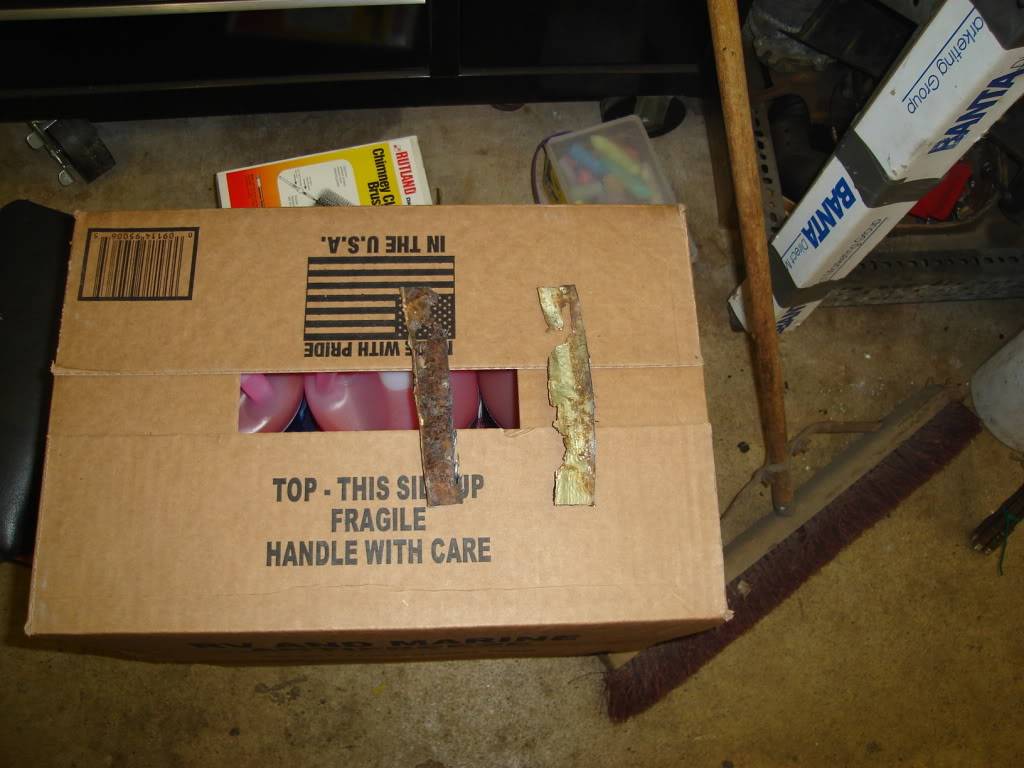
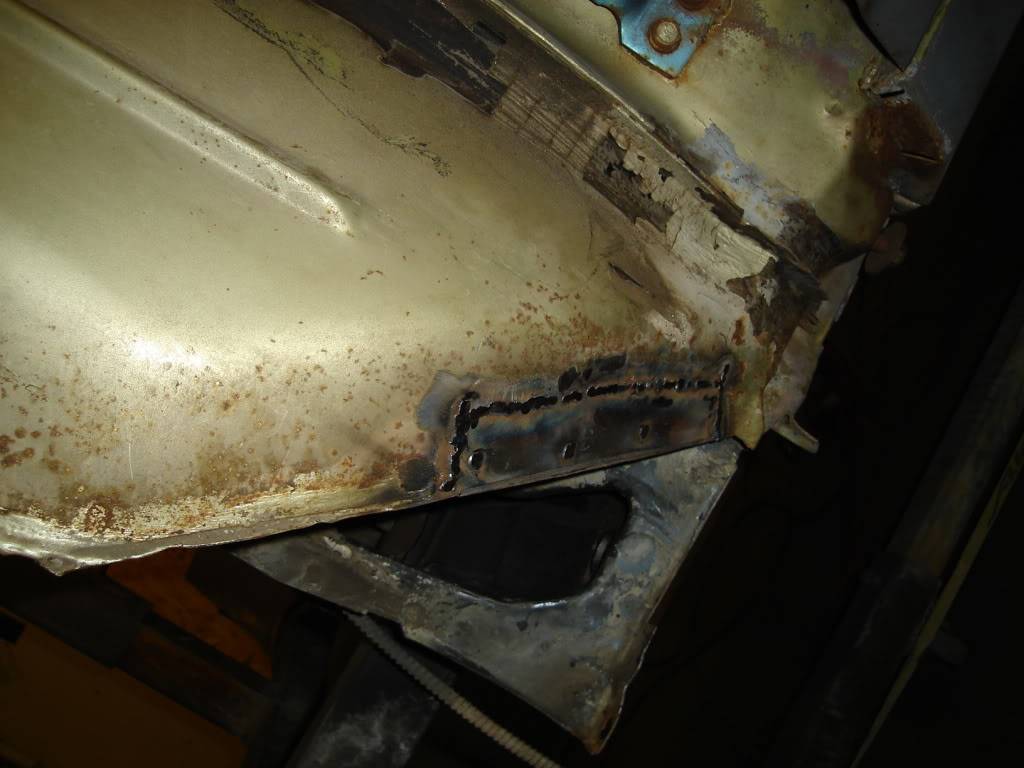
I had one spot on the cowl that was in bad shape. I cut out both sides and welded in new metal. All welds need to be ground down before painting.

10-13-2009 #69
Registered User
- Join Date
- May 2009
- Location
- Minnesota
- Posts
- 615
Thanks John. I now know that I fit in the trunk of a 1st and 2nd gen car. I still have more to do back there but it's getting closer. Originally Posted by John Wright
10-13-2009 #70
Registered User
- Join Date
- Aug 2004
- Location
- Rustburg, Virginia
- Posts
- 3,436
I have the rust bug working on my car back there from when the tail light gaskets were not sealing.
1970 RS/SS350 139K on the clock:
89 TPI motor w/ 1pc rear seal coupled to a Viper T56 via Mcleod's modular bellhousing w/ hydraulic T/O bearing from the Viper, 12 bolt rear w/ 3.73 gearing, SC&C upper control arms, factory lowers with Delalums, C5 brakes at all four corners, Front Wheels 17x8's with Sumi 255/40/17 and Rear Wheels 17x9's with Sumi 275/40/17.
Brief description of the work done so far can be found here: http://www.nastyz28.com/forum/showthread.php?t=112454
10-13-2009 #71 Registered User
- Join Date
- Oct 2009
- Location
- Amherst, OH
- Posts
- 524
I'm new to PT cars, and I haven't had a chance to research this....
But, what is the benefit in getting rid of a factory heat/AC system in favor of the Vintage Air unit? Is it just a cosmetic thing, so you can have a smoother firewall?
10-13-2009 #72 Registered User
- Join Date
- May 2008
- Location
- Western MA
- Posts
- 86
Space savings under the hood as much as cosmetics. The stock A/C plenum takes up a lot of real estate in the engine compartment. Running the vintage air unit frees that up and makes it easier to access the passenger side of the engine.
10-13-2009 #73
Registered User
- Join Date
- Oct 2009
- Location
- Amherst, OH
- Posts
- 524
Makes sense!
Cost wise, is it cheaper to revive the stock unit with replacement parts and cleanup vs. getting this system?
How is the installation on this kit? Any tricks involved?
10-14-2009 #74
Registered User
- Join Date
- May 2009
- Location
- Minnesota
- Posts
- 615
It's probably more expensive going with the Vintage Air if your ac system is complete. The older system will need to be converted over to the newer style of freeon (sp) Originally Posted by Josue
My car did not have ac from the factory and my heater box was in bad shape from a mouse who thought it would be a cool house.
Vintage Air makes a kit just for out cars (1st gen) so that helped a lot in making the decision to install it. I just have to save up the money for it.
10-14-2009 #75 Registered User
- Join Date
- Feb 2005
- Location
- Sydney, Australia
- Posts
- 1,797

Nice work...must be a "thing" with that section on the cowl sides...pretty much the only body rust on my old 67 Firebird 400 convertible was located right in the same place.
10-14-2009 #76
Registered User
- Join Date
- Oct 2009
- Location
- Amherst, OH
- Posts
- 524
Yea, I'm not even sure if you can get R12 anymore...lol Originally Posted by 68400BIRD
X2! Our '69 convertible has a patch in the same spot, but on the passanger side.Nice work...must be a "thing" with that section on the cowl sides...pretty much the only body rust on my old 67 Firebird 400 convertible was located right in the same place.
10-19-2009 #77
Registered User
- Join Date
- May 2009
- Location
- Minnesota
- Posts
- 615
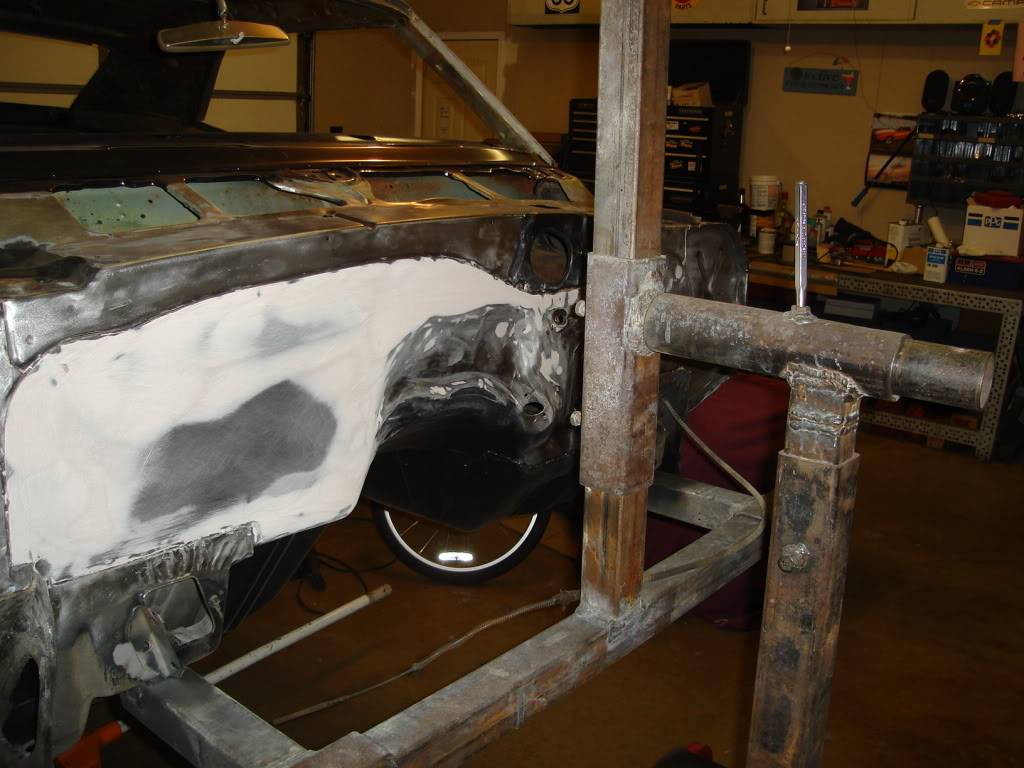
Started on the firewall this weekend. Heres a before pic.
After a little grinding.
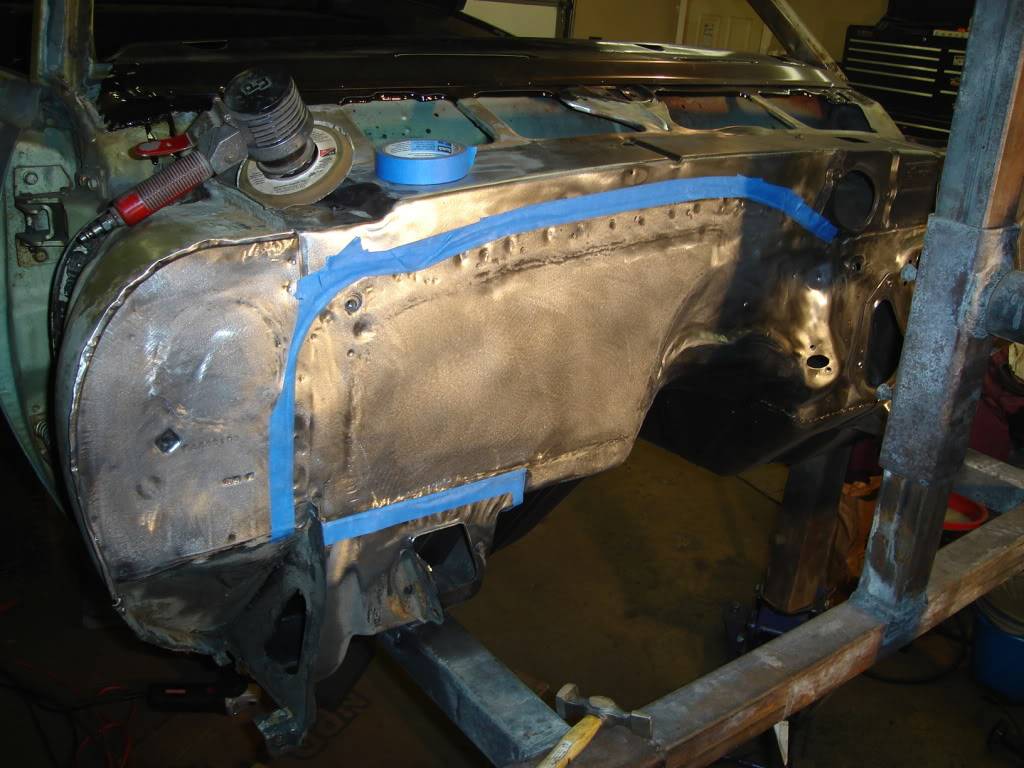
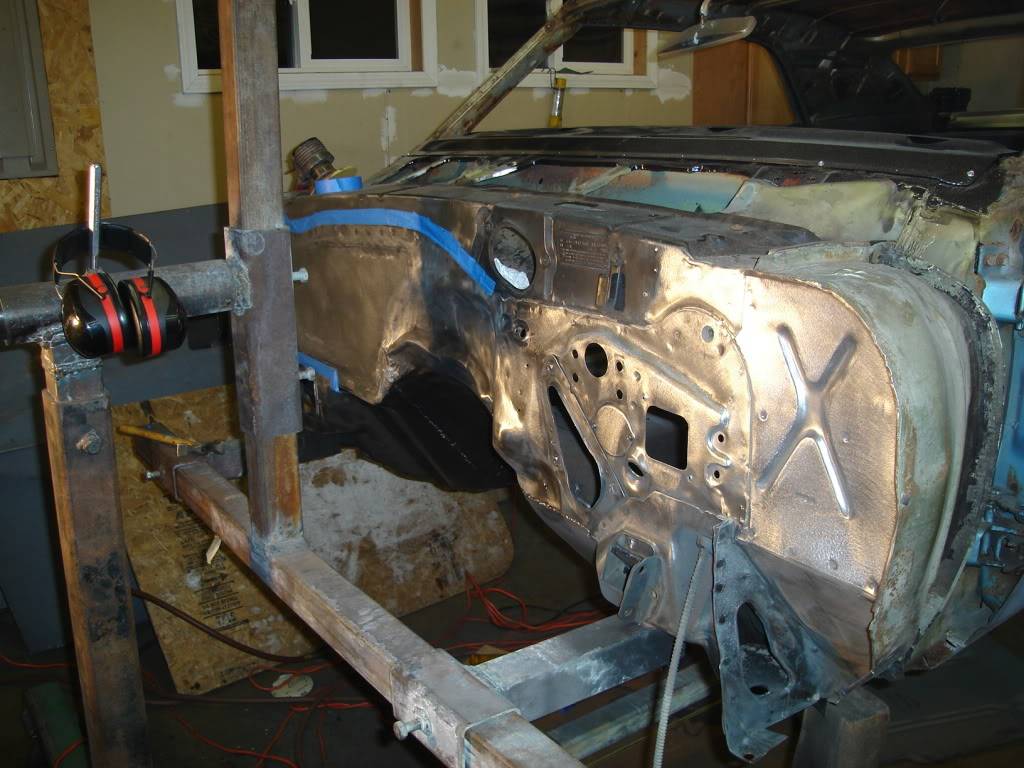
And a little body work. I'm not going for perfect but I will smooth out as much as possible. The firewall did not have a flat surface on it from the factory.LOL
10-20-2009 #78 Registered User
- Join Date
- Apr 2004
- Location
- Cedar Rapids, IA
- Posts
- 999
I can't believe that your doing this in a two stall garage! Very impressed. What are you going to do with the kids bikes when the thing is painted?
Some times I'm fast sometimes I'm half-fast
10-21-2009 #79
Registered User
- Join Date
- May 2009
- Location
- Minnesota
- Posts
- 615
Thanks for the compliments. I hope to have a bigger garage within a few years. I don't see it in paint for at least two years. Just way to much to buy. It needs a complete interior, Vintage Air, posi rear end, and a set of 16 heads that need a ton of work. Money is the biggest issue or wait is it time. LOL I'm just hoping to be able to drive it next year in primer. Originally Posted by rohrt
10-28-2009 #80 Registered User
- Join Date
- Sep 2004
- Posts
- 154
Thanks for posting your build. Glad to see you saving that 'Bird and doing it right!
Wanna Be A G

 Reply With Quote



