


Results 21 to 40 of 132
-
08-12-2015 #21

 Starting The Transformation
- Join Date
- Feb 2010
- Location
- El Segundo, CA
- Posts
- 268

Some progress pics...
Since I am increasing caster, it seemed reasonable that the load on the power steering would be increased. So I've added a power steering fluid cooler. Here is a pic of the steel shroud I fab'd up to direct air to the Earl's cooler:
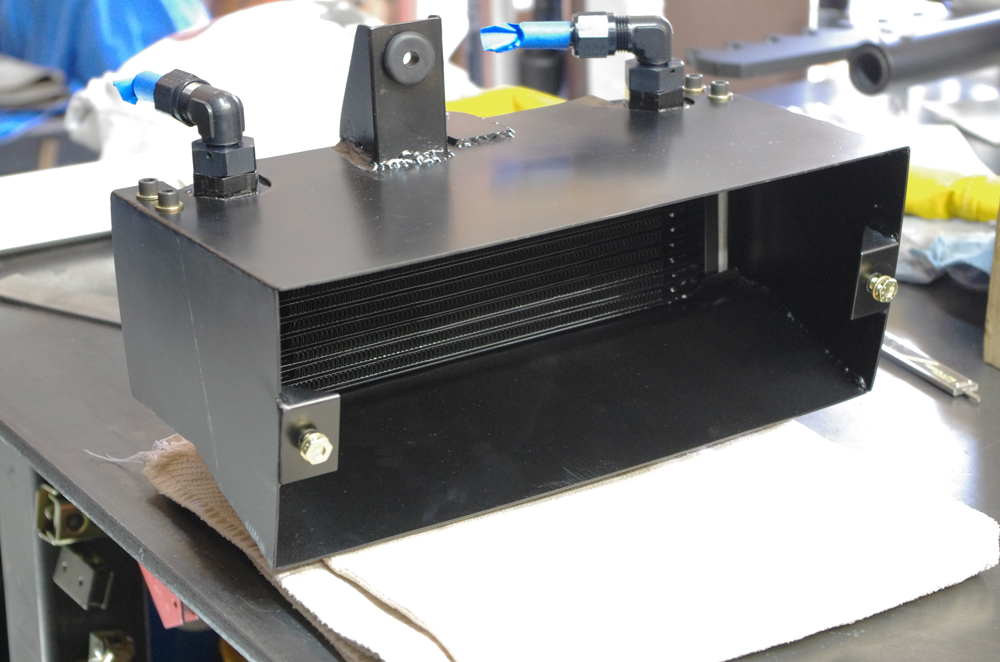
The cooler is situated behind what Ford calls the "gravel pan". I am busy now plumbing it into the pump and rack.
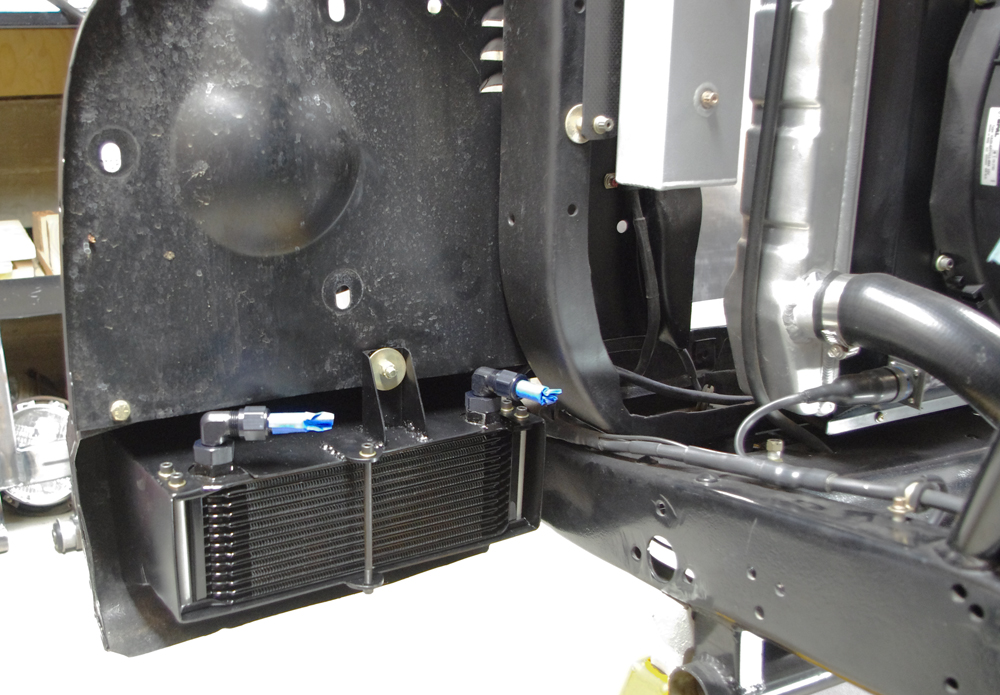
Air is directed to the cooler via holes in the gravel pan:
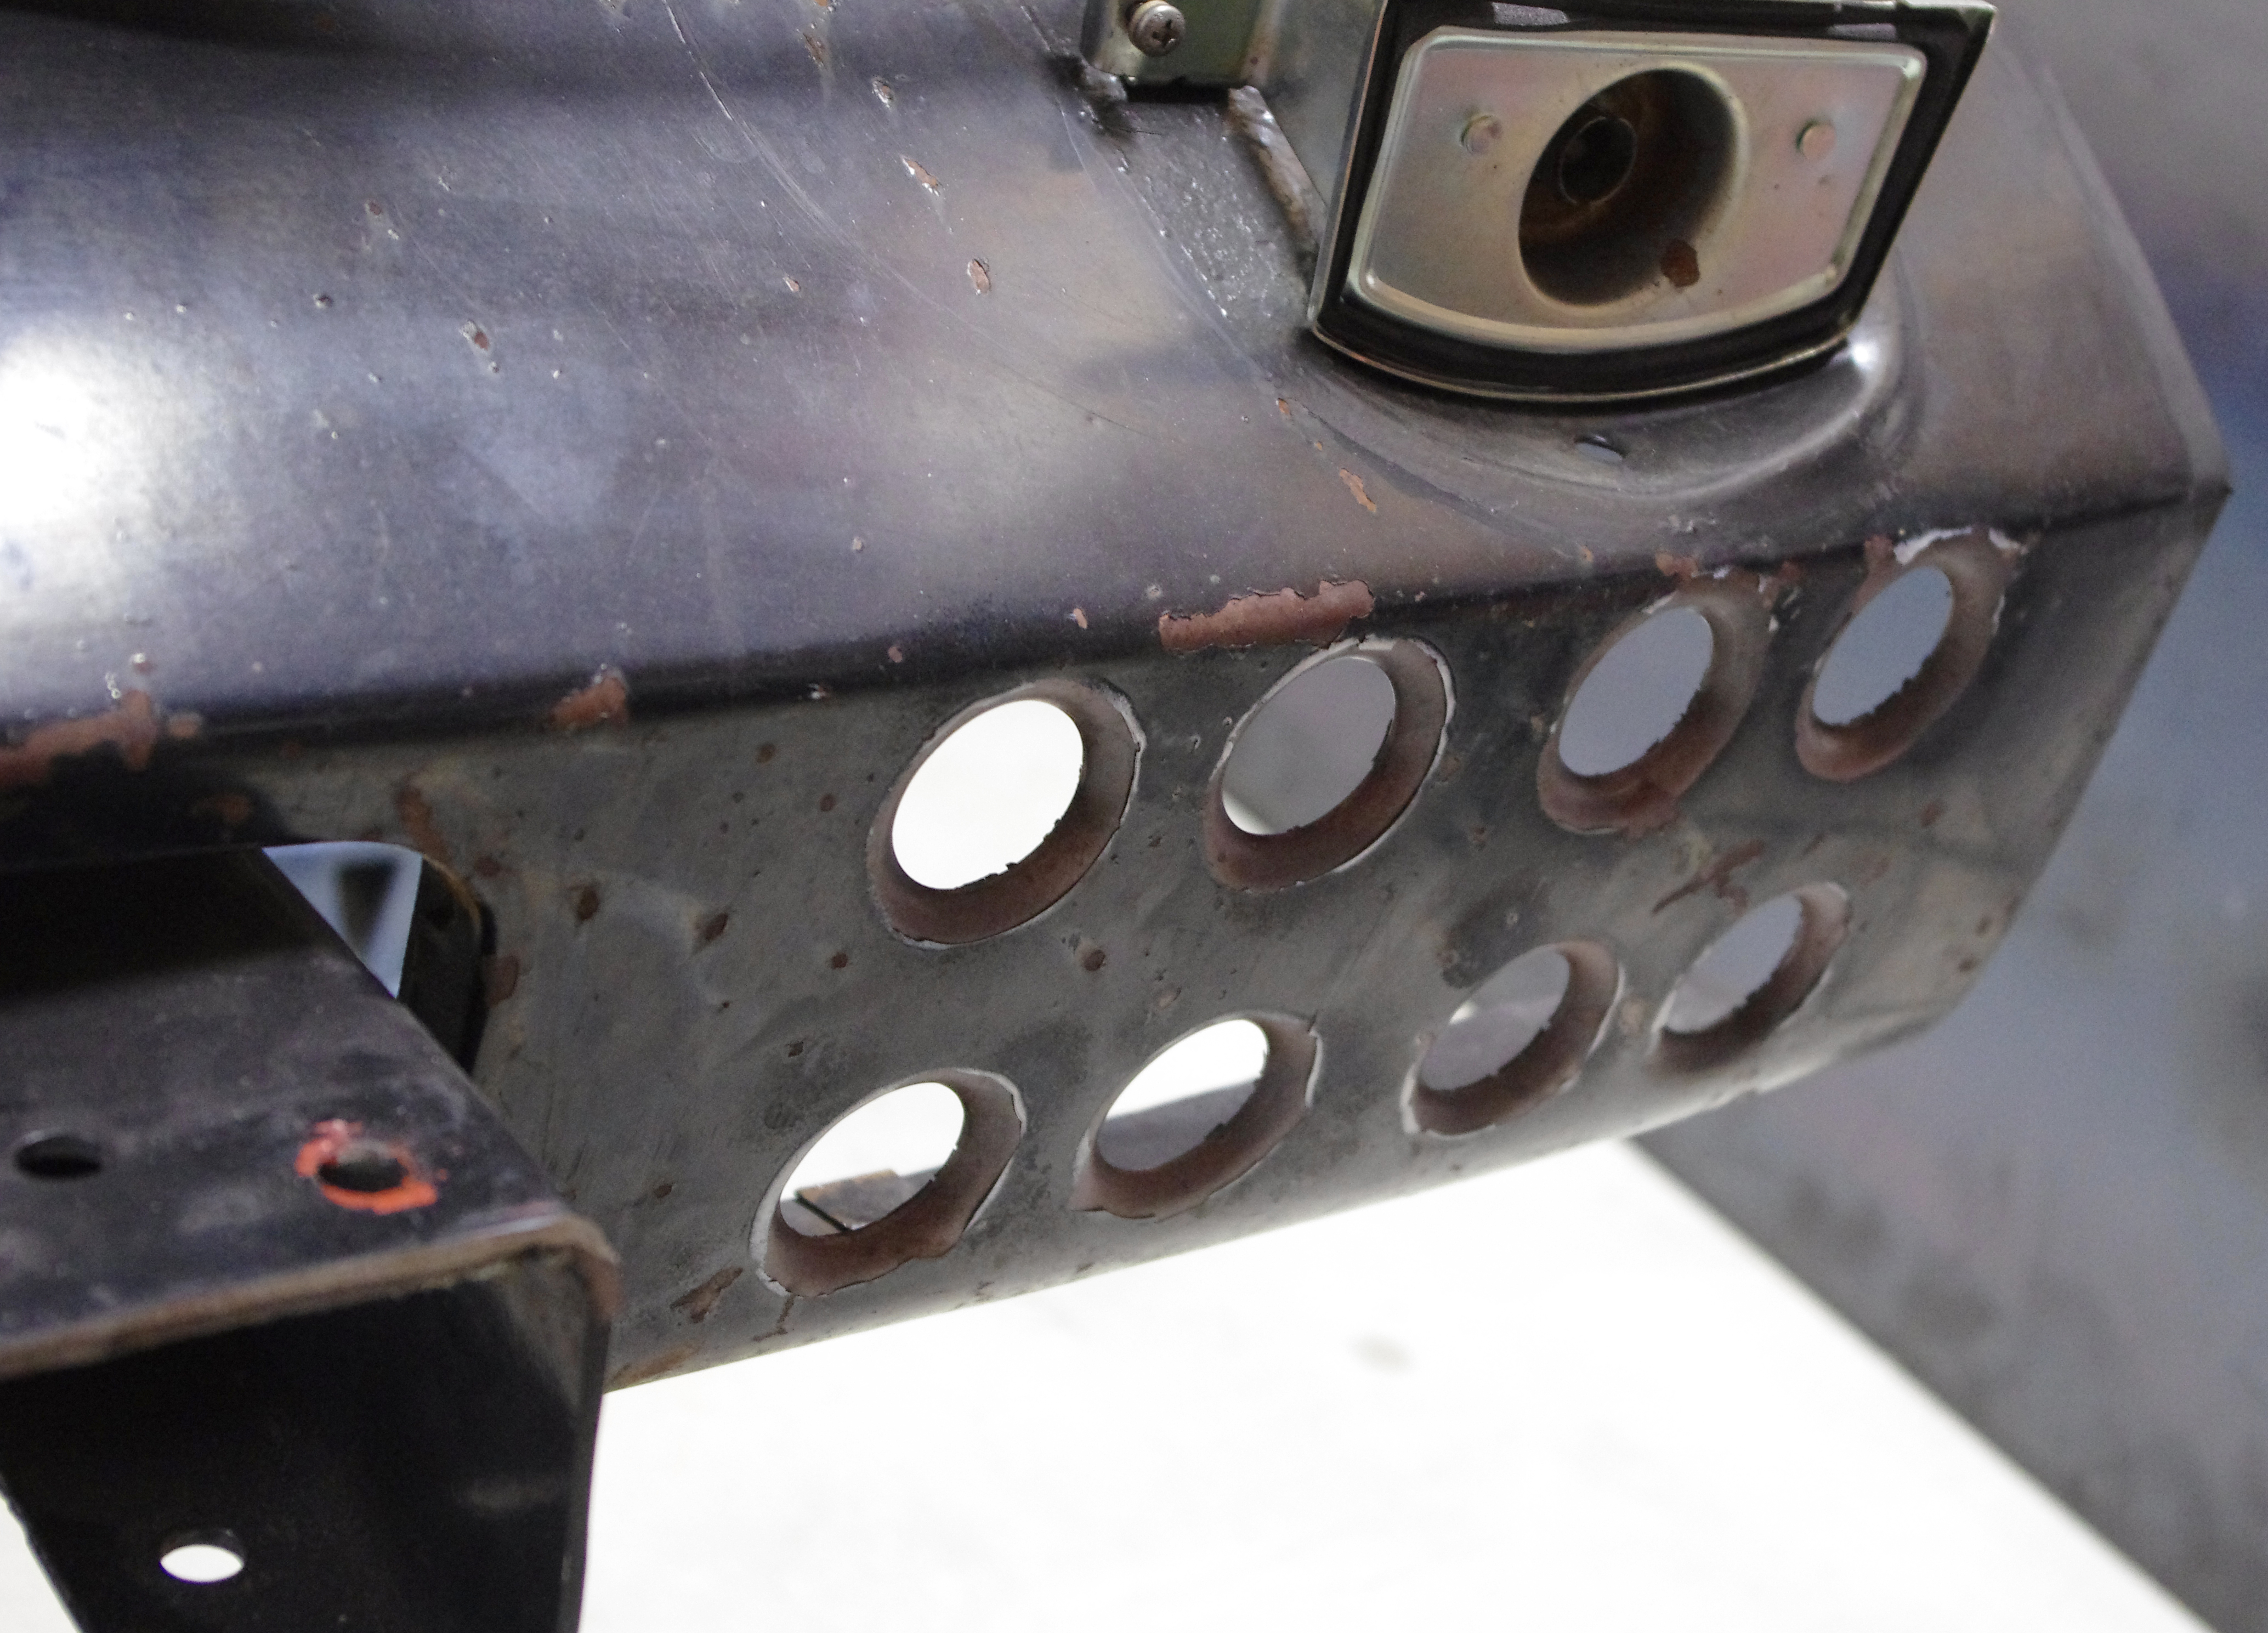
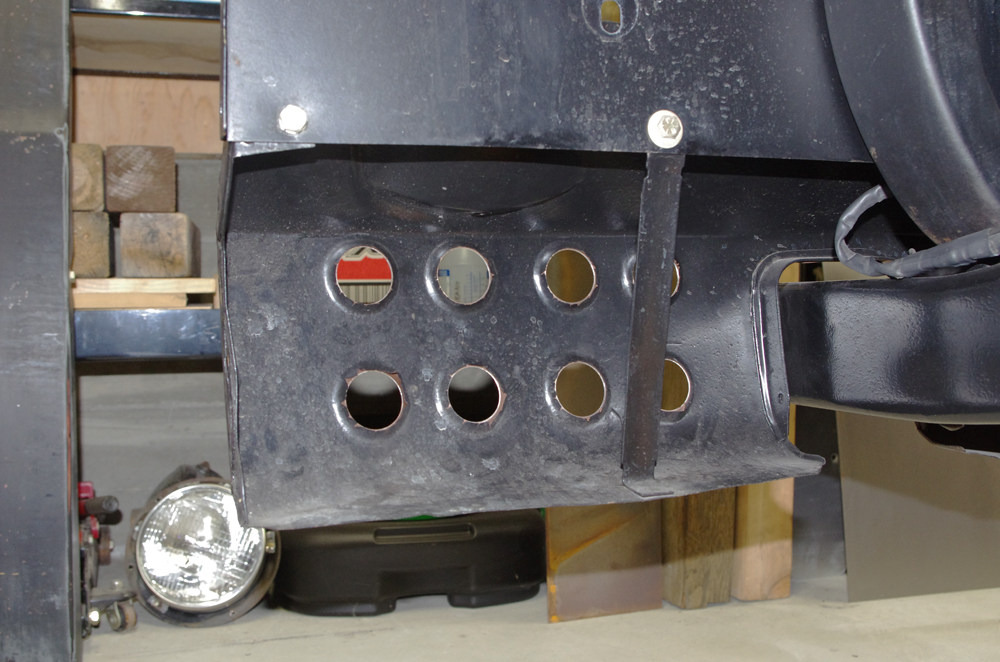
In terms of maximizing air flow to the cooler, this is not optimum, but not bad. The bumper will get in the way to some extent, and I'm not ready yet to punch holes in that like Rob did.
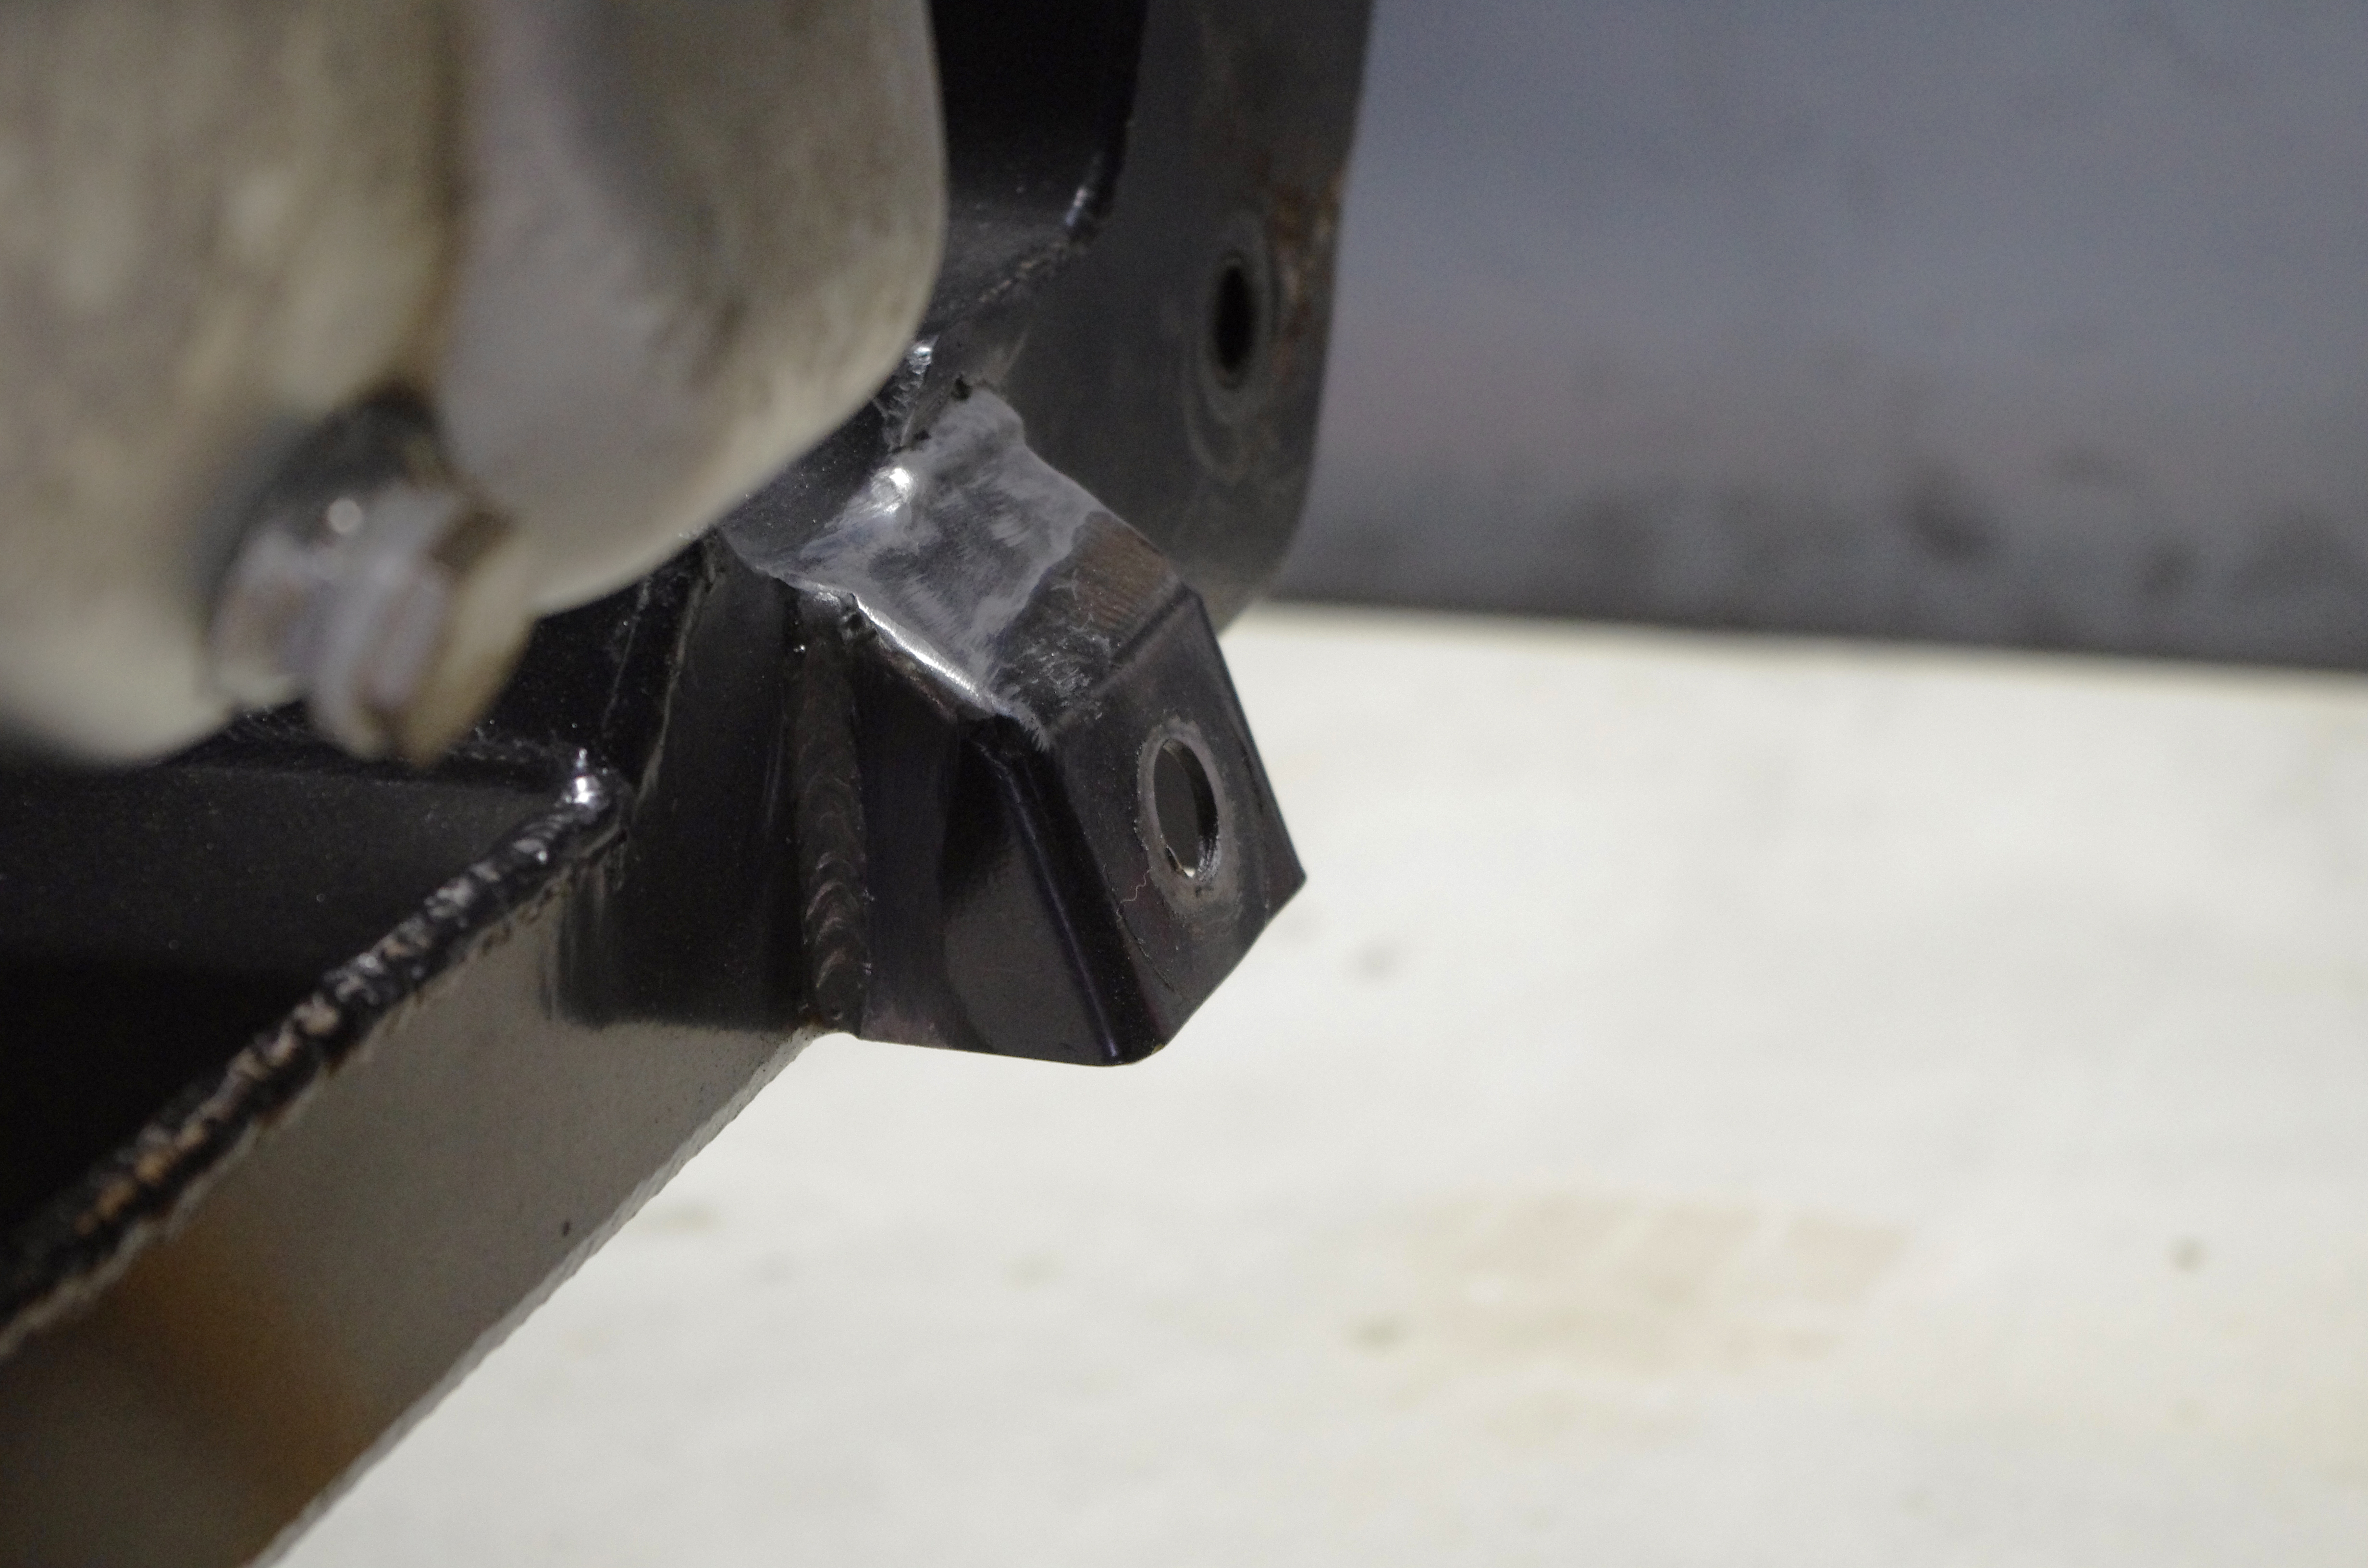
Because my new control arms push the front wheels forward both to increase the wheelbase 1" and some more to increase caster, I had to move the rack forward and up. This was a bitch to figure out. I think I got it close, but ultimately I will need to measure the bump steer to know for sure.
The original rack was mounted on these pylons:
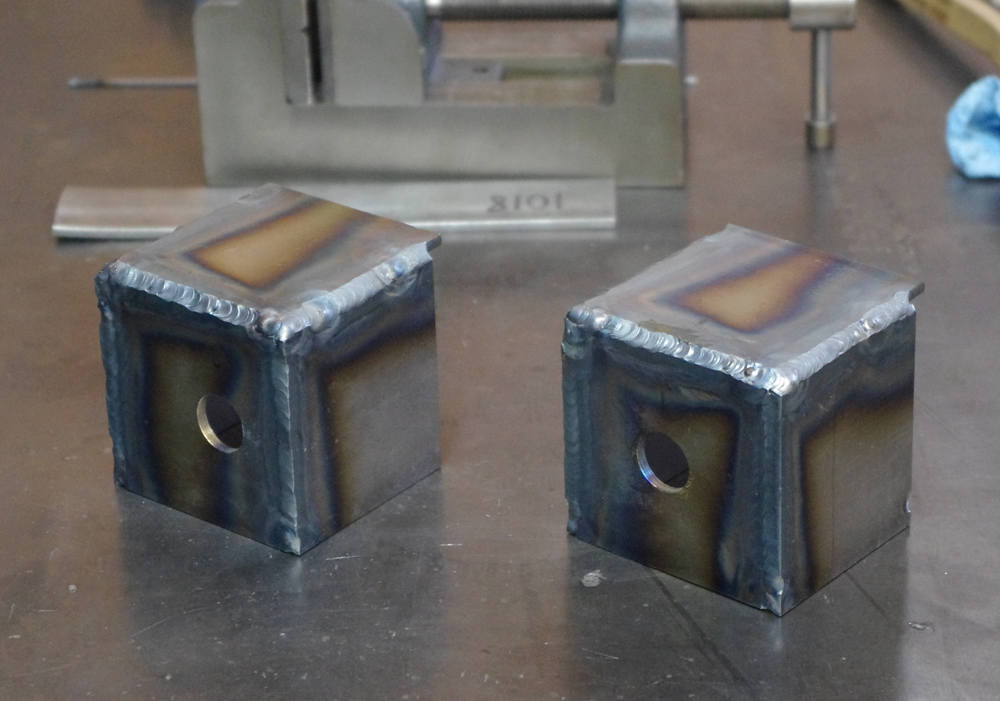
The easiest way I could think of to make new mounts was to enclose these pylons with new bigger pylons. Here they are welded up on the bench:
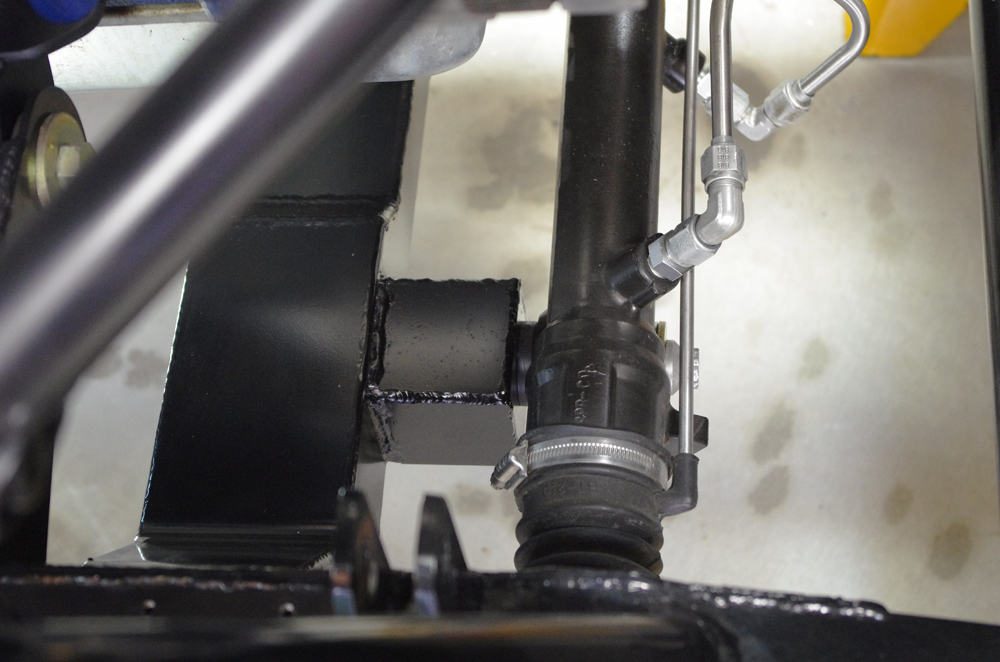
And here they are welded onto the (wimpy) subframe:
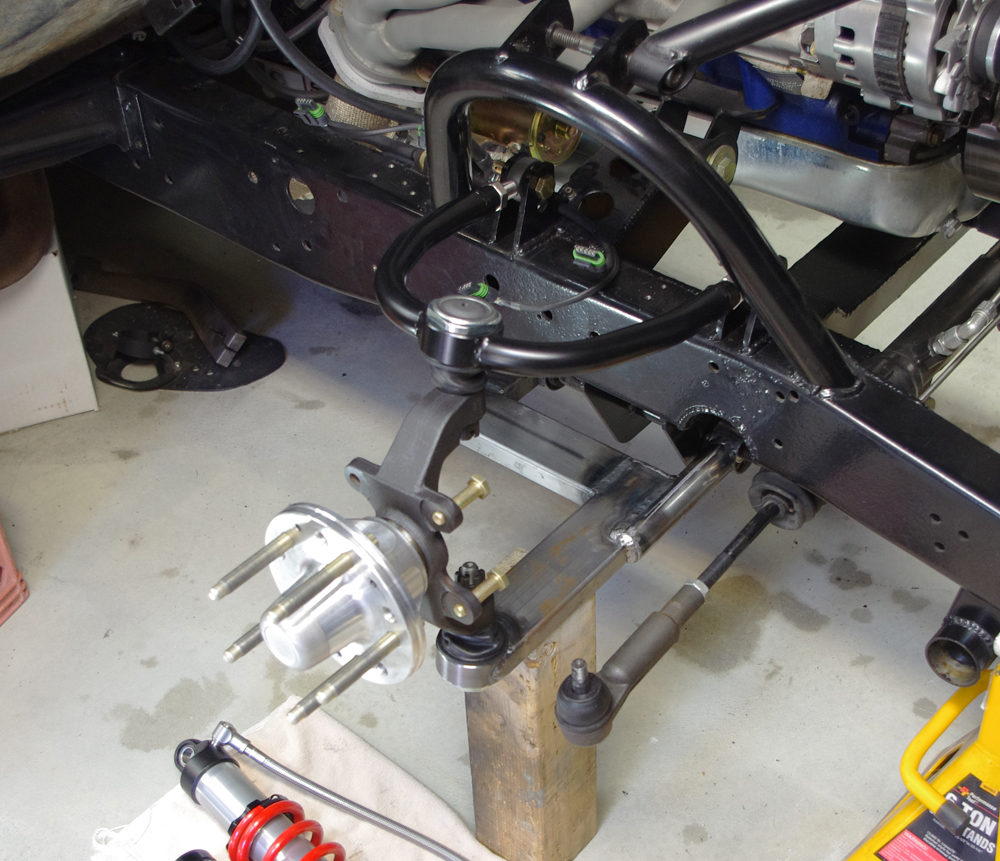
I've also finished the lower control arms and had the rubber bushings pressed in. I did a mock install today:
More to come... Gustave
-
08-24-2015 #22
Starting The Transformation
- Join Date
- Feb 2010
- Location
- El Segundo, CA
- Posts
- 268
Well, a lot of work without much visible progress.
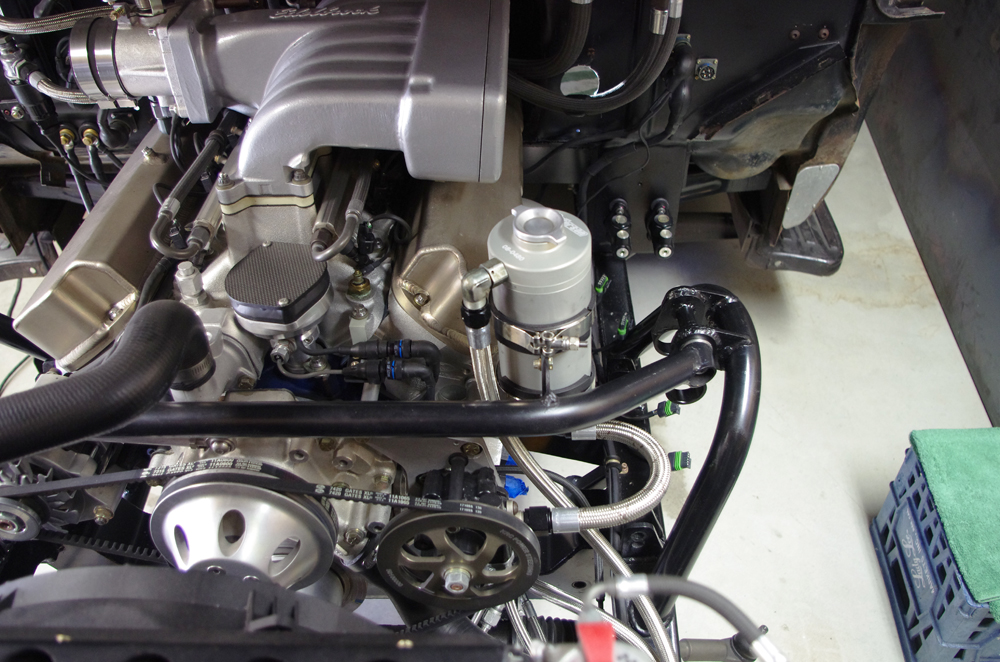
I did get the power steering hoses finalized:
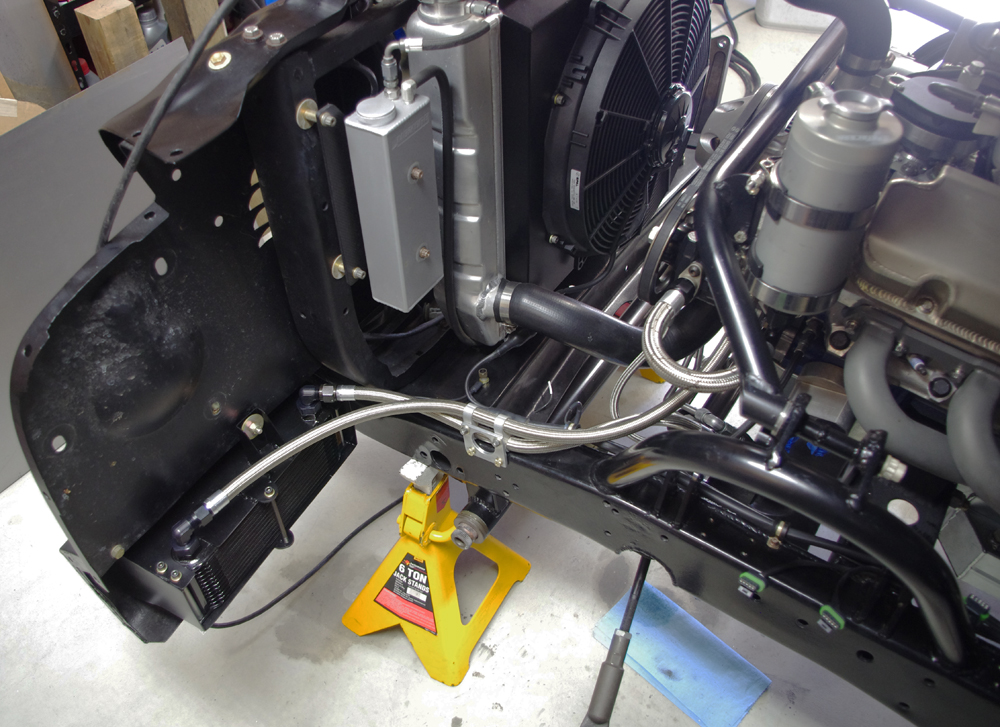
I take a lot of care when running hoses to make sure they do not (a) rub against another hose, especially a rubber hose, and that they do not (b) rub against any wiring, and (c) that they run as straight as possible to reduce pressure losses, and lastly (d) that they look somewhat visually appealing. It takes time to get the lengths and routing correct.
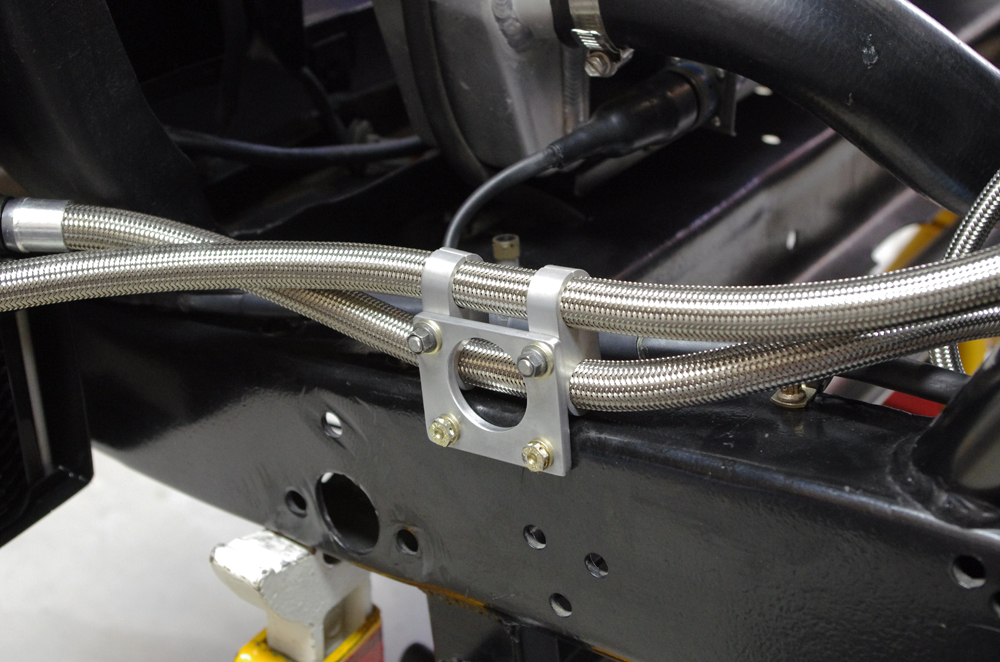
On this truck I use almost exclusively Earl's Ultra-Flex hose and connectors. This is a crimp-on style, but has a super tight bend radius (more so for the stainless than the Kevlar). It also just looks clean without the bulky reusable hose ends. I live close to Earl's Store #1 in Hawthorne so I just go down there and they make them on the spot. The guy Tom who owns the place is pretty tight with Holley (who owns Earls) so he is a good source for advice.
I also made some brackets to for the new upper front shock mounts. The old shocks were way too long (7" stroke) so the new ones are shorter. I also wanted the shock to mount to poly bushings to help absorb road noise and shock. We'll see how much that helps.
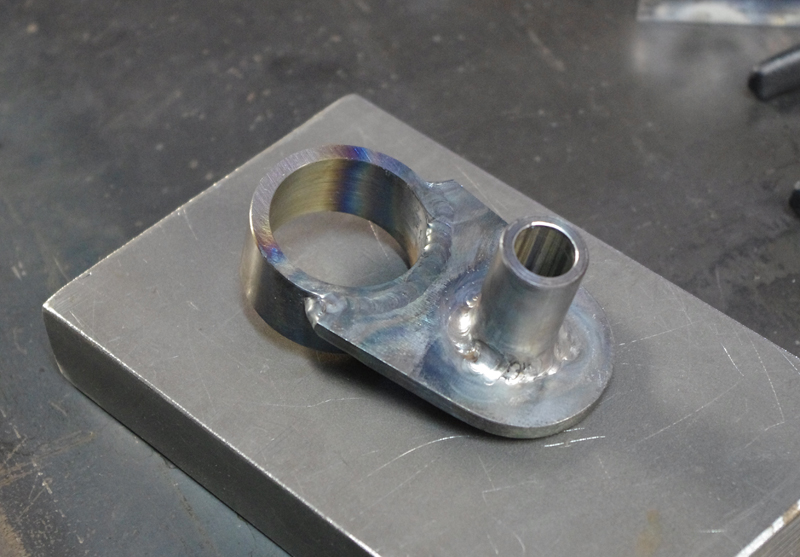
I try to TIG weld whatever I can. Once it comes to welding it to the frame I resort to MIG.
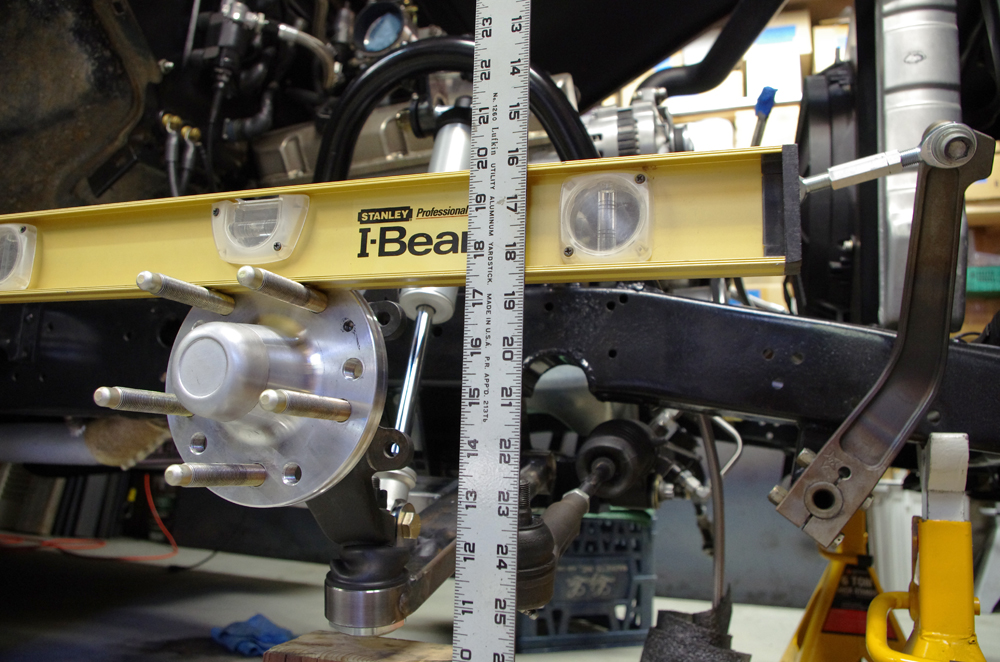
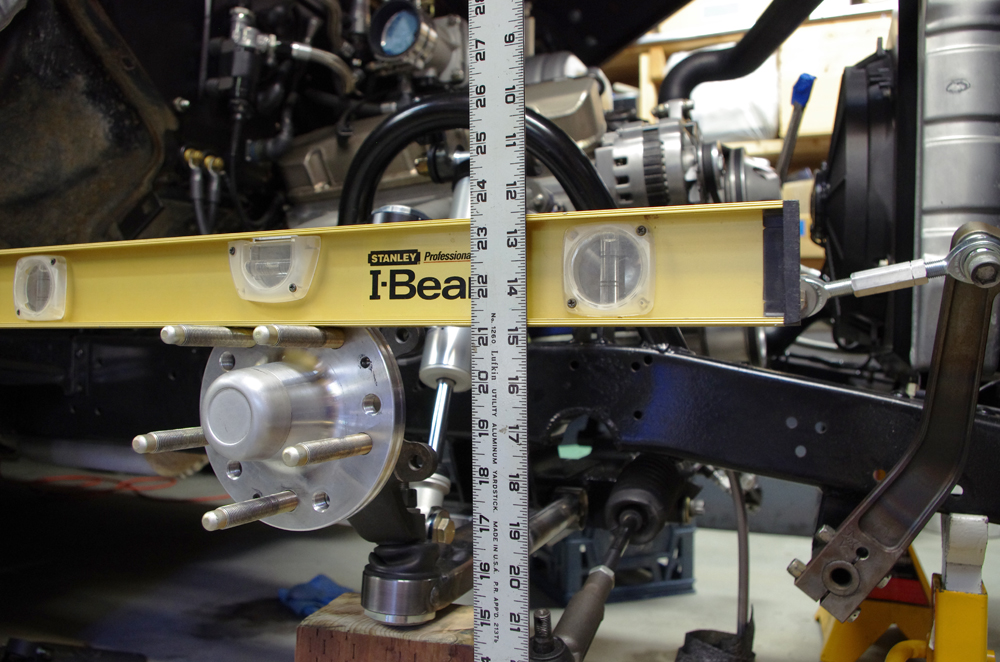
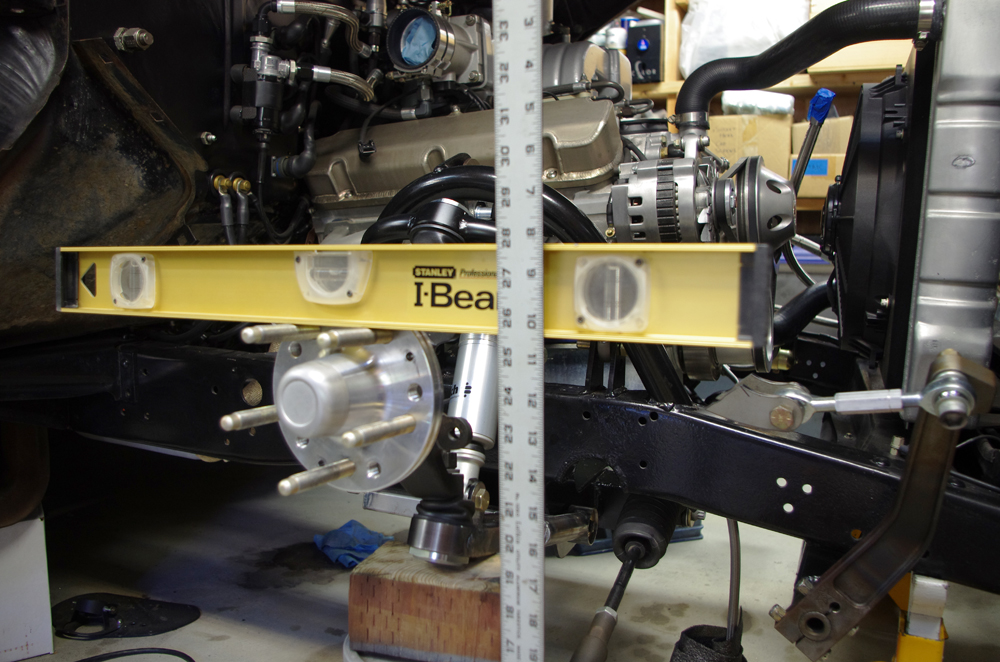
I also mocked up the front suspension to check the wheel travel from full droop to full bump (not including any bump stop which will limit bump travel a bit). The three pics show full droop, app. ride height, and full compression:
Lastly I got the new brake fluid reservoirs plumbed up. Now that the master cylinders are in the engine compartment instead of under the dash, this was necessary. I also wanted bigger volume. The previous reservoirs were mounted on the dash where the ash tray used to be. That was the only place I could find that was higher than the master cylinders in that configuration. But the reservoirs were only 1 oz each, which meant they had to be refilled frequently during bleeding. And like an idiot I had the reservoirs black anodized, which made it almost impossible to see the fluid level - resulting in a lot of brake fluid leaking down the dash onto the shifter. I did not repeat this mistake with the new Wilwood 4 oz reservoirs.
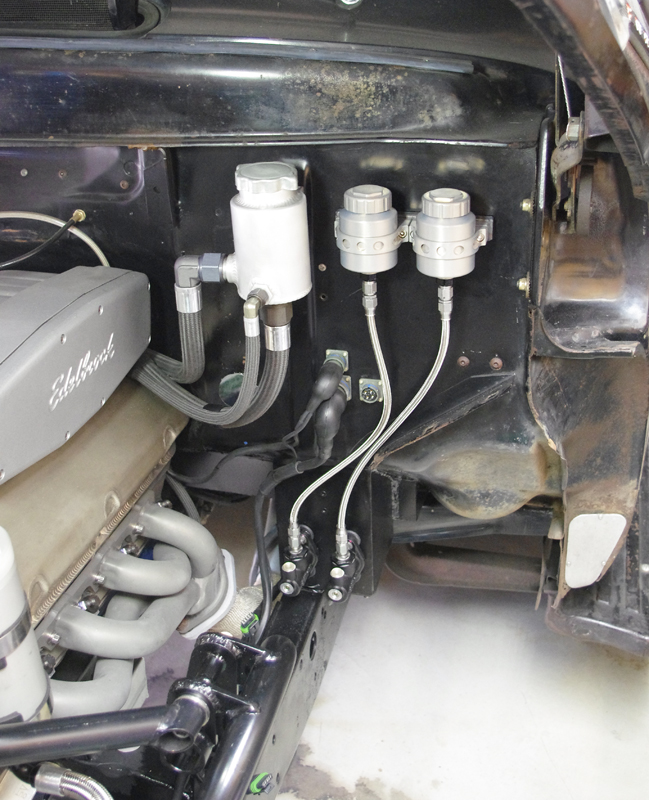
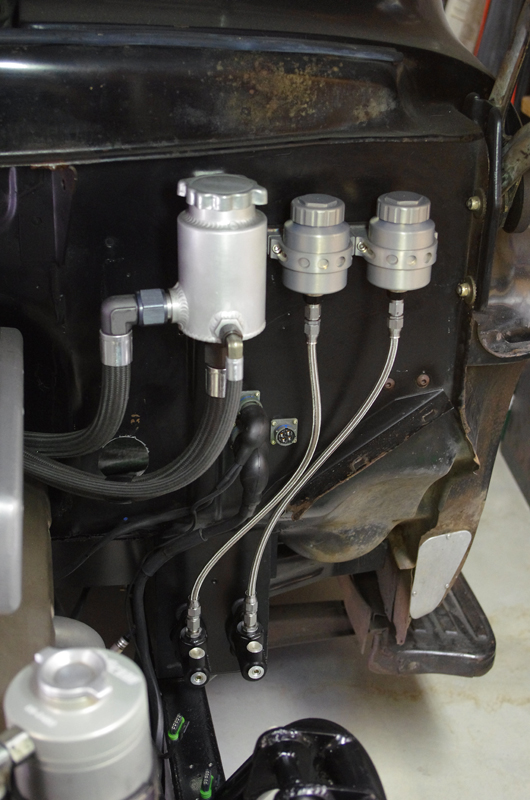
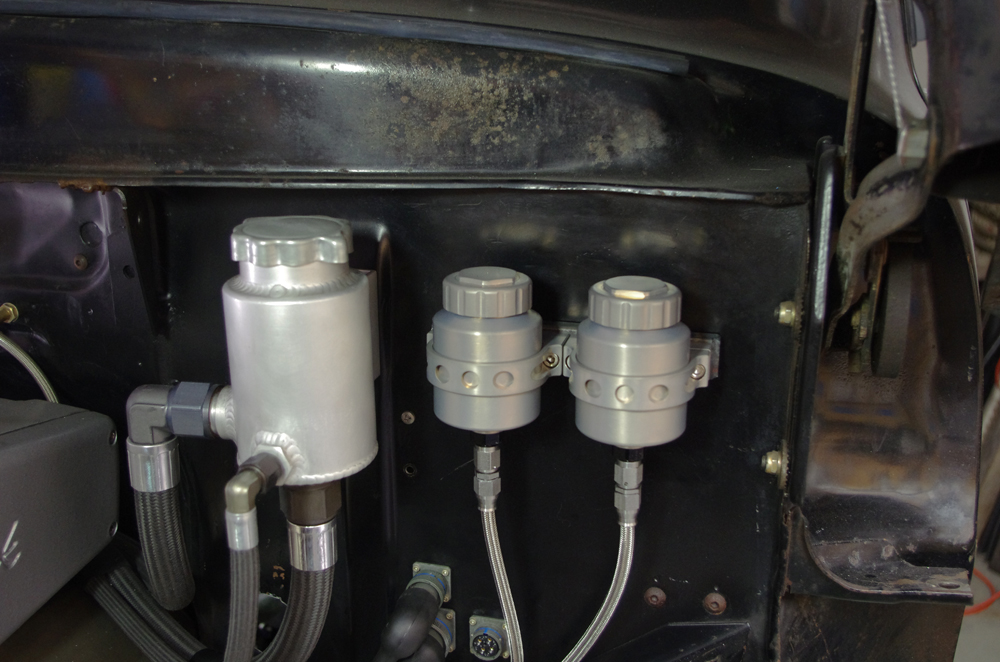
That is all for now, more to come. Gustave
-
08-29-2015 #23
New to Pro-Touring
- Join Date
- Jan 2009
- Posts
- 22
Wow!! This looks great! Can you give us anymore details on the truck? motor, trans, etc... Perhaps there is another build thread somewhere?
-
09-01-2015 #24
Starting The Transformation
- Join Date
- Feb 2010
- Location
- El Segundo, CA
- Posts
- 268
Glad you like it. I'm not sure a lot of people really 'get' the things I do to my 56. Which is ok, I march to the beat of my own drummer I guess. Originally Posted by my79f

I originally bought the truck in 2010 'by accident' on eBay. Ostensibly it was to haul my CBR1000RR to the track for lapping days. But I got the hot rod bug and started wanting to modify it. It had a 460 FE with a C6, solid axle up front and was horrible to drive. After some unsuccessful attempts to make it better I decided something more substantial was warranted, like IFS and truck arms. I did not have the skills to execute that at the time and was lured into shipping the truck to a shop outside my city, something I still regret to this day. It was not a good experience. But it convinced me to learn to weld so that I could take matters into my own hands.
I have a prior history of auto-crossing and tracking BMWs, and this is what I would like to do with the 56 also. But it has to still be a truck, since my wife and I use it in our business to haul stuff around. So a useable bed floor is non-negotiable, and preferably no full cage or things like that. I had my fill of driving a full cage stripped out race car as my daily driver about 20 years ago!
I have modified it in "phases". First was a complete re-wire using mil-spec parts (I just like doing that). Second phase was converting the new engine to fully programmable sequential fuel injection and ignition. Again so that I could take control of things. I'm much more comfortable tapping keys on a laptop than changing jets on a carburetor.
The engine btw is a Ford Racing 347JR. This is a sealed racing engine intended for low level oval racing. It makes 350HP and 400 ft lbs. The fact that it makes more torque than horsepower is a good indication of a mild cam, and this thing does have a real baby cam. Which makes it very drivable around town. Should be good for auto-x also, though not so much at the track. One of my planned future phases is to add dual turbos to full out the upper end of the power curve. Unless I get tempted by a V6 Ecoboost before then! If Ford comes out with a crate version of that engine that makes, say, 500 hp and 500 ft lbs, that would be pretty cool. The upcoming Raptor and GT will show the potential of the platform.
The transmission is a leaky old C4 with a bad shift kit.
My current phase is almost entirely dedicated to making the truck more livable. That is what you see in this thread. Moving the seats lower and tilting them back a bit. Changing the angle of the steering wheel so it is more upright like a car. Changing out the brake system for lower effort (manual). Increasing caster for more stability. New front suspension for better absorption of sharp impact loads. More sound and thermal proofing. Not very sexy stuff, but important to me and my wife.
The next phase will occur in about 1 year and will consist of building a new frame. Converting the rear suspension from truck arms to 3-link. Adding a real fuel cell. Solid mounting the cab and doing some rust repair on the lower front corners. Maybe add a simple roll bar. And mount the engine much further down and further back. The prior builder left a lot of meat on the table in that area. I will also install a new transmission at that time, either an AODE or a TCI 6X.
The next phase after that will be turbos. I am already planning where to mount them and the intercoolers and how to go about fabricating a new intake manifold.
Perhaps I should start a build thread so that all my activity is contained in a single place.
Gustave
-
09-01-2015 #25 Registered User
- Join Date
- Dec 2006
- Location
- Out of the Burbs of Detroit to SoCal, then onto my ancestral homeland, the woods of Cascadia
- Posts
- 1,753
Ummmm...
This isn't your build thread?Greg Fast
(yes, the last name is spelled correctly)
1970 Camaro RS Clone
1984 el Camino
1973 MGB vintage E/Prod race car
(Soon to be an SCCA H/Prod limited prep)
09-01-2015 #26
Starting The Transformation
- Join Date
- Feb 2010
- Location
- El Segundo, CA
- Posts
- 268
This is just a thread about a few things I'm doing right now. I've done a lot of stuff in the past that is not documented anywhere. And if I build a new frame, then putting it in a thread called "new control arms and brakes" would not be appropriate. If I could change the name of this thread then it could just become my build thread. Originally Posted by Twentyover
09-04-2015 #27
Registered User
- Join Date
- Feb 2011
- Location
- Indpls, IN
- Posts
- 612
Please do a build thread.

Looks like a great build.
09-04-2015 #28
Starting The Transformation
- Join Date
- Feb 2010
- Location
- El Segundo, CA
- Posts
- 268
So the title of this thread has been changed to make it a build thread (thanks Larry!). This way I can add to it for years if necessary 8^)
Ok, a few updates. There is a small town car show coming up a week from now in Westchester (LA). I set myself a target to have the truck at the show, just to have something to shoot for. The show has a chili cook off as part of the deal, and I love chile, so that is extra motivation!
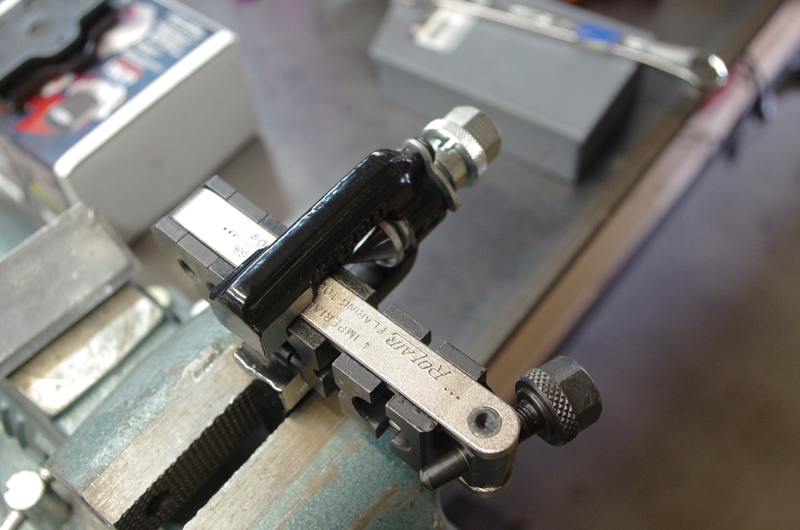
I've plumbed the front brake lines. Previously the master cylinders were under the dash, so the brake lines were no longer appropriate, as the master cylinders are now in the engine compartment. I do all my brake lines using 37 deg flare AN connections. I don't bother with bubble flares. I use a RolAir flaring tool as shown here:
Here are a couple shots of the lines I bent up for the front:
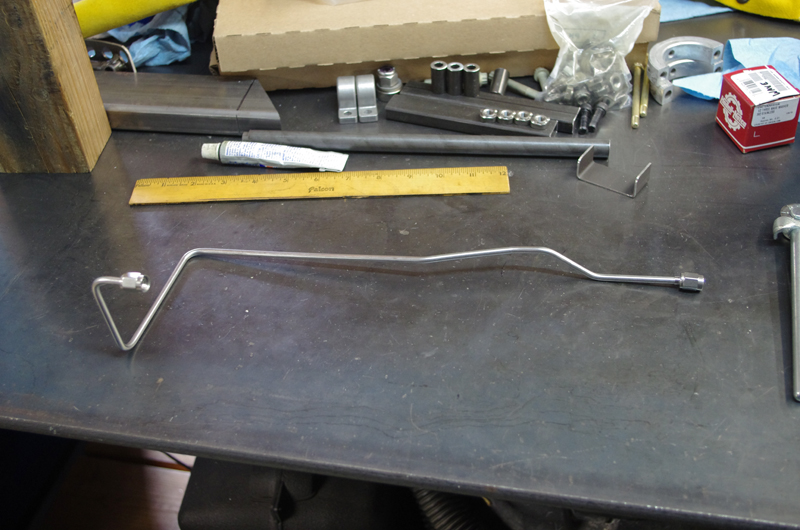
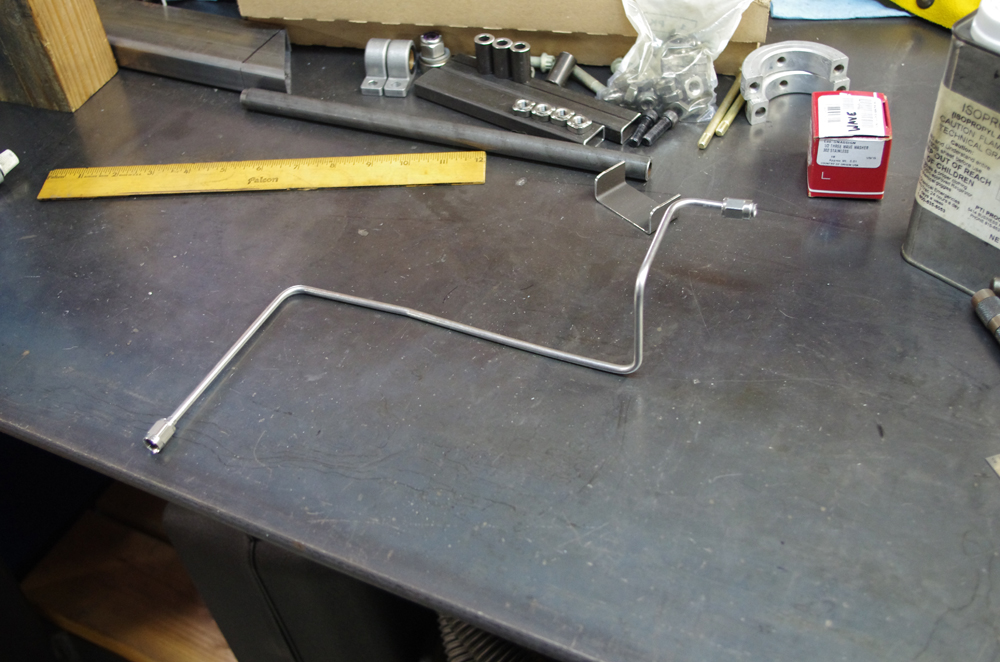
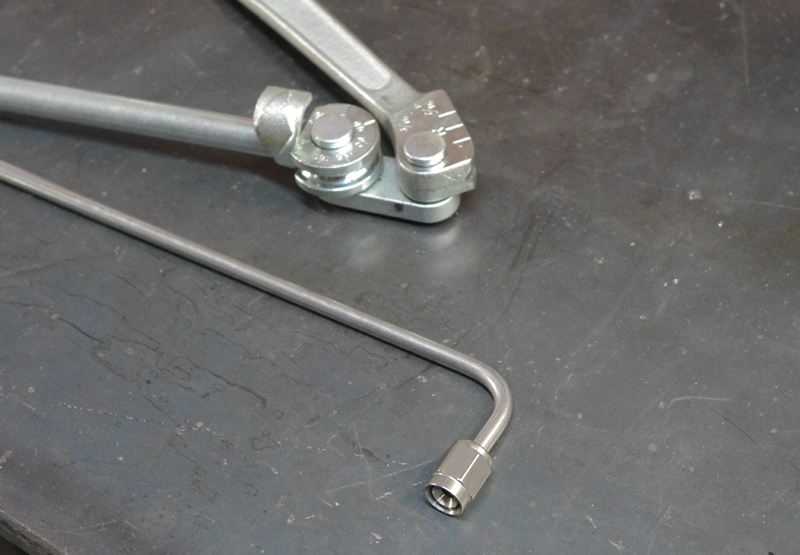
One thing to keep in mind when making hard lines is that you can only put a bend so close to the end of a line due to space needed for the end fitting and limitations of the bending tool. For me this was as close as I could get a bend to the the end of a hard line:
All the hard lines are made from annealed stainless that I buy at Earls. All the fittings are stainless as well. I've come to the point where I don't like using aluminum on the brake system, but that is a personal choice.
I made little brackets to act as the interface between the brake hard line and the flex lines going to the calipers:
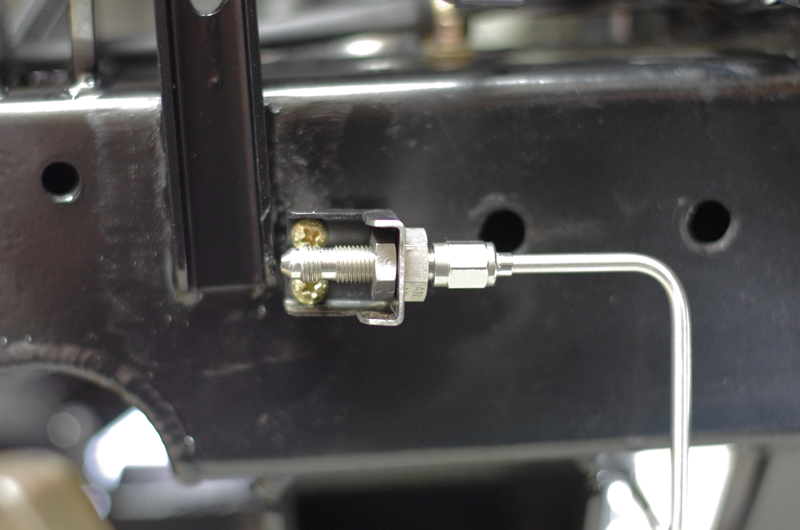
The bracket holds a stainless AN-3 bulkhead fitting to act as the transition.
Then on to the flex lines, again made out of 100% Earls parts. The next few shots show how the end fittings are installed on the flex lines:
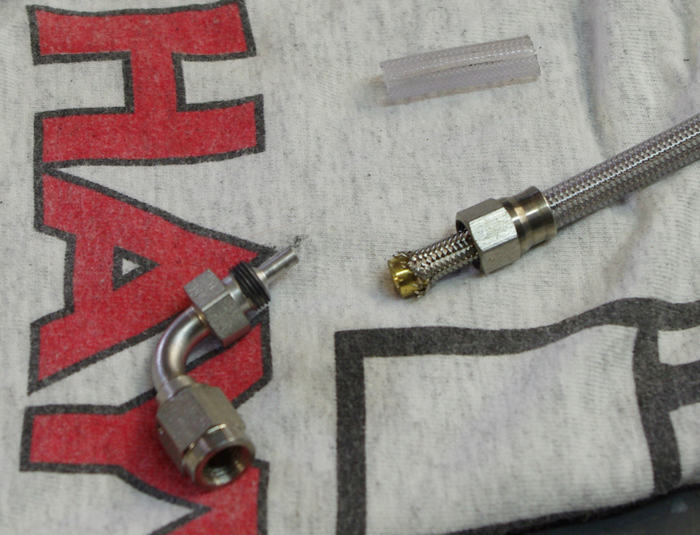
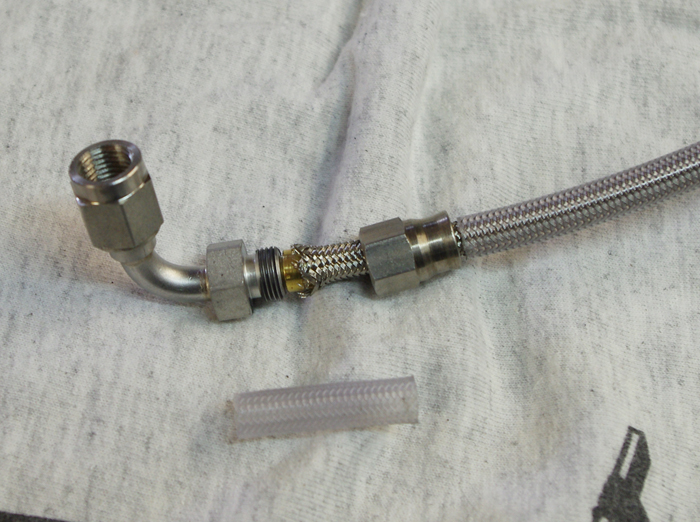
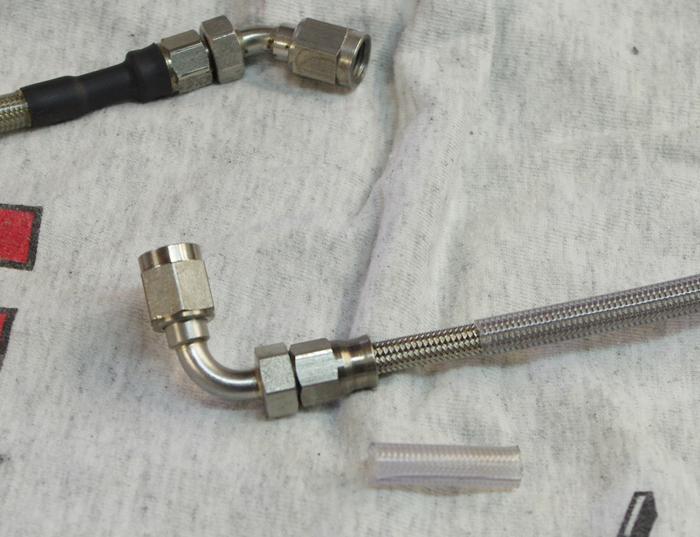
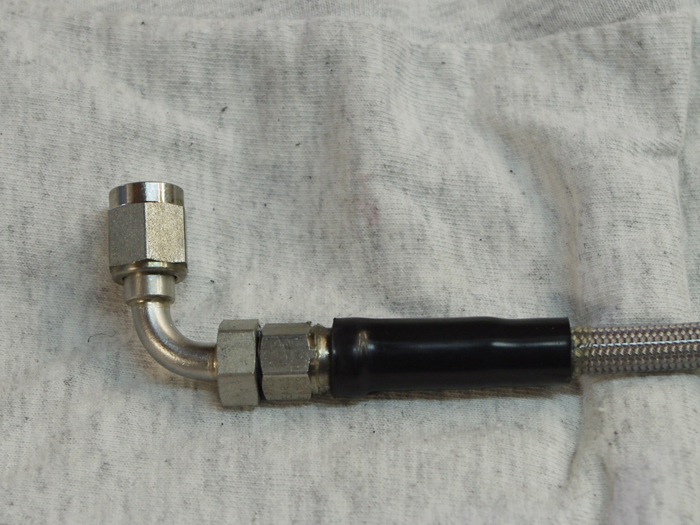
I routed the front brake flex lines in a rather unconventional way this time, trying to get something that does not move the lines around as much as the front wheels are turned.
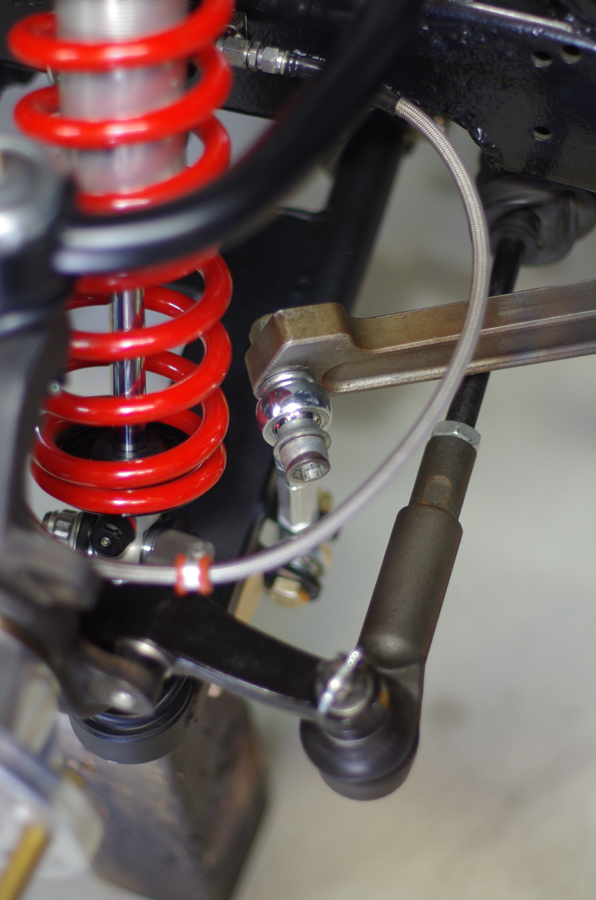
I picked this idea up from a pic of some rally car, and it made sense to me. It actually does work pretty good too. Very little change in the angle of the flex lines as the wheels are turned.
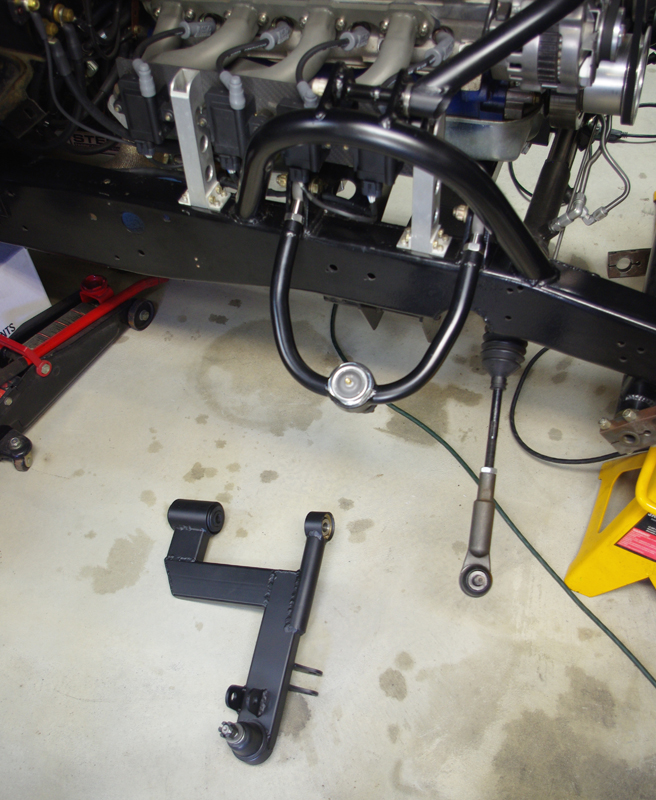
Here's a pic of the lower front control arm just before installation. It's not the most aesthetically please piece of work, but it should do the job:
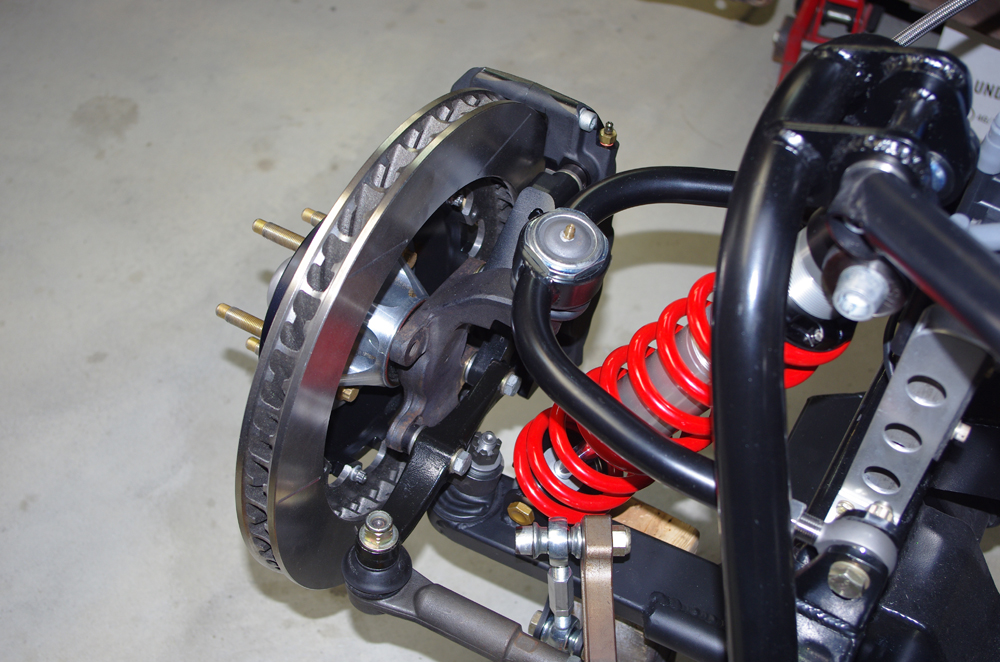
Here is a shot of the front suspension fully assembled on the passenger side:
Then it was time to install the front wheel and tire to do some interference checks:
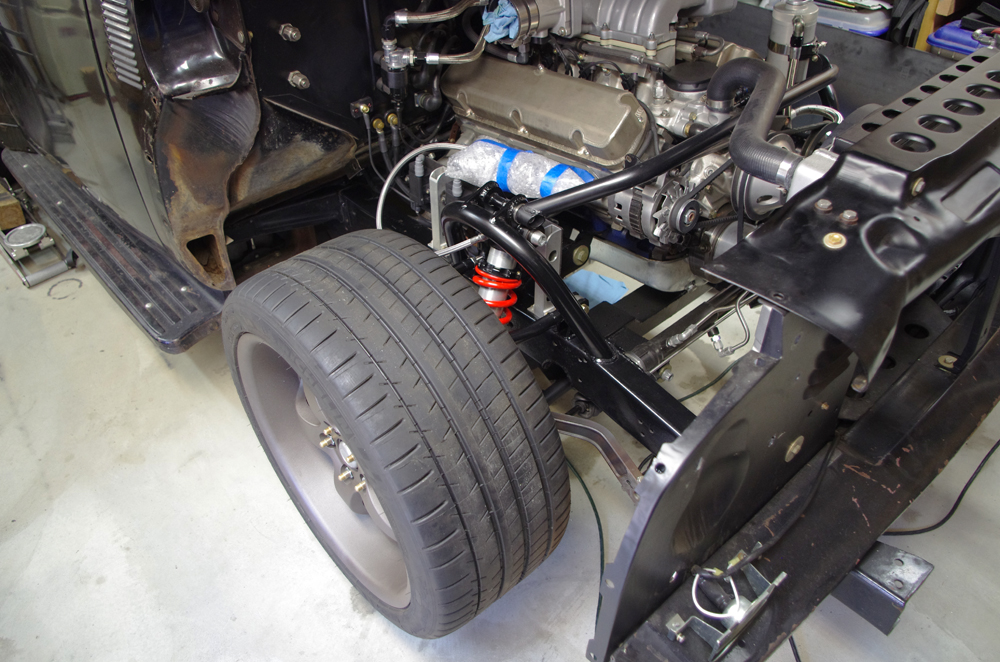
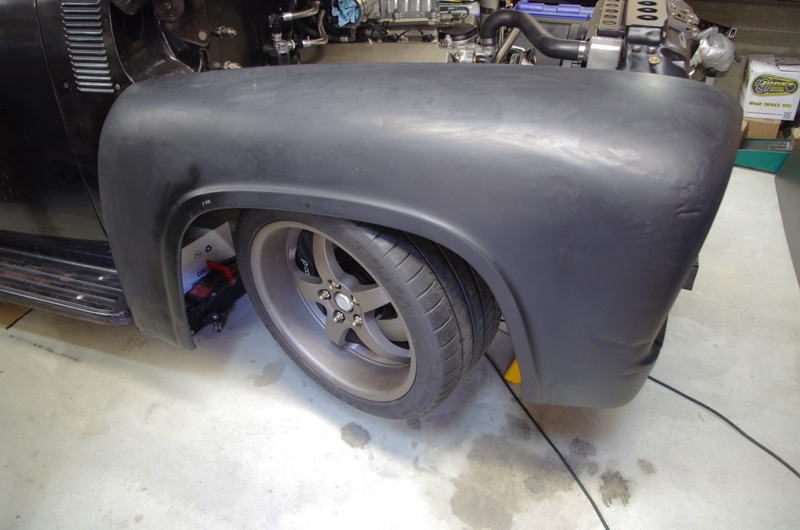
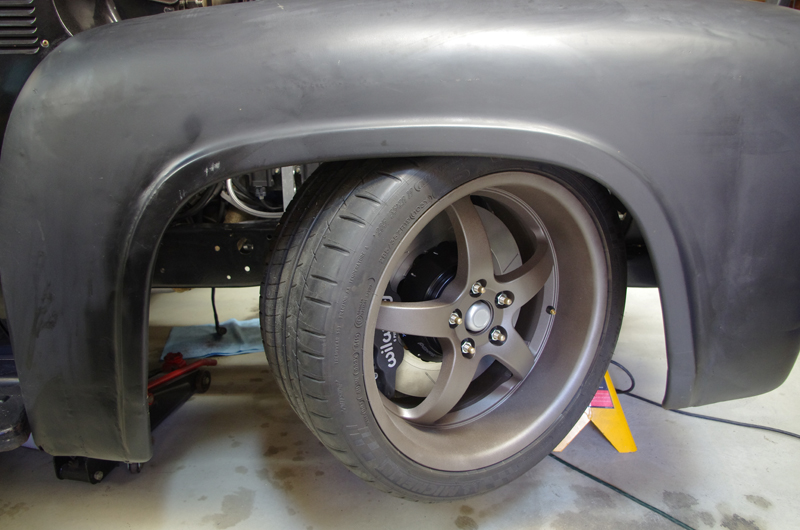
This is at simulated static ride height. Clearance is ok, but it may not be sufficient during an auto-x. Although even then your unlikely to go full lock when cornering.
Finally a photo of the a front upper control arm bolt and nut:
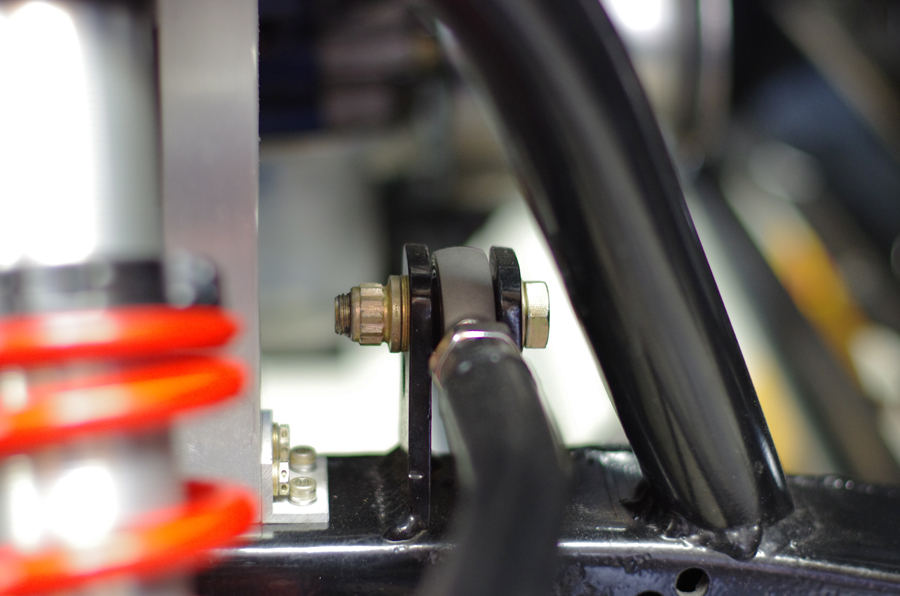
Certainly on the suspension I use only "grip length" fasteners. Not just grade 8 stuff with threads extending into the working zone. I size the bolts so that the threads don't start until past the working zone, just as Carol Smith explained so many years ago.
More to come... Gustave
09-05-2015 #29 Registered User
- Join Date
- Nov 2006
- Location
- Ma.
- Posts
- 5,560
Front end looks great, nice work !
Wayne
Car FINALLY home !!!!!! lol
Project FNQUIK https://www.pro-touring.com/showthre...ghlight=FNQUIK
09-08-2015 #30 Registered User
- Join Date
- May 2010
- Location
- Phoenix AZ
- Posts
- 169
Love the Truck Build!
09-12-2015 #31
Registered User
- Join Date
- Feb 2014
- Location
- Hanau, Germany
- Posts
- 56

Very cool. Love it. Guess you saw my 54 here in the forum. I left the guess work about the chassis and suspension to Rob at No Limit Engineering. I just had to do this after he took my for a ride in the Silver Bullet before he sold it. Wish I had the fabrication skills you have. And also the suspension geometry knowledge you have. I keep watching your stuff closely now. Thanx. Kai
09-12-2015 #32
Starting The Transformation
- Join Date
- Feb 2010
- Location
- El Segundo, CA
- Posts
- 268
Thanks guys.
Today is the Westchester car show I had set as a target completion date. No go. When I went to start the engine last Wed. the starter pinion gear and the flex plate had a little dust up. Result is I need to get the starter rebuilt and replace the flex plate. Cause? I had a single missing tooth on the flex plate which the old Powermaster starter seemed to be able to ride over, the new starter did not like it. Or maybe the adjacent teeth were on the edge of breaking off at this point. I also realized the previous builder did not install a spacer plate between the block and bell housing which could have caused excessive pinion stick out (I should have measured it as the instructions indicate).
In any case, there was no way I was going to pull out that leaky C4 and put it back in just to replace the flex plate. So this seemed like the right time to upgrade to an AODE with a PCS control module, which are on order. I am currently looking at the scope for moving the engine and tranny down to make more room for the AODE, which I know is bigger in girth, just not sure how much until I get it.
Gustave
09-13-2015 #33
Registered User
- Join Date
- Feb 2014
- Location
- Hanau, Germany
- Posts
- 56
What makes you stick to automatics and not go 5- or 6-speed manual ? Would that make more sense when racing / auto crossing ?
09-15-2015 #34
New to Pro-Touring
- Join Date
- Jan 2009
- Posts
- 22
Thanks for the updates! All the work looks great. Im currently trying to map a motor and tranny out for my 72. Yours makes me want a pushrod motor instead of a mod motor. haha
09-15-2015 #35
Starting The Transformation
- Join Date
- Feb 2010
- Location
- El Segundo, CA
- Posts
- 268
Two reasons: 1. I am 53 years old and just not interested in manual shifting anymore, 2. I love left foot braking. Originally Posted by Street-Garage
I leased two BMW 335i's in succession from 2007 to 2013. Both as automatics. Those cars taught me that when an engine has a good wide power band, modern automatics work great. There is no need for a stick shift. Yes, you loose the visceral appeal of shifting manually, but using your left foot to brake opens up other possibilities.
Gustave
09-15-2015 #36
Registered User
- Join Date
- Sep 2011
- Location
- Southern Ontario
- Posts
- 640

Gustave, I have a 4r70w in my 56. If you want pics or anything just let me know
09-16-2015 #37
Starting The Transformation
- Join Date
- Feb 2010
- Location
- El Segundo, CA
- Posts
- 268
Sure Peter, thanks. If you have pictures handy I would love to see them. But please don't climb under your truck to take them or anything! Originally Posted by Peter Mc Mahon
Gustave
09-17-2015 #38
Registered User
- Join Date
- Jan 2015
- Location
- Mountains of AZ
- Posts
- 21
Originally Posted by Dr G
Go with the 4R70W. Lower first gearMy finished daily
1966 Fairlane
306 with 4R70W
QA1 Coilovers,vintage air,
Current project
1948 Ford F1
Lexus SC400 IFS
DOHC 4.6 with 4R70w
09-17-2015 #39
Starting The Transformation
- Join Date
- Feb 2010
- Location
- El Segundo, CA
- Posts
- 268
Thanks yes, but I avoided the 4R70W for exactly that reason. I don't want a shorter 1st and 2nd gear. My engine makes enough torque off idle that I had to back off on the timing in that region of the map just to make it more drivable. I don't do burn outs nor drag race, so a short first gear does not do much for me personally. Originally Posted by c91x
Gustave
09-30-2015 #40
Starting The Transformation
- Join Date
- Feb 2010
- Location
- El Segundo, CA
- Posts
- 268
Well, have not been posting much since I found out I broke a few teeth off my flex plate when trying to start the truck.
But there has been progress.
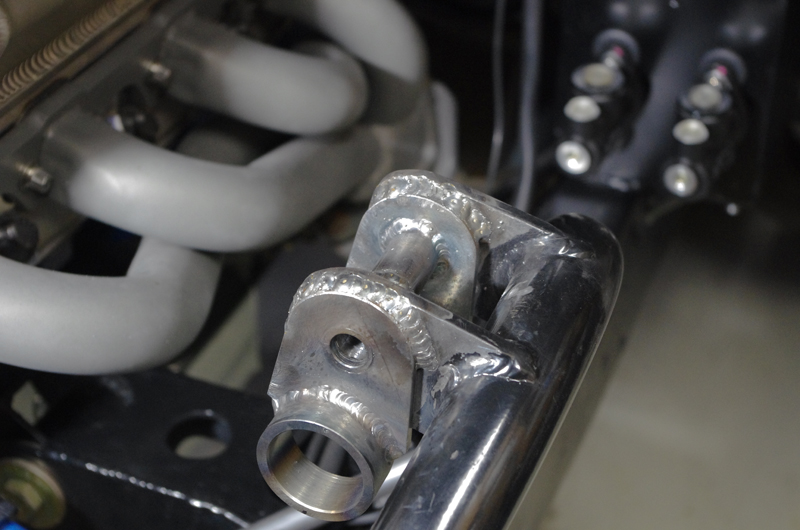
To make some more room for the AODE (vs. existing C4) I lowered the front of the engine as much as I could. Eventually the limit was something of my own making, I added a rod end as a steering shaft guide in the process of relocating my steering column. Due to the existing motor mount design on the frame I had limited options. Ultimately the first interference in lowering the engine was the one of the header tubes contacting the bracket I made for the steering shaft rod end. So about 1 inch was as far as the engine could be lowered at the motor mounts. Sadly there is scope for more but I would have to yank the engine, and I'm not willing to do that for this old frame.
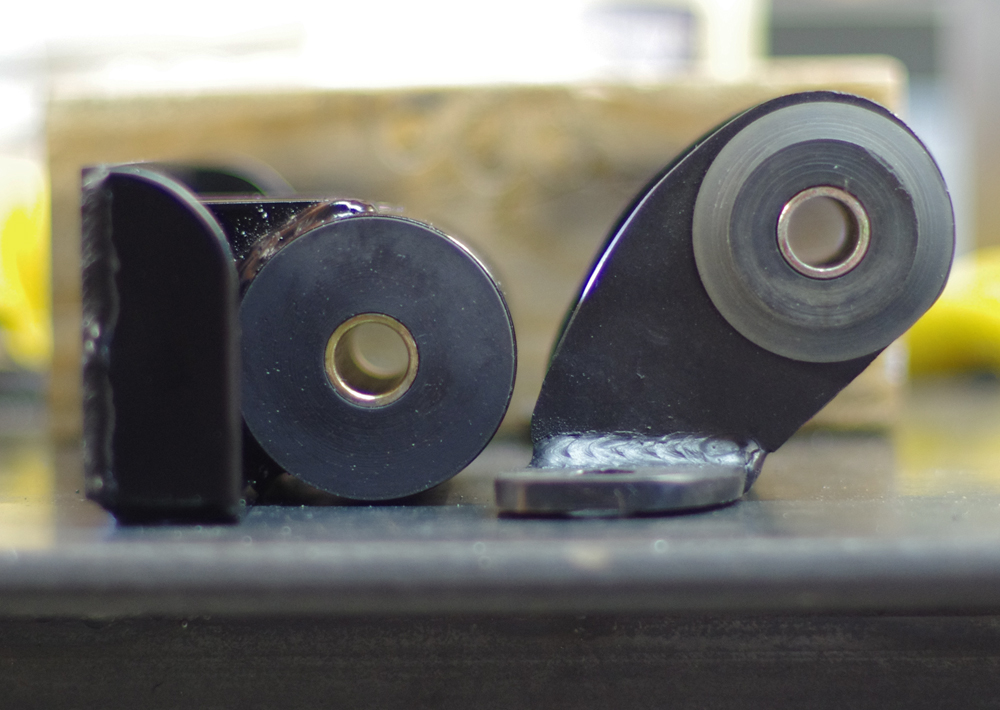
Here is a photo of the new mounts I made for the engine side of the motor mount to allow lowering the engine:
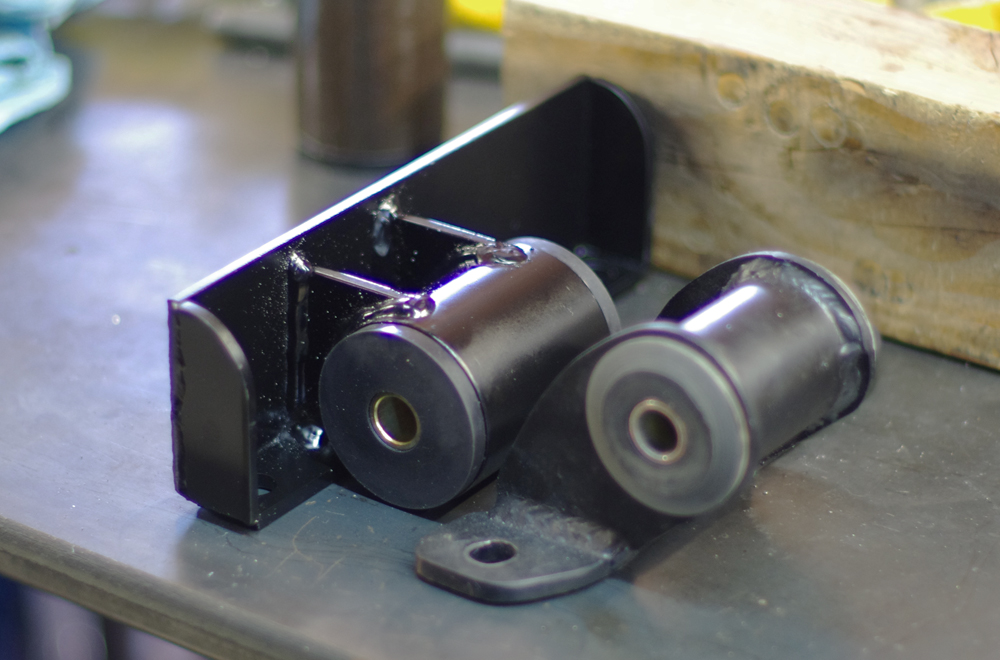
The new motor mount is on the left. The one on the right was made by a previous builder. It's design had allowed the 1/4" flat plate to deform quite a bit already. I tried to avoid that with improved design on my own mounts.
Here is a photo that shows the 1 inch lowering that was achieved with the new mounts:
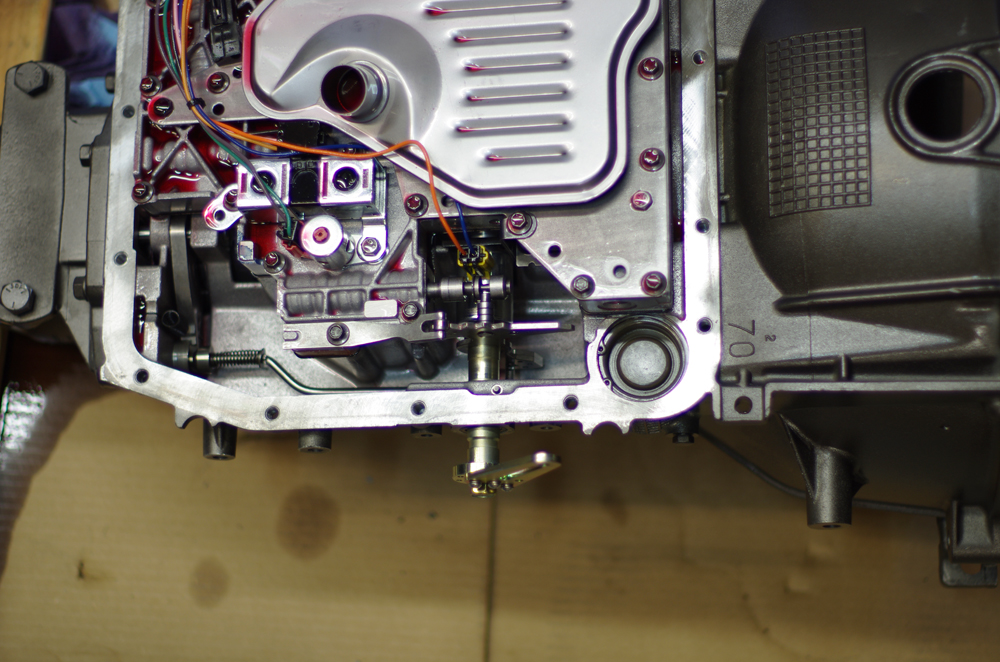
I bought a rebuilt AODE from TCI. It's their street fighter series which should be plenty for me. I plan to use a Lokar cable actuated shifter. So it was necessary to replace the actuator rod with Lockar's unit:
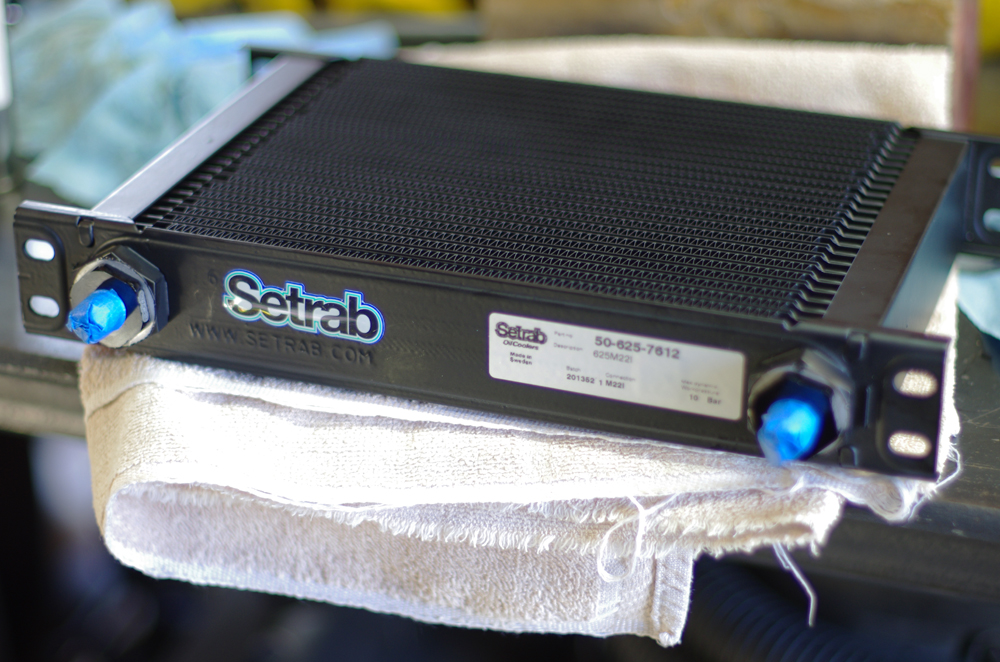
The previous builder had installed a cheap tube and fin heat exchanger for the transmission, and then mounted it flat against the bottom of the cab, getting pretty much zero airflow. I got this Setrab cooler, and plan to mount it into the leading edge of the rear fender, a natural high pressure zone:
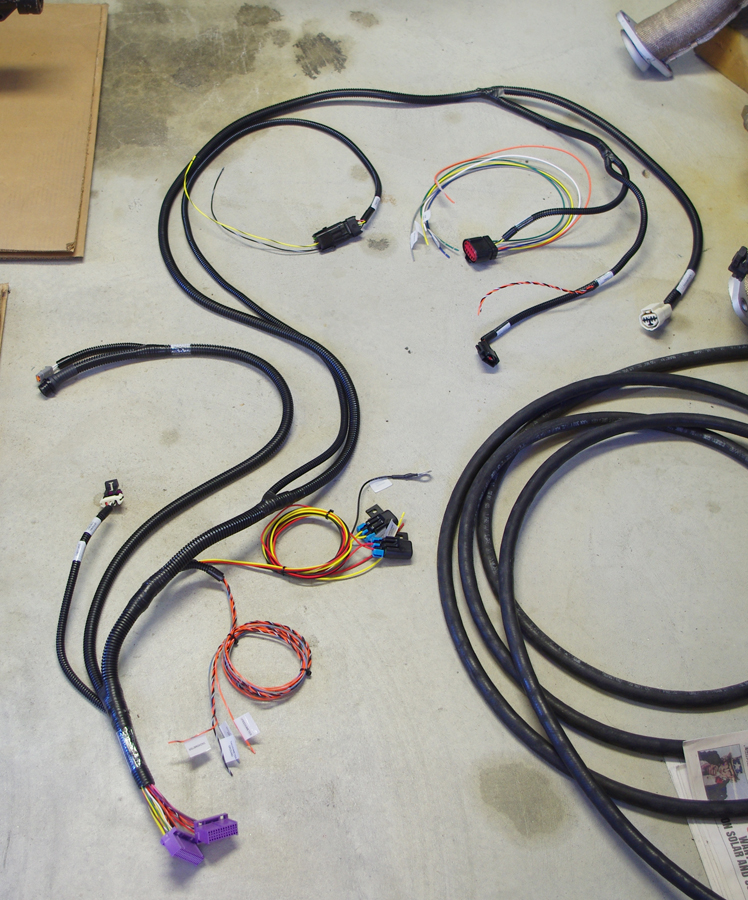
I just today received my PCS transmission controller and harness. Here is a shot of the harness, it will need some cleaning up to meet my goals. I hate the corrugated plastic loom stuff they used and will replace it with proper Mil Spec heat shrink:
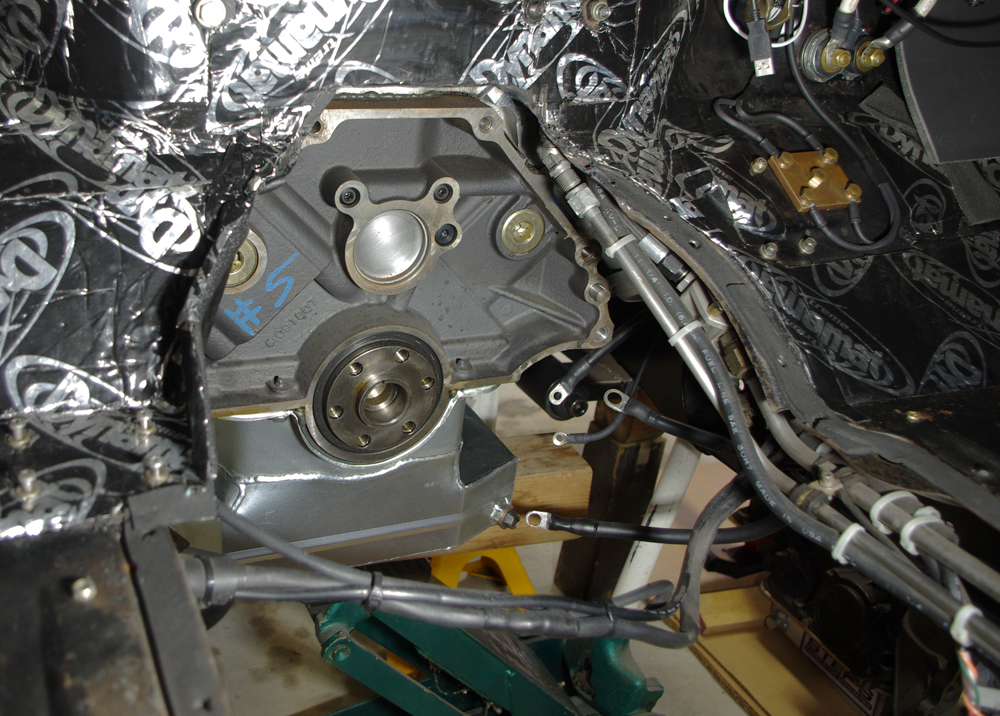
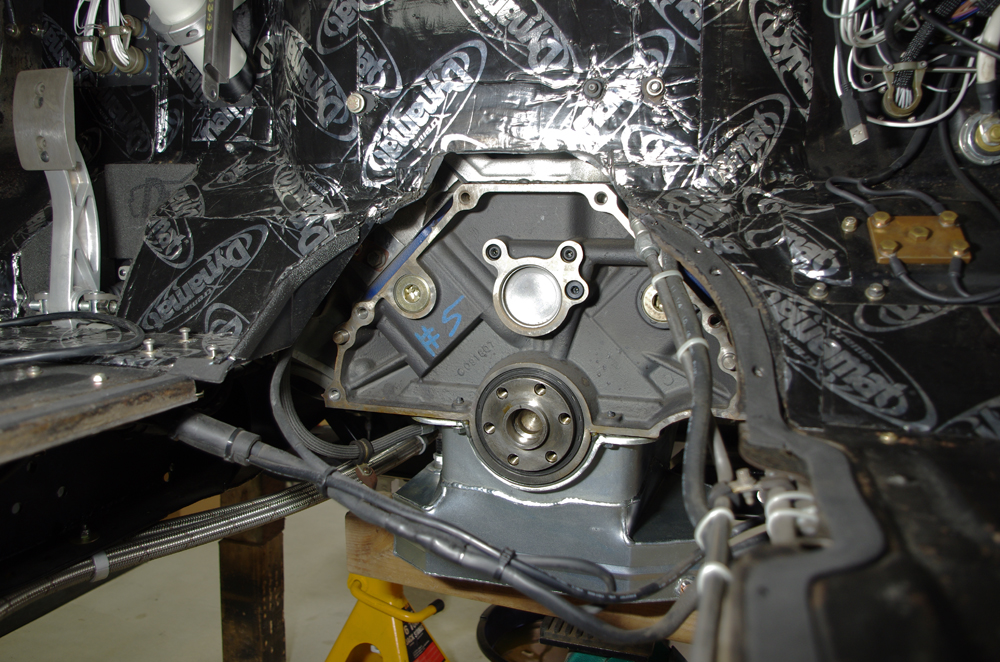
I was forced to trim the firewall a tad at the top of the tranny cover, there was just now way around it. I cannot lower the rear of the transmission hardly at all because of the way the previous builder constructed one of the cross member, causing the driveshaft to contact it at full droop (I cannot wait to build my own frame!).
You can see the backside of the (new style) Boss 302 block.
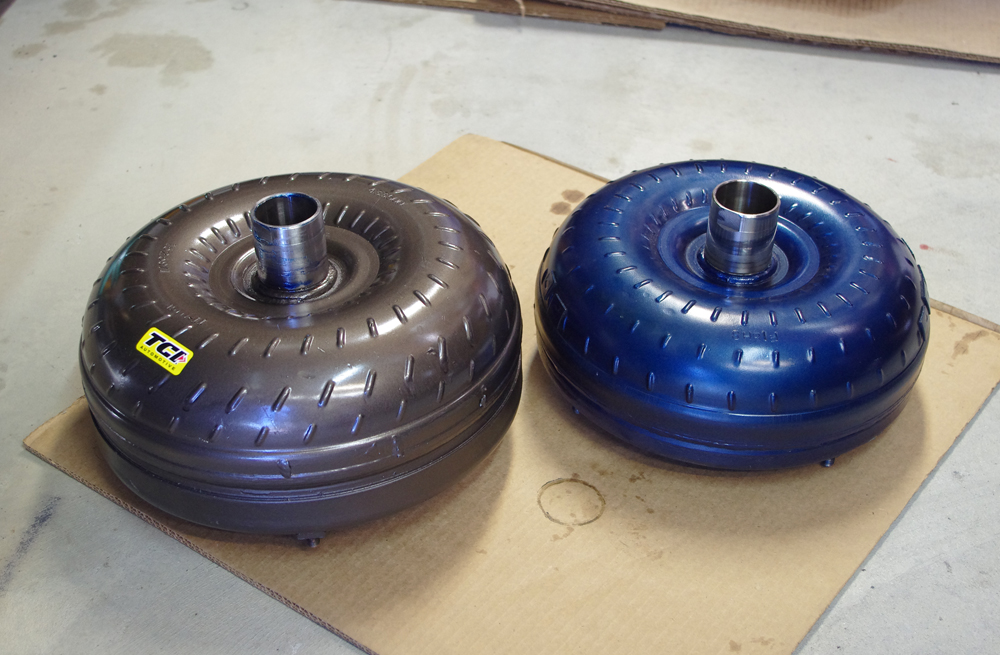
Everything about this AODE is bigger when compared to the C4. It is wider, longer, taller, heavier etc... Even the torque converted is bigger:
More to come as I peck along here in my garage.
Gustave
P.S. Oh by the way, here is what you do not want to see when you look up inside your bell housing:
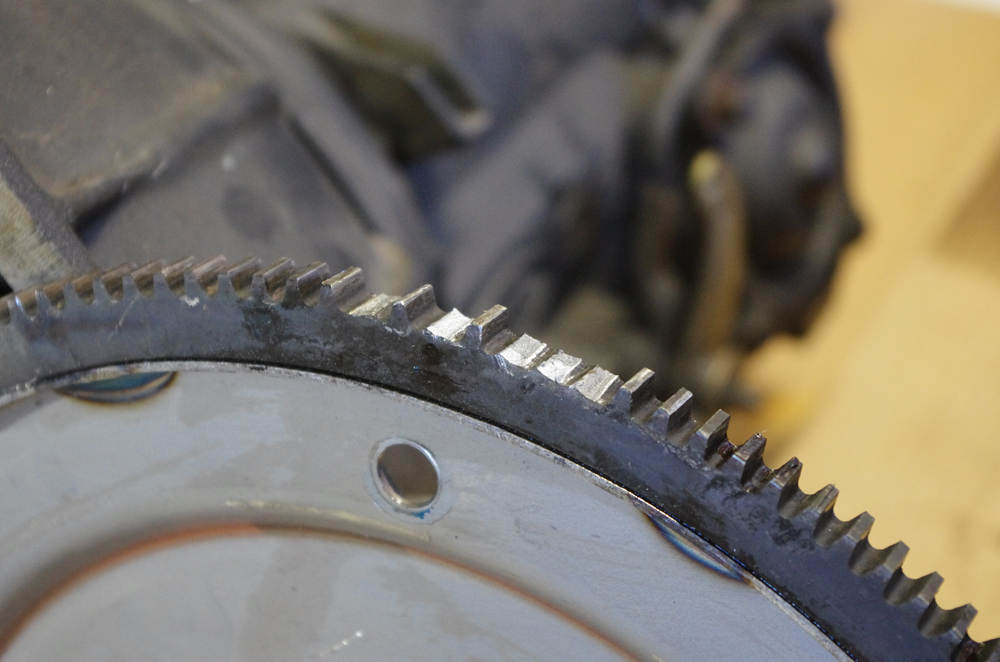
When you see this you know you're in for a fair bit of work!

 Reply With Quote



