


Results 401 to 420 of 536
Thread: Project 70 RS
-
03-31-2015 #401

 Registered User
- Join Date
- Feb 2009
- Location
- N.J.
- Posts
- 690

Rear is all done and I will take pictures this weekend. I'm adjusting the rear bumber brackets now to make them fit right.
I just pulled the trigger on a set of the Truck lite LED headlights. Can't wait to drive at night with modern LED technology.- Paul
70 Camaro RS Project Build
https://www.pro-touring.com/showthre...-Project-70-RS
90 Mustang GT Project Build
https://www.pro-touring.com/threads/...ang-Gt-Project
My Garage Project
http://garagejournal.com/forum/showthread.php?t=189511
-
03-31-2015 #402
 Registered User
- Join Date
- Nov 2006
- Location
- Ma.
- Posts
- 5,560
some times if you leave the filler a little thicker on the spreader it breaks free when you flex it. I had a new 1973 and the tail panel edge looked just like those from the factory. It used to drive me crazy Chevrolet let them out like that.
Wayne
Car FINALLY home !!!!!! lol
Project FNQUIK https://www.pro-touring.com/showthre...ghlight=FNQUIK
-
04-13-2015 #403
Registered User
- Join Date
- Feb 2009
- Location
- N.J.
- Posts
- 690
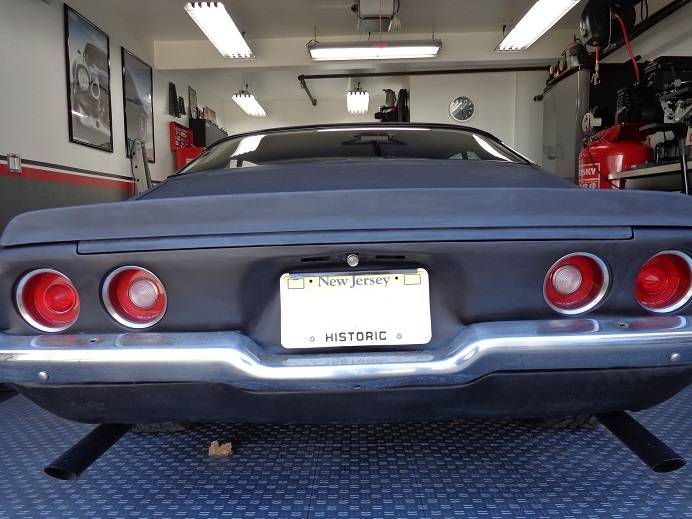
Here is the done tail section. The line between the body and trunk is much cleaner now.
 - Paul
70 Camaro RS Project Build
https://www.pro-touring.com/showthre...-Project-70-RS
90 Mustang GT Project Build
https://www.pro-touring.com/threads/...ang-Gt-Project
My Garage Project
http://garagejournal.com/forum/showthread.php?t=189511
-
04-13-2015 #404
 Registered User
- Join Date
- Mar 2013
- Location
- Boise ID
- Posts
- 97
Paul, I've enjoyed your thread....great work. Love the trunk body line modification, I've been planning something similar and I'm very glad to know that there is at least 1 other person bothered by that little issue. Great job! I'm going to integrate my bumper into the body, sort of....basically going to recreate the lines of the bumper into the body. Should be interesting. Keep up the great work and I love your shop.
-
04-13-2015 #405
Registered User
- Join Date
- Nov 2006
- Location
- Ma.
- Posts
- 5,560
Nice job!
Wayne
Car FINALLY home !!!!!! lol
Project FNQUIK https://www.pro-touring.com/showthre...ghlight=FNQUIK
-
04-14-2015 #406
Registered User
- Join Date
- Feb 2009
- Location
- N.J.
- Posts
- 690
Thanks John. Originally Posted by Goosesdad
 - Paul
70 Camaro RS Project Build
https://www.pro-touring.com/showthre...-Project-70-RS
90 Mustang GT Project Build
https://www.pro-touring.com/threads/...ang-Gt-Project
My Garage Project
http://garagejournal.com/forum/showthread.php?t=189511
-
04-14-2015 #407
Registered User
- Join Date
- Feb 2009
- Location
- N.J.
- Posts
- 690
Thanks Wayne. Originally Posted by Motown 454
- Paul
70 Camaro RS Project Build
https://www.pro-touring.com/showthre...-Project-70-RS
90 Mustang GT Project Build
https://www.pro-touring.com/threads/...ang-Gt-Project
My Garage Project
http://garagejournal.com/forum/showthread.php?t=189511
-
04-15-2015 #408
Registered User
- Join Date
- Feb 2009
- Location
- N.J.
- Posts
- 690
I installed the Trucklite LED headlights. I love modern technologhy, these lights are super bright and they truly are plug & play. Took about 15min for both lights.

They have a flater surface then original so the sides stick out further, but I'm ok with that.


Plus I REALLY dig the look of them.- Paul
70 Camaro RS Project Build
https://www.pro-touring.com/showthre...-Project-70-RS
90 Mustang GT Project Build
https://www.pro-touring.com/threads/...ang-Gt-Project
My Garage Project
http://garagejournal.com/forum/showthread.php?t=189511
-
04-26-2015 #409
Registered User
- Join Date
- Feb 2009
- Location
- N.J.
- Posts
- 690
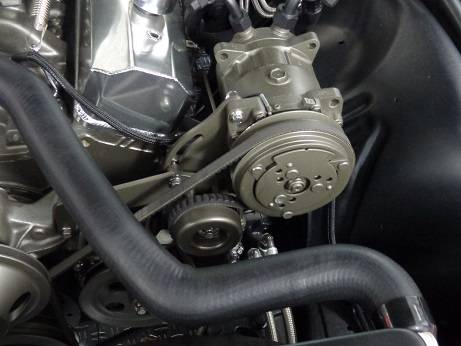
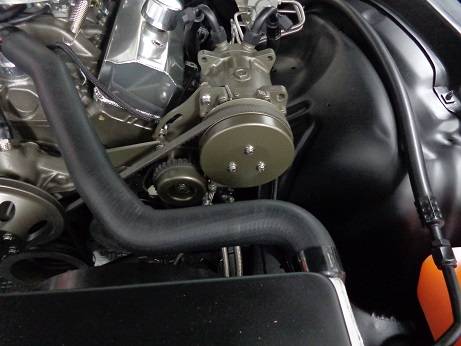
Painted and installed a/c pulley cover. About time!!!!
No cover
Cover
 - Paul
70 Camaro RS Project Build
https://www.pro-touring.com/showthre...-Project-70-RS
90 Mustang GT Project Build
https://www.pro-touring.com/threads/...ang-Gt-Project
My Garage Project
http://garagejournal.com/forum/showthread.php?t=189511
04-27-2015 #410
Registered User
- Join Date
- Feb 2009
- Location
- N.J.
- Posts
- 690
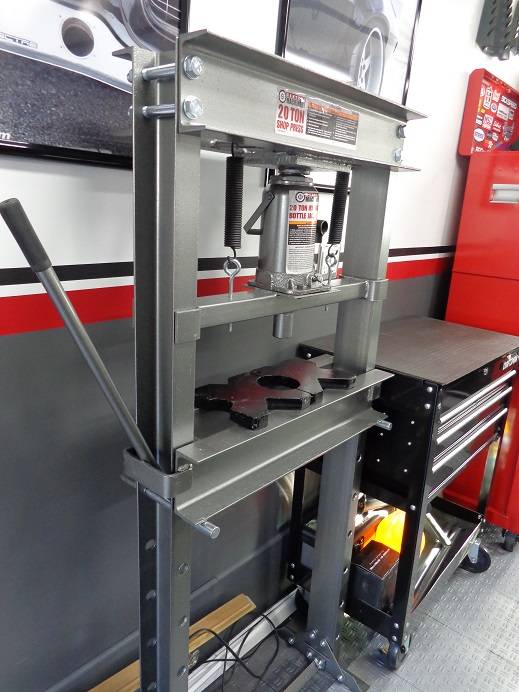
Finally put together my new toy that I got for my birthday. Should come in handy when I build the new rear end.
 - Paul
70 Camaro RS Project Build
https://www.pro-touring.com/showthre...-Project-70-RS
90 Mustang GT Project Build
https://www.pro-touring.com/threads/...ang-Gt-Project
My Garage Project
http://garagejournal.com/forum/showthread.php?t=189511
05-23-2015 #411
Registered User
- Join Date
- Feb 2009
- Location
- N.J.
- Posts
- 690
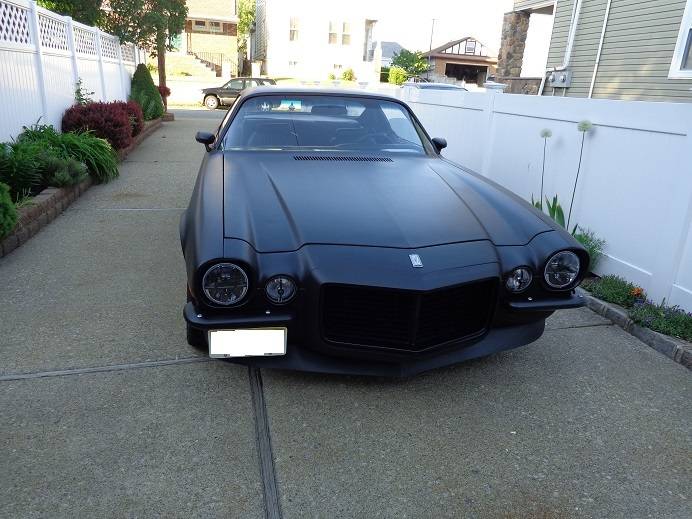
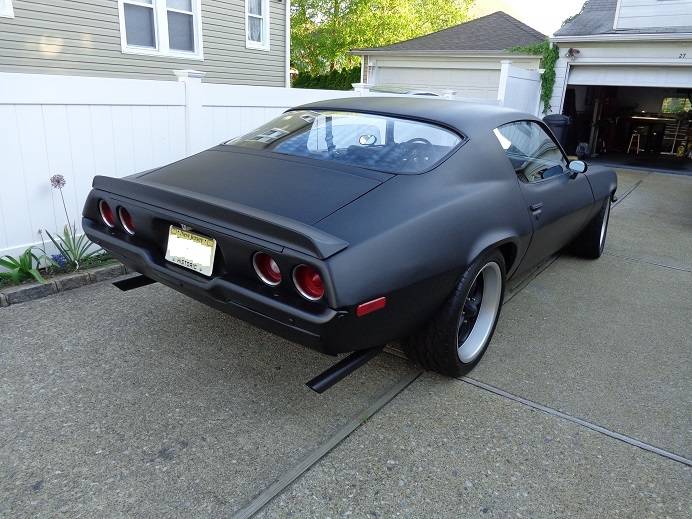
You are all going to think I've gone nuts.
But, I was watching youtube about a month ago and came across these video's from DipyourCar.com. Again you will think I'm nuts but I think it's the coolest and most unique thing I've seen in quite awhile. Change the color of your car, whenever you want, all for about $200 in material? I'm in!!!!!!
So I bought their kit which includes the sprayer, spray gun, hose etc.... Everything you need to do the job yourself. All for about $400(that includes the 4 gallons of product).
They also carry this stuff called Dip Coat which comes in a spray bottle. You spray it on a rag, wipe the car down and it takes away the rubbery feeling of it. Feels almost like a vinyl wrap.
Taped off the car and garage and away I went.
I have to say, I love this stuff. Plus the car came out awesome. Plus if I get tired of it I can just peel it off and and it doesn't hurt the paint.
Win, win in my opinion.
 - Paul
70 Camaro RS Project Build
https://www.pro-touring.com/showthre...-Project-70-RS
90 Mustang GT Project Build
https://www.pro-touring.com/threads/...ang-Gt-Project
My Garage Project
http://garagejournal.com/forum/showthread.php?t=189511
05-23-2015 #412 Registered User
- Join Date
- Sep 2013
- Location
- Chicago suburbia
- Posts
- 228
That does look really good! Any pictures or video of it going on?
'69 Charger TT Viper project - SOLD
'65 Mustang Shelby clone project "almost done"
05-23-2015 #413
Registered User
- Join Date
- Nov 2006
- Location
- Ma.
- Posts
- 5,560
Paul I've seen that on You Tube and yours came as good as the one the people who sell its car. Did. Nice job !!
Wayne
Car FINALLY home !!!!!! lol
Project FNQUIK https://www.pro-touring.com/showthre...ghlight=FNQUIK
05-24-2015 #414 Registered User
- Join Date
- Feb 2006
- Location
- Idaho Falls, Id
- Posts
- 1,341
Been a long time since I've seen this thread. Car looks good, lots of cool details.
Traven
05-24-2015 #415
Registered User
- Join Date
- Feb 2009
- Location
- N.J.
- Posts
- 690
Unfortunatley no, I was too focused on doing it. I forgot to take pictures. Originally Posted by Cop Magnet
Here is a tutorial video from their web site.
https://www.youtube.com/watch?v=7J6rRj98A5s
Thanks Wayne, I really tried to follow their steps closely. Originally Posted by Motown 454
Thanks, it's been alot of fun. Originally Posted by T_Raven
- Paul
70 Camaro RS Project Build
https://www.pro-touring.com/showthre...-Project-70-RS
90 Mustang GT Project Build
https://www.pro-touring.com/threads/...ang-Gt-Project
My Garage Project
http://garagejournal.com/forum/showthread.php?t=189511
05-24-2015 #416 Registered User
- Join Date
- Jul 2010
- Location
- OREGON
- Posts
- 364
Looks pretty good in the pics
05-25-2015 #417
Registered User
- Join Date
- Feb 2009
- Location
- N.J.
- Posts
- 690
Thanks, it came out even better than I expected. I'm already thinking about the next color for the car. Matte White? Pearl Orange? Who knows. Originally Posted by FRENCHBLUE72
- Paul
70 Camaro RS Project Build
https://www.pro-touring.com/showthre...-Project-70-RS
90 Mustang GT Project Build
https://www.pro-touring.com/threads/...ang-Gt-Project
My Garage Project
http://garagejournal.com/forum/showthread.php?t=189511
05-26-2015 #418
Registered User
- Join Date
- Feb 2009
- Location
- N.J.
- Posts
- 690
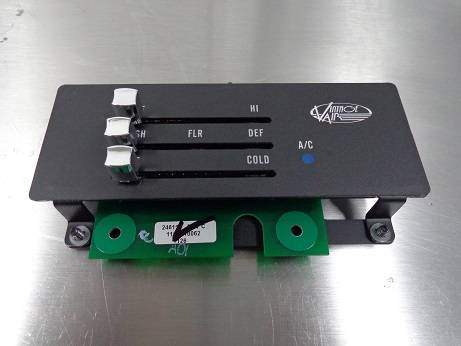
Went to switch on the a/c and no blower. Checked a few things with Vintage Air on the phone and turns out, I have a bad control panel. They asked for the serial # on the unit and sent me out a new one, no problem. Big thanks to Vintage Air for backing up a great product with great customer service.
 - Paul
70 Camaro RS Project Build
https://www.pro-touring.com/showthre...-Project-70-RS
90 Mustang GT Project Build
https://www.pro-touring.com/threads/...ang-Gt-Project
My Garage Project
http://garagejournal.com/forum/showthread.php?t=189511
05-31-2015 #419
Registered User
- Join Date
- Feb 2009
- Location
- N.J.
- Posts
- 690
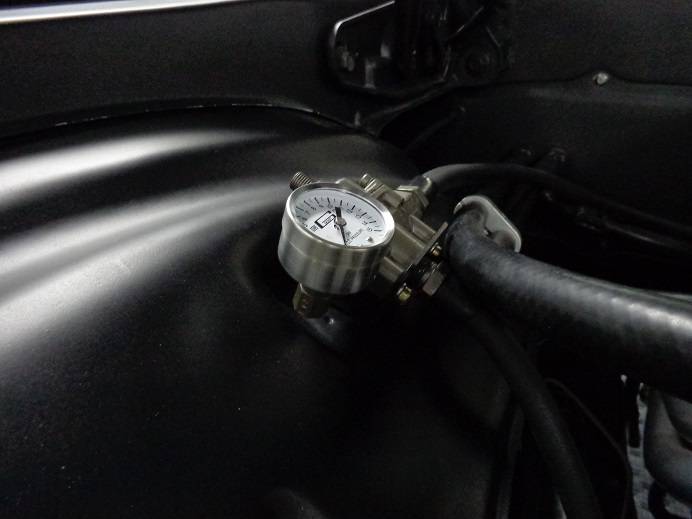
Installed a fuel pressure guage today. I couldn't put a chrome one in so I took some scotch brite and not it looks brushed. Much better.
 - Paul
70 Camaro RS Project Build
https://www.pro-touring.com/showthre...-Project-70-RS
90 Mustang GT Project Build
https://www.pro-touring.com/threads/...ang-Gt-Project
My Garage Project
http://garagejournal.com/forum/showthread.php?t=189511
06-07-2015 #420
Registered User
- Join Date
- Feb 2009
- Location
- N.J.
- Posts
- 690
As I've said before, when I started this project I promised myself that if I didn't know how to do something I would buy the tools and learn how to do it myself. Whatever "it" was.
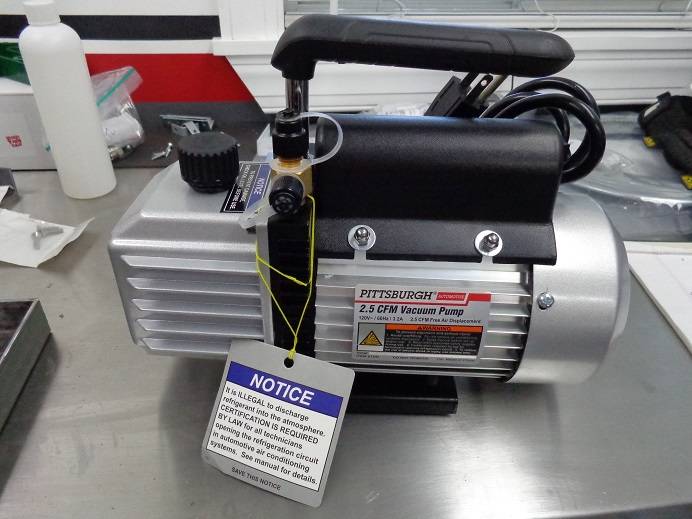
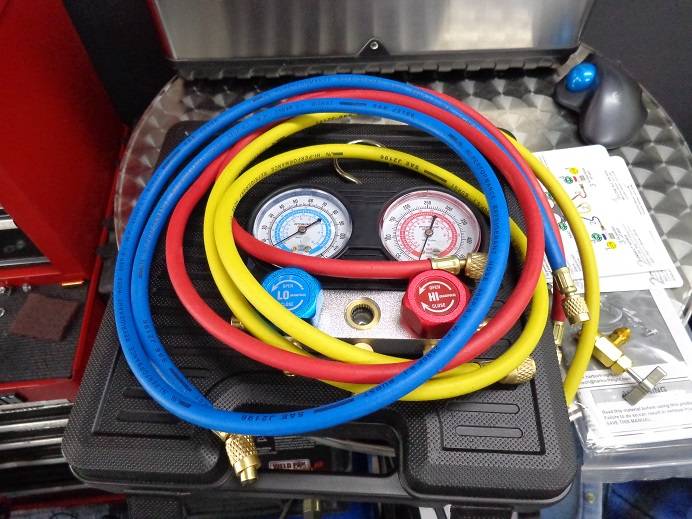
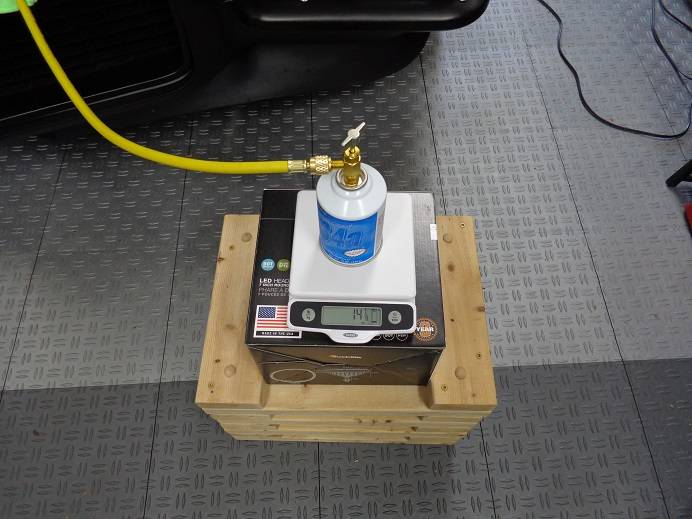
Well it was time to evacuate the a/c system and add refrigerant. So I read up and watched many youtube video's. Bought the right tools and did it myself.
Started by evacuating the system. Good news, no leaks first time. So in went the refrigerant. Now I have nice cold air. This summer will be a blast.
Vacuum pump.
Guage set.
Evacuating the system.
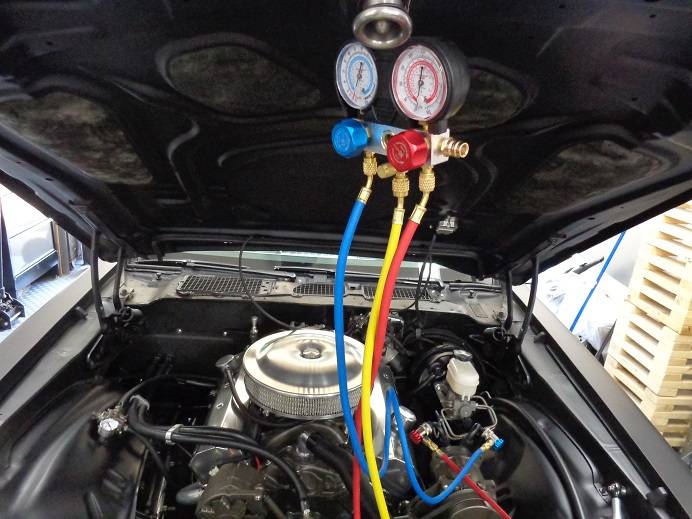
Putting in the refrigerant.
 - Paul
70 Camaro RS Project Build
https://www.pro-touring.com/showthre...-Project-70-RS
90 Mustang GT Project Build
https://www.pro-touring.com/threads/...ang-Gt-Project
My Garage Project
http://garagejournal.com/forum/showthread.php?t=189511

 Reply With Quote



