

Results 61 to 80 of 165
-
05-08-2014 #61

 Starting The Transformation
- Join Date
- Apr 2013
- Location
- Burleson, TX
- Posts
- 210

Uhh, hell.....yah
-
06-02-2014 #62
Registered User
- Join Date
- May 2013
- Posts
- 98

I had a decent weekend working on the car. I spent most of saturday cleaning my work shed and swapping stuff from my old motor to my new one. Lots of little work like swapping the pan / dipstick because it had been converted to rear sump to go in my friends 240Z. Got that all sealed up, cleaned all the accessories/ brackets and installed my GKTECH clutch fan. Now I must not have the original clutch fan because I was under the impression that I would need an adaptor to fit but it bolted straight up. There was no way for the adaptor fit. Either way It means that I have more clearance between the fan and aftermarket rad I have.
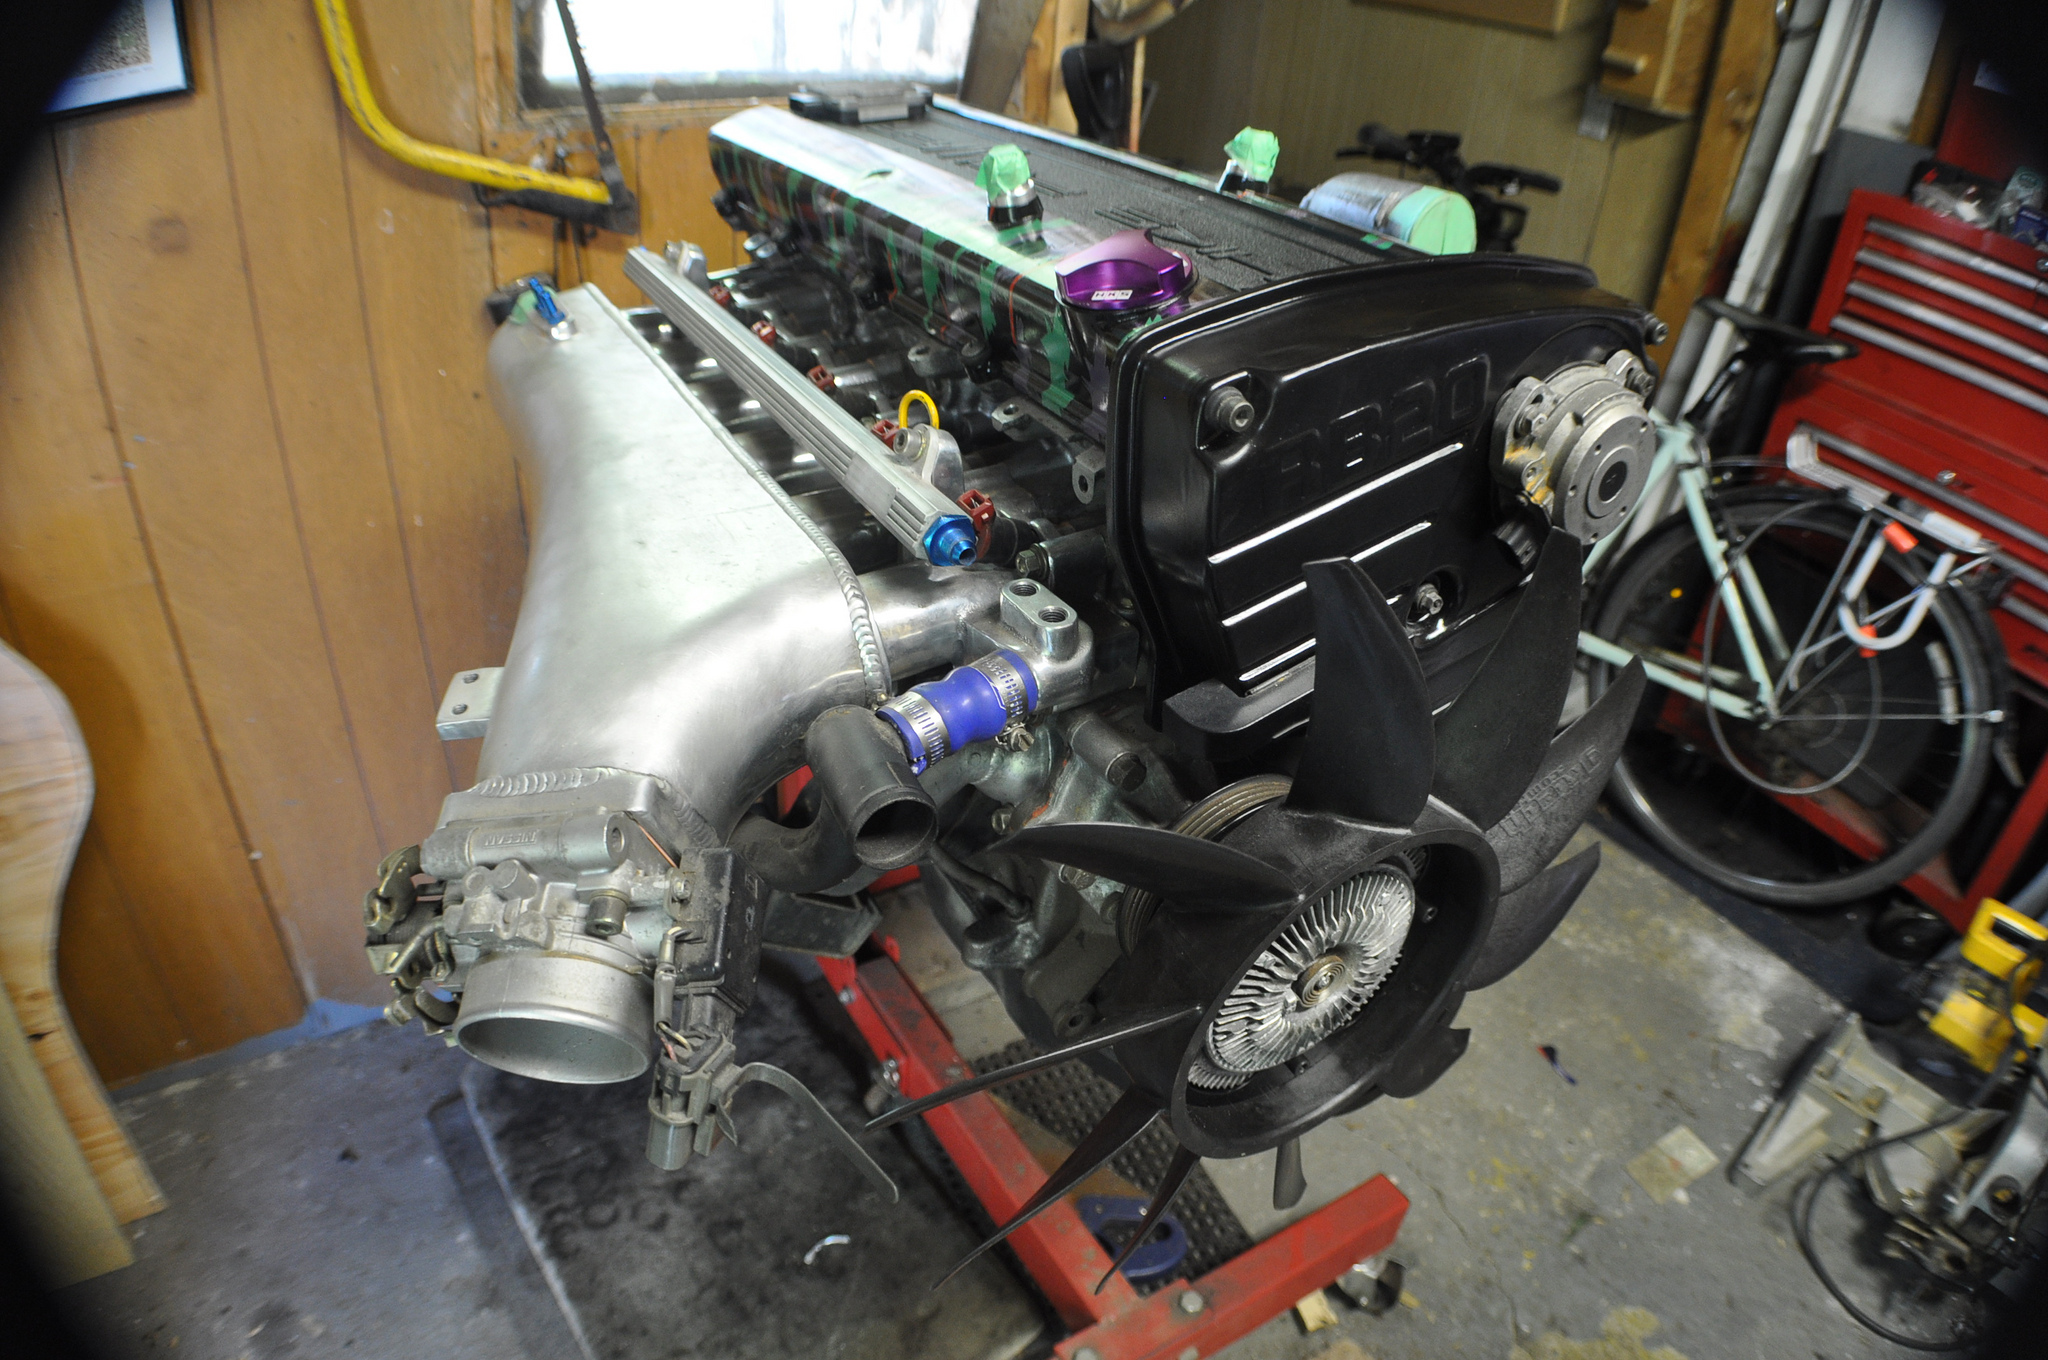
I have purchased a new clutch and everything is ready to bolt into the car for the mockup. I WAS hoping to get that done this weekend so I could start mocking up the intercooler piping but my friend with the truck and engine crane got busy that will have to happen another time. I just want to get it off the stand.
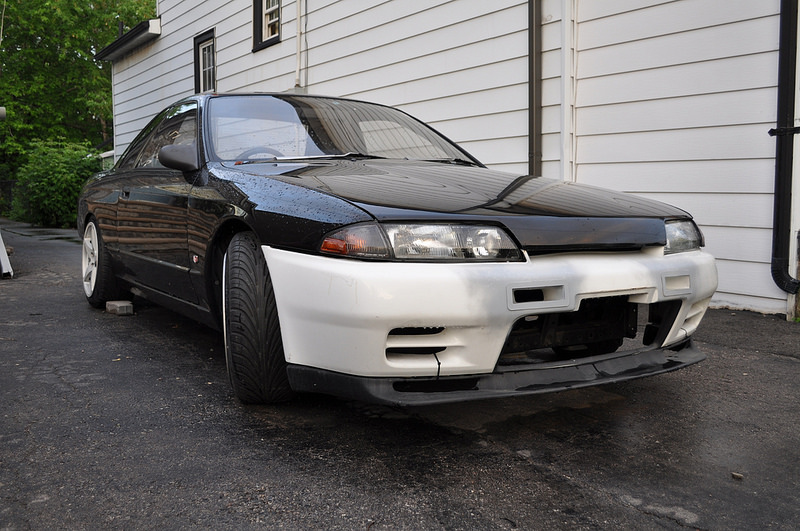
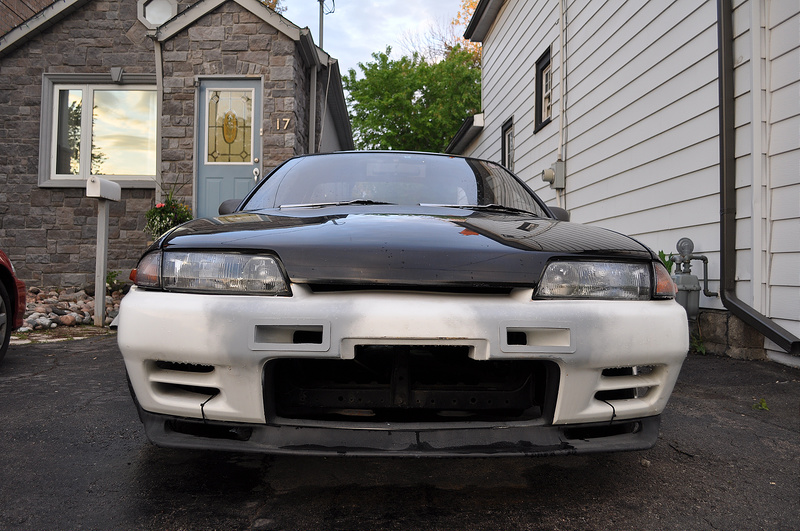
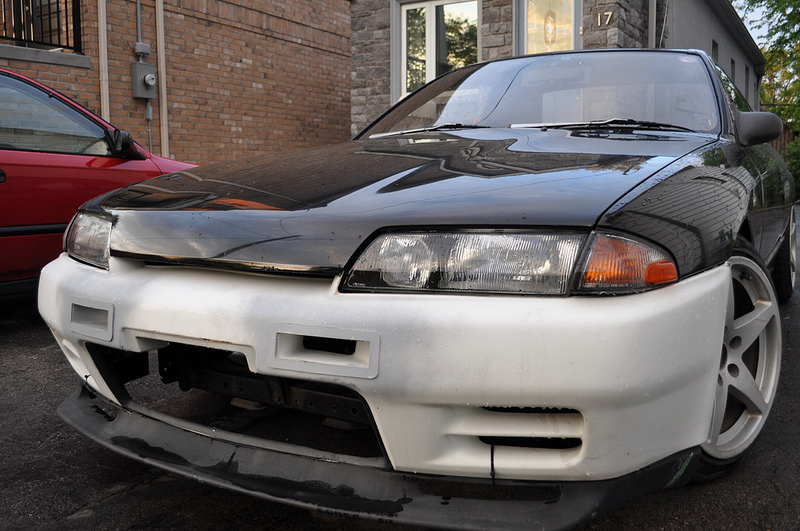
Many moons ago I had purchased a set of fiberglass N1 vents for my GTR bumper and thought since I couldn't get the motor in, I'd just install them.
I measured 3289472893 times and cut once.
Please don't mind the wavy bumper or the fact it looks like I just completed the Dakar Rally
At first glance I was stoked.
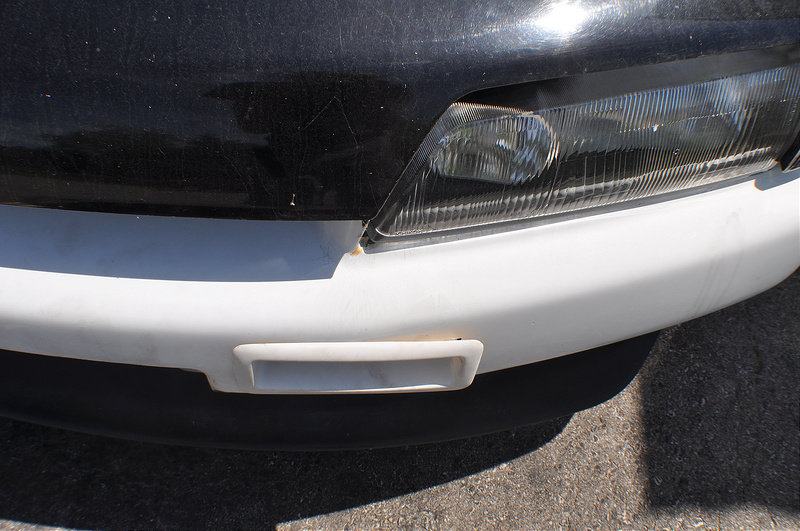
Spot on fitment. UGH. Now I have 2 gaping holes in my bumper. I dont know the best way to deal with this but I do have a couple Ideas. I may either section them to match the contour and glass them back together. Or cut a bezel from plastic (matching the N1 duct shape) and epoxy it in place and make my own. Either way its going to be more effort than I wanted it to be.

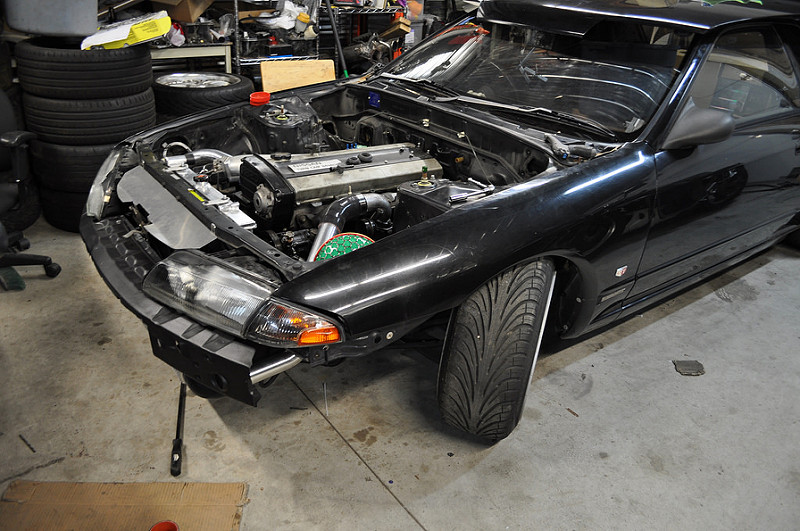
Since there is a serious lack of cooling panels that suit the GTS-T, I prototyped this last week at work out of .0625" aluminum. It could use a little more fine tuning but overall I'm pleased with the outcome. Ideally I would like it to cover the headlights a bit more. It meets up with the hood quite well though.
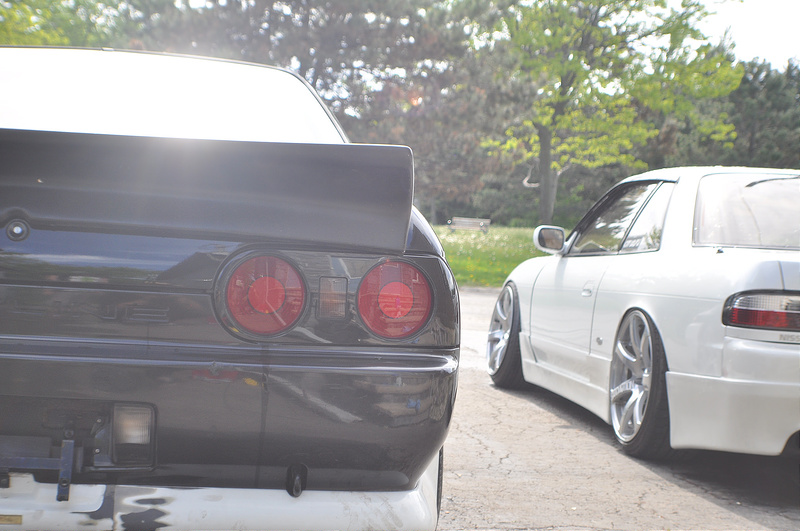
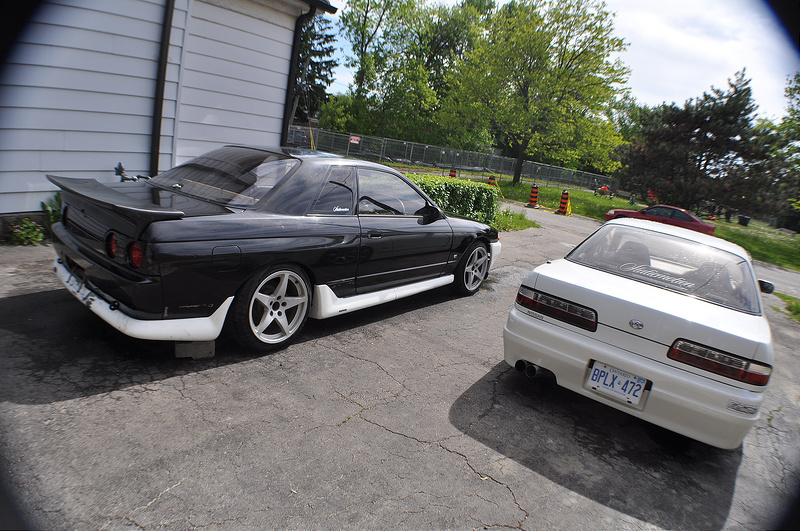
Without access to an engine crane and having hacked my bumper up, I thought it would be productive to finally wash the car and fit my aero for some more motivation. My friend Santi came by with his Silvia to help wash the engine bay of the skyline and we ended up taking some pics.
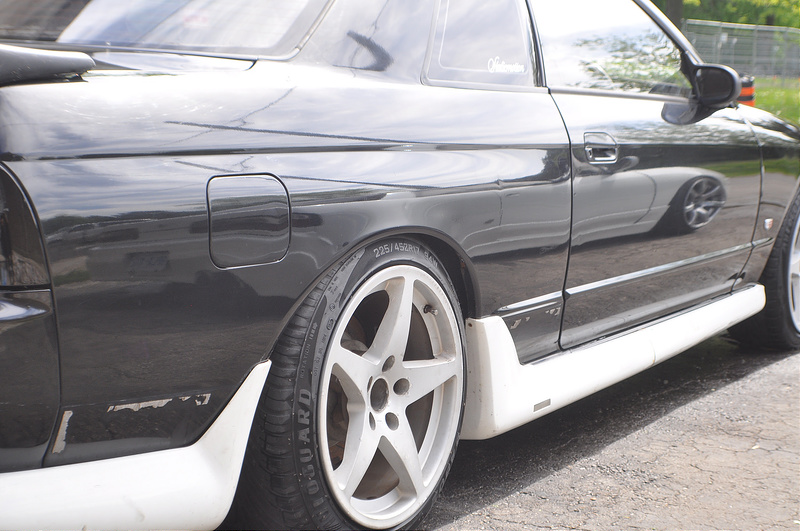
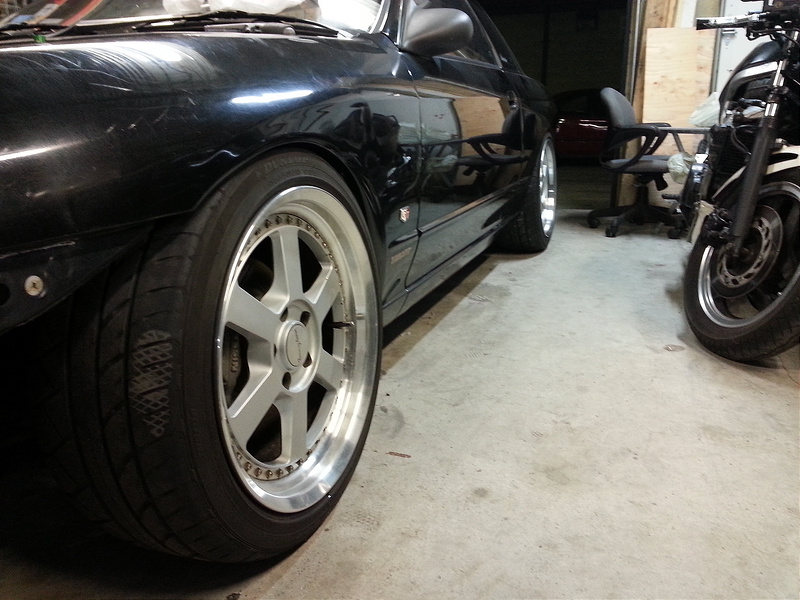
Oh yea and a HUGE thanks to Anti (Martin) on here for sending me a Yahoo Auction link for a set of Tommy Kaira wheels. I ended up winning the auction and got them for a STEAL. They are the same style as the pair of 17's I already have but are step lipped 18x9 +25. One is bent so until I get that repaired / the lips replaced, I will run a 17 / 18 stagger setup.
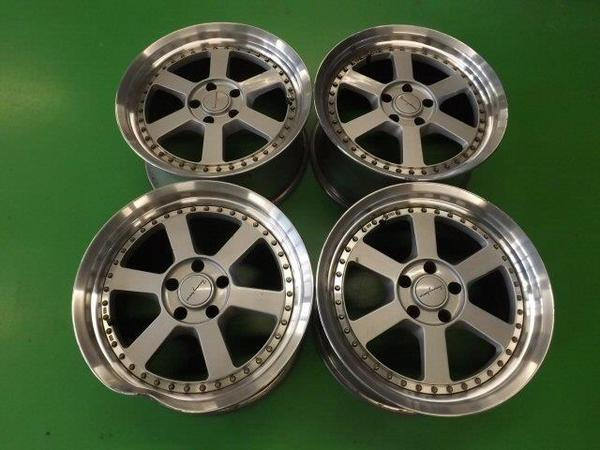
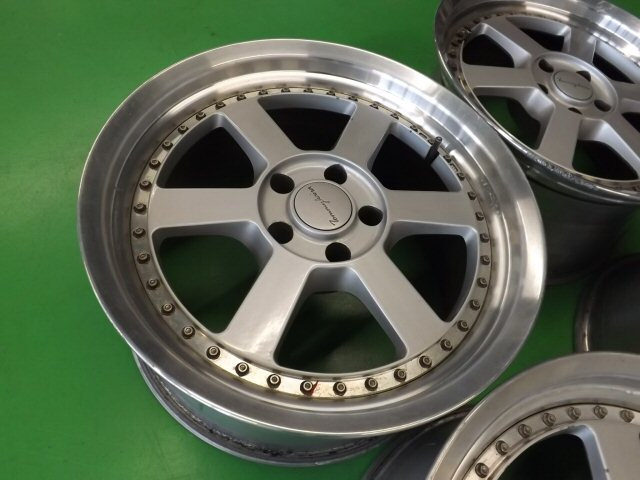

So stoked to finally have a matching set of these wheels to match my skirts and rear valance. True 90's Style.
-Jordie
06-02-2014 #63
Registered User
- Join Date
- Jul 2013
- Location
- ATL Metro
- Posts
- 8
Just a thought, instead of sectioning those N1 vents, you might be able to shave/sand the flange area to fit flush with the contour of the bumper. The only downside is that it could change the square shaping of the flange.
Very excited to see this car come together, I'm a huge Nissan fan.
EDIT: Beautiful work on that lower kick panel that houses the turbo timer. Looks like it came that way from the factory. - Peter -- 66 Le Mans - 93 LX 5.0 --
06-03-2014 #64 Registered User
- Join Date
- Aug 2011
- Location
- Connecticut
- Posts
- 926
GAHHH. . . I love

1967 Firebird "Poor-Boy Build"
New updated thread
https://www.pro-touring.com/threads/...bird-(Updates)
Follow me on Instagram @NaturalLivingMan
06-03-2014 #65
Registered User
- Join Date
- May 2013
- Posts
- 98
Hey thanks for the kind words. I initially started trimming and sanding the edges to contour the vents, but like you said the shape started getting a little distorted. Originally Posted by PBarkley

Plan B was to make my own since I had already hacked the bumper and have nothing to lose. First I measured up shape of the visible part of the vent and cut a pair of them from .125" polycarbonate on the router table at work.
I then took the existing fiberglass copies and cut the flange off, marked the contour of the bumper and cut it to fit.
I then scuffed up the bumper and plastic "bezel" and stuck it on using a 2 part epoxy. I do not have pictures of this step as it required both hands as well as a lot of taping to get the plastic to form the contour of the bumper.
Next using the 2 part epoxy I glued the inner vent in place, smoothing it out as needed.
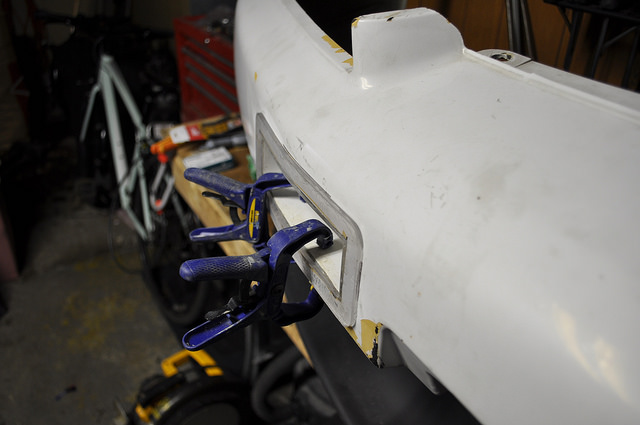
I am by no means experienced at this but at the moment I have nothing to really lose (the bumper wasn't in the greatest shape to begin with). The vent seems to be glued in there pretty solid. Over the next few days I will sand and fill as needed.
Thanks for reading
-Jordie
06-03-2014 #66
Registered User
- Join Date
- May 2010
- Location
- kitchener,Ontario,Canada
- Posts
- 2,336
Looks good jordie keep up the good work. If your ever down kitchener way I got a buddy who has a RHD Twin Turbo supra which you might like
 Spinnin'my tires in life's fast lane
Ryan Austin
On twitter @raustinss
On Instagram austinss70
06-04-2014 #67
Registered User
- Join Date
- Jul 2013
- Location
- ATL Metro
- Posts
- 8
Fiberglass can be tricky stuff, but the good thing about it is that you can always sand off the mistakes and try again, haha. I do fiberglass and carbon repair for a living (private jet industry) so I know what you're going through right now with trying to make stuff fit properly.
- Peter -- 66 Le Mans - 93 LX 5.0 --
06-09-2014 #68
Registered User
- Join Date
- May 2013
- Posts
- 98
The only good thing about fiberglass is that it is somewhat forgiving but I am a little skeptical about bonding it the OEM bumper. Where the vents are positioned there shouldn't be much flex, thus the risk of the filler cracking is lower. Because I used scrap clear plastic to make the bezels, I hit the vents with a little primer to better show the imperfections. Originally Posted by PBarkley
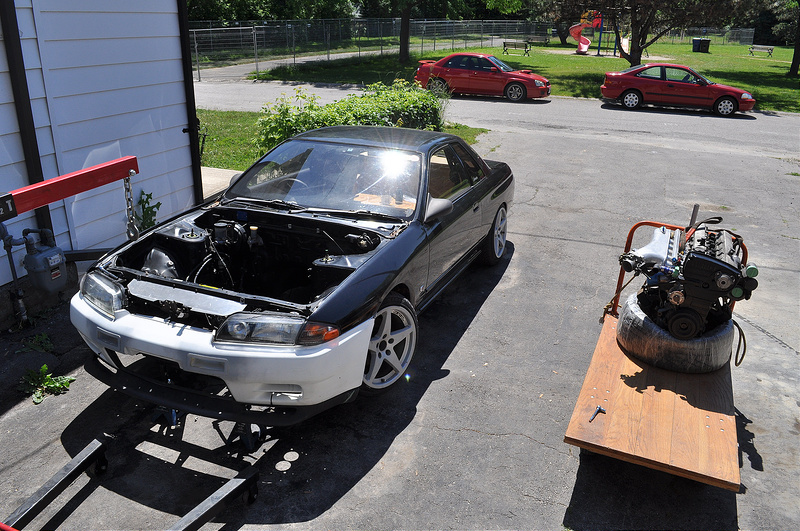
They still need a lot more sanding and filling work before they are truly "finished" but the next step would be to mock up the intercooler to make sure everything clears. I have a friend bringing by an engine crane (hopefully) this week so I can temporarily drop the motor in and figure out where all the piping will go.
06-09-2014 #69
Registered User
- Join Date
- May 2013
- Posts
- 98
Once everything is together I'd love to drive out and see it. Originally Posted by raustinss
06-12-2014 #70 Registered User
- Join Date
- Jul 2010
- Location
- Pittsburgh, PA
- Posts
- 114
Just read through your thread, and I love the attention to detail. I don't know if I mentioned it in my thread, but I'm also an industrial designer! I know exactly how you feel with the struggle of trying to make progress while still serving your innate need to spend ample amounts of time perfecting the details. The details are what makes a car though IMO, so I wouldn't have it any other way. My biggest problem is the snowball effect, I can't just do one project...it turns into 10 projects, each of which branch into 10 more, and so on lol.
Cheers on sticking to the period correct 90's theme, I too grew up in the Gran Turismo generation, and always fantasized about all the fantastic 90s super cars. You should do a bright colored "Tommy Kaira" script down the side of the car like the pic below to really take the 90's look to full term!

I'm jealous that your company lets you use the 3D printers for personal projects, I can use any equipment I want at work except the rapid prototypers because they run 24hrs a day, 7 days a week usually.95 Rio Red Mustang Cobra
Procharger D1SC 347 stroker, full maximum motorsports suspension, Full Tilt Boogie 03 Cobra IRS, Tremec 3550, 19x9.5 and 19x11 HRE 542R. 566rwhp/614rwtq
https://www.pro-touring.com/threads/...ra-OCD-Machine
06-23-2014 #71
Registered User
- Join Date
- May 2013
- Posts
- 98
I do plan on running Tommy Kaira graphics down the side of the car to keep the the theme. Ill have them cut in either a grey or grey reflective vinyl but ill keep it below the door line. I have actually located the front bumper shown in the picture you've posted in montreal, but will likely pass because it would just get ruined at my current ride height.
Thats neat that you're a designer as well. What industry are you in exactly? I've been in the industry for about 5 years now and I love it. I started off working in a small design house designing consumer products, Simoniz pressure washers and I even worked on designing the spoon for the Yogen Fruz franchise. I have been at my current job for almost 3 years and they let me use all the equipment. The 3D printers aren't running 24/7 so I have a chance to build small little projects.
On the topic of work, Ive been super busy figuring things out with my career and will be starting a new job after the Canada Day long weekend. While i'm going to miss having the use of the printer and router table (I have a lot of things to make this week), more money is always welcome and the new company seems like it will be a good place to be for a while.
On to the project!
I had a bunch of buddies by on sunday to help put the motor in so I could mock up the engine bay (Intercooler piping ect.) I was fortunate enough to have 2 of the photographers from autoblog.ca to document everything. All watermarked pictures are taken from by my good friend Ronnie Fung. Check out his website: www.ronniefung.com
Lets get the party started.
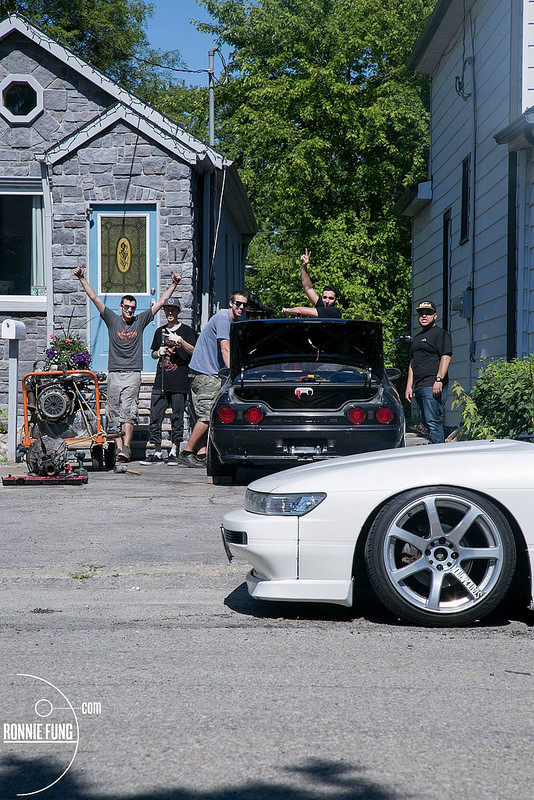
Everyone showed up to give a helping hand. Its amazing the people that car culture brings together.
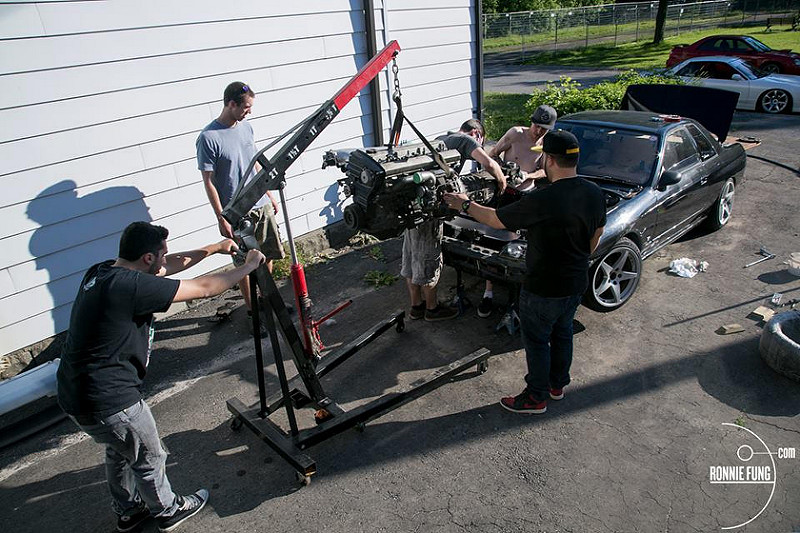
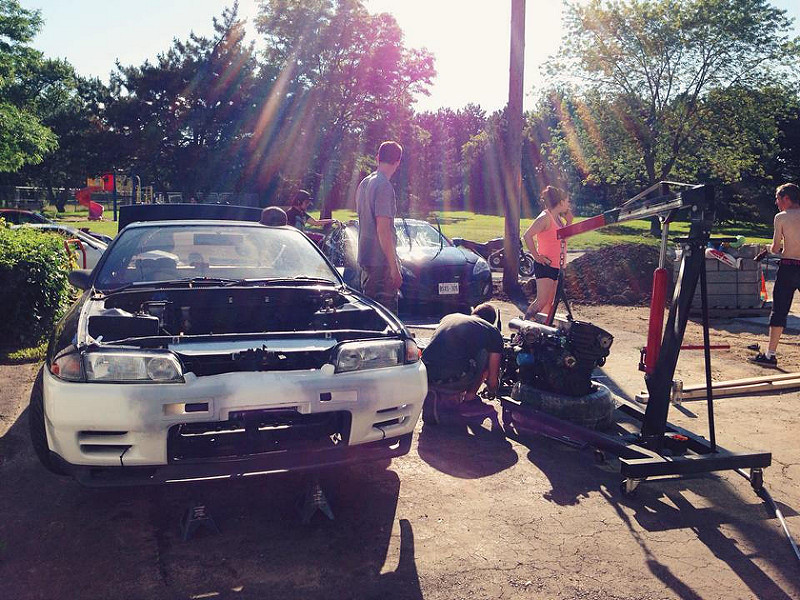
The one thing I forgot to get was a clutch alignment tool, we had a tough time getting the trans back on the motor but finally got there.
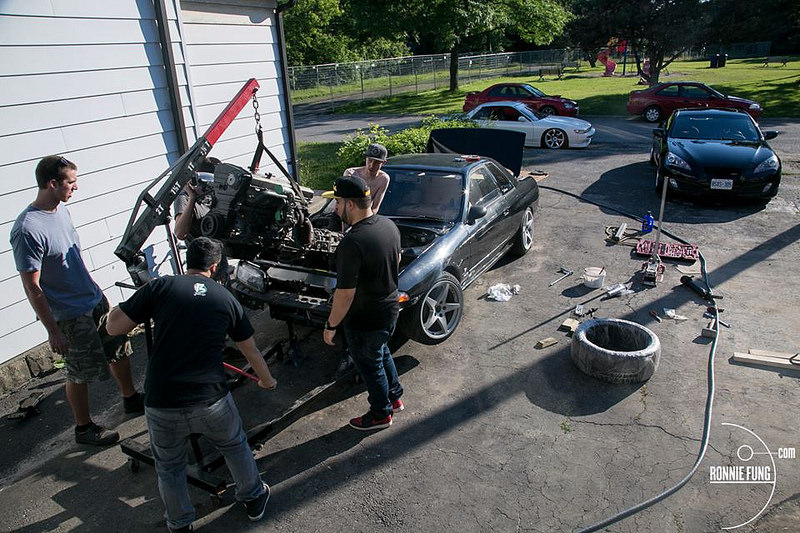
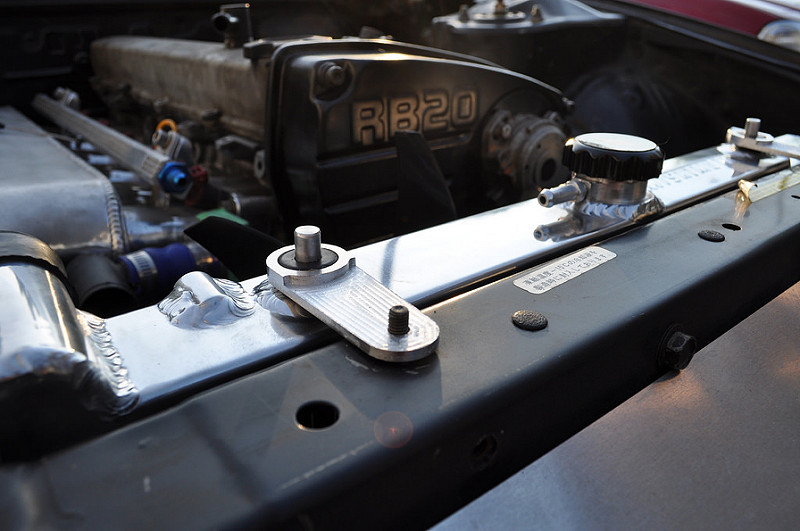
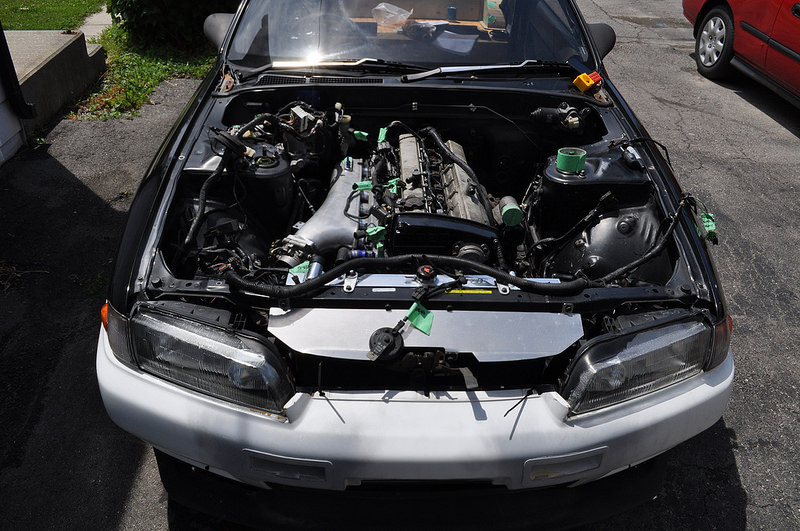
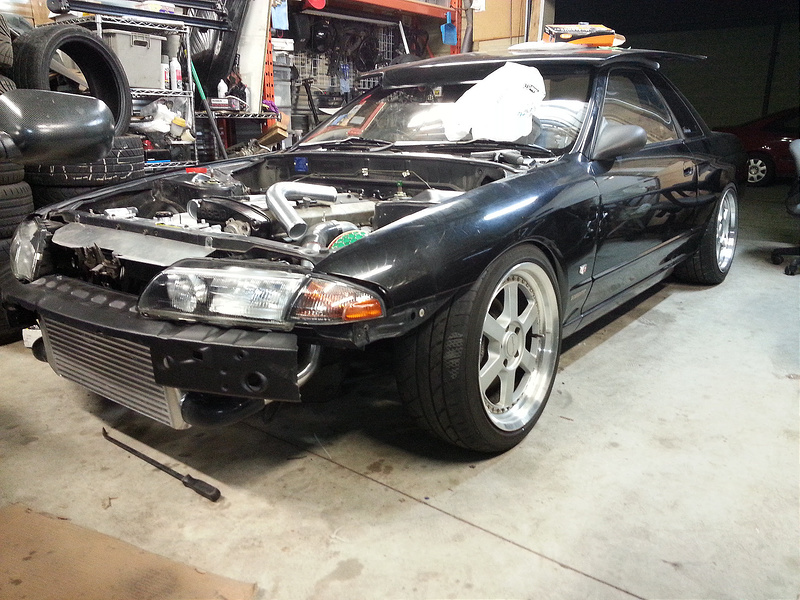
We finally got the motor in there, I will need to caress the clutch line as it slightly touches the manifold but other than that everything went according to plan
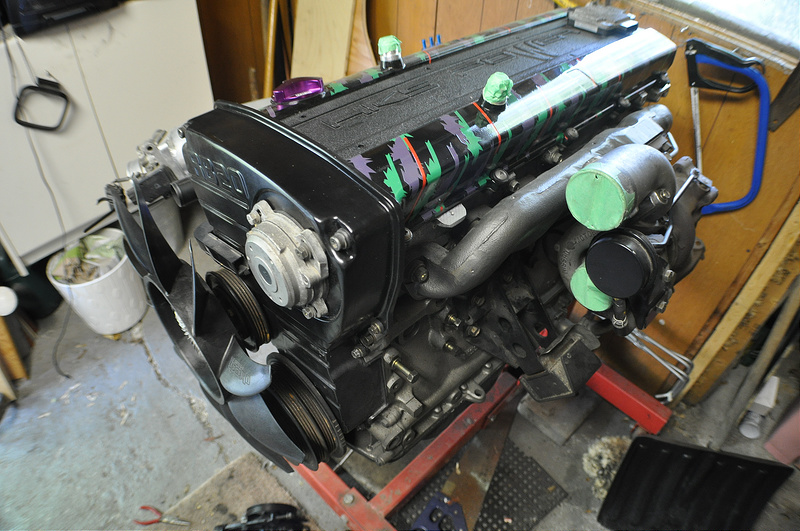
Then I had to put on my painted cam covers to see how everything would look
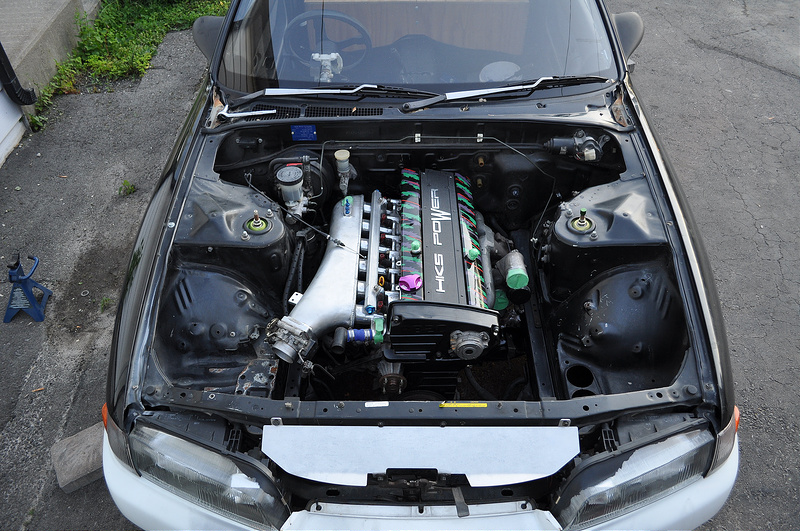
I am so stoked on how it looks. The engine bay will be repainted and smoothed after making holes for the intercooler.
06-23-2014 #72 Registered User
- Join Date
- Aug 2009
- Location
- Honolulu
- Posts
- 72
Nice! I love those engines :D
1969 Camaro. Just bought, starting the build now! :D
1978 Porsche 911 morphed into a 1973 911RS
06-27-2014 #73
Registered User
- Join Date
- May 2013
- Posts
- 98
Thanks! Hopefully I can keep the bay clean looking.
It was an interesting last couple days in the office, at 2 am the main overhead water main broke and continued running until 4am. The motion detector was set off when the saturated ceiling tiles started to fall. By the time the water was shut off there was 4 inches of water on the floor of the entire office. I got the phone call not to come in because there was a cleanup crew / insurance investigation taking place which meant I had a day to start putting all the accessories on the motor and start mocking up the Intercooler.
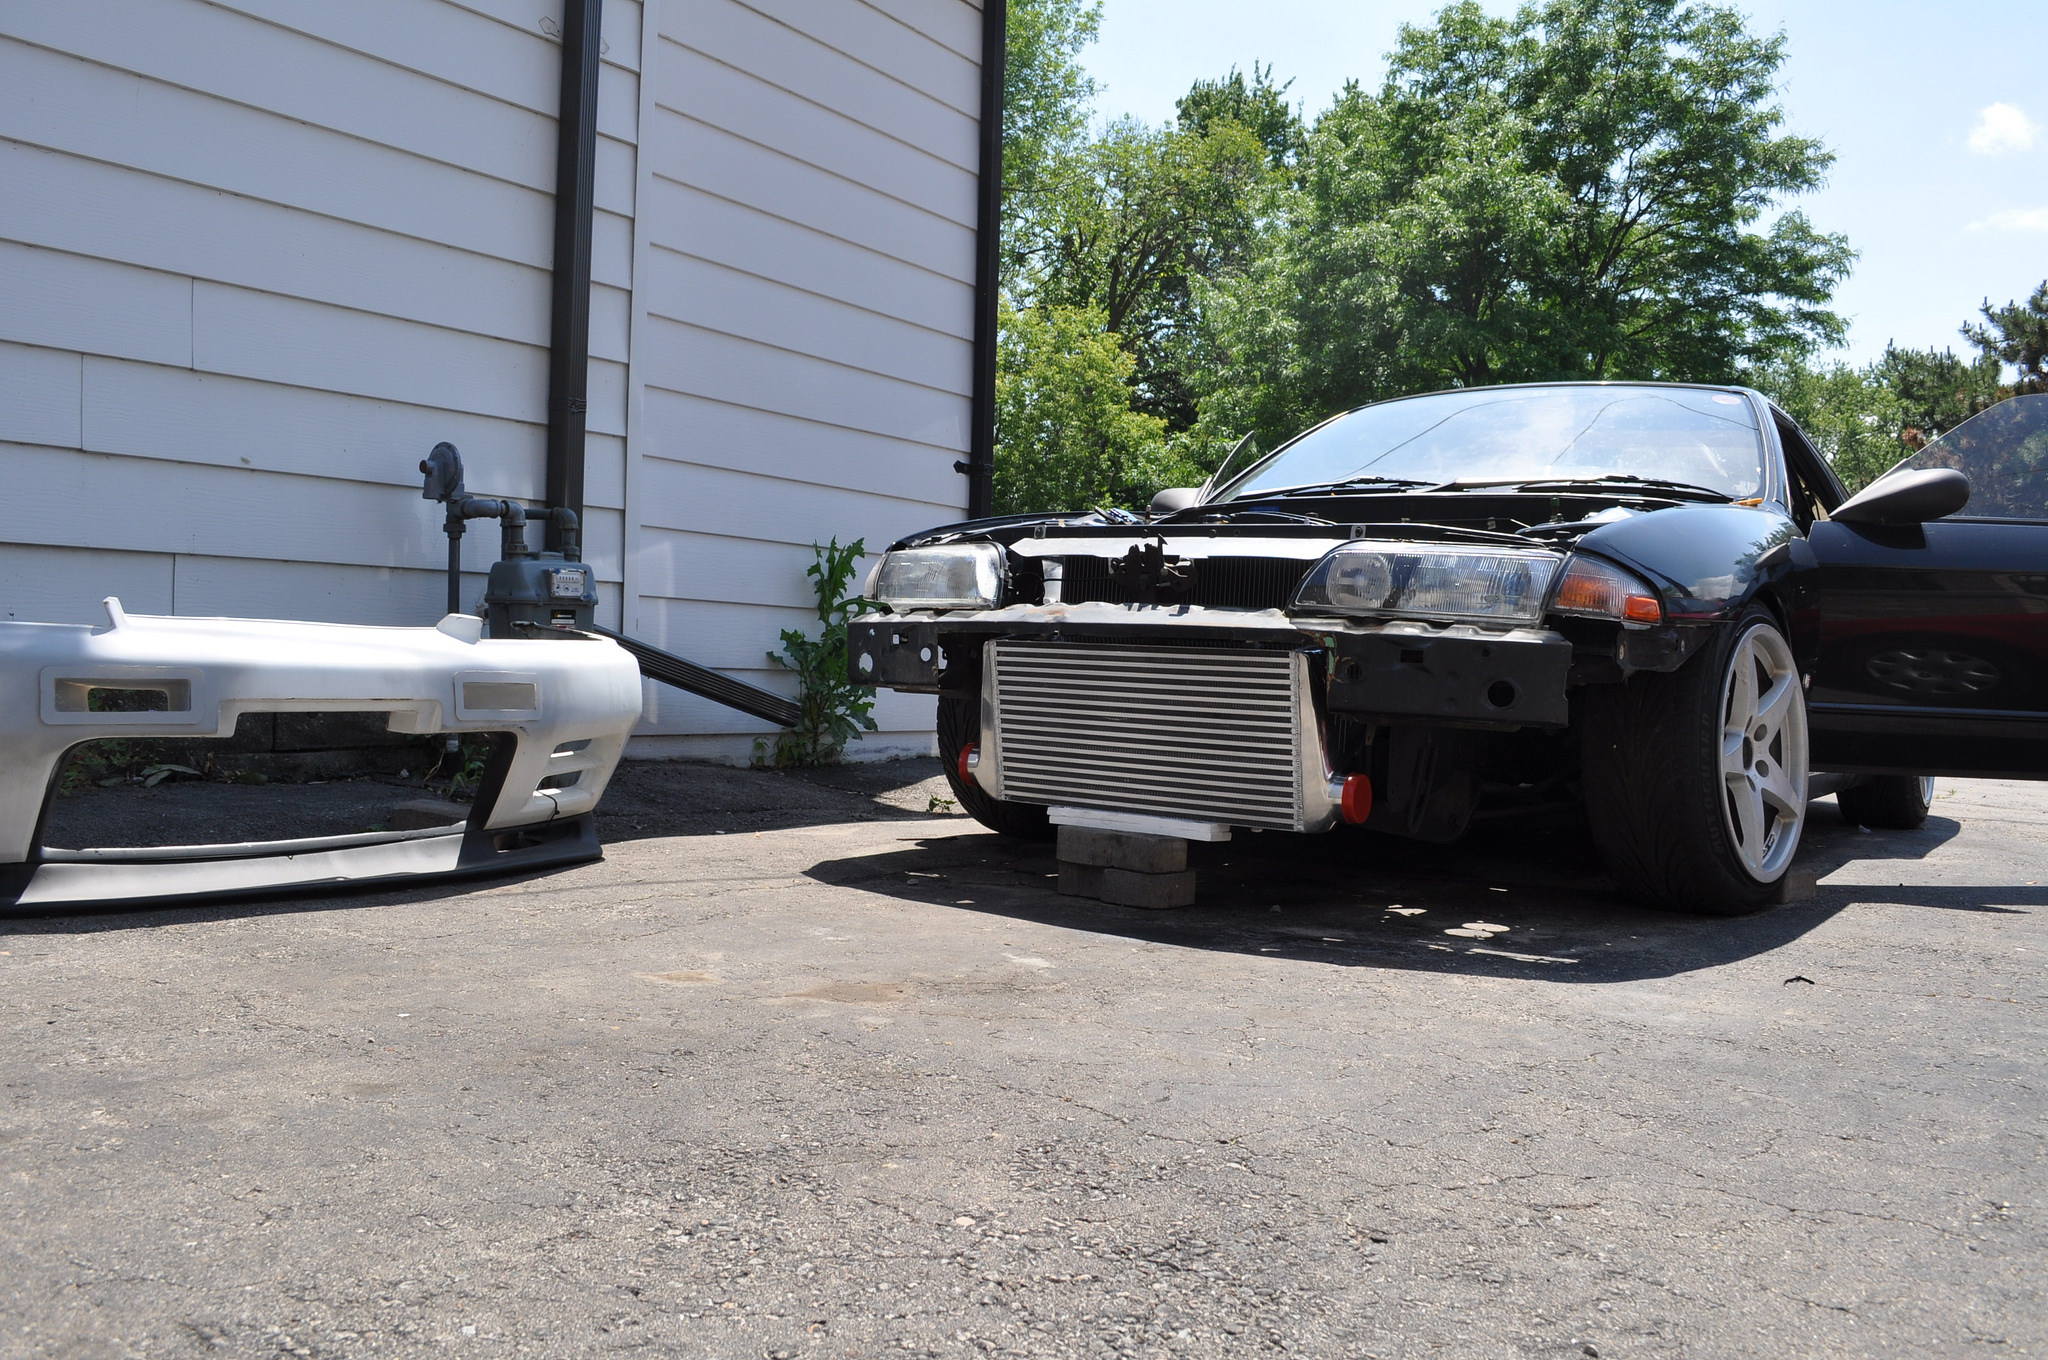
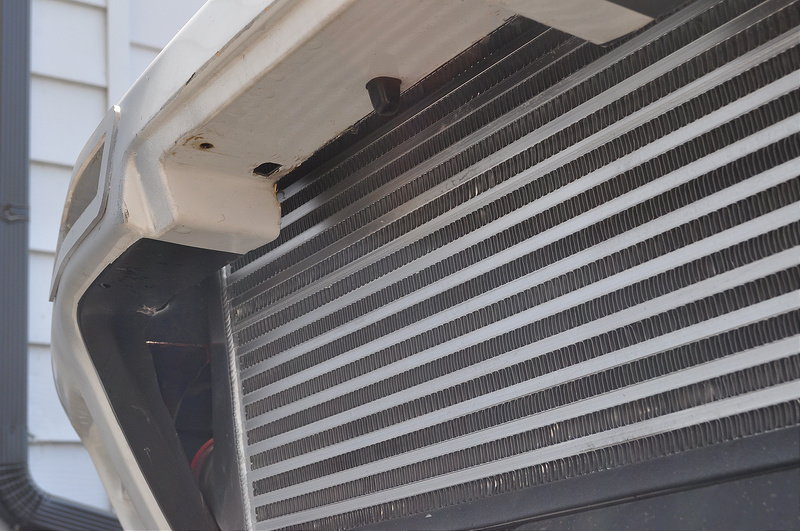
The rebar had to be modified slightly to accommodate the bumper vents and the intercooler but It will be strengthened back up by welding in some plates. I believe I will mount the intercooler directly to the bumper rebar, It is stonger than any brackets I could make and I feel better about it being supported from the top rather than the bottom.
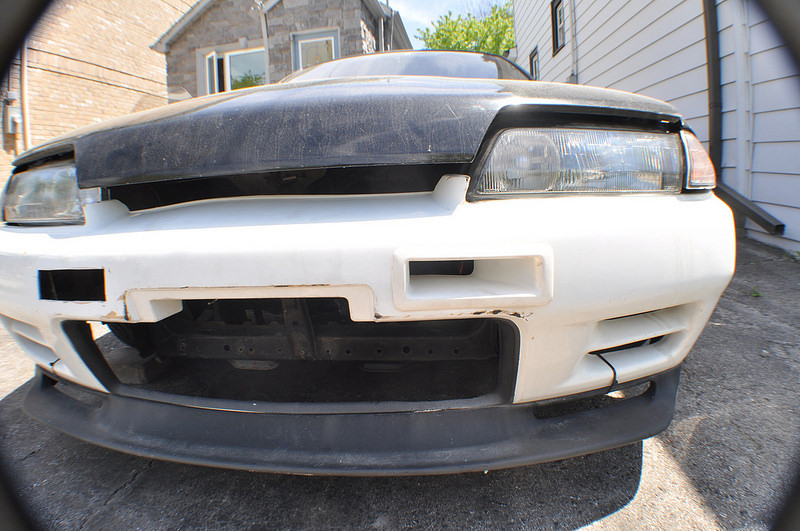
However, unfortunately the bumper ducts will have to be cut on the inside about 1/2" to allow the bumper to fit properly.
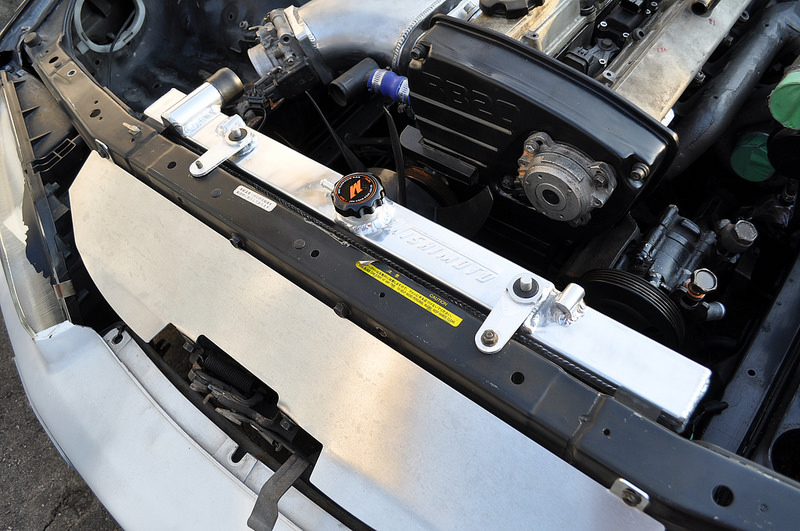
After fooling around with the intercooler, I bolted on the PS pump, GK TECH clutch fan as well as my new Mishimoto radiator. The previous owner had made radiator brackets by simply drilling flat bar to hold the rad in place. I took some quick measurements and made a quick design in Solidworks.
Friday (today) was my last day at the office (READ: last day to play with the equipment) so I quickly programmed and cut out some brackets. Turns out our vendor managed hardware coincidently has the perfect sized grommet. They fit perfectly! and will be powdercoated along with all the intercooler piping when its ready. I am seriously thinking of getting a smaller router table to run small jobs. I think its worth the initial investment and would easily pay for itself in a year or so.
Thats all for now, I start at the new place on Wednesday so I have some time to work on the car over the long weekend. I might aim to have the rear seat delete finished and upholstered, but we shall see.
-Jordie
07-22-2014 #74
Registered User
- Join Date
- May 2013
- Posts
- 98
So I've stalled a bit on the interior as I have been working on getting the Intercooler sorted and simplifying the wiring harness. Its been extremely hot and doing work inside the car is awful.
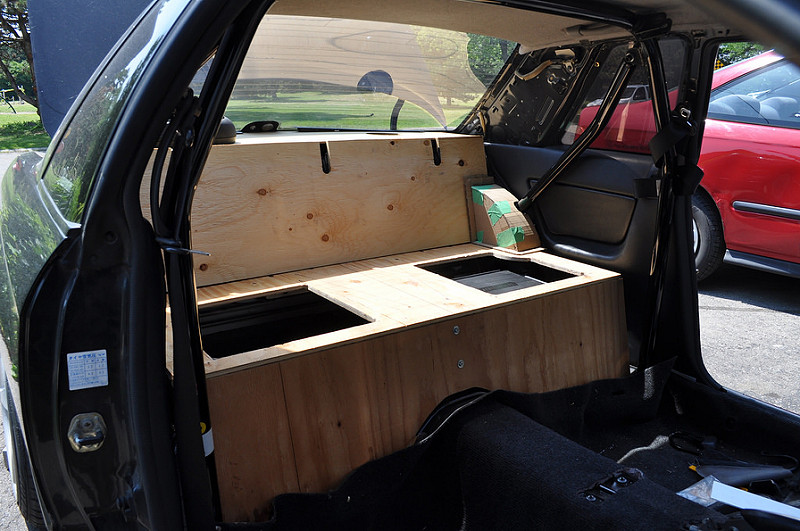
I mocked up the all the cutouts for the seat delete compartments, I really need to have this piece cut out on the router table as there are to many imperfections (in my eyes anyways :( ) The rear wheel wells also looked less than stellar so I mocked up a cover piece from cardboard which will be made out of plastic eventually. Its not a priority and like I said, far too hot to work on the interior right now.
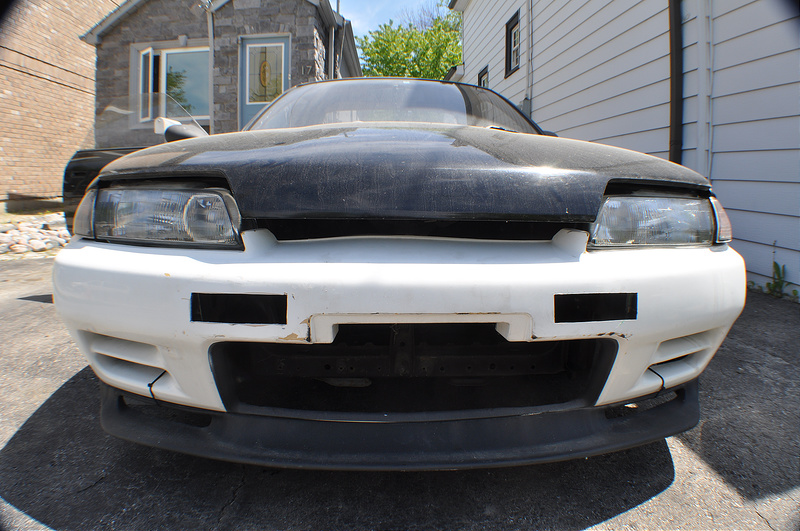
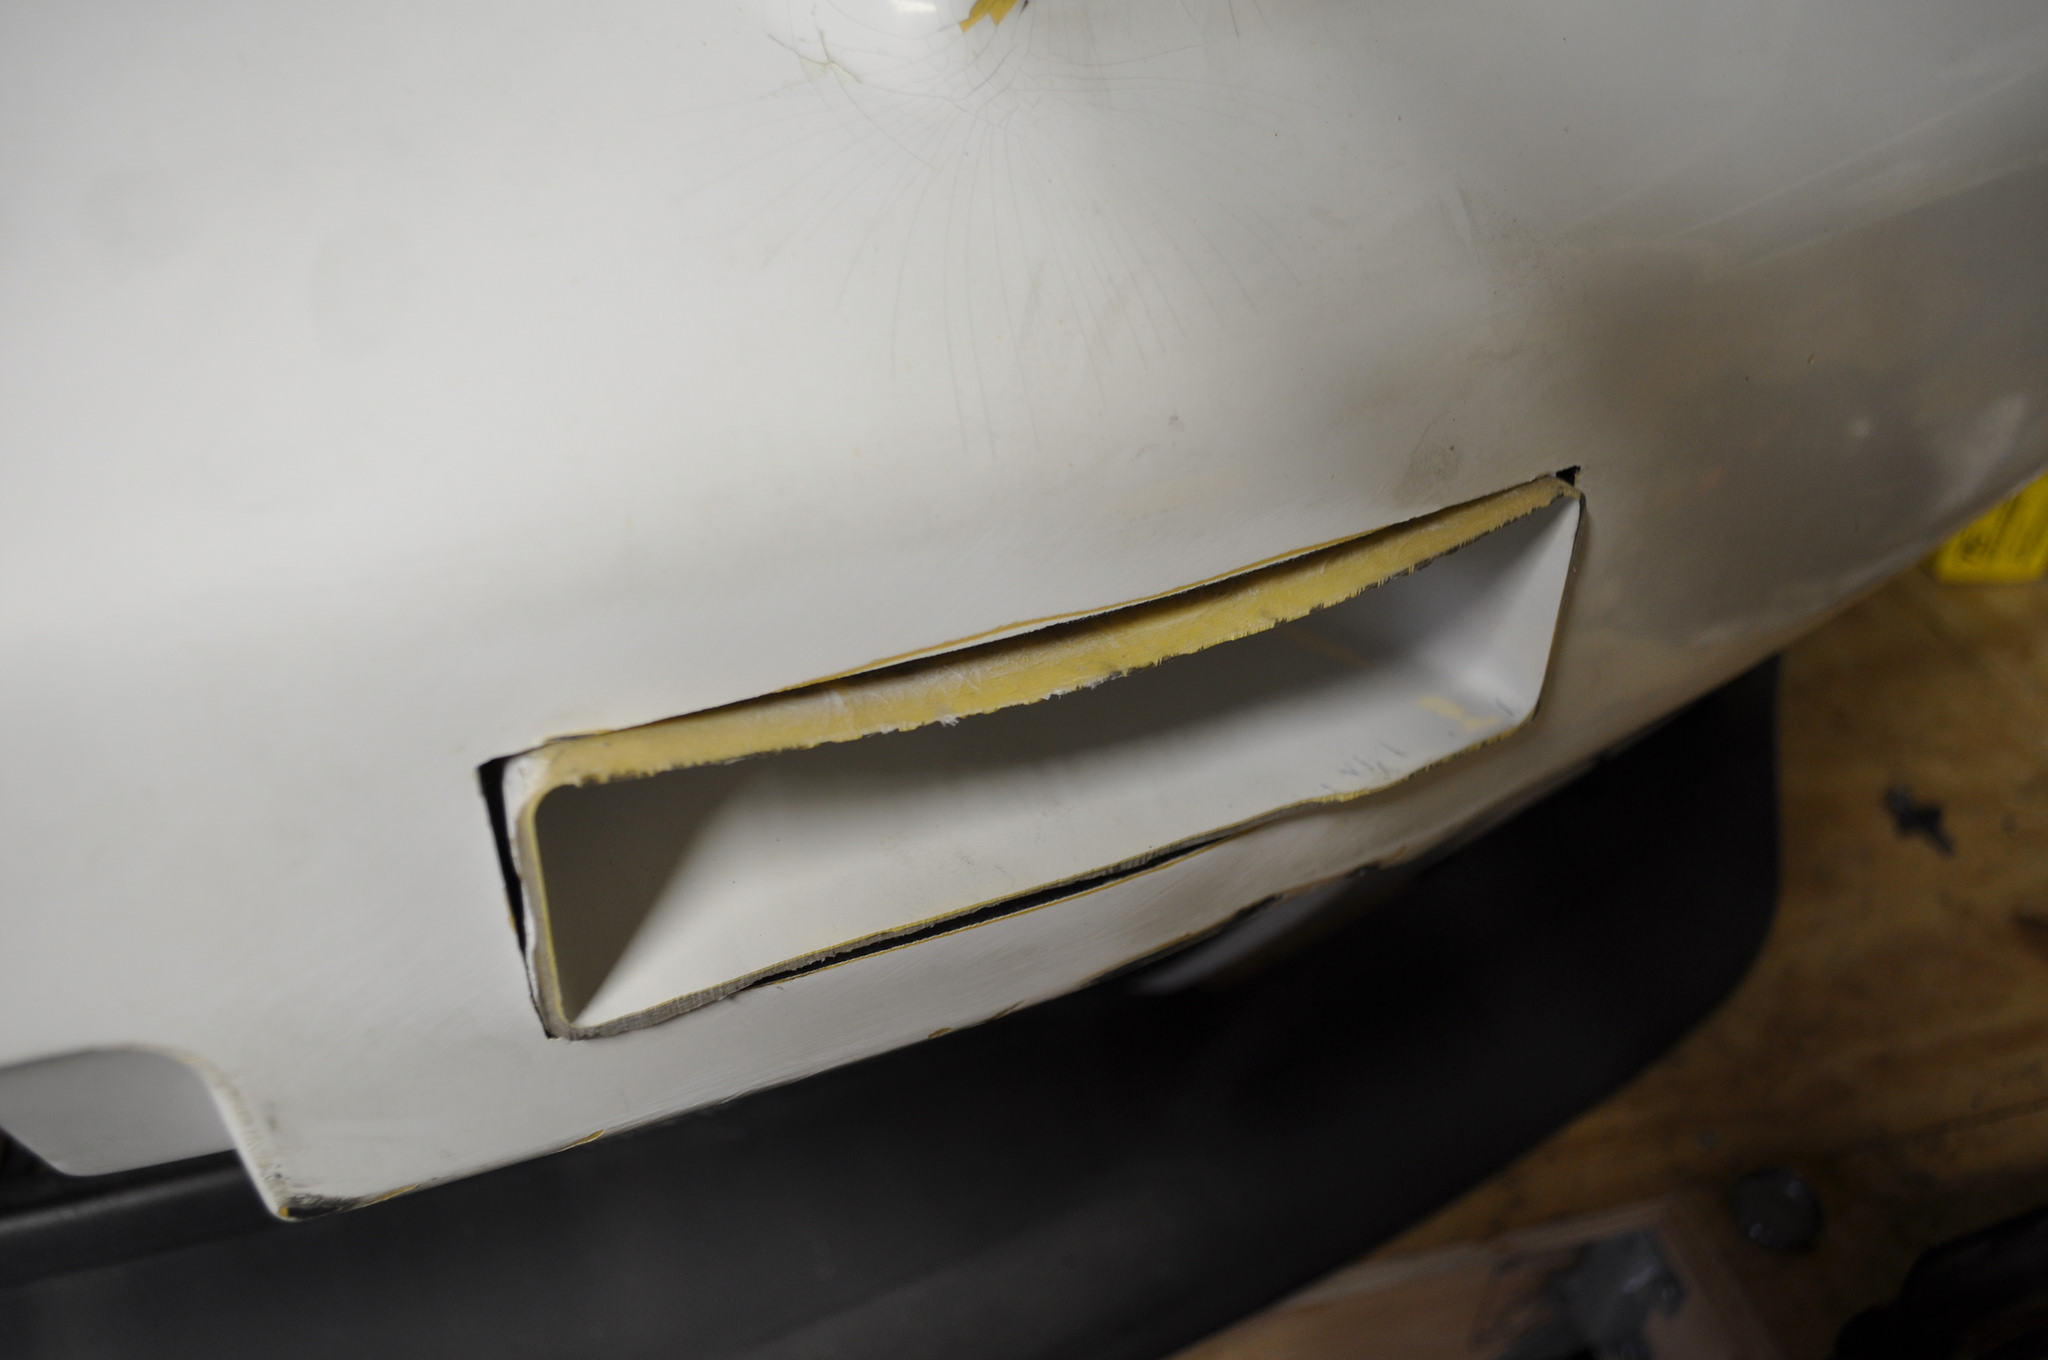
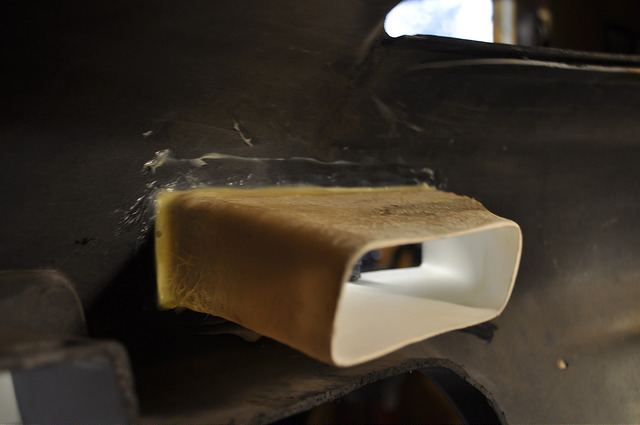
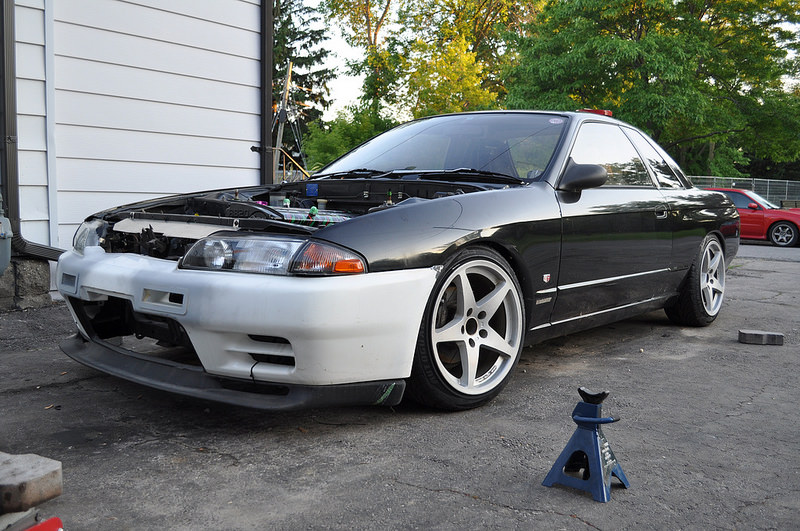
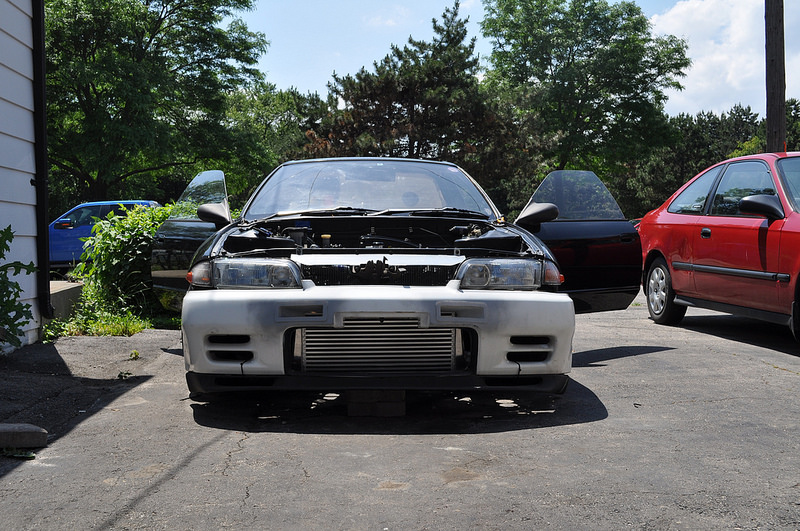
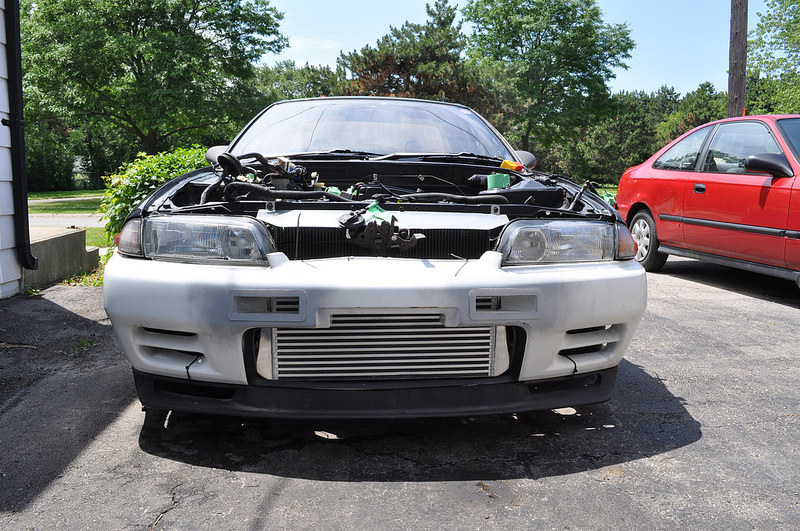
In order to fit the bumper over the intercooler, I needed to trim down the N1 vents I had previously glassed into place.
I trimmed off 3/4" from each of the ducts and the bumper fit perfectly. I have yet to make a small plate that sandwiches the bumper between the rebar to prevent the bumper from bowing.

I saved the sprayer from the rear window delete and it just fit perfectly in an existing hole in the bumper in front of the intercooler. I have a reservoir from a BMW which will get mounted under the rear seat delete and hopefully help cool intake temps. This is a 100% unnecessary mod but the devil is in the details.
Got all the wiring labeled and am now in the process of re locating the fuse/ relay box to inside the car. The only wires coming into the bay on the chassis harness are the headlights, turn signals, horn and ambient air temp sensor.
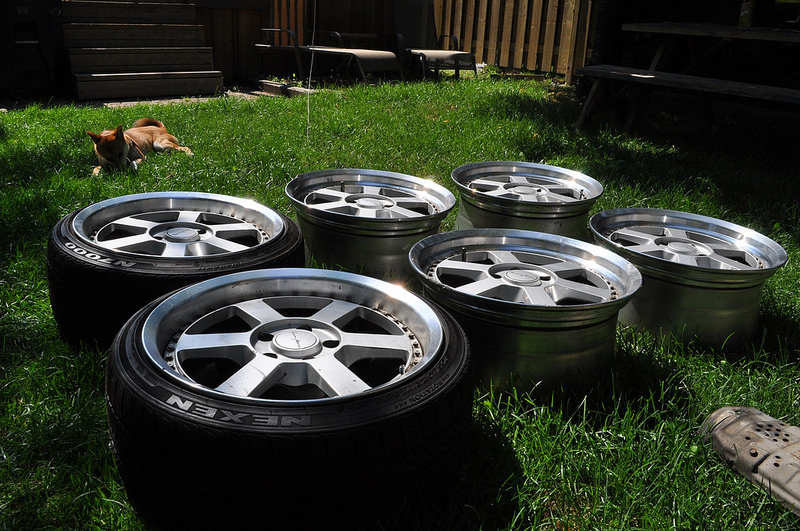
My Tommy Kaira wheels showed up today. I had the pair of 17's already but wanted a full set and came across a set of 4 in GTR sizes (18x9+24) and jumped on them. One has a bend and will have to be repaired but when buying rare parts sometimes you have to take what you can get. I won the auction for $221 dollars so i'm not really bothered.

Fitment is on point, I will probably need to pull the fenders a bit to fit a square tire setup. None of that hellaflush stretched tire garbage here :P

More updates to come...
Jordie
07-22-2014 #75
Registered User
- Join Date
- Mar 2009
- Location
- Southern Maryland
- Posts
- 402
Even shiba is hot
08-17-2014 #76
Registered User
- Join Date
- May 2013
- Posts
- 98
So lots has changed since I've updated last (by my standards anyways)
We bought my Girlfriend her first new car. Its a 2015 Nissan Micra in SR trim with a 5spd which makes it pretty fun around town. She enjoys it and you cant beat the price and the fact that it has a warranty.
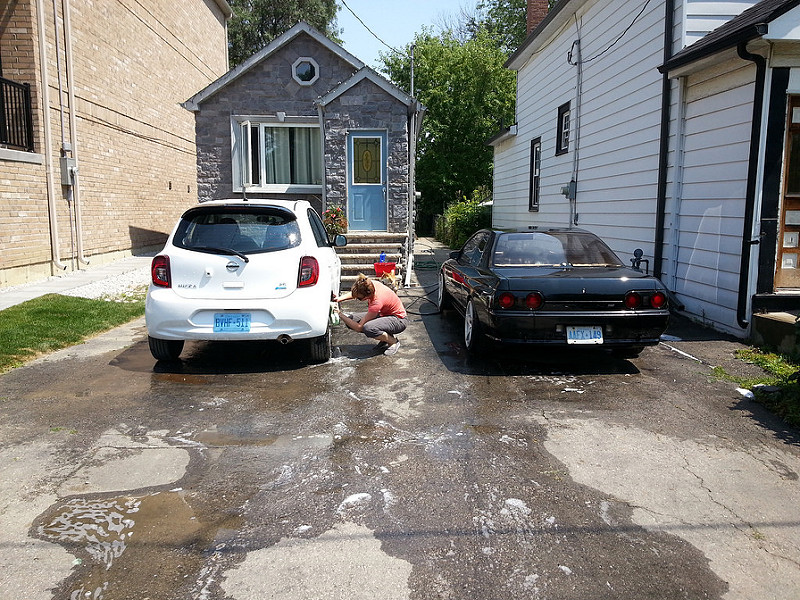
His and Hers.
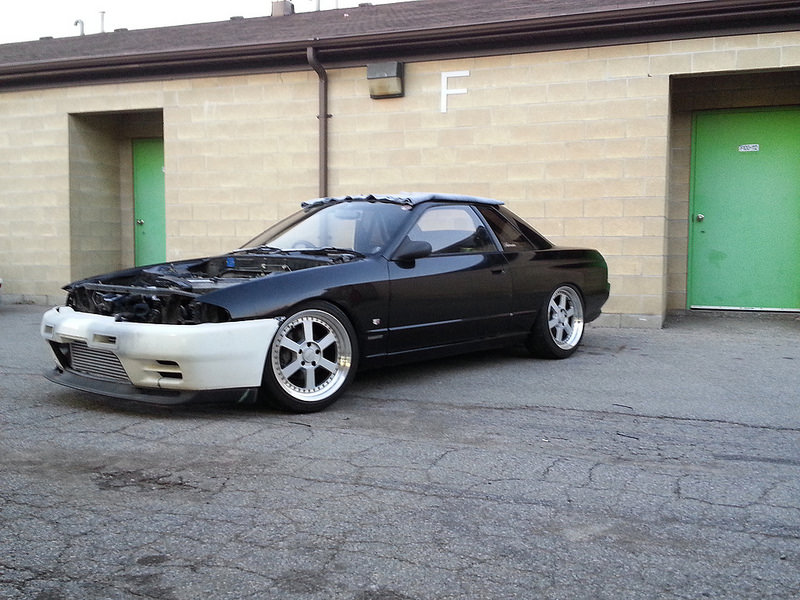
Here is the last driveway shot for a while. I test fitted the side skirt so I could take dimensions for the graphics and did them up in Adobe Illustrator. They have been sent to the vinyl shop to be cut. Priorities I know.
I finally got fed up walking from the front of the house to the shed to get tools and the lack of shade meant it was time to move the car so I could actually make some progress.
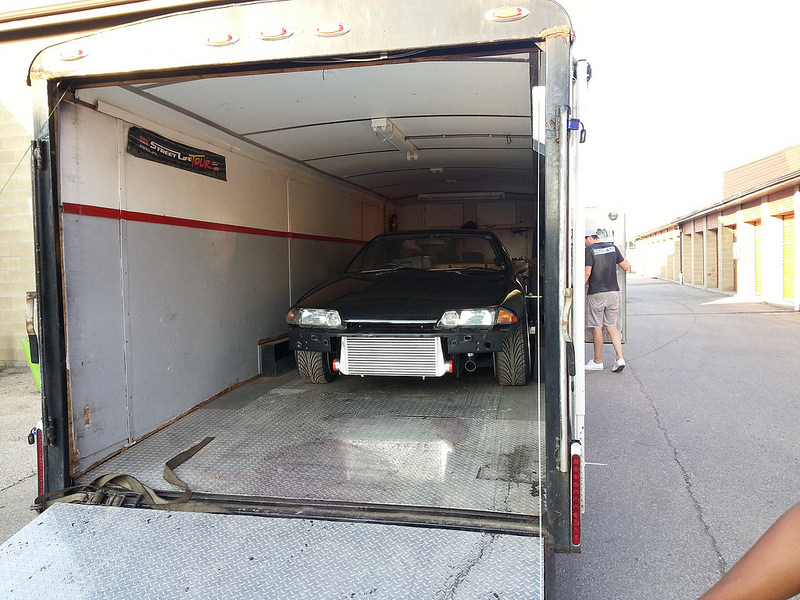
I had a good buddy trailer the car to a friends storage unit which is fully equipped with everything needed to finish the project. Its a little cramped but it beats working in the driveway. These storage lockers are rented out as workshops so they are perfect.
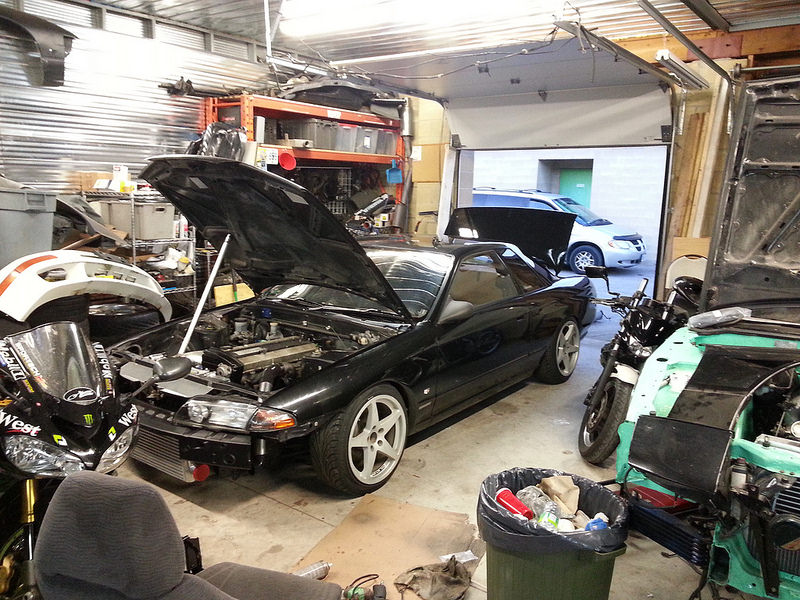
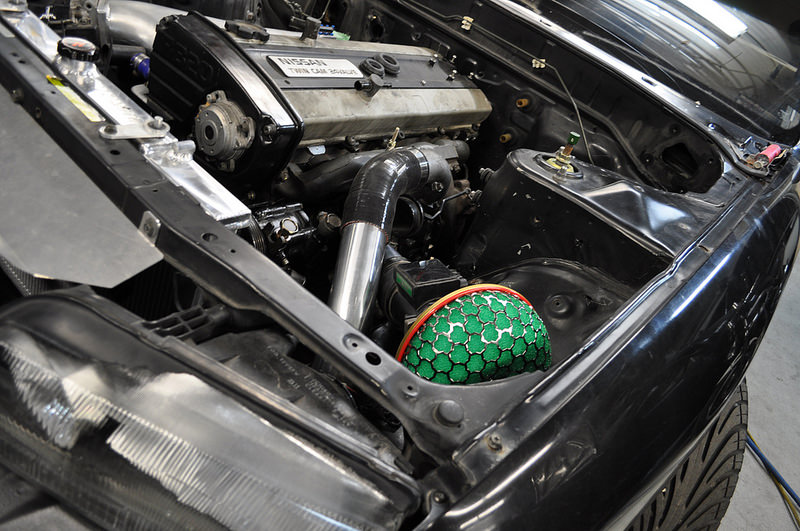
On our row of units there is one that does autobody, another for fabrication and a host of people building cool projects. All the resources are in one place to get the project done. I spent most of last week there until all hours of the morning and got all my intercooler piping tacked up as well as made the intake.

The firewall has been stripped of the brake booster/ master cylinder, clutch master, wiper motor for cleaning and paint. Now the intercooler piping is all mocked up the engine can come out to fill all the unused holes, smooth the bay and paint. I am on the fence if I should buy the lava mat head shield as its not needed but will completely set off the look of the bay.
Finally I test fit the wheels on the car. My friend had a pair of 245/40/R18s sitting in the corner so I threw them on. The side wall is a little big and will rub the back of the front fender once the wheel is turned. I think I will end out running a 255/35/R18 and rolling / pulling the rear fenders so they fit and have the biggest contact patch as possible.
I love the look. 18's suit the car way better which leads me to believe that the old Nismo wheels will be up for sale soon.
Thats all for now. Thanks for reading.
08-18-2014 #77 -Moderator/Sponsor-
- Join Date
- Apr 2001
- Location
- The City of Fountains
- Posts
- 15,978
Love this build. Great progress!!!
Andrew1970 GTO Version 3.0
1967 Cougar build
GM High-Tech Performance feature
My YouTube Channel Please Subscribe!
Instagram @projectgattago
Dr. EFI
I deliver what EFI promises.
Remote Holley EFI tuning.
Please get in touch if I can be of service.
"You were the gun, your voice was the trigger, your bravery was the barrel, your eyes were the bullets." ~ Her
08-18-2014 #78 Registered User
- Join Date
- Apr 2011
- Location
- North NJ/SW Virginia
- Posts
- 197
Looks great. I'm considering an RB for my wagon project.
08-18-2014 #79 Registered User
- Join Date
- Jul 2014
- Location
- orlando FL where the hot panties are
- Posts
- 102
i lived in Japan for a total of 1.5 years and the R32 R33 and R34 are my loves! this build is awesome to say the least. and man you have some excellent toys to build with! lol
The Enemy of my Enemy is my Friend...
MY BUILD https://www.pro-touring.com/threads/...ra-1-Contender
08-19-2014 #80
Registered User
- Join Date
- May 2013
- Posts
- 98
Thanks Andrew, Its something different than what is usually posted here thats for sure. Originally Posted by andrewb70
They are great motors, They're rev happy and just sound great. The only downfall is getting parts for them :/ Originally Posted by john31s
Japan is certainly on the bucket list for me. Were you serving overseas? To be honest it is tough not having access to the CNC router anymore, The small imperfections of making things by hand are killing me haha. I have an old co-worker who said they would run parts for me if I need something small made up so at least there is that. Down the line I am looking to buy a small 3'x4' machine I can have in my garage (when I get one) Originally Posted by PANTYEATR
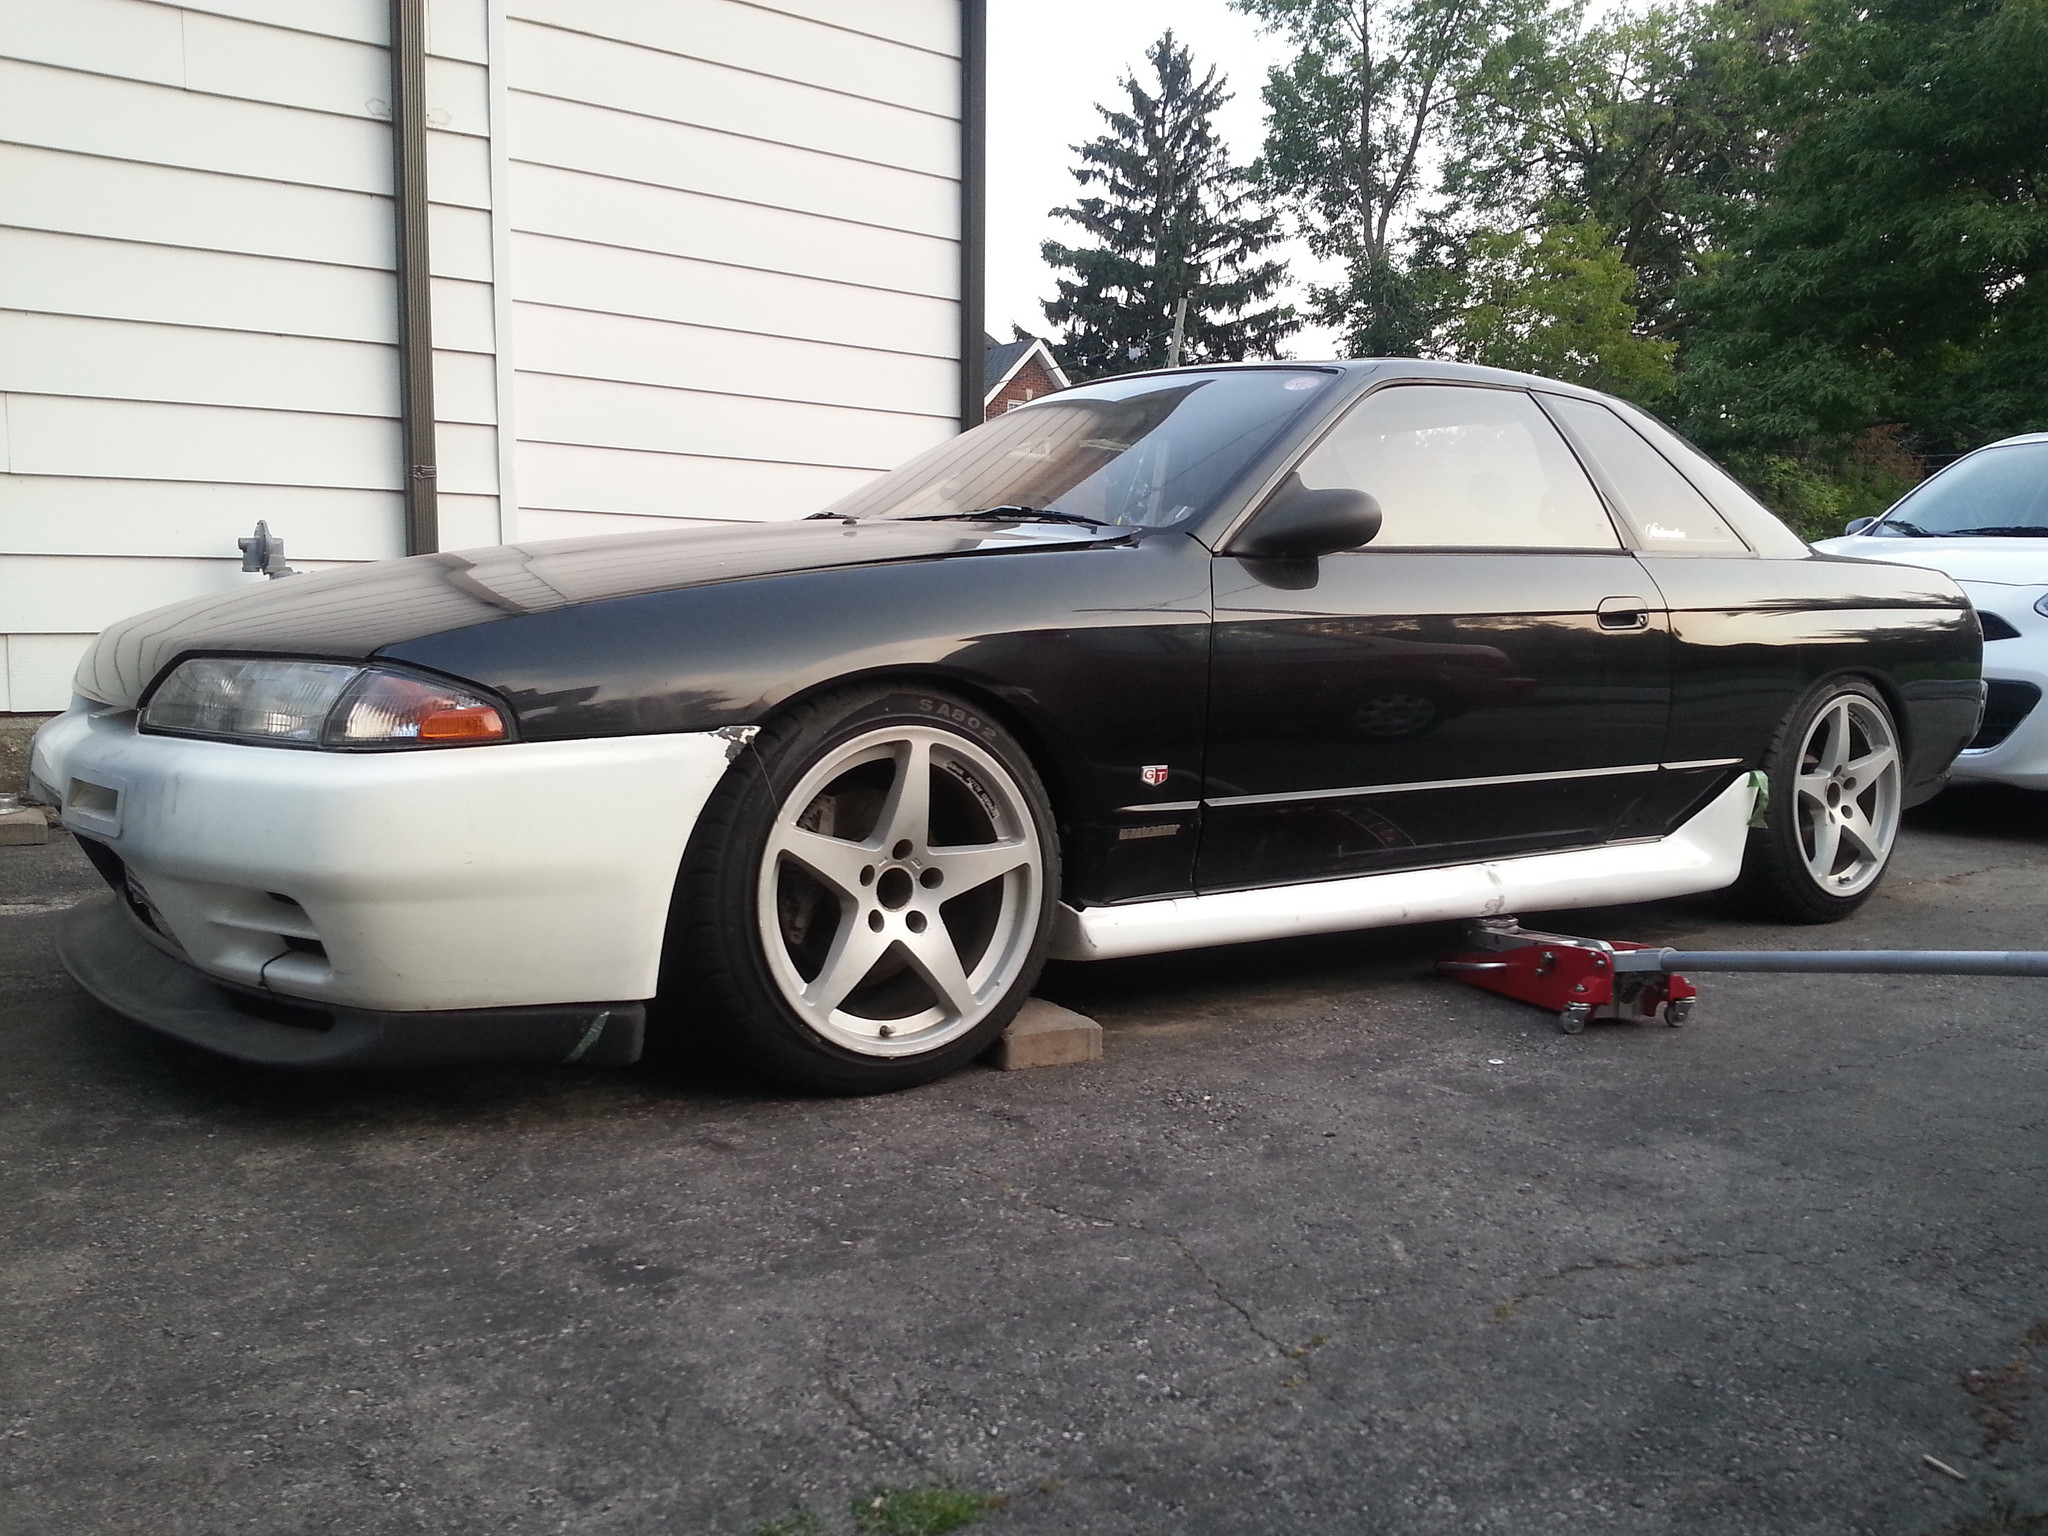
Its coming along now, The engine bay is stripped (save for the motor which will be out tonight). Thought I'd wheel it outside one last time.
Unfortunately I did not have my camera with me so this cellphone picture will have to suffice. I love these wheels.

 Reply With Quote


