


Results 21 to 40 of 268
Thread: 1976 Trans Am Resto-Mod
-
03-06-2012 #21

 Registered User
- Join Date
- Sep 2009
- Posts
- 2,969

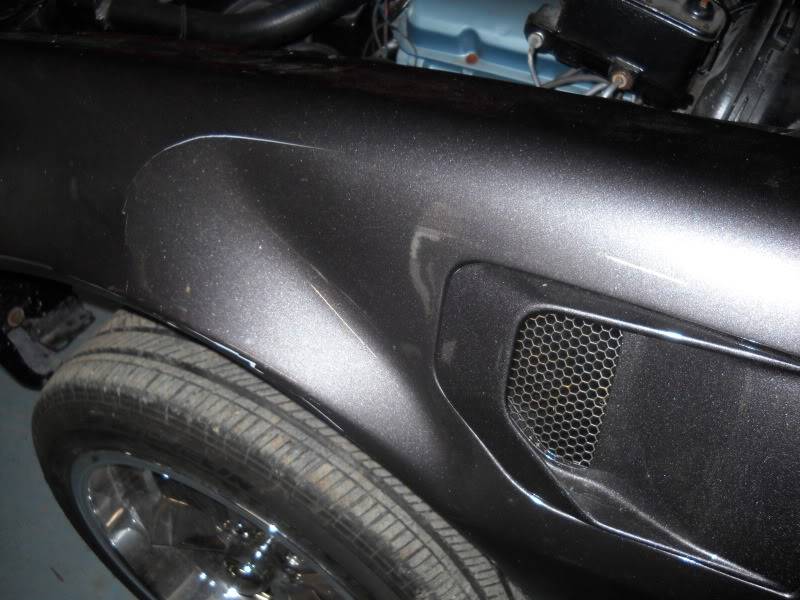
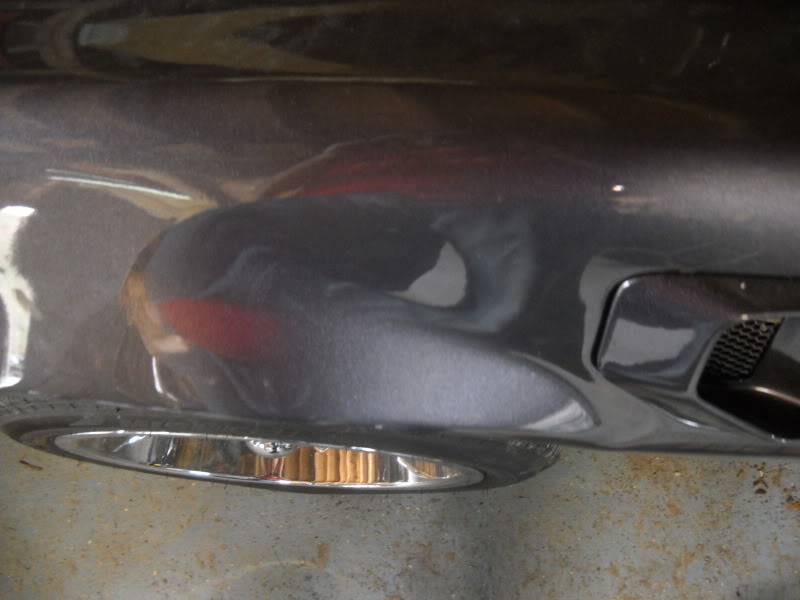
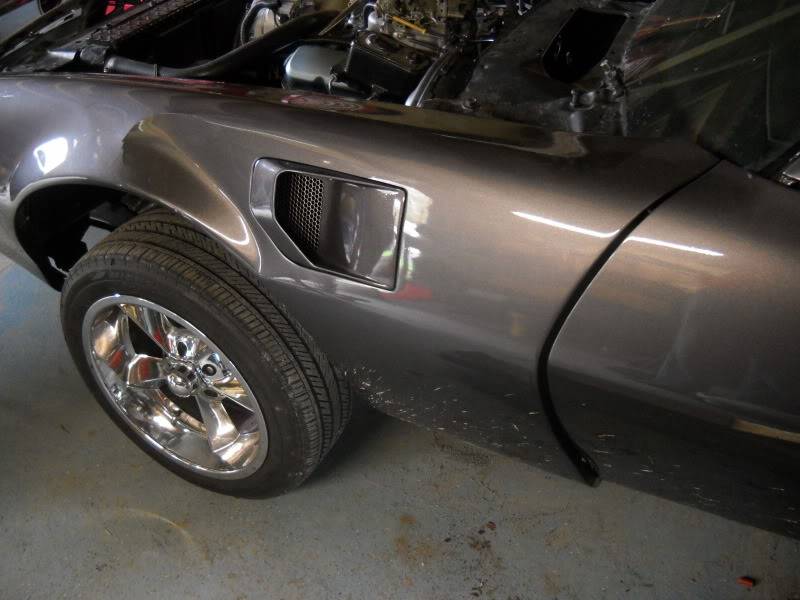
And that brings us to about October 2011, when I made a huge mistake. I finally got the car tuned up and running very well. I wanted to take the car for a drive. I thought that I checked everything, but overlooked a small and fundamental area... my lug nuts. When I was pulling the car back into the driveway, the front wheel feel off causing it to contact my front fender. I felt so stupid for not having them properly torqued, but it could have been much worse. The only thinkg affected was the driver's fender. I cut my losses and took the fender back to have it repaired. It came back about 5 months later, but I wasn't until I needed it.
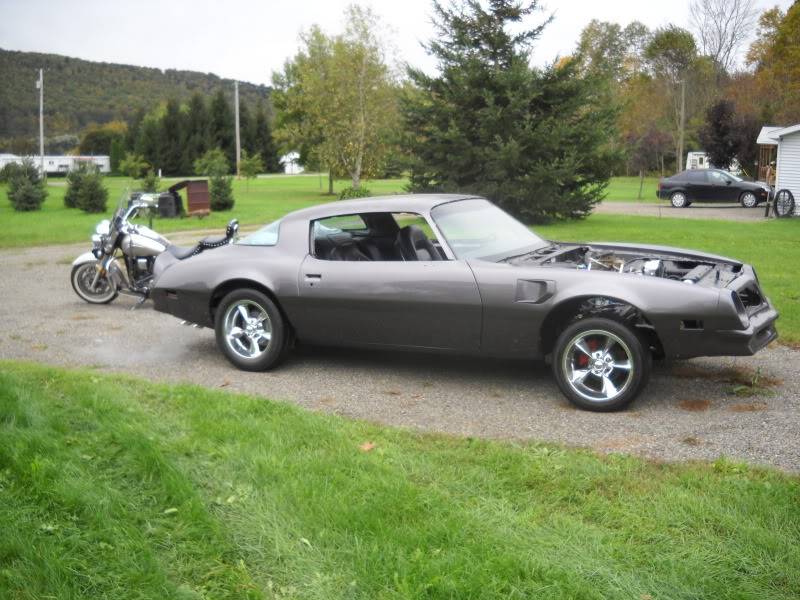
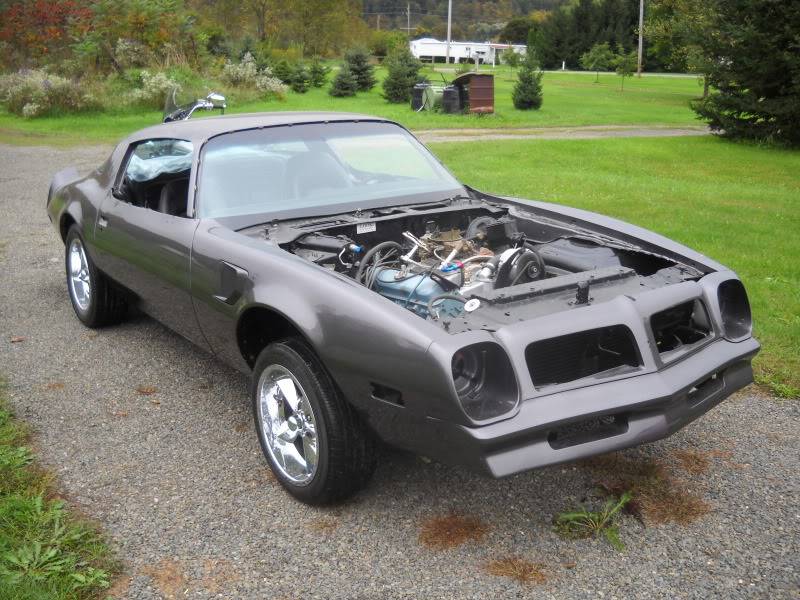
Here is the damage.
1955 Nomad project LC9, 4L80e, C5 brakes, Vision wheels
1968 Camaro 6.2 w/ LSA, TR6060-Magnum hybrid and etc SOLD
1976 T/A LS1 6 Speed, and etc. SOLD
Follow me on Instagram: ryeguy2006a
-
03-06-2012 #22 Registered User
- Join Date
- Mar 2009
- Location
- overseas
- Posts
- 3,434
looking good! very nice exhaust tips!!
 I also thought about them for my monte! where did you get these?
Kevin S. (overseas in Germany)
I also thought about them for my monte! where did you get these?
Kevin S. (overseas in Germany)
1963 Chevrolet Impala 2d ht Coupe
www.CruznArt.com
CRUZN - Automotive Artworks
03-06-2012 #23
Registered User
- Join Date
- Sep 2009
- Posts
- 2,969
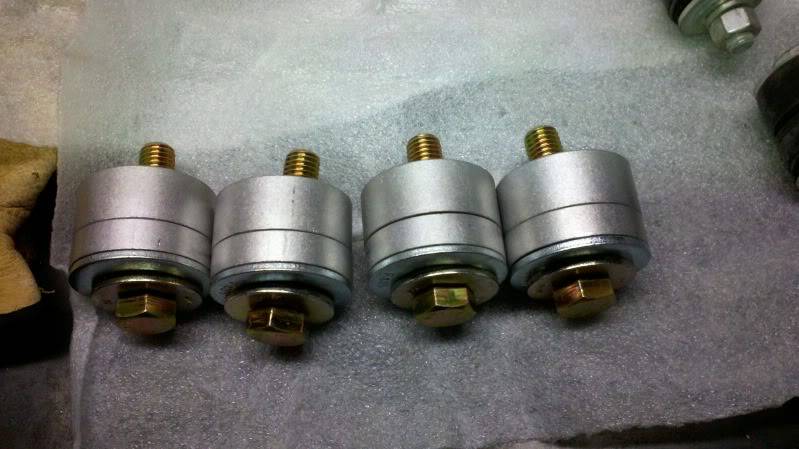
It was actually that event that made me turn my build into more of a Resto-Mod build. I will explain. I was forced to take the front end apart due to the damage. While I had it apart I decided to upgrade the front springs to PTFB GT springs along with Koni single Adjustable front shocks. I also got the PTFB solid body bushings. I made the order to Custom Works, all in all I bought Keith's C5 kit with hubs, brackets, bearings, SS lines, Solid body bushings, Koni's, and the GT springs.
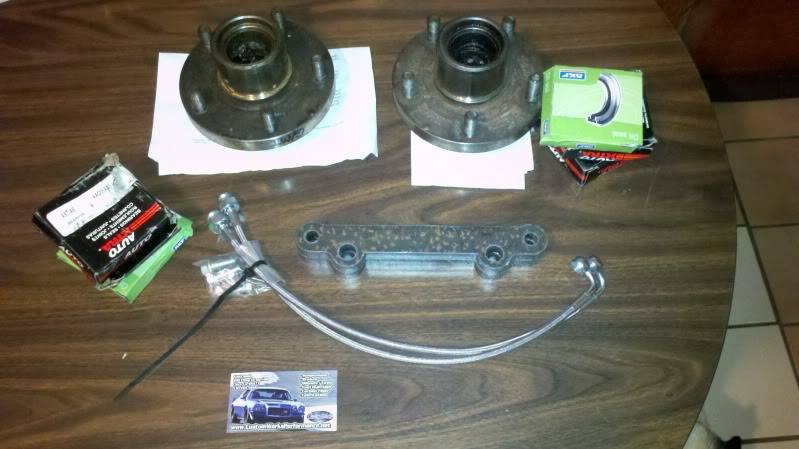
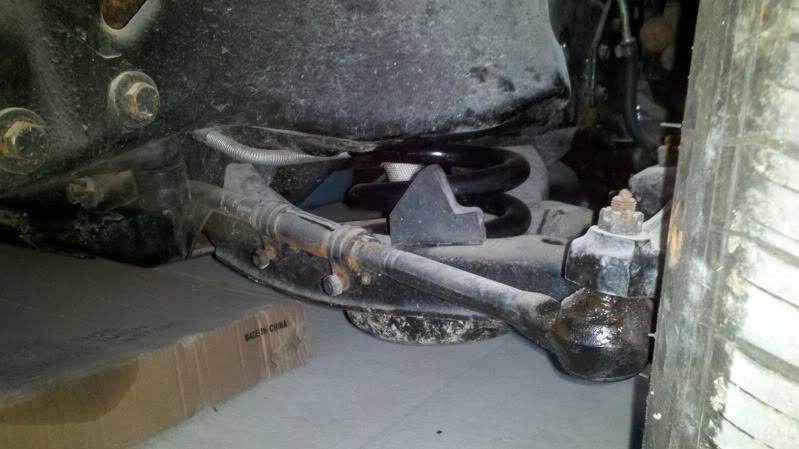
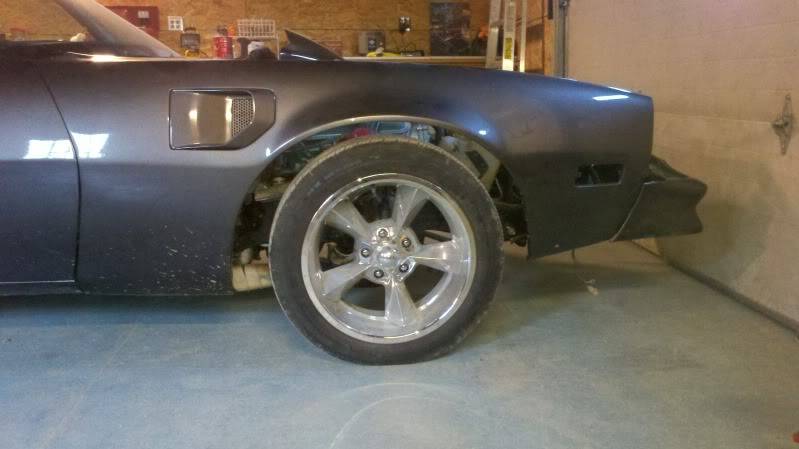
This is the new ride height.
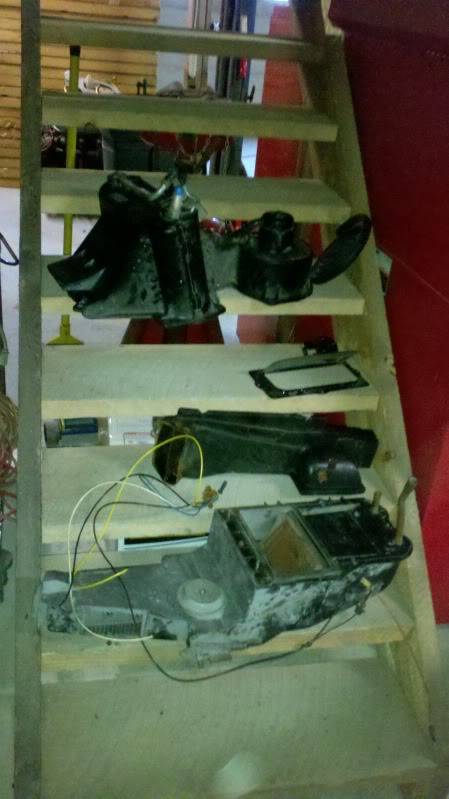
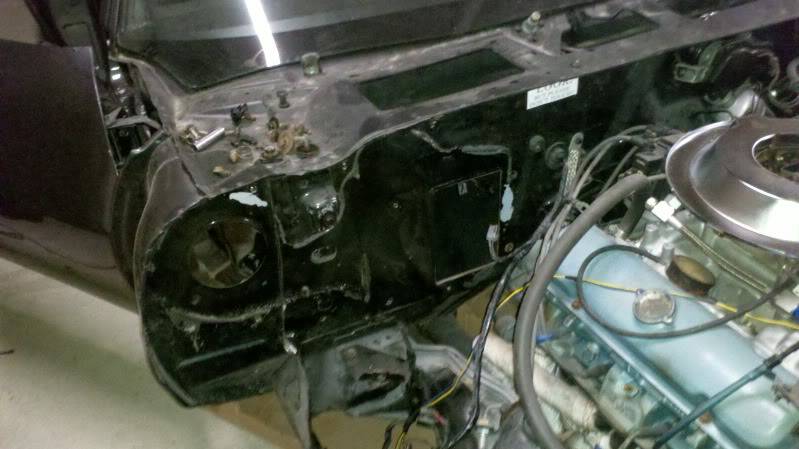
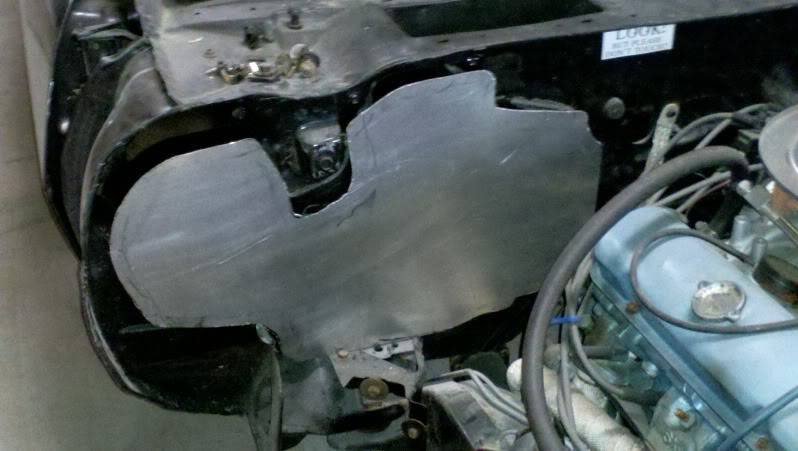
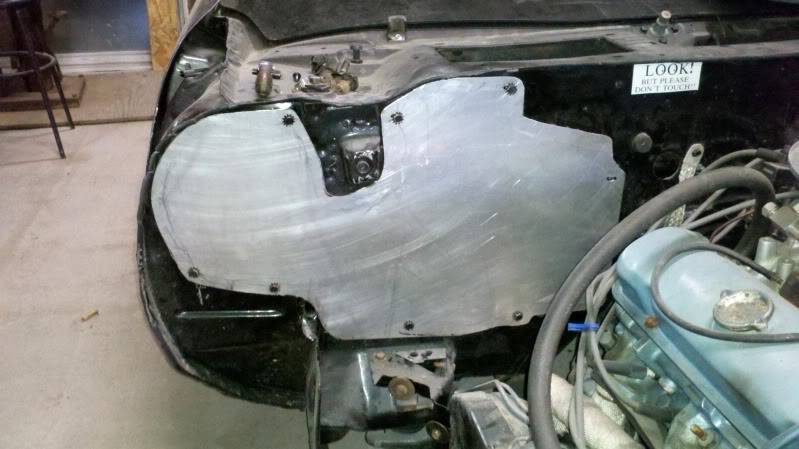
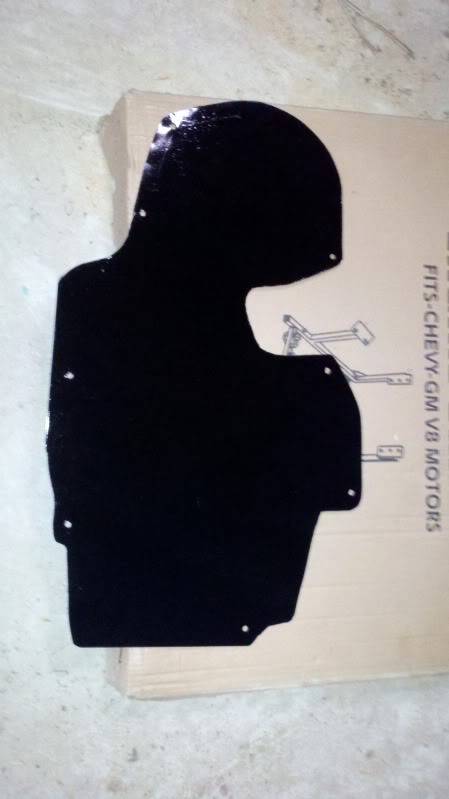
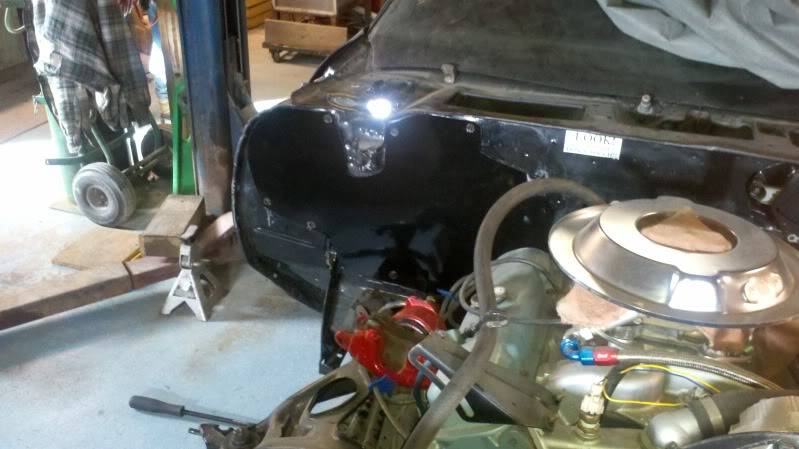
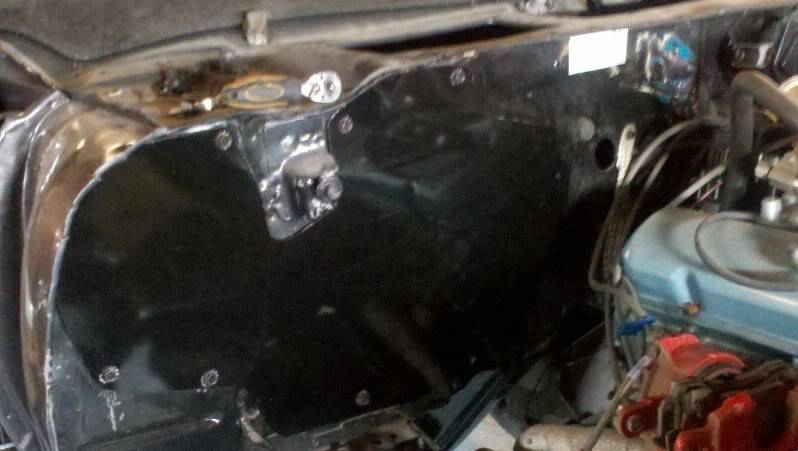
Since I was tearing into the car I also decided I wanted to shave the firewall, but instead I went with block off plate. I went with .050 Aluminum with is the NHRA Spec for sheet aluminum. I will eventually upgrade to the Vintage Air Gen IV Setup for my car. For now I am going to run without one.
1955 Nomad project LC9, 4L80e, C5 brakes, Vision wheels
1968 Camaro 6.2 w/ LSA, TR6060-Magnum hybrid and etc SOLD
1976 T/A LS1 6 Speed, and etc. SOLD
Follow me on Instagram: ryeguy2006a
03-06-2012 #24
Registered User
- Join Date
- Sep 2009
- Posts
- 2,969
That brings me up to Last weekend where I finally did my C5 conversion on a budget. Excluding the wheels I have $325 bucks into it. I found deals on things and jumped on them when I could. I also have a complete LS1 rear brake setup to do install after I get the car running a little bit. I want go get it on the road before I tackle that job.
I wasn't able to get as much as I wanted done, but still I was able to get a huge step forward. I was able to get my C5 brakes installed. I have been collecting parts for this upgrade for a long time and now I was finally able to get it installed. It took a lot of work and patience making sure that everything lined up and was going to be square. I used the included instructions from Custom Works to modify the spindles to accept the new C5 calipers and brackets.
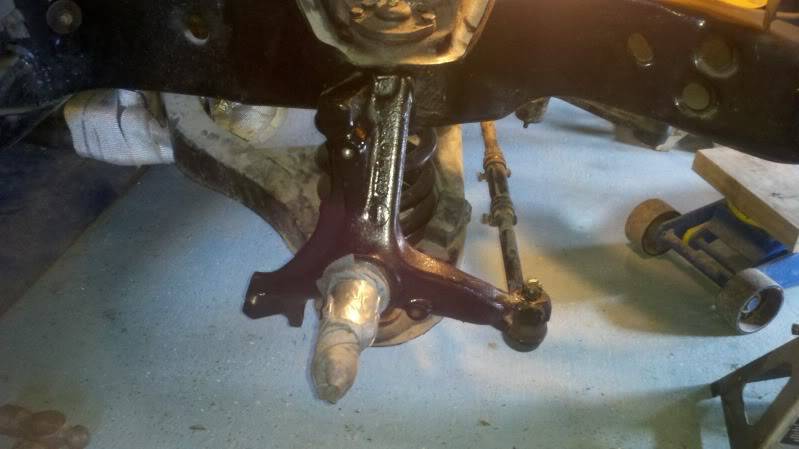
First I had to actually cut into my spindles, and let me tell you that was a cool feeling that I was doing the upgrade, but once that one ear came off of the spindle I realized there was no turning back.
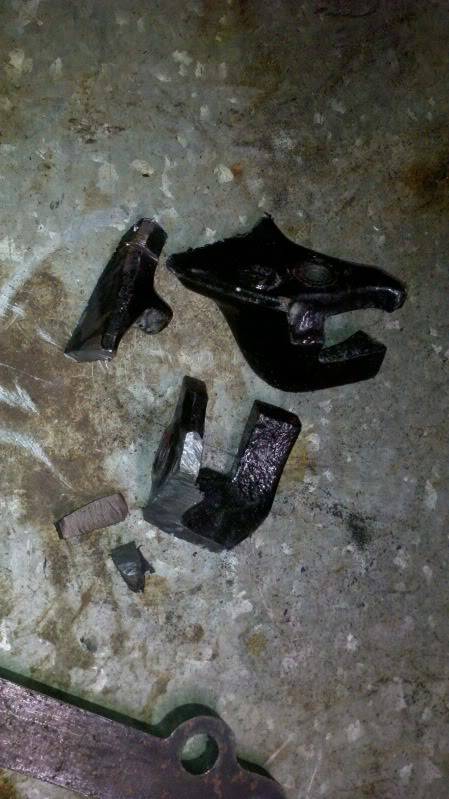
Once the ears came off the spoilers to clear the new brackets I used a grinding wheel to clean up and smooth out the areas where I made the cut. I think that it turned out really well.
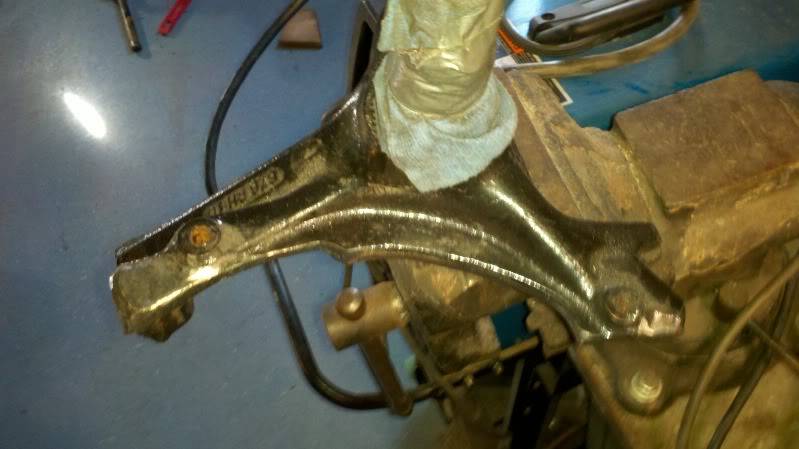
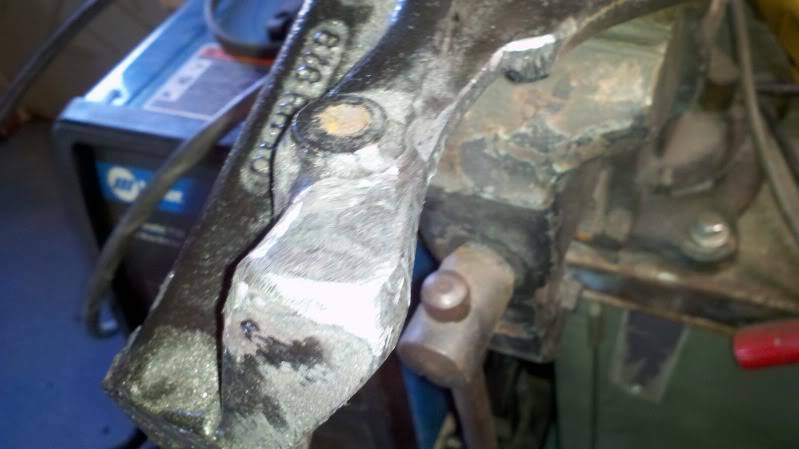
The two holes for the old dust cover need to be drilled out with a 3/8 inch drill bit and then tapped with a 7/16 by 14 threads tap. This is what took a really long time is making sure that the hole for the tap was completely square and that the tap was going in straight. If this is off it can cause failure by making the bolt fatigued.
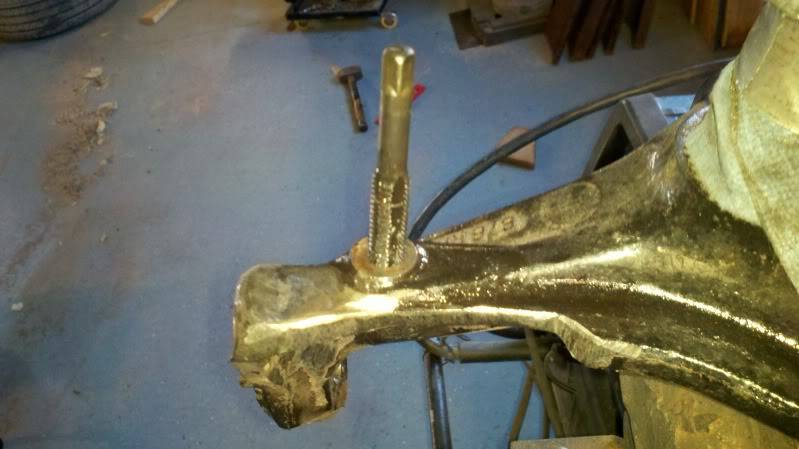
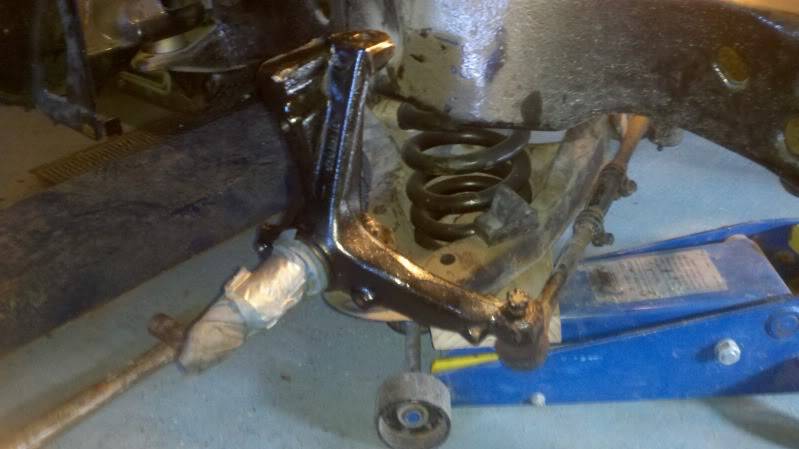
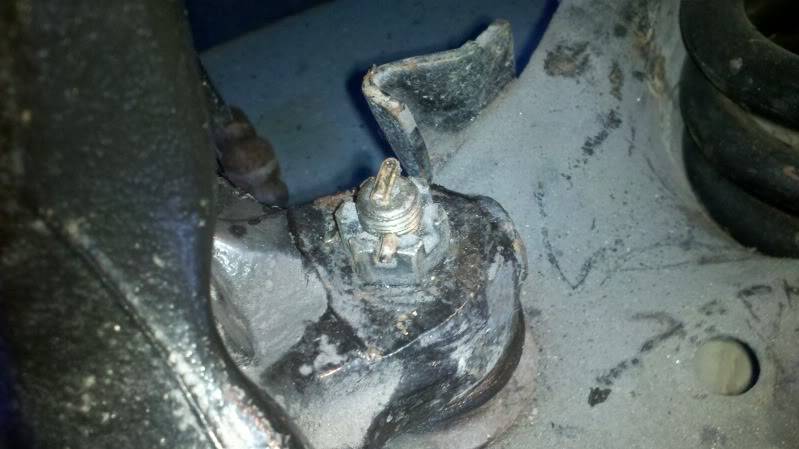
Next I had to re-install the spindles onto the car and getting the C5 brackets installed and torqued down. I made sure to check all of the fitment of the brackets before I did a final install and glad that I did because I ended up needing to remove more of the spindle. I also made sure to torque down the ball joints to the correct specs and install the cotter pins so the bolts won't come out again. I bought new grade 8 bolts and torqued them down to what was recommended by Custom Works. I added a little thread lock to them for some added insurance.
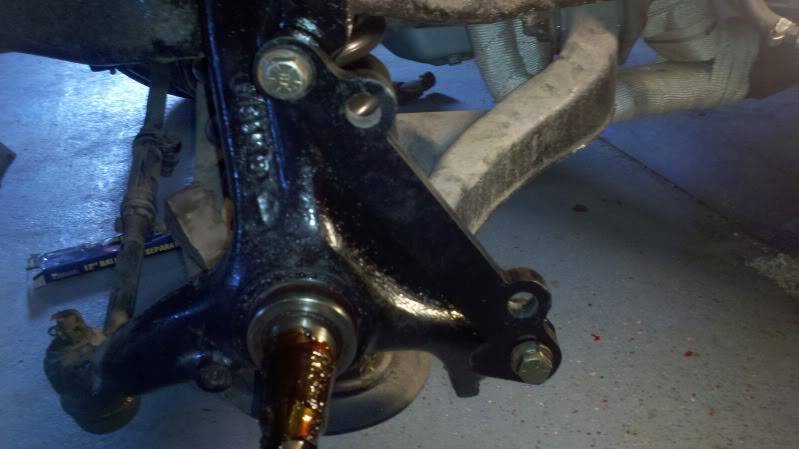
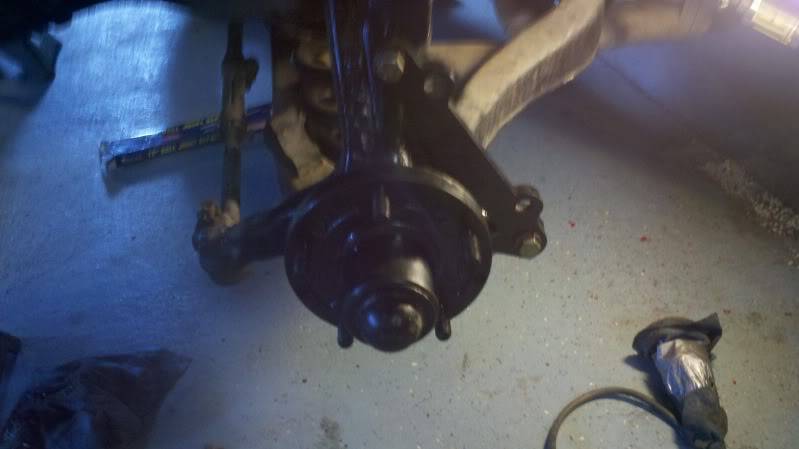
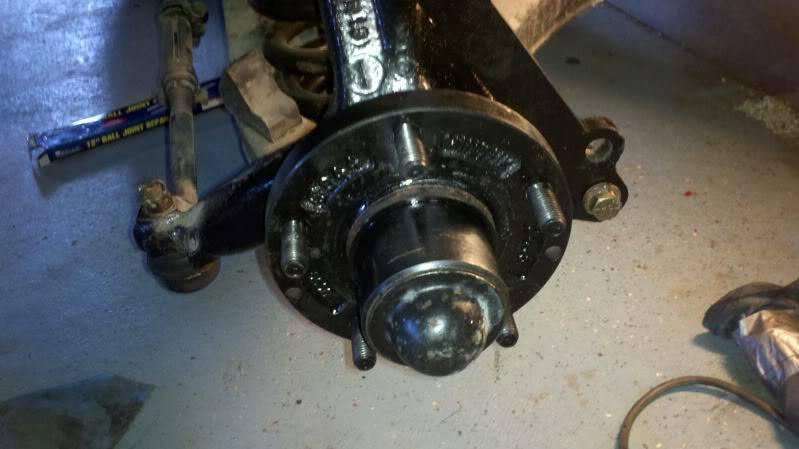
Now it was time to install the hubs that I also bought from Custom Works. They are pieces that were machined from 3rd gen F-body rotors and turned down into hubs to allow for the correct spacing for the wheels. They came from Custom Works with new inner and outer wheel bearings along with new dust covers for the rear. One downfall to the hubs is the studs are Metric, so I either have to press on some new SAE studs make sure not to mix and match my lugs. Once they were installed I torqued the spindle nuts down to 12 ft/lbs. to set the bearings, then backed the nuts off until there was some play back and forth with the hub. Once I felt the play I tightened the nut to the next closest hold for the cotter pin and king nut to line up. I put new cotter pins in and put the dust caps back on.
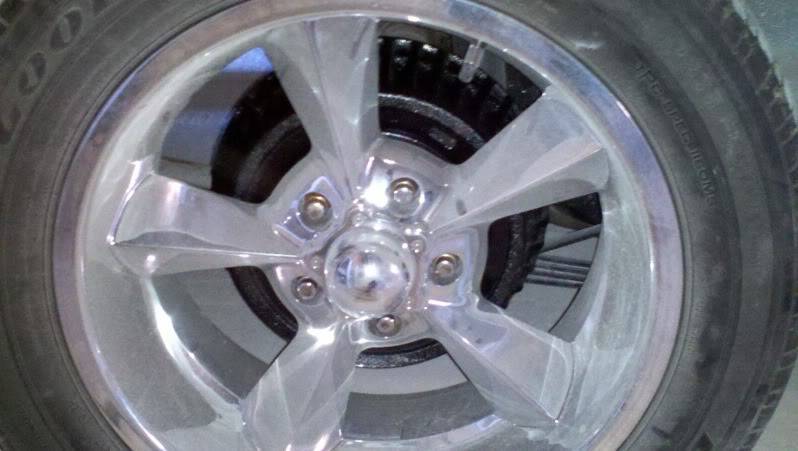
This was the most exciting part for me. I put on the rotors and calipers to check the clearance with the wheels, and what luck the 17" rims that I bought fit over the calipers! Actually I knew they were going to fit because before I bought the rims I used a template that was supplied by Kore3 to measure the rims. Although I wasn't 100% sure, I was confident enough to buy the rims. They fit great, although I may need a small spacer for the rims when I install new pads, as when they have new pads, they calipers float too far out causing the rims to contact the caliper.
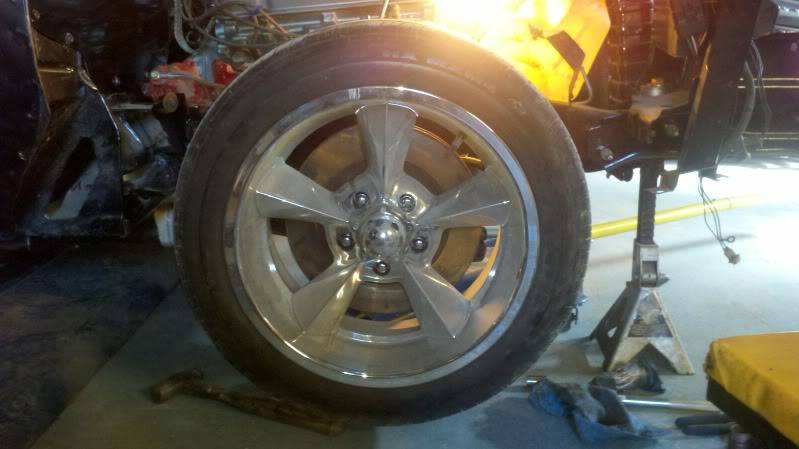
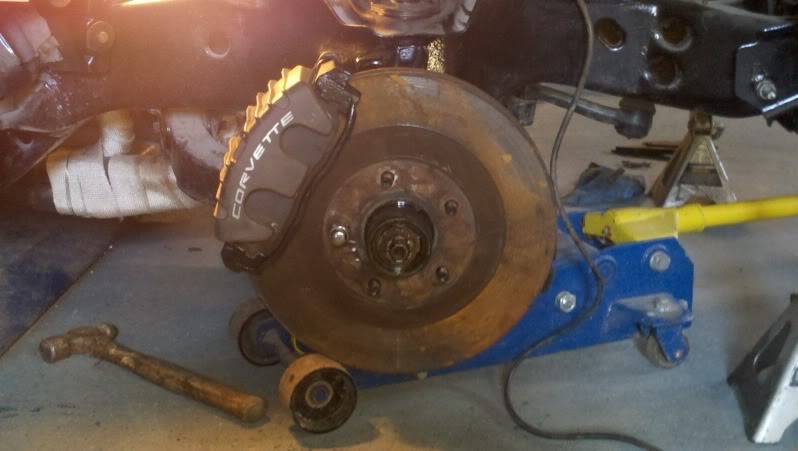
Lastly I installed the stainless steel braided hoses that came with the kit. They are conversion hoses that are metric on the side for the calipers and SAE for the side that bolts to the brake lines. That way it is a complete bolt on kit that doesn't require any other fittings. They came with new clips, crush washers, and bolts. Very complete kit from Custom Works, and they did a great job with the parts that I ordered. And last but not least my favorite picture of the day.
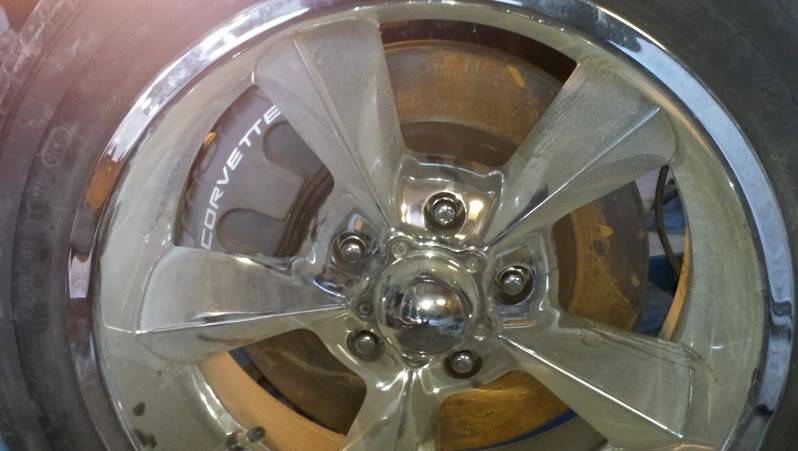
There is some slight surface rust on the rotors, but will clean up as soon as I hit the brakes.The only thing that needs to be finished is the brakes need to be bled. I tried to bleed them, but for some reason they were being difficult. It was getting late so I decided to call it a day. I was able to cross that off my list of things to do. I was putting this off because I knew that it was going to be time consuming, and I am glad that I jumped in head first.
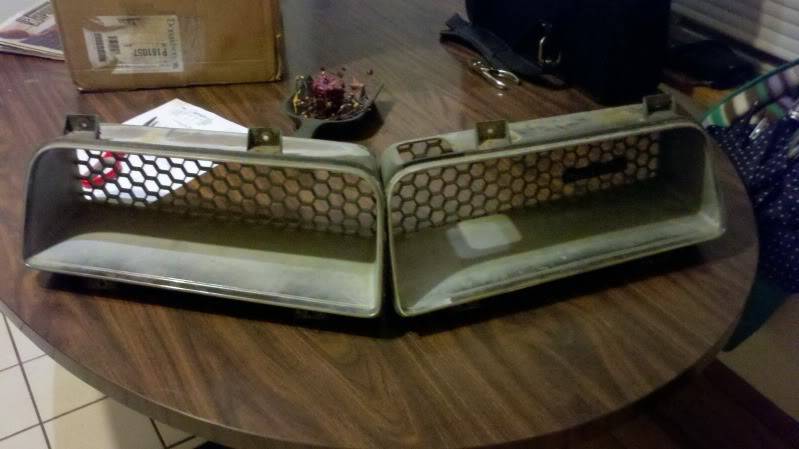
I also was able to get some 1976 grills from a member on 78ta.com, and I will be painting them black to match the trim. I am really excited to see what the car is going to look like when it is finished.
That is all for now. Enjoy.
1955 Nomad project LC9, 4L80e, C5 brakes, Vision wheels
1968 Camaro 6.2 w/ LSA, TR6060-Magnum hybrid and etc SOLD
1976 T/A LS1 6 Speed, and etc. SOLD
Follow me on Instagram: ryeguy2006a
03-06-2012 #25
Registered User
- Join Date
- Sep 2009
- Posts
- 2,969
I bought the tips from a member on another site who had them custom made. I don't know who made them, but they did a great job. Originally Posted by CruizinKev

1955 Nomad project LC9, 4L80e, C5 brakes, Vision wheels
1968 Camaro 6.2 w/ LSA, TR6060-Magnum hybrid and etc SOLD
1976 T/A LS1 6 Speed, and etc. SOLD
Follow me on Instagram: ryeguy2006a
03-06-2012 #26 Registered User
- Join Date
- Dec 2005
- Location
- Birmingham, AL
- Posts
- 3,355
Looking great. I have a 74 and I love the front fascia on these cars. You just don't see many 74-76 builds. I have been wanting to go with a similar gunmetal grey, so it is nice to see this body style with that color.
Stephen
03-06-2012 #27
Registered User
- Join Date
- Apr 2010
- Location
- Portland, OR
- Posts
- 357
Looks Awesome, amazing what you've done with that car!!!
1973 Firebird 466 Pontiac, T56, C5 Brakes, PTFB and Hotchkis suspension
2011 Camaro SS Supercharged, ZL1 body and brakes, Z28 suspension.
03-06-2012 #28 Registered User
- Join Date
- Feb 2005
- Location
- Sydney, Australia
- Posts
- 1,797

A lot of work posting all those pics to catch everyone up, eh?
Looking good, Ryan!Regards,
Leigh
Sydney, Australia
1971 Firebird 455
https://www.pro-touring.com/showthre...Project/page27
03-06-2012 #29 Registered User
- Join Date
- Mar 2009
- Location
- SoCal
- Posts
- 1,240
The new ride height in the front looks much better. What was going on with the old ride height? It seemed really high.
Brett H.
1979 Pontiac Firebird Trans Am
1991 Mazda Miata
2005 Ford Mustang GT
1987 Ford Mustang GT - Sold 06-29-2014
1988 Oldsmobile Cutlass Ciera - RIP 9-17-2011
1992 Chevrolet Corvette - Sold 10-12-2017
03-07-2012 #30
Registered User
- Join Date
- Sep 2009
- Posts
- 2,969
Thanks, It took me quite a while to go through all the pictures. But like I said, it has become more of a Resto-Mod and thought it belonged over here too. I don't see a lot of 2nd gen Trans Am's so I thought I would add to the collection. Originally Posted by LeighP
1955 Nomad project LC9, 4L80e, C5 brakes, Vision wheels
1968 Camaro 6.2 w/ LSA, TR6060-Magnum hybrid and etc SOLD
1976 T/A LS1 6 Speed, and etc. SOLD
Follow me on Instagram: ryeguy2006a
03-07-2012 #31
Registered User
- Join Date
- Sep 2009
- Posts
- 2,969
I am not quite sure what happened with the old ride height. I bought some new replacement springs from NAPA, and they made the car sit very high. Not sure if they would have settled enough for my liking, but I decided to just swap them out. I am on the home stretch to finish the car, so I just need to focus on getting the car finished. The C5 brakes were my biggest hold up because it was intimidating to me, but I did it and am very happy with the results. Originally Posted by 79-TA
1955 Nomad project LC9, 4L80e, C5 brakes, Vision wheels
1968 Camaro 6.2 w/ LSA, TR6060-Magnum hybrid and etc SOLD
1976 T/A LS1 6 Speed, and etc. SOLD
Follow me on Instagram: ryeguy2006a
03-19-2012 #32
Registered User
- Join Date
- Sep 2009
- Posts
- 2,969
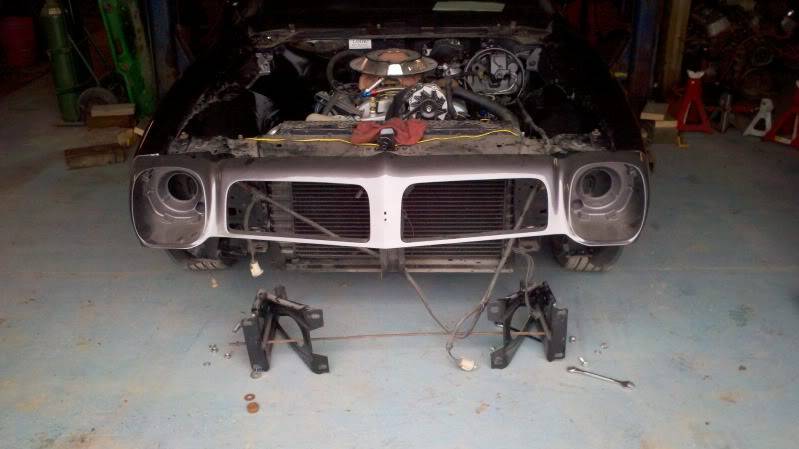
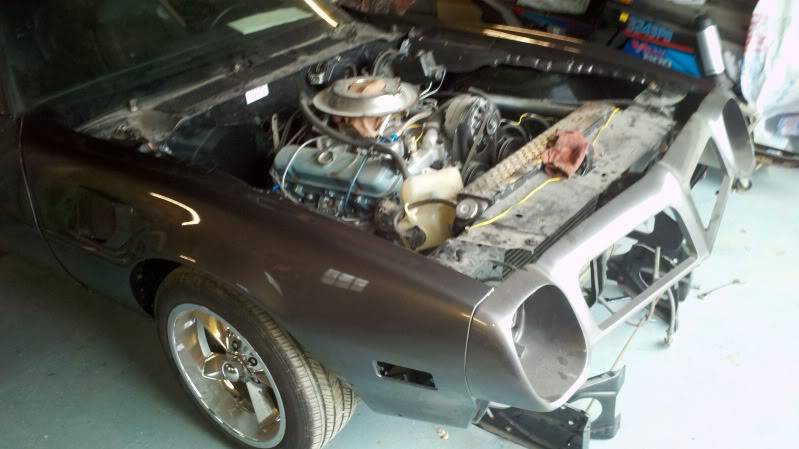
I was able to take Friday and Saturday off of work this week and I was able to get a lot done on the car. My first goal was to get the fenders and front end of my car back together. I put the fenders and nose piece together and all of the body lines matched up very nicely. The fender that is on the car was actually the fender that was damaged earlier. My body guy did a fantastic job of getting it back together and you can't tell that the fender was ever damaged. Here are some pictures.
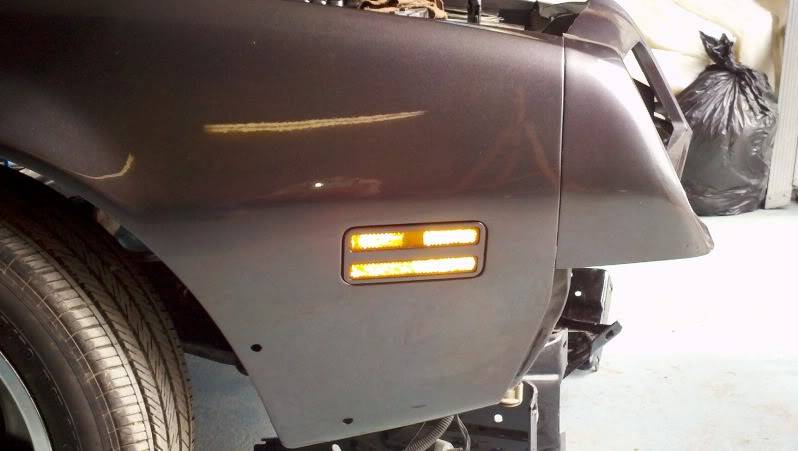
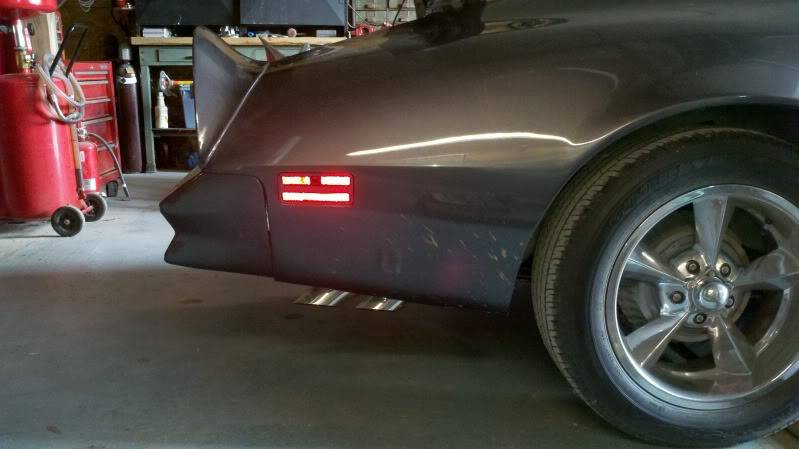
I was able to get the marker lights in and they fit very nicely.
Then I got the front bumper on.
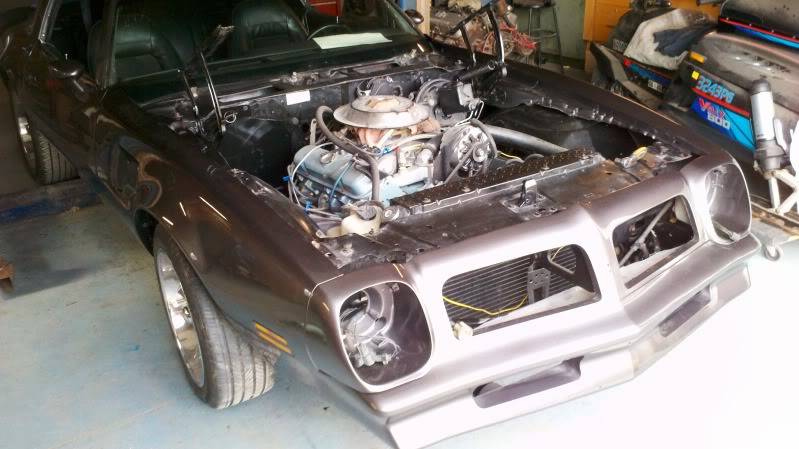
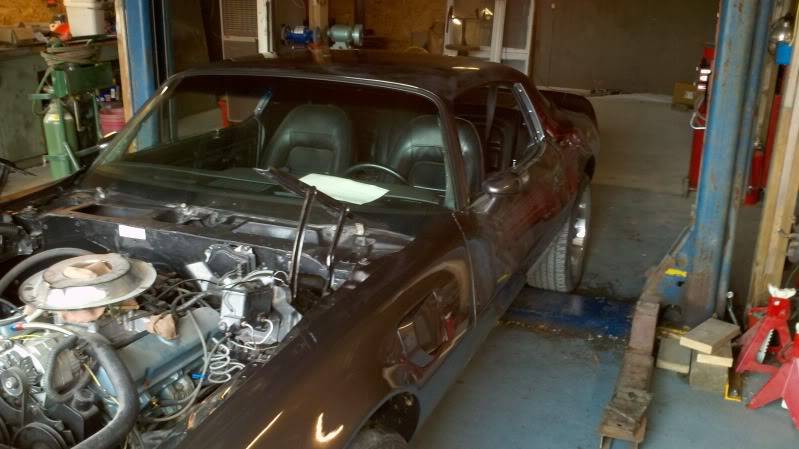
Here is a picture of the stance with all of the front sheet metal on.
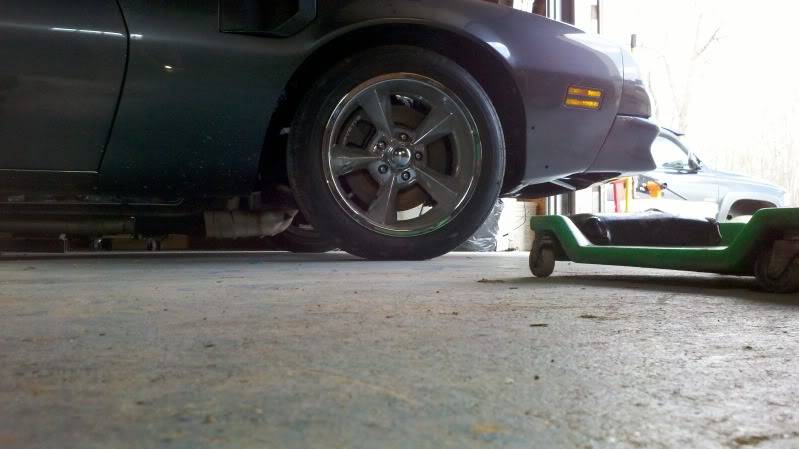
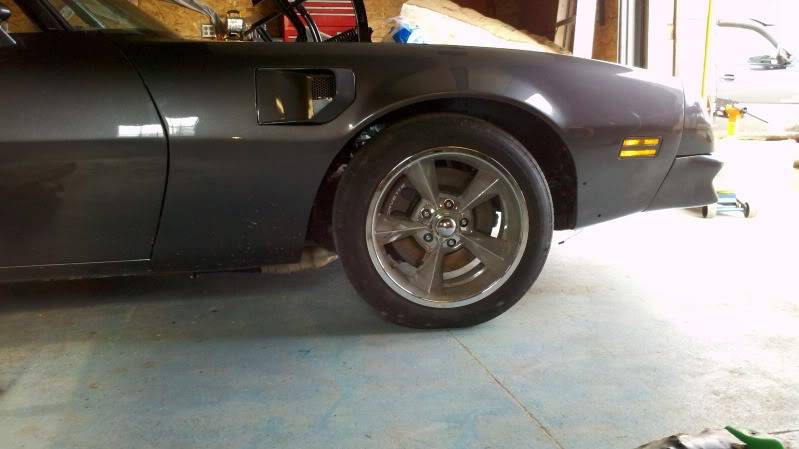
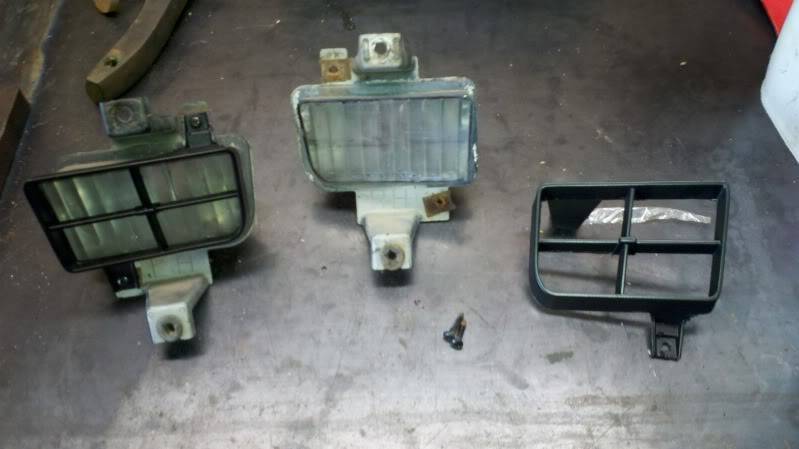
I blacked out the front grills and the fog light bezels.
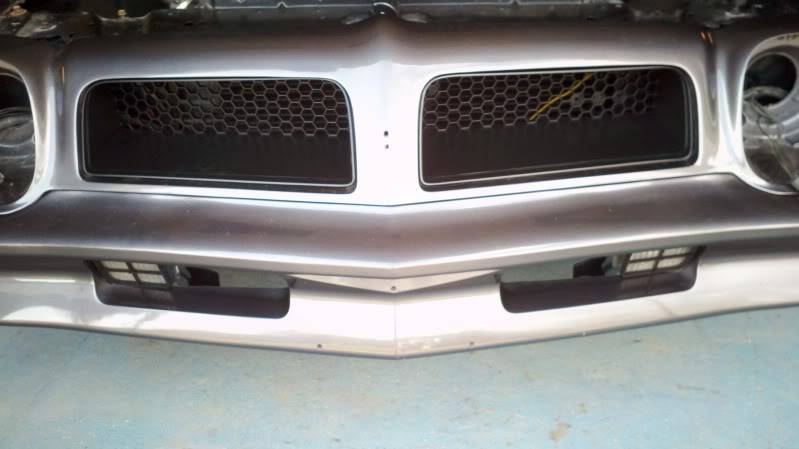
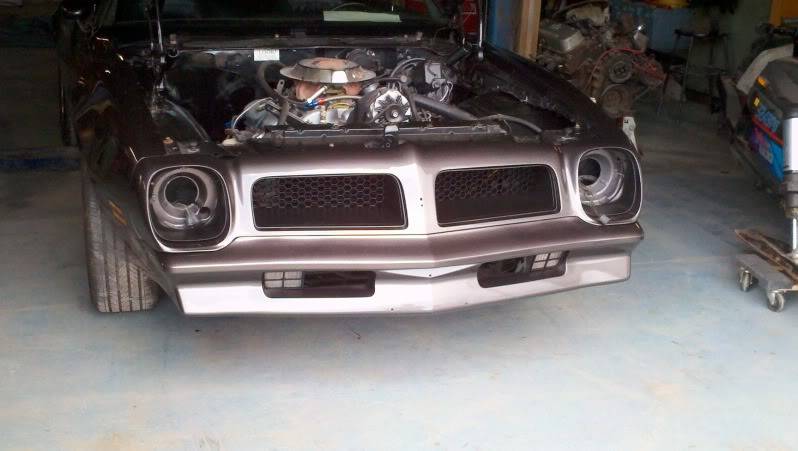
I feel like I didn't get that much done, but I think it is because I am just getting back to where I was before I had the incident with the fender. This is all that I got done on Friday. More to come for Saturday. I will post those pictures up soon.
Ryan
1955 Nomad project LC9, 4L80e, C5 brakes, Vision wheels
1968 Camaro 6.2 w/ LSA, TR6060-Magnum hybrid and etc SOLD
1976 T/A LS1 6 Speed, and etc. SOLD
Follow me on Instagram: ryeguy2006a
03-19-2012 #33
Registered User
- Join Date
- Sep 2009
- Posts
- 2,969
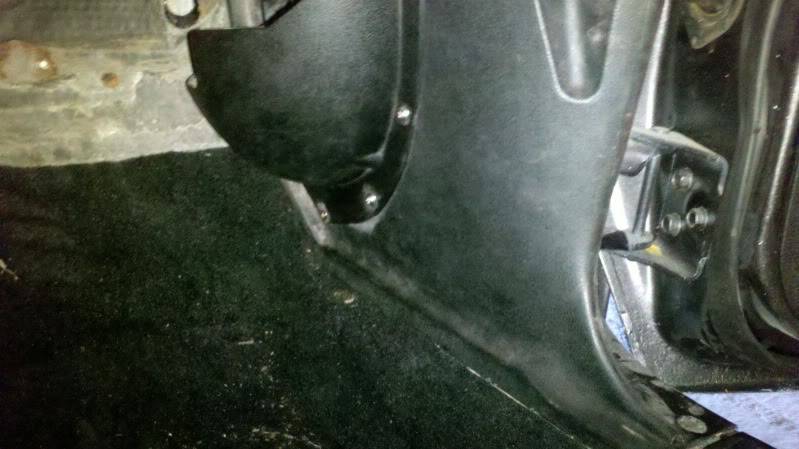
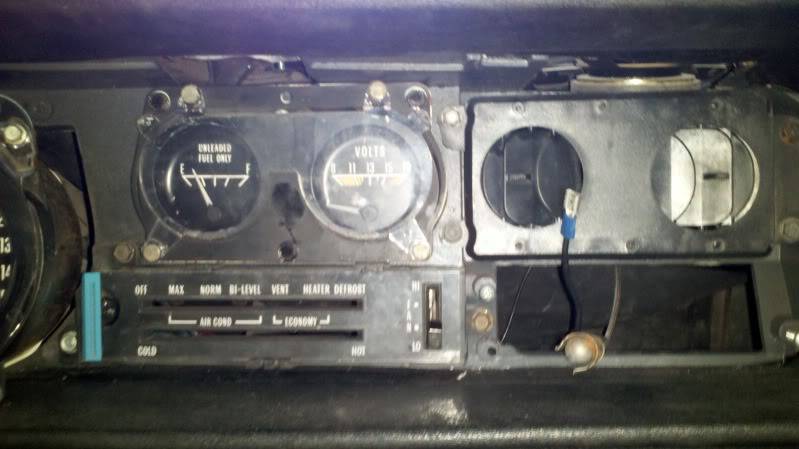
Now I was also able to work on the car this Saturday as well. I wasn't able to get as much done as I hoped, but progress is progress. What took me so long was the first two tasks I did; Kick panel installation and fixing the fuel gauge. I was able to get the fuel gauge reading correctly as well as putting my kick panels on. I didn't think they were going to take that long, but that is how it goes. They ended up taking me most of the morning to accomplish. Any way, I was able to get those tasks done and on to other things.
Here is the car in the air when I was fixing the fuel gauge.
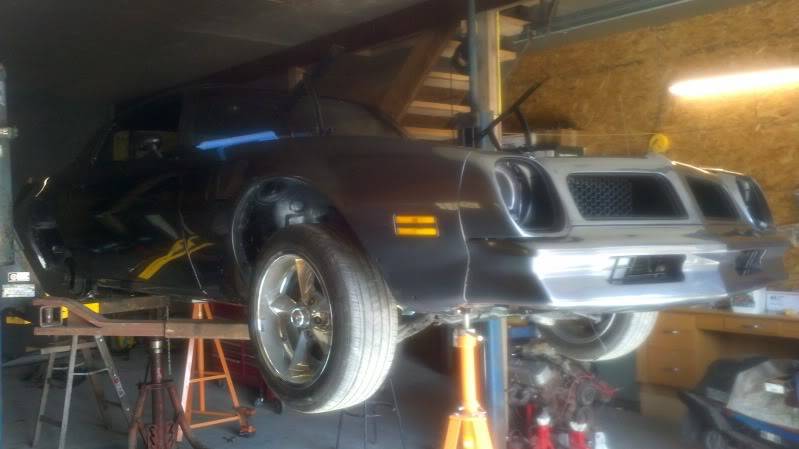
Here are the kick panels that I installed.
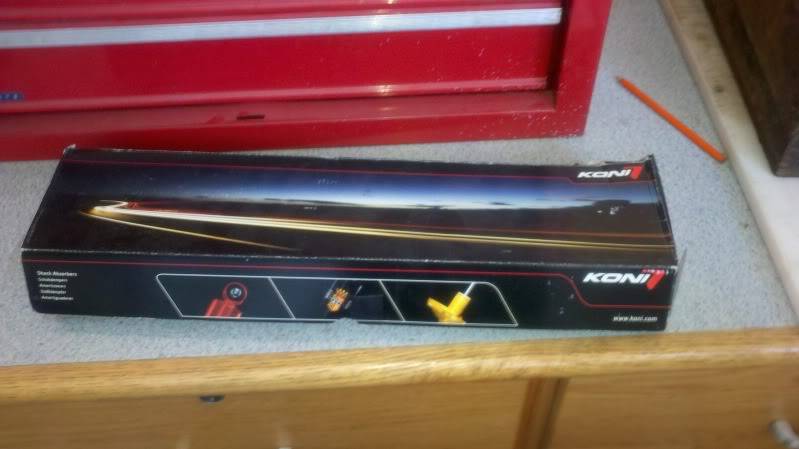
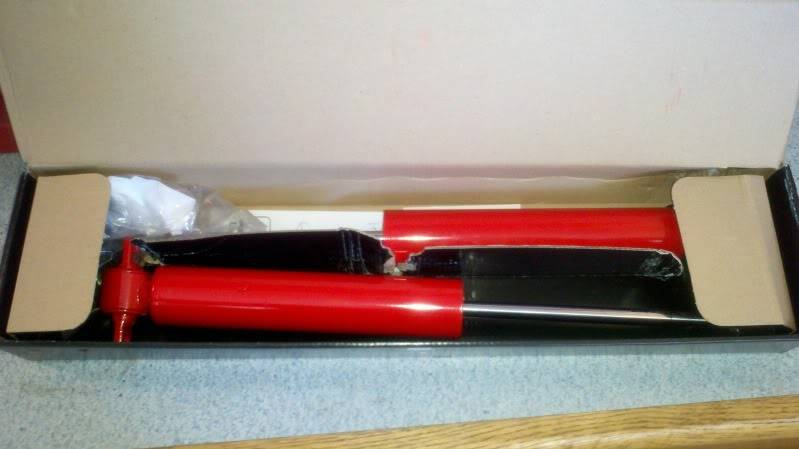
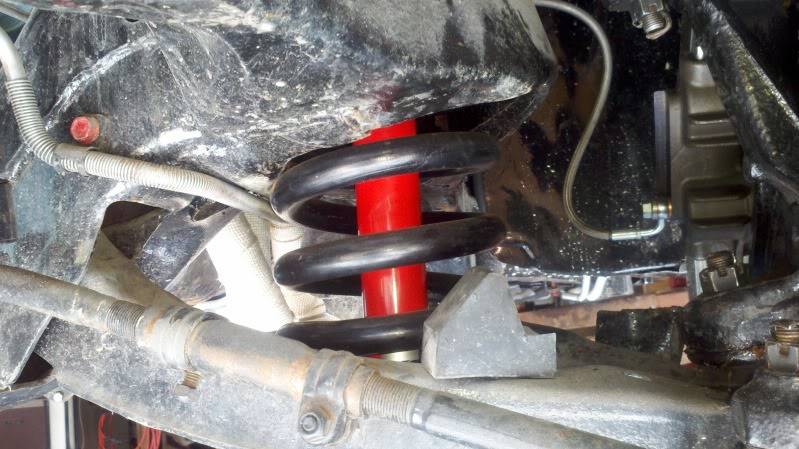
Once they were done, I was able to get my Koni Adjustable shocks on. That was a good feeling bolting on something that was new!
While the car was on the lift, I also painted my rear drums black so they weren't in primer any longer.
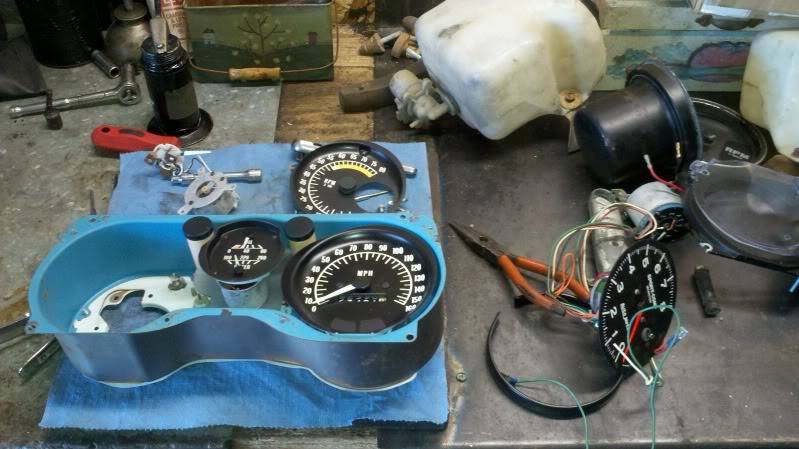
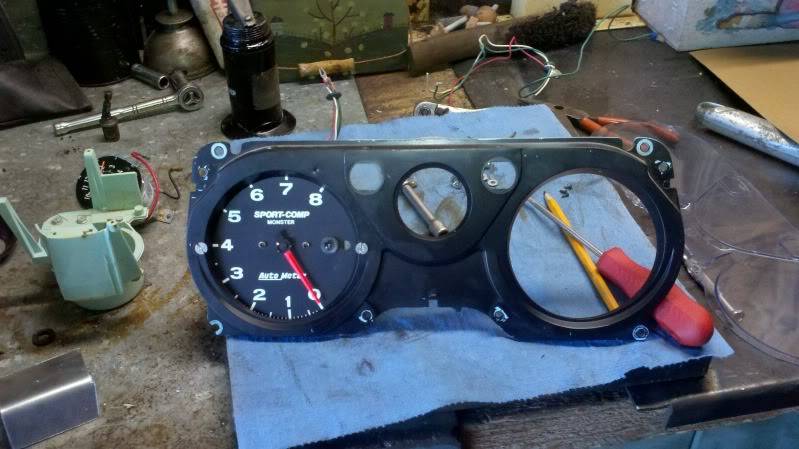
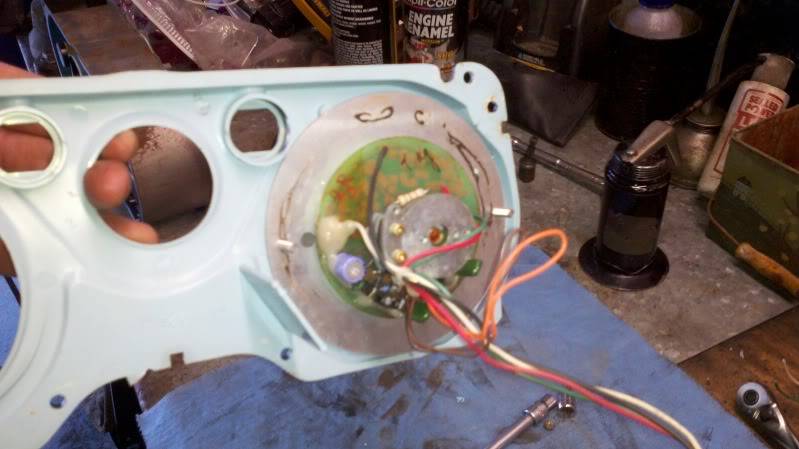
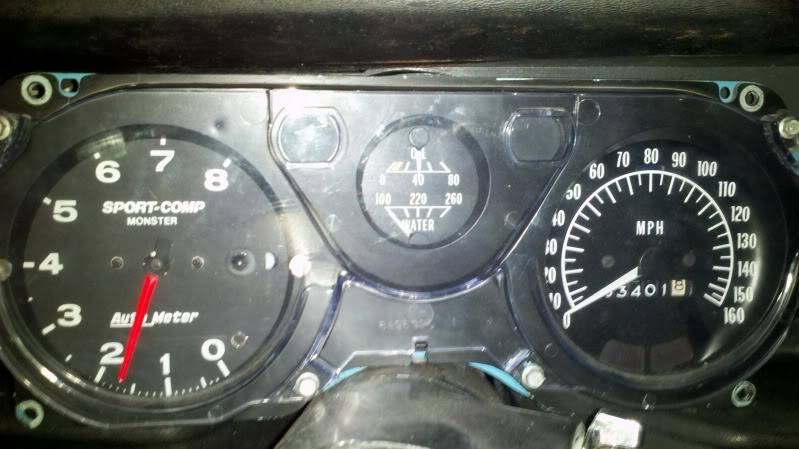
I was having trouble with my factory 8k tach so instead of having it sent away to be fixed, I gutted an Autometer gauge that I had laying around and grafted it into my factory gauge bezel. I think that it turned out great and will be a good temporary fix to my issue of not having a tach.
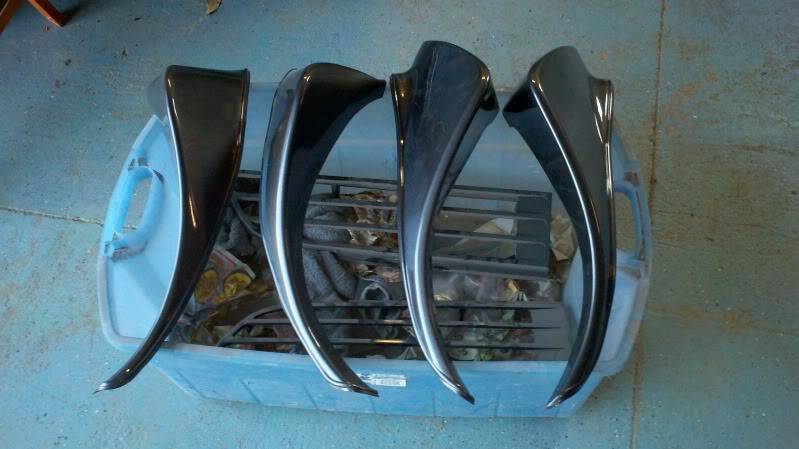
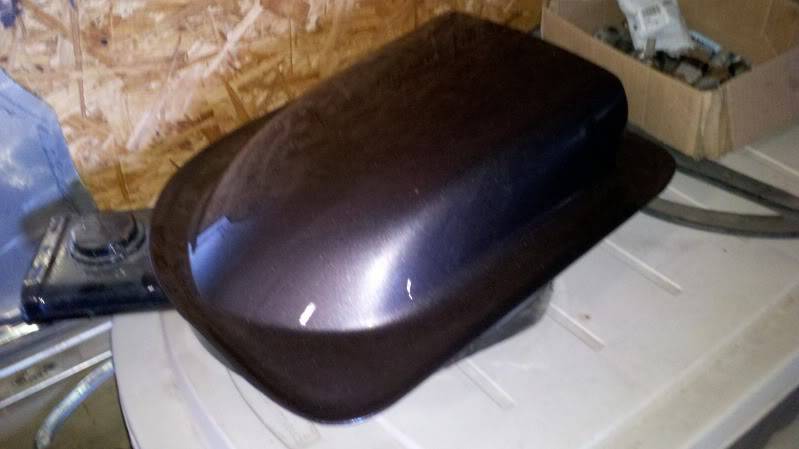
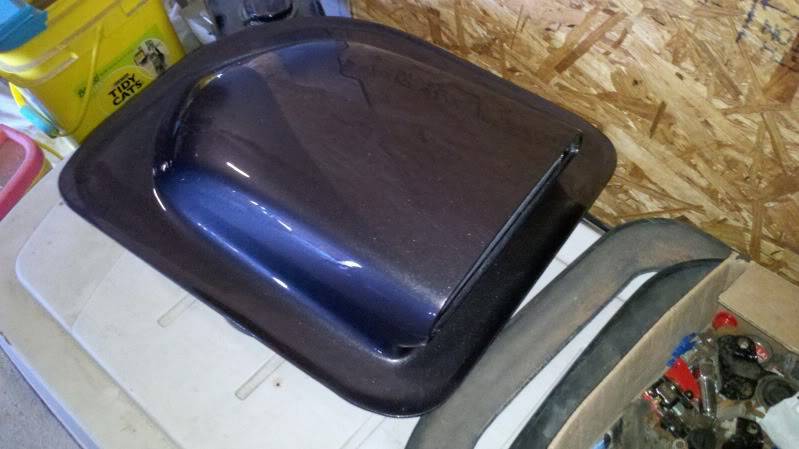
I now have the rest of my parts all painted! I got the wheel spoilers and shaker back from my paint guy. Let me tell you it looks so good. I cannot wait to put them all on the car. It is going to change the appearance of the car completely. Here they are.
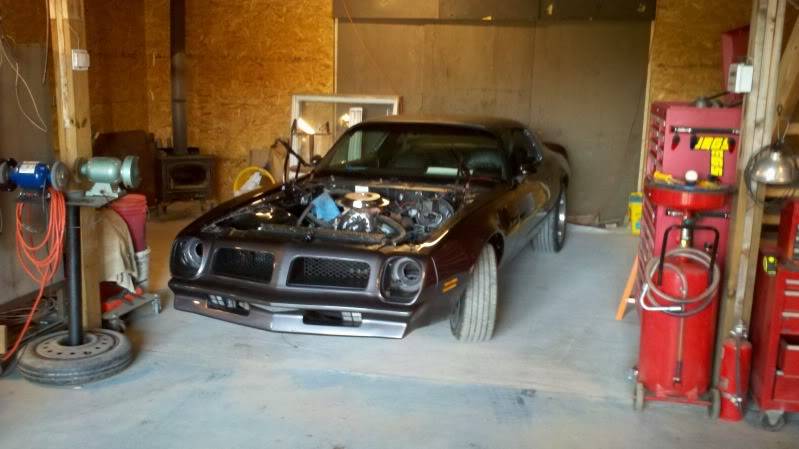
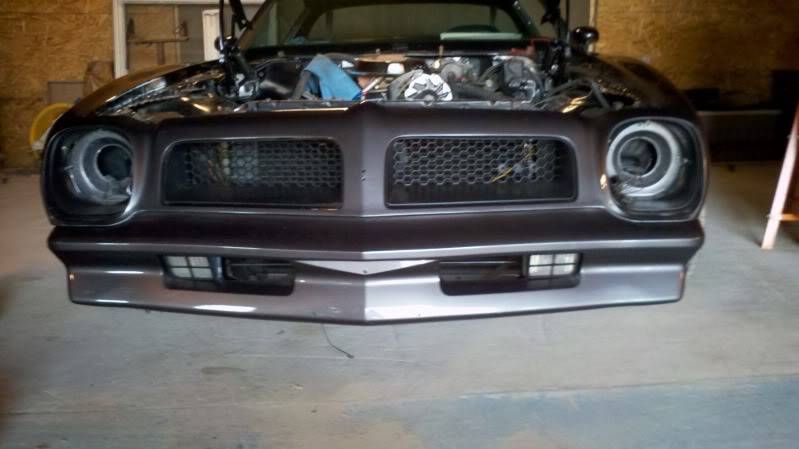
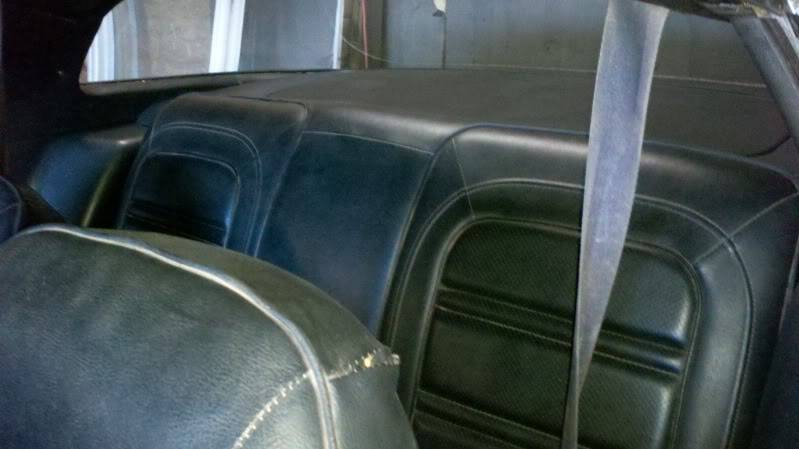
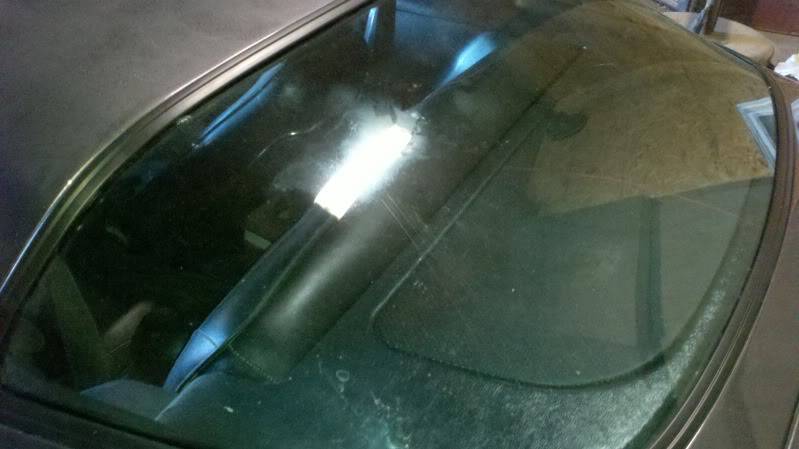
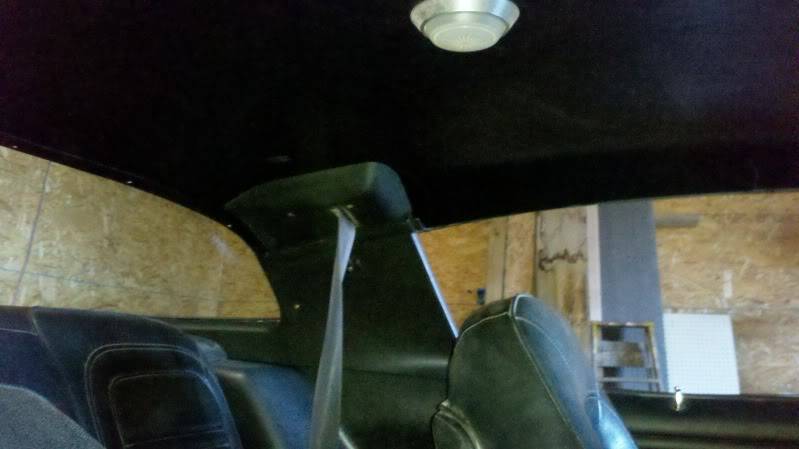
Here are just another few photos of the car just parked and in its current condition.
1955 Nomad project LC9, 4L80e, C5 brakes, Vision wheels
1968 Camaro 6.2 w/ LSA, TR6060-Magnum hybrid and etc SOLD
1976 T/A LS1 6 Speed, and etc. SOLD
Follow me on Instagram: ryeguy2006a
03-19-2012 #34 Registered User
- Join Date
- Dec 2011
- Posts
- 120
Very nice
03-19-2012 #35
Registered User
- Join Date
- Mar 2009
- Location
- overseas
- Posts
- 3,434
good work man!
Kevin S. (overseas in Germany)
1963 Chevrolet Impala 2d ht Coupe
www.CruznArt.com
CRUZN - Automotive Artworks
03-19-2012 #36 Registered User
- Join Date
- Oct 2006
- Location
- Norway
- Posts
- 513
Like it...
03-19-2012 #37 Registered User
- Join Date
- Feb 2007
- Posts
- 38
Lookin' good! I like the exterior color.
03-19-2012 #38
Registered User
- Join Date
- Sep 2009
- Posts
- 2,969
Thanks guys, I really appreciate the compliments. I haven't seen another 2nd gen firebird in this color and I wanted to be different than all the rest that you see. I am very happy at the way that it turned out. I can't wait to get it out on the road.
1955 Nomad project LC9, 4L80e, C5 brakes, Vision wheels
1968 Camaro 6.2 w/ LSA, TR6060-Magnum hybrid and etc SOLD
1976 T/A LS1 6 Speed, and etc. SOLD
Follow me on Instagram: ryeguy2006a
03-24-2012 #39
Registered User
- Join Date
- Sep 2009
- Posts
- 2,969
I was able to get in the garage on Friday afternoon for a few hours. I have been having a lot of trouble getting my brakes bled after I did the C5 front brake conversion. My dad and I had about 10 hours logged into trying to get the brakes bled over the past few weeks. It had boggled my mind that it was taking this long and we weren't getting anywhere because we tried everything. I thought that it was the proportioning valve since that was the only piece of the system that wasn't new or refurbished. The worst part of the whole deal, was that before I put the C5 brakes on, all of the brakes were working fine? So we were all lost as to what the problem could be.
I finally said that enough was enough and we pulled the Master Cylinder off and started from there. I was very surprised to find that there was quite a bit of rust on the back of the master cylinder around the pump? Upon further inspection we found that the front plunger was sticking? I bought a new/refurbished piece from a local parts store about 4 years ago and thought that it would be good. I guess it makes me think differently about some of the auto parts stores. Since I needed a new one, I called Tobin at Kore3 and he told me that I wouldn't be happy with the petal feel on the stock MC with the 1 1/8th inch bore. He said that a good cheaper alternative to buying an aftermarket piece would be to buy a stock 68-76 C3 Corvette Manual brake MC. These come with a 1" Bore which is the same as the bore on the factory C5 brakes. It should give me the same petal feel as the factory C5 and much better stopping power than the original brakes.
Now, although I was upset that I spent all that time thinking that I had a good MC, I was happily surprised to find out that the parts store actually gave me a full exchange price on the MC I bought 4 years ago and the C3 MC was cheaper than the one I originally bought so I ended up getting back $8 in change! I didn't think that was too bad. The C3 MC was completely bolt in, with the exception of having to make a spacer to make up for the difference with the brake petal plunger. It took me around 20 mins to make the spacer and it fit great. I will get some pictures next weekend when I go to work on the car. I was able to get the new MC installed in about 20 mins and bled in about another 20 mins. It is amazing to me that it was as simple as getting a new MC, and it actually looks fairly stock. I am completely happy with my upgrade now.
That is all for now.
Ryan
1955 Nomad project LC9, 4L80e, C5 brakes, Vision wheels
1968 Camaro 6.2 w/ LSA, TR6060-Magnum hybrid and etc SOLD
1976 T/A LS1 6 Speed, and etc. SOLD
Follow me on Instagram: ryeguy2006a
03-25-2012 #40 Registered User
- Join Date
- Jul 2008
- Location
- ohio
- Posts
- 1,135
the car has came a long way keep up the great work
keep the wheels a spinning and the Beavers a grinning (burt reynolds-smokey and the bandit)

 Reply With Quote


