


Results 21 to 40 of 121
-
11-29-2011 #21
 Registered User
- Join Date
- Jul 2011
- Location
- South Dakota
- Posts
- 118

Out comes the plasma cutter... I am sure there may be better ways to get this rear seat brace out... but this is what I did.
I drilled out all the spot weld I could find that held the brace to the floor the the car....
The car had lots of undercoating in the wheelhouses... I heated and scrapped as much as I could out... I know I would not be using the inner housings, for I am going with DSE minitubs. With all the gunk in the wheelhouse, I could hardly find the spot welds... so I figured I would just plasma it out of there...
Then used a air hammer to remove the leftover wheel house skin
Well after all that the rear seat brace was still fighting me... so I decided to remove the rear part of the brace, so as to only have to deal with on panel at a time.
Finally it was out...
Remember what I said about hidden rot... look what was hiding behind that brace. Looks like it going to be a Full Trunk pan now! (see the list keeps growing!)
67 Firebird Convertible
Jarrod
My Build Thread:
https://www.pro-touring.com/showthre...rd-Convertible)
-
11-29-2011 #22 Registered User
- Join Date
- Oct 2009
- Location
- Amherst, OH
- Posts
- 524
Dang.....son of a!!!
I just installed a complete floor pan in my Dad's 69 convertible, now I'm wondering how bad it might be in these areas!
11-29-2011 #23
Registered User
- Join Date
- Oct 2008
- Location
- Durham,NC
- Posts
- 664
Double what you think you will spend on the car and there is the rel figure in the end.
02-07-2012 #24
Registered User
- Join Date
- Jul 2011
- Location
- South Dakota
- Posts
- 118
Look inside... Looks like a full trunk pan was a wise choice.
Had to get a little crazy with the plasma cutter to get in here...
67 Firebird Convertible
Jarrod
My Build Thread:
https://www.pro-touring.com/showthre...rd-Convertible)
02-07-2012 #25
Registered User
- Join Date
- Jul 2011
- Location
- South Dakota
- Posts
- 118
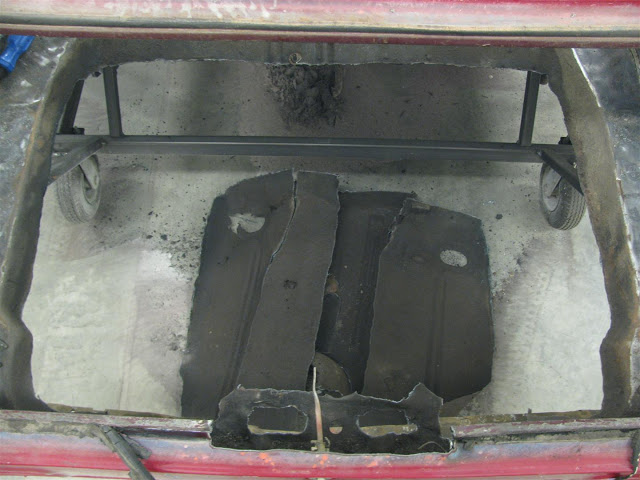
As you can see the trunk floor was in need of replacement anyway. Original plan was to just to a partial trunk floor, but after all the rot uncovered under the seat brace... it was decided to do a FULL trunk pan.
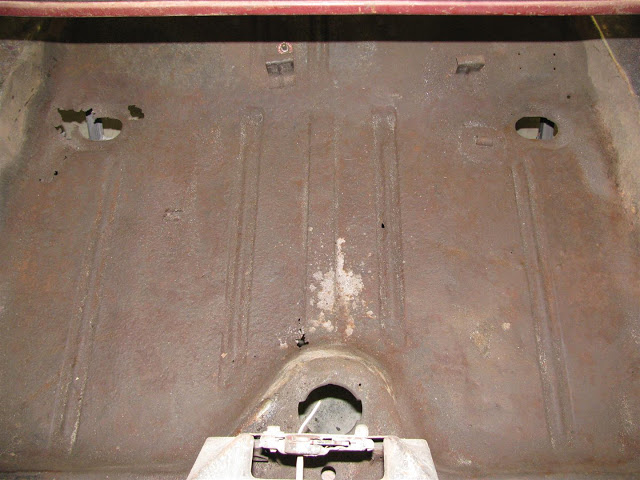
And a few minutes with the plasma... look at all my trunk room now!
 67 Firebird Convertible
Jarrod
My Build Thread:
https://www.pro-touring.com/showthre...rd-Convertible)
02-07-2012 #26
Registered User
- Join Date
- Jul 2011
- Location
- South Dakota
- Posts
- 118
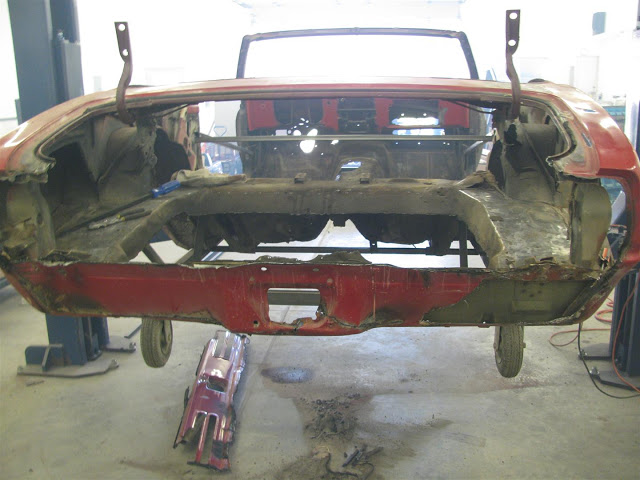
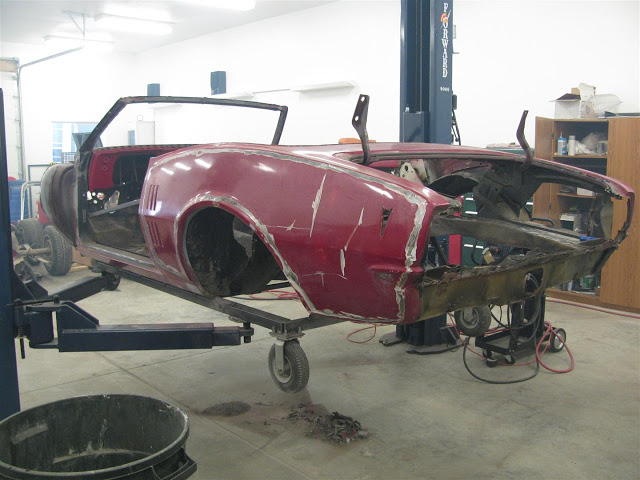
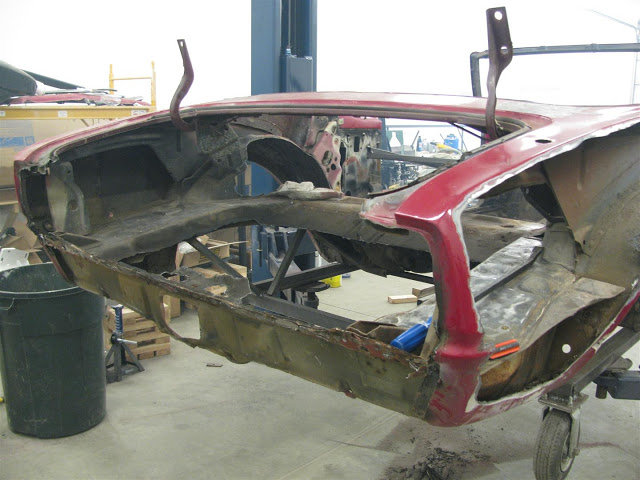
Next was the Tail panel... after finding these beautiful repairs under the bumper... I knew a new tail panel would be easier than to undo all the wonderful bodywork.
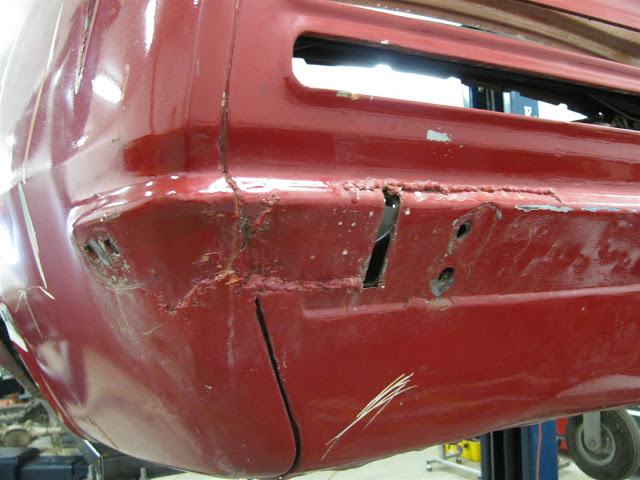
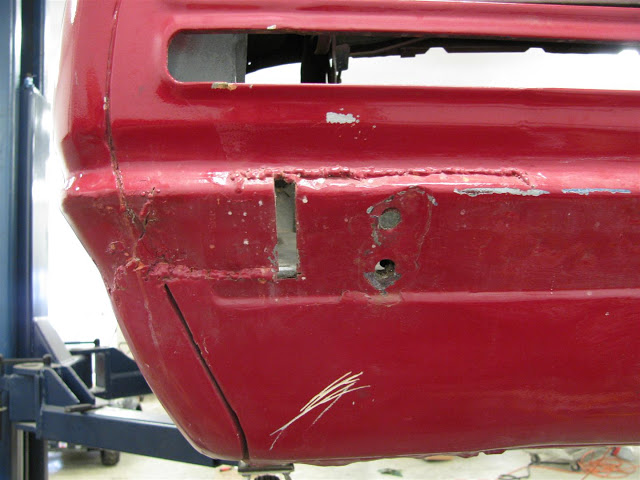
Off it comes... I must say, knowing I wasn't going to use any of the metal under the tail panel made it WAY easier to remove than if I had to hunt down all the spot welds and surgically remove it. It was a bunch of air-hammer time!
 67 Firebird Convertible
Jarrod
My Build Thread:
https://www.pro-touring.com/showthre...rd-Convertible)
02-07-2012 #27
Registered User
- Join Date
- Jul 2011
- Location
- South Dakota
- Posts
- 118
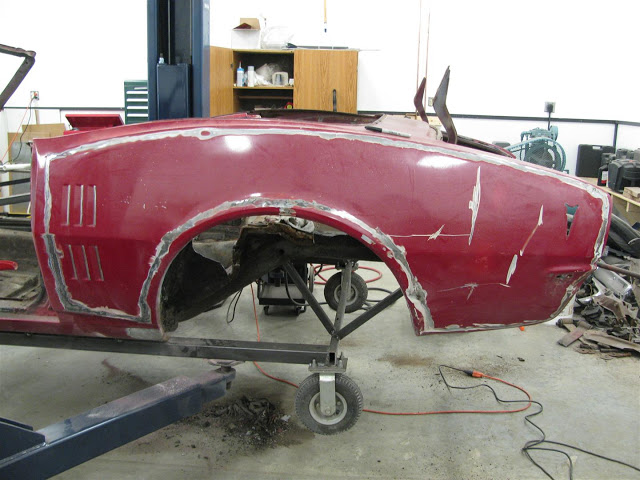
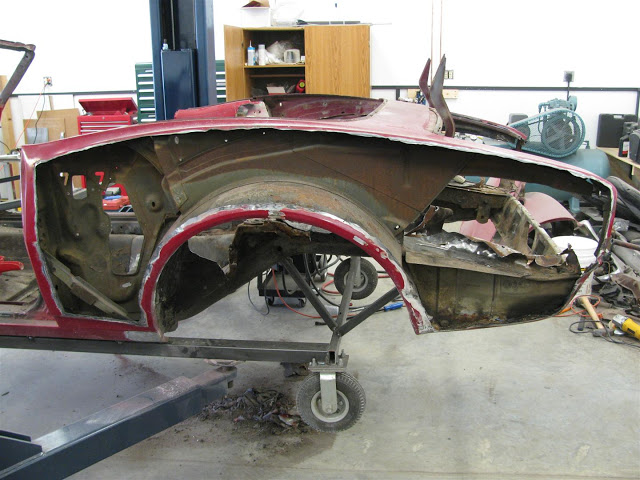
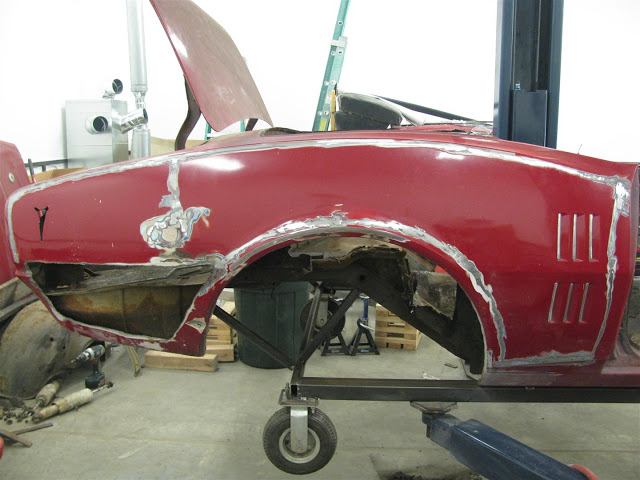
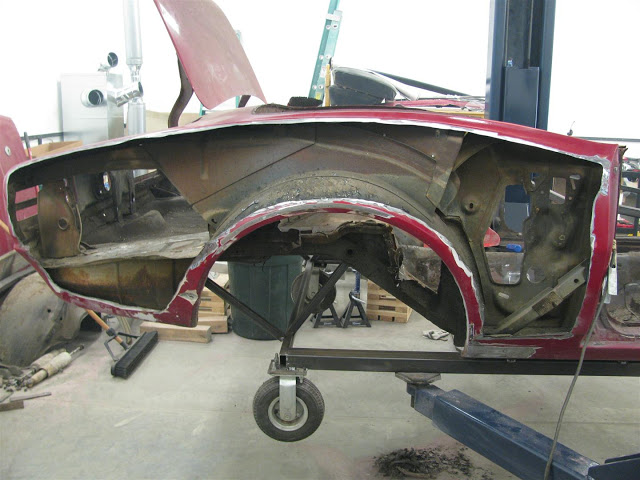
Moving on to the quarter panels... This car is one of those examples of what you can hide with paint and bondo. I started by sanding down the paint in a few test areas to see what I was dealing with.... looks like a classic quick fix.

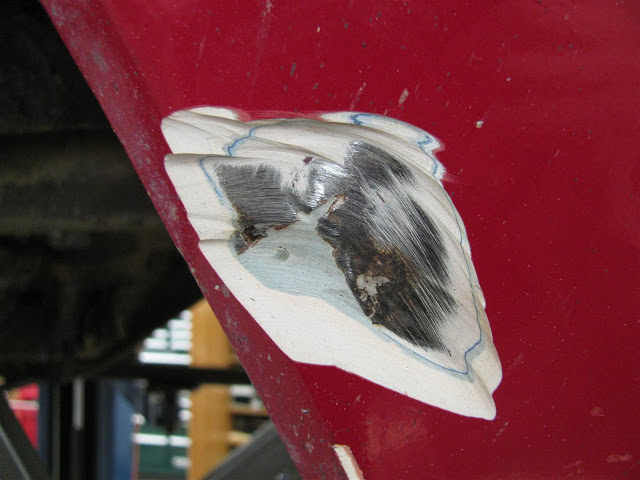
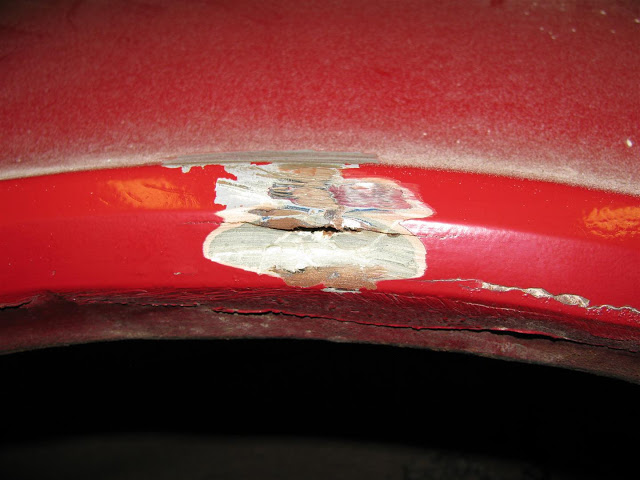
So I started to sand down to the metal, so the plasma cutter could ground enough to cut... DAMN this guy must have used a gallon of bondo per quarter.
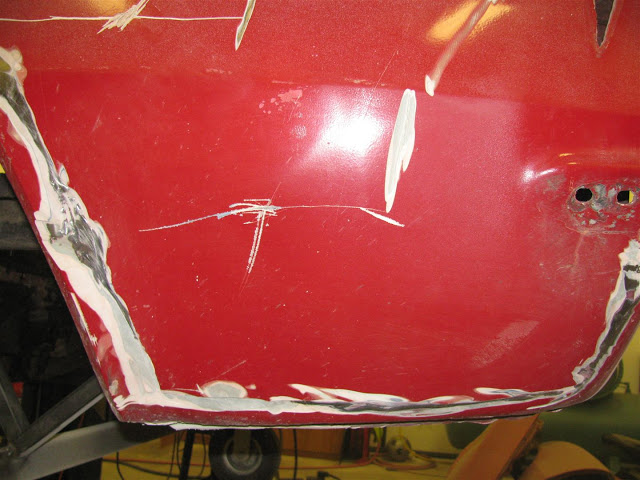
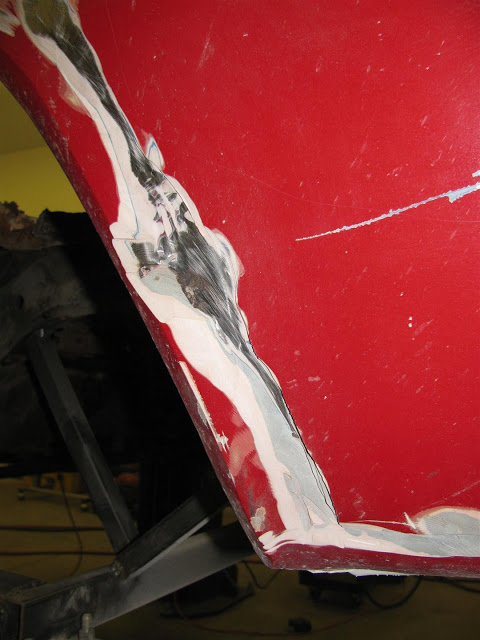
This is a 67 Firebird... but someone sure wanted to make it a 68... look at the beautiful job they did making the Pontiac emblem cutouts in the quarters.
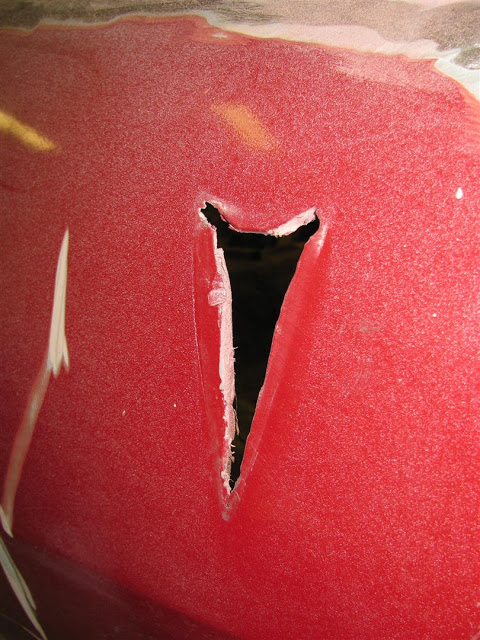
Finally got them ready for the Plasma... I will be removing the entire quarter, but just started with the center first.
 67 Firebird Convertible
Jarrod
My Build Thread:
https://www.pro-touring.com/showthre...rd-Convertible)
02-07-2012 #28
Registered User
- Join Date
- Jul 2011
- Location
- South Dakota
- Posts
- 118
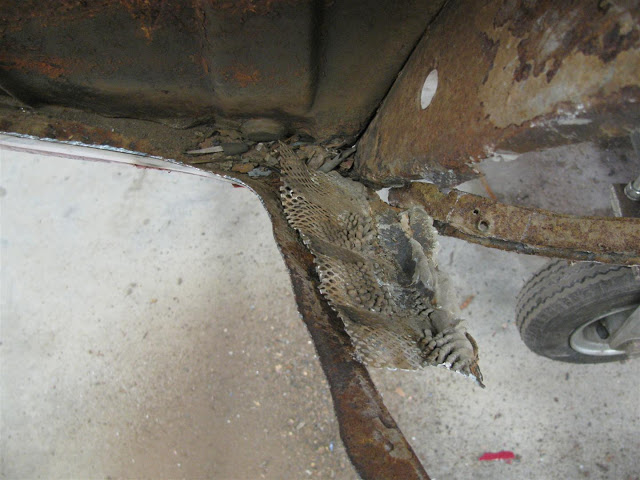
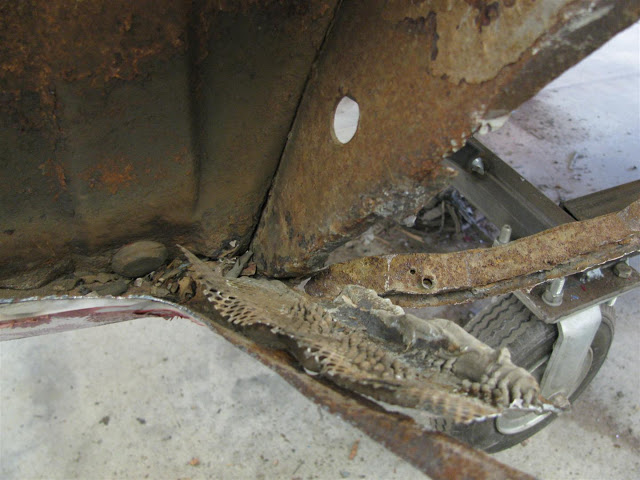
Look at the hidden treasures I found under the quarter panels,in the wheelhouse area. Looks like "more is better" was the approach to the bondo situation.
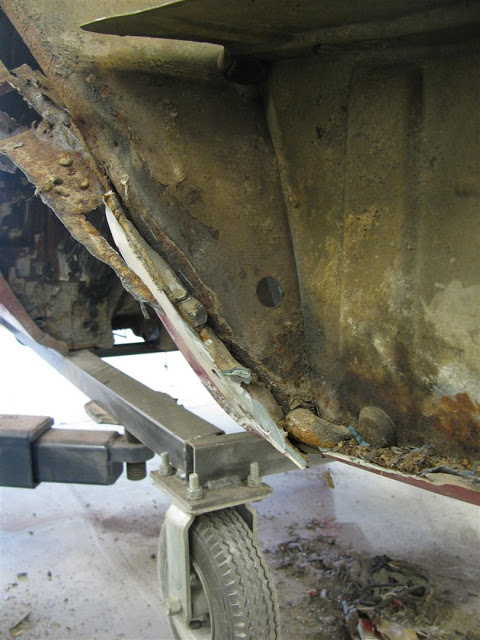
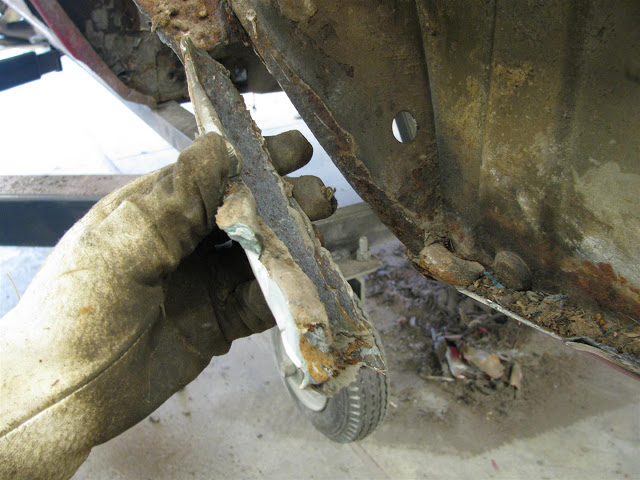
Looks like on the passenger side he couldn't get the bondo to even build up enough... had to use some mesh in there to hold it together!
 67 Firebird Convertible
Jarrod
My Build Thread:
https://www.pro-touring.com/showthre...rd-Convertible)
02-08-2012 #29 Registered User
- Join Date
- Aug 2004
- Location
- Amsterdam,The Netherlands
- Posts
- 880

lot of work, good job! Keep the updates coming!

Cliff
1968 Firebird
Project Cheyenne Pro Performance
05-03-2012 #30
Registered User
- Join Date
- Jul 2011
- Location
- South Dakota
- Posts
- 118
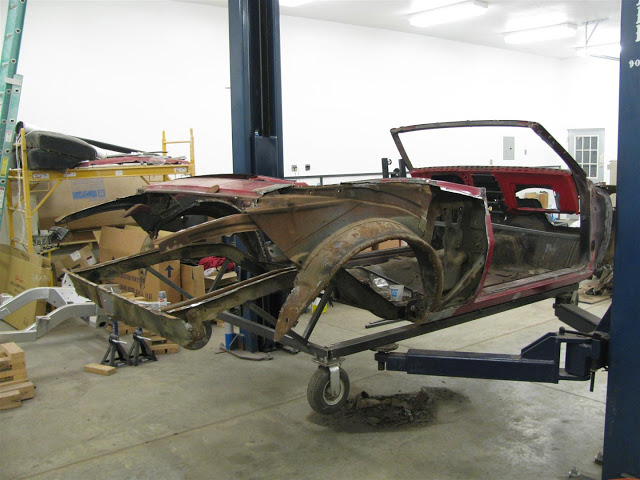
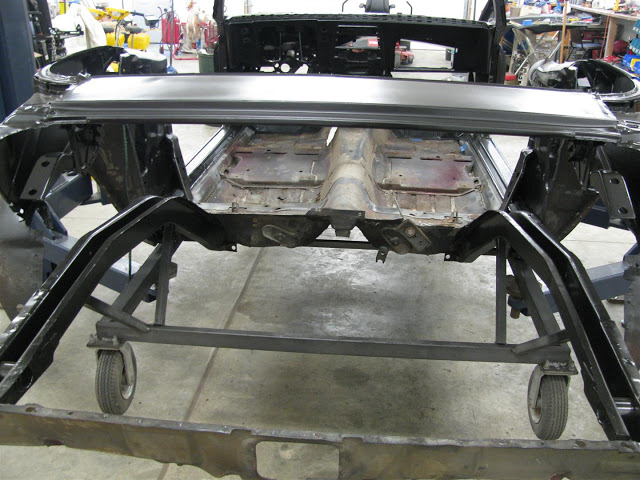
After some real "quality time" with the air hammer... the rest of the trunk is out... down to the frame rails. Good news is the frame rails look really good... not even any rust pitting (just some surface rust). There seemed to be enough "gunk" on them from undercoating the car at some point in its life.
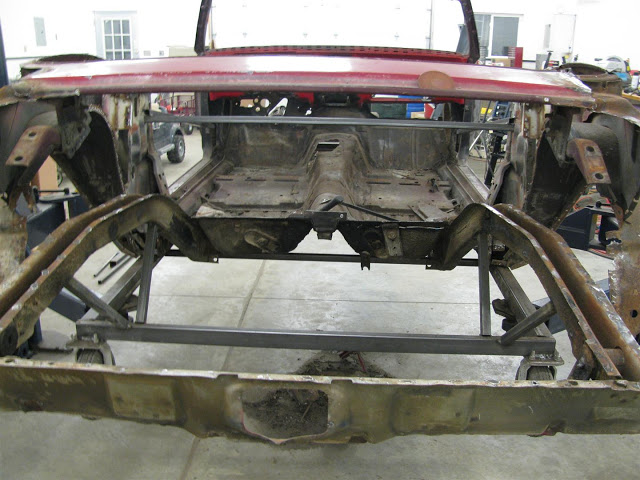
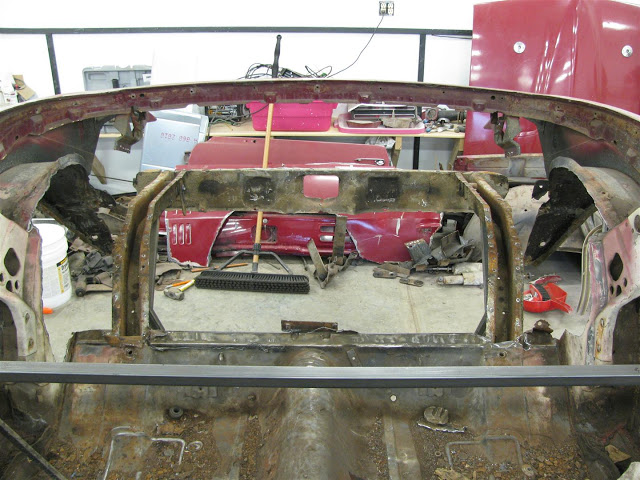
I left the front part of the door jam, and upper part in place (temporarily) to... 1: give the car some strength in the rear due to how much structure I removed.
2: give a reference for hanging the doors... should still be able to line the doors up with whats left of the door jam.
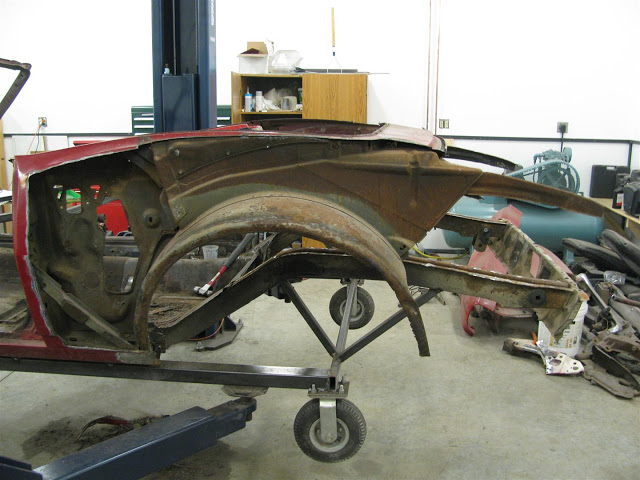
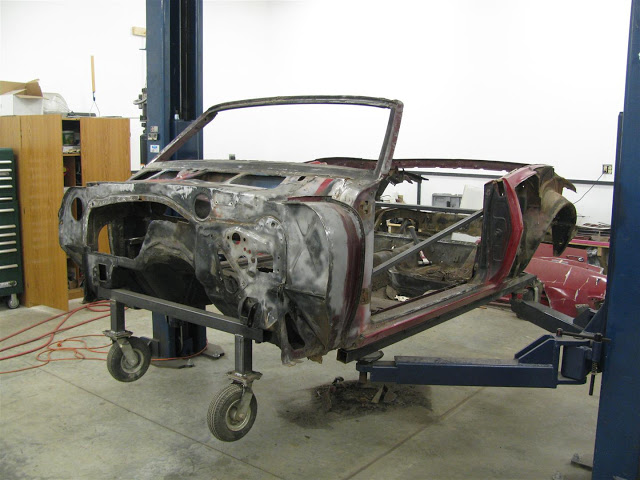
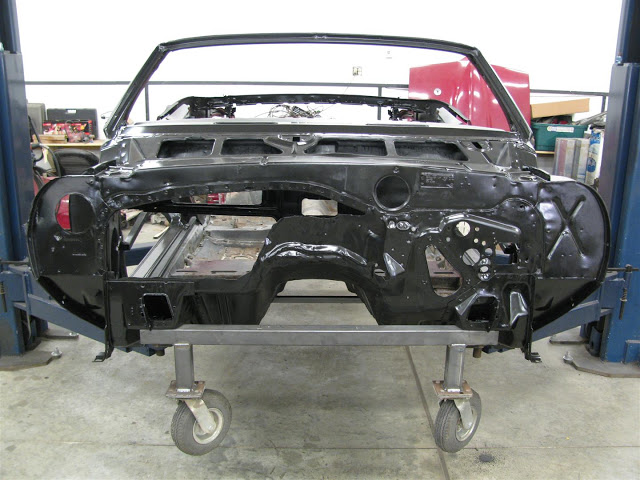
I also left the outer wheel housing in place for structural reasons and to be able to help locate the inner wheel housing. (With this much metal removed... need SOME reference points) After the trunk, main floor and inner wheel housings are in, I will then cut these out and replace them.
 67 Firebird Convertible
Jarrod
My Build Thread:
https://www.pro-touring.com/showthre...rd-Convertible)
05-03-2012 #31
Registered User
- Join Date
- Jul 2011
- Location
- South Dakota
- Posts
- 118
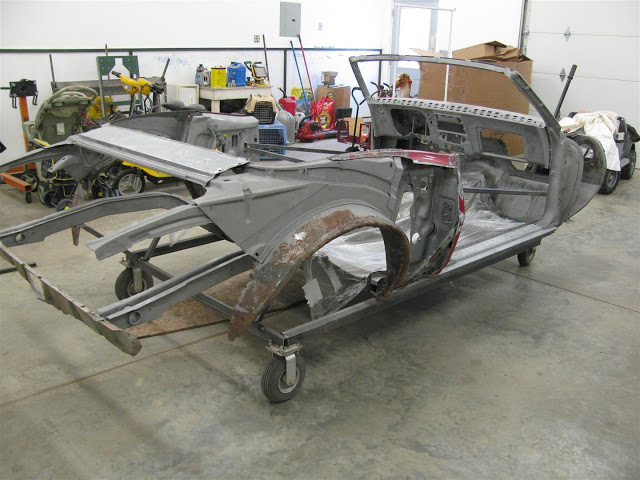
I must say... i HATE sandblasting. After about 2 days, and about 1,000lbs of sand... I finally have a clean slate to start with. That stuff gets EVERYWHERE... took over 2 hours to blow the sand out of all the nooks and crannies.
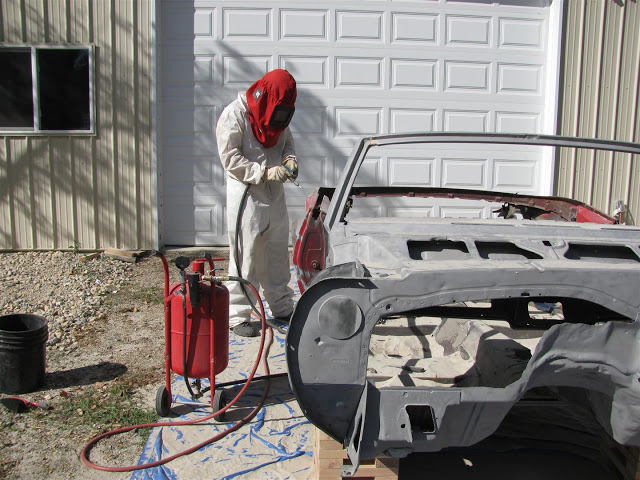
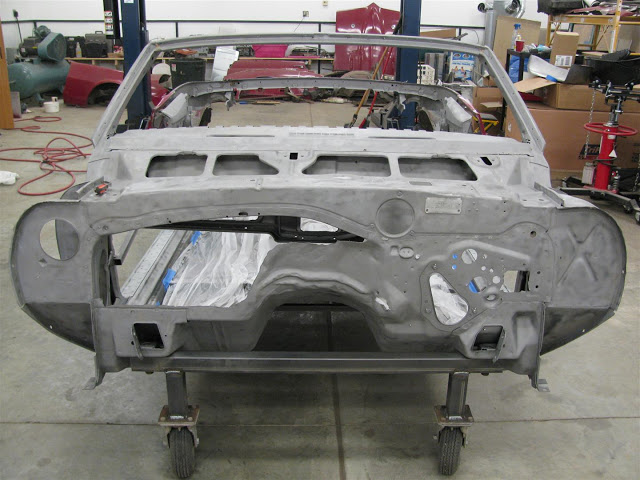
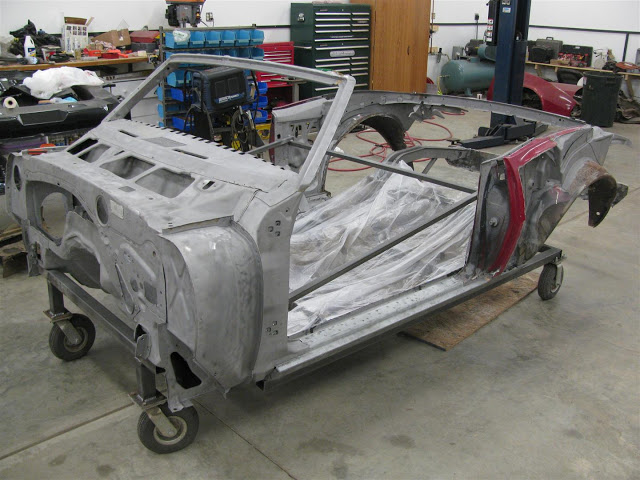
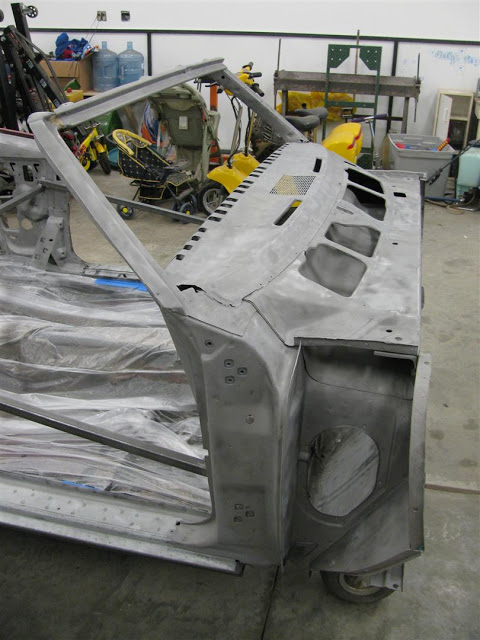
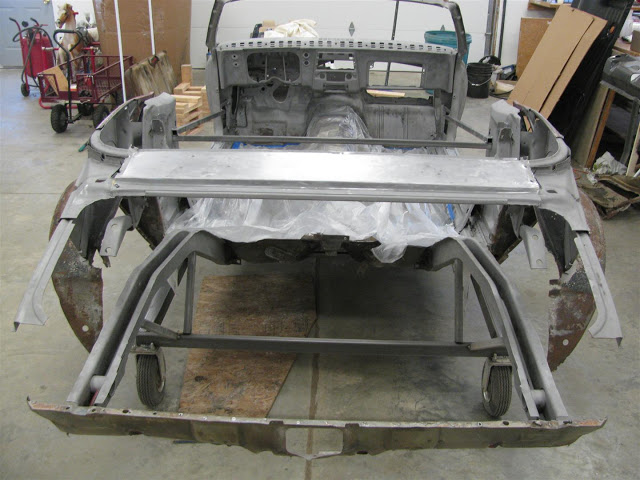
The outer wheel housings, inner valance panel and main floor are still rusty, because they are only there to hold things together a bit longer. Once more more structure is added... OFF they come!
 67 Firebird Convertible
Jarrod
My Build Thread:
https://www.pro-touring.com/showthre...rd-Convertible)
05-03-2012 #32
Registered User
- Join Date
- Jul 2011
- Location
- South Dakota
- Posts
- 118
Sealed everything off with a few good coats of epoxy primer. Not dealing with this rust AGAIN!! Considering that GM didn't bother to coat any of the underlying metal, should be MUCH better than the factory job!
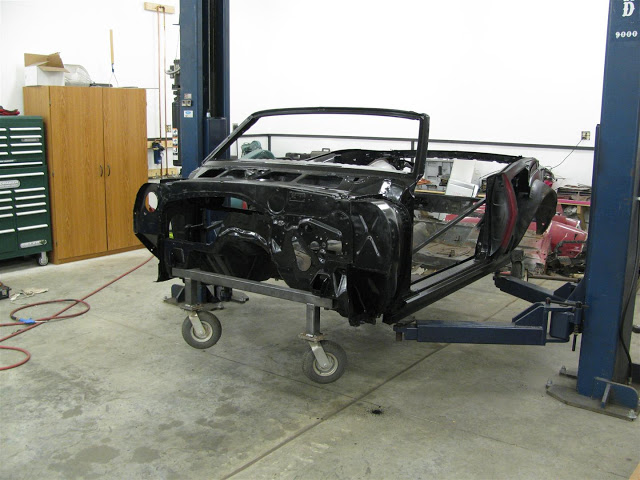
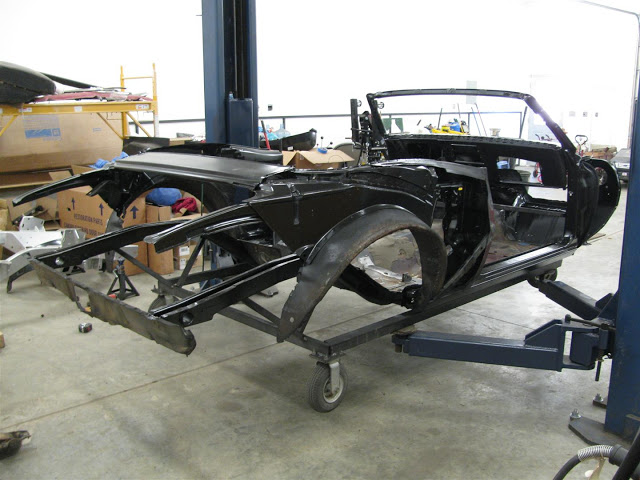
Like I said before, outer wheel housing, rear inner valance and complete floor are coming out, as I get more metal put into place.
 67 Firebird Convertible
Jarrod
My Build Thread:
https://www.pro-touring.com/showthre...rd-Convertible)
05-03-2012 #33
Registered User
- Join Date
- May 2012
- Location
- Huntington Beach, CA
- Posts
- 7
Incredible job you are doing. Talk about a ground up build Luckily the frame rails were good as you wouldn't have much left to work with ;-) It might have taken a long time for that garage, but what a great setup!
Subscibed!
05-04-2012 #34 Registered User
- Join Date
- Feb 2005
- Location
- Sydney, Australia
- Posts
- 1,797

Nice work.....a 1st gen convertible is one of my "must have" cars.
Regards,
Leigh
Sydney, Australia
1971 Firebird 455
https://www.pro-touring.com/showthre...Project/page27
05-04-2012 #35
Registered User
- Join Date
- Jul 2011
- Location
- South Dakota
- Posts
- 118
Well, it is finally time to add some parts back on. Before I go ahead and cut the main floor out, I decided to put the trunk floor in place and weld it in. This way I put some rigidity back into the car before cutting out the main floor. Otherwise with both out I run the risk of things moving around (never a good thing!! )
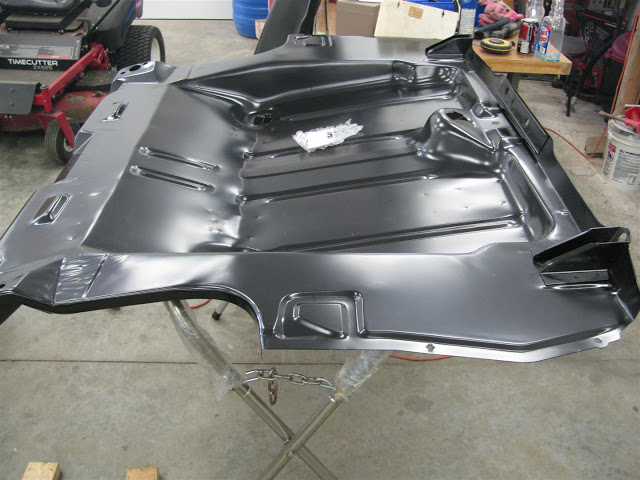
Got my new AMD full trunk floor...
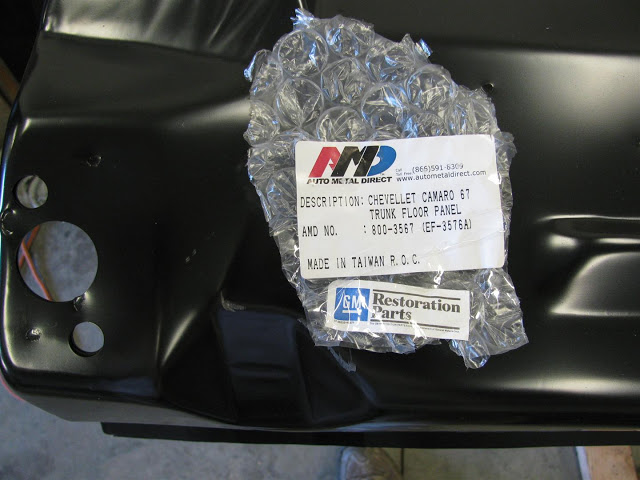
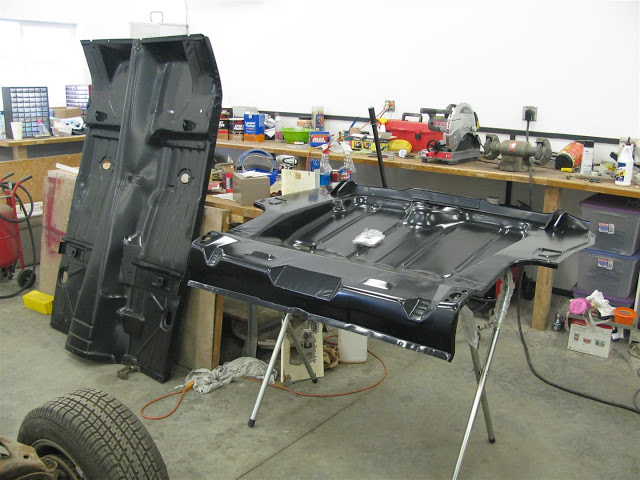
Between the Trunk Floor and the Main Floor... there isn't anything left to change out... just a LOT of work!!
 67 Firebird Convertible
Jarrod
My Build Thread:
https://www.pro-touring.com/showthre...rd-Convertible)
05-04-2012 #36
Registered User
- Join Date
- Jul 2011
- Location
- South Dakota
- Posts
- 118
Note to self... next time measure how far back the lip of the trunk floor is... BEFORE cutting out the old one.

So I lay the new trunk floor into place... and even though these are quality parts... I see that I will be having to clamp the @#($ out of the panel to make it lay tight against the frame rails.
Issue is you can move the trunk pan forwards and back a good inch. To far forward, trunk panel will sit inside of the quarter panels to far. To far back and I will be sticking out the back of the quarters.
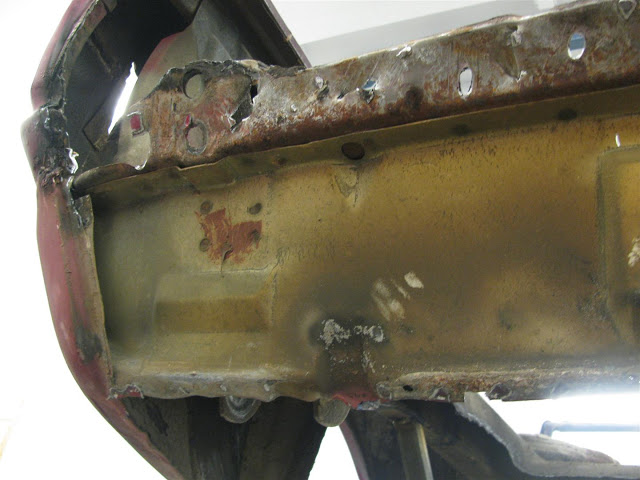
I took a photo of the gap between the rear inner valance panel and the back edge of the trunk pan.. but didn't take any reference measurements.
My solution:
to make sure everything squared up first... I clamped some square tubing to the back of the trunk floor, and used it as a measuring point to square the floor up with the car. (since the floor moves around a bit, you really can not just lay it in there and start welding it up).
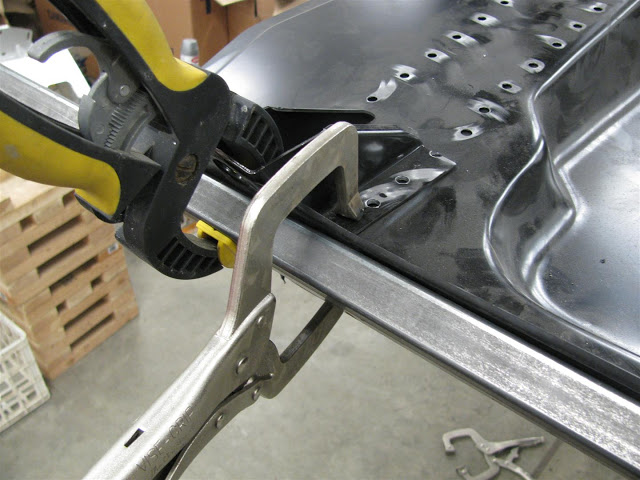
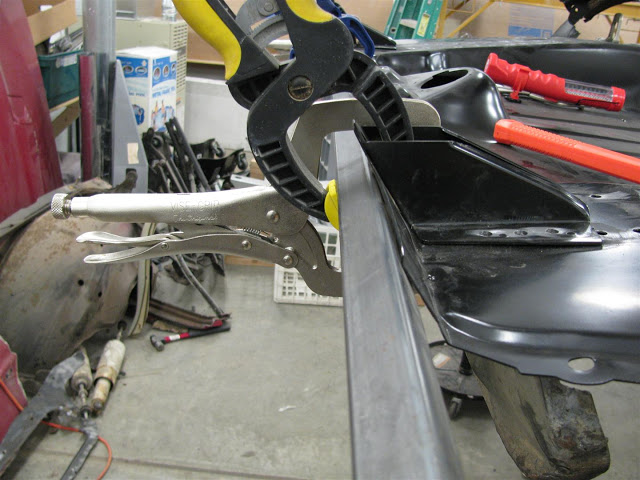
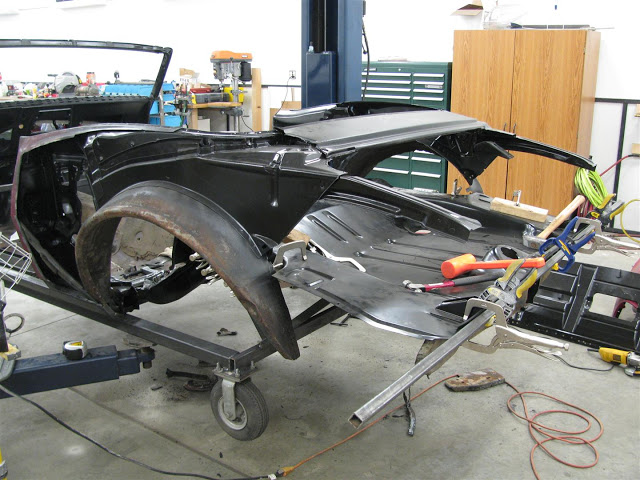
I then used this bar to measure from center of remaining quarter panel front lip and a few other reference points to make sure things got squared up.
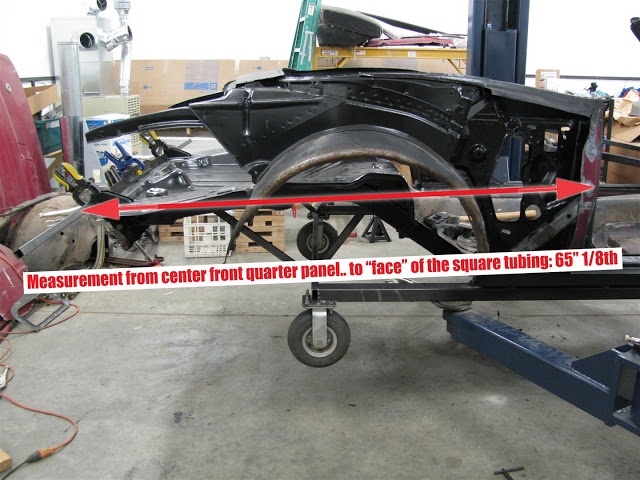
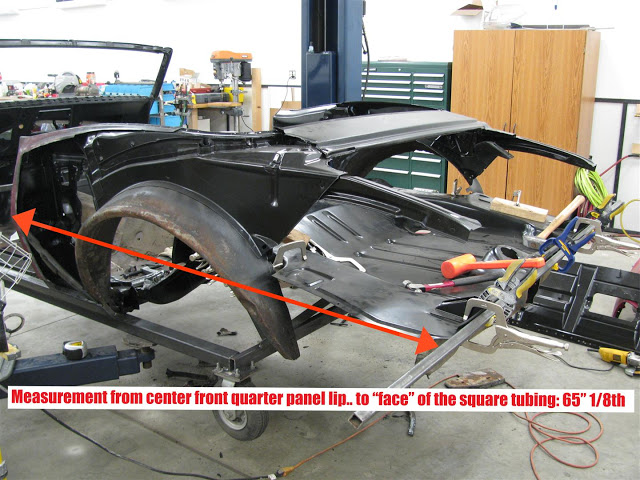
a few other measurements to make sure things were where they should be.
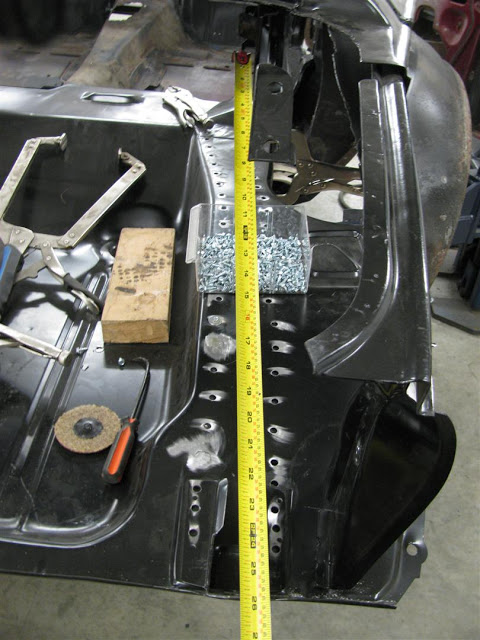
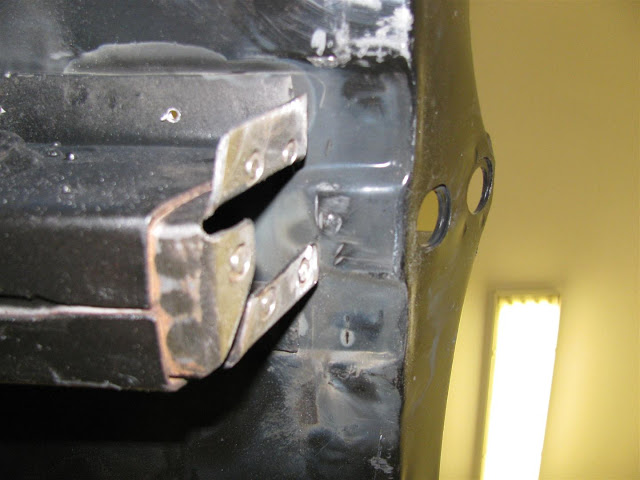
What I finally did was to hang the passenger side quarter panel and make sure the trunk was not to far forward or to far back.. (sorry didn't get a picture of this)
NOTE: I thought I could get some measurements off of my father-in-laws 68 camaro to give me a idea of how far forward/back to place the trunk... NOT A CHANCE... these cars have WAY to much tolerance between them to take measurements off of one car and use it on another. So DO NOT USE MY MEASUREMENTS ON YOUR CAR!!!
67 Firebird Convertible
Jarrod
My Build Thread:
https://www.pro-touring.com/showthre...rd-Convertible)
05-04-2012 #37
Registered User
- Join Date
- Jul 2011
- Location
- South Dakota
- Posts
- 118
Once I had the trunk where it needed to be... I marked it with a chalk pencil and pulled it out to be drilled for the plug welds.
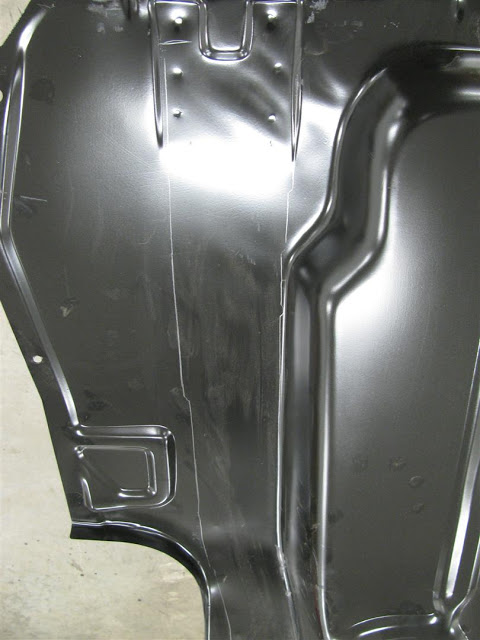
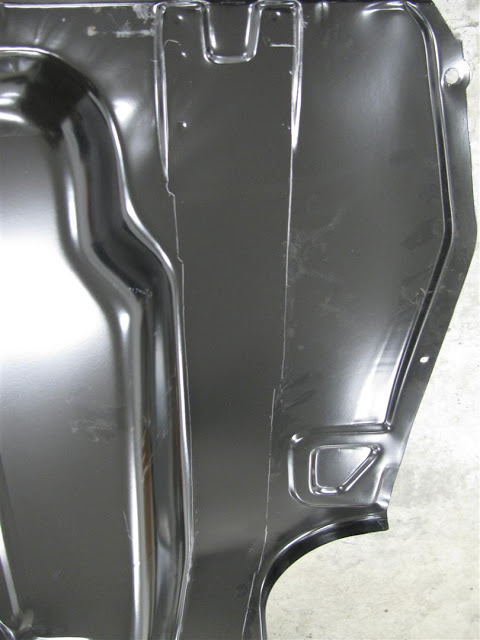
All drilled and ready to go...
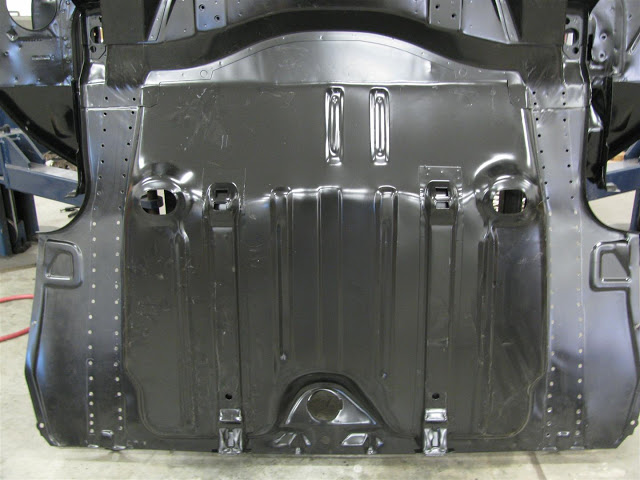
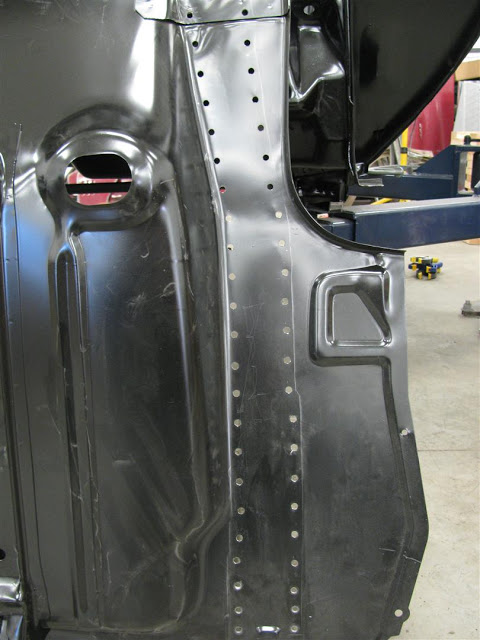
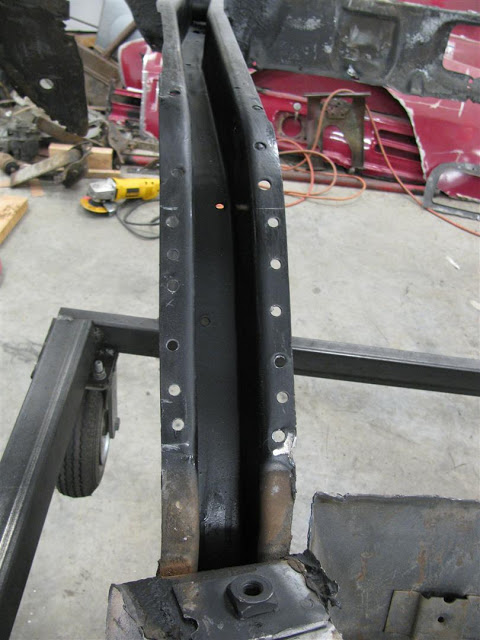
Drilled out the front part of the frame rails where I will be welding the trunk floor from the bottom.
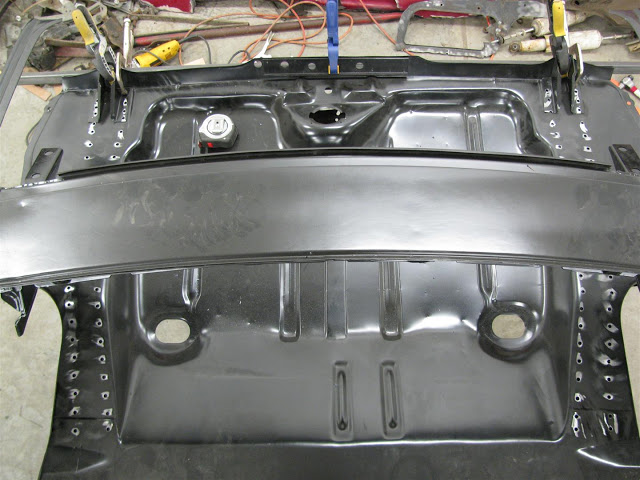
Recheck all the measurements... I was so concerned about getting this right I think I have about 6 hours in just placing the trunk in the right location.
I then (again forgot to take a picture) put a screw in almost every other plug hole and clamped the trunk down to the frame rail... this worked GREAT and really tightened everything up. Then I would just remove a screw and weld the plug hole as I went.
Sorry forgot to take a picture after it was all welded in. PS. make sure you use enough heat to get good penetration to the frame rails (this is a major structural piece of the cars strength.) Not the most fun thing to weld in... like welding a pop can to a frame rail. I would weld in short bursts to fill the plug hole rather than one continuous weld, otherwise I would get burn through with the amount of heat I was using.67 Firebird Convertible
Jarrod
My Build Thread:
https://www.pro-touring.com/showthre...rd-Convertible)
05-04-2012 #38 Registered User
- Join Date
- Jun 2007
- Location
- Dayton Ohio
- Posts
- 1,283
wow, I was about to say looks like a decent project car, but yikes almost would of been better to start with one of the repoped camaro convertible shells.
Good luck with this.GTO Project https://www.pro-touring.com/showthre...-The-Great-One
Colorado Project https://www.pro-touring.com/showthre...cab-CodeRedZQ8
Check Out My YouTube Channel http://www.youtube.com/c/geedsgarage
05-04-2012 #39
Registered User
- Join Date
- Jul 2011
- Location
- South Dakota
- Posts
- 118
I had already purchased this car way before they made repops of the convertibles... Plus, from everything I read, they need ALOT of work before they are ready to go, and sometimes it is harder to redo their mistakes than just do it right the first time. And as long as I do the work myself I do save a good amount of money. I just like the idea that it is and original 67, not a repop... even though the vin number is about the only original piece left! Originally Posted by Code Red

Hey and what better way to know everything about your car than build the damn thing from the ground up!
67 Firebird Convertible
Jarrod
My Build Thread:
https://www.pro-touring.com/showthre...rd-Convertible)
07-24-2012 #40
Registered User
- Join Date
- Jul 2011
- Location
- South Dakota
- Posts
- 118
Trunk Floor all welded in... Finally adding parts back ON!!!
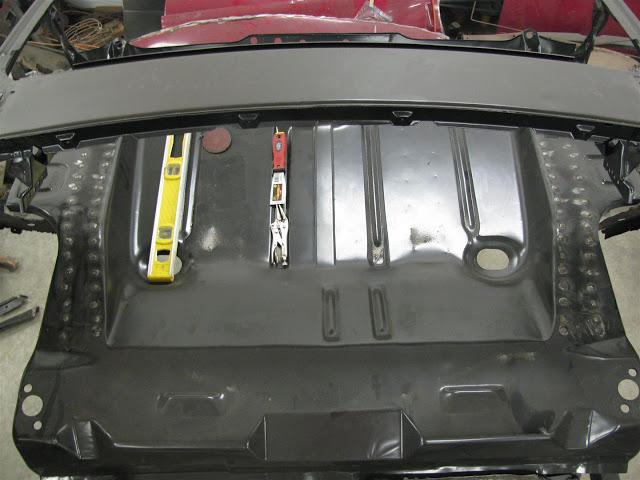
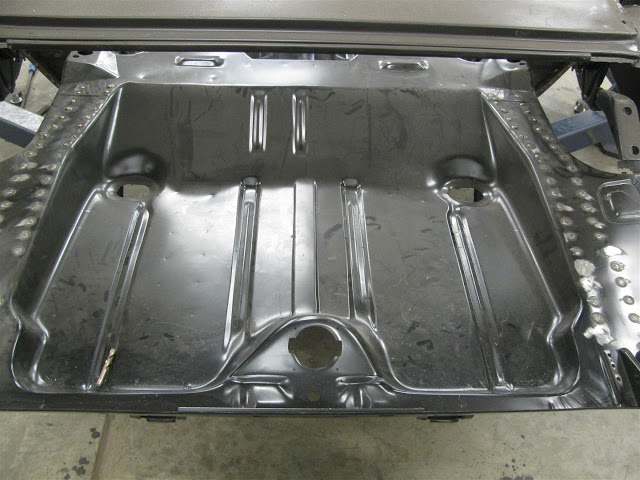
I will dress (grind down) the welds when I am ready to prime all the work.67 Firebird Convertible
Jarrod
My Build Thread:
https://www.pro-touring.com/showthre...rd-Convertible)
Tags for this Thread

 Reply With Quote



